
This work is licensed under a Creative Commons Attribution-NonCommercial-ShareAlike 4.0 International License
Week 16: Wildcard Week
May 13, 2021Summary
This week's assignments
- Design and produce something with a digital fabrication process (incorporating computer-aided design and manufacturing) not covered in another assignment (examples):
- Document how you made your creation ✔
- Describe problems and how you fixed them ✔
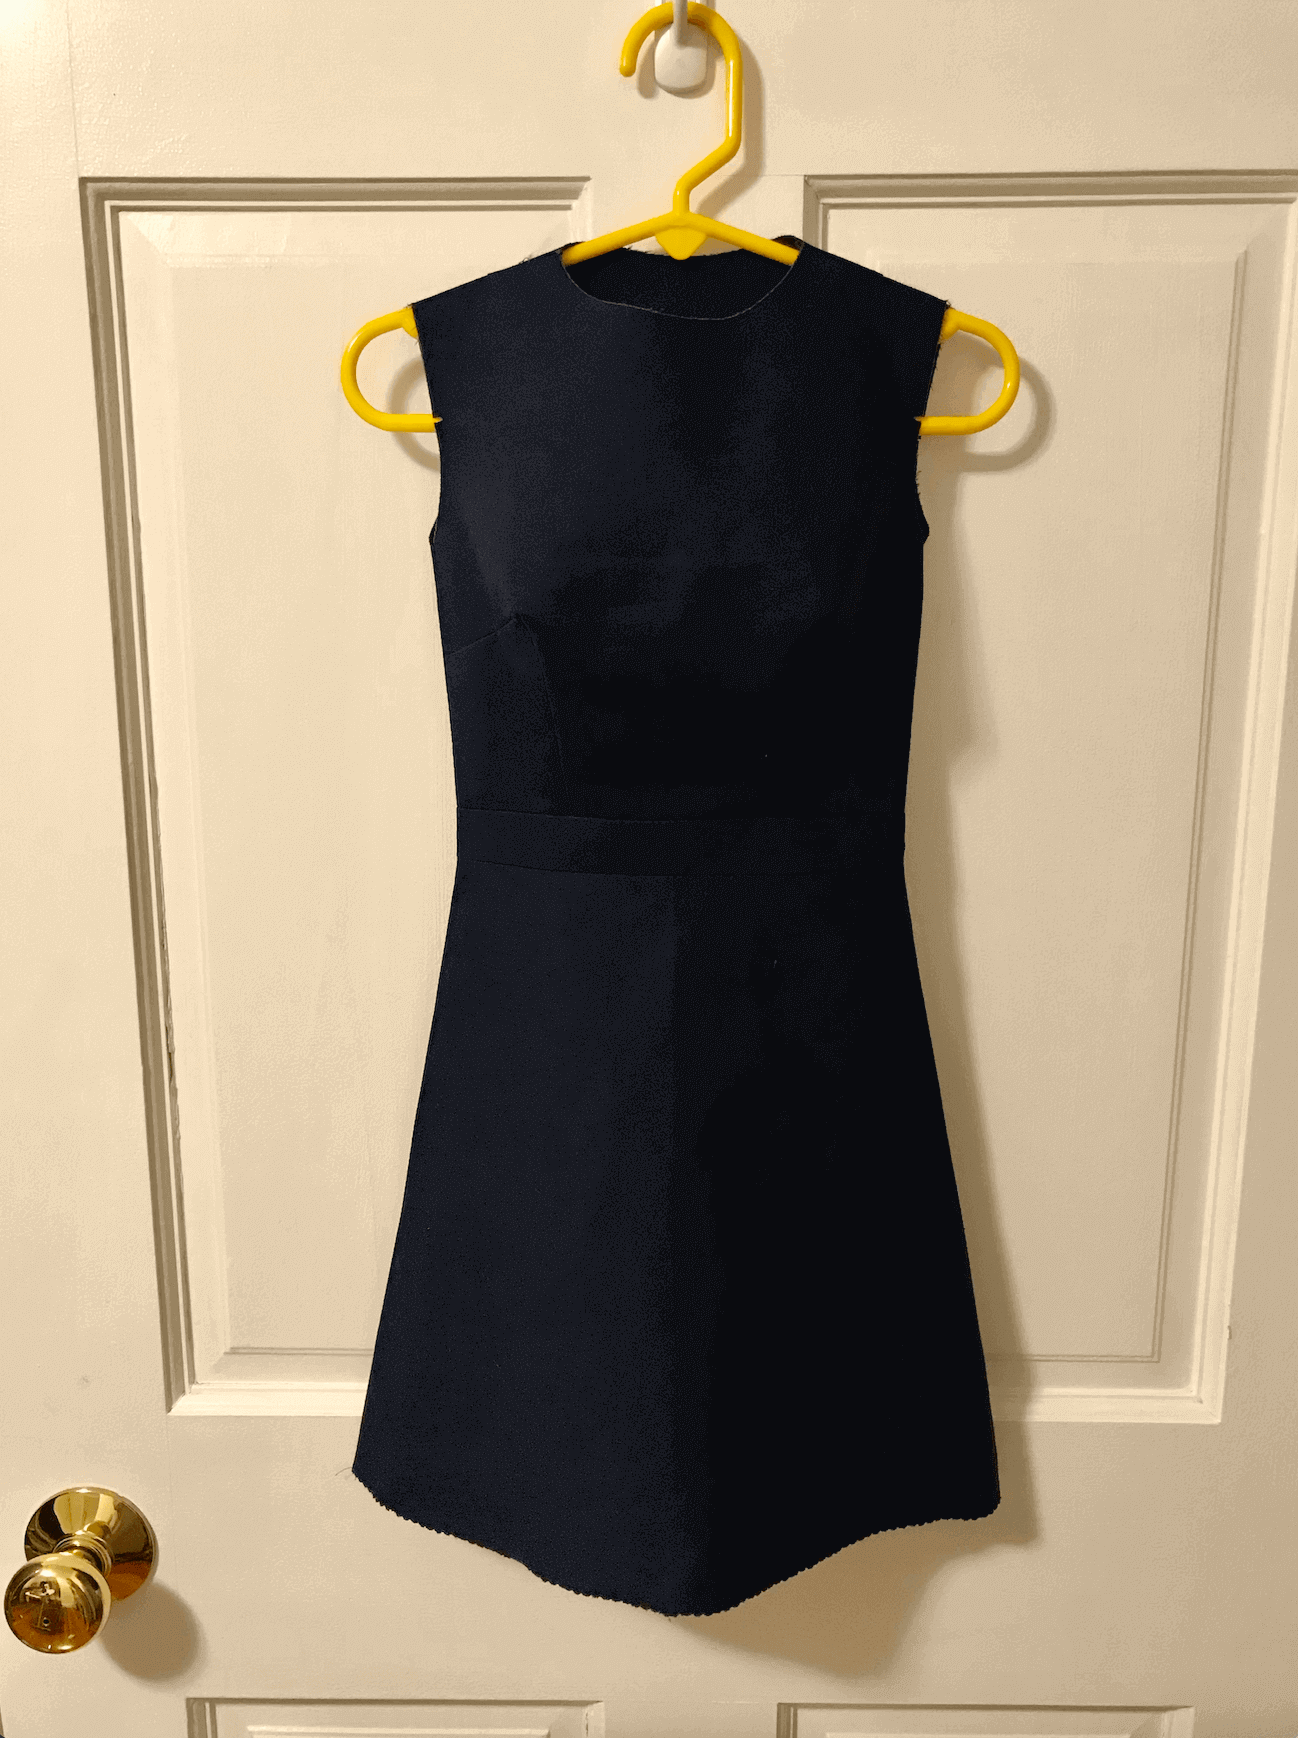
- Include your design files and ‘hero shot’ of the result ✔
Resources Used
- Software: CLO3D, Adobe Illustrator
- Hardware: Trotec Speedy 400 Flexx, Sewing Machine
Skills Gained
- Fashion design, Textile Laser cutting, Sewing
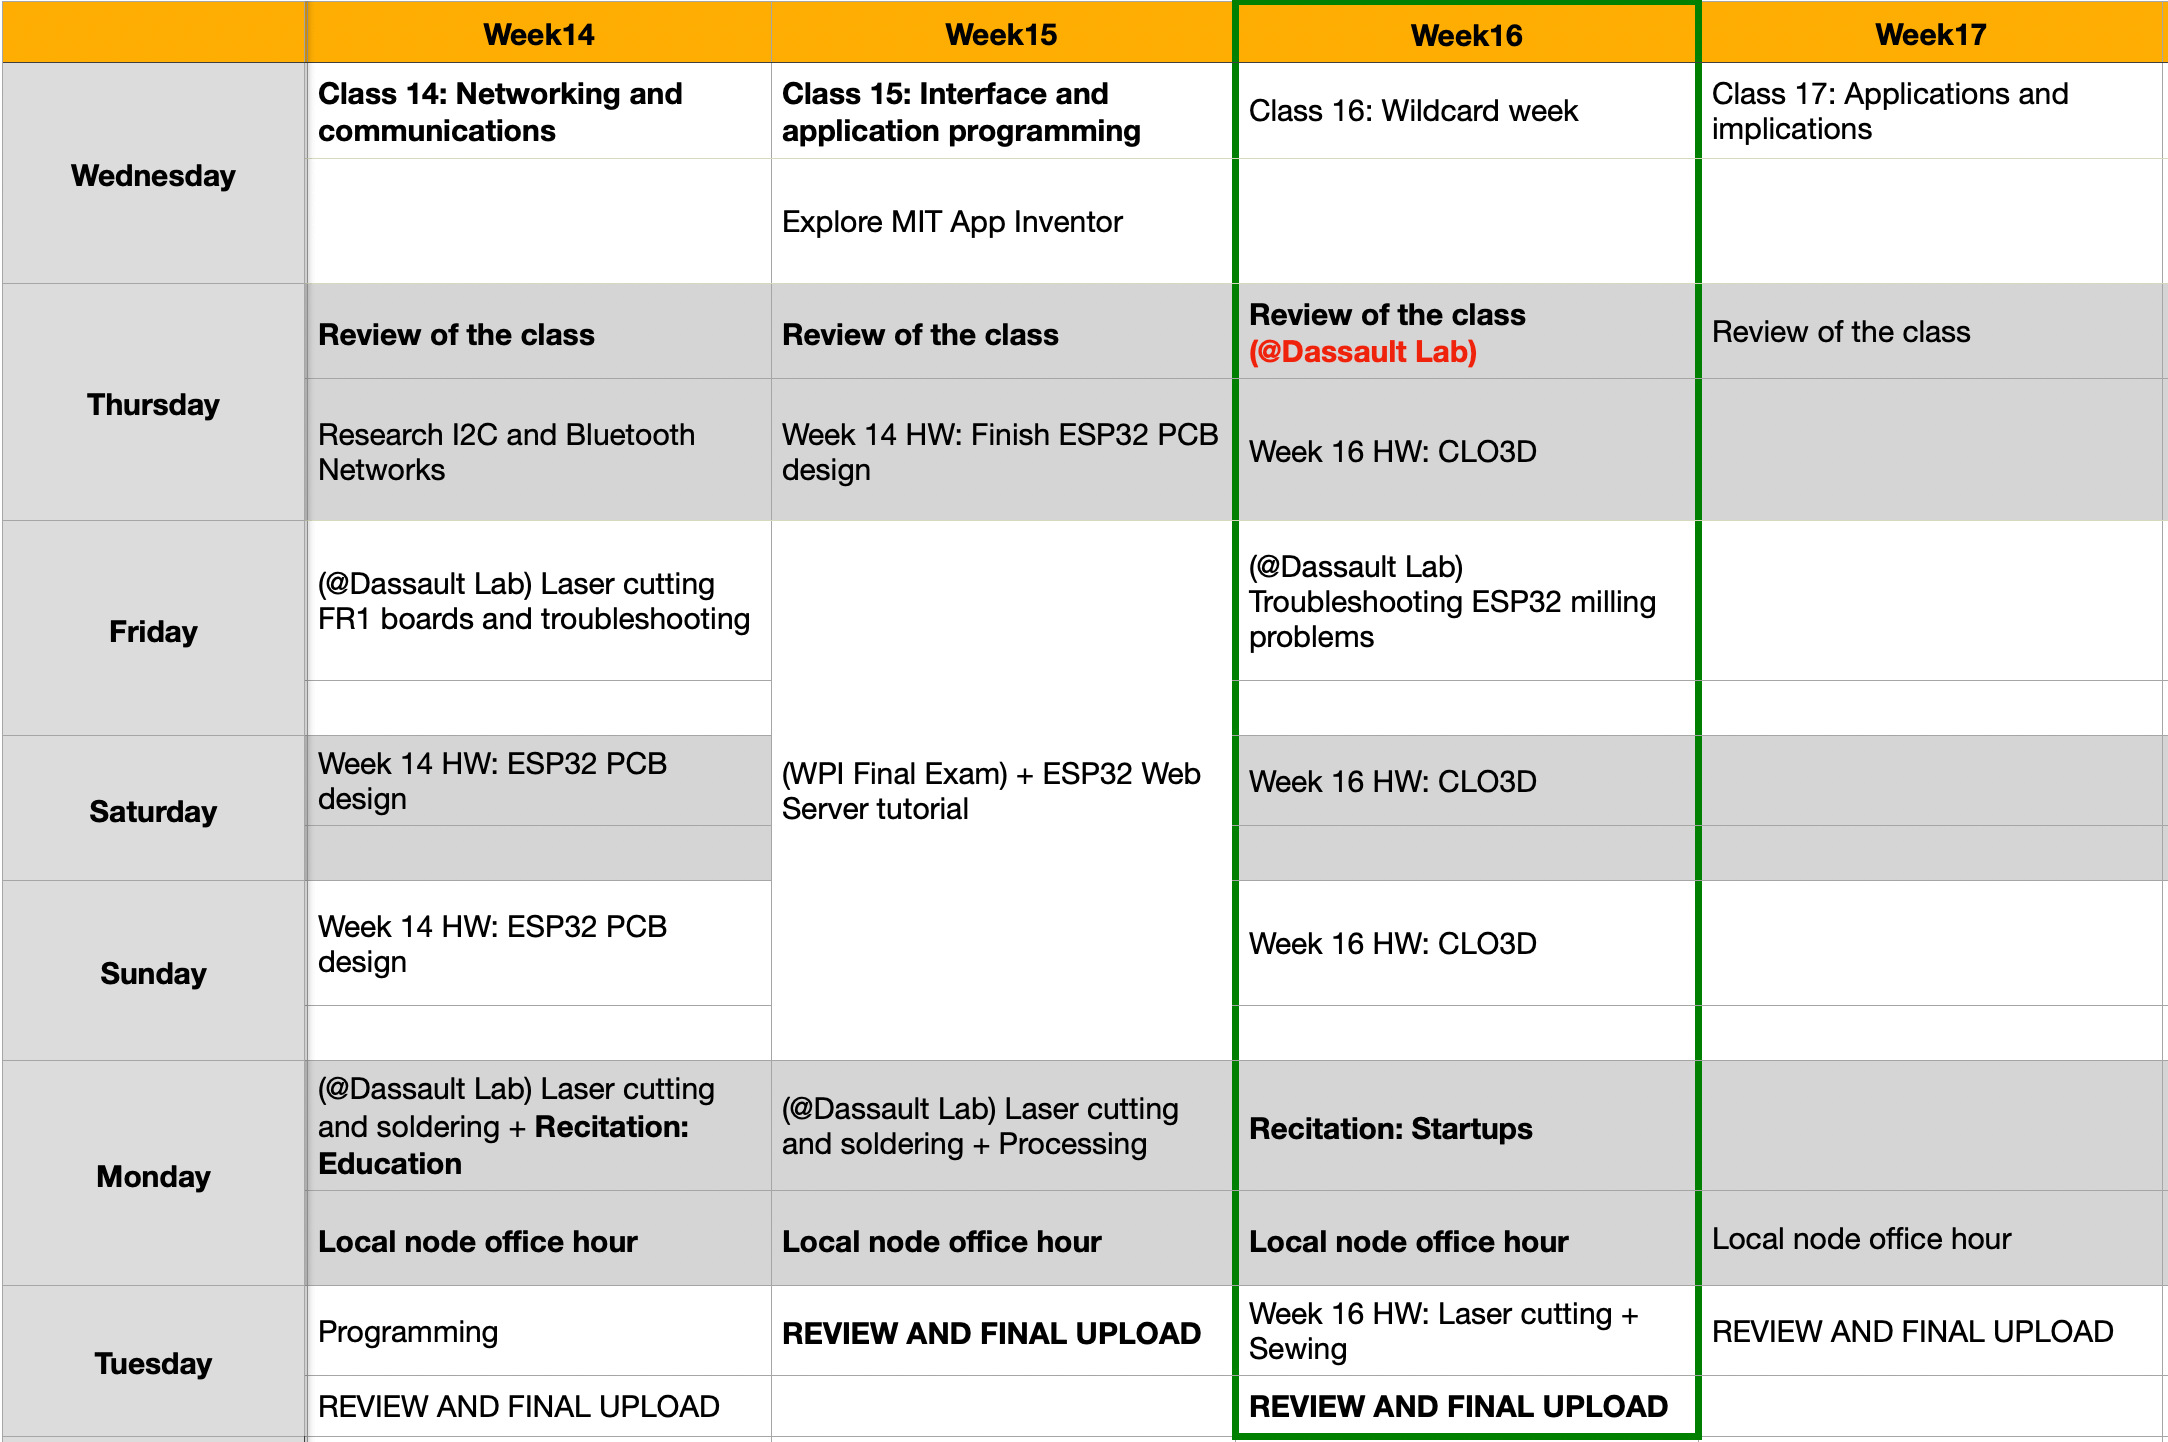
My Weekly Schedule
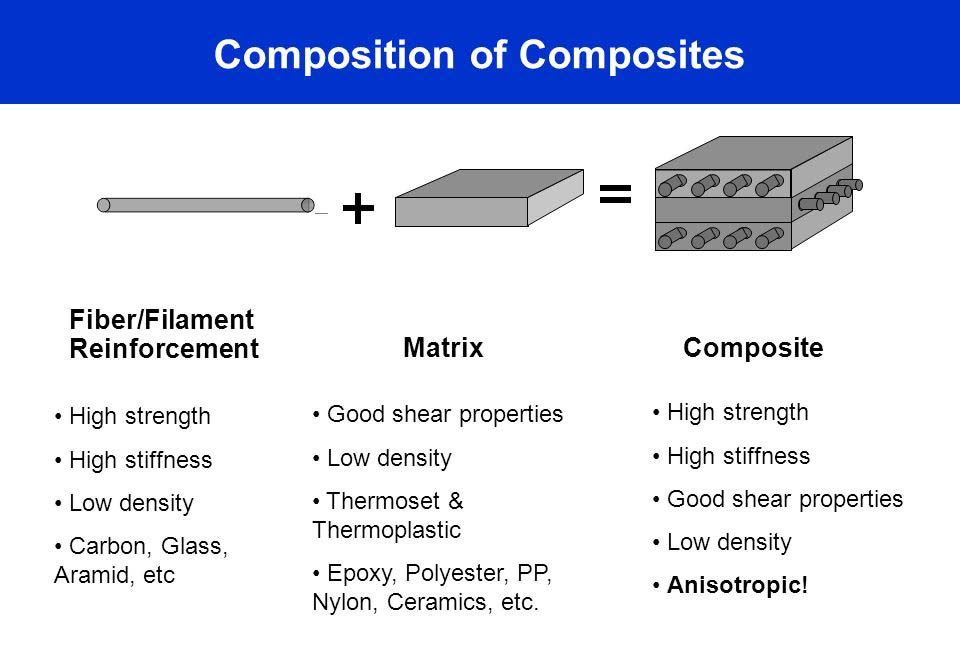
Group Project: Introduction to Composites
May 13, 2021During the review session on Thursday, our local Guru Luciano gave us an informative composites demo at the 3DExperience Lab. Let's see what I learned!
A composite material is composed of at least two materials, which combine to give properties superior to those of the individual constituents.
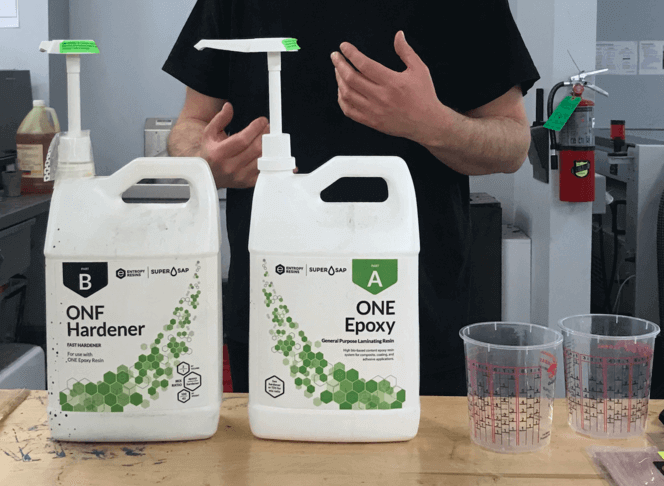
To create the matrix, we can use epoxy. However, epoxy is a a toxic material, breathing epoxy fumes has effects on the nose, throat and lungs...etc., thus we must wear PPE such as gloves, goggles, and masks when working with this material.
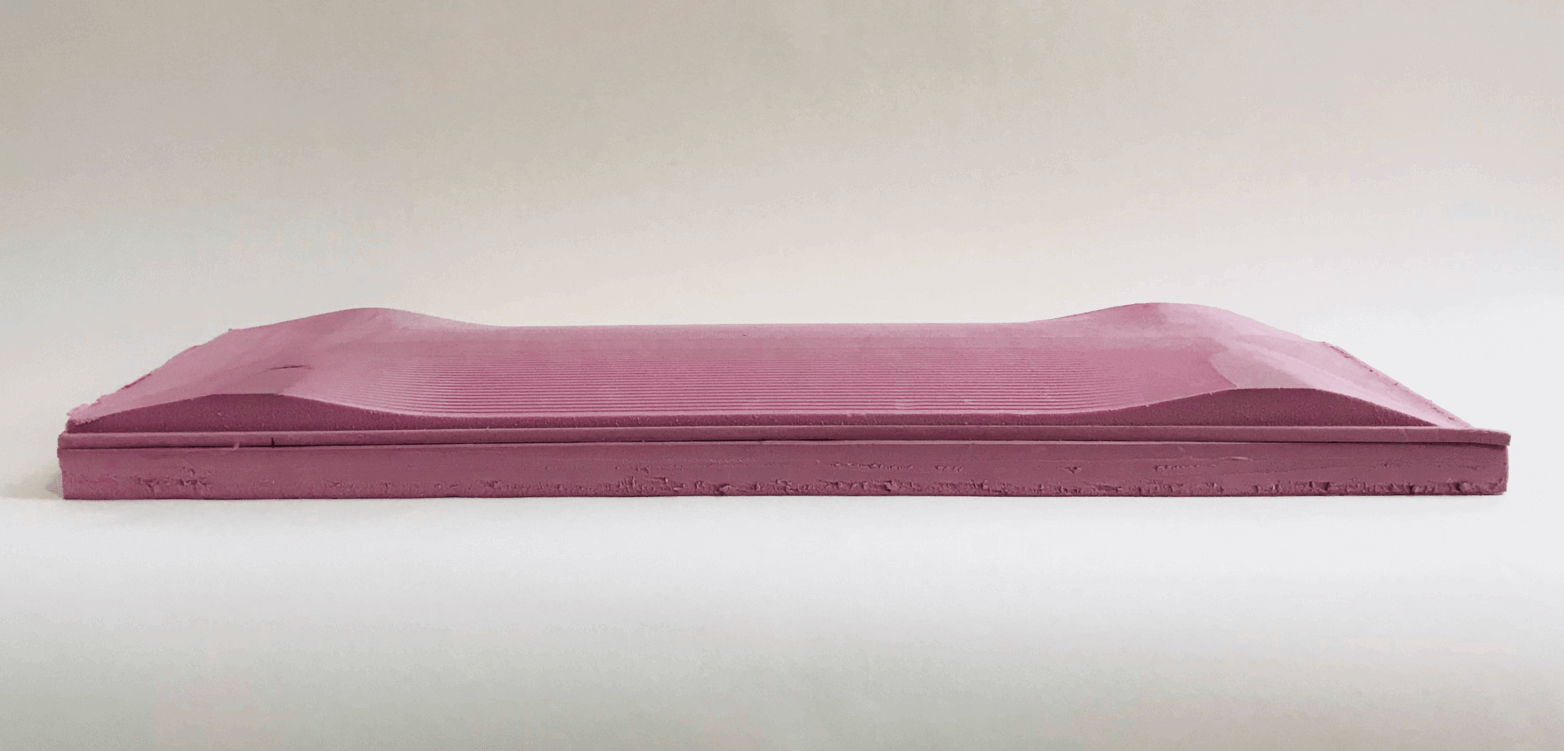
To make a composite componsent with a certain shape, we need a mould. On Monday, Nick had milled a skateboard foam mould using the ShopBot.
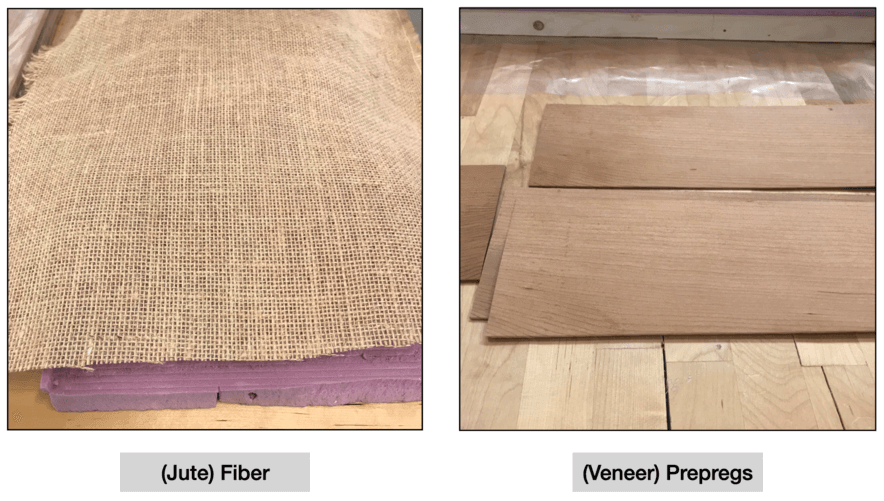
We can use fibers or prepregs for making the composites. In industry, the most widely used fibers are glass fiber and carbon fiber. However, for us hobbyists, we can make use of prepregs (pre-impregnated" composite fibres), which are uni-directional and have an amount of the matrix material (i.e. epoxy?) used to bond them together. As Nick and Luciano had prepared the prepregs, we didn't use epoxy in this demo.
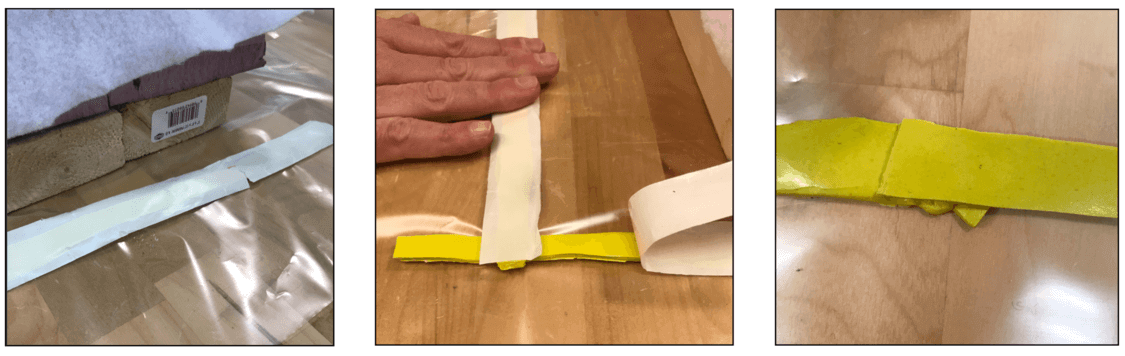
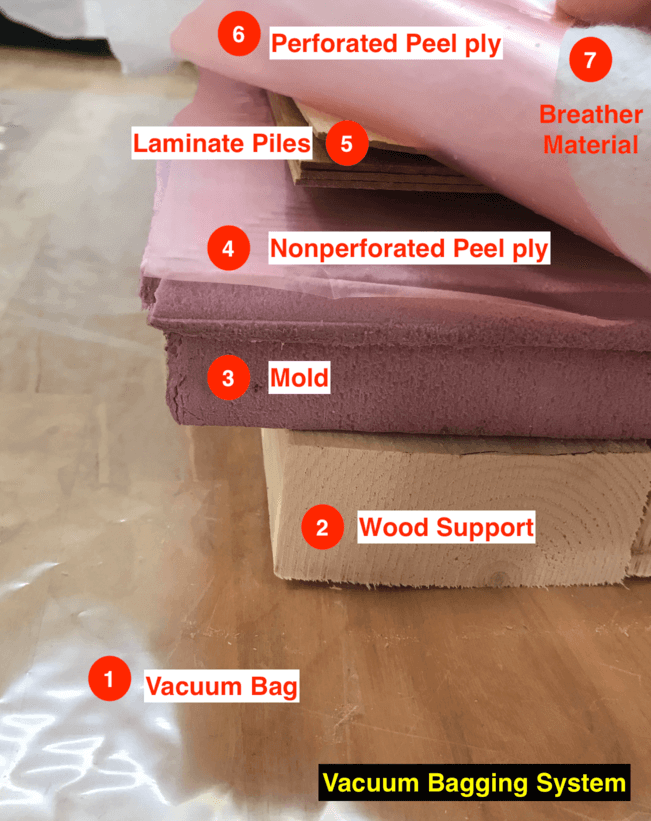
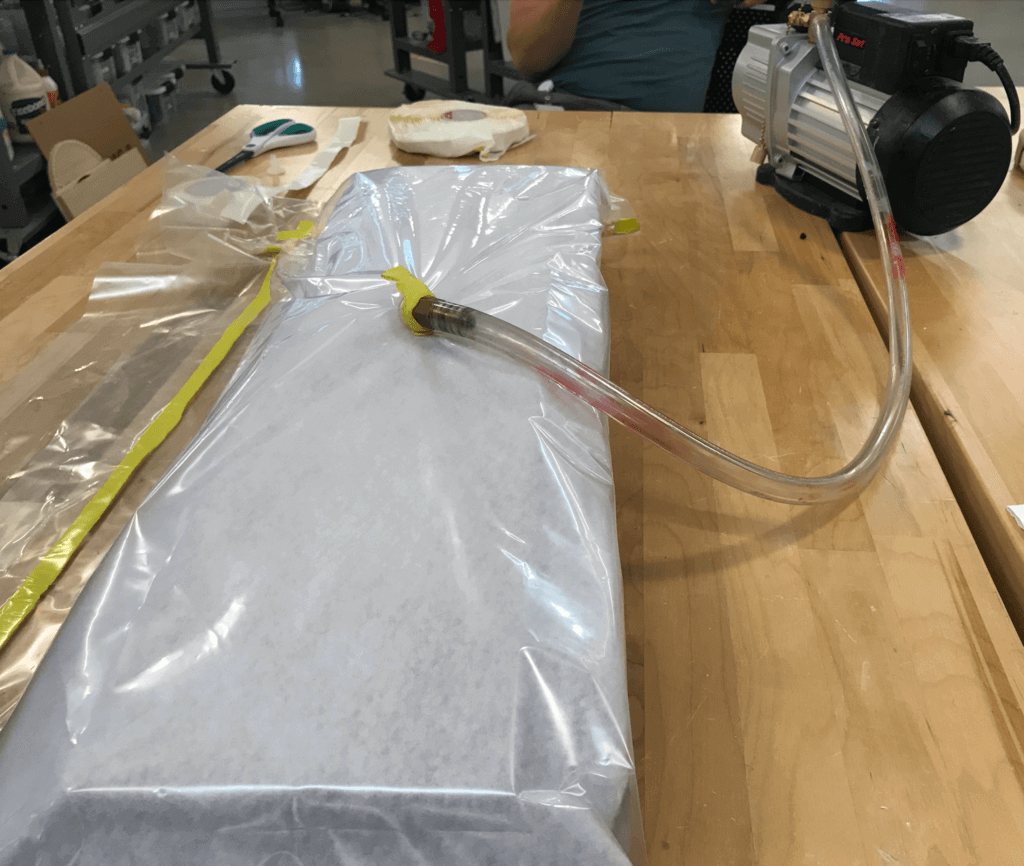
Luciano told us that a good-sealed vacuum bag was the most important thing in composites making. This paper shares a wealth of information on vacuum bagging system: The vacuum bagging system consists of the airtight clamping envelope and a method for removing air from the envelope until the epoxy adhesive cures. For this purpose, Luciano used the mastic sealant tape and the vacuum valves. I learned that taping the bag as flat as possible was very important! I made a mistake and didn't seal my side well enough (due to unflat taping on some area), so it gave air the opporutnity to come back into the bag during the vacuuming process (last image of this section).
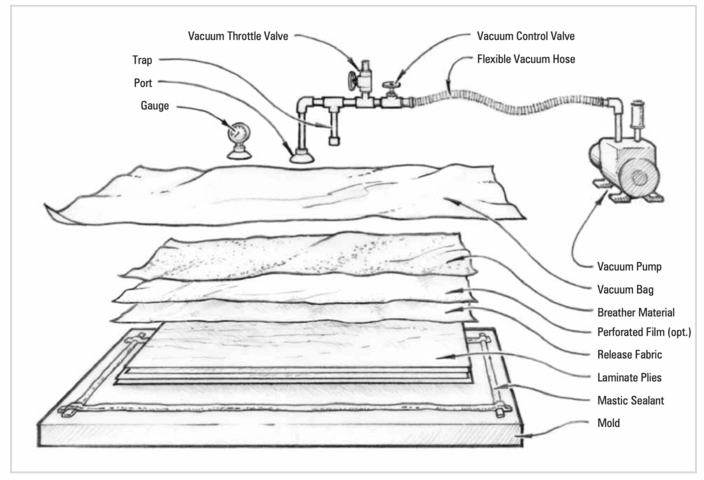
This image shows what a typical vacuum bagging system is like:
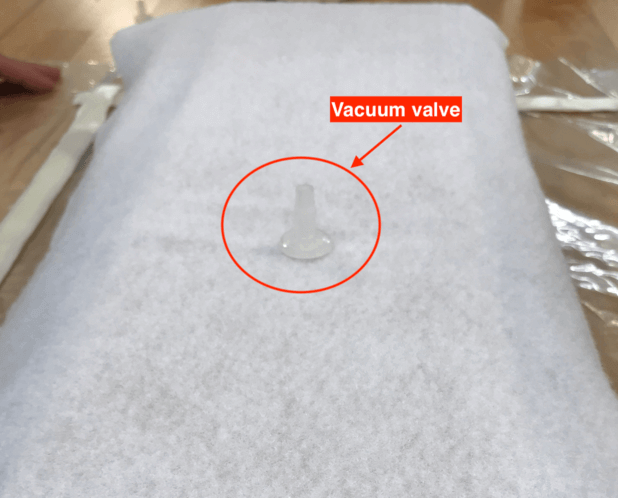
We made good use of the materials available to create our vacuum bagging system. Since we used foam for mold making, it was better to have the wood support (layer #2). Notice that there are two types of peel ply: nonpeforated vs. perforated. According to Luciano, nonperforated peel ply (layer #4) are used for lamination process, while perforated peel ply (layer #6) are used for infusion process. Vacuum infusion can bring the composite product to industrial quality standards. The breather material (layer #7) is designed to allow airflow throughout the vacuum bagging process as well as bleed out an excess resin in a composite part.
And here is an image of the bag being vacuumed. Because there was some air in, we didn't see the product come to life. Yet, it was an eye-opening experience!
Individual Assignment: Wildcard Week
This week the individual assignment was to design and produce something with a digital fabrication process (incorporating computer-aided design and manufacturing) not covered in another assignment, documenting the requirements that your assignment meets, and including everything necessary to reproduce it. I chose to investigate processes that are related to my final project:
- Computer designing the dress pattern and check that the pattern fits the model
- Laser cut the pattern pieces
- Sew different parts of the dress
Part 1: Digital Pattern Making and Simulation
May 16, 2021In Week 2, I had a stretch goal for myself to learn a fashion design software. I was able to follow a tutorial to make the bodice sloper for a size 10 curvy shape avatar, however, I still needed to make edits to adapt to my measurements.
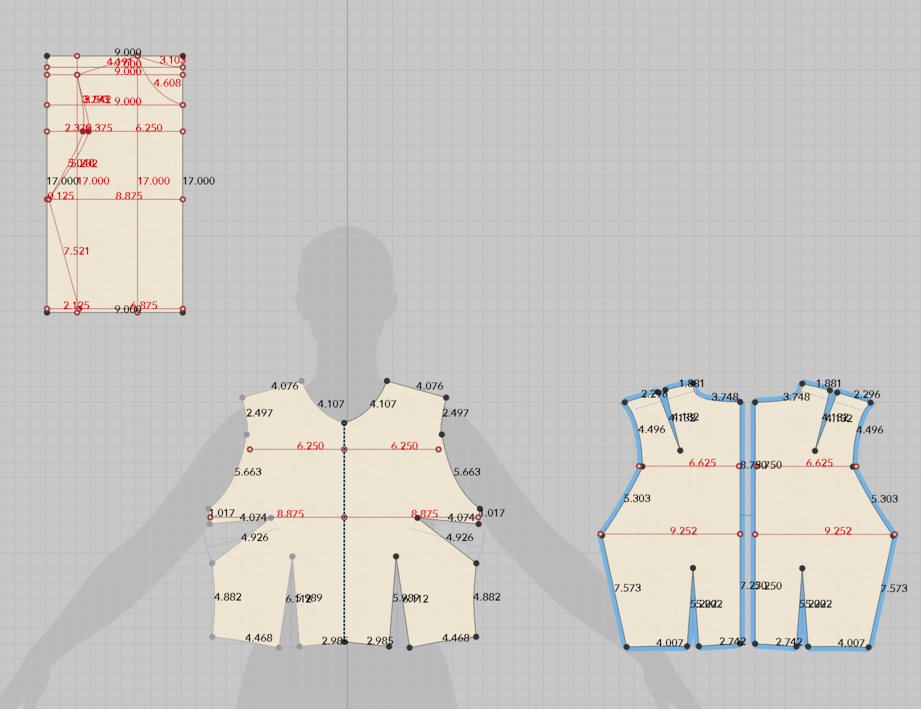
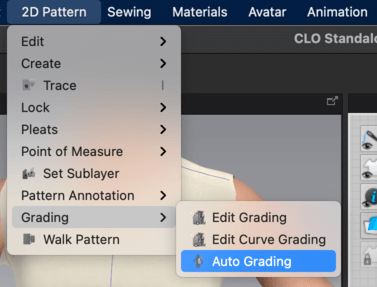
It has been almost 3 months ( 😶) since I last worked on this software, so I decided to do it again to refresh my memory. This time I paid more attention especially on the shortcut keys. I was also delighted to find the Auto grading tool so I didn't have to do the calculations on my own 😄!
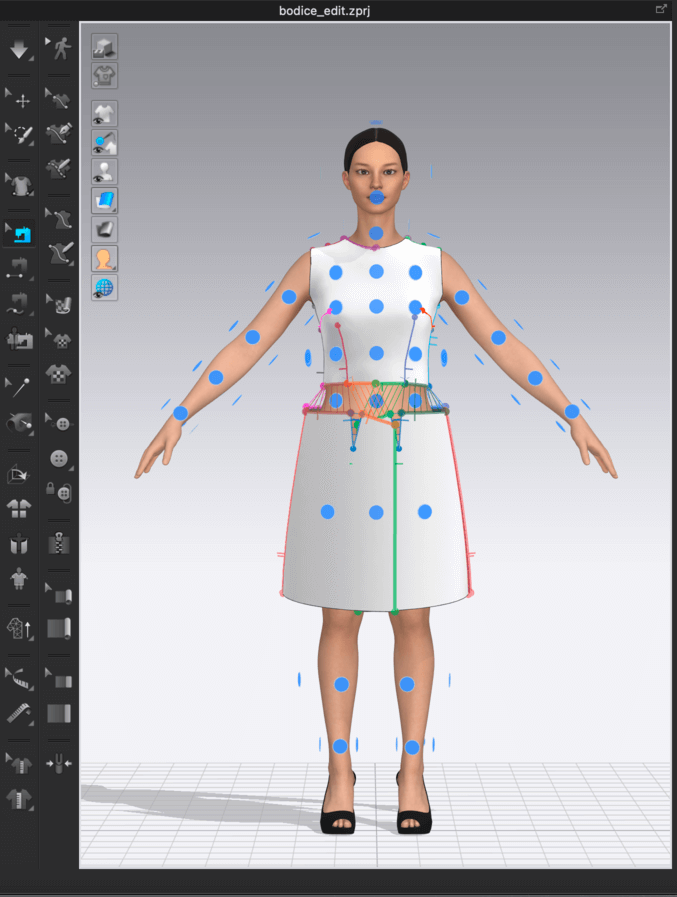
This time, I also learned how to do the 3D simulaiton on the software. When trying on the pattern, I needed to turn on the show arrangment points tool
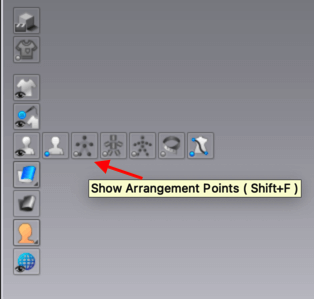
And then select the pattern on the 2D view, then hovel over the 3D view and the pattern will be attached to the avatar like magnets.
I then used the Segment sewing or Auto sewing tool to do the "stitching", and this is what it looked like on my first attempted... too large!
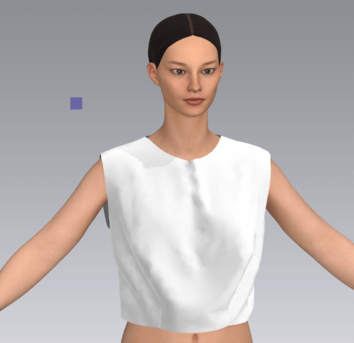
So I decided to marquee select everything and reduce the size of all the pattern, and this is how it looked after a few attempts, it looks more fit:
May 17, 2021
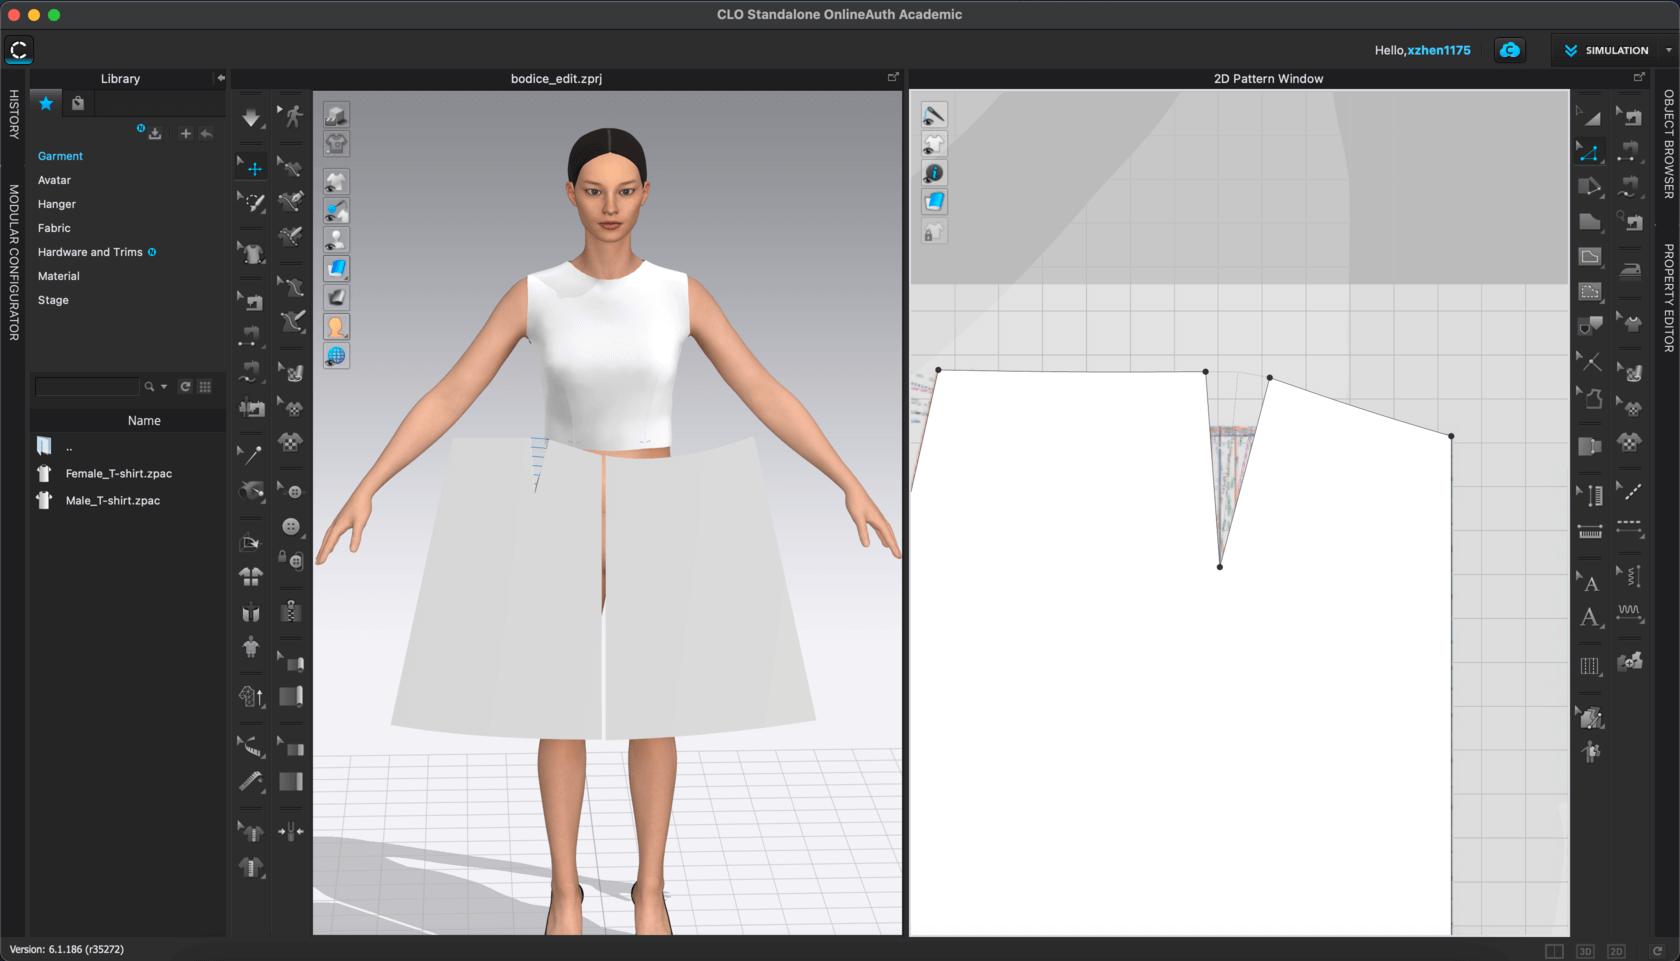
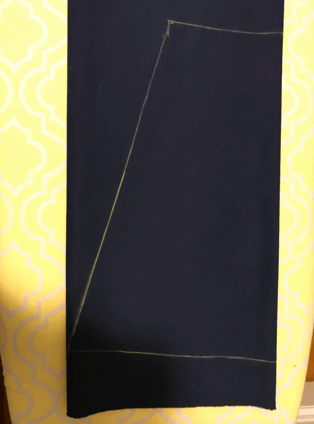
Next I wanted to make the skirt. I chose to start with the skirt block that was provided in the Udemy course.
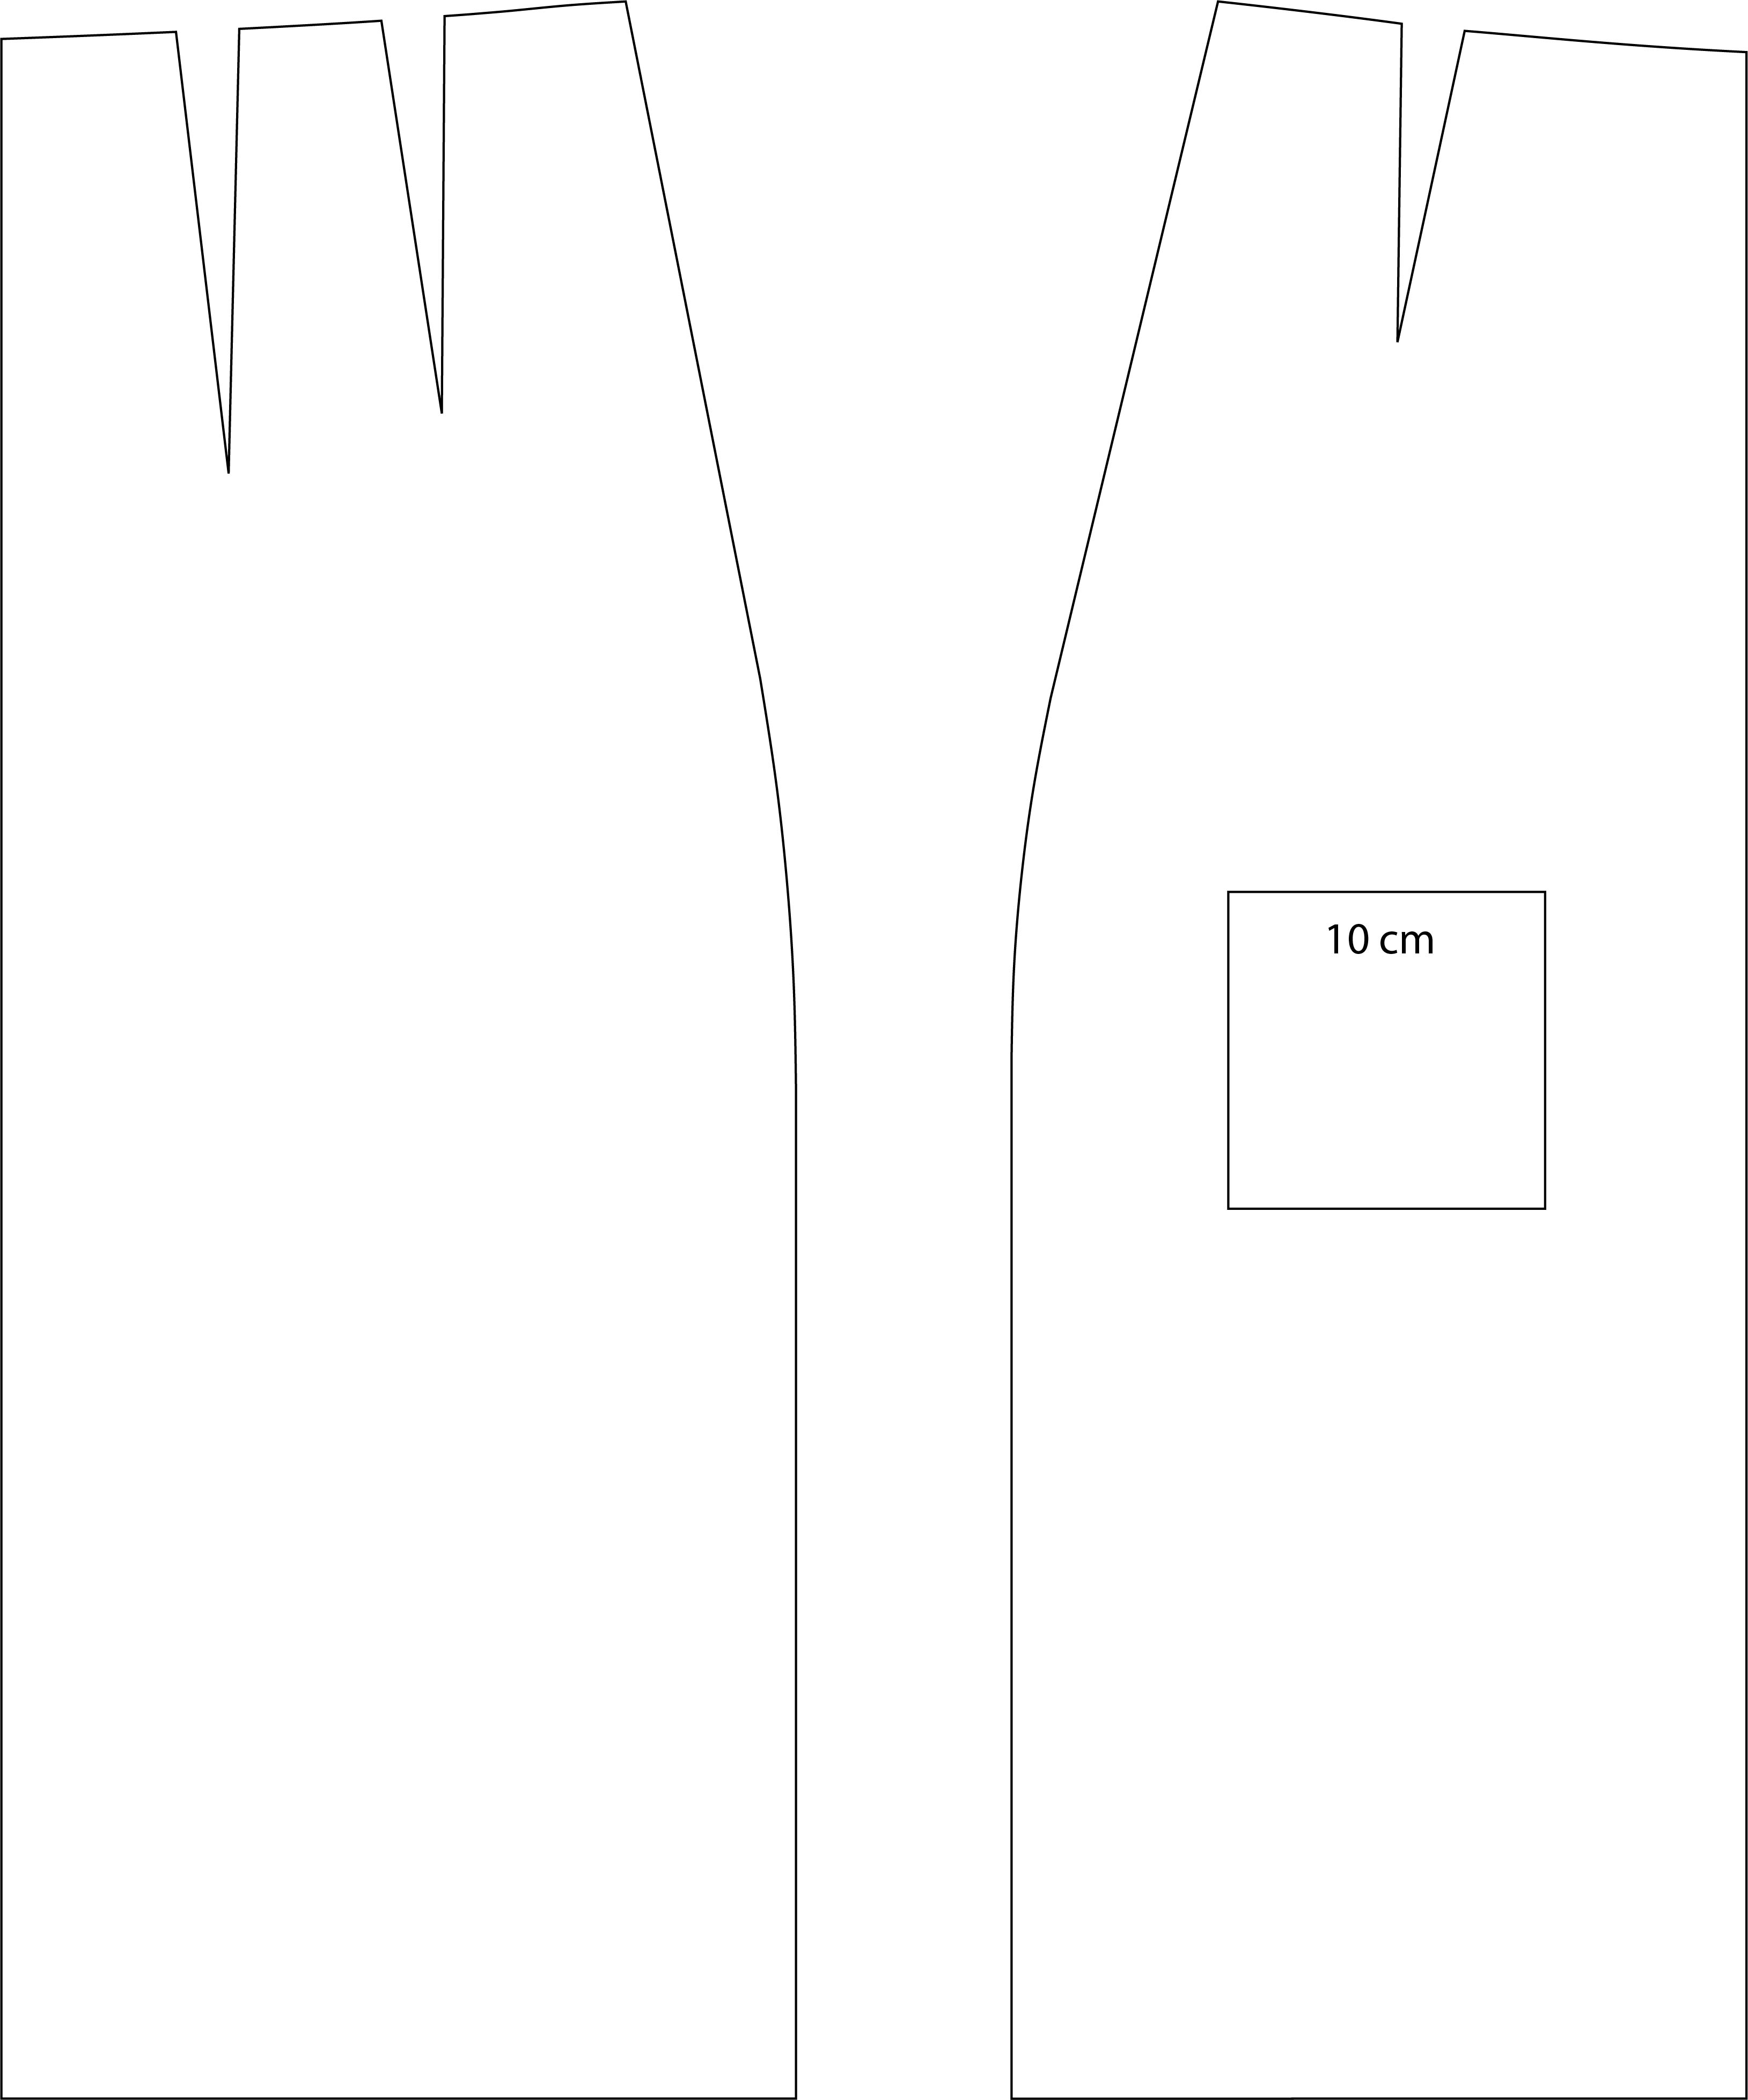
I followed the tutorial to import the images in CLO3D: In the 2D pattern view, right click and select Add background Image.
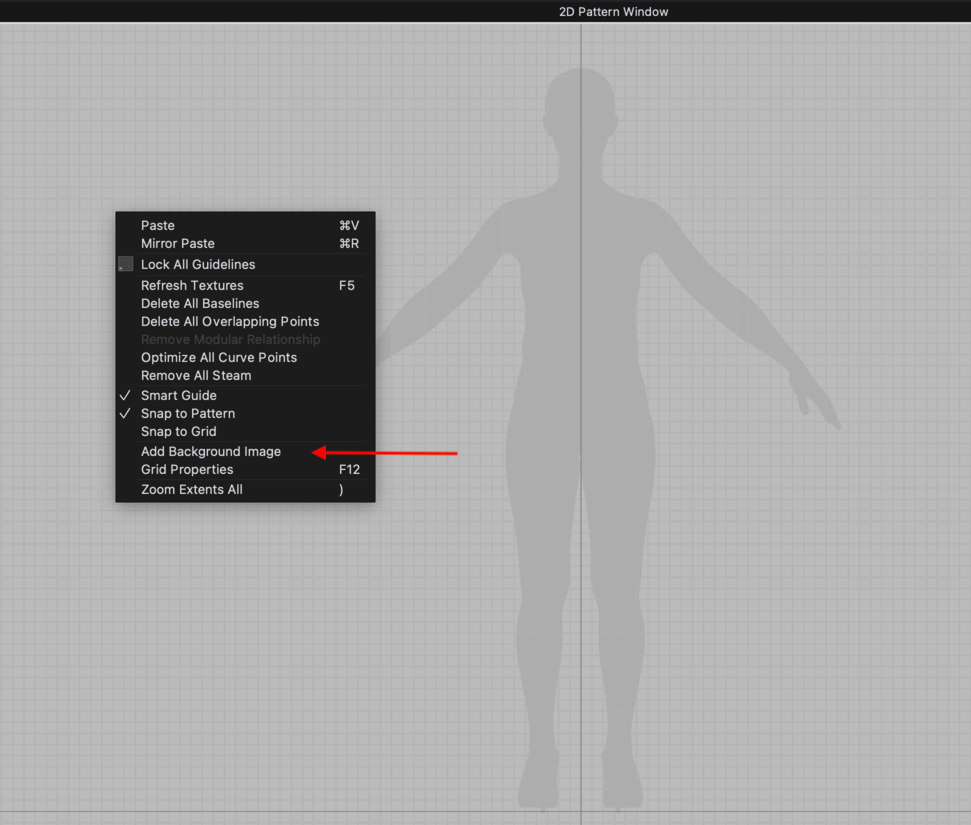
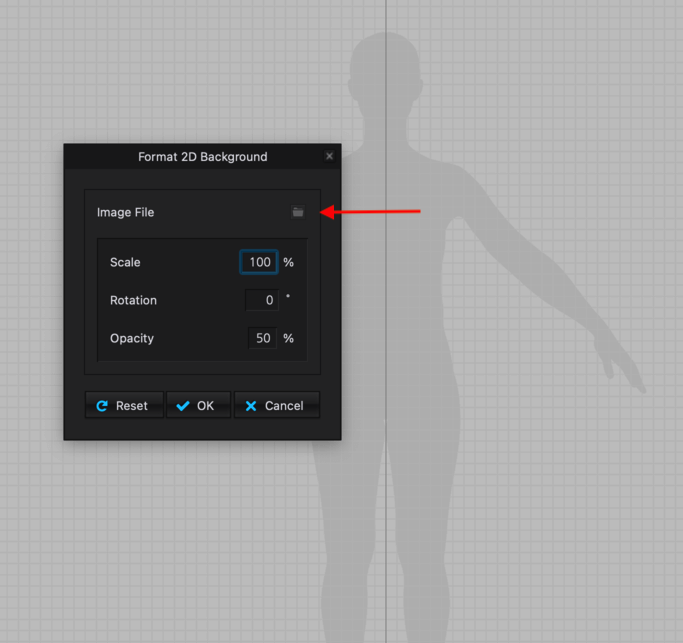
Then import the image file, make sure the scale, rotation, and opacity are correct.
The next step would be to trace the images using the polygon tool and also make the straight lines to curve lines using the curve tool (shortcut: C). A nice thing about CLO3D is the side-by-side 2D and 3D view. Here is an image of me trying to make a pleat on the skirt block.
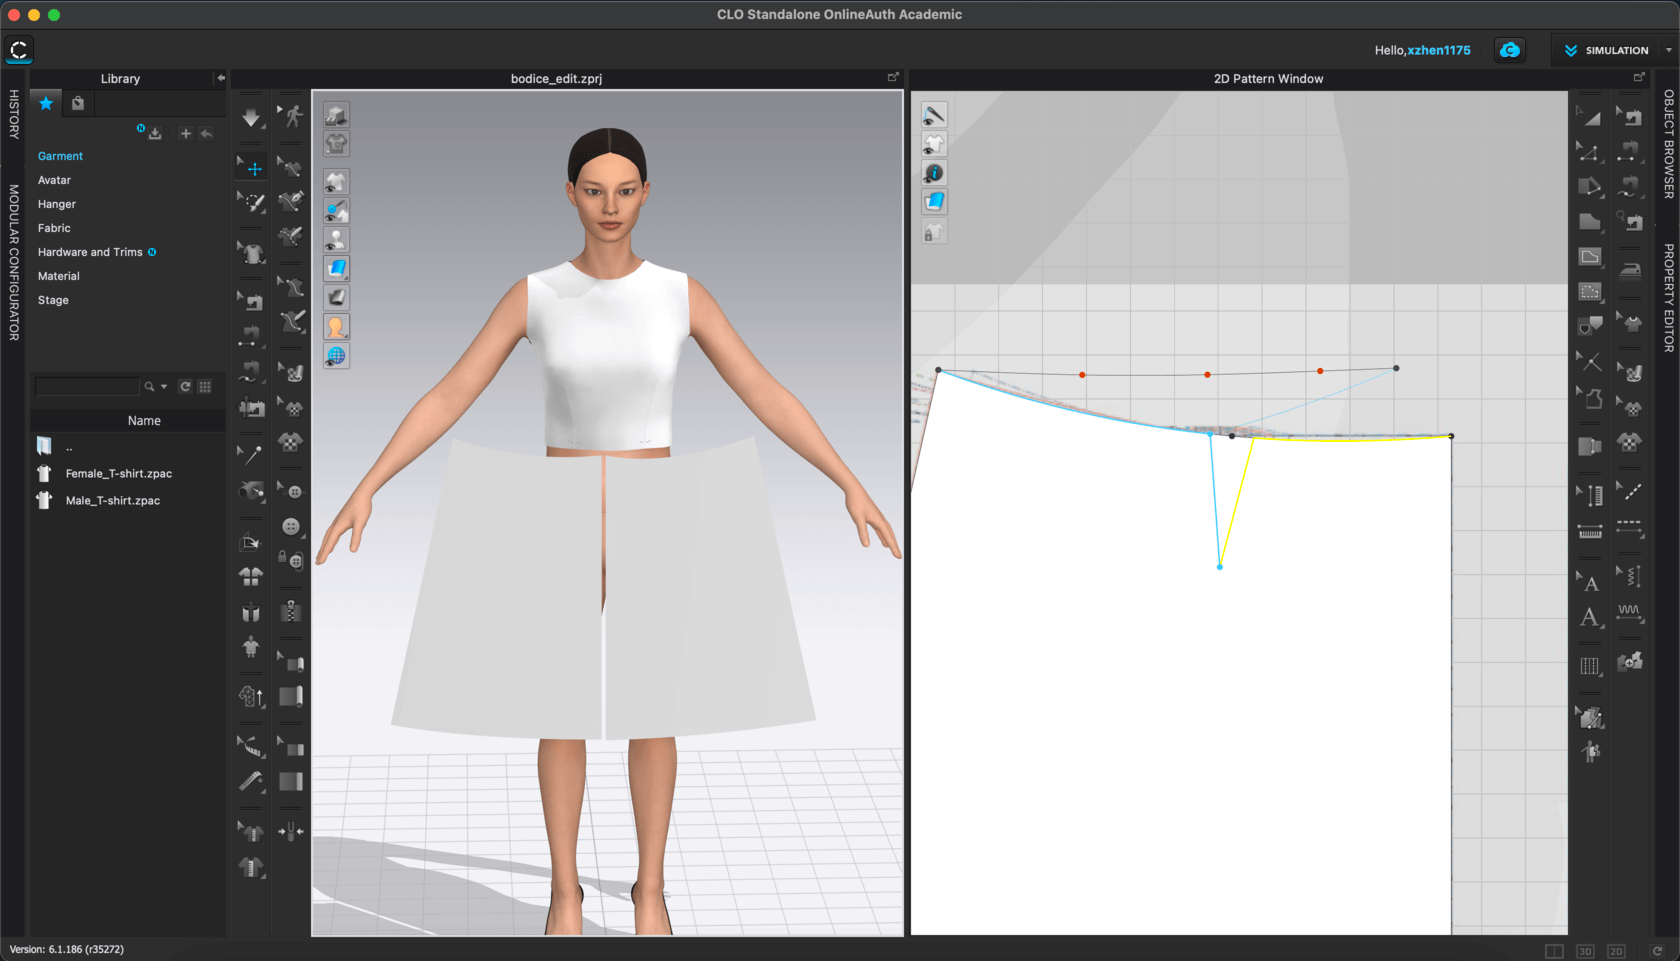
The 3D simulation reflected what I did on the 2D pattern view.
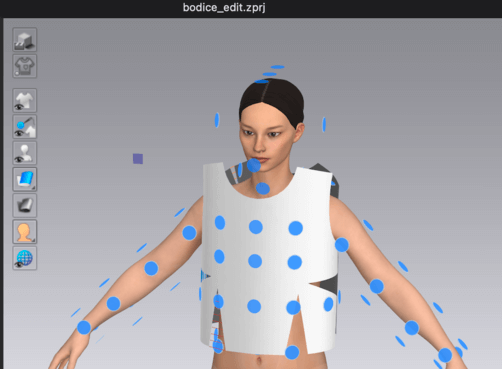
Turned on the show arrangment points tool.
This is how it looked after I arranged everything, before sewing
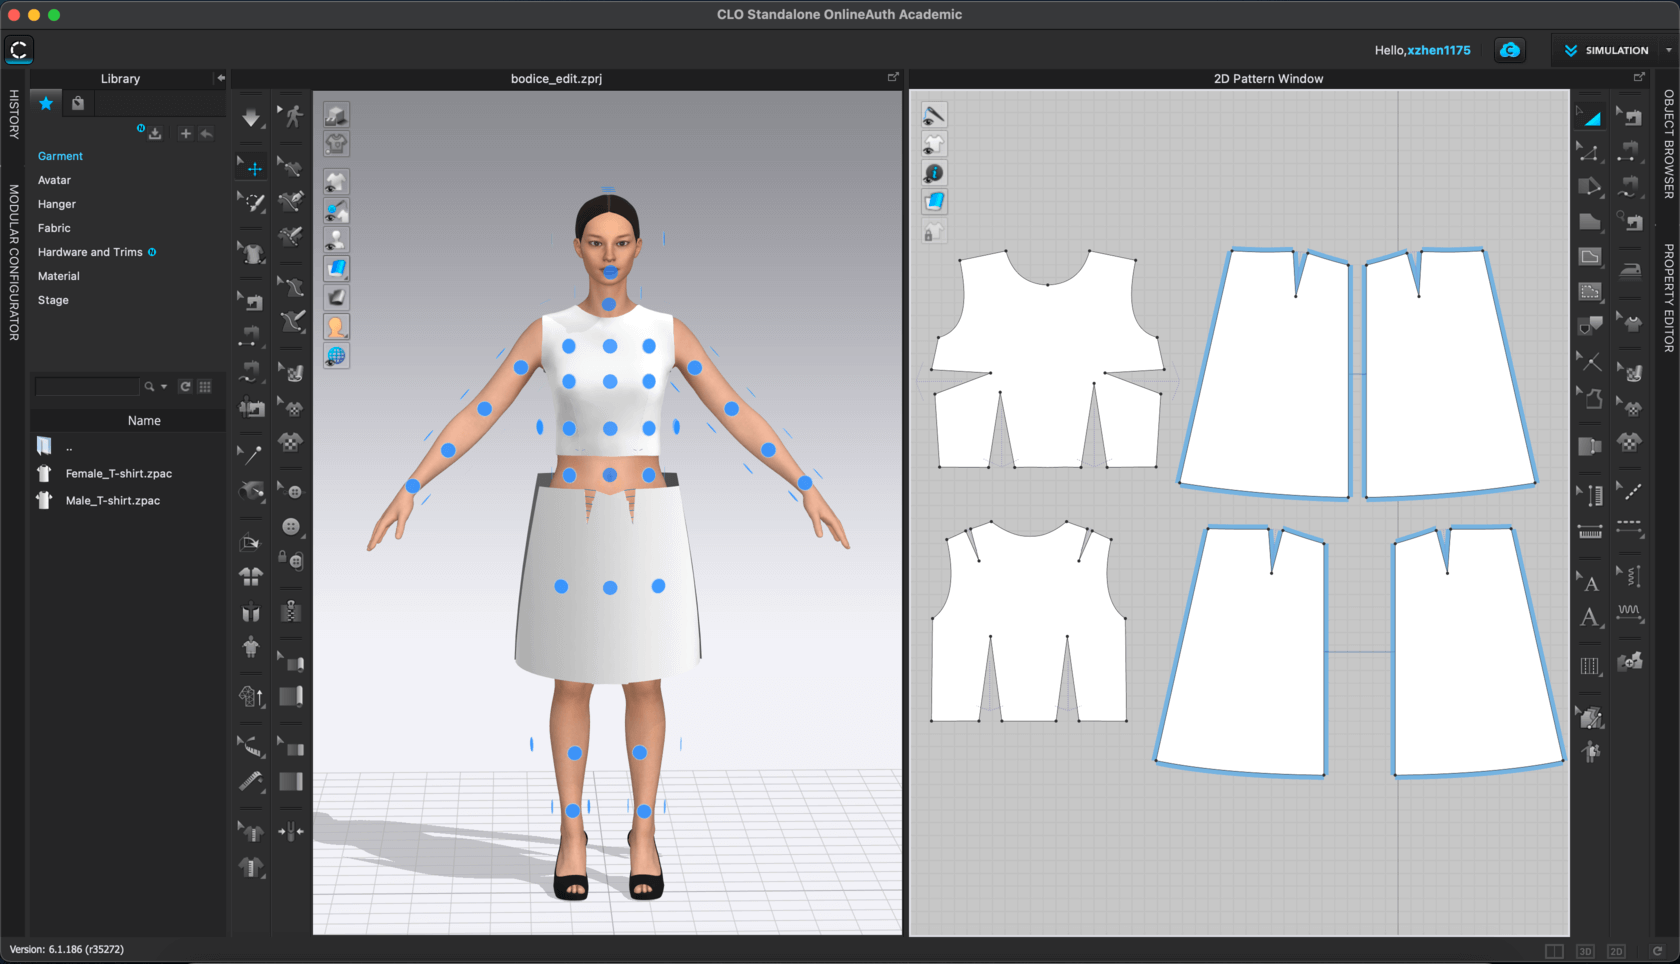
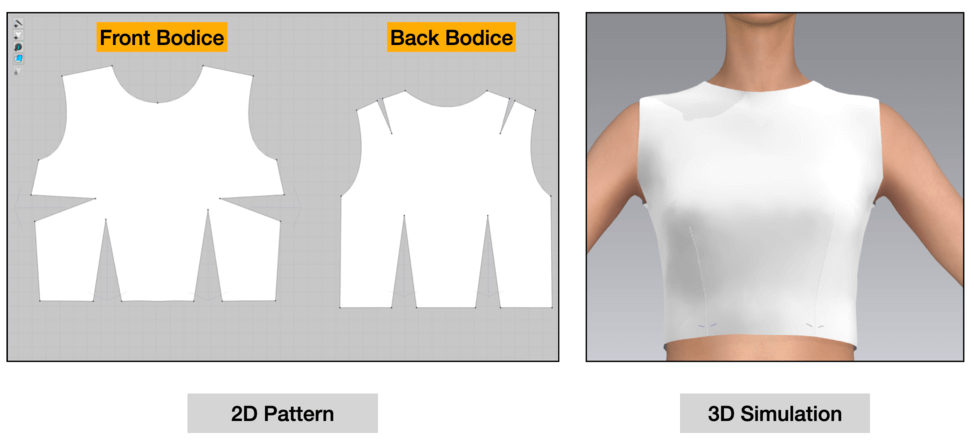
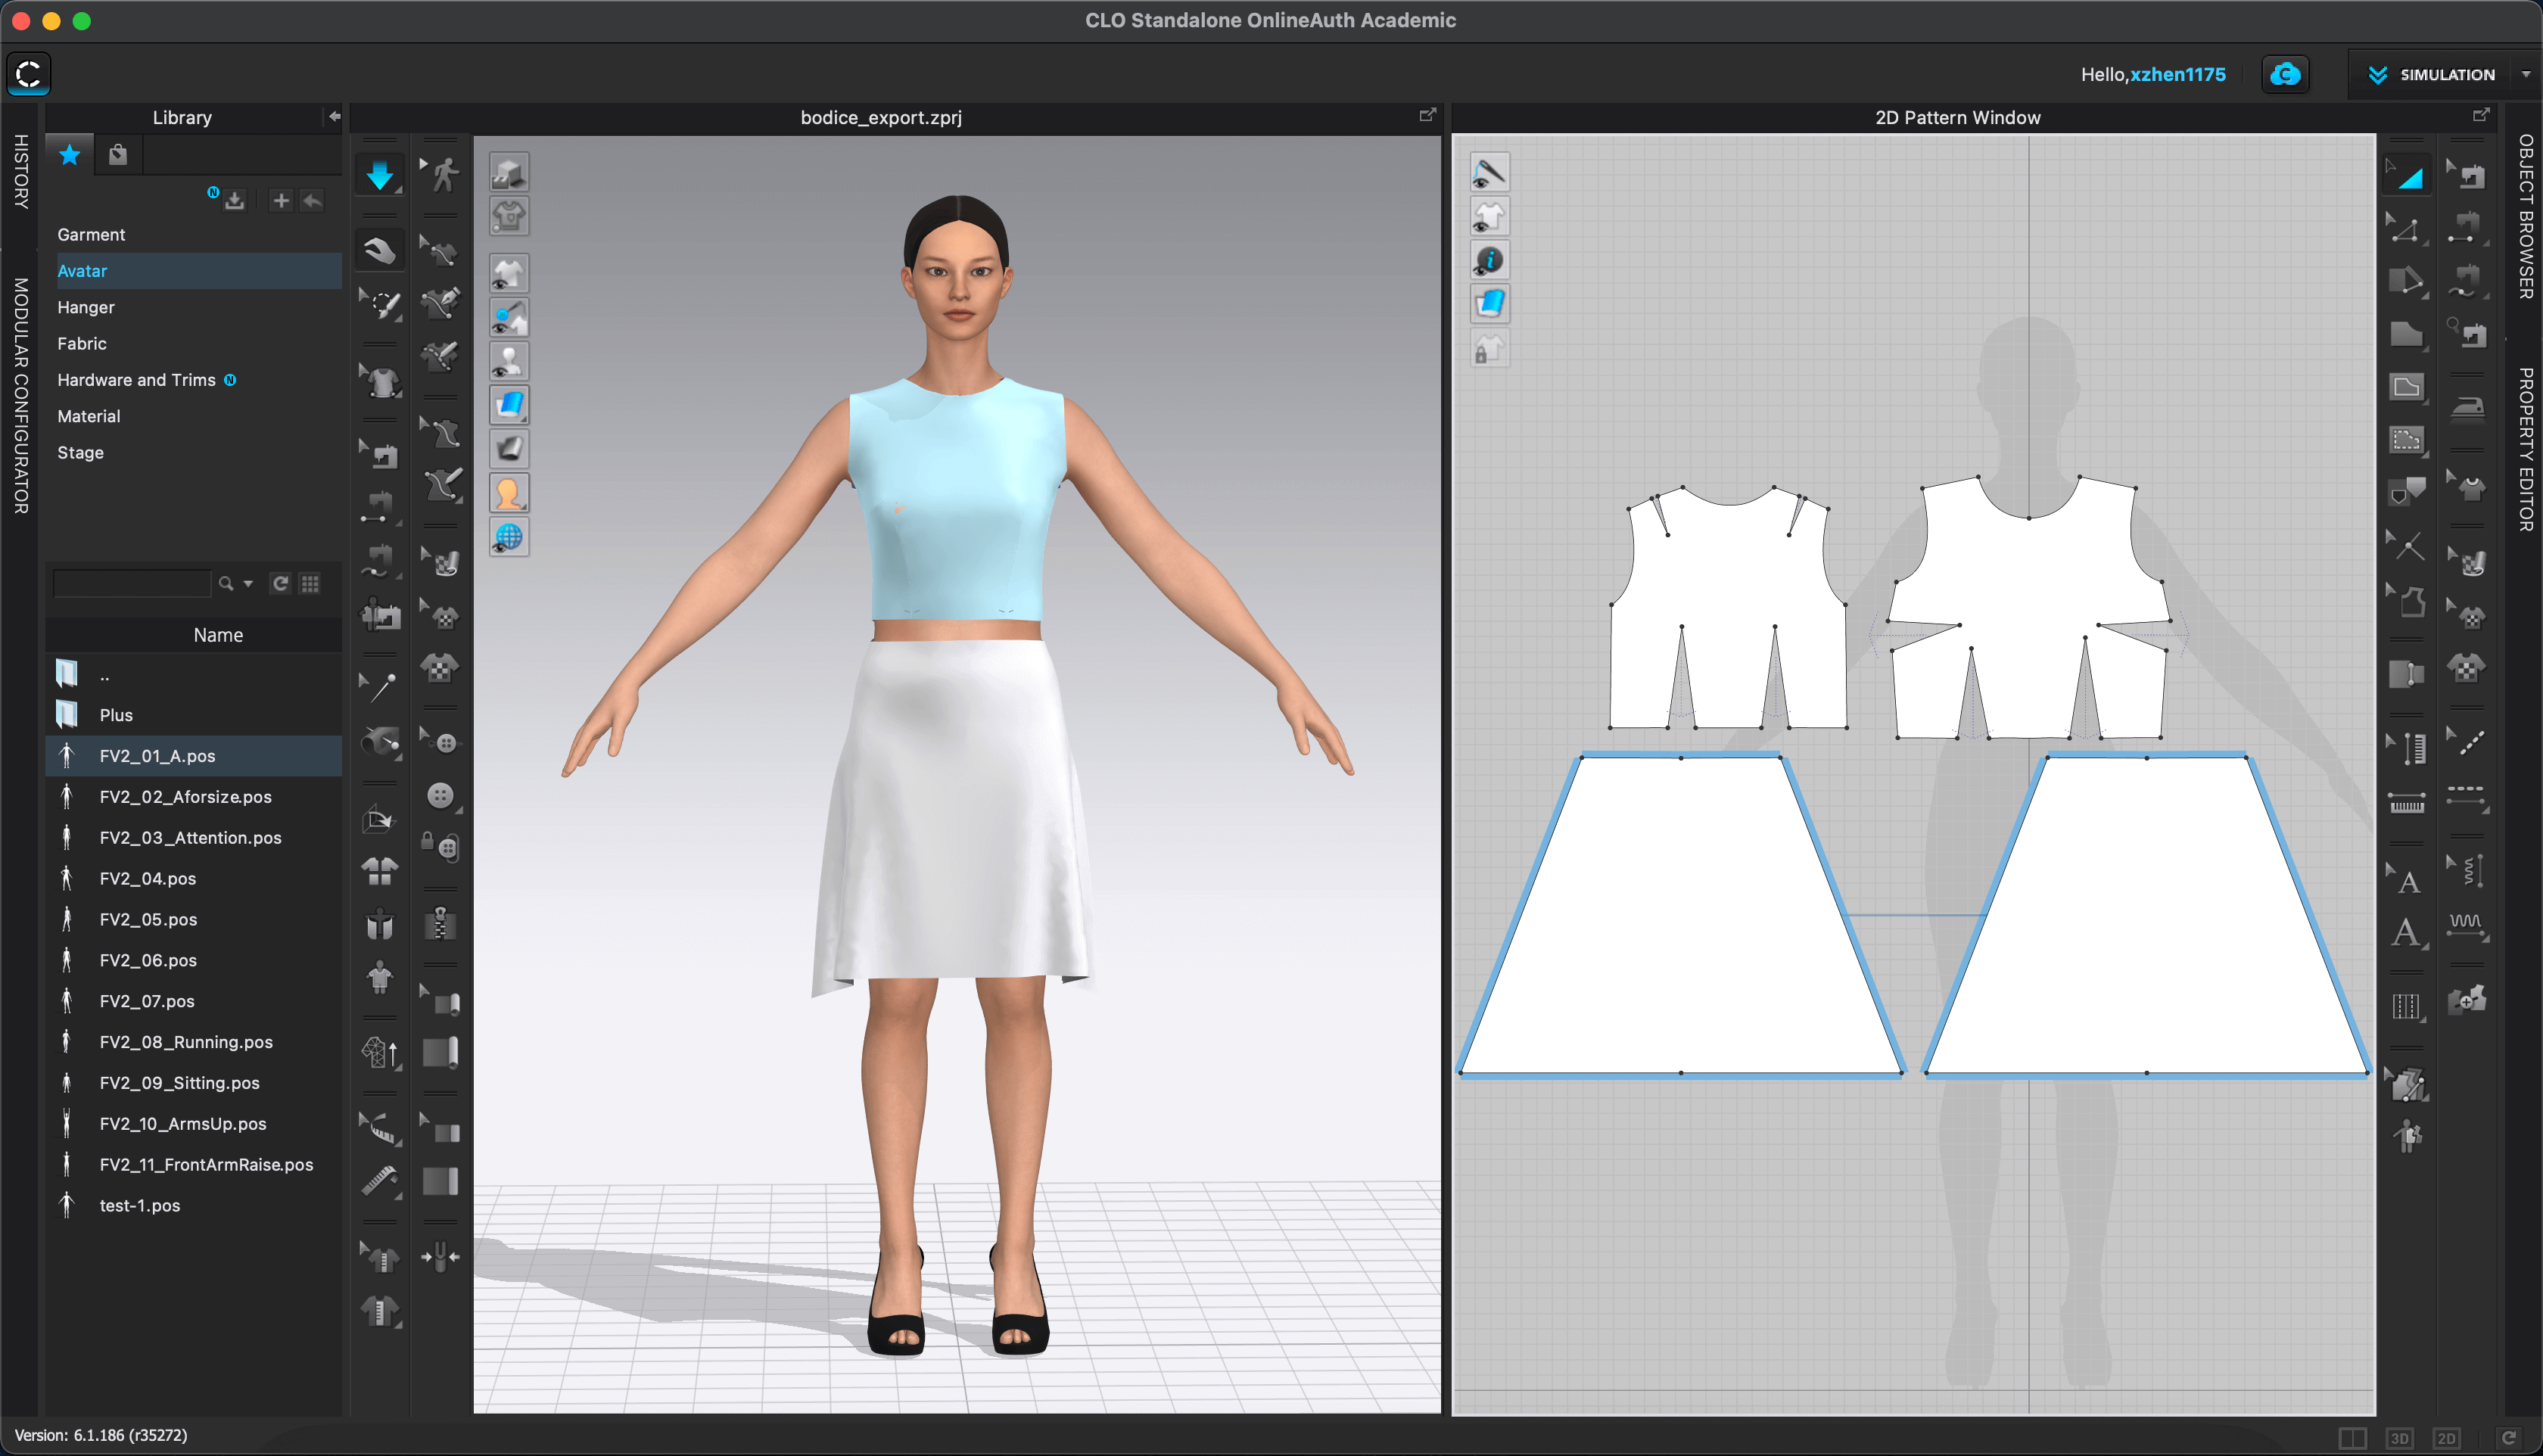
However, when I ran the simulation, everything seemed messed up in the "sewing", and I couldn't figure out how to fix that with the knowledge I currently have for the software. I guess the error occured due to me not resizing the bodice in a proper way... Since I wanted to move onto the next part of the assignment, I replaced the skirt block with two trapezoids, and simulated the avatar as wearing a tank top and an A-line skirt, and this is how it looked. I like the flow of the skirt on the 3D simulation view - it looked photorealistic!
Part 2: Laser Cutting The Sewing Pattern
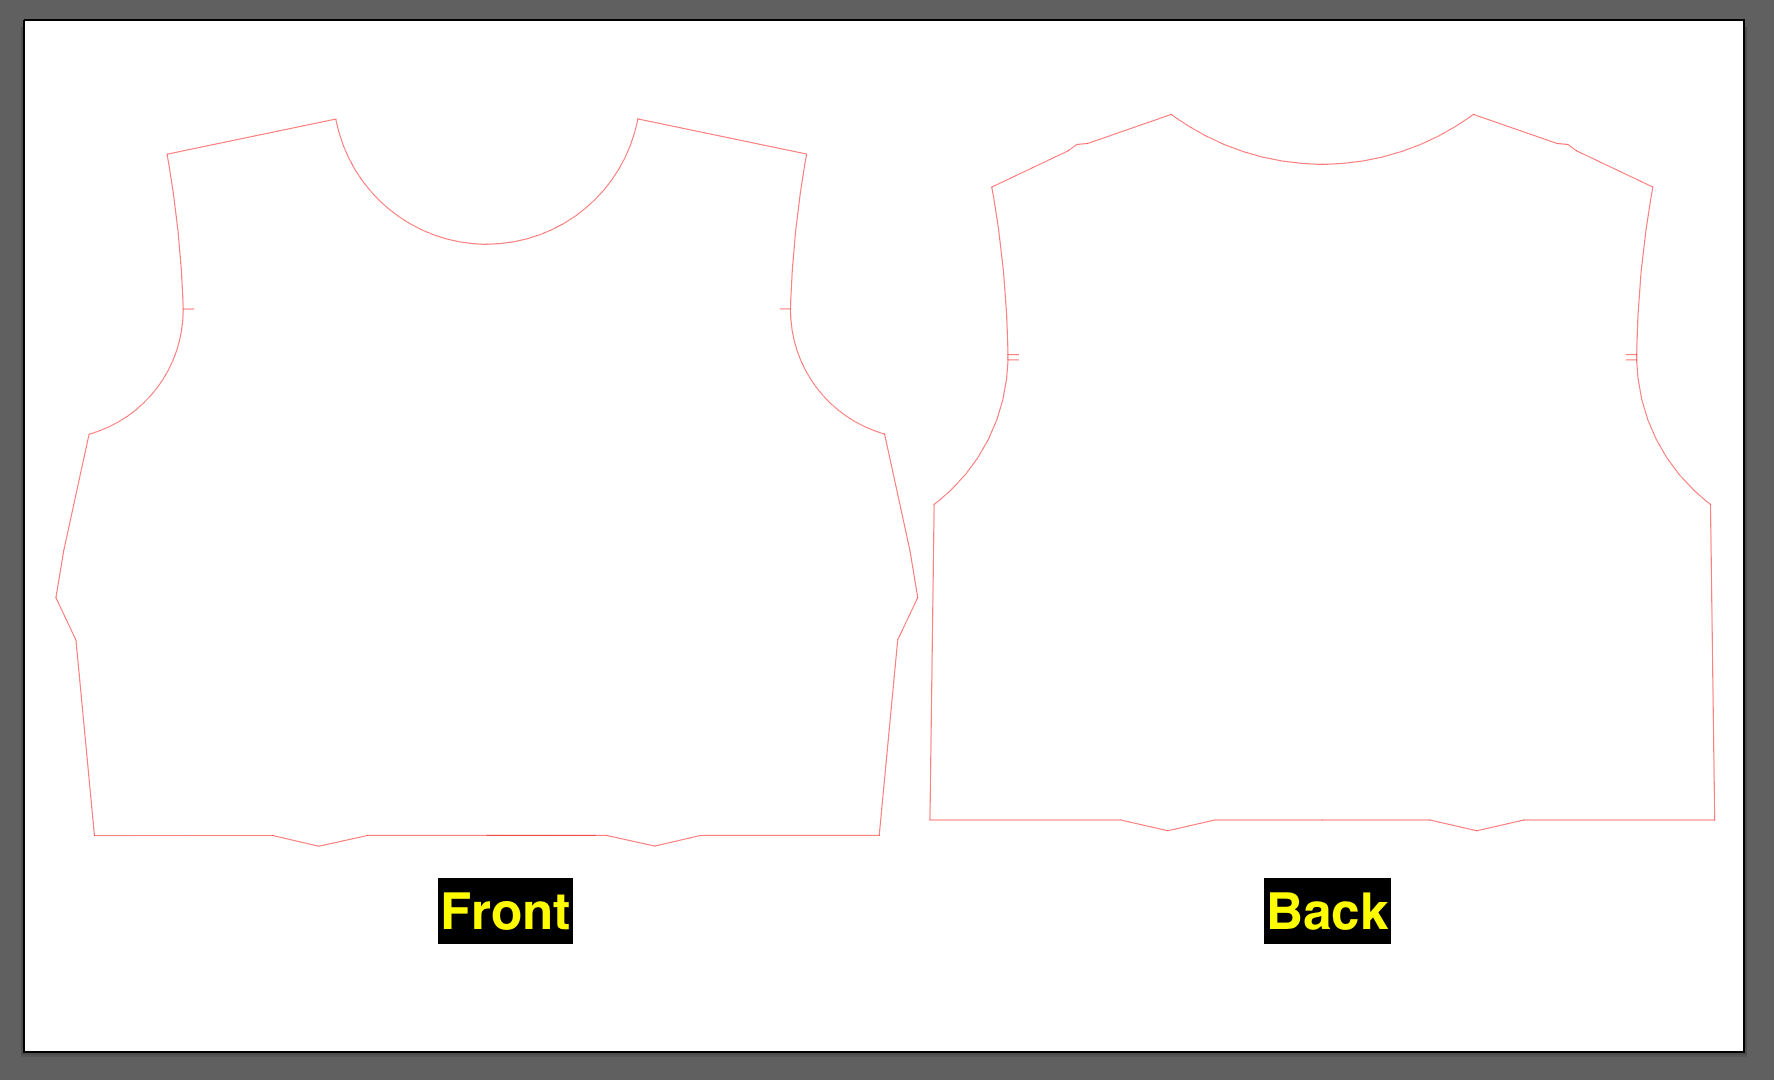
May 18, 2021The second part of this assignment was to laser cut the sewing pattern. I initially exported the pattern to dxf format and planned to post-process it using Adobe Illustrator, however, I was not able to open it. So I needed to find an alternative method. I then came across this YouTube tutorial and learned that I could import PDF to Illustrator. Since I still needed to change the stroke width to 0.001" for laser cutting, I used an online tool to convert the .pdf file to .dxf and then imported the .dxf back to .ai for post processing. And this is how the prepared .ai file looked. Note that I needed to fill the gaps of the darts for the sewing steps.
Darts are folds (tucks coming to a point) and sewn into fabric to take in ease and provide shape to a garment.
I had ironed the fabric and taped it on a 3mm plywood. Here are a couple things that I learned from experimenting with laser cutting sewing patterns:
- Align the selvages to the edge of the wood - this is for double checking the pattern pieces are cut in the correct direction
- Make sure no pattern pieces is "cut in fold" since we have to lay the fabric flat for laser cutting
In my case, my pattern pieces were quite large compared to the work area of the Trotec machine, thus I needed to divide the job into batches. As I was not sure whether the scaling issue was resolved, I decided to be conservative this time and used the scale tool in Illustrator to reduce my pattern pieces to 50% of its original size. This way, even if the issue was not solved previously, I wouldn't wasted as much fabric.
In Week 13, I learned how to use the Trotect Speedy Flexx 400 machine to laser cut textiles. I was able to define the settings that I would use for the linen fabric for my final project.
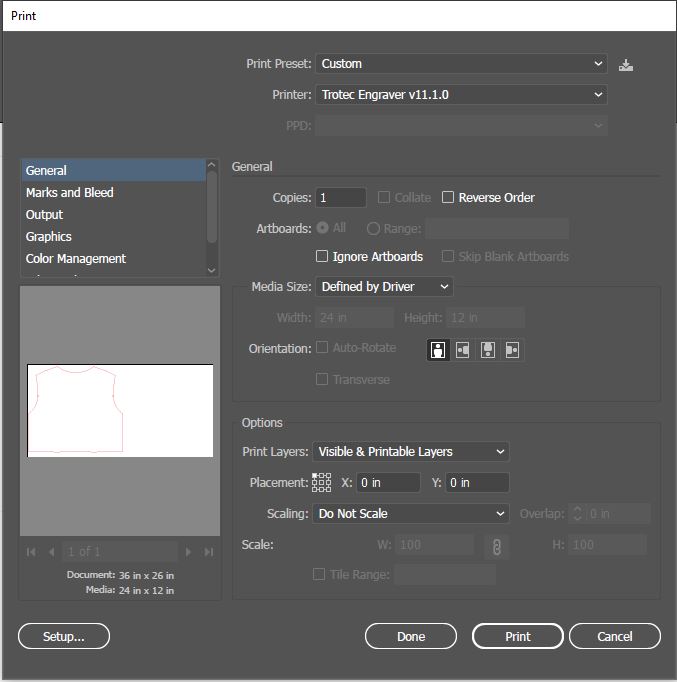
- Adobe Illustrator: File > Print (Printer settings):
- Select the top left corner as the placement
- Resolution: 500dpi
- Halfton: Color
- Make sure to check the boxes for Inner geometries first
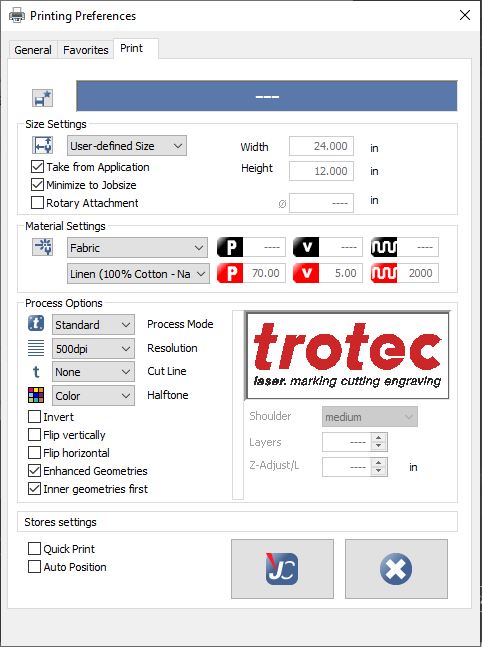
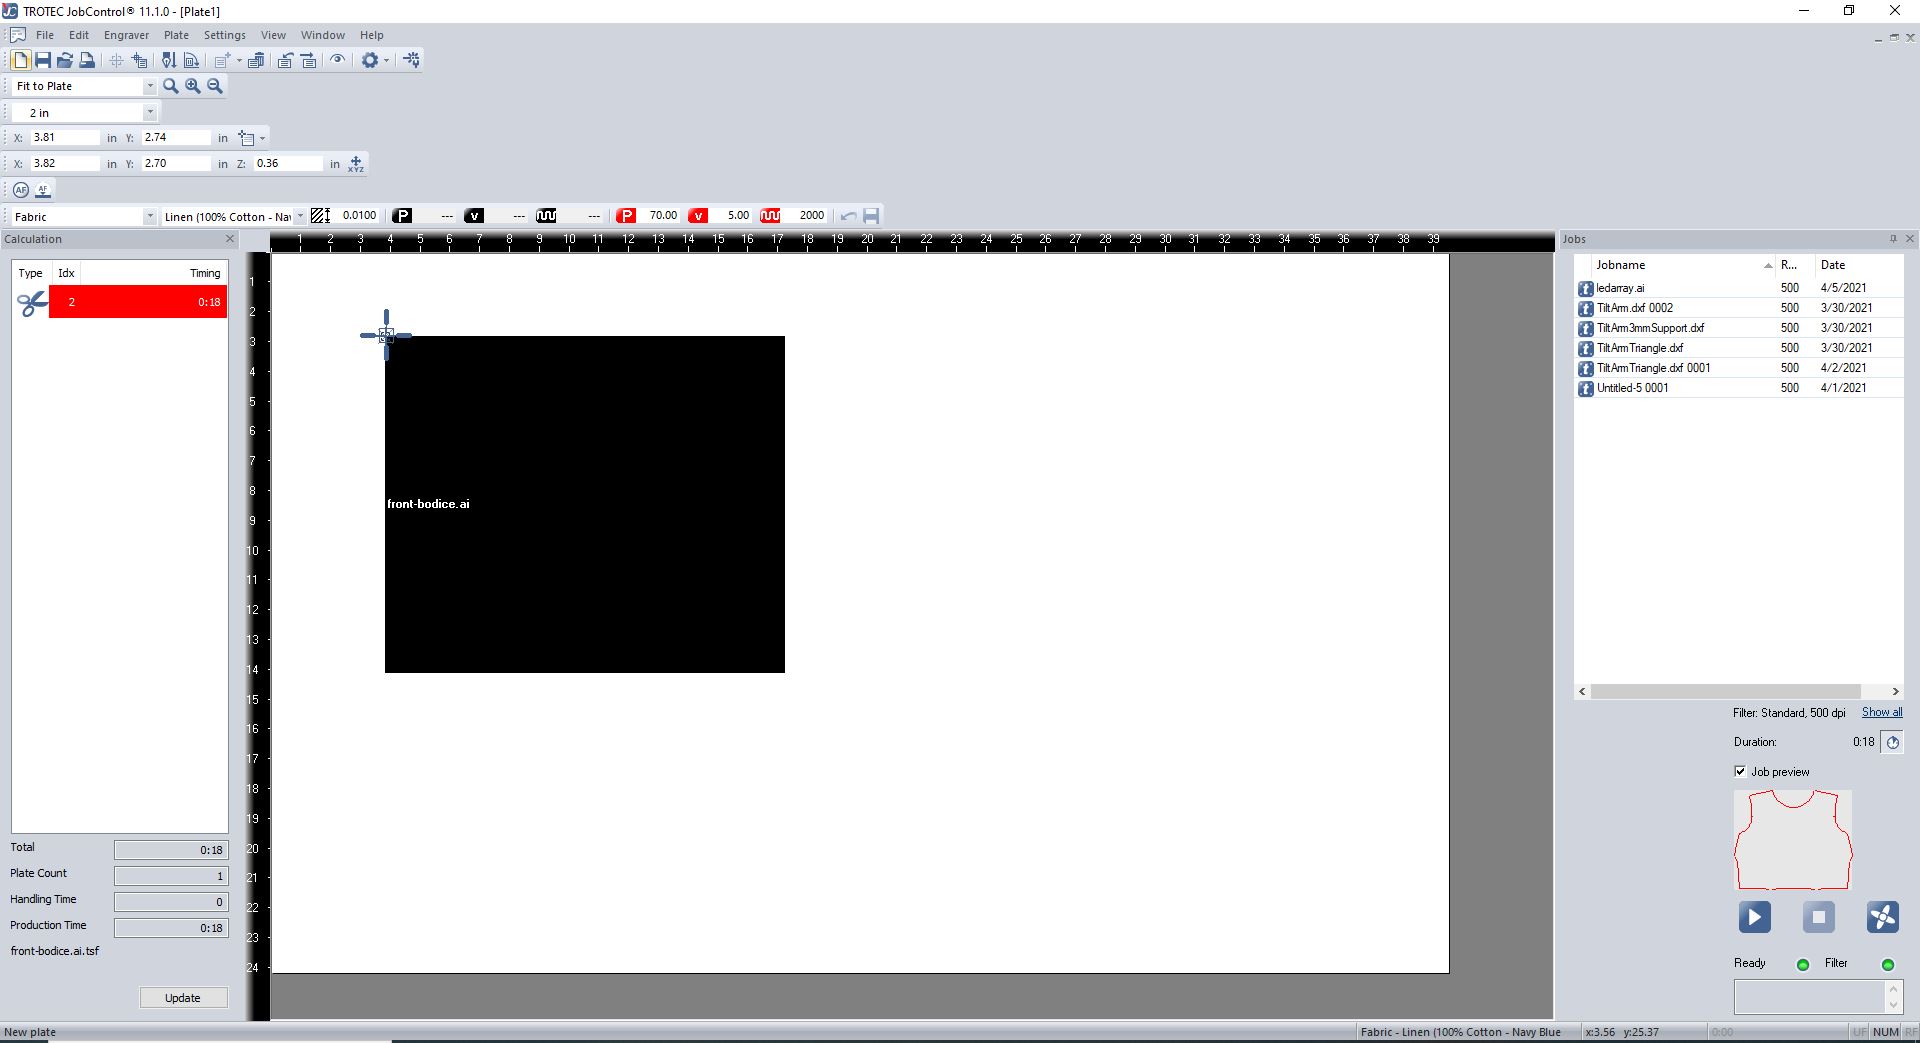
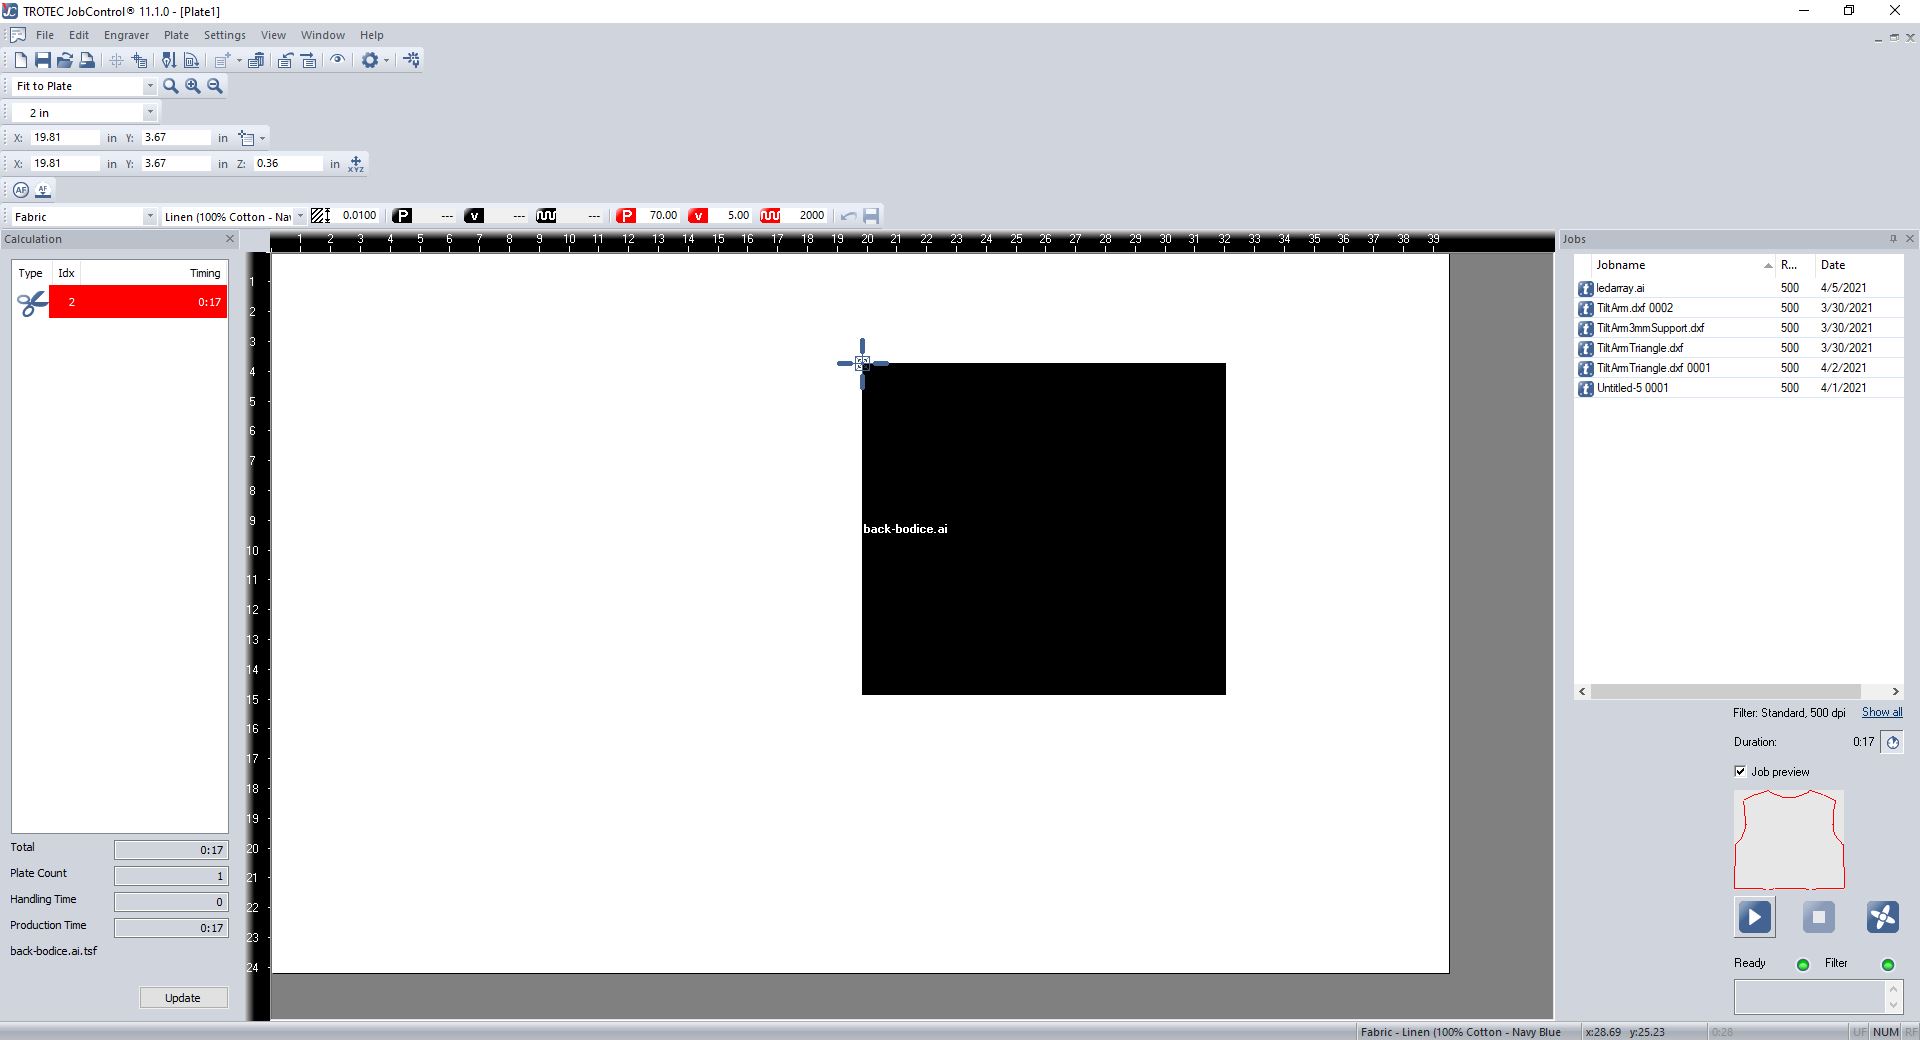
- Job Control Material Setting:
- Material: Fabric > Linen (100% Cotton - Navy Blue)
- Power: 70
- Speed: 5
- Frequency 2000
- Thickness: 0.01" (setting the thickness to help with focusing)
- Passes: 1
The cutting time was very short, it only took 18 and 17 seconds to cut the front and back bodice pieces, respectively.
Here is a short video of the the cutting process on the back bodice piece.
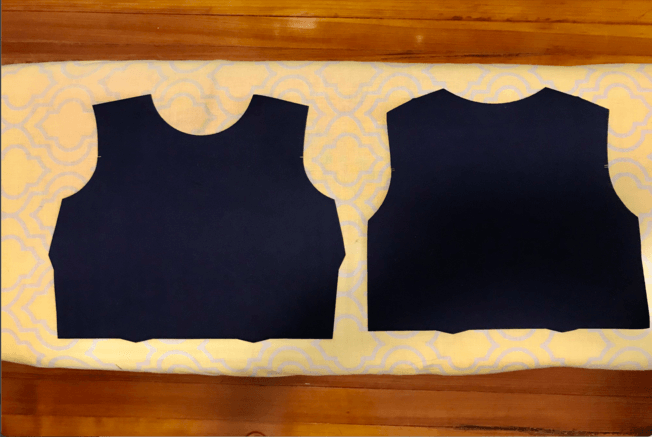
And this is the end result, I really liked how clean the cutting edges were:
Part 3: Sewing
I had to leave early so I didn't get to try the sewing/embroidery machines at the 3DExperience Lab. However, I was still able to finish this part of my assignment at home!
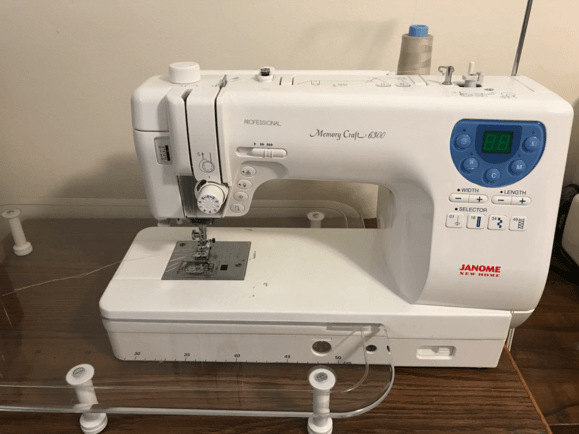
First, I changed the thread to match the color of my fabric following this workflow:

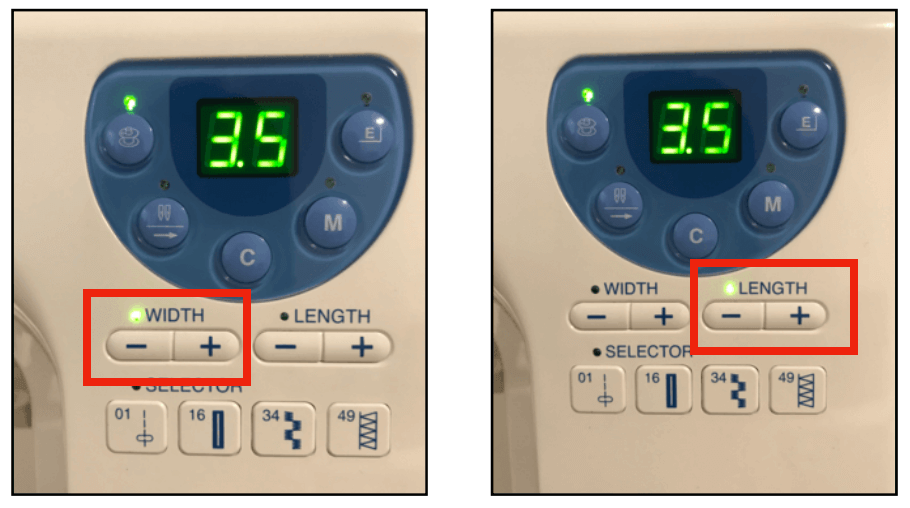
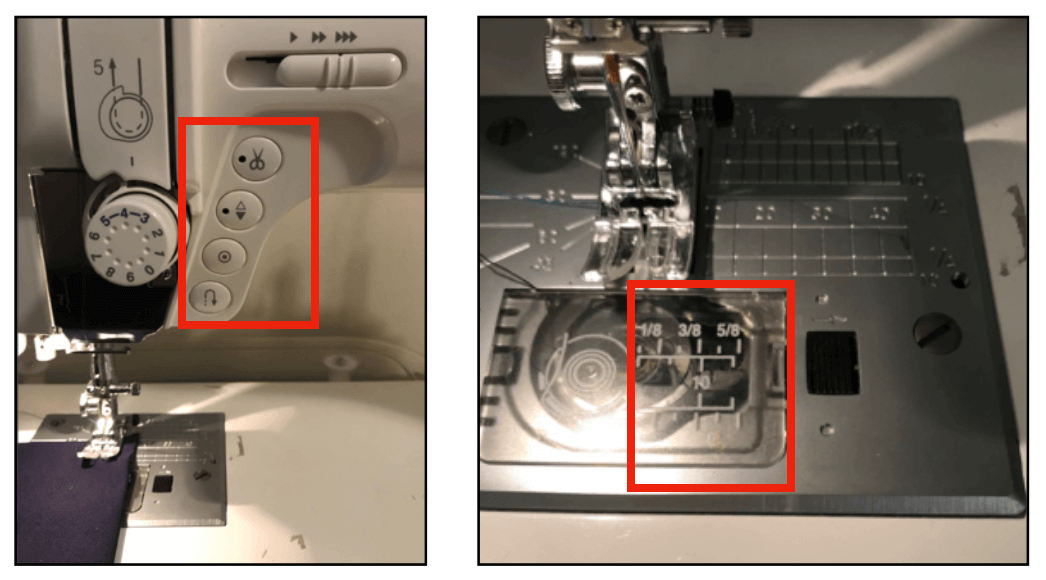
Once turned on the machine, I set the width and length of the stich to be 3.5 as this was the recommended setting for linen fabric.
Although the machine was not computerized, there were still some helpful hints / tools from here and there. The first image below shows three tools that I often used while sewing: trimming the thread (icon 1), moving the needle up or down (icon 2), and backstich (icon 4). I also liked to use the seam guide as shown on the second image, another way could be to tape a sticky note on the seam guide to make sure the seam was as neat (straight) as possible.
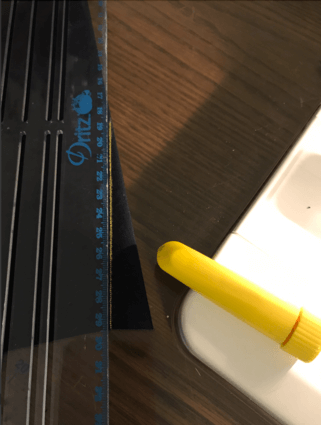
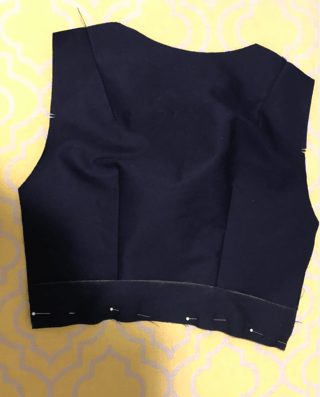
There were four darts on my scaled pattern pieces, so I chose to use chalk to mark the sewing line to guide my process.
Here is a short video of the the sewing process.
Here is an image of how the finished dart looked. It is a little hard to see as the thread color matches the fabric color.

I also made sure to follow the sewing rule of "press as you sew". As the dart created some curve on the sewn piece, I used a tailors ham (the "triangular" pillow on the image) to shape the dart and achieve a perfect press. The middle part is called seam roll and it has a similar purpose, however it is best for pressing seams open on long and narrow areas, such as sleeves.
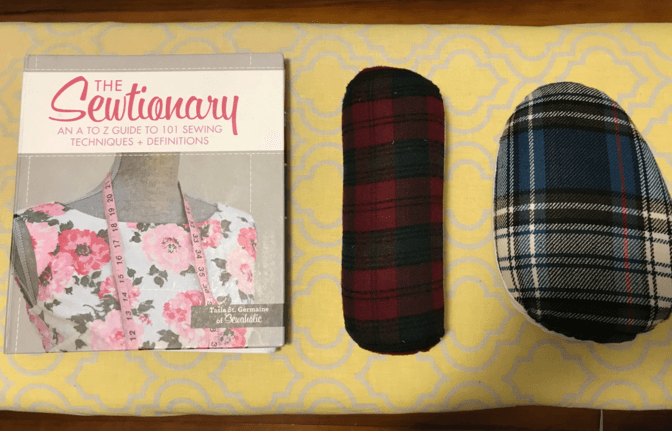
When pressing, the pointed side of the dart would be seated on the pointed side of the tailors ham.
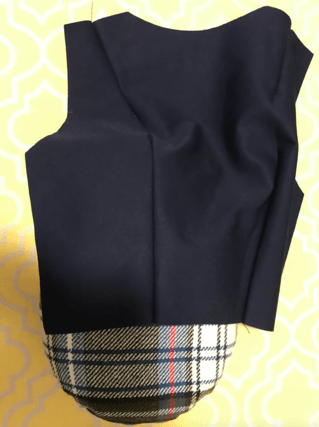
As mentioned previously, I was unsure about the scale so I chose to only laser cut the bodice pieces. After finished pressing the darts, I manually sketched the waistband and the skirt on the fabric scrap.
When sewing the seam, I made sure the right sides of the fabric touching.
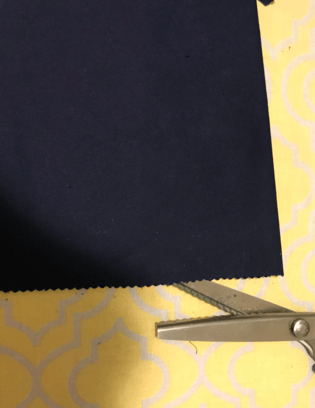
I finished the hem of the skirt with the decorative edger scissor. Another reason for using this edge scissor because I didn't want to hem and this finish would provide a clean result!
And here is an image of the assembled scaled dress!
Files
Please find below the files that I made for this assignment.