
This work is licensed under a Creative Commons Attribution-NonCommercial-ShareAlike 4.0 International License
Activity Log 1: Fashion Design, Laser Cutting Textile and Sewing
Summary
In Week 2, I discovered Valentina and CLO3D, which are very powerful tools that allow pattern creation using either standard sizing tables or an individual's set of measurements. Valentina is a great open-source tool with a simple user interface, while CLO3D is a commercial virtual draping software but gives excellent support to students.
In the end, I chose to use CLO3D because I like that it has a virtual, true-to-life garment visualization engine that allows me to test the fit of the patterns and experiment with different cloth materials before making the first cut.
Fashion Design in CLO3D
I started with taking tutorials and interactive sessions to get myself familiar with the basics. I watched some videos in CLO3D's YouTube Channel, and I was so intrigued that I signed up for a Udemy CLO3D course during the weekly Udemy flash sale 😹.
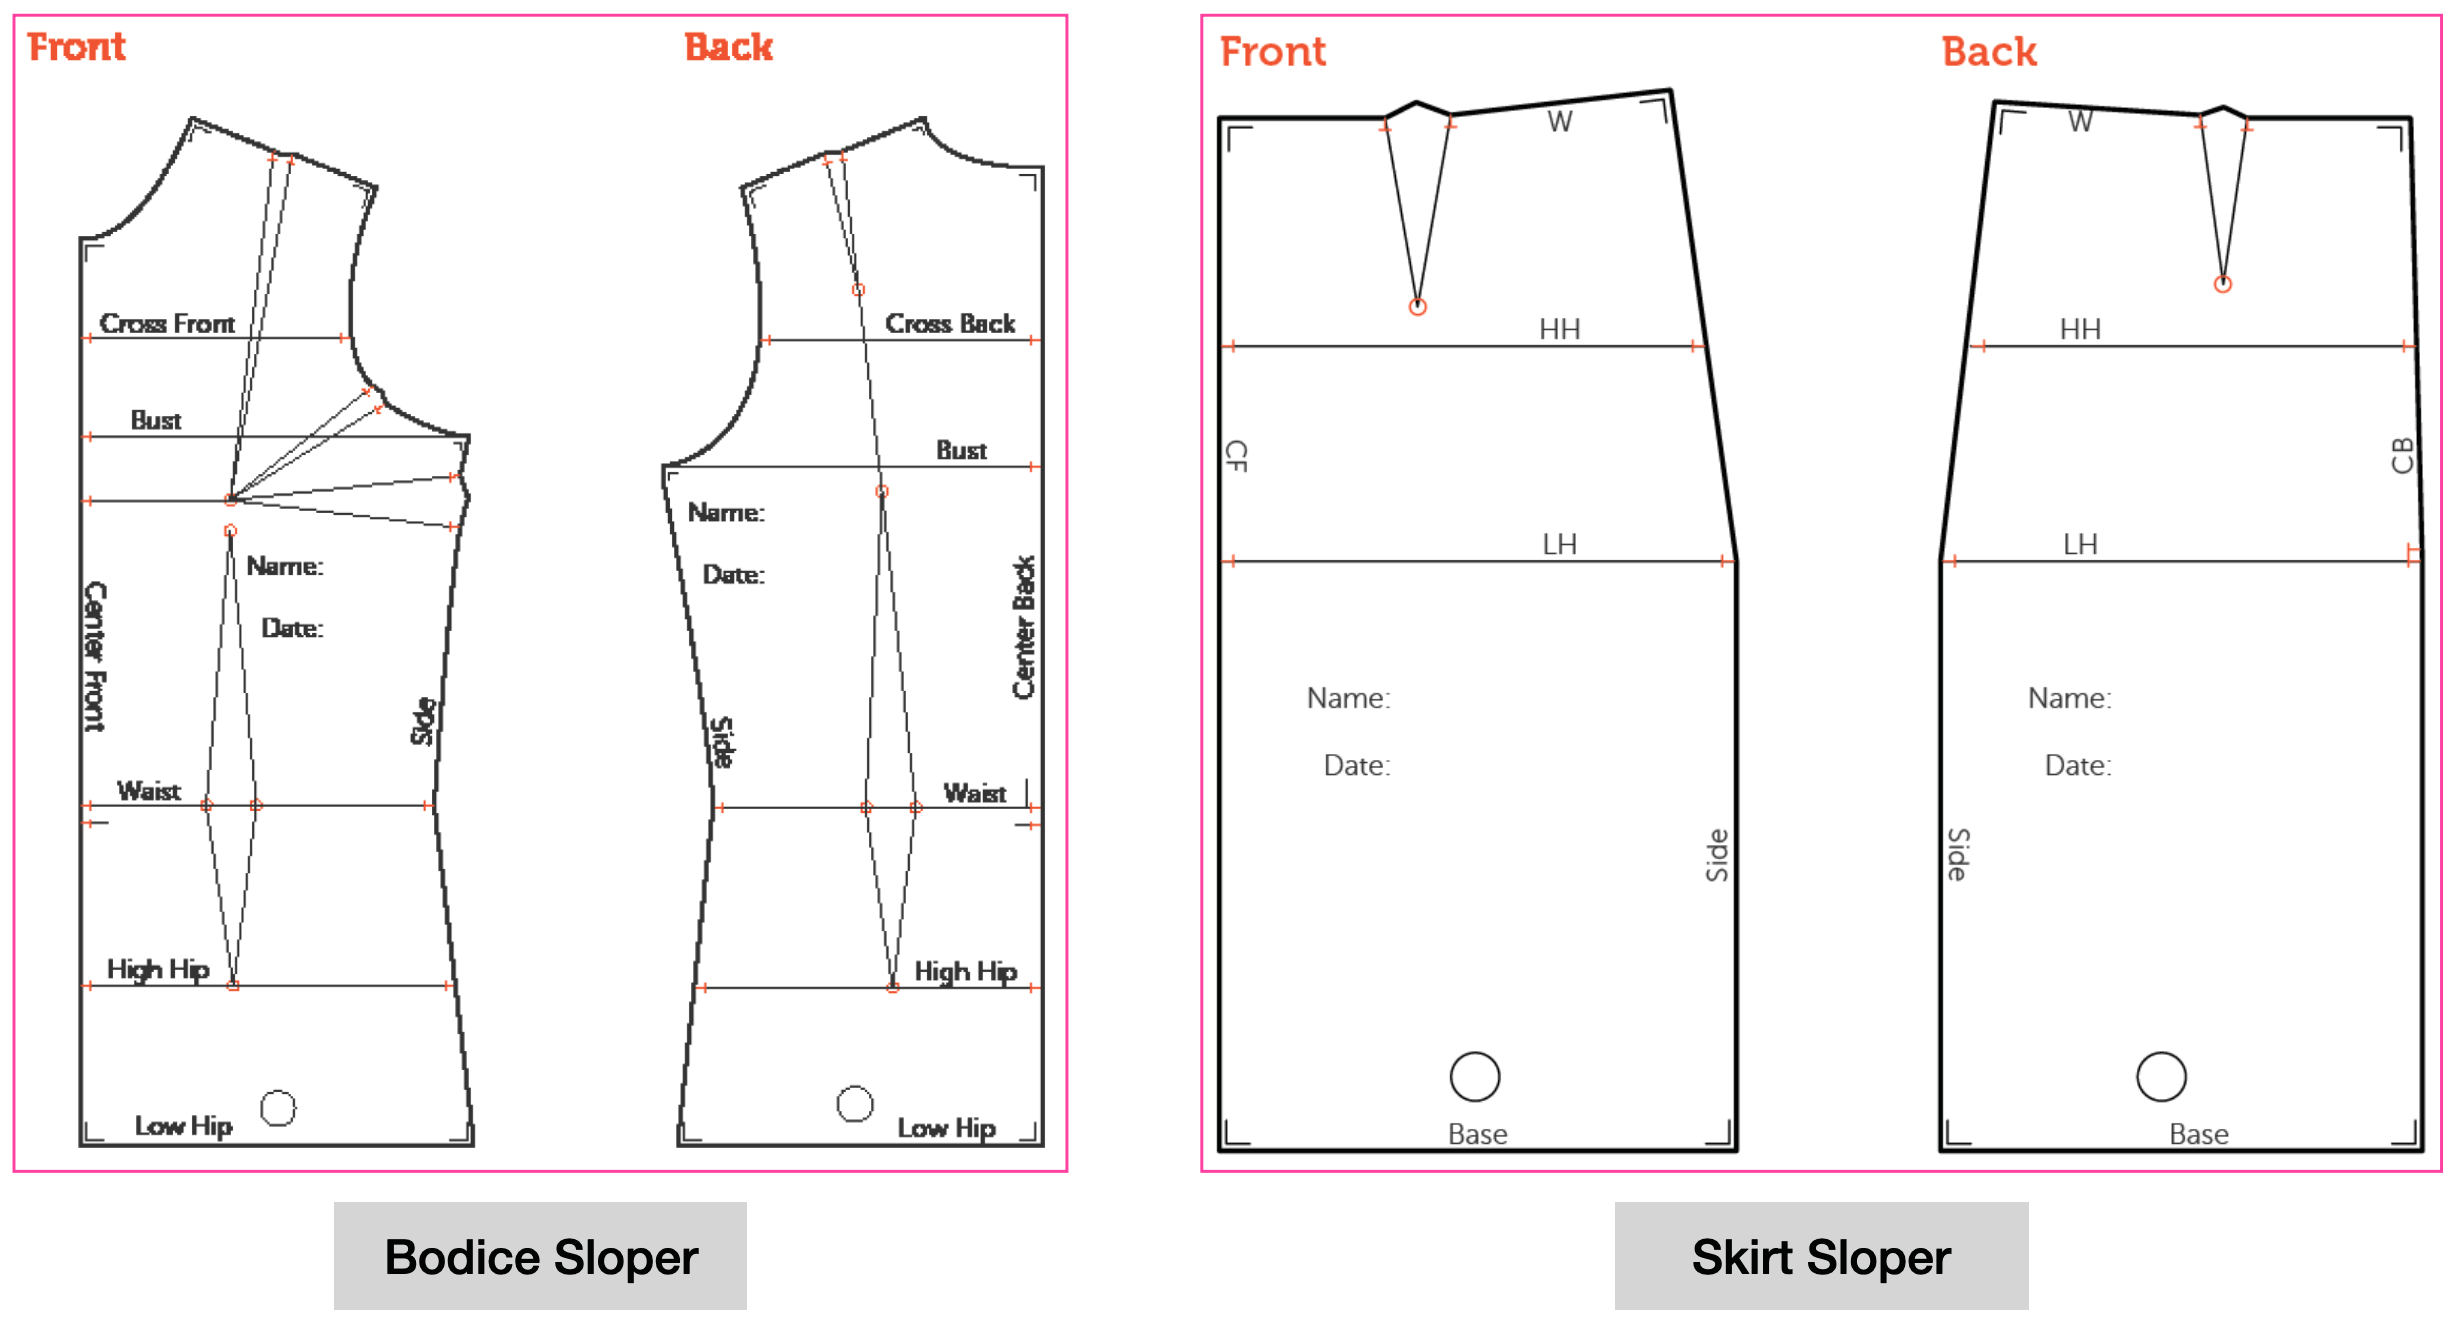
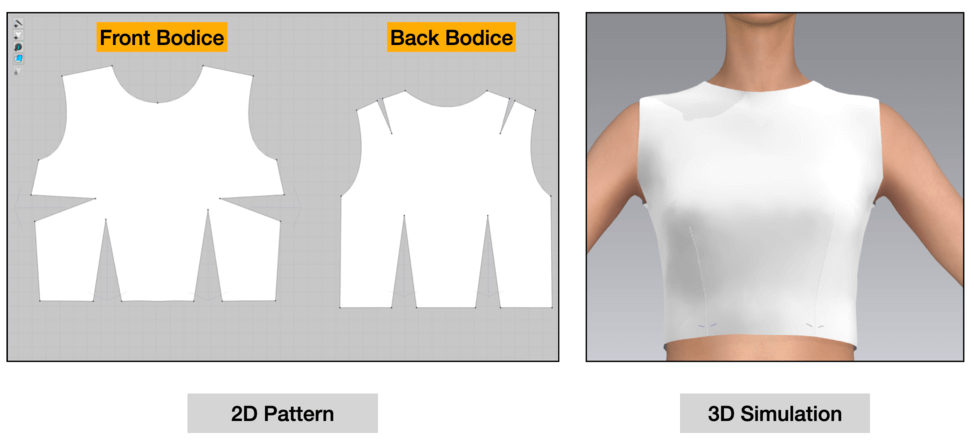
The class was intensive and I learned a lot! In the Flat Pattern Drafting section, I learned to create a bodice sloper. A sloper is like a foundation pattern that our clothing designs are based. For me, I will be adapting the sloper to add princess seams.
Let's see how a bodice sloper was created.
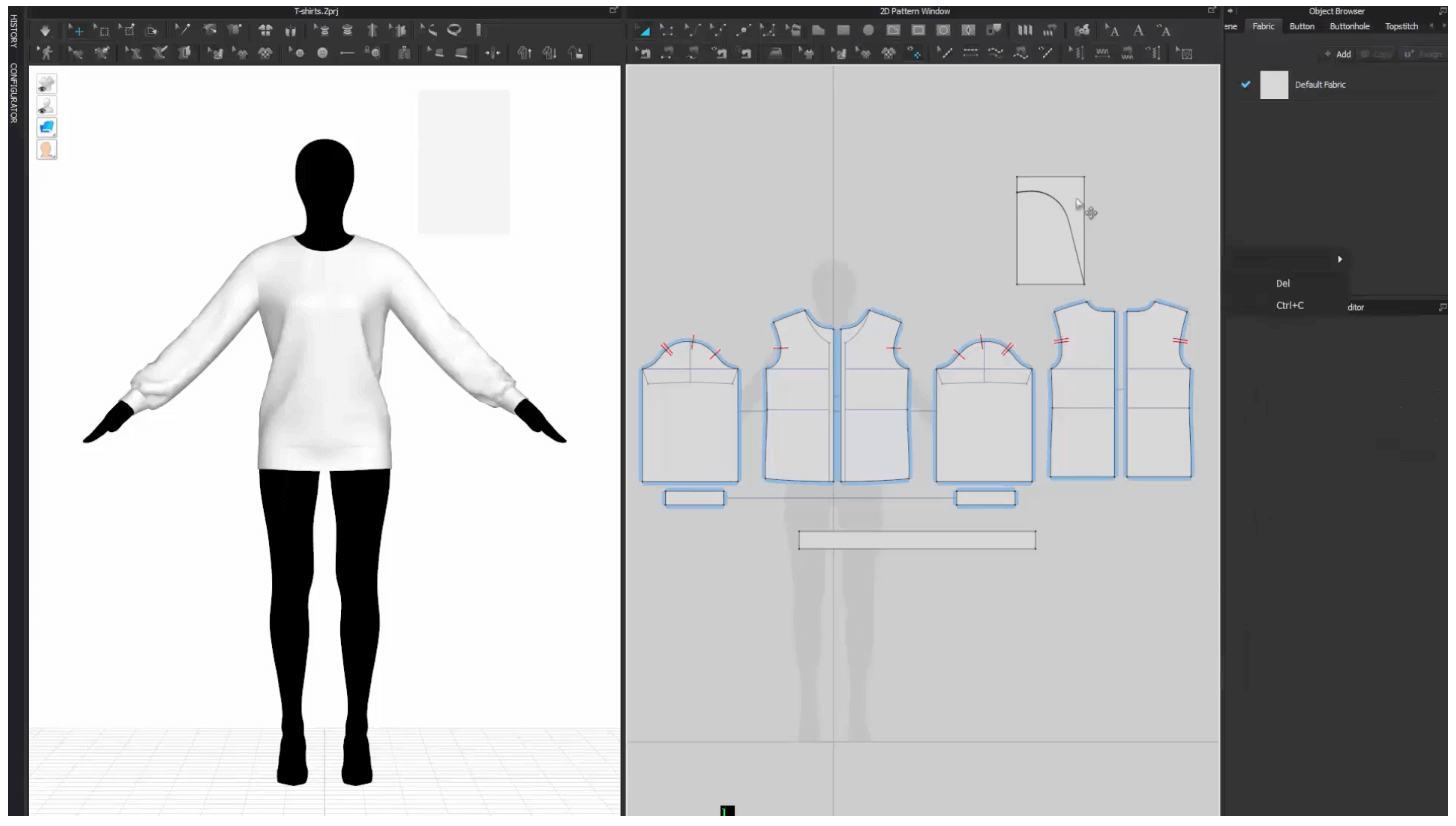
Step 1: Choose the avatar, sizing, and the fabric.
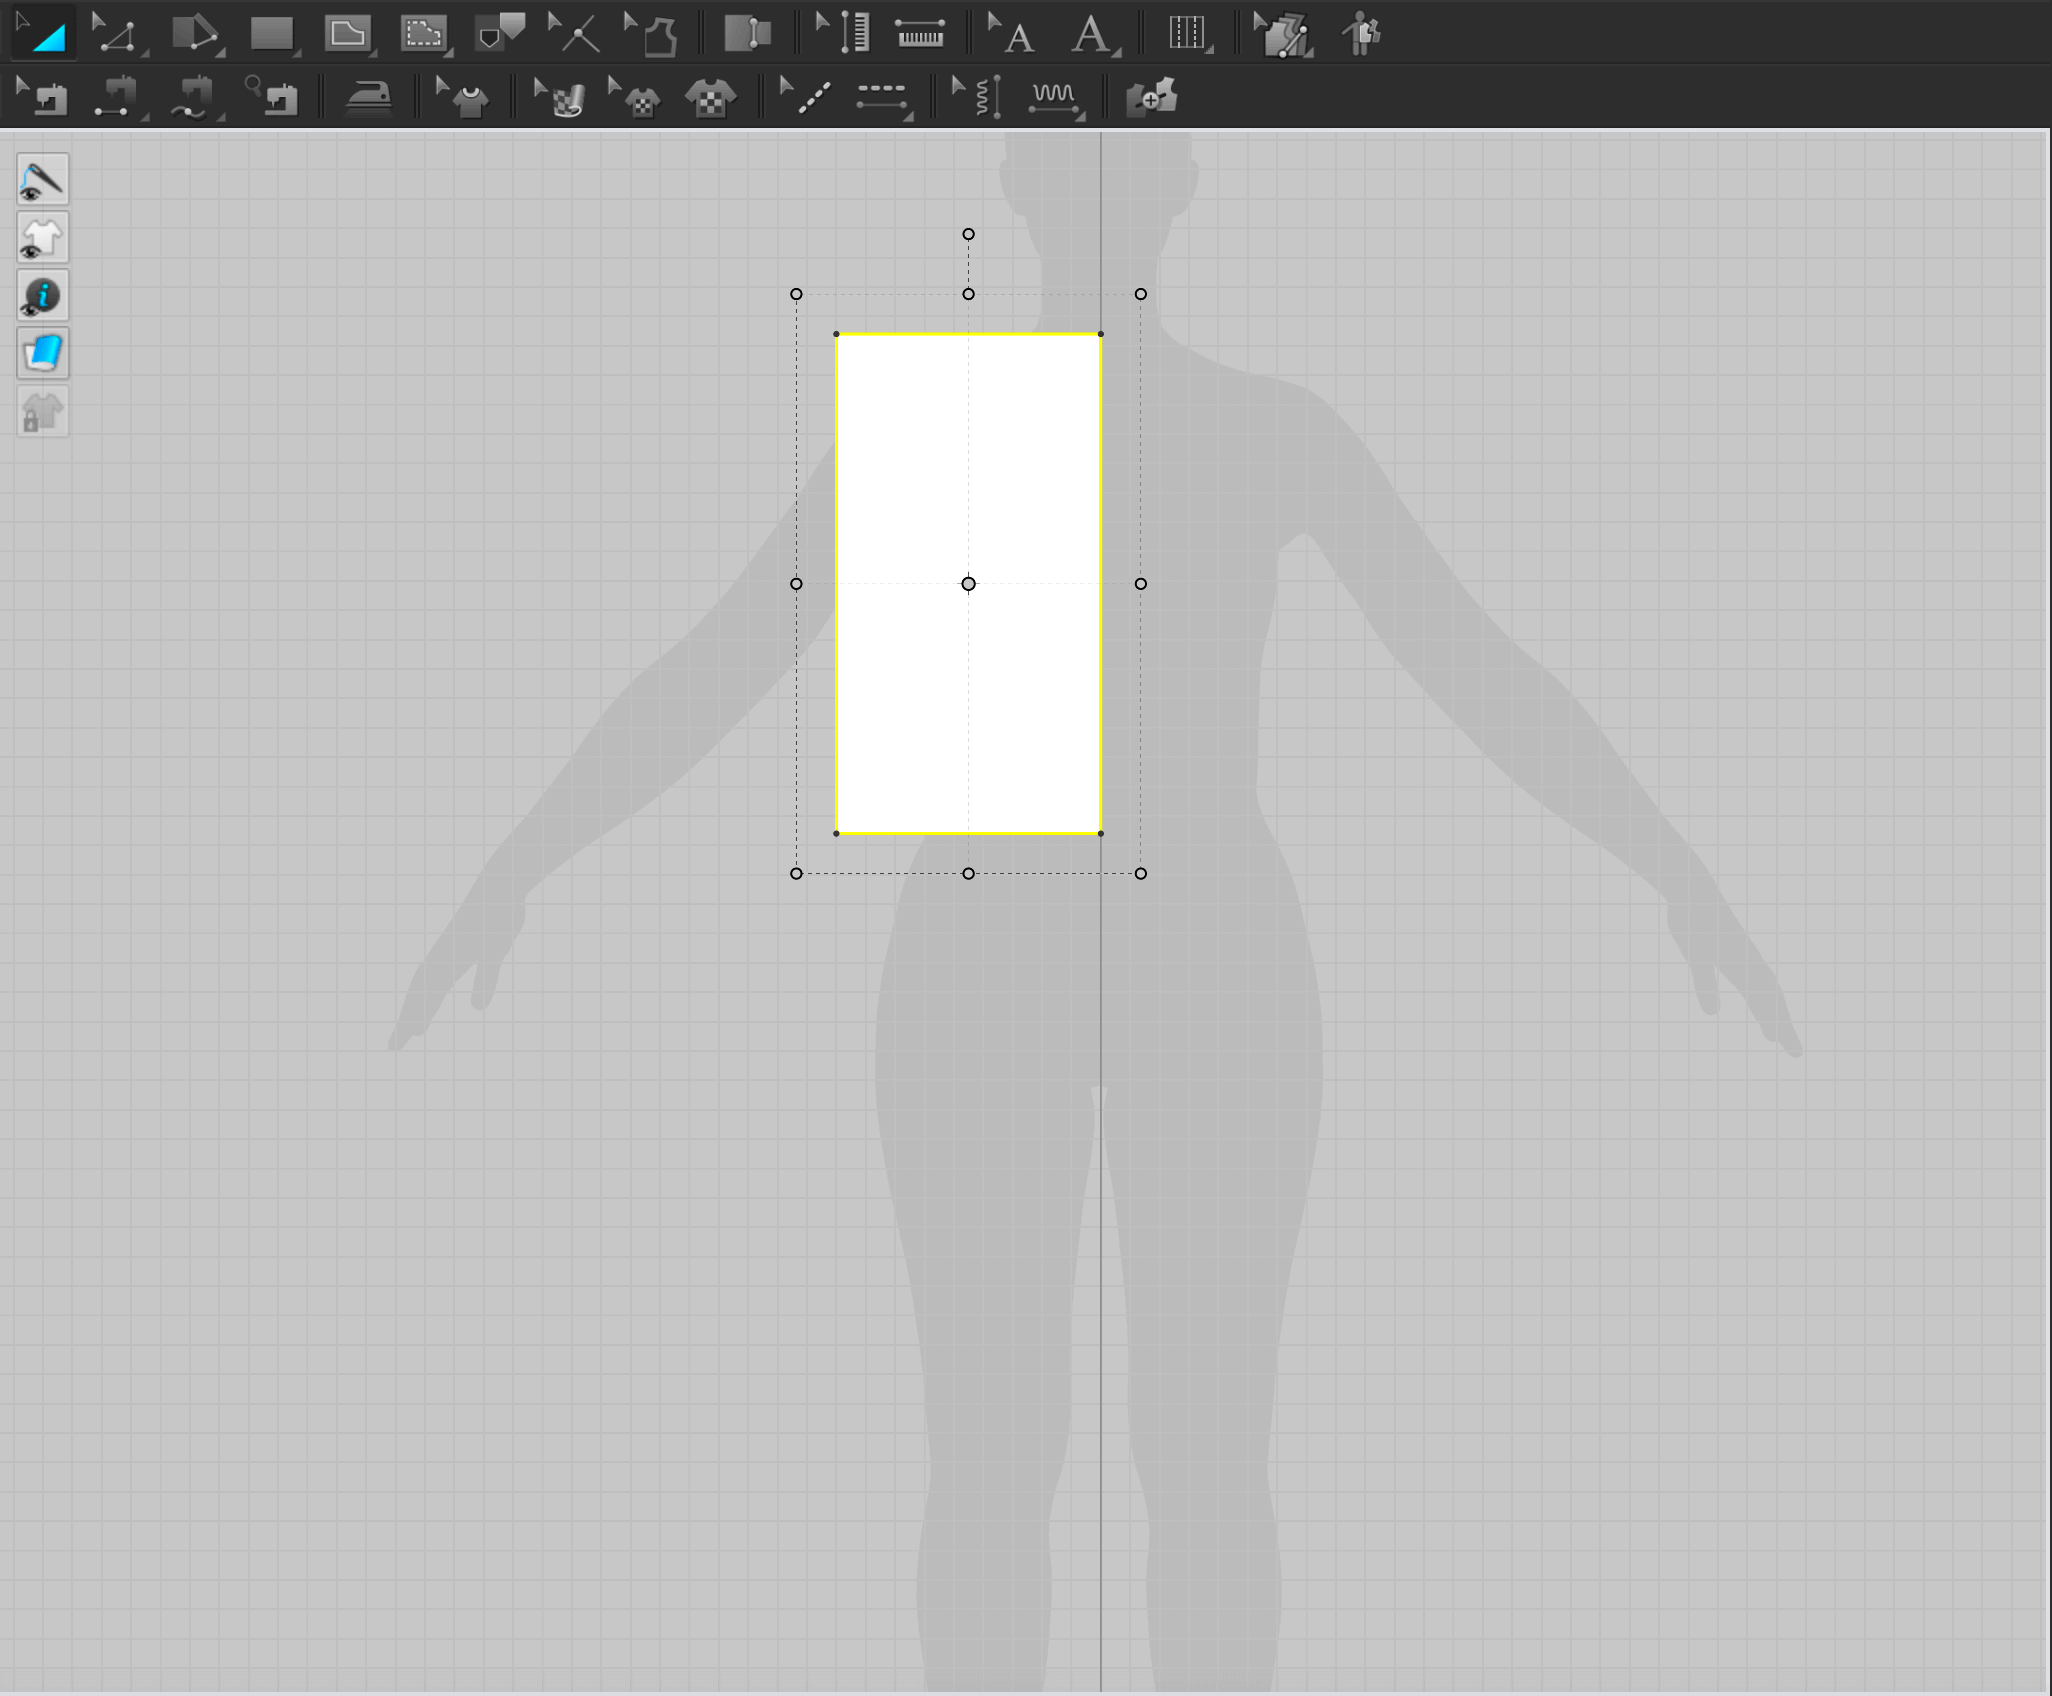
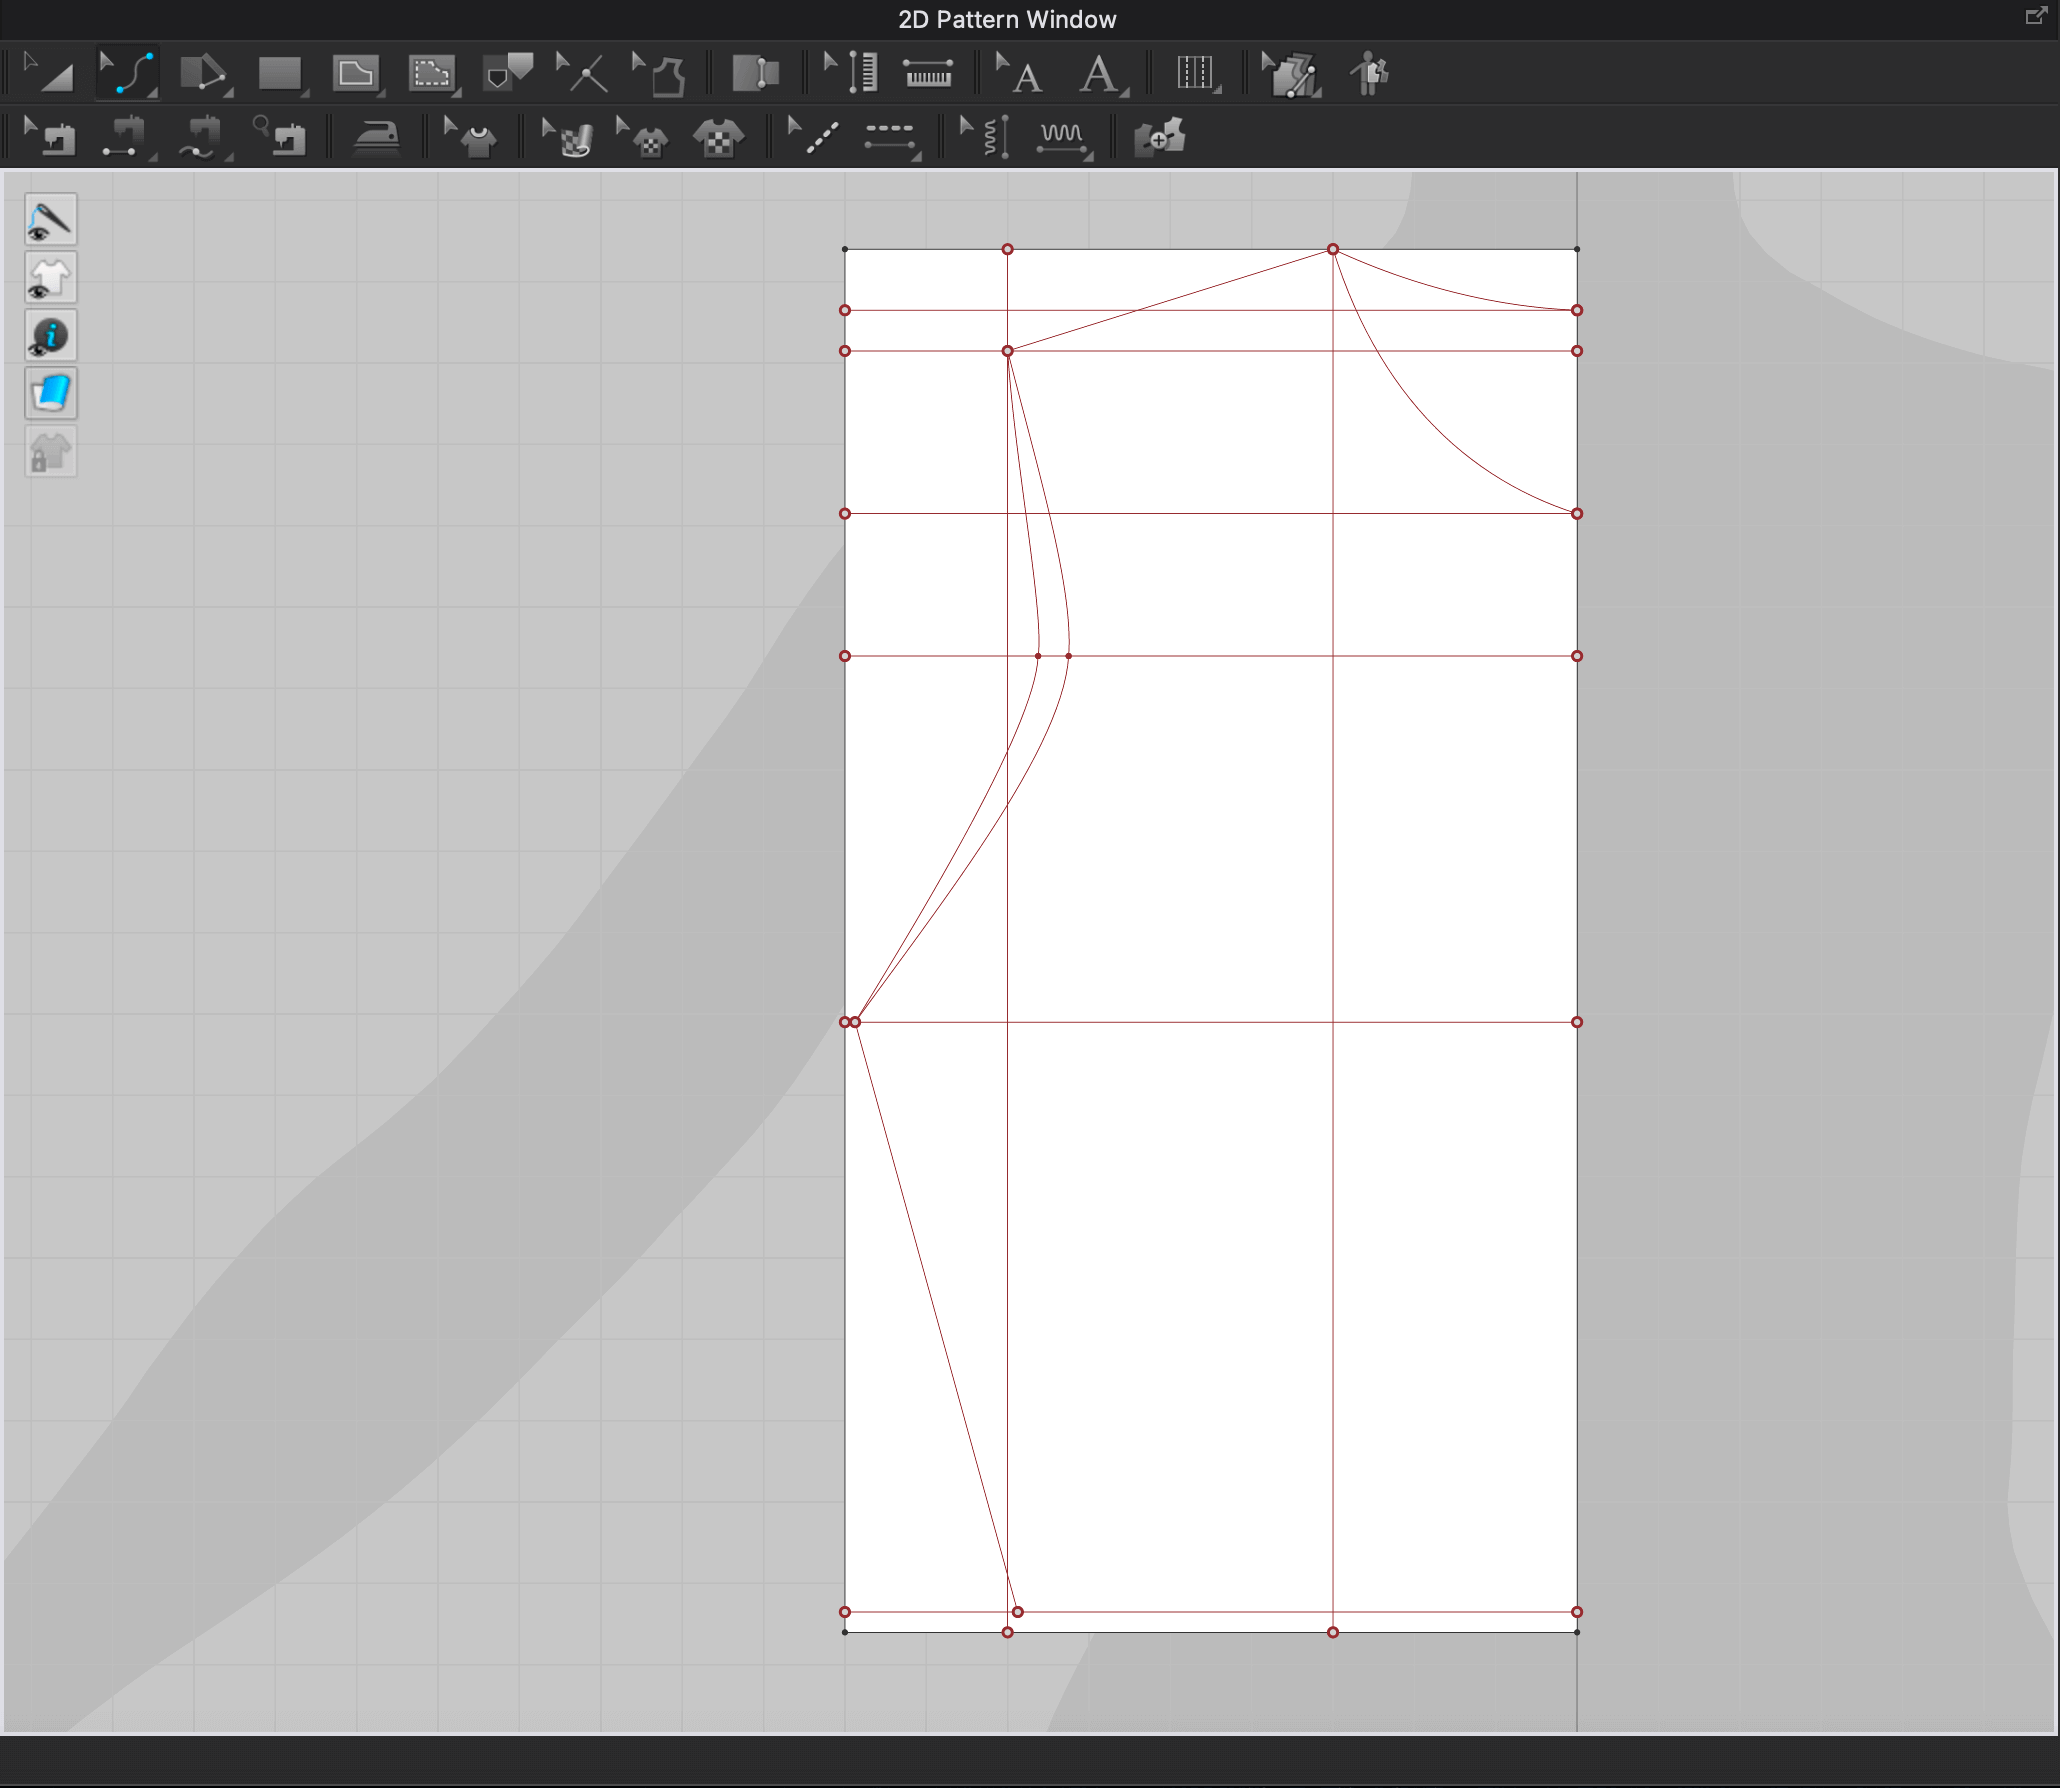
Step 2: Create a rectangular block and align the top edge to the left shoulder on the 2D Pattern View Interface. For this step, we will need to check back the size spec and use the largest measurements as the width and length of the rectangle.
In this case, the chest is the longest part in width, and the center back body length is the longest height, and since we are only only on half block, so we need to divide the chest width by 2 when we input the width for the rectangle.
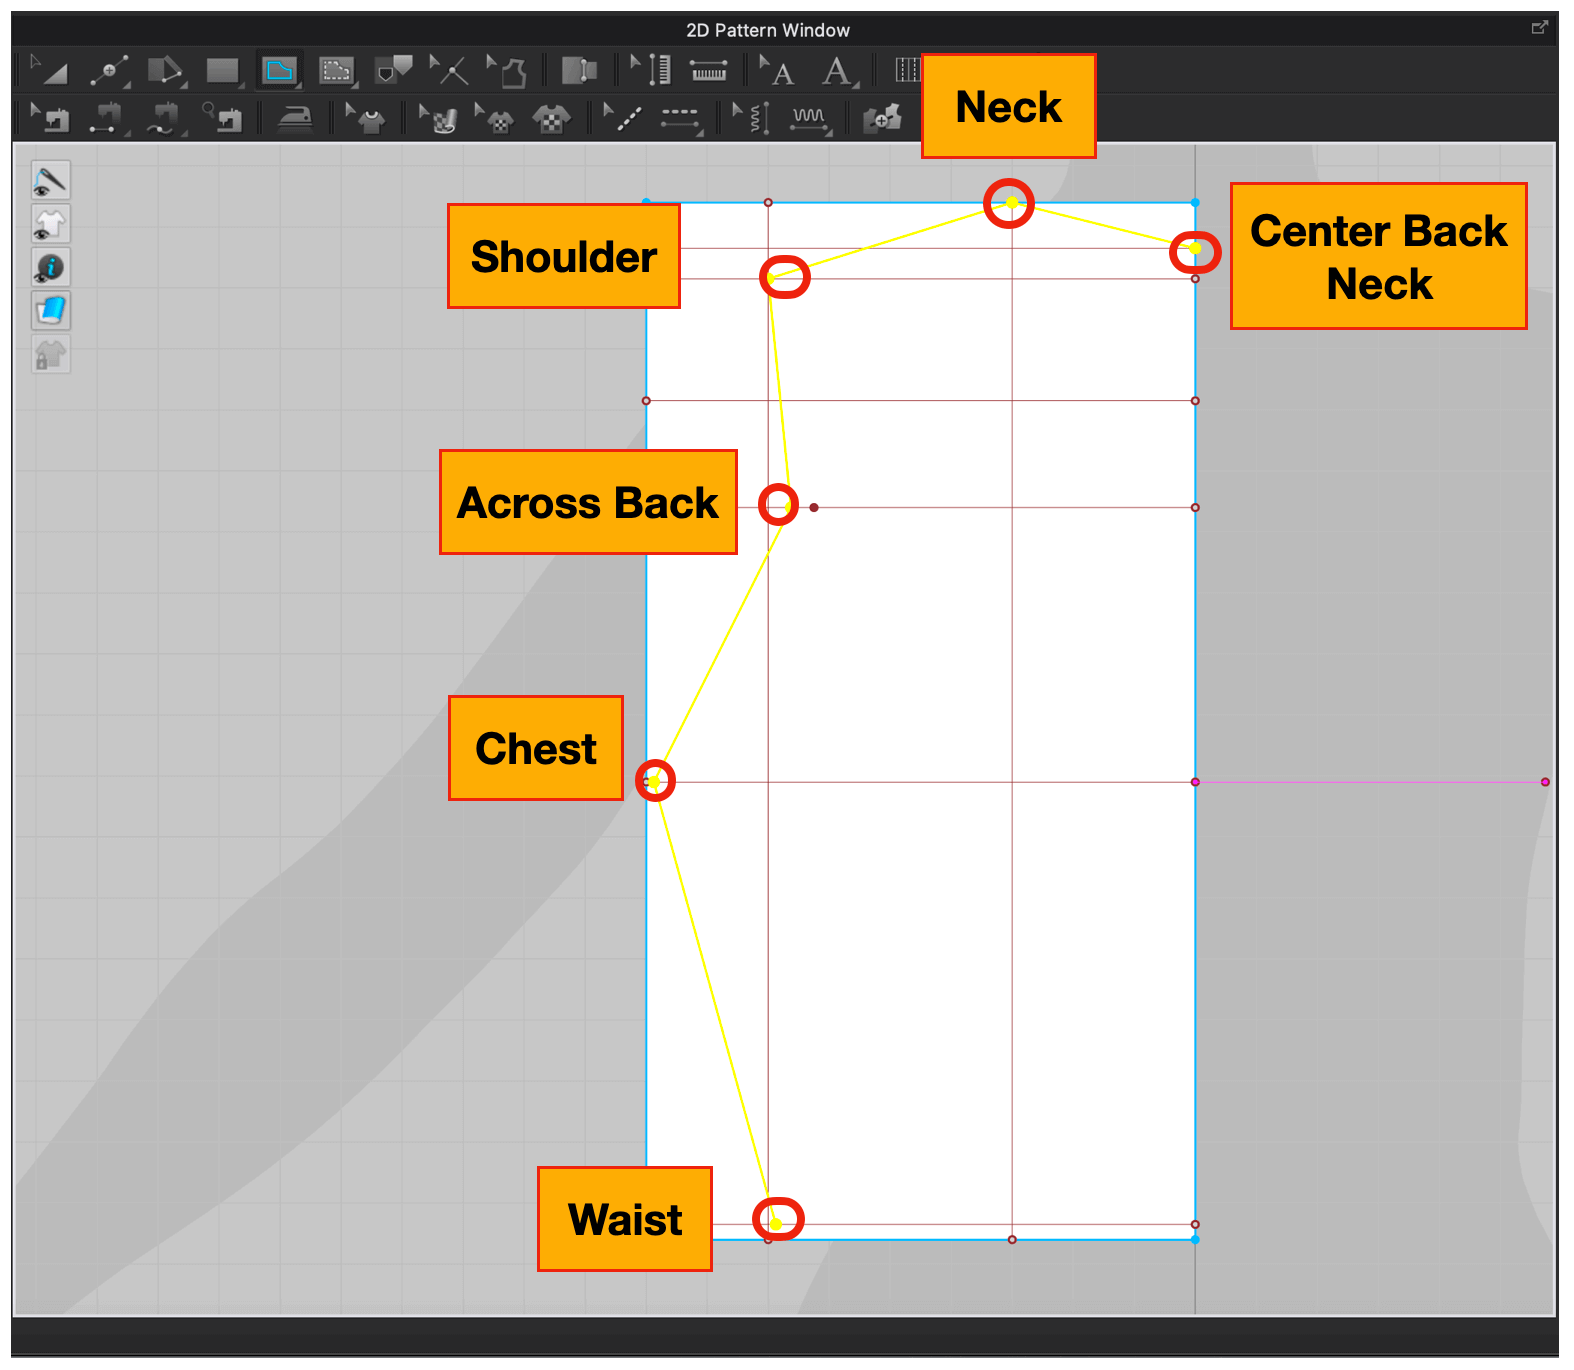
Step 3: Use the Edit Pattern tool (keyboard shortcut Z ) and Add Point Splitline tool (keyboard shortcut X ) to add guidlines and markings.

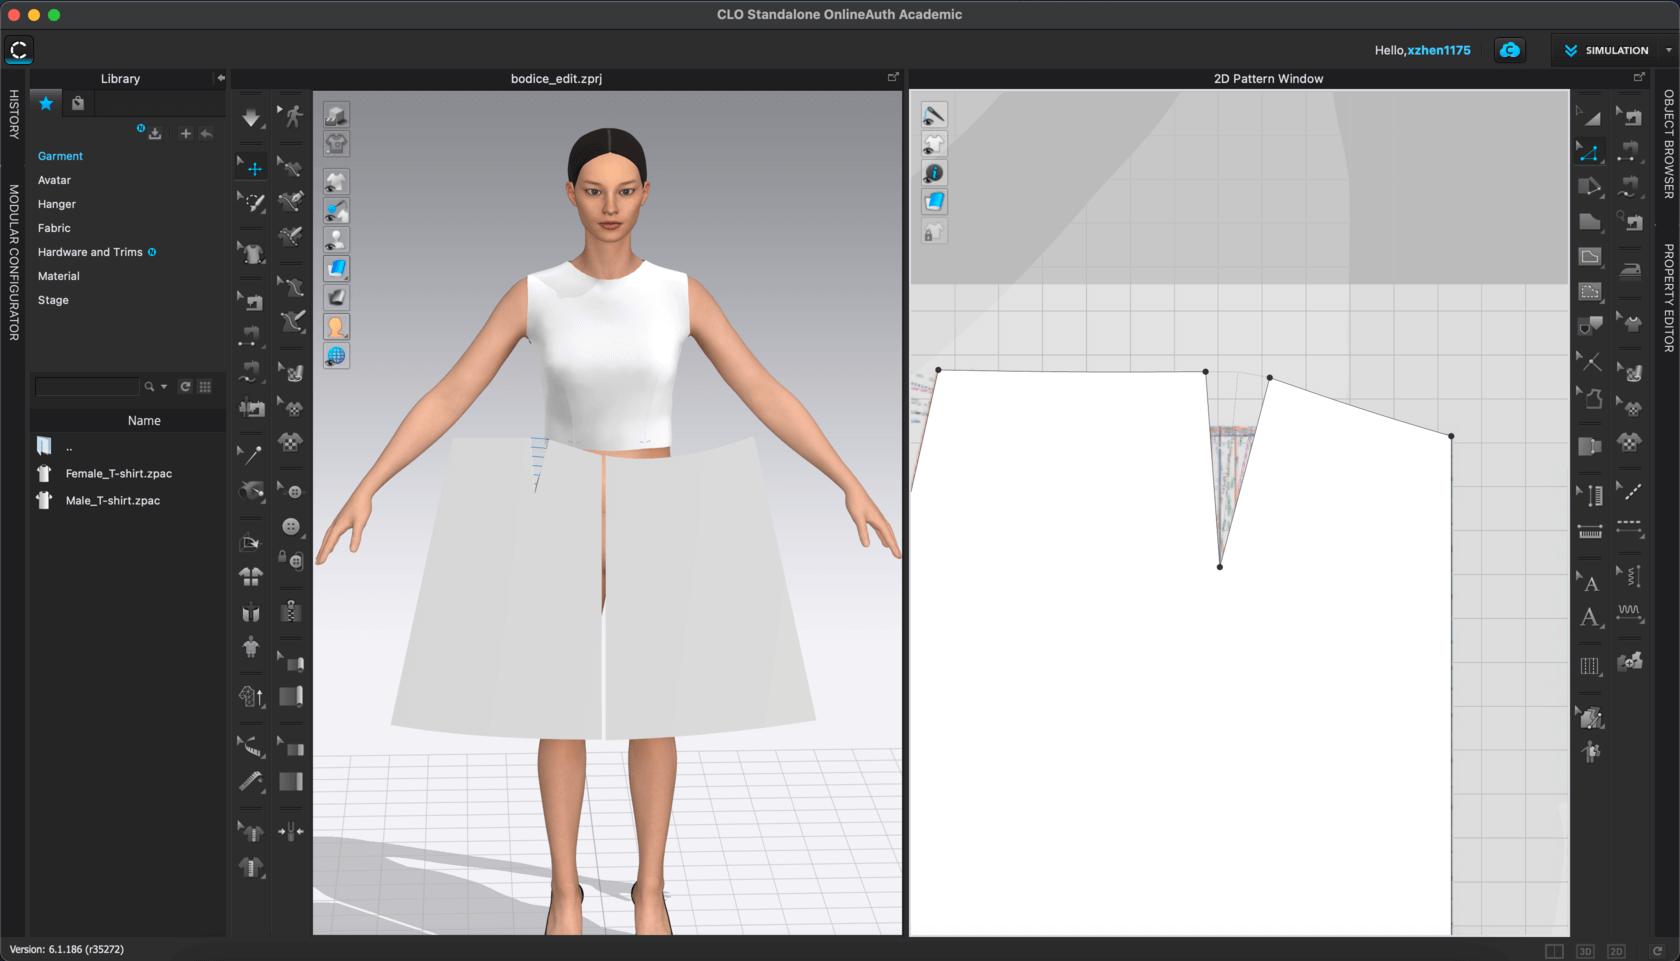
Step 4: Use the Internal Polygon Line tool (keyboard shortcut G ) to connect the points with straight lines. In here, when we connect the Across Back point and the Chest point, we will be able to build the armhole.
Step 5: Use the Edit Curvature tool (keyboard shortcut C ) to curve up the neckline and the armhole. The image below shows the front half block combining with the back half blocks, so the next step is to separate them.
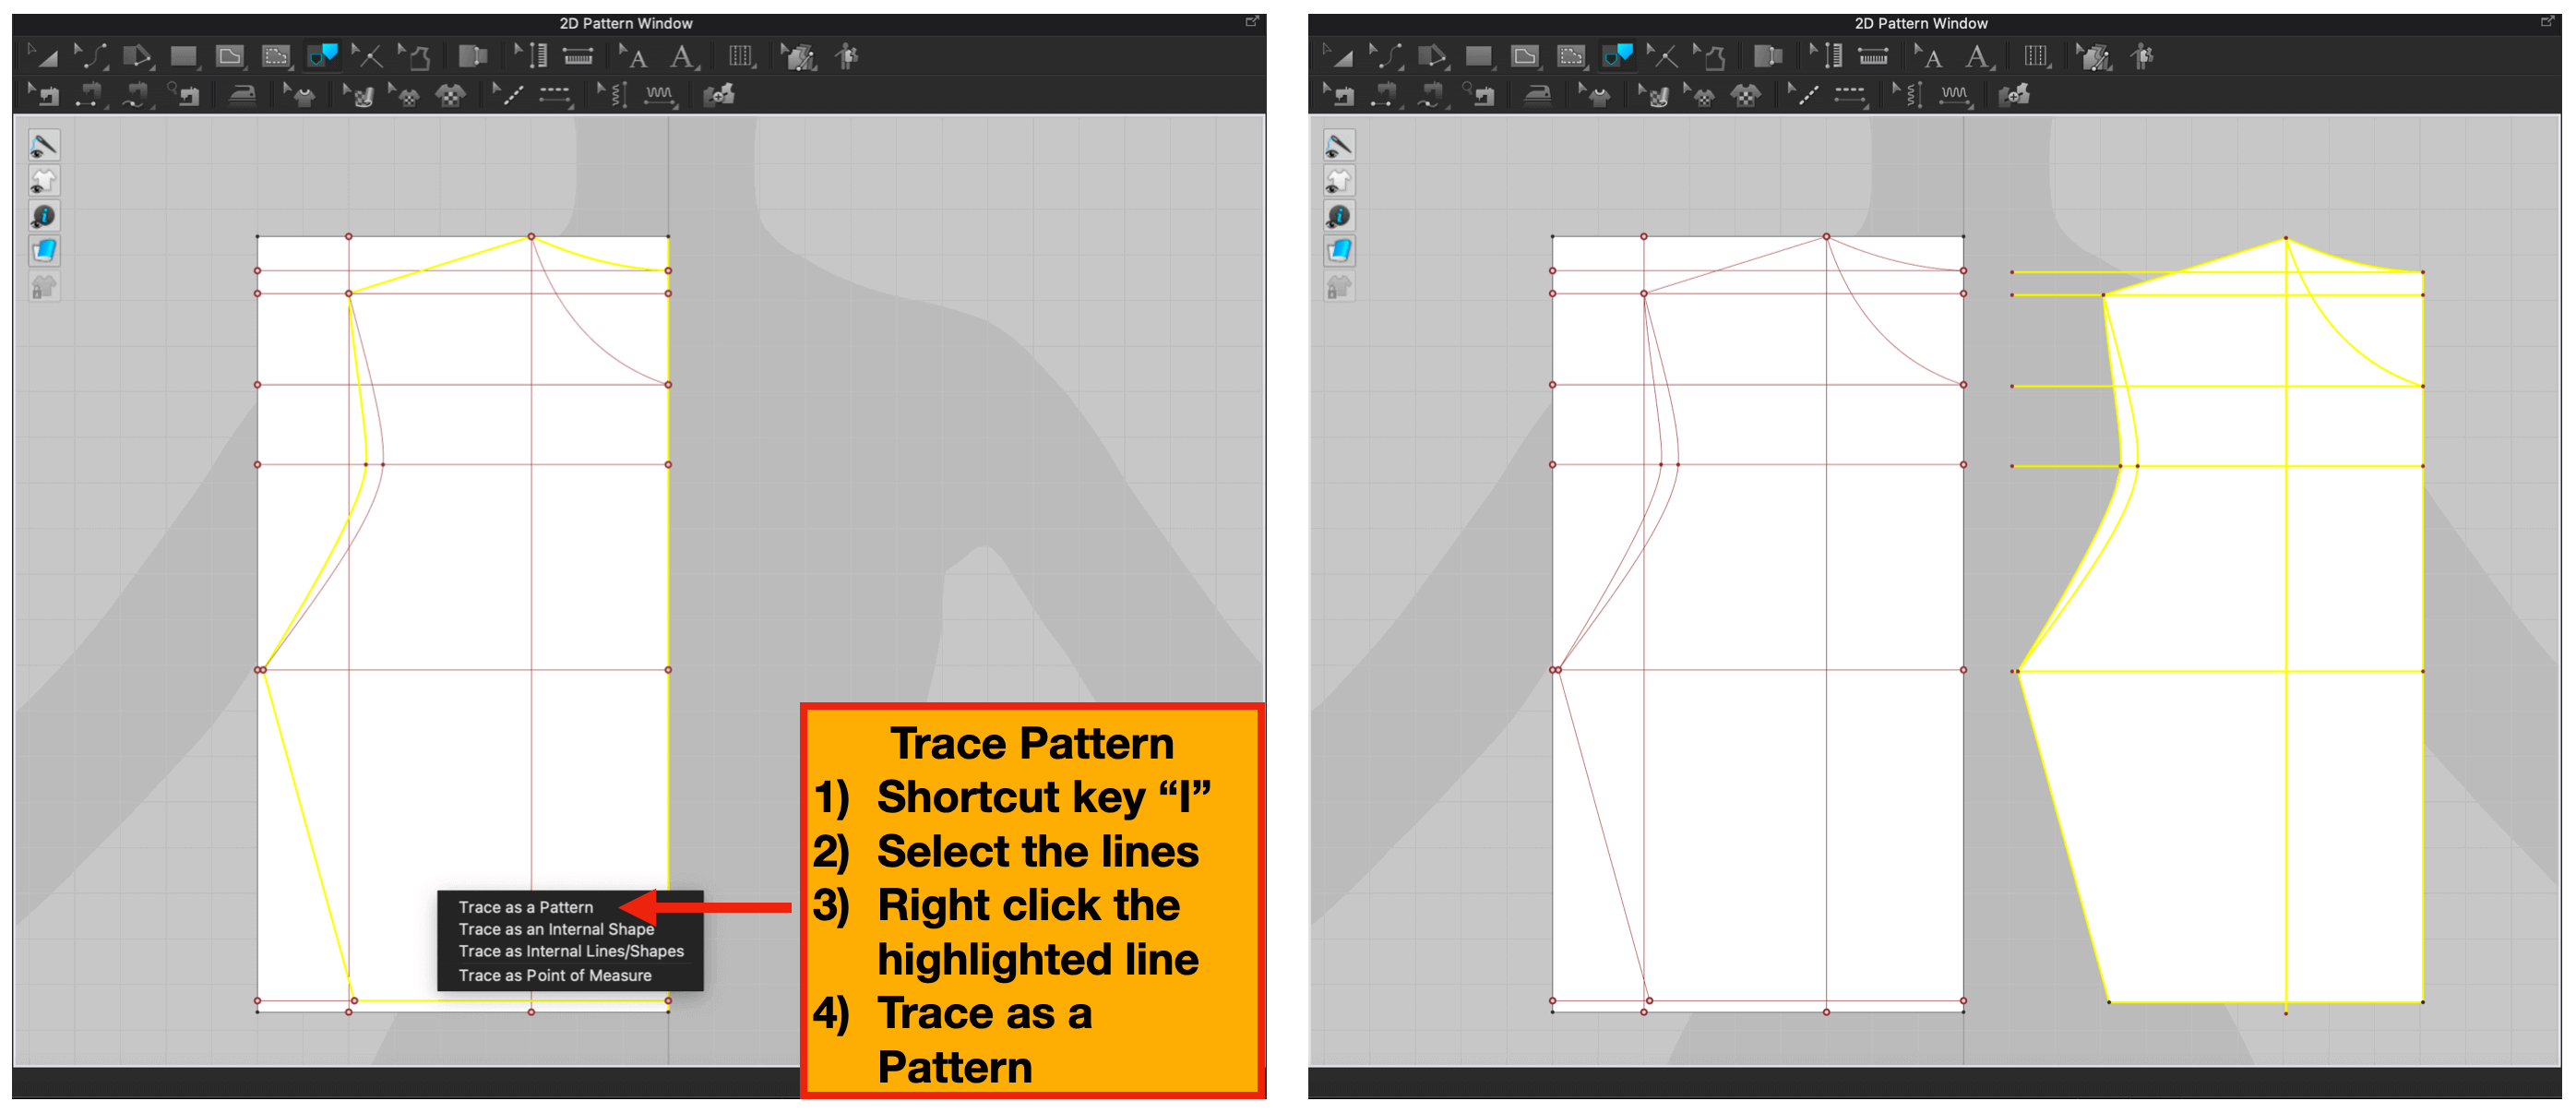
Step 6: Use the Trace as a Pattern tool to realize the initial shape of the sloper, we will do this step twice, one for the back half block, and the other for the front half block.
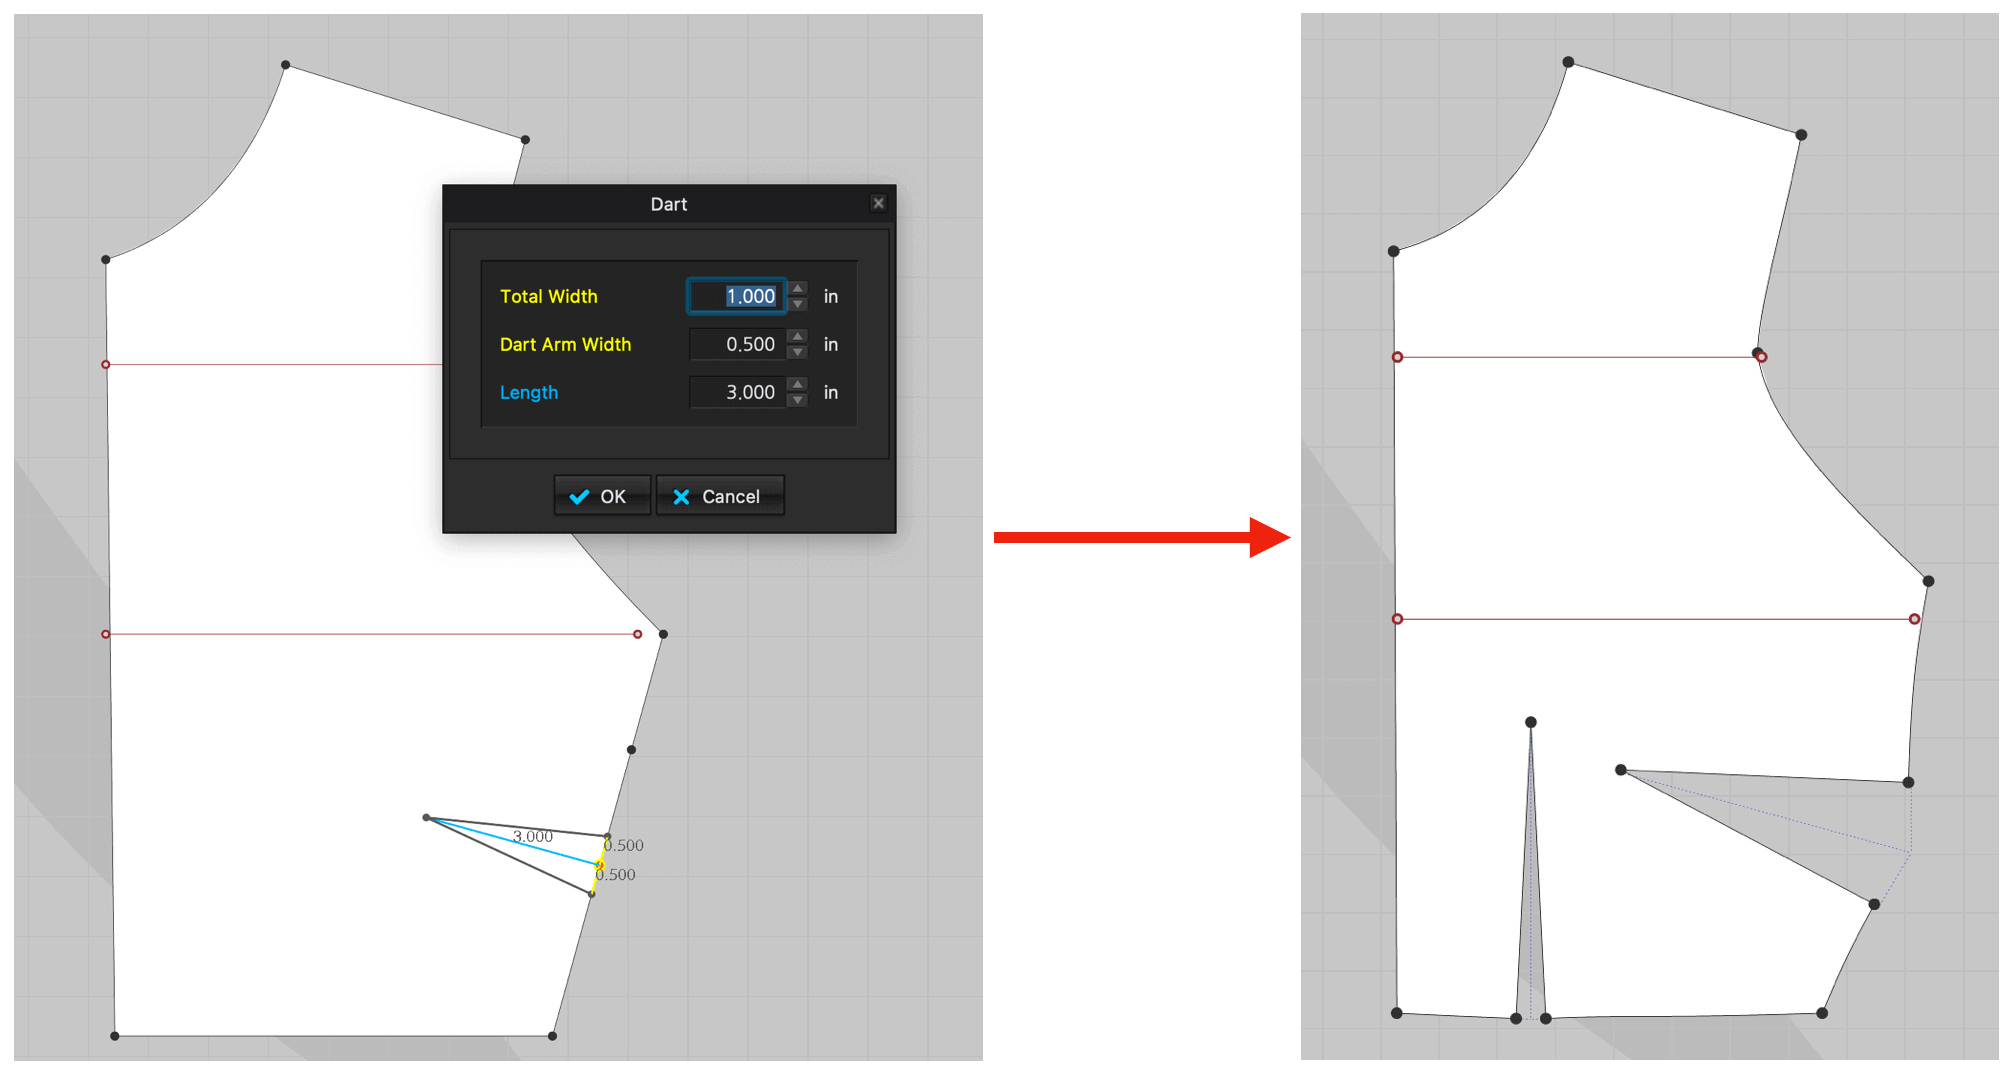
Step 7: After removing the extra dots and lines, we will add the darts using the Add Dart tool.
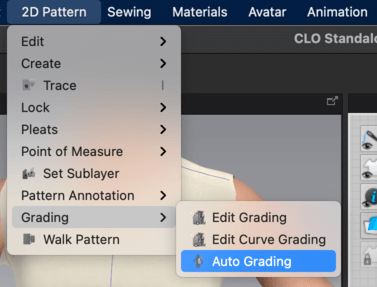
The whole process was very mathematical and I was very appreciative with the built-in calculator from the program. The pattern that I followed along was using a US Standard Size ASTM Missy Size 10, thus I would need to adjust the pattern for my size.I was delighted to find the Auto grading tool so I didn't have to do the calculations on my own 😄!
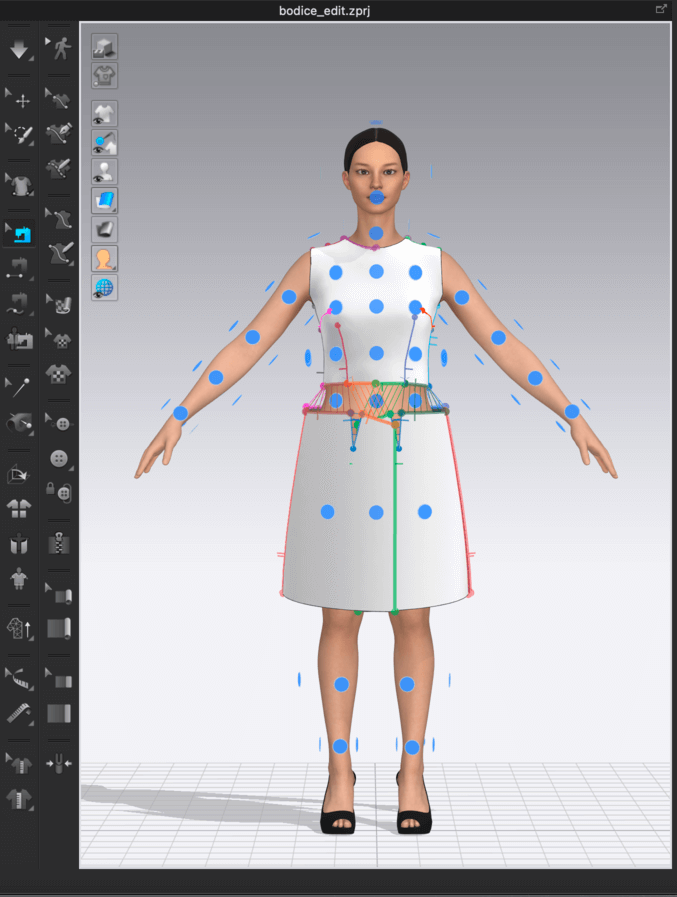
I also learned how to do the 3D simulaiton on the software. When trying on the pattern, I needed to turn on the show arrangment points tool
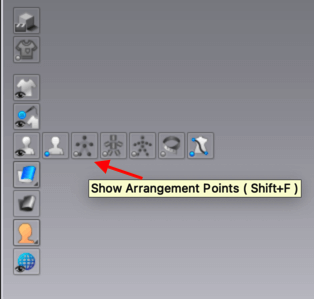
And then select the pattern on the 2D view, then hovel over the 3D view and the pattern will be attached to the avatar like magnets.
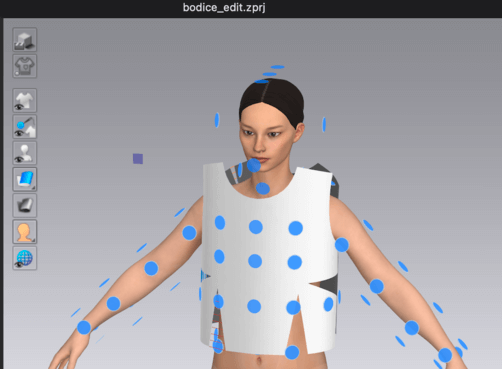
I then used the Segment sewing or Auto sewing tool to do the "stitching", and this is what it looked like on my first attempted... too large!
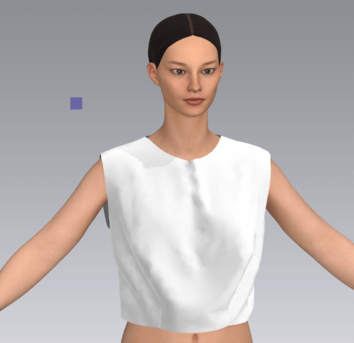
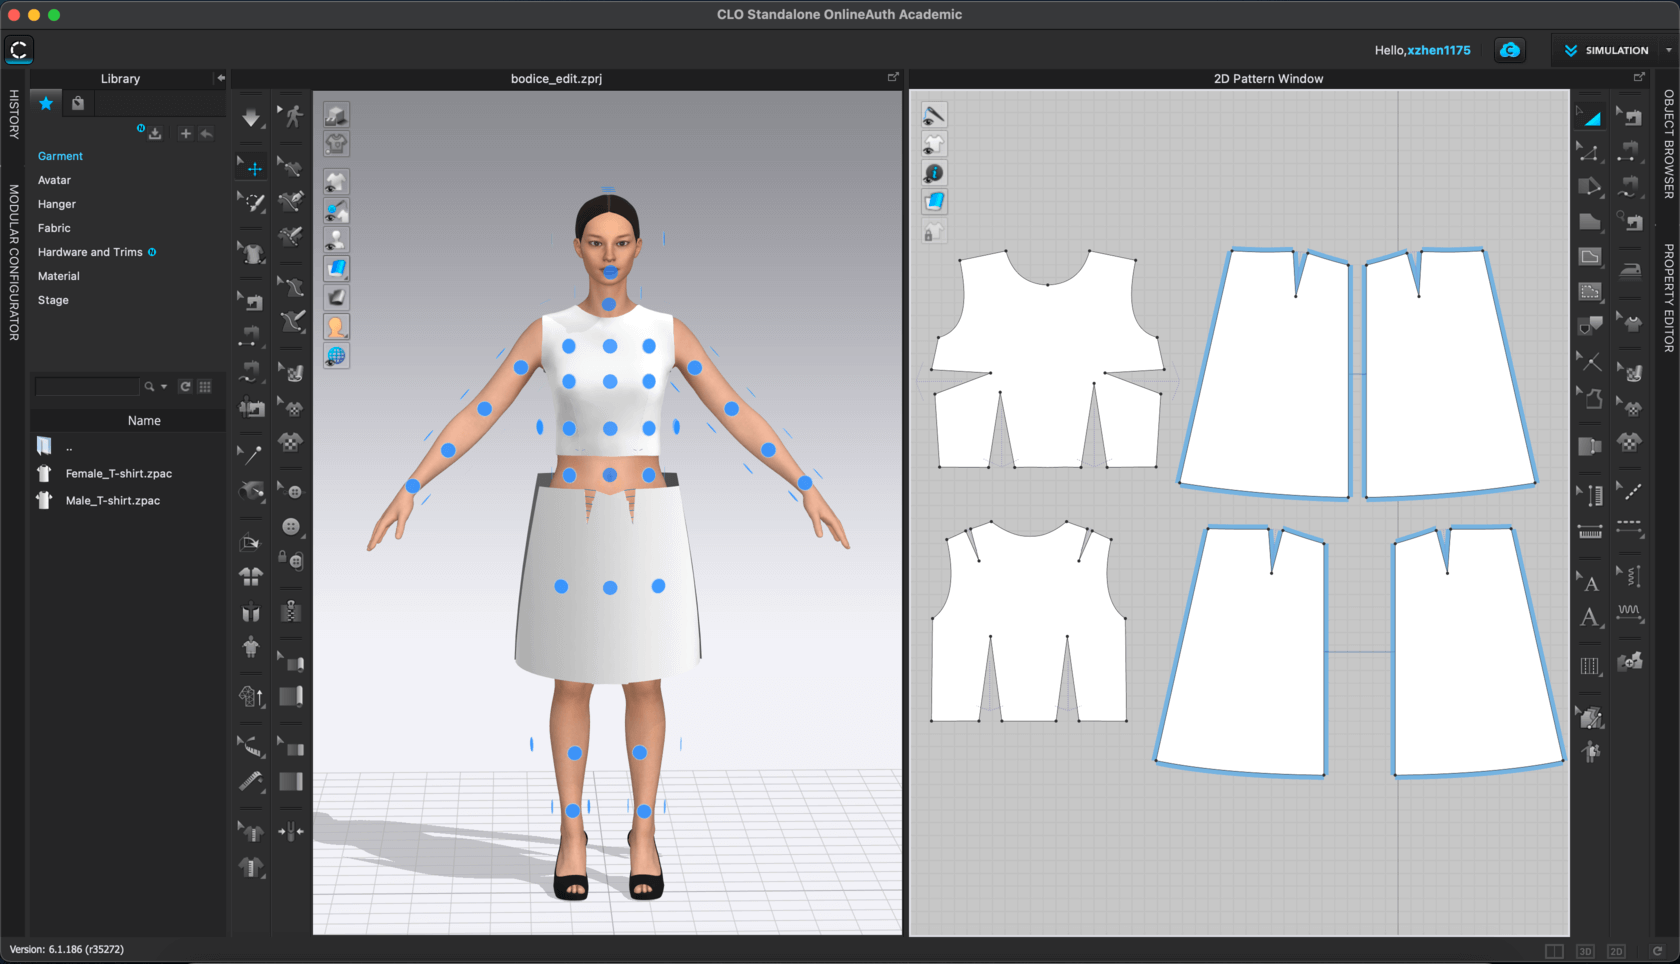
So I decided to marquee select everything and reduce the size of all the pattern, and this is how it looked after a few attempts, it looks more fit:
My next exercise was to make a skirt. I chose to start with the skirt block that was provided in the Udemy course.
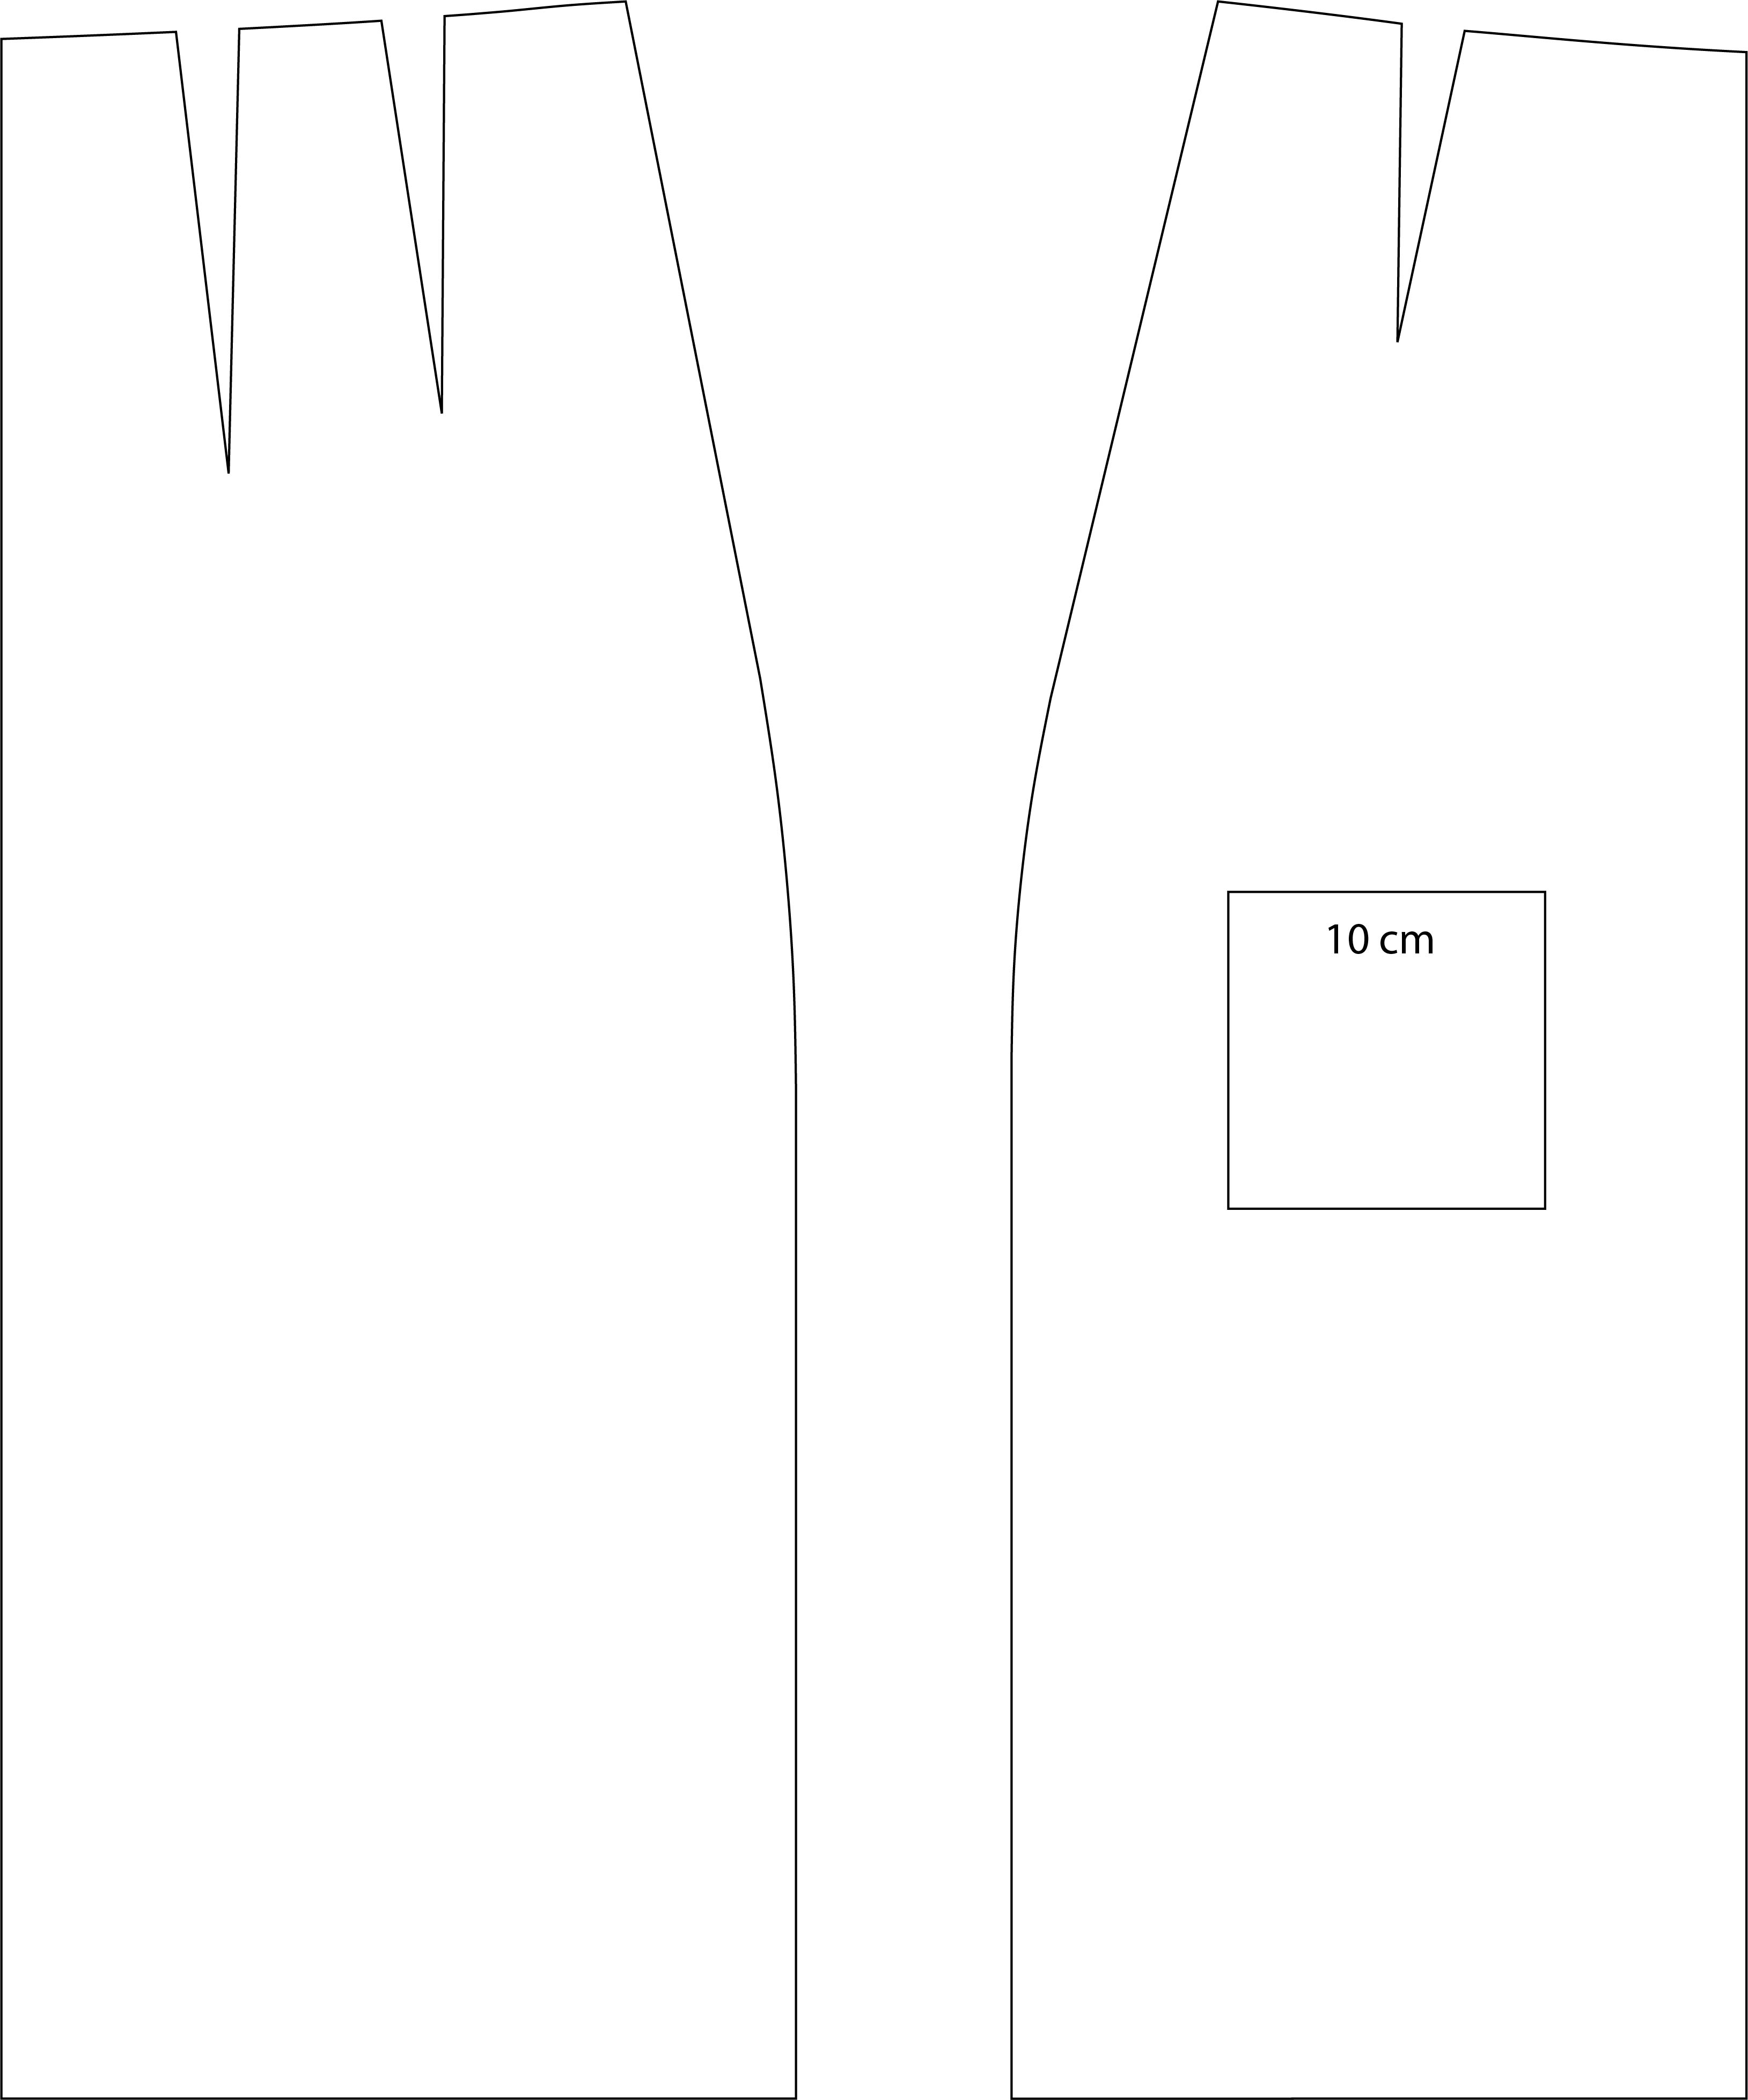
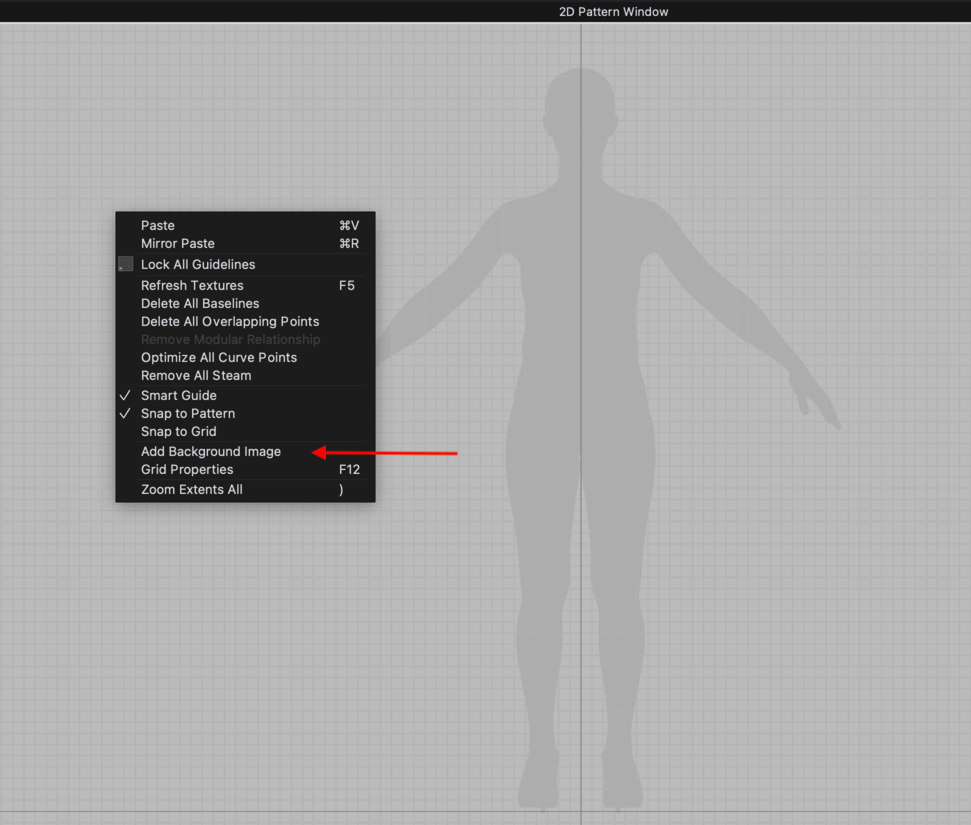
I followed the tutorial to import the images in CLO3D: In the 2D pattern view, right click and select Add background Image.
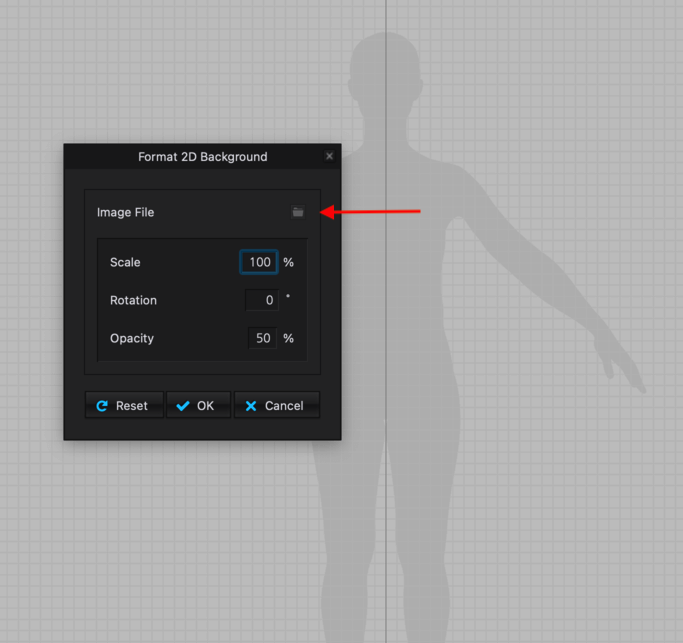
Then import the image file, make sure the scale, rotation, and opacity are correct.
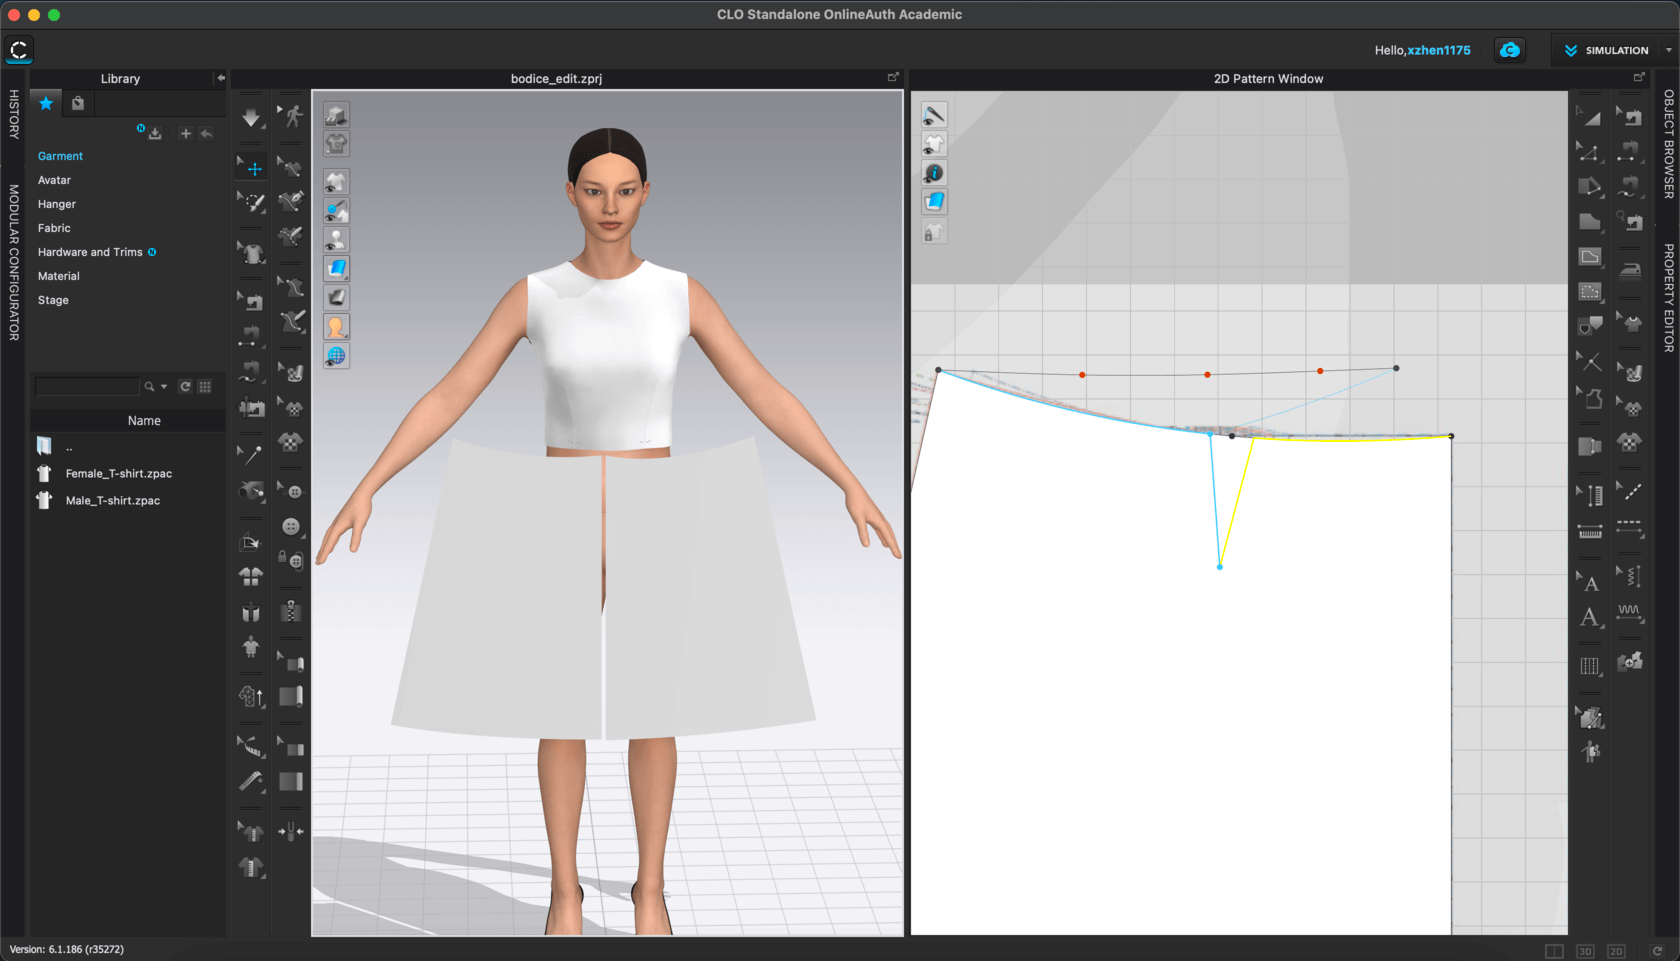
The next step would be to trace the images using the polygon tool and also make the straight lines to curve lines using the curve tool (shortcut: C). A nice thing about CLO3D is the side-by-side 2D and 3D view. Here is an image of me trying to make a pleat on the skirt block.
The 3D simulation reflected what I did on the 2D pattern view.
Turned on the show arrangment points tool.
This is how it looked after I arranged everything, before sewing
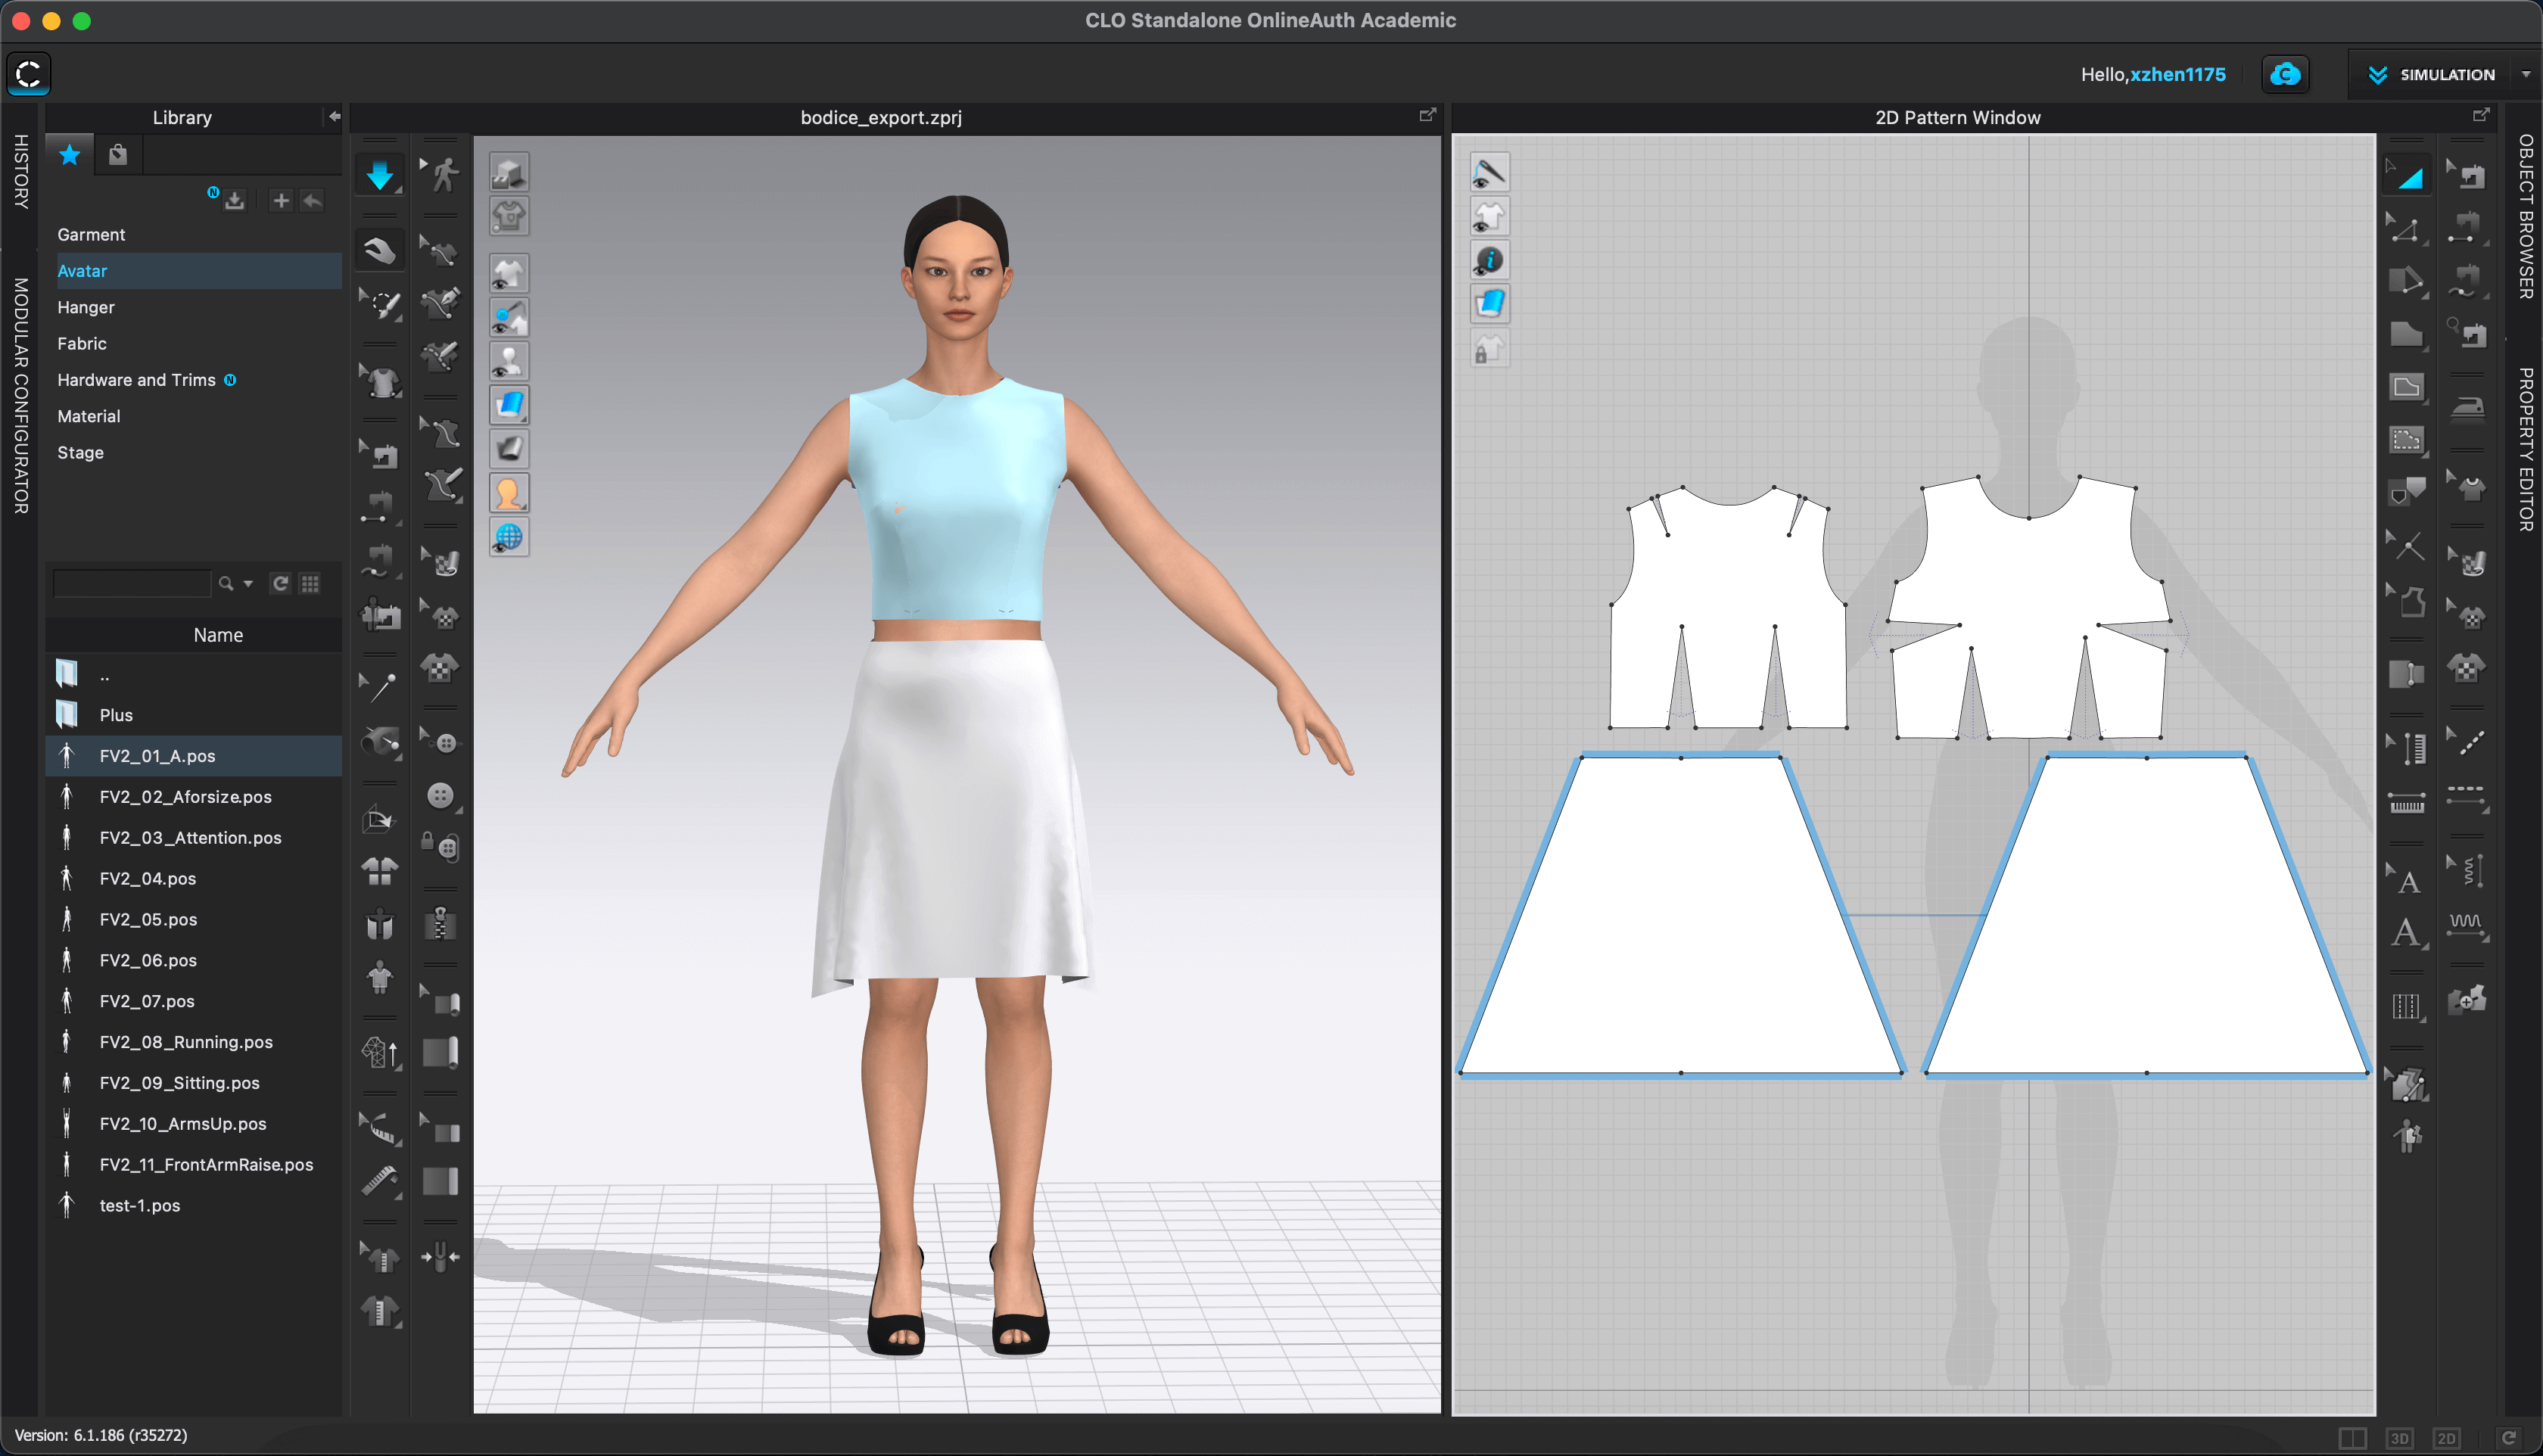
However, when I ran the simulation, everything seemed messed up in the "sewing", and I couldn't figure out how to fix that with the knowledge I currently have for the software. I guess the error occured due to me not resizing the bodice in a proper way... Since I wanted to move onto the next part of the assignment, I replaced the skirt block with two trapezoids, and simulated the avatar as wearing a tank top and an A-line skirt, and this is how it looked. I like the flow of the skirt on the 3D simulation view - it looked photorealistic!
Laser Cutting a Scaled Prototype
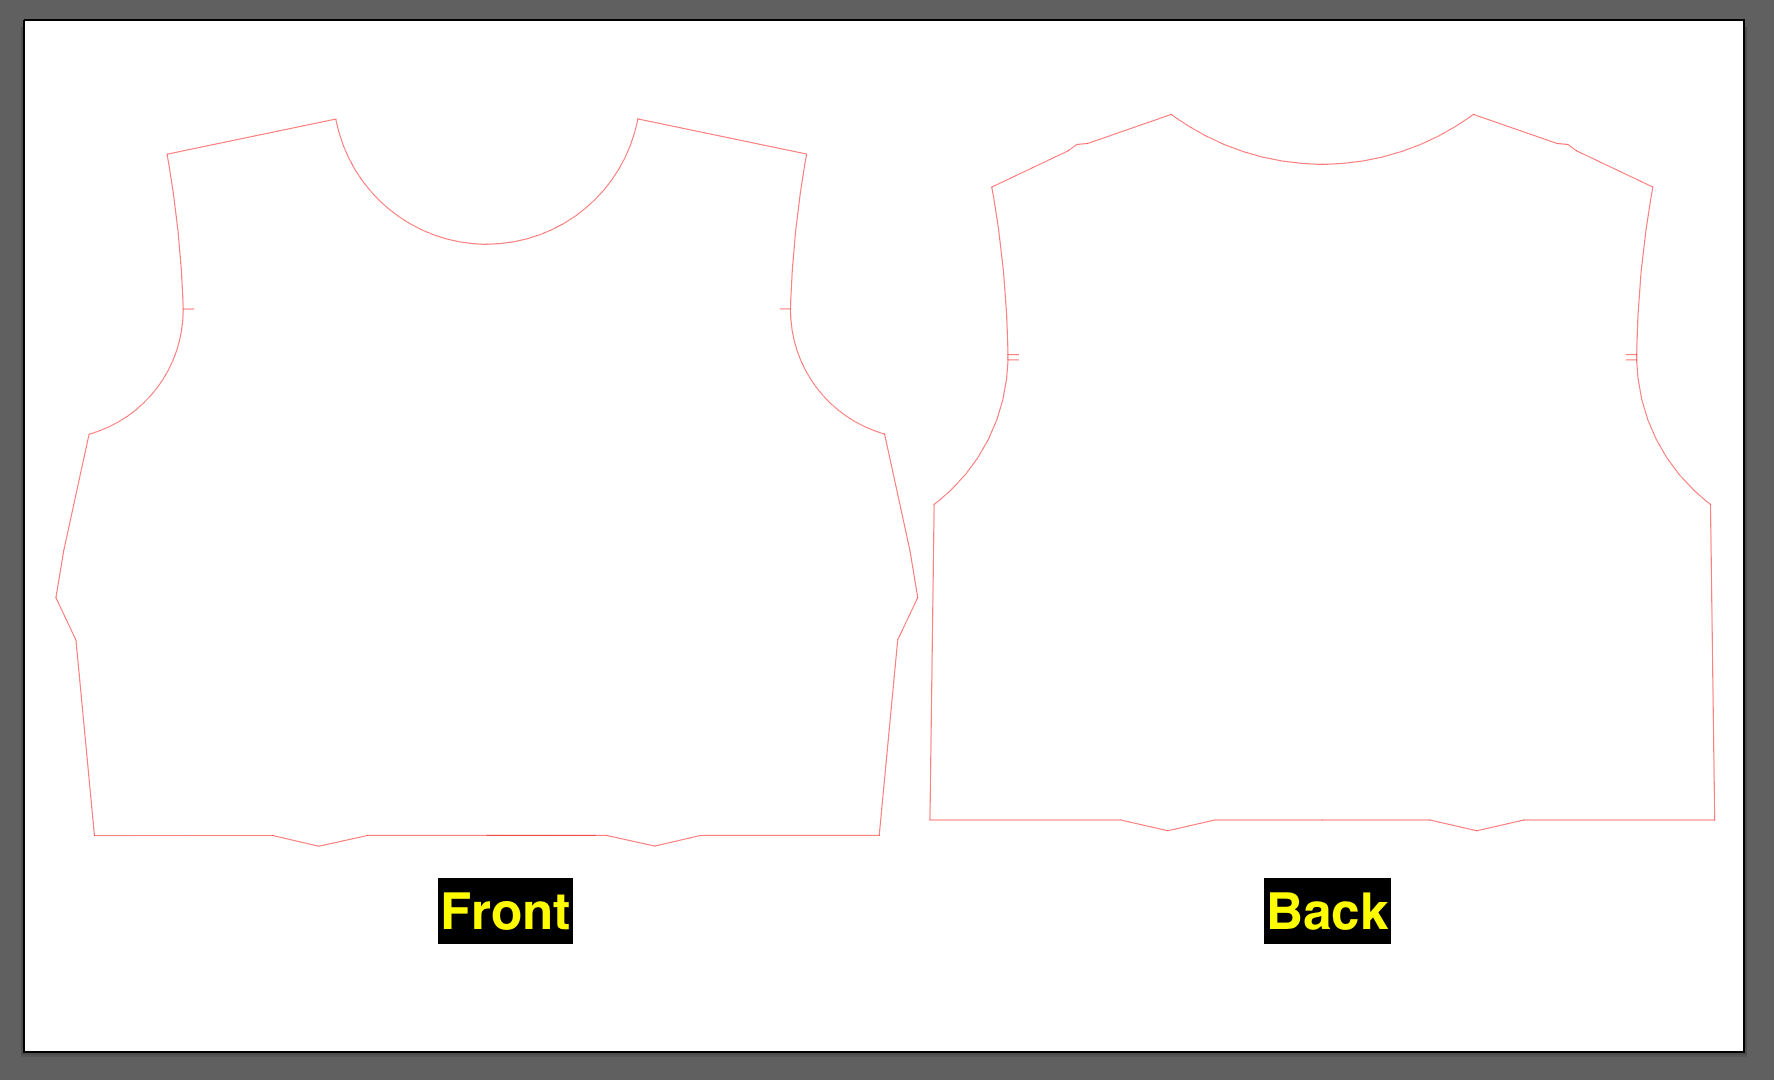
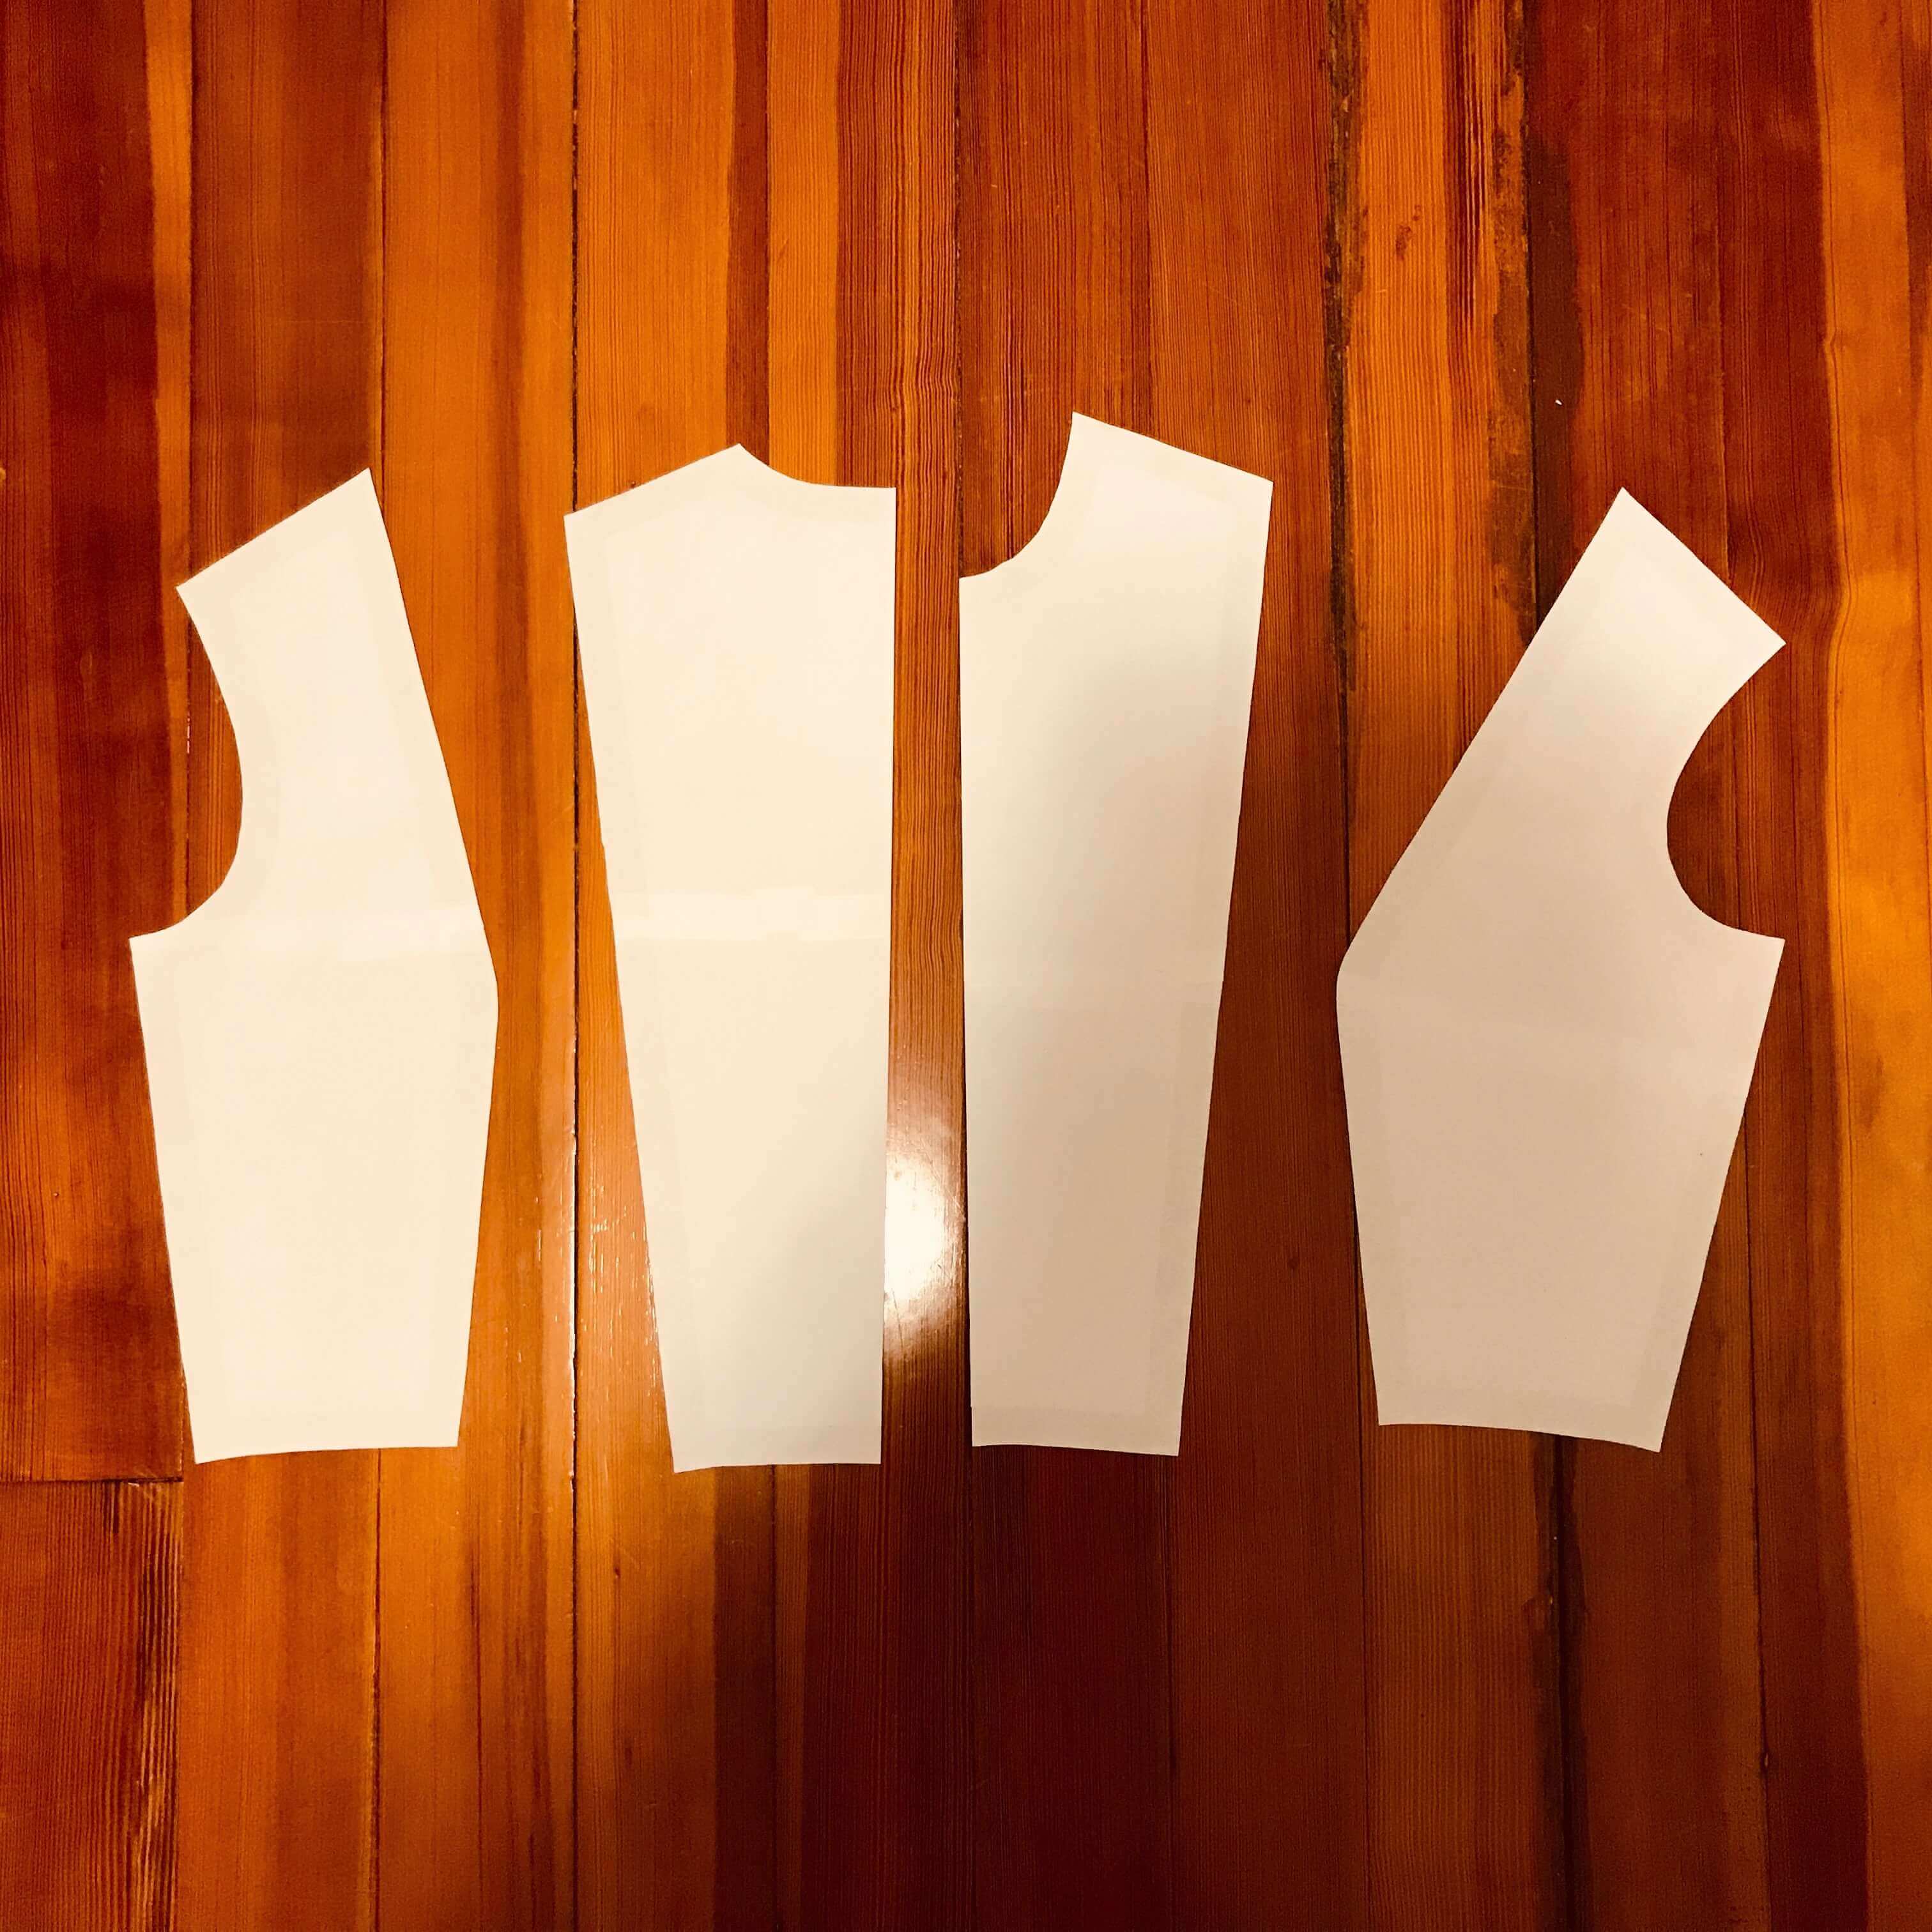
The next part was to laser cut the sewing pattern. I initially exported the pattern to dxf format and planned to post-process it using Adobe Illustrator, however, I was not able to open it. So I needed to find an alternative method. I then came across this YouTube tutorial and learned that I could import PDF to Illustrator. Since I still needed to change the stroke width to 0.001" for laser cutting, I used an online tool to convert the .pdf file to .dxf and then imported the .dxf back to .ai for post processing. And this is how the prepared .ai file looked. Note that I needed to fill the gaps of the darts for the sewing steps.
Darts are folds (tucks coming to a point) and sewn into fabric to take in ease and provide shape to a garment.
I had ironed the fabric and taped it on a 3mm plywood. Here are a couple things that I learned from experimenting with laser cutting sewing patterns:
- Align the selvages to the edge of the wood - this is for double checking the pattern pieces are cut in the correct direction
- Make sure no pattern pieces is "cut in fold" since we have to lay the fabric flat for laser cutting
In my case, my pattern pieces were quite large compared to the work area of the Trotec machine, thus I needed to divide the job into batches. As I was not sure whether the scaling issue was resolved, I decided to be conservative this time and used the scale tool in Illustrator to reduce my pattern pieces to 50% of its original size. This way, even if the issue was not solved previously, I wouldn't wasted as much fabric.
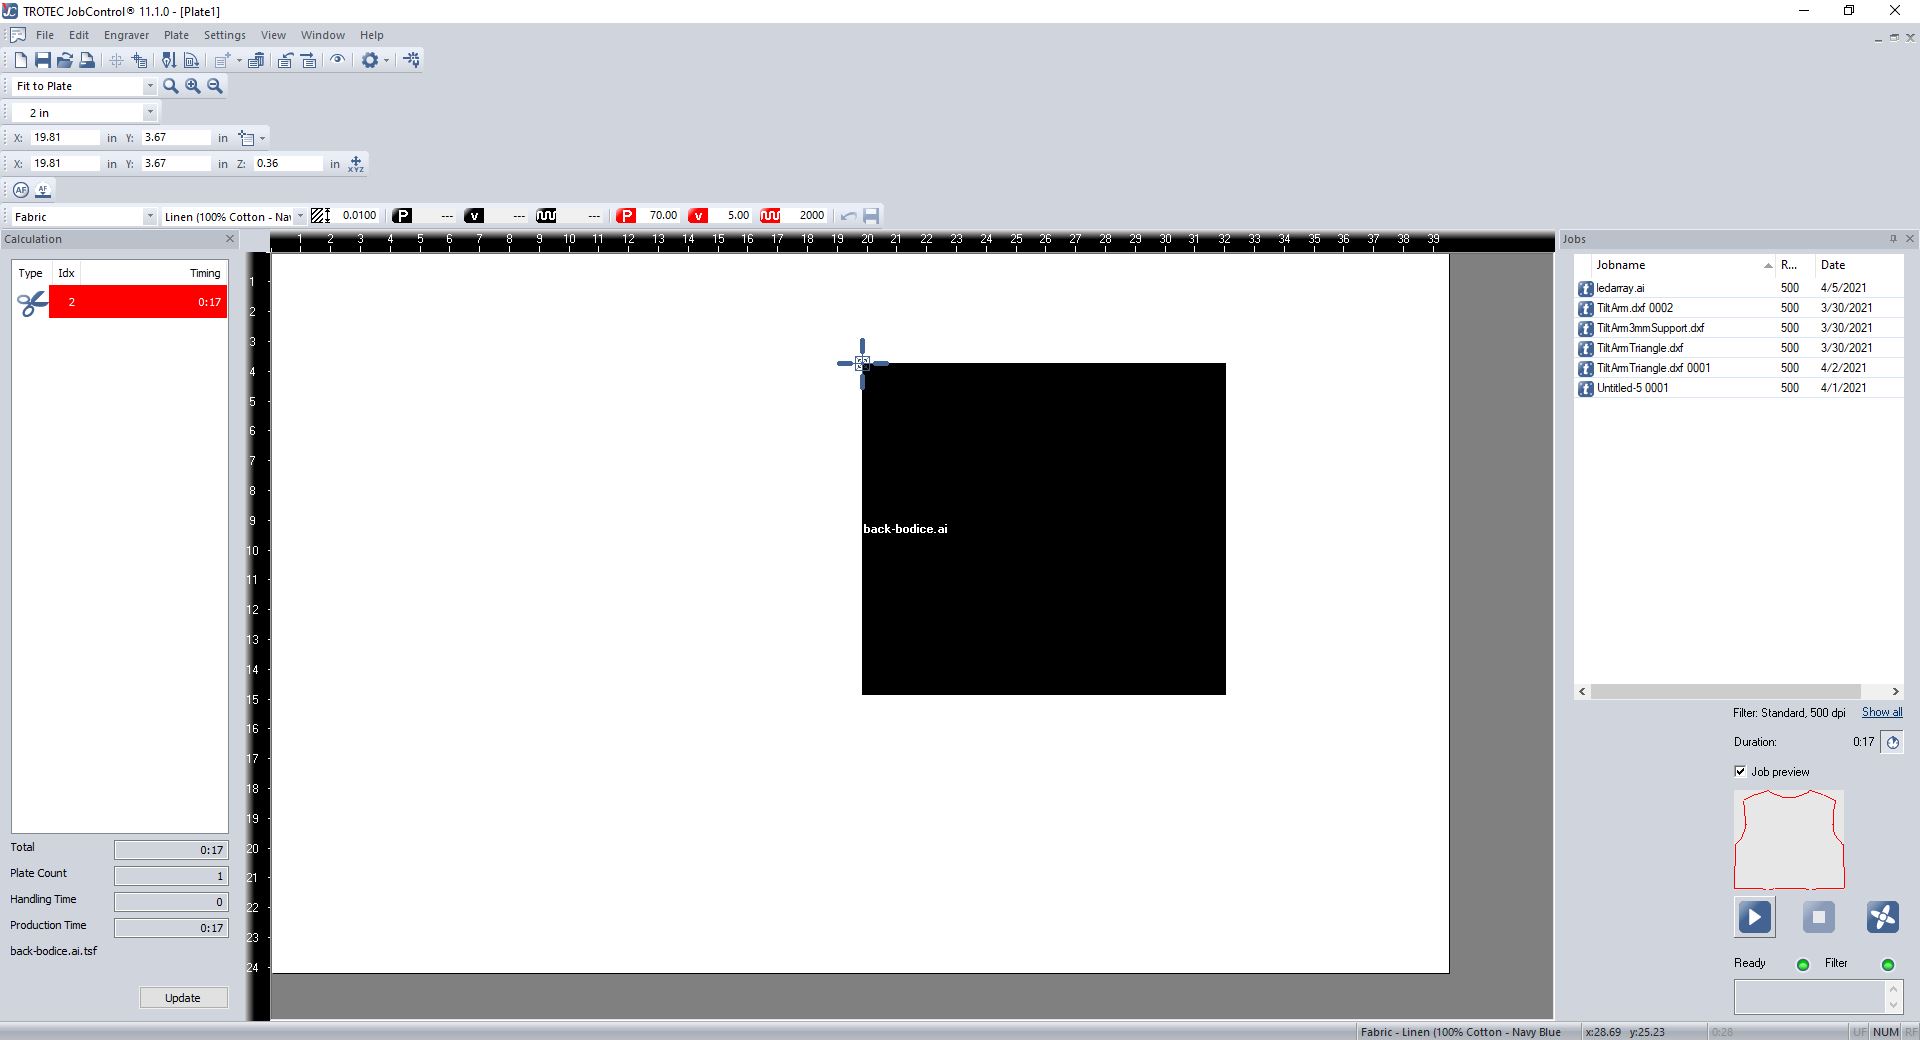
In Week 13, I learned how to use the Trotect Speedy Flexx 400 machine to laser cut textiles. I was able to define the settings that I would use for the linen fabric for my final project.
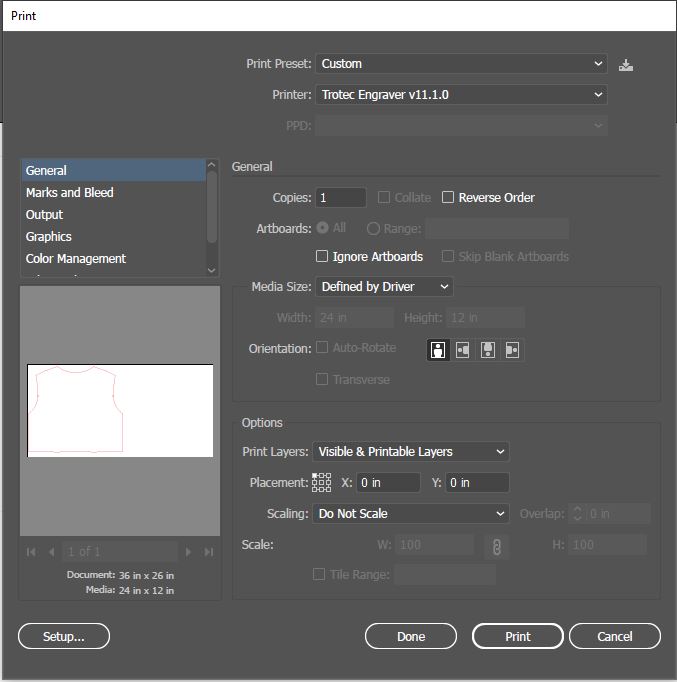
- Adobe Illustrator: File > Print (Printer settings):
- Select the top left corner as the placement
- Resolution: 500dpi
- Halfton: Color
- Make sure to check the boxes for Inner geometries first
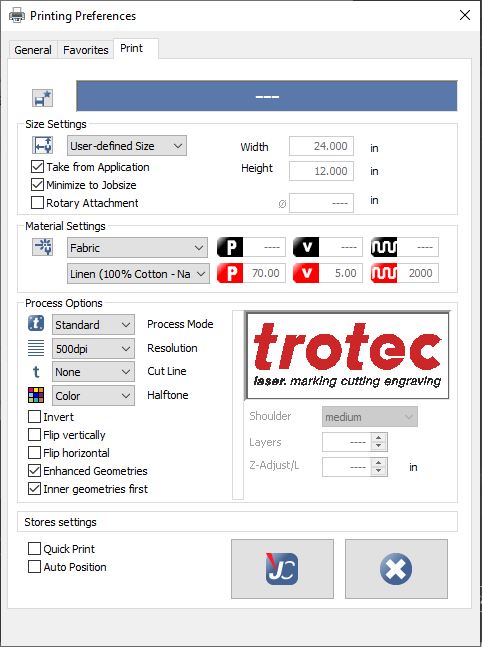
- Job Control Material Setting:
- Material: Fabric > Linen (100% Cotton - Navy Blue)
- Power: 70
- Speed: 5
- Frequency 2000
- Thickness: 0.01" (setting the thickness to help with focusing)
- Passes: 1
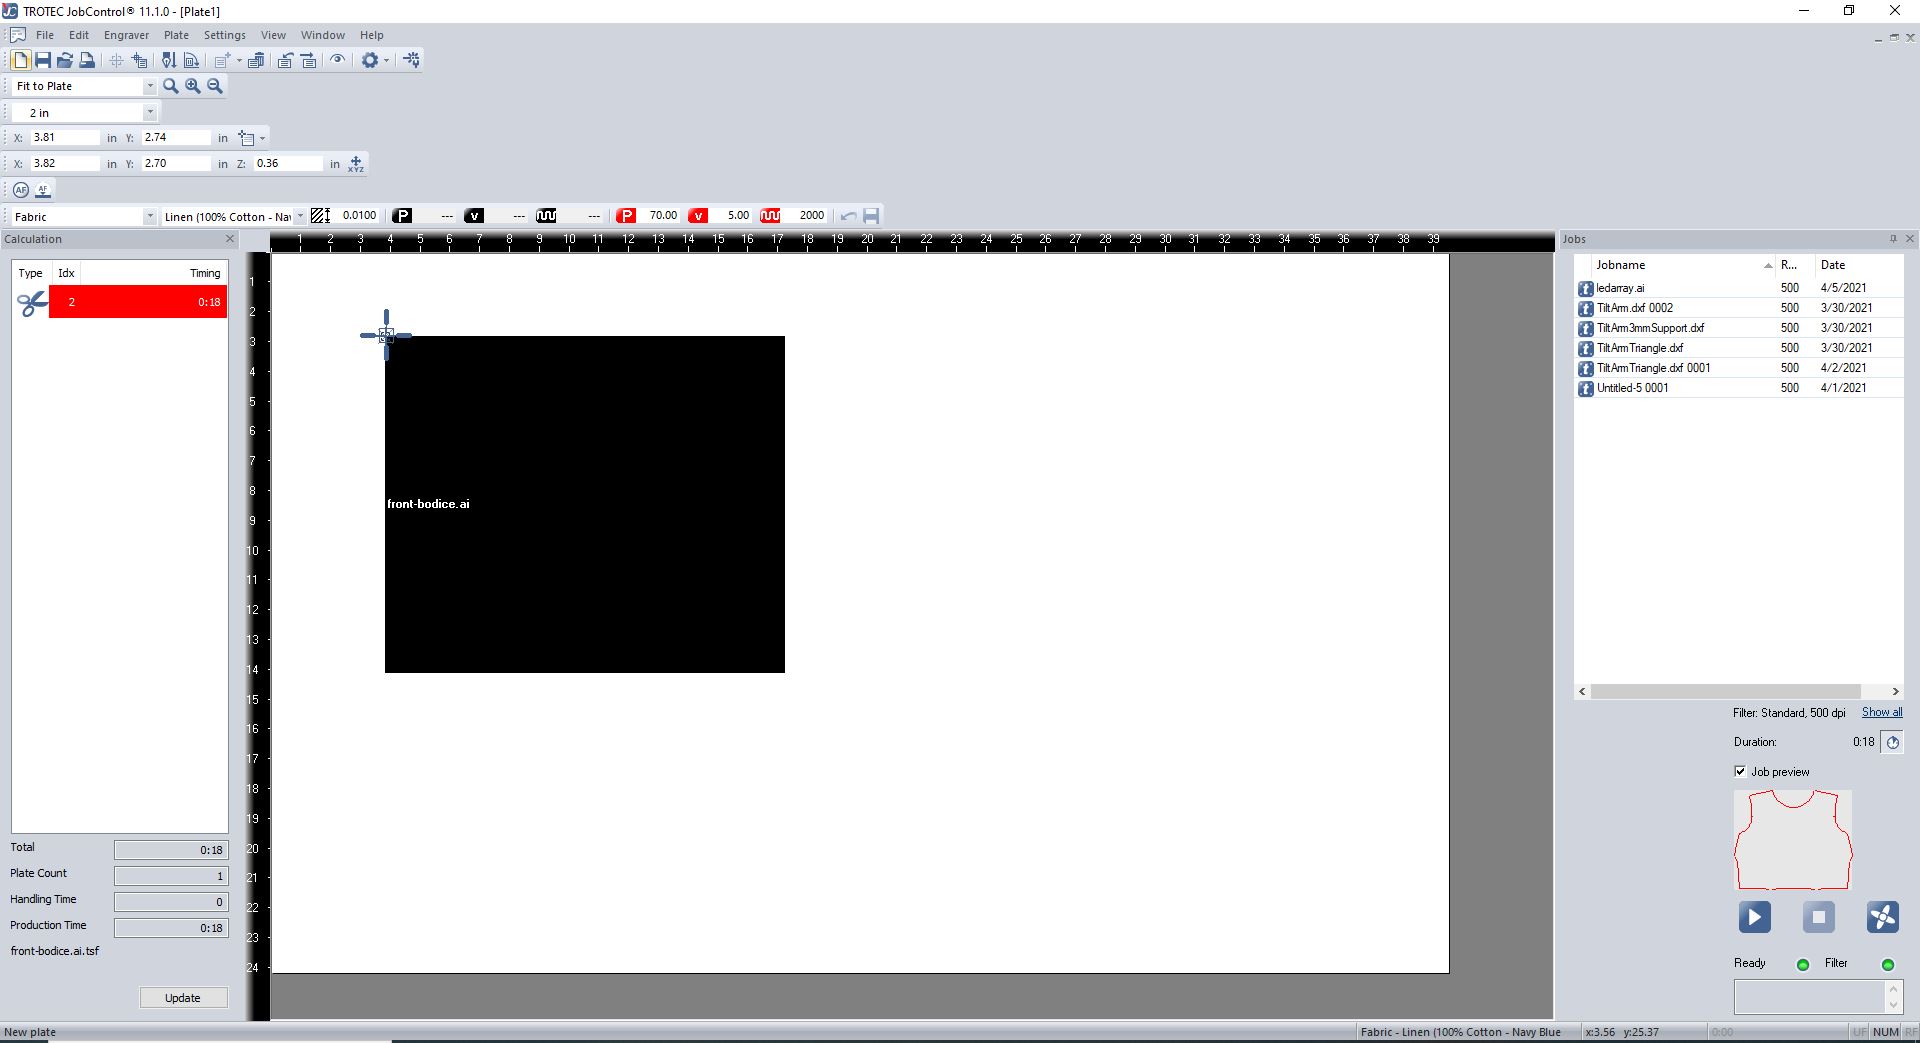
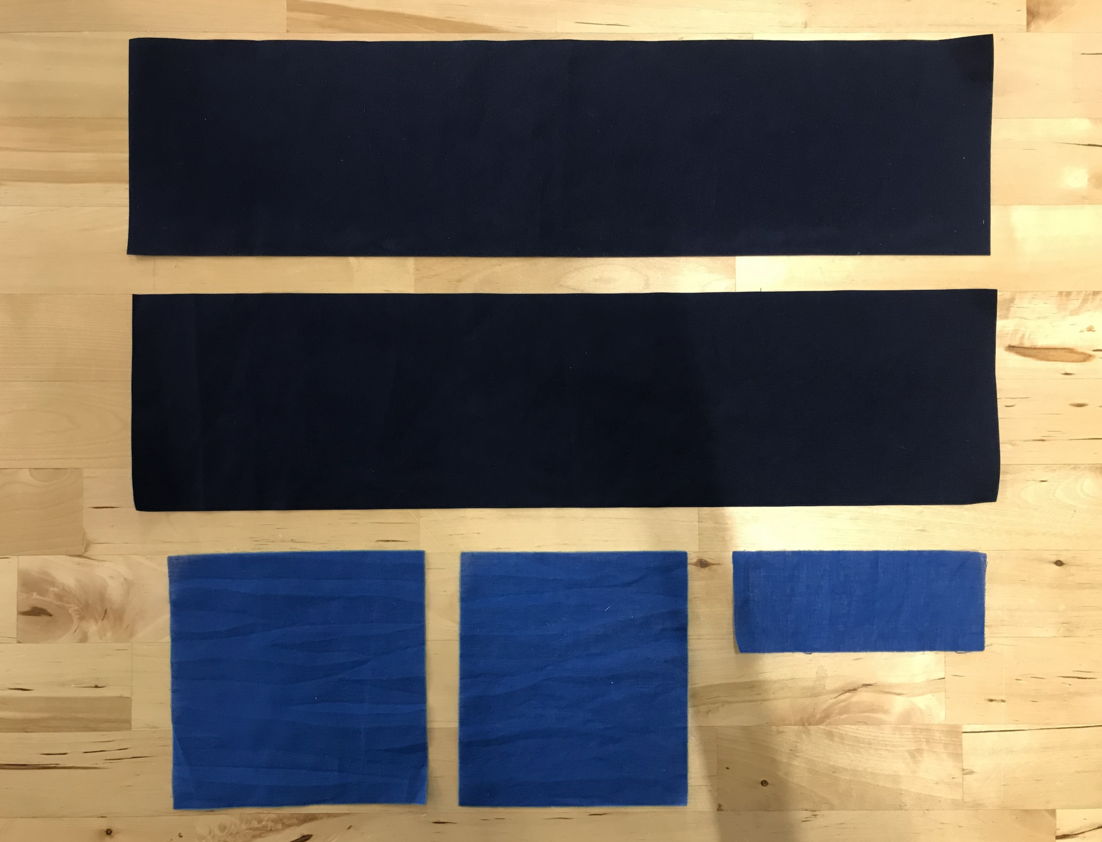
The cutting time was very short, it only took 18 and 17 seconds to cut the front and back bodice pieces, respectively.
Here is a short video of the the cutting process on the back bodice piece.
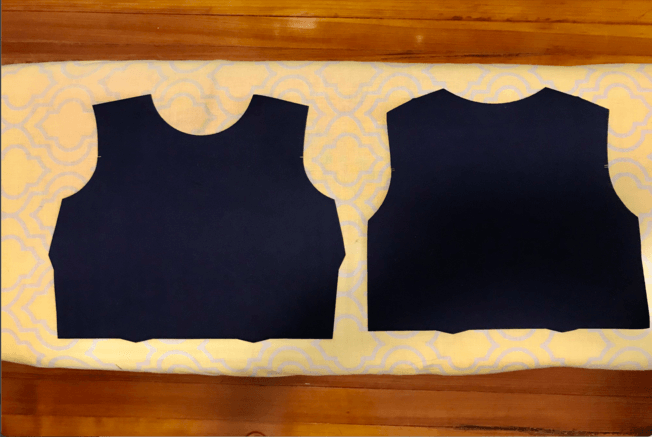
And this is the end result, I really liked how clean the cutting edges were:
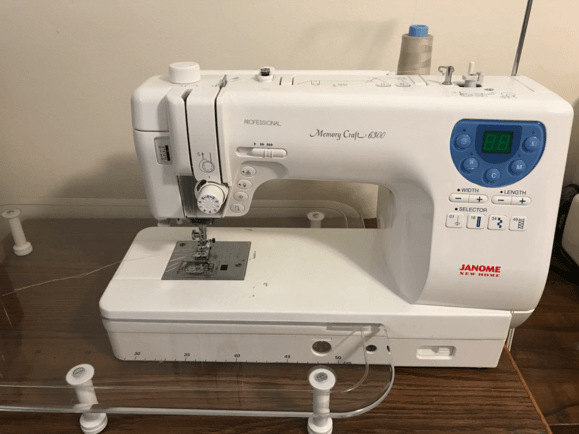
Sewing the Scaled Prototype
I chose to sew the scaled prototype at home.
First, I changed the thread to match the color of my fabric following this workflow:

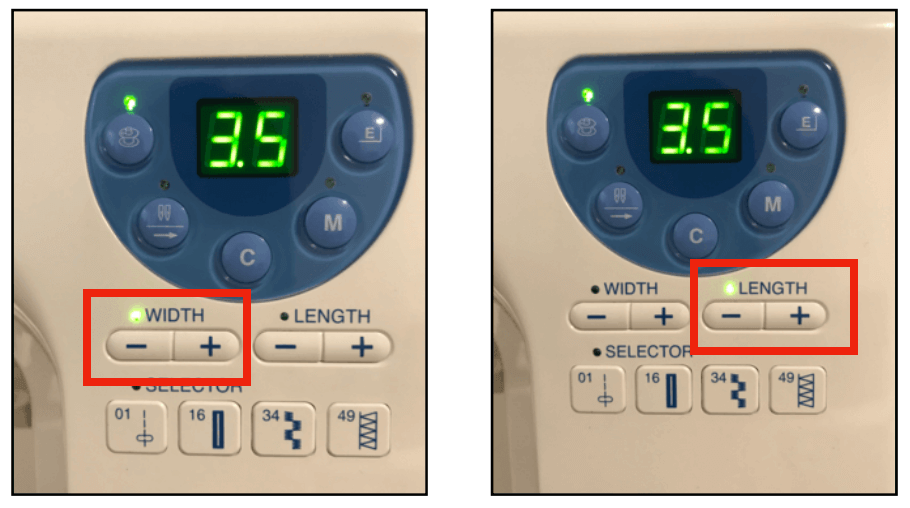
Once turned on the machine, I set the width and length of the stich to be 3.5 as this was the recommended setting for linen fabric.
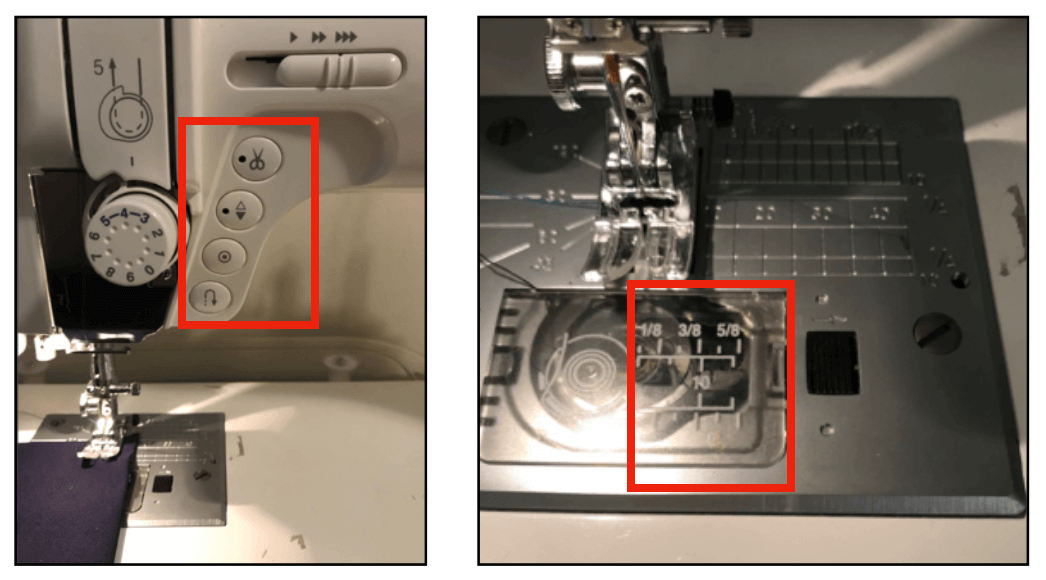
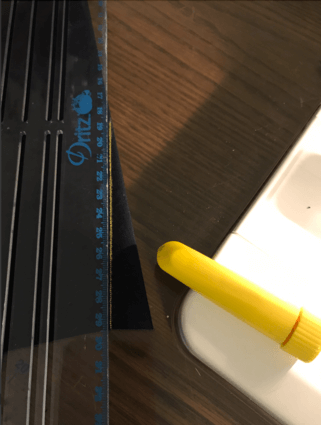
Although the machine was not computerized, there were still some helpful hints / tools from here and there. The first image below shows three tools that I often used while sewing: trimming the thread (icon 1), moving the needle up or down (icon 2), and backstich (icon 4). I also liked to use the seam guide as shown on the second image, another way could be to tape a sticky note on the seam guide to make sure the seam was as neat (straight) as possible.
There were four darts on my scaled pattern pieces, so I chose to use chalk to mark the sewing line to guide my process.
Here is a short video of the the sewing process.
Here is an image of how the finished dart looked. It is a little hard to see as the thread color matches the fabric color.

I also made sure to follow the sewing rule of "press as you sew". As the dart created some curve on the sewn piece, I used a tailors ham (the "triangular" pillow on the image) to shape the dart and achieve a perfect press. The middle part is called seam roll and it has a similar purpose, however it is best for pressing seams open on long and narrow areas, such as sleeves.
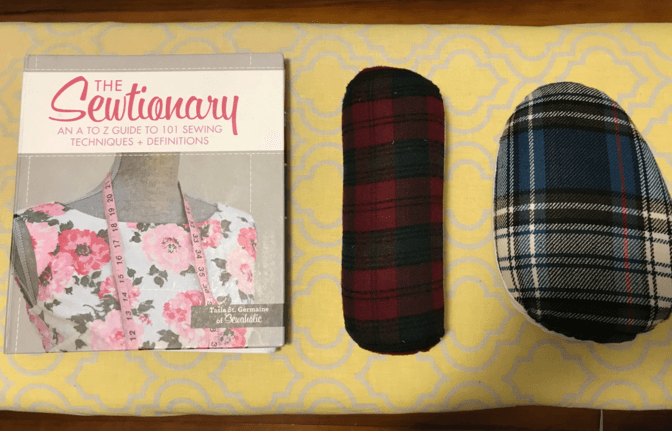
When pressing, the pointed side of the dart would be seated on the pointed side of the tailors ham.
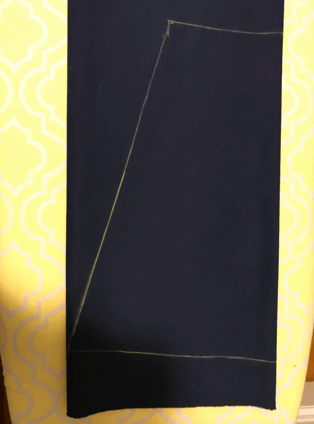
As mentioned previously, I was unsure about the scale so I chose to only laser cut the bodice pieces. After finished pressing the darts, I manually sketched the waistband and the skirt on the fabric scrap.
When sewing the seam, I made sure the right sides of the fabric touching.
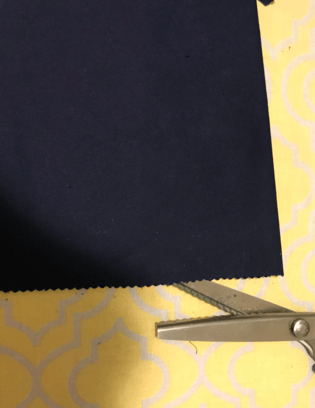
I finished the hem of the skirt with the decorative edger scissor. Another reason for using this edge scissor because I didn't want to hem and this finish would provide a clean result!
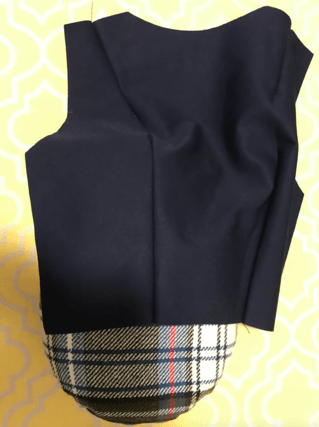
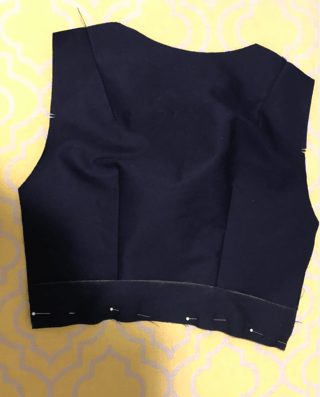
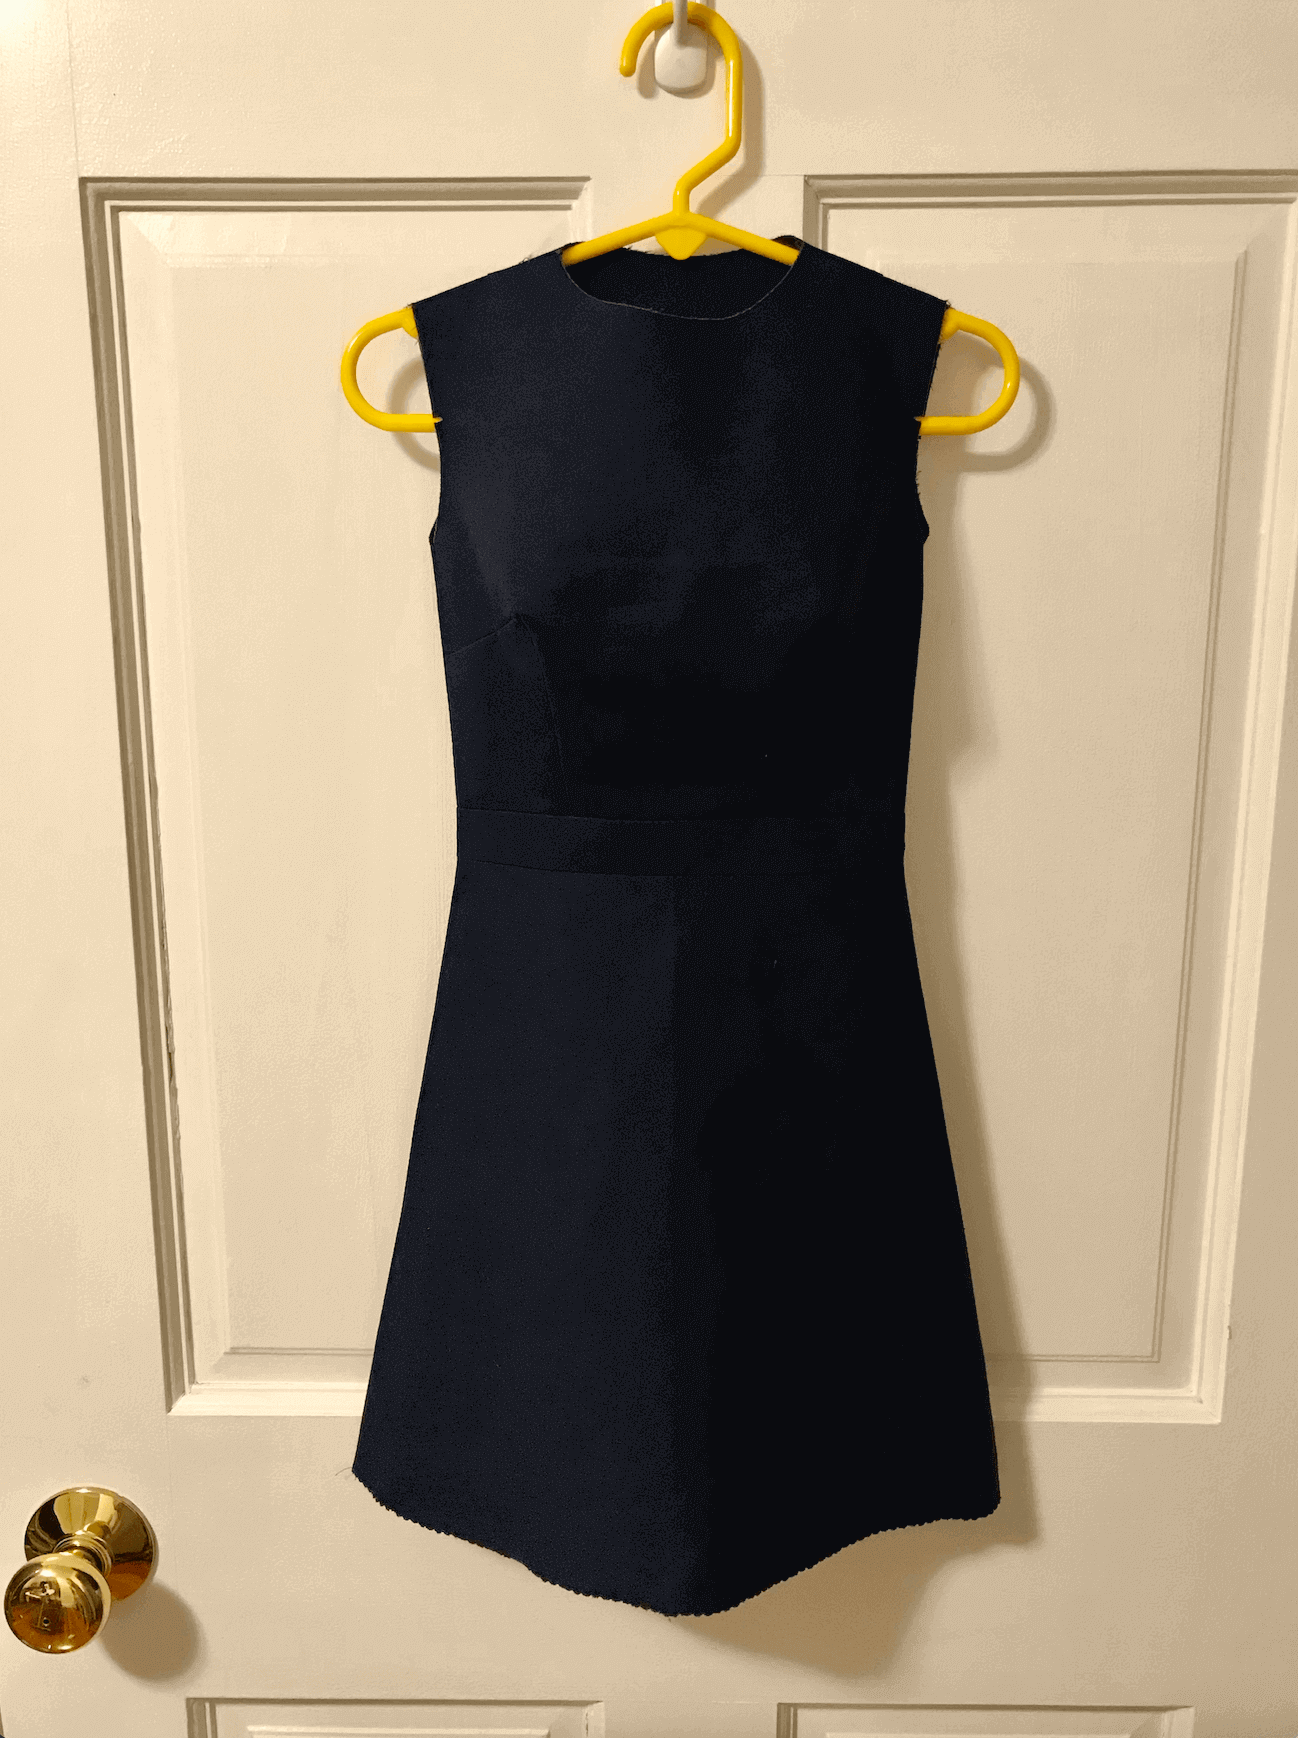
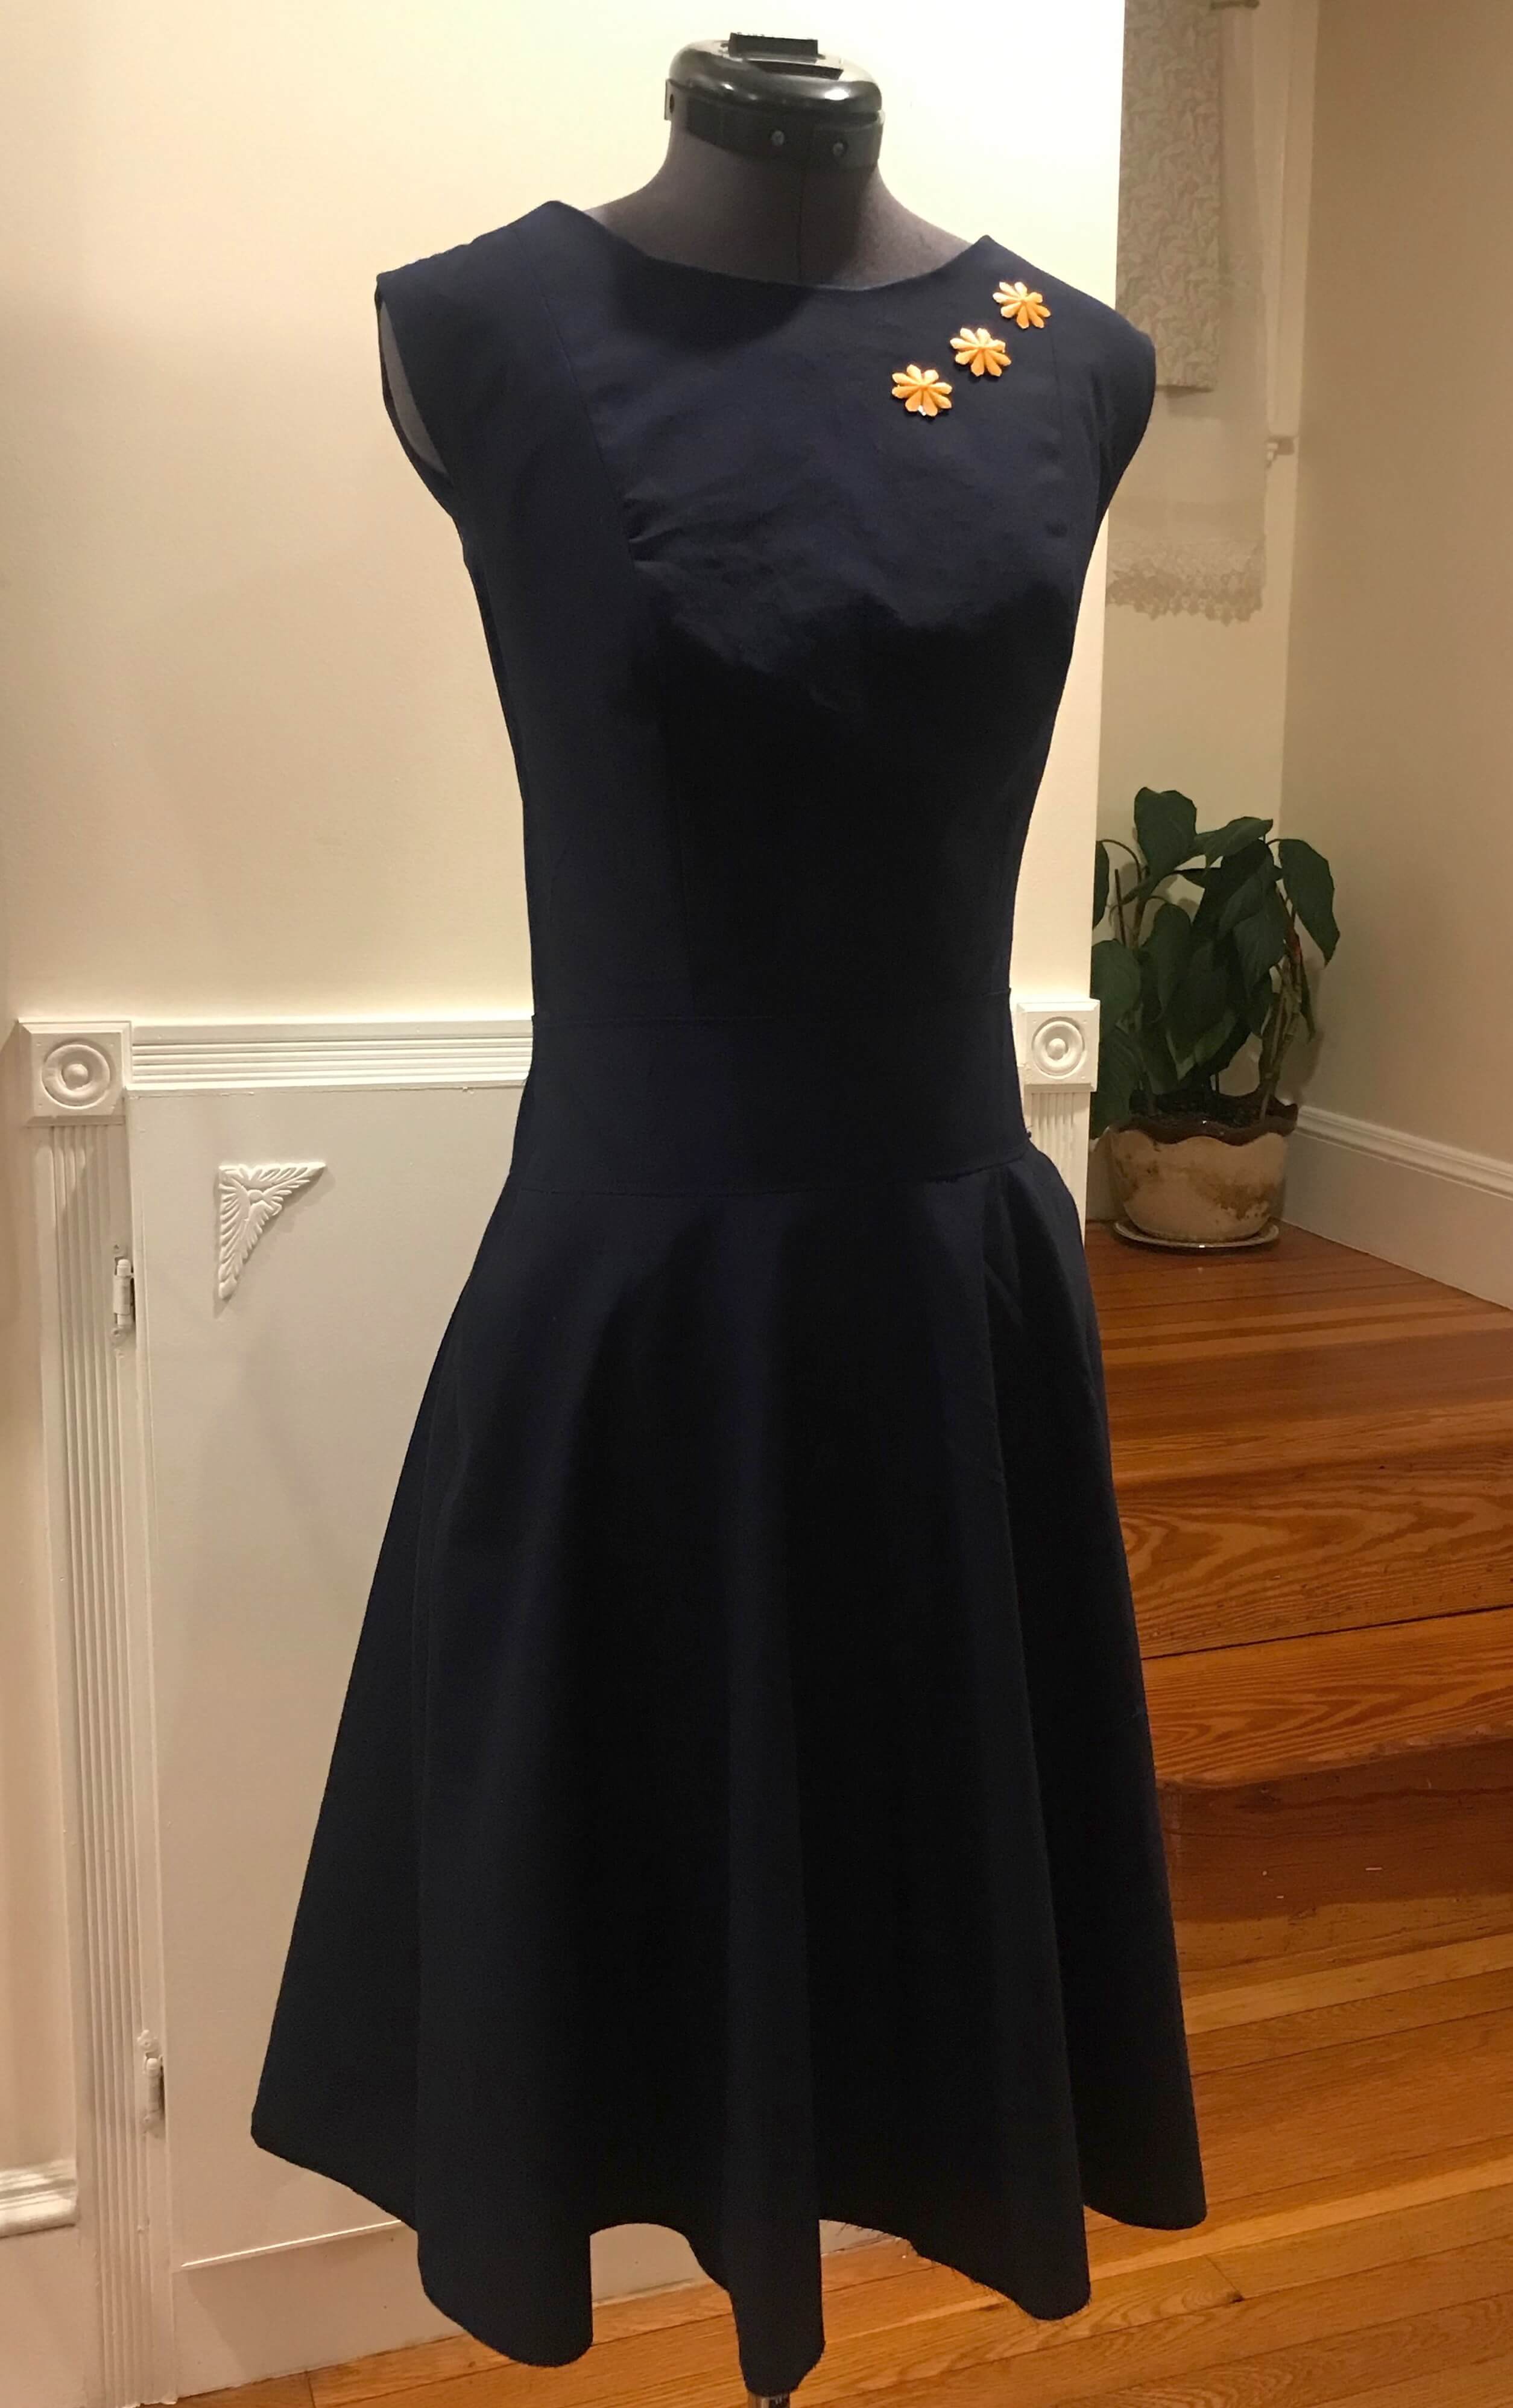
And here is an image of the assembled scaled dress!
Revision and Final Prototype
In the latest version, I combined the bodice, waistband, and skirt as one and created the silhouette in CLO3D. Here is how it looks:
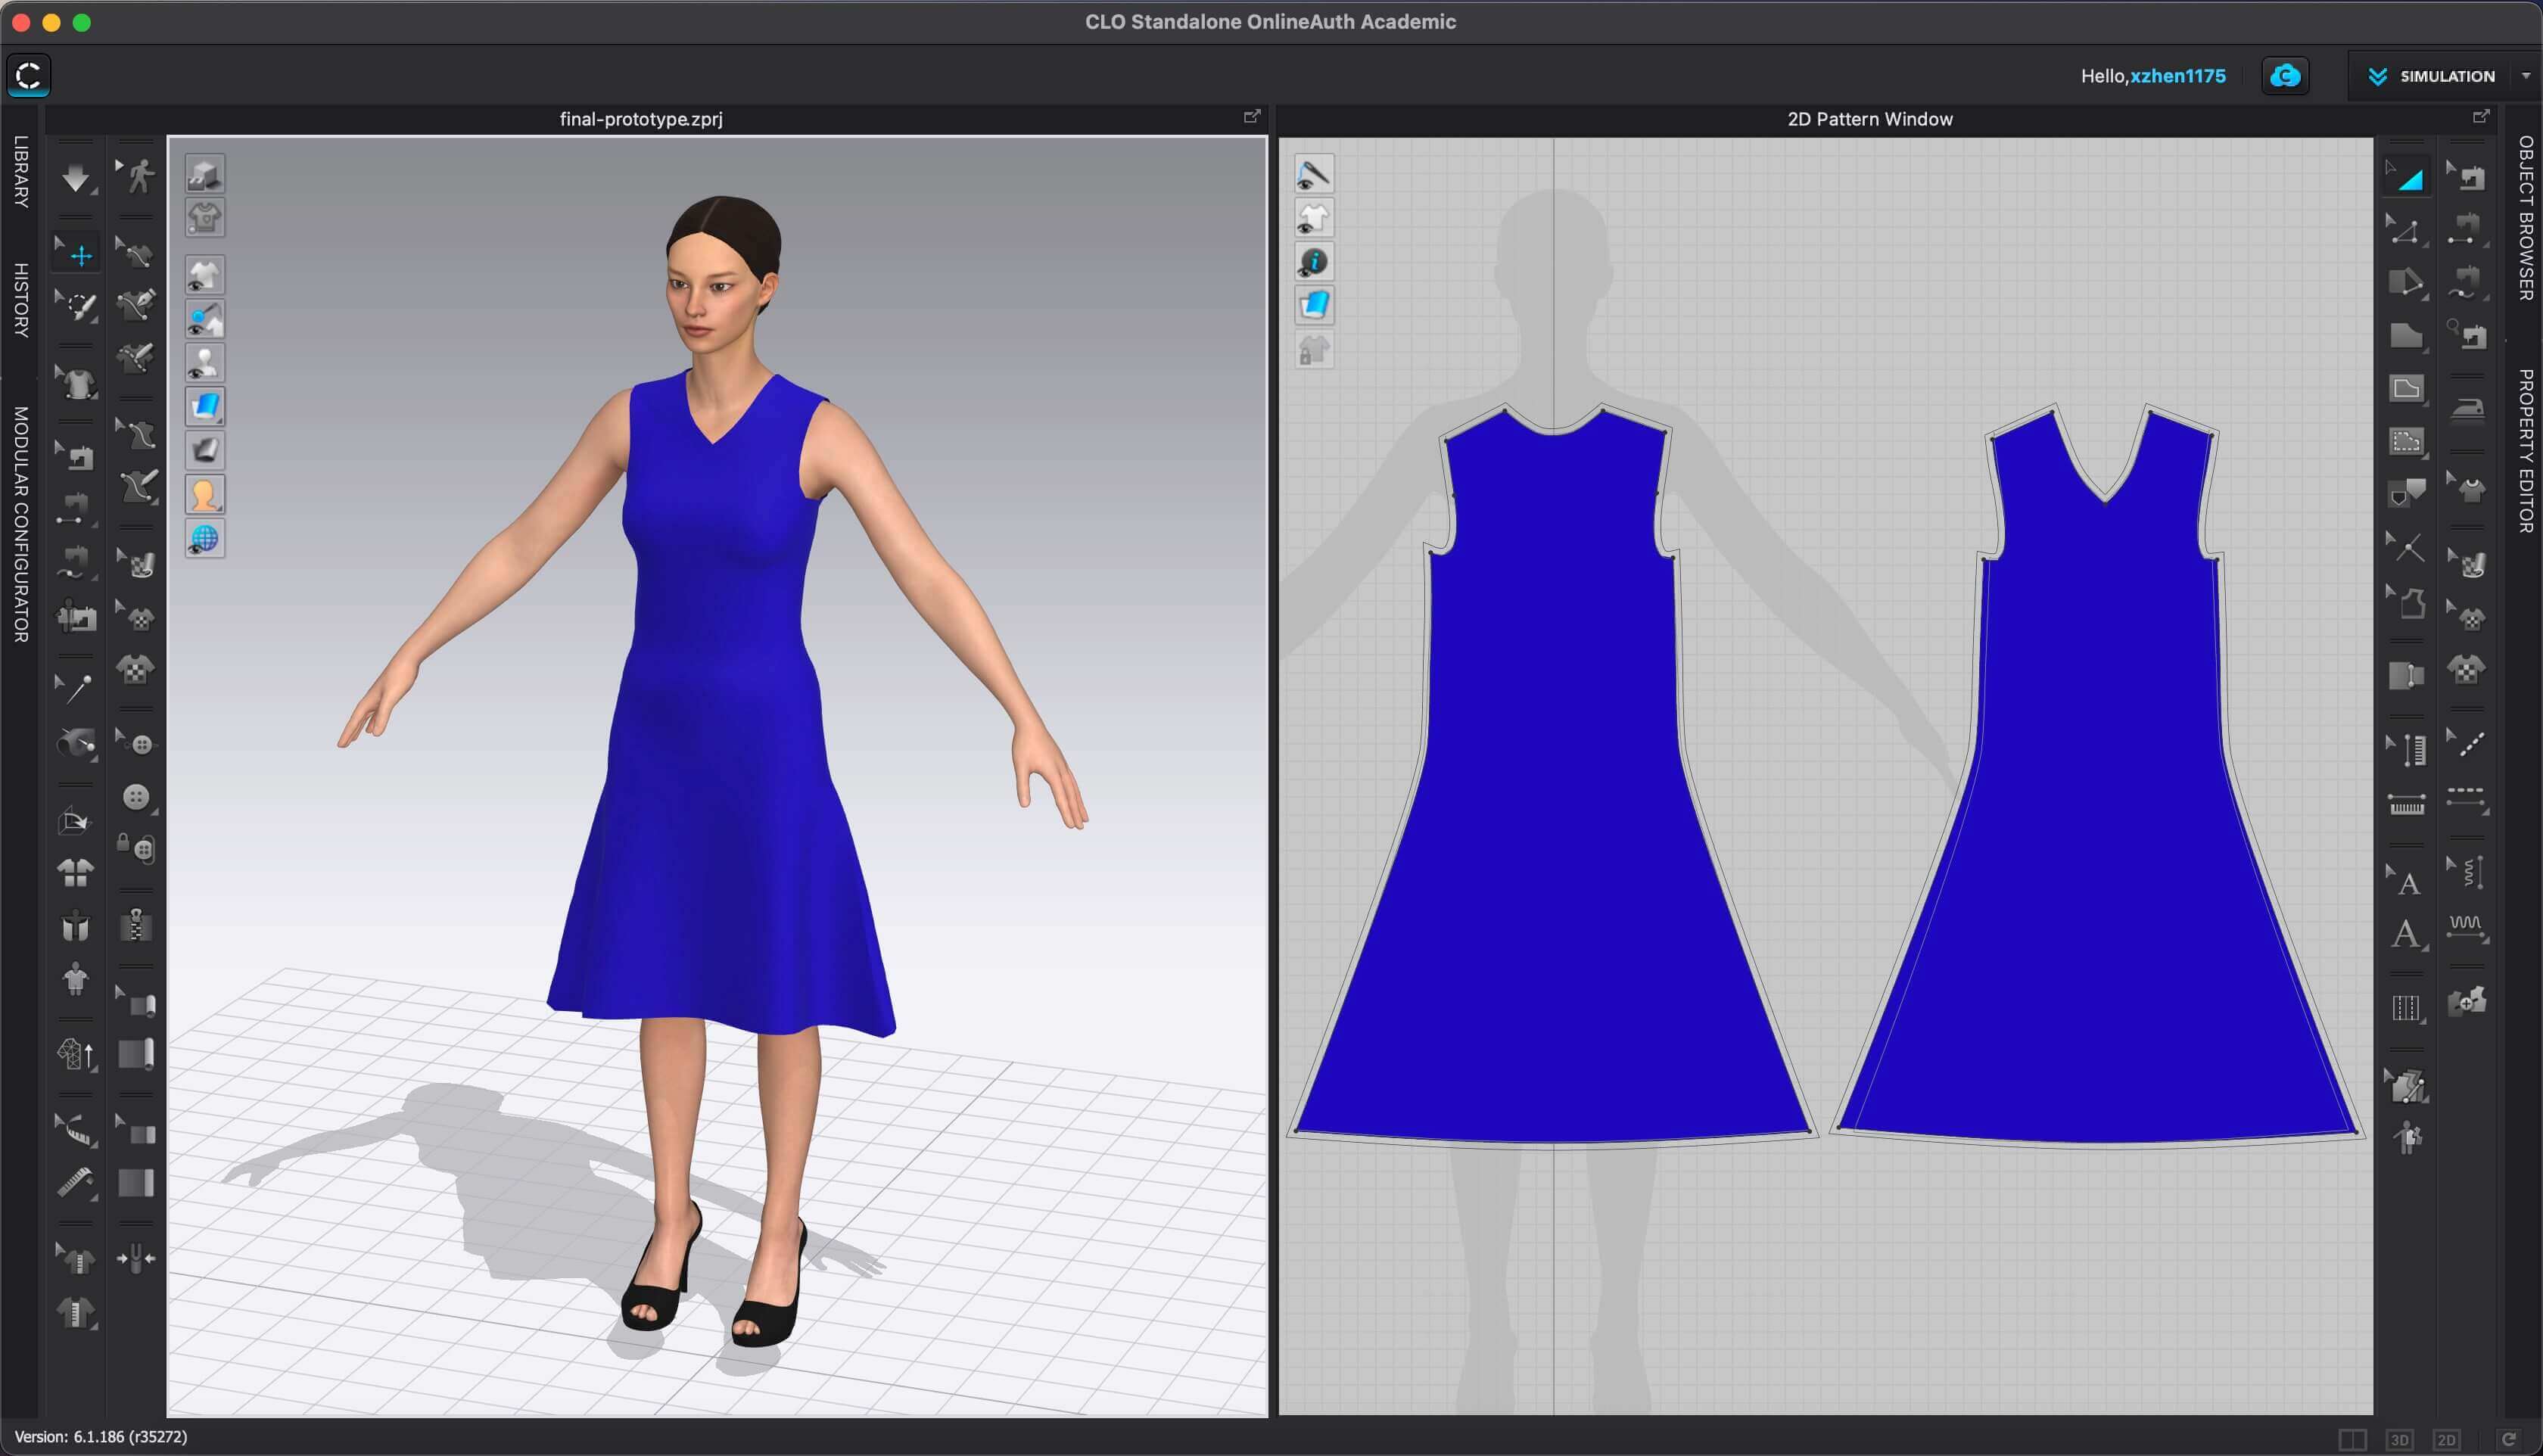
From here, I have the dress bodice for my size. Next, I modified the bodice pattern pieces to include the princess seams. As mentioned above, a fitted bodice is important to the accuracy of the data captured. The princess seam adds style to the top, while maintaining a smooth, body-skimming fit. I was still a little concerned about the thickness because the ESP32-WROOM was quite big as a microcontroller (0.5 mm). To make the dress as comfortable to wear as possible, I included the "tolerance" (0.5mm ease) in my sewing pattern, so this dress is slightly loose if I remove the PCB.
The fabric that I chose for my project is a ligh-to-medium-weighted linen fabric (fabric weight: 190 GSM, color: navy blue). Although I was not able to laser cut most of my sewing pattern pieces because they were too large for the machine work area, I was still able to laser cut the smaller pieces (i.e. welt pocket and the waistband).
For the final prototype, I opted for a side zipper as I had planned to nest the flexible PCB on the center back of the dress bodice. Regarding system integration: initially I was thinking of sandwiching the flexible PCB in the main fabric and lining of the dress. Since I wanted to improve the PCB design post-fabacademy, I decided not to sew the flexible PCB into the lining. In the new approach, I sewed a "welt pocket" inside the back lining to serve as the nesting place for the flexible PCB. As the flexible PCB has a taped back, it can be removed easily for safe laundry.

Next, I used hot glue gun to glue the back of the brooch to the dress, and this is how the final dress looks.
Files
Please find below the files that I made for this assignment.
- CLO3D Fashion Design Files
- Laser Cut Textile Files (.ai file for laser cutting)