
This work is licensed under a Creative Commons Attribution-NonCommercial-ShareAlike 4.0 International License
Activity Log 3: 3D Printing Brooch
Jun 10, 2021Summary
During the 3D Scanning and Printing week, I learned how to work with the different 3D printers in our lab. While I have decided to apply 3D printing techniques in my project during this week, the actual design and manufacturing process were accomplished later. In this exercise, I designed a small flower brooch in SOLIDWORKS, then 3D printed and painted the brooch to decorate the bodice of the dress.
Design
In my project, I chose to apply 3D printing on the decoration (i.e. a small brooch). Here is an image of the final design, which shaped like a flower or a star.
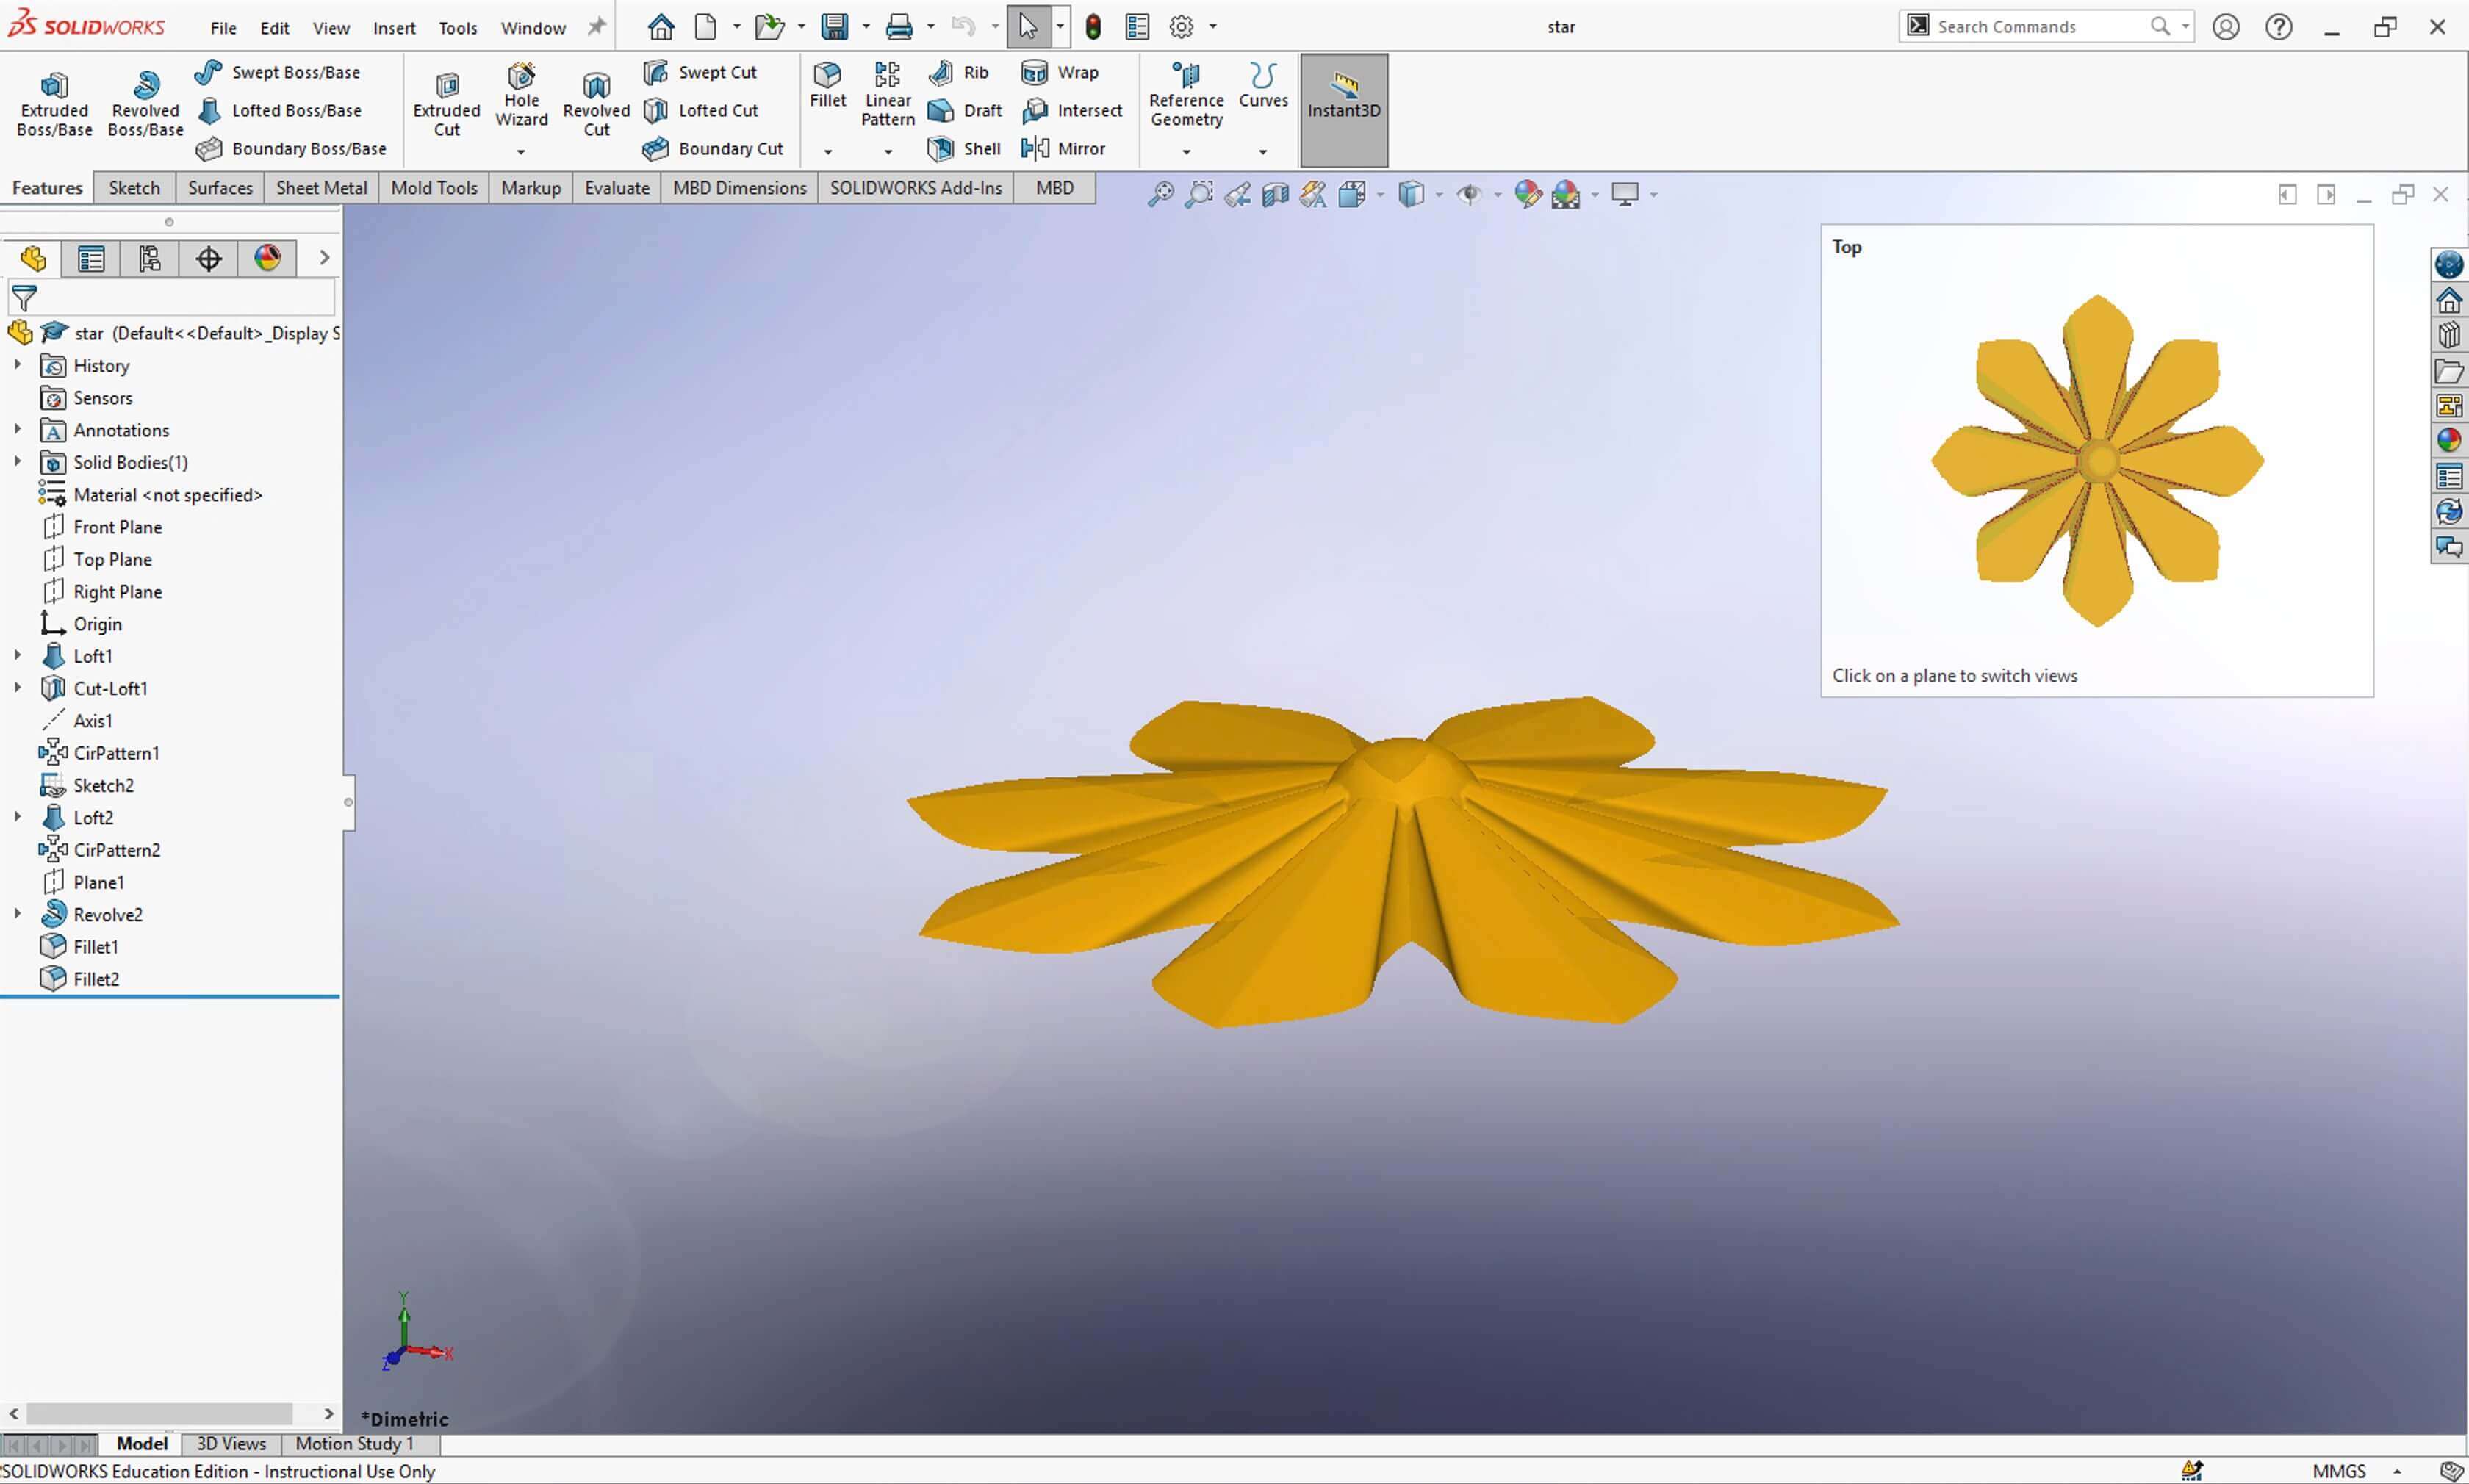
Here is a short video showing the evolution of the design. I started by sketching an octagon and a line, then use a loft and circular pattern features to realize a thin diamond. Next, I sketched a triangle on side of the diamond, and use extrdue cut and circular pattern to get the shape of a star. Next, I used spline to sketch a petal. As a finish touch, I sketch a half circle in the center, and use the revolve feature to realize the pistil (the center circular support) of the flower.
3D Printing
I mentioned in the 3D Scanning and Printing week that I would like to use a golden silk PLA filament. However, through experiments, I learned that this type of PLA filament is more brittle than the normal PLA that we usually encounter, and thus it is not ideal for printing small objects. Thus, I used the Sindoh DWOX DP201 3D printer to print the brooch. This was because this printer print quite efficiently with adequately good precision.
The slicer for this printer was 3DWOX. The design was simple so I didn't need to add supports. I also picked Normal Speed - Normal Quality print in the Profile section. I was not sure how large the flower was compared to the size, so I loaded one regular size flower, and one 1.2 scale flower. Here is how they looked in the slicer.

Here is a short video showing the printing process.
And this is how the final print looked.
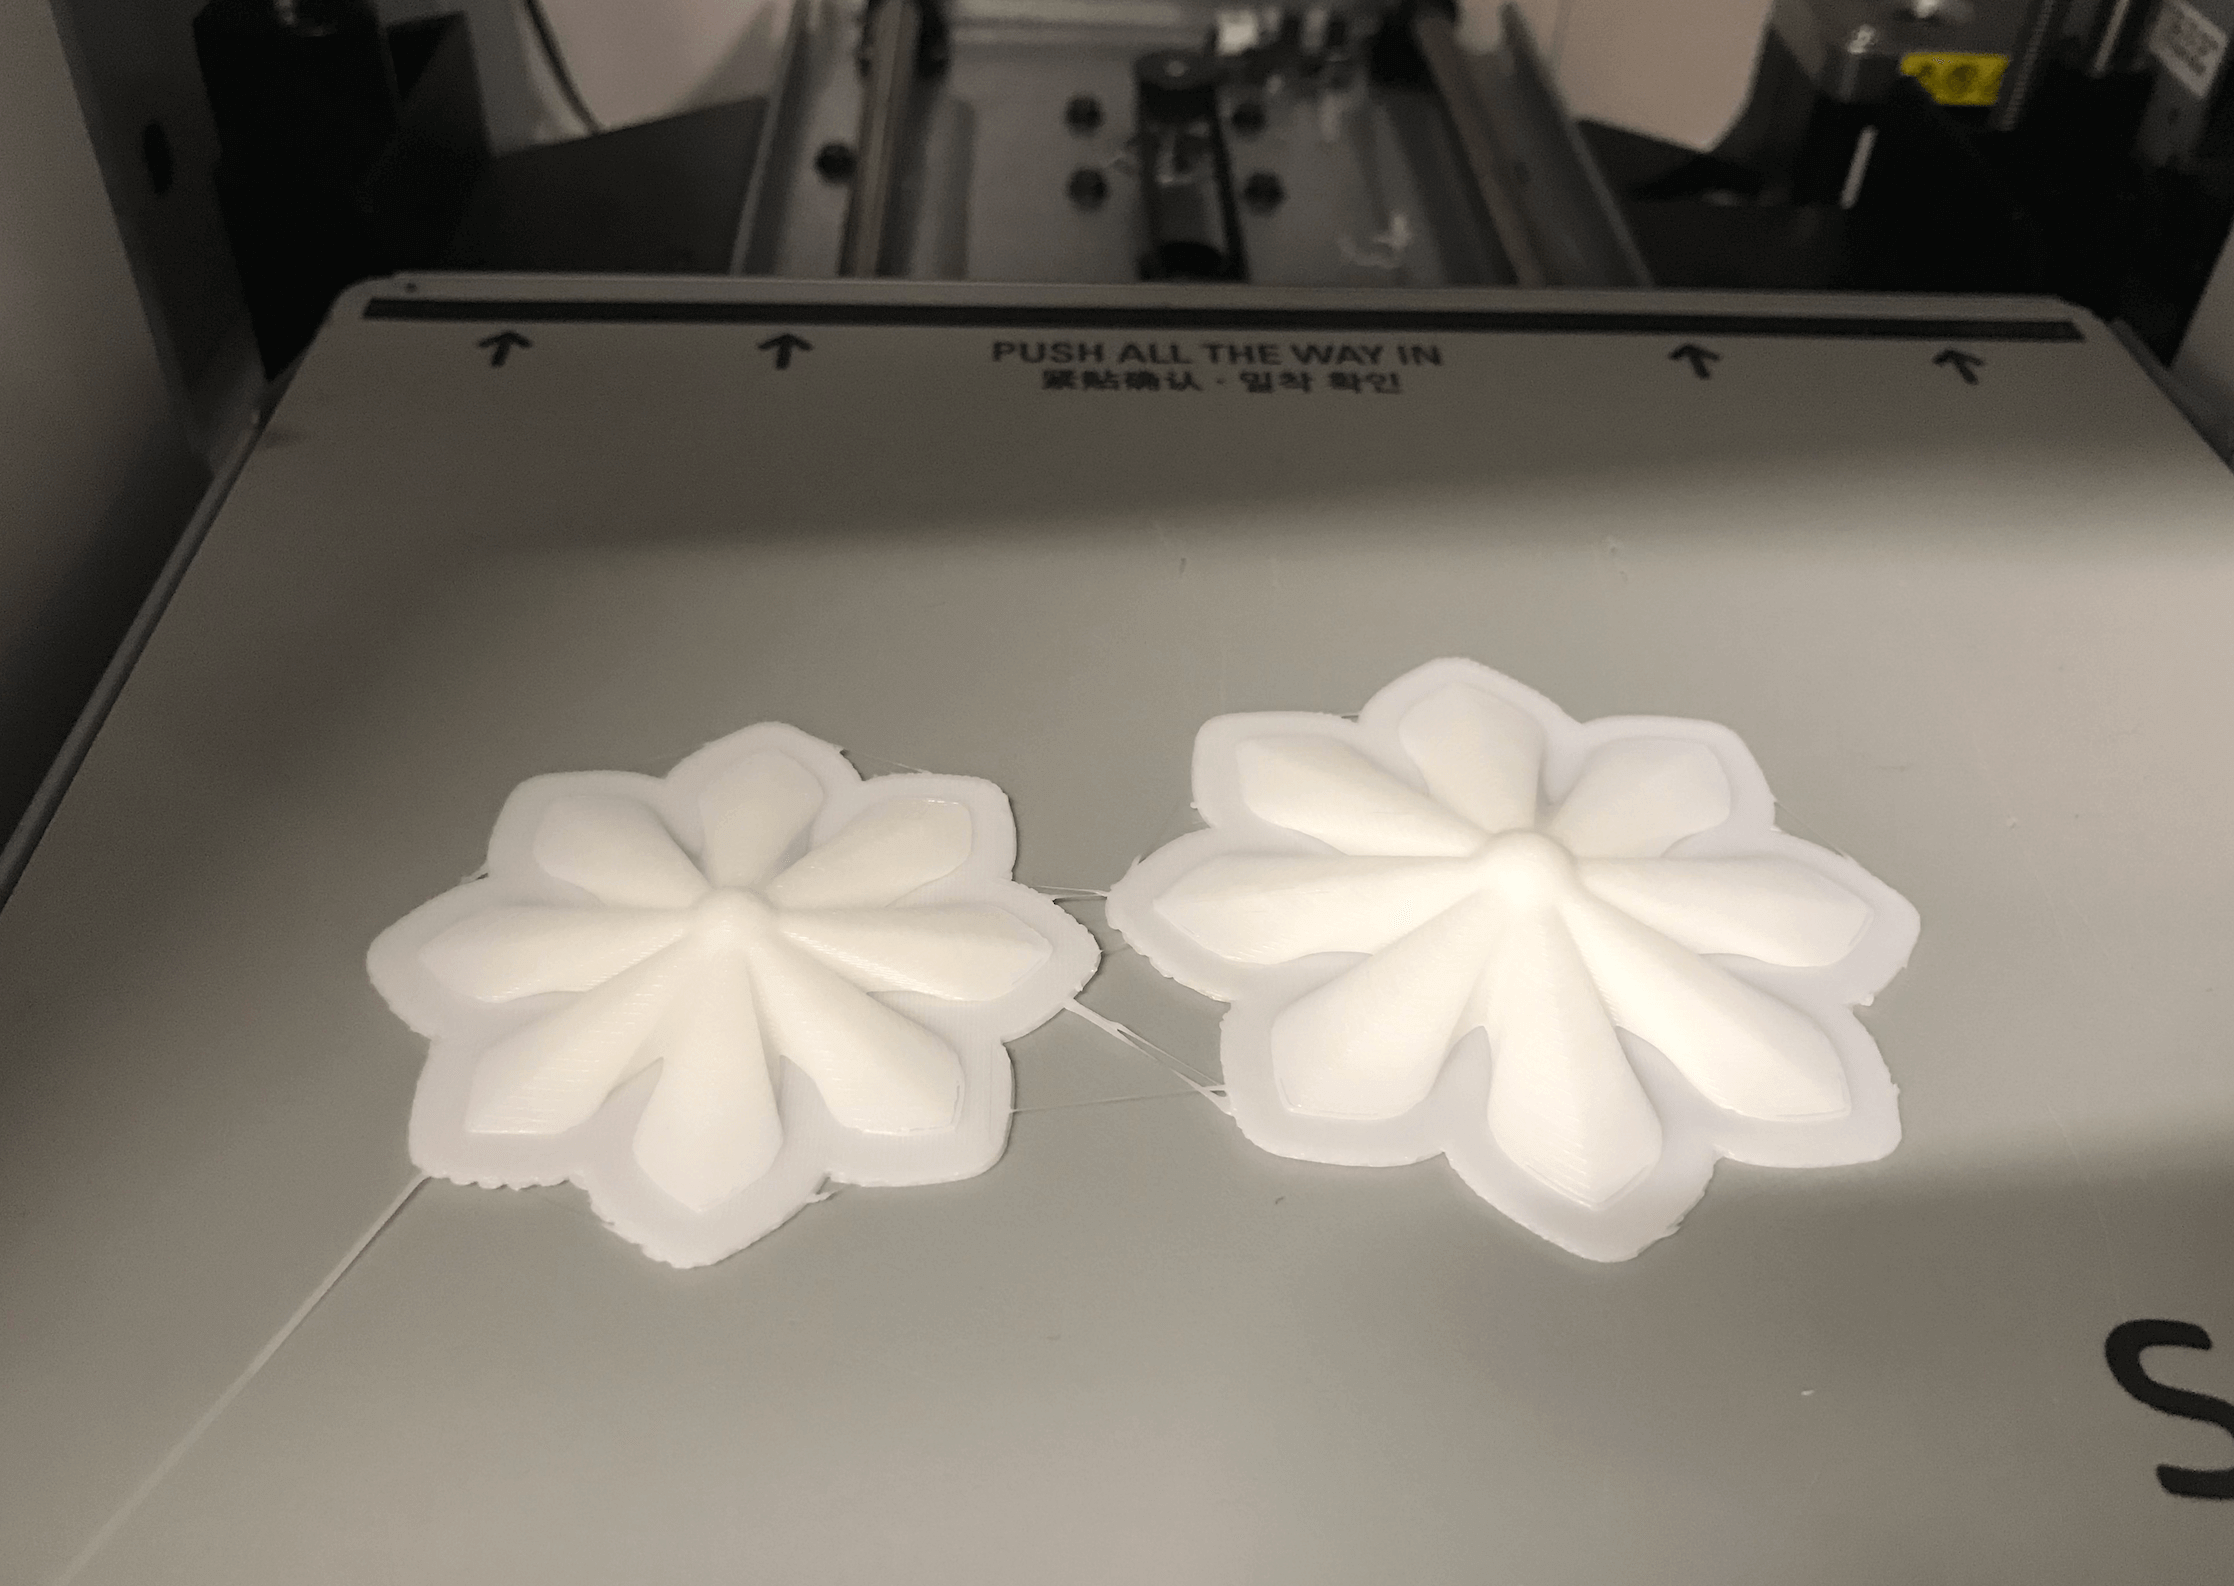
I realized that my design was a little large to the dress, so I reduced the flower size to 60% of its original size when printing. I also wanted to have a smoother surface so I picked Slow Speed - High Quality print in the print profile.

The print time was 46 minutes for three flowers. Here is a short video from the slicer showing the preview of the print. After getting my first three flowers, I then printed in a batch to have some back-ups later on.
Painting
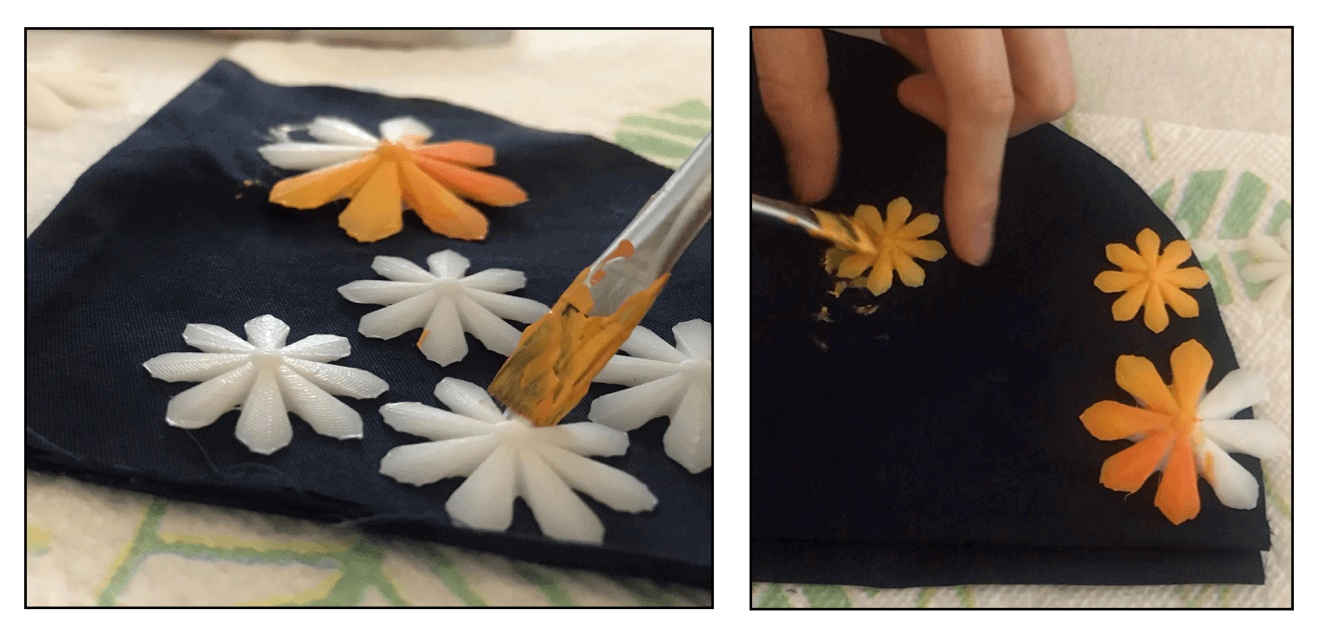
I preferred the flowers have colors other than white, so I decide to paint them using acrylic paint.
I learned that sanding and applying primer would help with painting, so I started the process. However, since the features of my flowers were so small, I needed to be careful. In the end, I only sanded the petal edge to make them as flat as possible, because I realized that the primer would not be able to arrive in time, so sanding the whole flower and painting it without a primer would look rather rough.
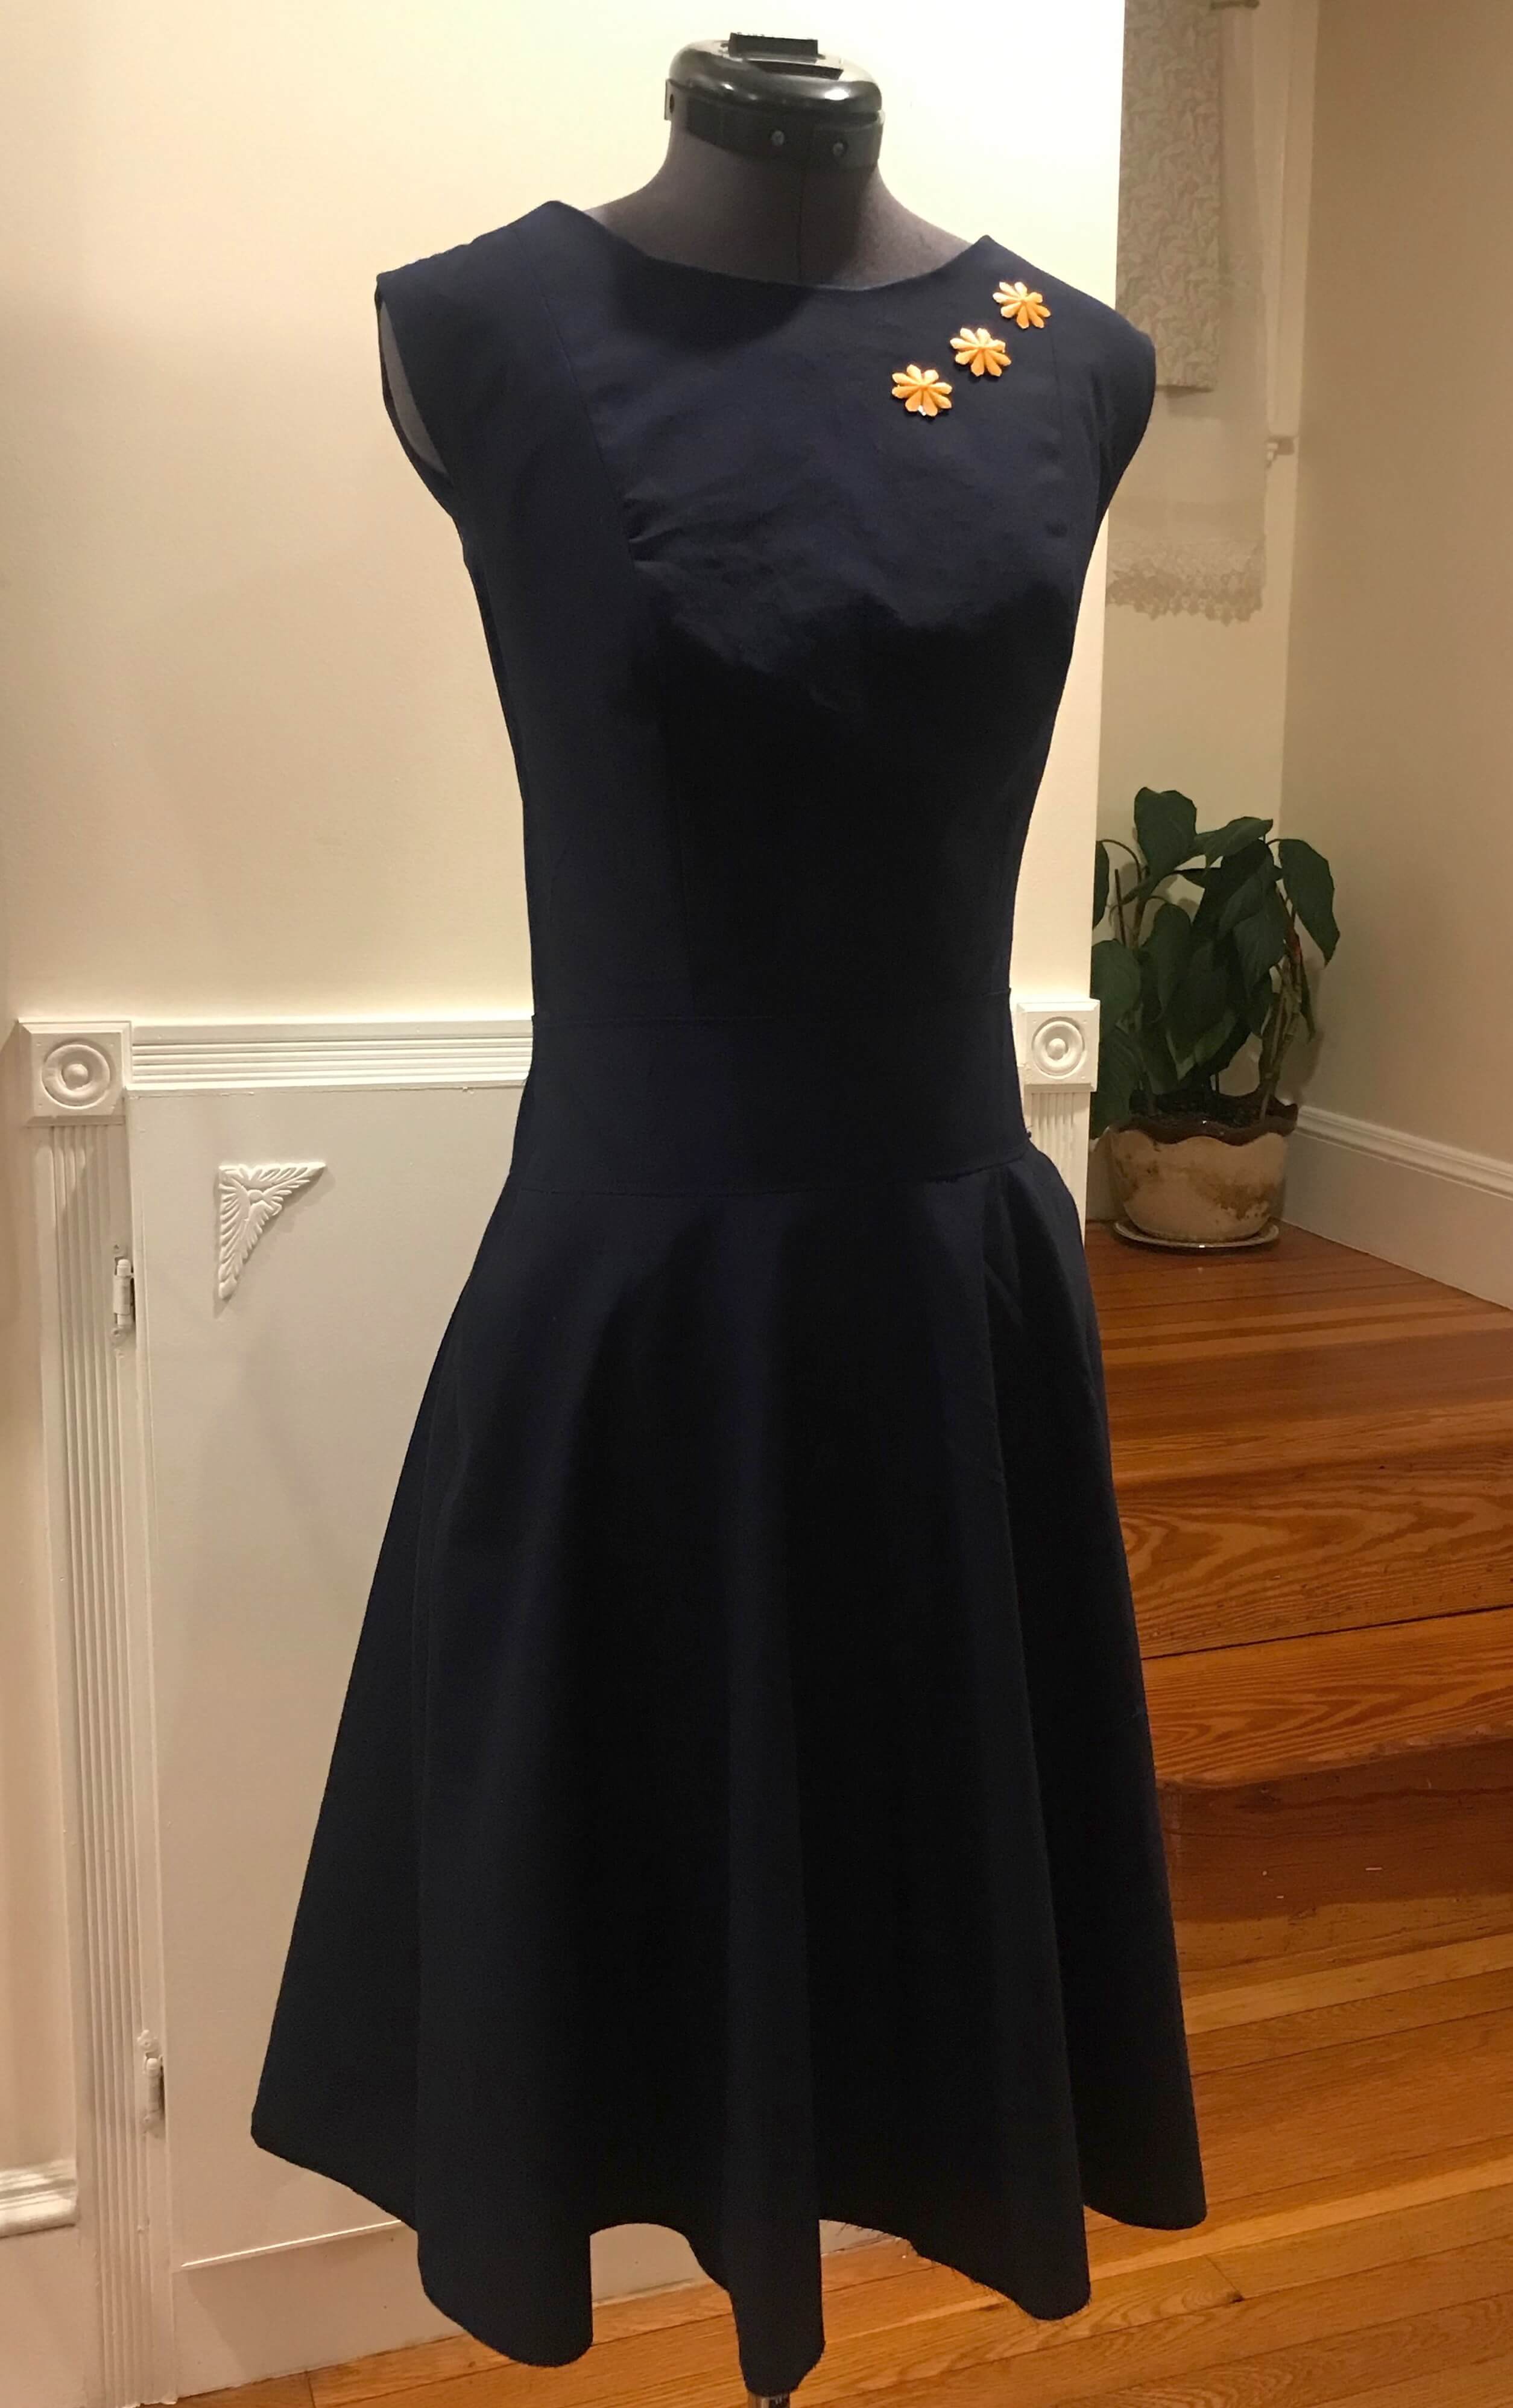
I placed my flowers on a piece of fabric scrap from my project. I then mixed the red, white, yellow, and gold color of the acrylic paint that I got from amazon.com. I did several tests on a larger flower before applying them to the smaller ones. I applied two coats to achieve optimal result, then set them aside to dry. In three hours, the flowers were fully dried and so I picked three flowers that I thought most beautiful as the brooch of the dress.
Next, I used hot glue gun to glue the back of the brooch to the dress, and this is how the final dress looks.
Files
Please find below the files that I made for this assignment.