3. Project Summary
Presentation
Description
What Does it Do ?
The original idea was to have a device capable of pointing a camera towards a moving object, similarly to what a Pixio/Pixem or a Soloshot can do. My motivation stems from a desire to film myself practicing some sort of alpine sport outdoors when I am on solo excursions.

A soloshot in its elementAs I progressed through the academy, I realised that reaching that end-goal was going to take more time and focus than I had initially anticipated. The complexity in creating a fully contained device with a reliable electro-mechanical system meant that I could only focus on certain aspects. I therefore decided to concentrate on creating a device I would use as a platform to develop the technology required to achieve my initial objective.
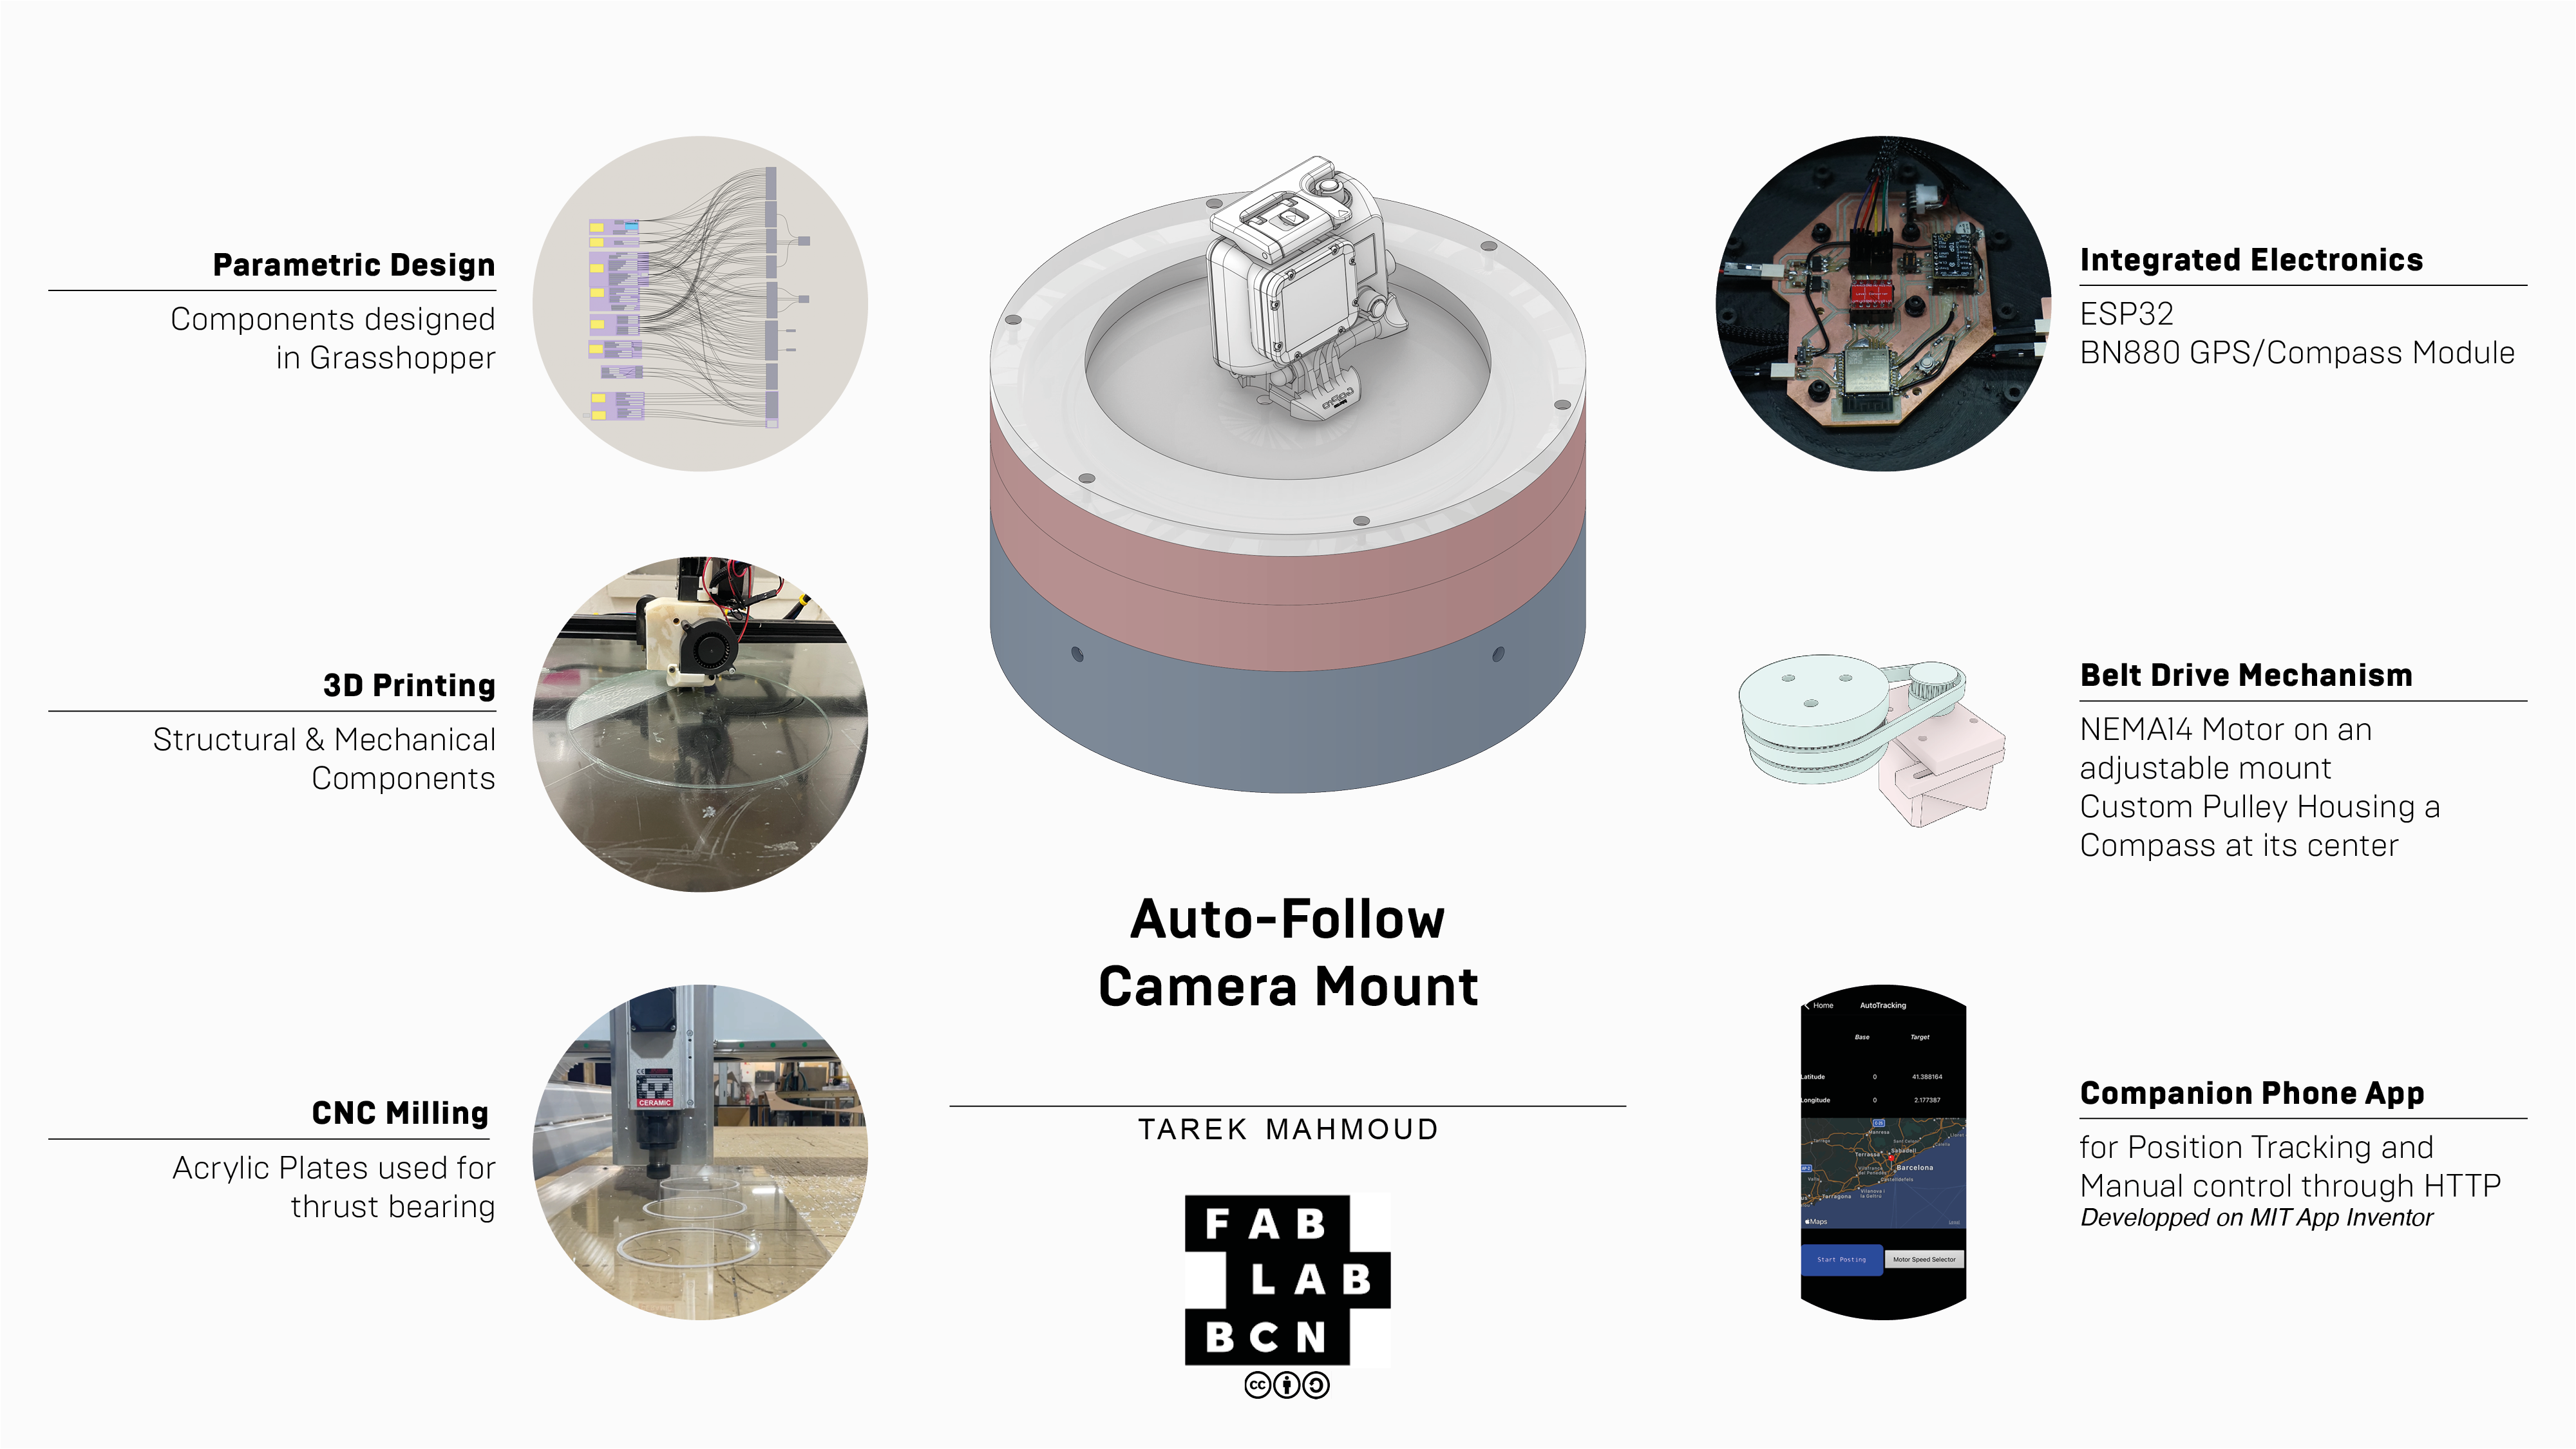
My fabacademy project is basically a motor controlled turntable. Because it is motor controlled, by attaching a camera onto its rotating plate, I can control the horizontal orientation of the camera and, theoretically, film a moving object. It basically acts as a pan only camera mount. The device can be operated manually through a phone app developed on the MIT app inventor. Its design is quite modular, allowing for components to be added, removed, or modified quite easily.
Who’s Done what Beforehand ?
In terms of existing products, I mentioned the Soloshot and Pixio. While their designs are proprietary, My global vision was heavily inspired by these products, mainly for their system design.
Soloshot (previous version) in action
Soloshot 3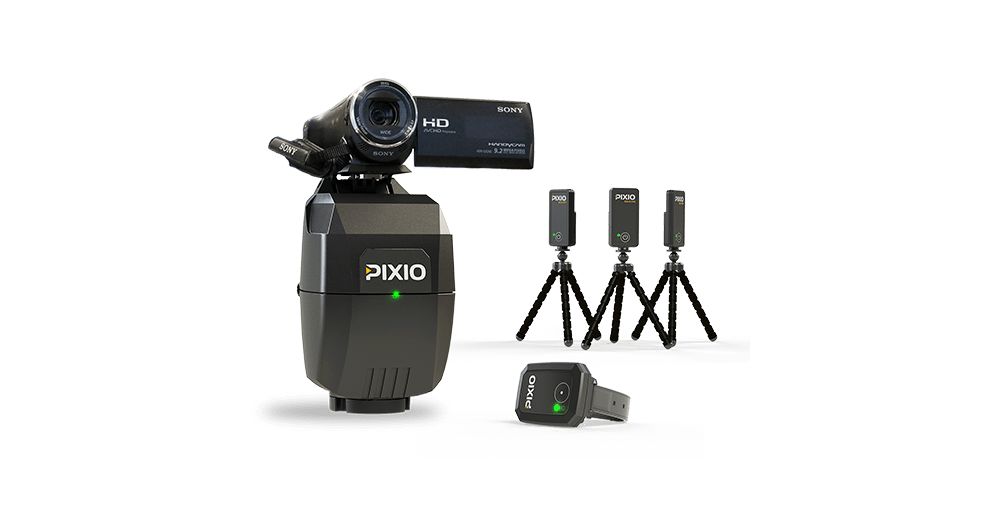
PixioOleksandr Romanko designed a Pan mechanism for a similar type of project (see his week09 Assignment show below). While I didn’t use any of his design files, I was influenced by the panning mechanism he developed.
What are the Implications ?
My final project is intended to be used for sports. The products I mentioned earlier are great but expensive. I aim to propose an open-source alternative which can be developed further by its community of users. Ideally, the base station would reach a stage where it offers both panning and tilting in a smaller package. People would then be able to develop accessories designed for specific activities and environments.
What did You Design ?
I developed a fully enclosed device to be used as a camera panning station. I designed the device’s casing, bearing, belt-drive pulleys, and electronics. I also designed an adjustable motor mount for the stepper motor driving the power train. Finally, I designed the PCBs used within.
What parts and systems were made?
- A power train composed of a belt-drive mechanism driving a thrust bearing.
- A WiFi based Stepper control mechanism
- A device capable of GPS relative positionning.
What processes were used?
CNC Milling - For the acrylic components used in the thrust bearing.
Electronics design - For the design of all electronic boards using KiCAD and a Roland SRM20
3D Printing (FDM) - For the core structure, casing housing the electronic components, motor mount and driven pulley.
How was it evaluated ?
Given the time I had, I decided to focus on making the panning mechanism work. At this stage, I am satisfied with the smoothness and low-noise emission of the mechanism. However, the bearing is not reliable as motion is not uniform throughout because the force resisting the movement of the plate increases in certain areas. Furthermore, the wireless control mechanism established is highly reliable, opening the door for the start of the second spiral of development.
What worked ? What didn’t ?
| WiFi based Control | Thrust Bearing |
| Electronics | Magnetometer |
| Structural Integrity | |
| Silent Smooth motion |
What questions were answered ?
Is the designed thrust bearing mechanism reliable ?
No. Neil also stated during my presentation that I should have gone for an industrial bearing. It was still nice to try though.
Is WiFi the optimal wireless transmission technology for this system ?
Yes. However, I am planning on trying RF transmission and other alternatives in order to get a global idea of the different technologies.
Will GPS tracking be sufficient for precise tracking
No. I already knew this and Neil also pointed it out. Perhaps adding IMU (Accelerometer & Gyroscope) readings to the system, making these the central tracking components, anchored by GPS readings in a dead-reckoning based tracking system. Nevertheless, I’ll stick to GPS for the time being to develop a pointing algorithmic logic.
What materials and components were used? Where did they come from? How much did they cost?
Summarised Table
The above table simply summarises the costs incurred for the completion of this project in its current state. Below are detailed lists of the components used.
| Elements | Description | Total Cost |
|---|---|---|
| Components | Includes all components purchased from external sources. | 97.259€ |
| Electronic & Circuit Components | Includes all electronic components obtained form the lab and used for the production of the project’s circuitry | 15.552€ |
| Consumables & Materials | Includes elements that could be manipulated once, such as 3d printing filaments, milled materials. Proportional to the quantities used. | 90.00€ |
| Total Project Cost | 202.811€ |
1. Components
| Component | Description | Manufacturer | Usage | Cost(unit) | Quantity | Total Cost |
|---|---|---|---|---|---|---|
| BN 880 | GPS & Compass Module | Beitian | Base station position & orientation detection | 34.98€ | 1 | 34.98€ |
| BOB-12009 | Bi-Directional Logic Level Converter | Sparkfun | Logic conversion from BN880 (5V) to EPS32 (3V3) | 3.00€ | 1 | 3.00€ |
| NEMA 14 | 2-Phase Stepper Motor with 200 steps | - | Motion of rotating plate | 14.88€ | 1 | 14.88€ |
| TMC2208 | Ultra-quiet two-phase stepper motor drive chip | Trinamic / Fystec | Silent operation of NEMA14 Motor | 4.95€ | 1 | 4.95€ |
| Bearing Balls* (6mm) | Stainless steel spheres with a diameter of 6mm | Thrust Bearing | 8.99€ (200) | 186 | 8.37€ | |
| M3 Screw Kit* | 280 pieces of M3 screws, nuts and washers | - | Fastening of components | 19.99€ (whole kit) | - | 19.99€ |
| M3 inserts* | 50 units of 5.7mm deep threaded inserts for M3 screws | - | Fastening of commponents into 3d Printed bodies | 9.99€ | 50 | 9.99€ |
| 200mm GT2 belt* | 6mm wide and 200mm long closed loop rubber belt used for belt-drive mechanism | 3Dman | Belt-Drive mechanism | 10.99€ | 1 | 1.099€ |
| Total Costs | 97.259€ |
Legend
* Components bought as part of a kit / bundle
2. Electronic & Circuit Components
as of 09/06/2021 - Prices & Components are subject to change in future iterations
| Component | Usage | Cost (unit) | Quantity | Total Cost |
|---|---|---|---|---|
| Control | ||||
| ESP32-WROOM-32U (16MB) | Central Control Unit / WiFi Network Host | 3.90€ | 1 | 3.90€ |
| Tactile Switch | Reset Button | 0.84€ | 1 | 0.84€ |
| Slide Switch | Programming Mode Switch | 0.84€ | 1 | 0.84€ |
| 10kΩ Resistance | Pull-Up of ESP32 Reset switch | 0.082€ | 1 | 0.082€ |
| Power | ||||
| Power Jack Connector | Connection with external power source - 12V Adapter | 0.81€ | 1 | 0.81€ |
| Diode | Circuit Protection | - | 1 | - |
| Voltage Regulator - 5V/1A [SOT223-4] | Power management for BN880 module | 1.50€ | 1 | 1.50€ |
| Voltage Regulator - 3V3/1A [SOT223-4] | Power management for all components | 0.59€ | 1 | 0.59€ |
| 1uF/50V Capacitor - Unpolarised | Current regulation | 0.23€ | 3 | 0.69€ |
| 47uF Capacitor - Polarised | Current Regulation for Motor Driver | 0.10€ | 1 | 0.10€ |
| Connectors | ||||
| Male Horizontal Conn Header - 10 positions | FTDI Interface | 1.33€ | 6 pos | 0.80€* |
| Female Horizontal Conn Header - 2 Positions | Internal Jumper Cable Connections | - | 6 | - |
| Female Vertical Conn Header - 5 Positions | Connectin with BN880, logic converter & TMC2208 | 0.71 | 38 pos | 5.4€* |
| Total Costs | 15.552€ |
Legend
* Price calculated from number of positions used
3. Consumables & Materials
| Consumable | Description | Manufacturer | Usage | Cost (units) | Quantity | Total Cost |
|---|---|---|---|---|---|---|
| XT-CF20 Filament | Copolyester filament based on carbon fiber binding material, Composed of 20% carbon fibers. (750g / 1.25mm diameter) | ColorFabb | 3D Printing of core structure and bottom container | 0.67€/g - 49.95€/750g | 750g | 49.95€ |
| 10mm Acrylic Sheet | - | - | Thrust Bearing Components | 87.65€ (60mmx100mm) | 1x25mmx68mm | 40.00€ |
| Copper PCB | - | - | Electronic Circuits | |||
| Total Costs | 90€5 |