Molding and Casting
This is a new technique ! This week, we will learn about molding and casting. I think it will be so fun. I read about the history of molding and casting, it’s very interesting to know that mold making is a 6000-year old skill !! Woow this means that our prehistoric ancestors were working in the same technique that we can pass on to our children and grandchildren. How cool is that? Also, In the third millennium BC, casting methods were advanced by Egyptians.
It’s really interesting to learn and read about Molding and Casting !
Let’s Start !
First, I will explain the difference between molding and casting.
Molding
What is molding ?
Molding is a manufacturing process that involves shaping a liquid or malleable raw material by using a fixed frame.
Mold is the negative shape. It’s the starting point of the process. We can either design and fabricate an object from scratch or use an existing object to make the copy.
Molding Materials :
There are a wide range of molding materials including:
1. Rigid materials : Some molds are made with more rigid materials such as:
2. Flexible materials: Most mold making materials are made from natural or manmade rubber. This kind of material has the ability to reproduce extraordinary details. The flexible material examples are:
The Basic Types of Mold :
Casting
What is Casting ?
Casting is a manufacturing process that involves pouring a liquid material into rubber molds which contains desired shape then allows the liquid mix to solidify. The solidified part is called casting.
The cast is in a positive shape, complimentary to the mold and it’s the final result of the process.
Cast Material :
The materials might be :
And many other options !
Molding and Casting In Our Life !
We are using molding and casting in many different functions in our life such as :
Group Assignment:
As a group of students , we are supposed to review the safety data sheets for each of our molding and casting materials, then make and compare test casts with each of them.
You can check the group assignment in TalentS LAB page : Molding and Casting Group Assignment
Now, let’s talk deeply about the materials that we have in our lab and It would be useful to read and understand the safety data sheet for each type of material to know more how to use it in the molding and casting process.
In TalentS lab, we have different kinds of materials for molding and casting. I will talk about one material in each category.
1. Rigid mold materials :
We usually use machinable wax as a rigid mold material to mill the model.
What is machinable wax ?
Machinable wax is an extremely hard wax that is a mixture of wax and plastic. It has a higher melting temperature than most other waxes. Machinable wax can be machined, cut, or shaped using standard metalworking or woodworking equipment such as CNC milling machines. This kind of material is environmentally friendly and it can be recycled. It also has been formulated to deliver exceptional machining properties including high resolution detail.
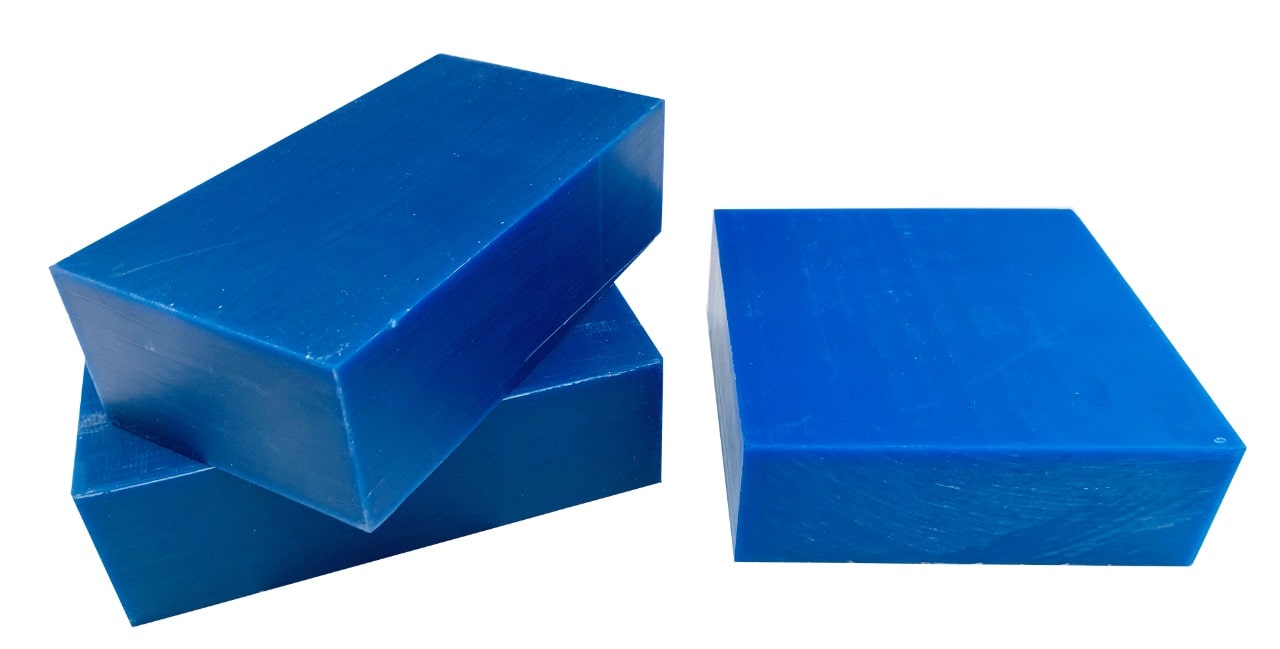
Blue Machinable Wax Specifications :
Safety Data Sheet :
The Safety Data Sheet is available here : Machinable wax safety data sheet.
2. Flexible mold materials :

It consists of two parts ( A and B ) which are mixed together to get flexible, high-strength and polyurethane mold rubbers. It is excellent for casting concrete and various resins, such as epoxy, polyester, polyurethane and acrylic.
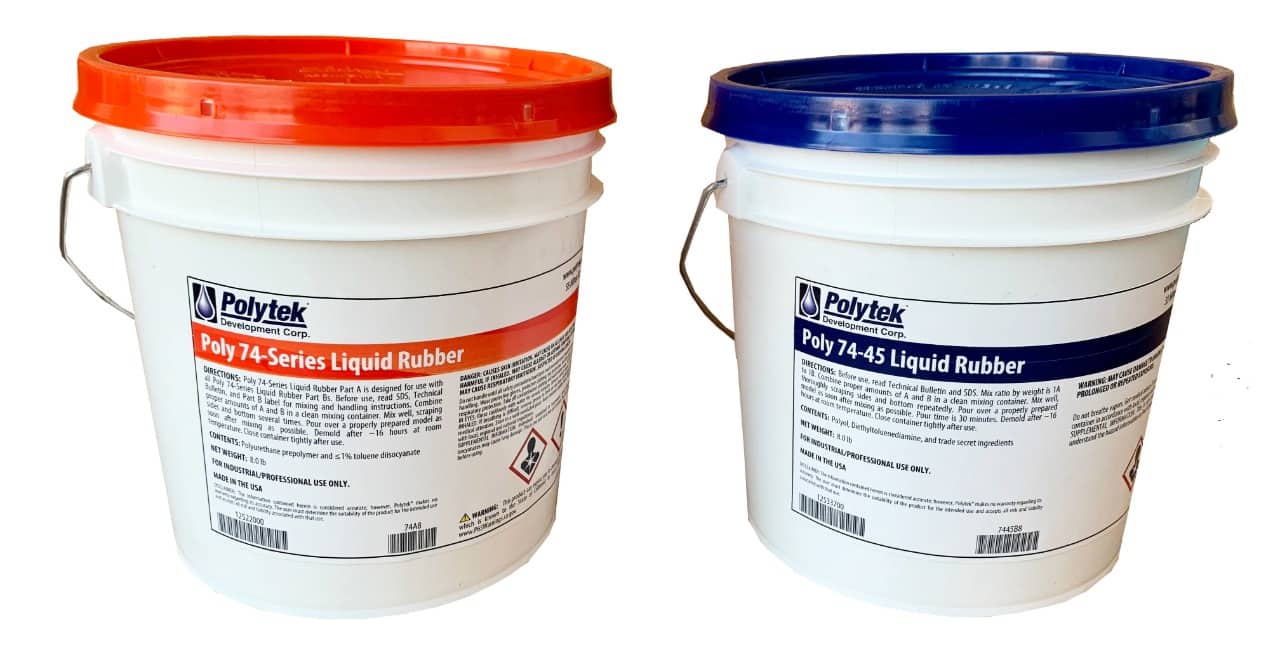
Polytek Specifications :
Technical Sheet :
You can check the technical sheet from this link : Poly 74-Series Technical Sheet.
Safety Data Sheet :
The Safety Data Sheet is available here : Poly 74-Series Liquid Rubber Part A Poly 75-Series Liquid Rubber Part A - Safety Data Sheet.
3. Rigid Cast materials:

Smooth cast material from Smooth-ON:
Smooth cast material is a series of liquid plastics are urethane resins that were developed specifically for adding color pigments and fillers to achieve true color representation or filler effect. It consists of two parts (Part A and Part B) which are mixed together with the same ratio.

Smooth Cast 320 Specifications :
Smooth Cast Technical Data Sheet :
You can find the technical data sheet here : Smooth-Cast 320 Technical Data Sheet
Smooth Cast Safety Data Sheet :
You can check the safety data sheet from this link : Smooth-Cast 320 Safety Data Sheet
Smooth Cast Material Types :
To look at different types of smooth-on materials open this link : Smooth-On Materials.
Individual Assignment :
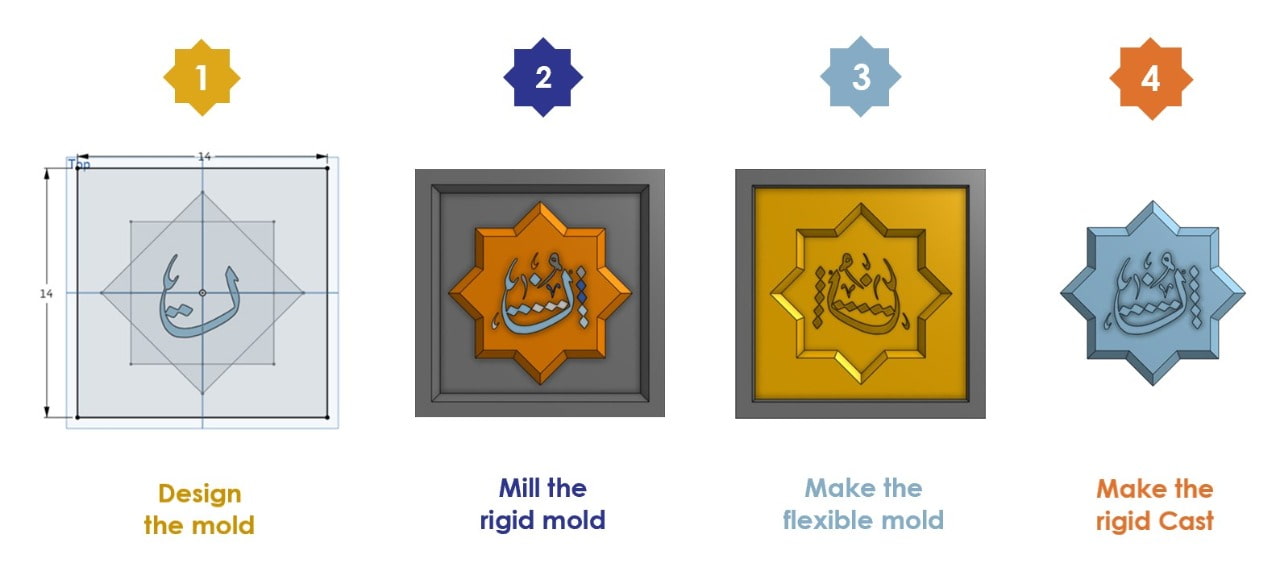
In this assignment, we were asked to design a mold around the stock and tooling that we will be using, mill it (rough cut + (at least) three-axis finish cut), and use it to cast parts.
To start the assignment, I will make the following process :
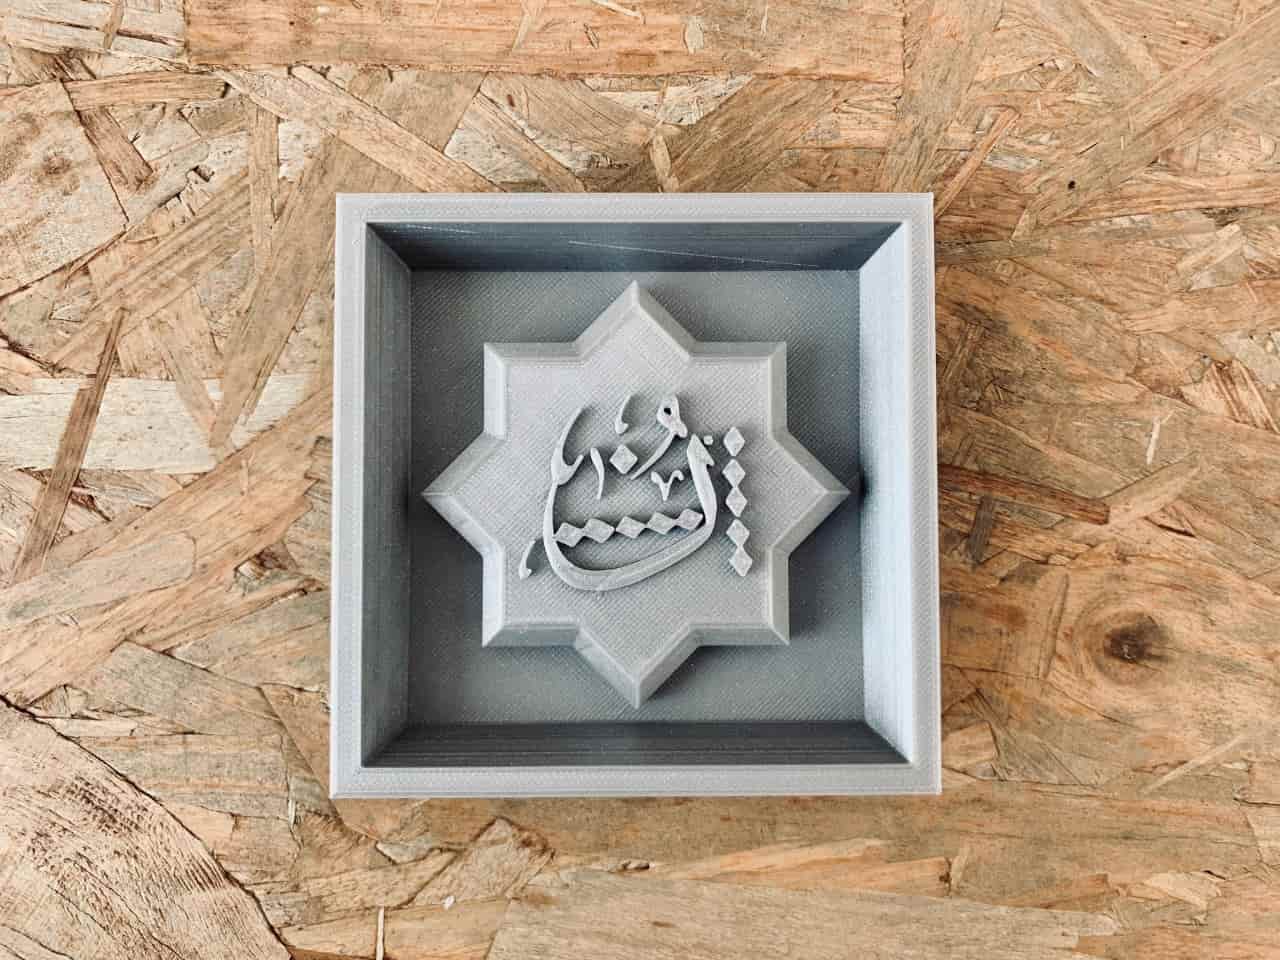
One Face Mold :
Design :
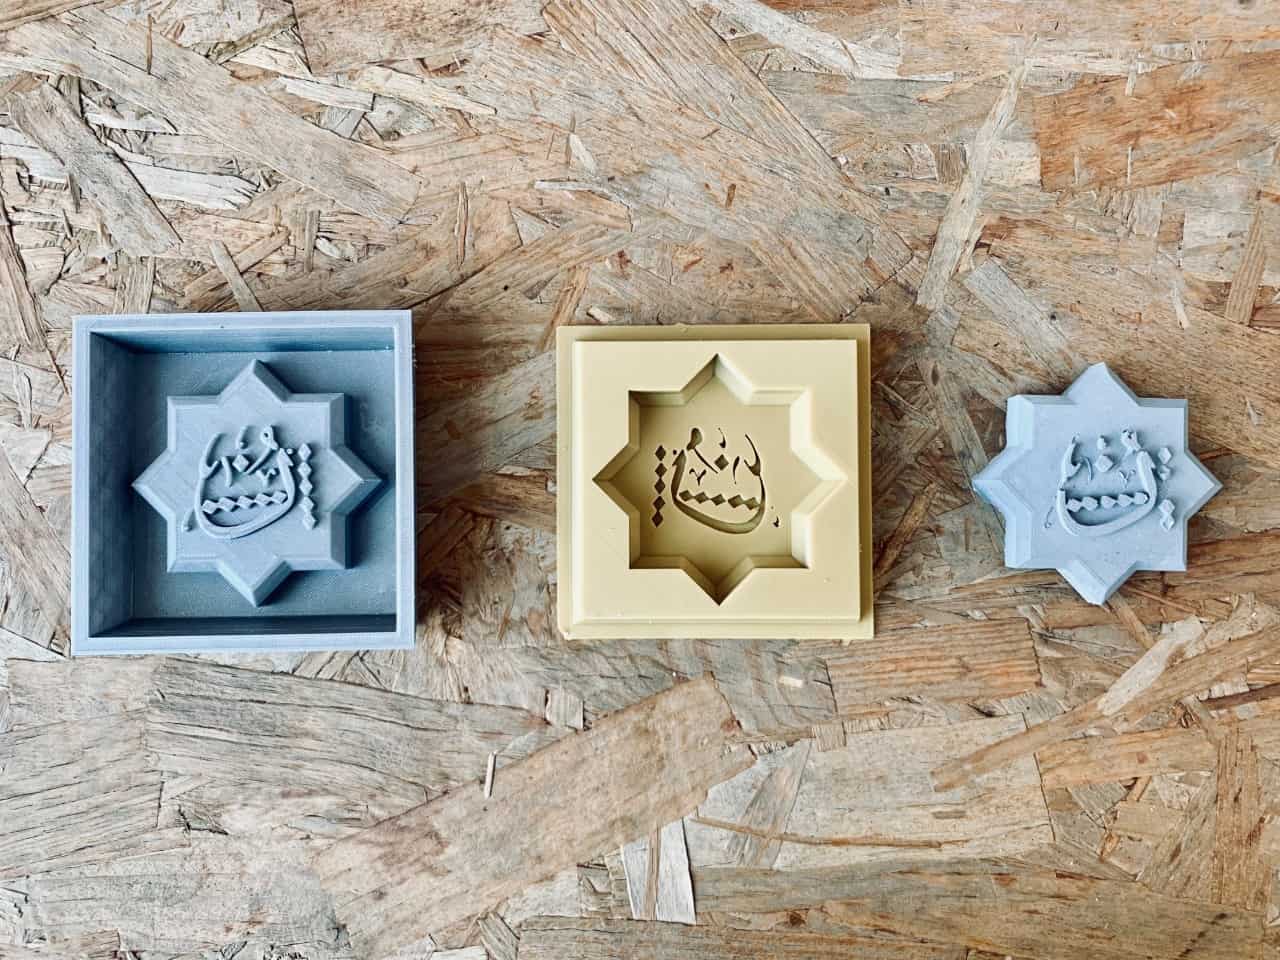
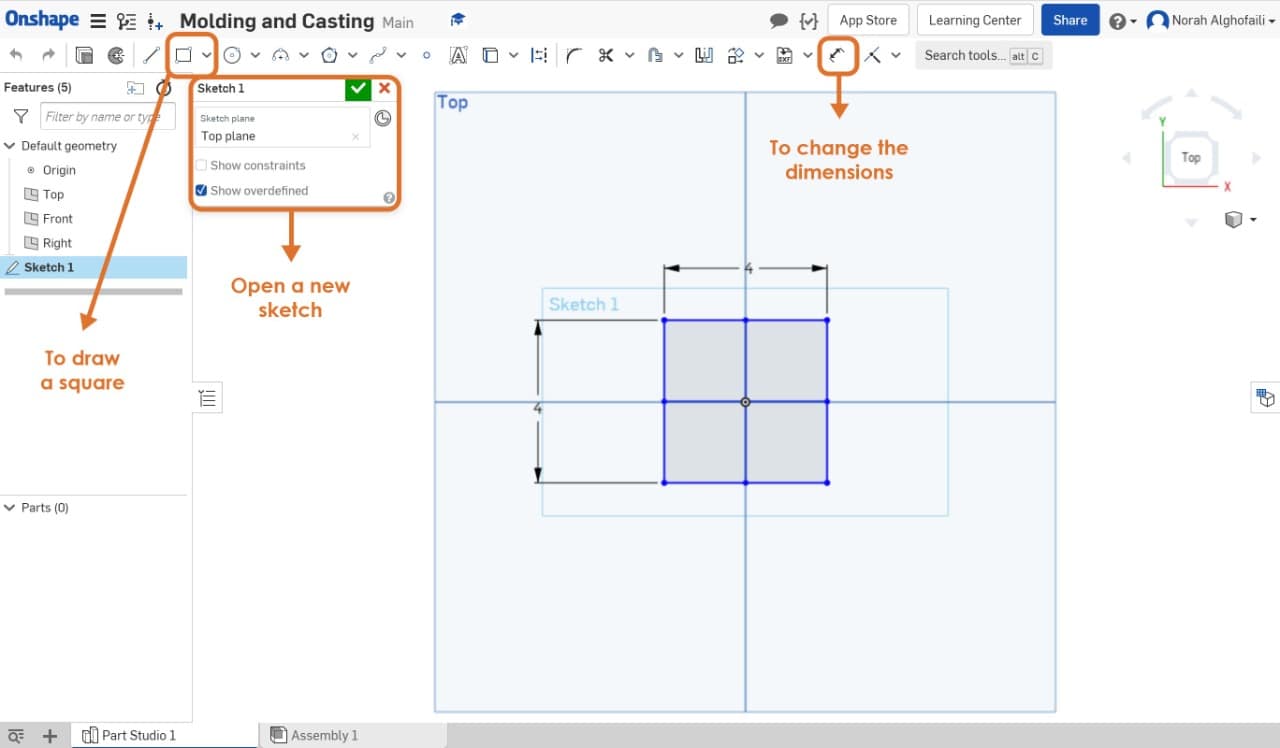
First, I decided to make a one face mold. I’m going to design my Arabic calligraphy letter which is called ( Noon , ن ) by using Onshape software.
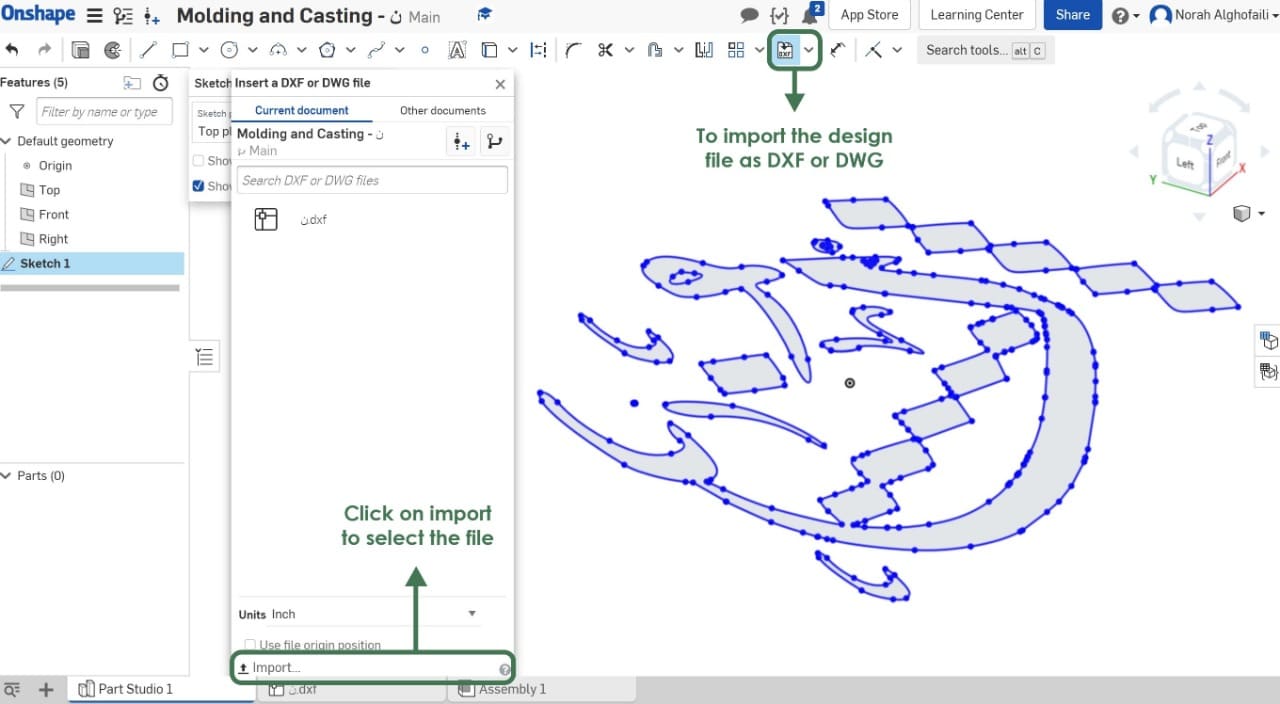
I opened Inkscape software then Imported the photo. After that I opend path then chose trace bitmap to make it vector. I saved the file as DXF or DWG format.
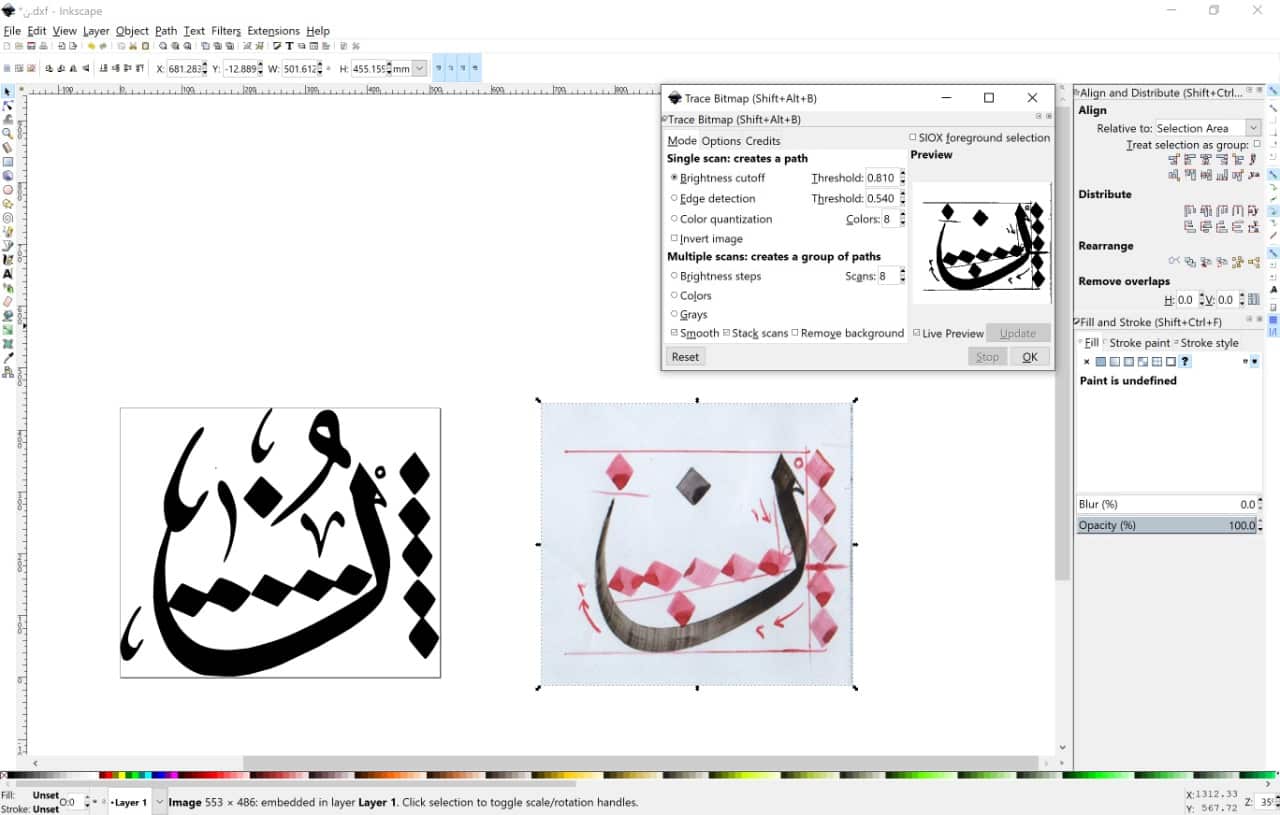
After that, I opened Onshape software then I Imported the DXF file.
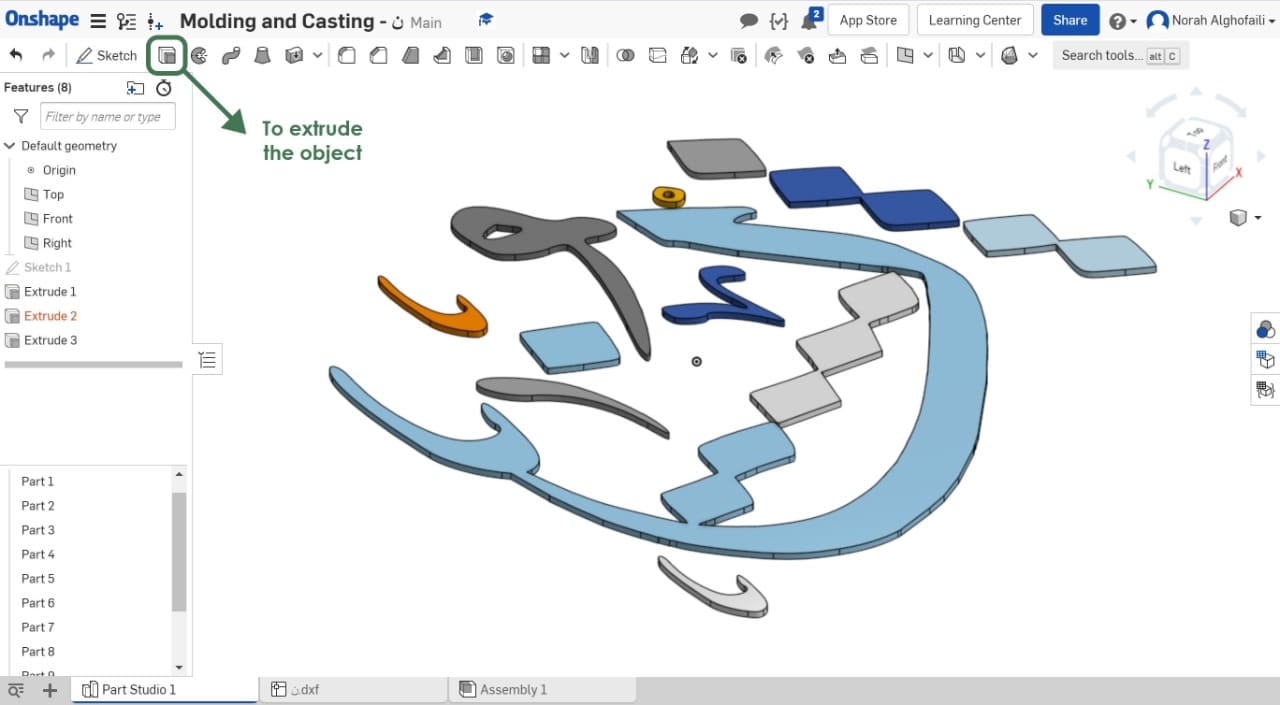
Then, I selected the object and extruded it to 0.5 cm.
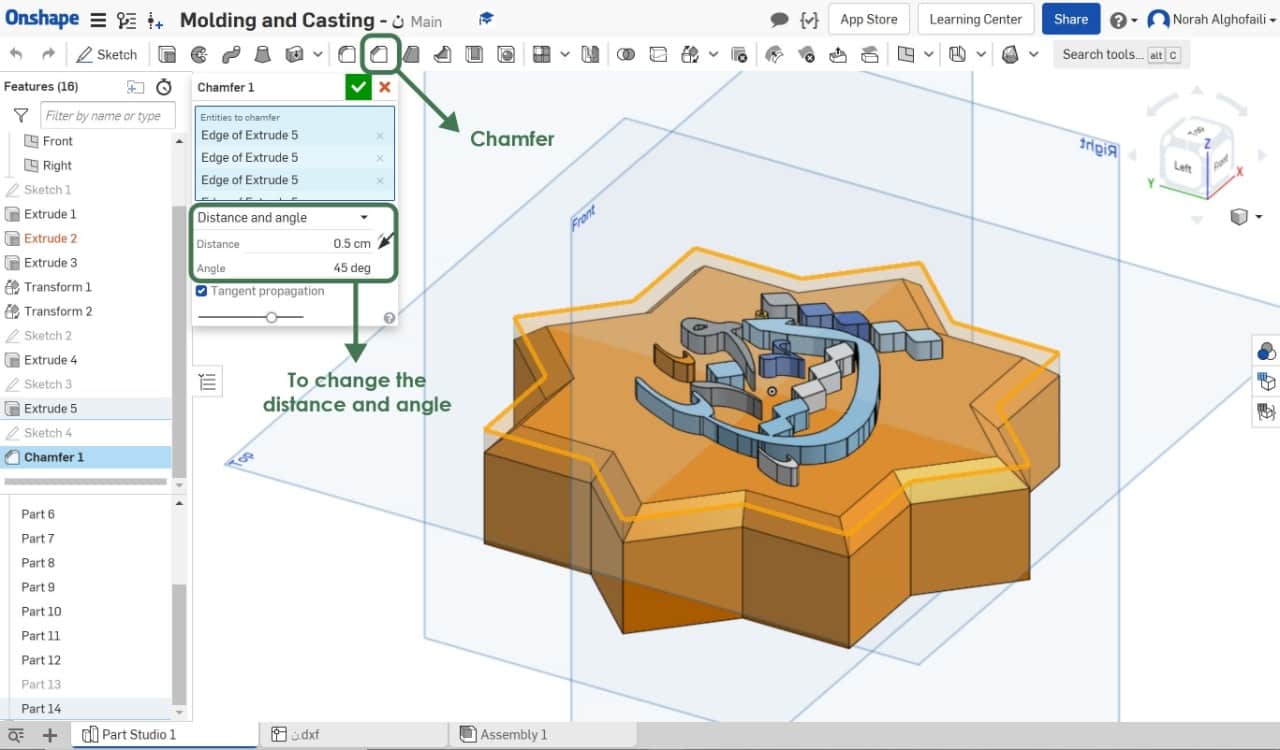
I drew the outline shape and extruded it to 2.5 cm. Then, I used a chamfer feature to make the edges or corner beveled.
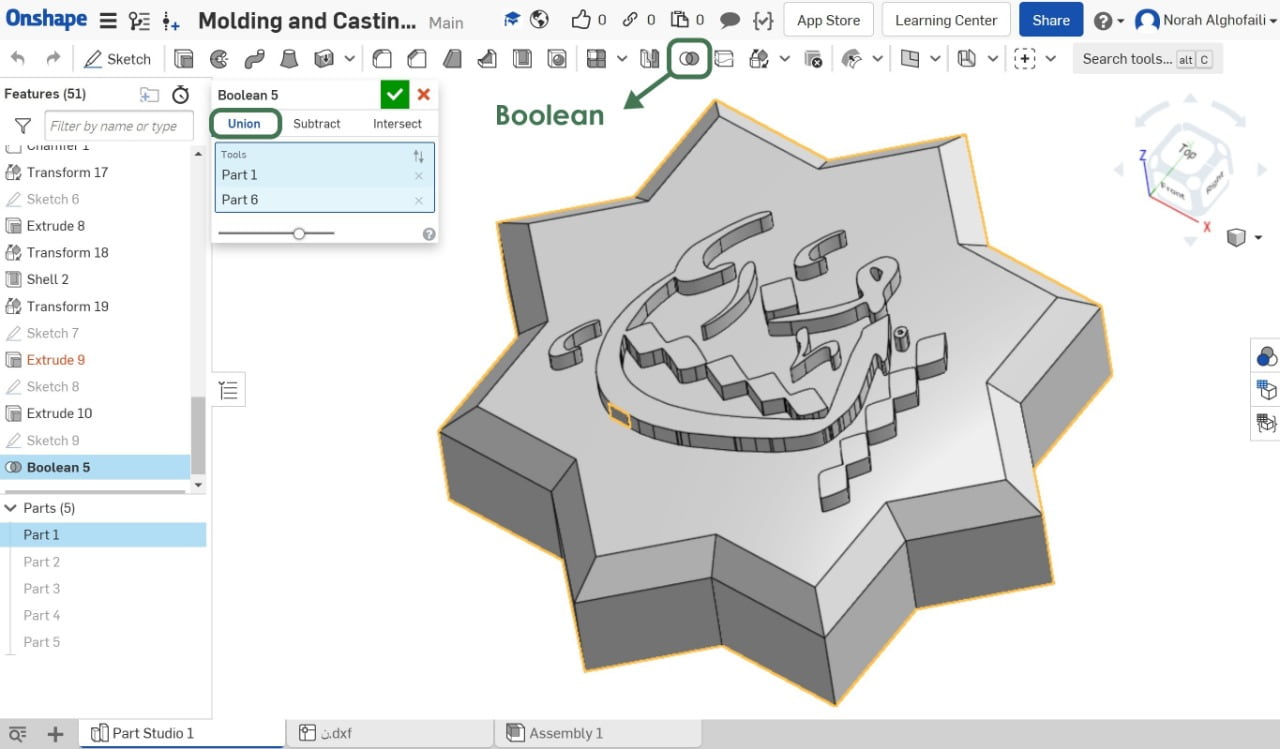
After that, I combined the objects with each other by using Boolean then Union. After this step, I selected the object then clicked the right click and chose export to save it as STL.
Fabrication :
I decided to print the previous design by using Prusa 3D printer.
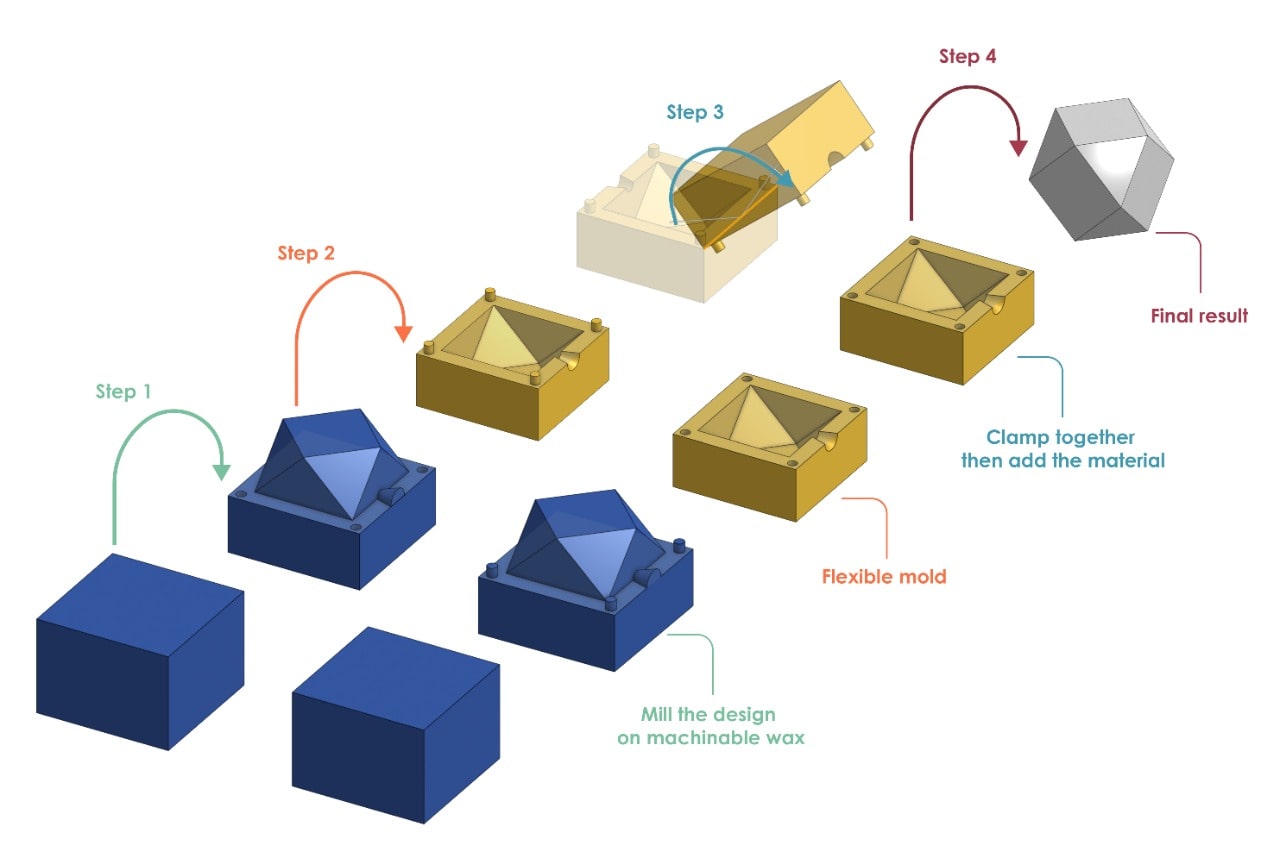
Making The Flexible Mold :
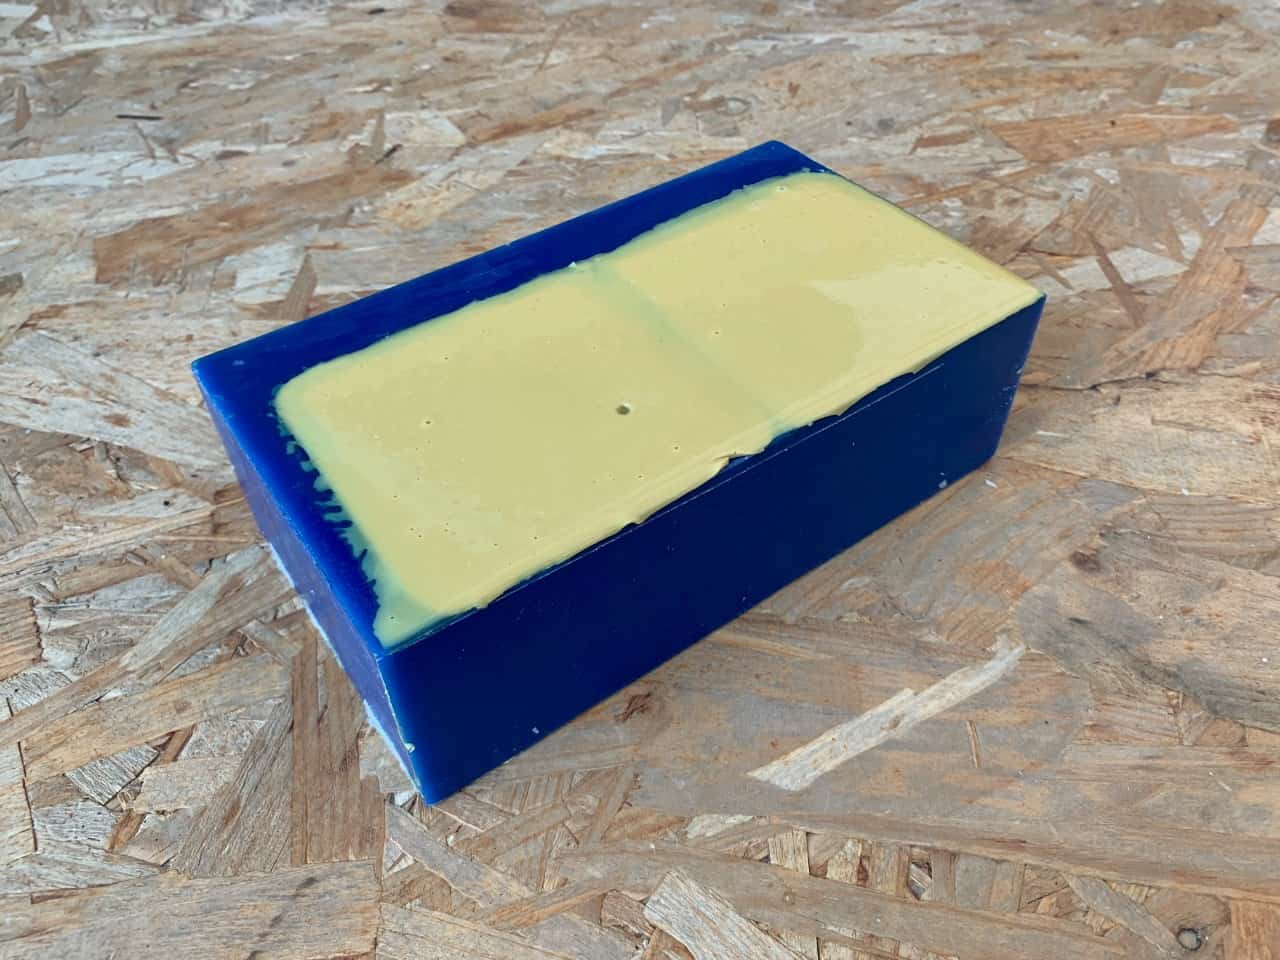
I put the polytec material A and B in 2 pots with the same ratio then mixed them together around 10 minutes. After that, I poured them on the model and left it to dry for 16 hours.
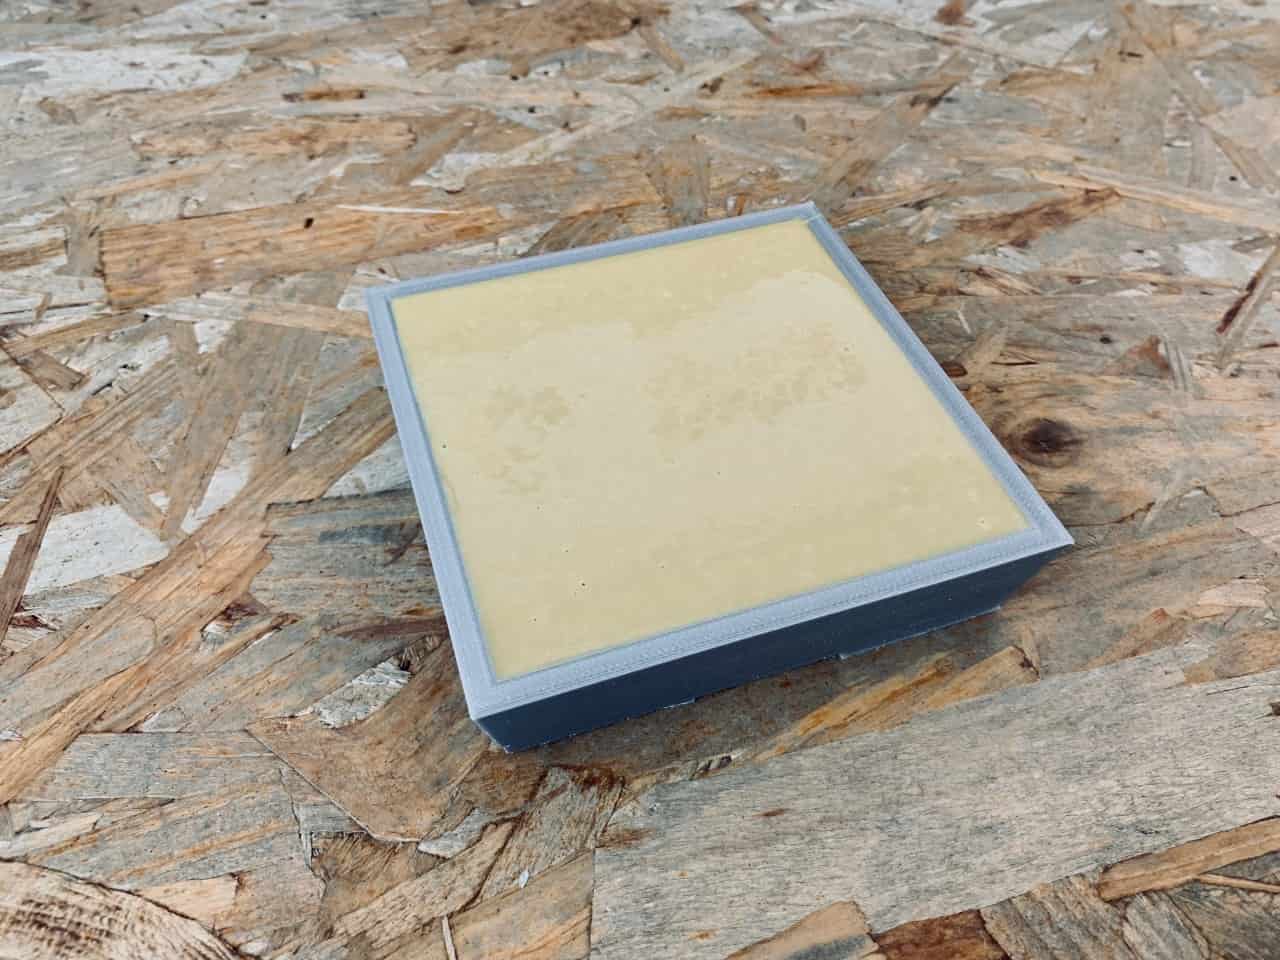
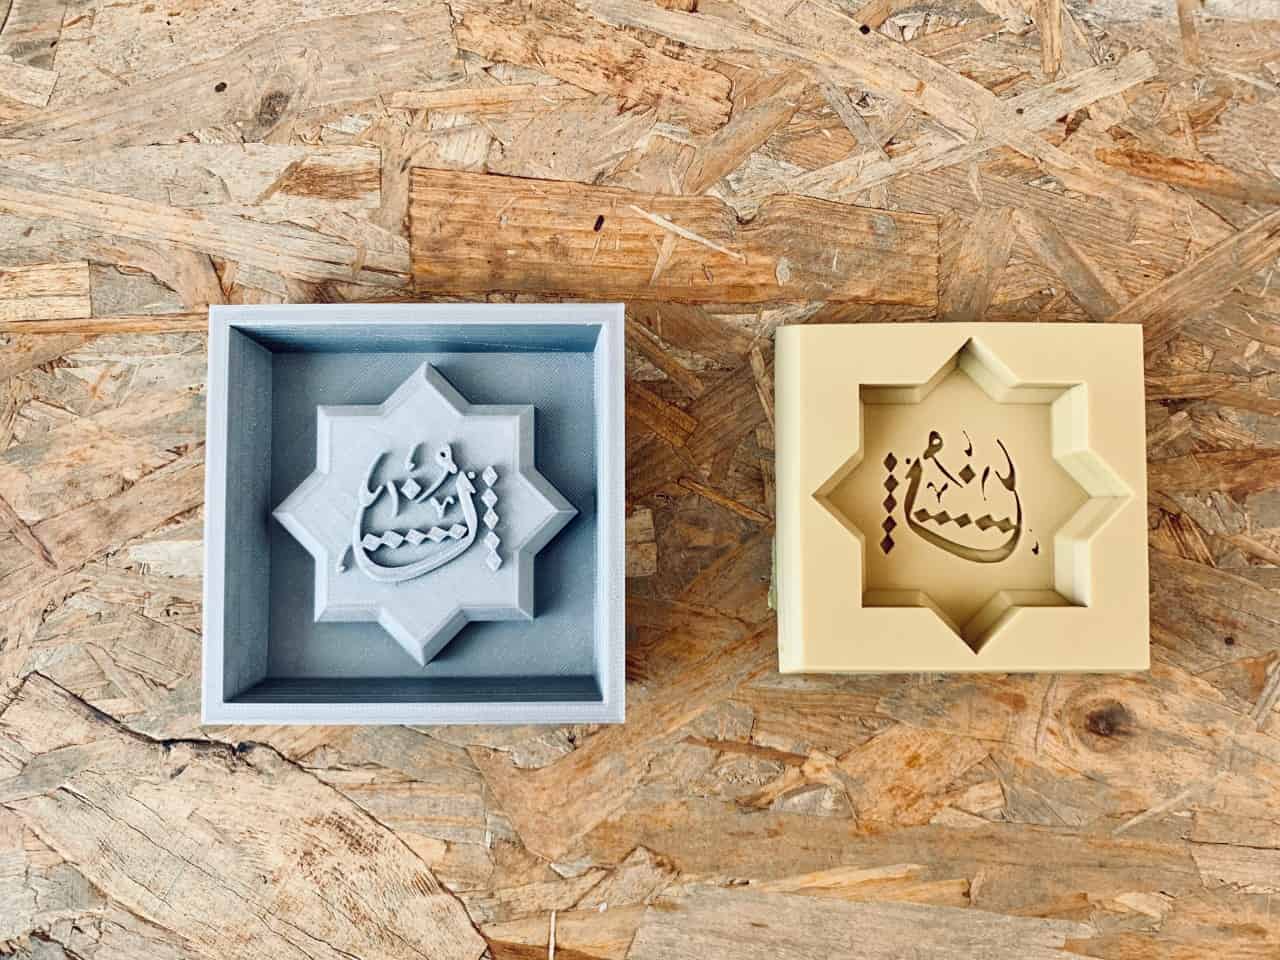
Making The Cast :
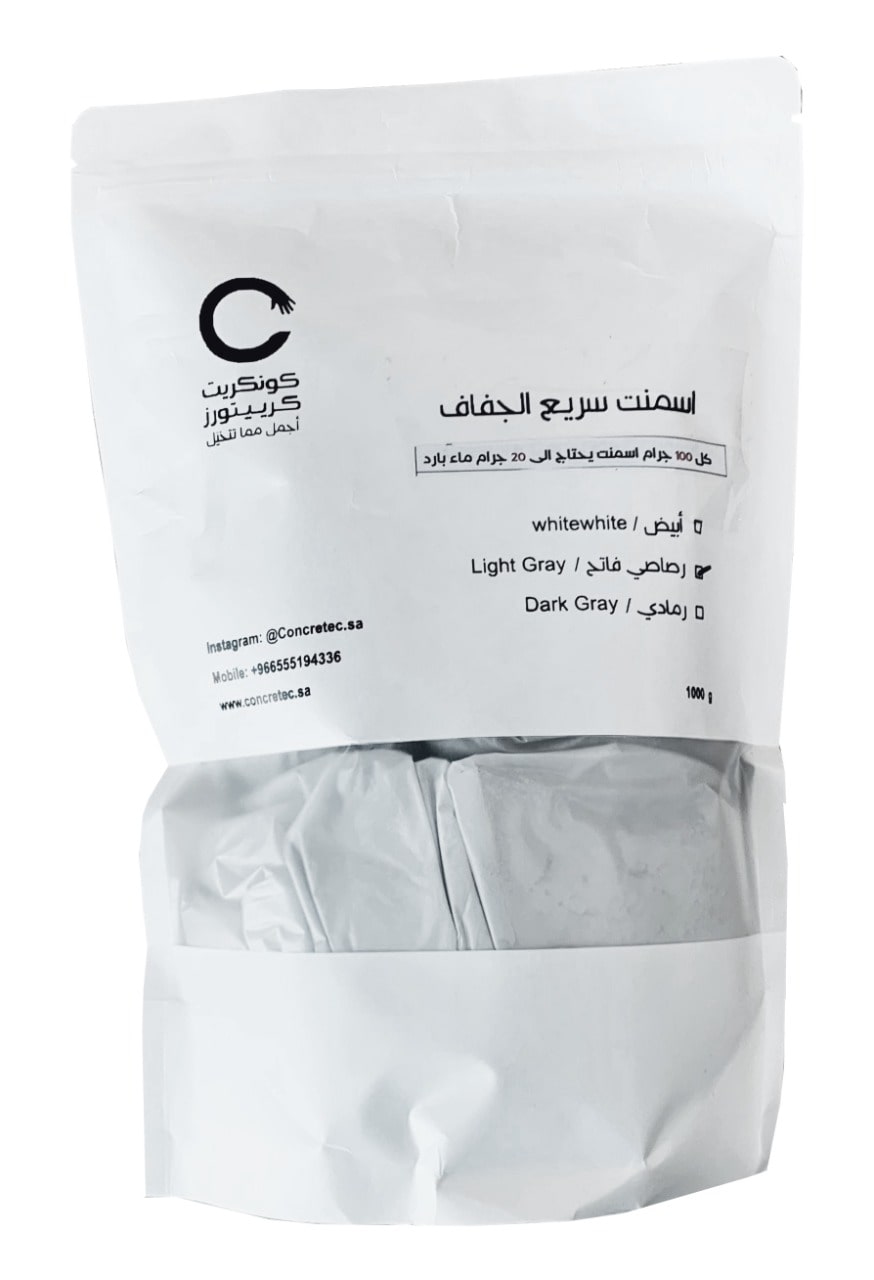
I decided to use light gray concrete material to make the cast. I mixed 150g concrete with 30g cold water then I poured the mixture on the silicone mold and left it to dry for 1 hour.
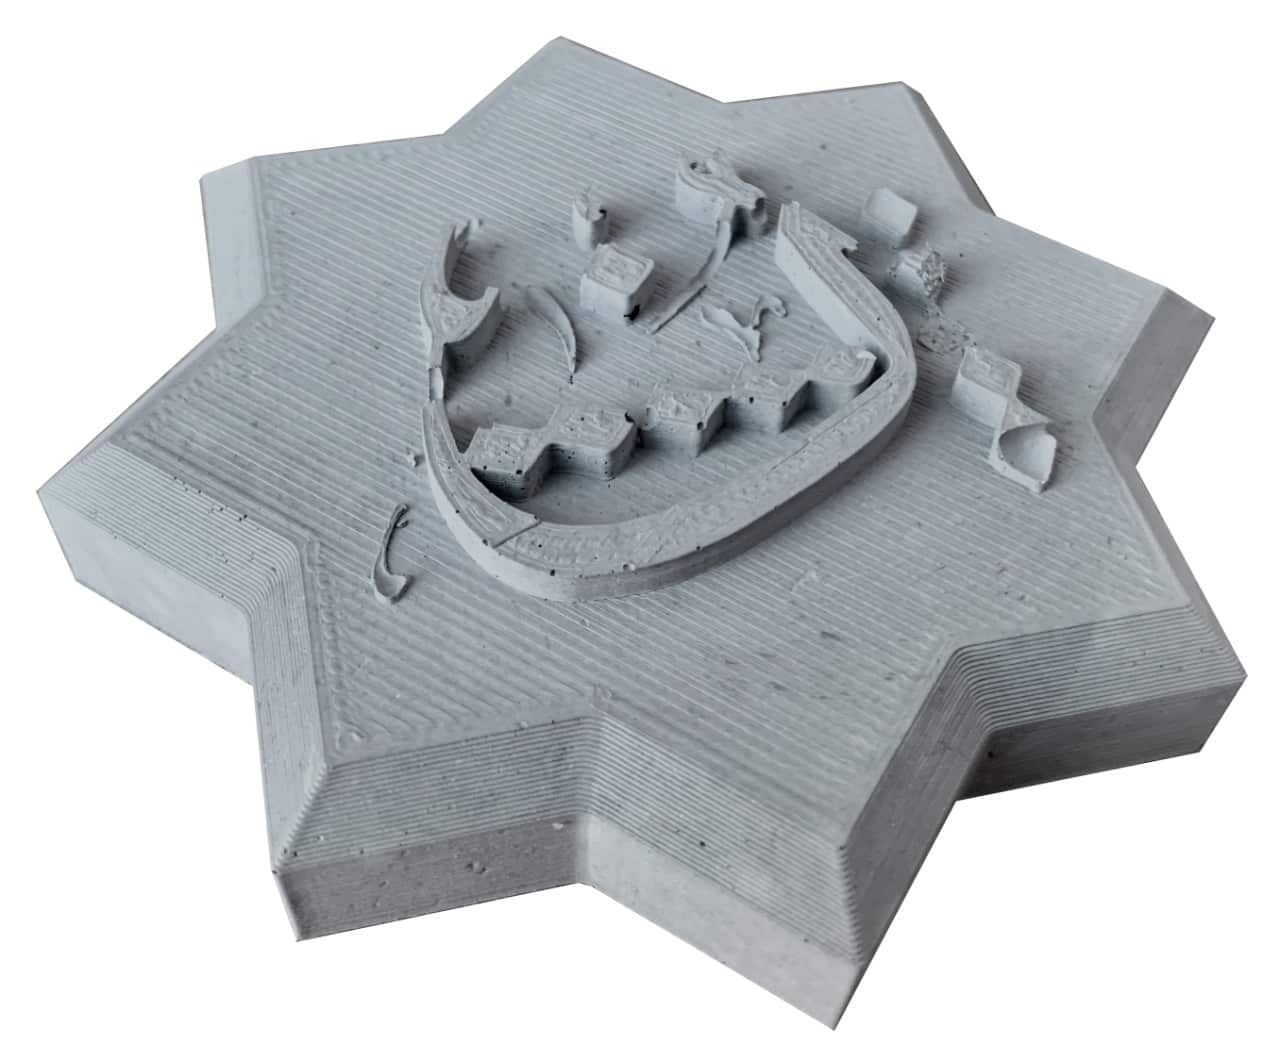
The Final Result :
Enjoy watching the video !
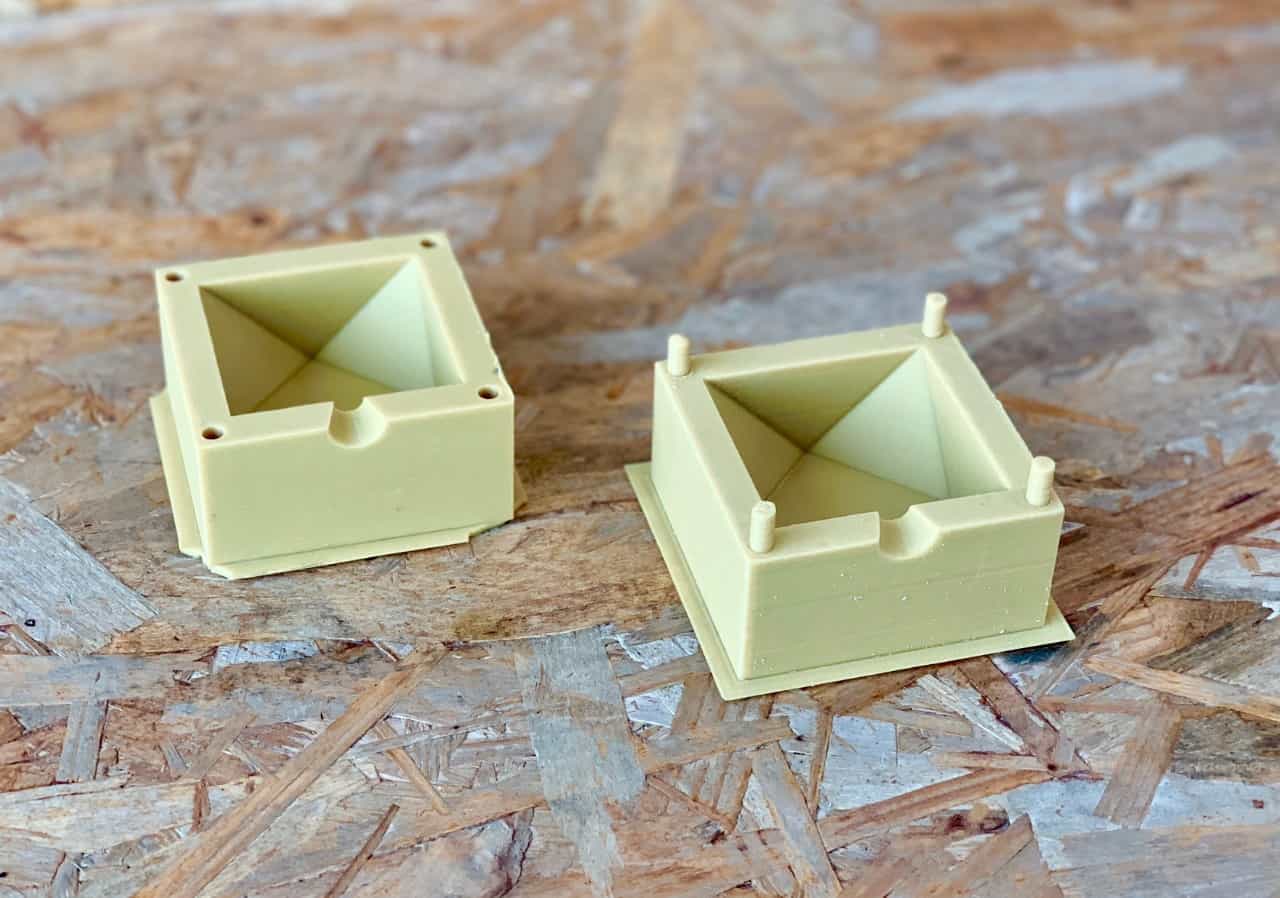
Two Faces Mold :
Design :
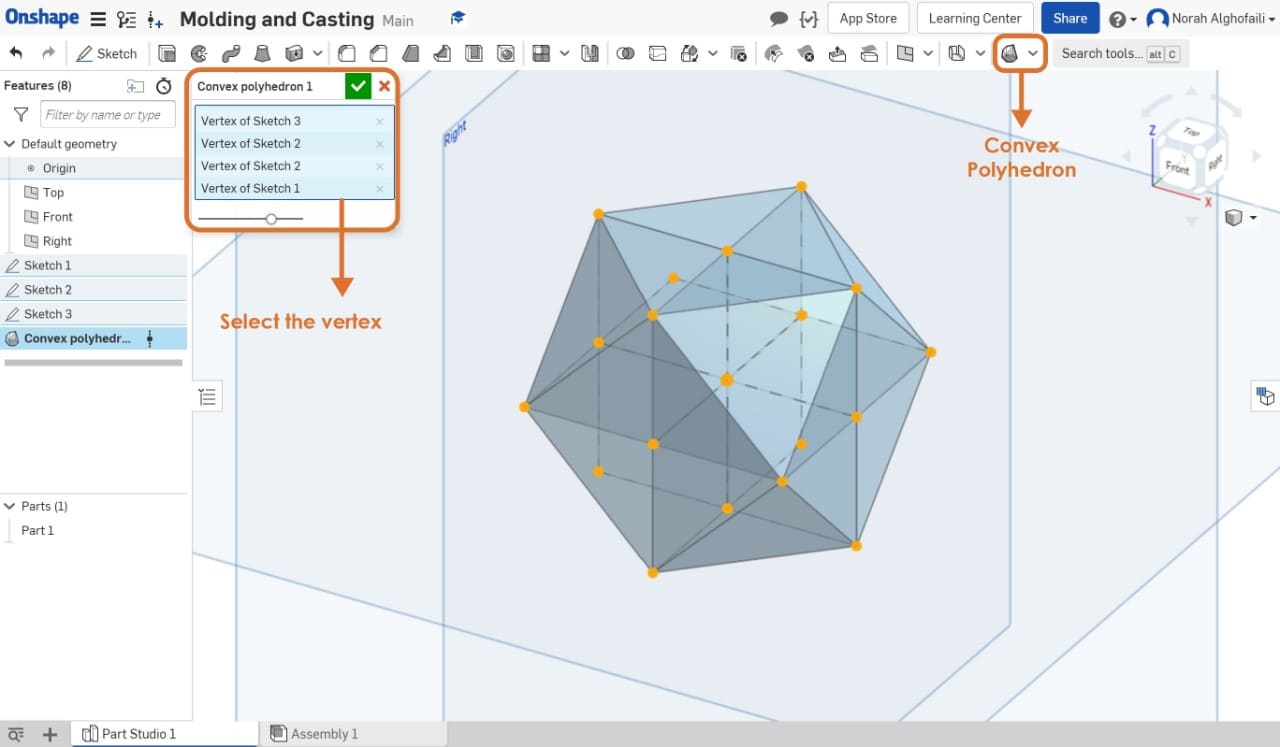
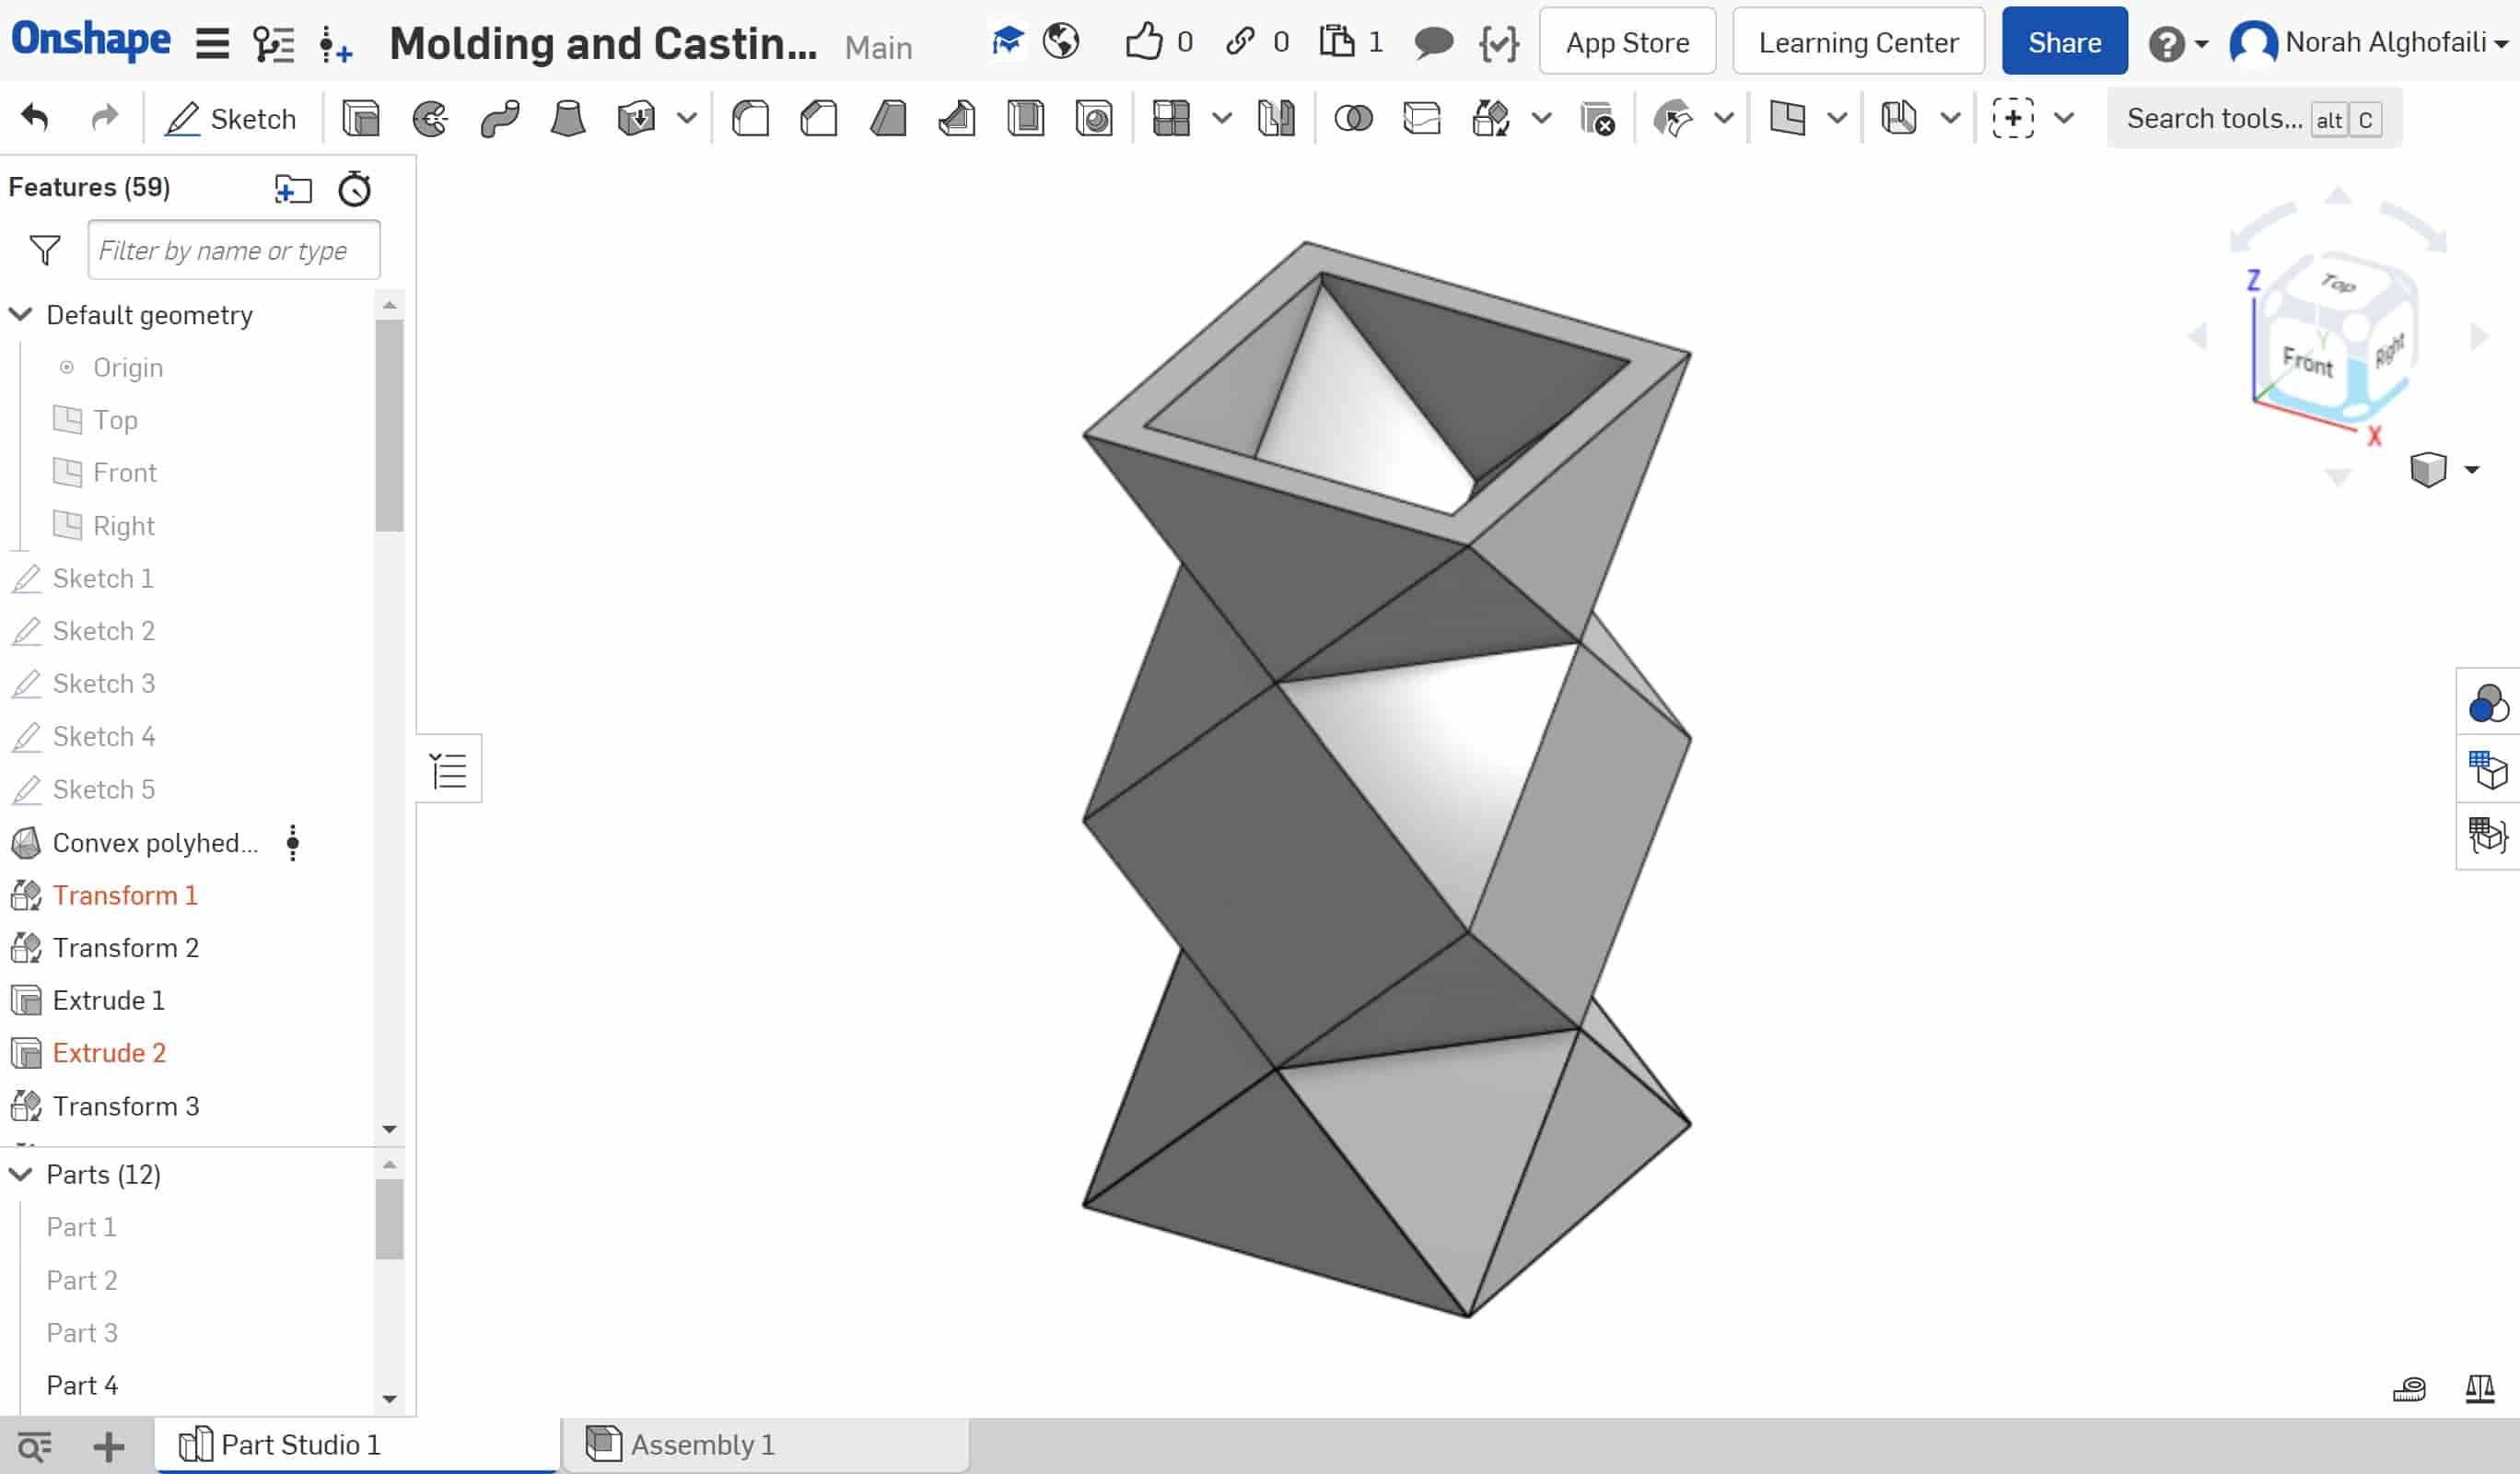
I decided to make a candle mold that consists of two parts, the top and bottom, which I will close them together and get a geomitric object that is inspired from Polygon Art Picasso Style.

To design the object I opened a new sketch then selected the top plane and drew a square shape. Then, I copied this shape and pasted it one time in the front plan and the other in the right plan with the same center point.
I selected all the shapes and chose to Convex polyhedron feature.
After that I subtracted the main object into half by making a cube on the bottom and clicked on boolean then subtract. The next step, I selected the cube and the object.
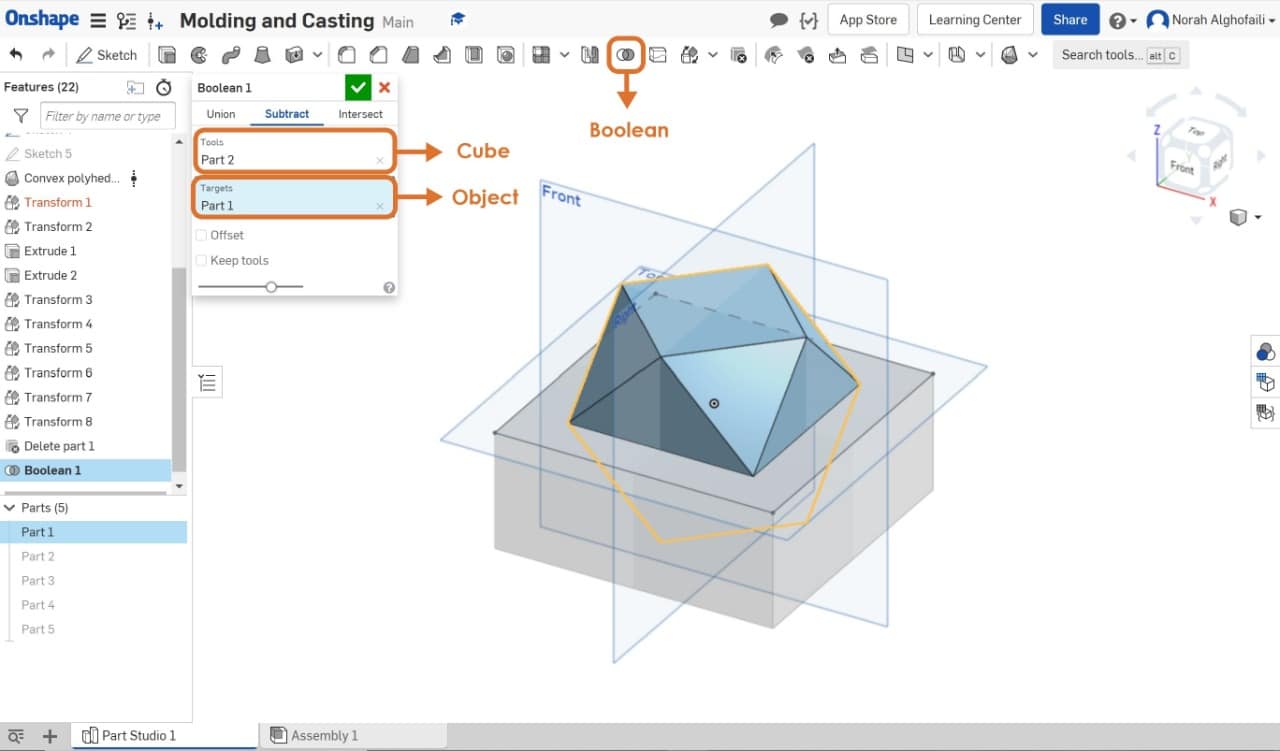
I drew a box as a base then extruded it. After that I made four joints in each corner with 0.5 cm circle diameter then extrude it with thickness 1 cm.
The last step I put the main objects on the top of the base Then I selected all the objects and exporedt them as STL file.
After finishing the design part, I worked on the following steps :
CNC Milling Machine :
In this assignment, I’m going to use a Carbide 3D milling machine. Let’s learn about it !
What is Nomad 883 Pro Carbide 3D Machine ?
The Nomad 883 Pro is designed to make machining something that normal people can do.
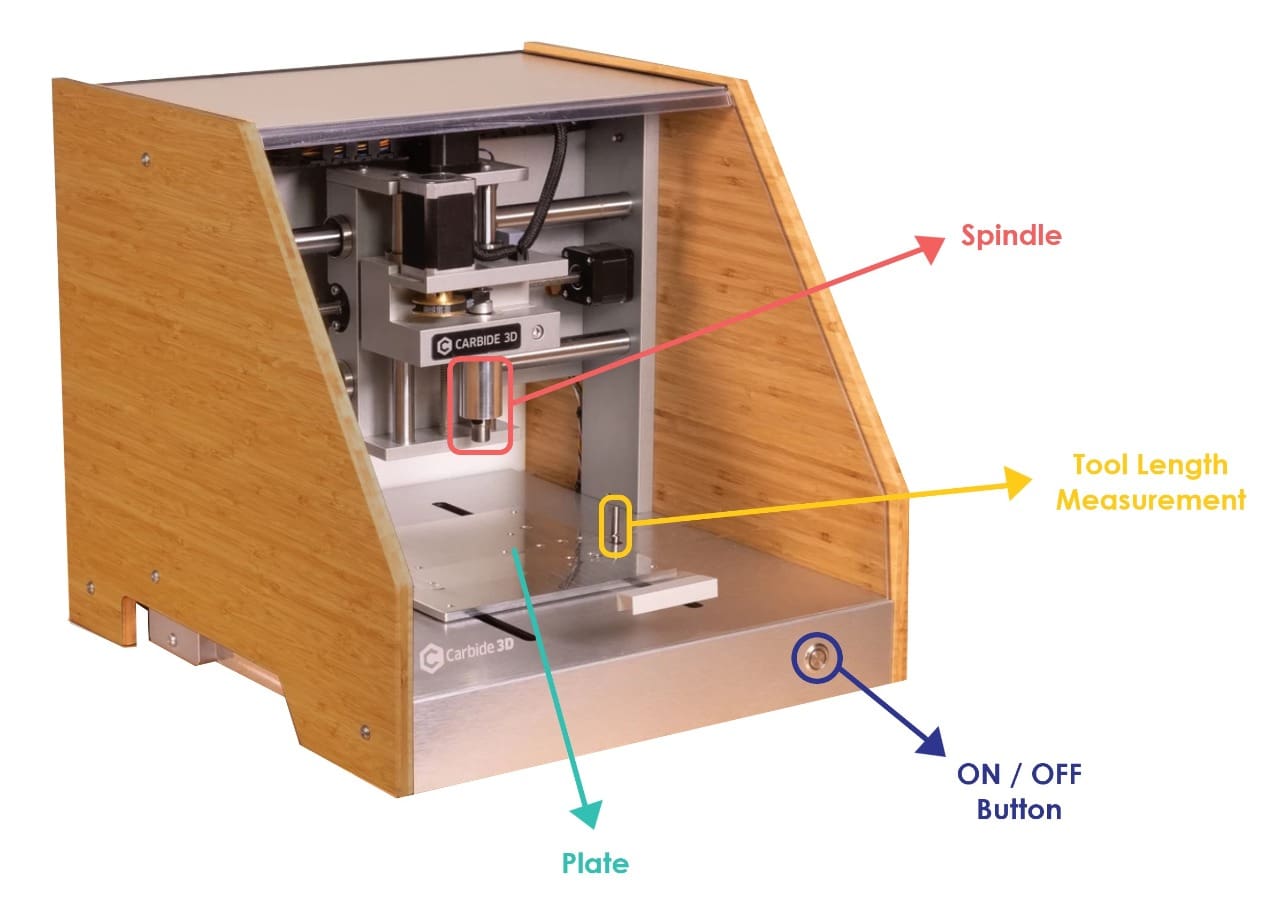
Nomad 883 Pro Specifications :
Items Included :
Cuttable Material :
The Nomad 883 Pro comes with all the software we need to make parts :
To know more about the machine check this website : Carbide3d.
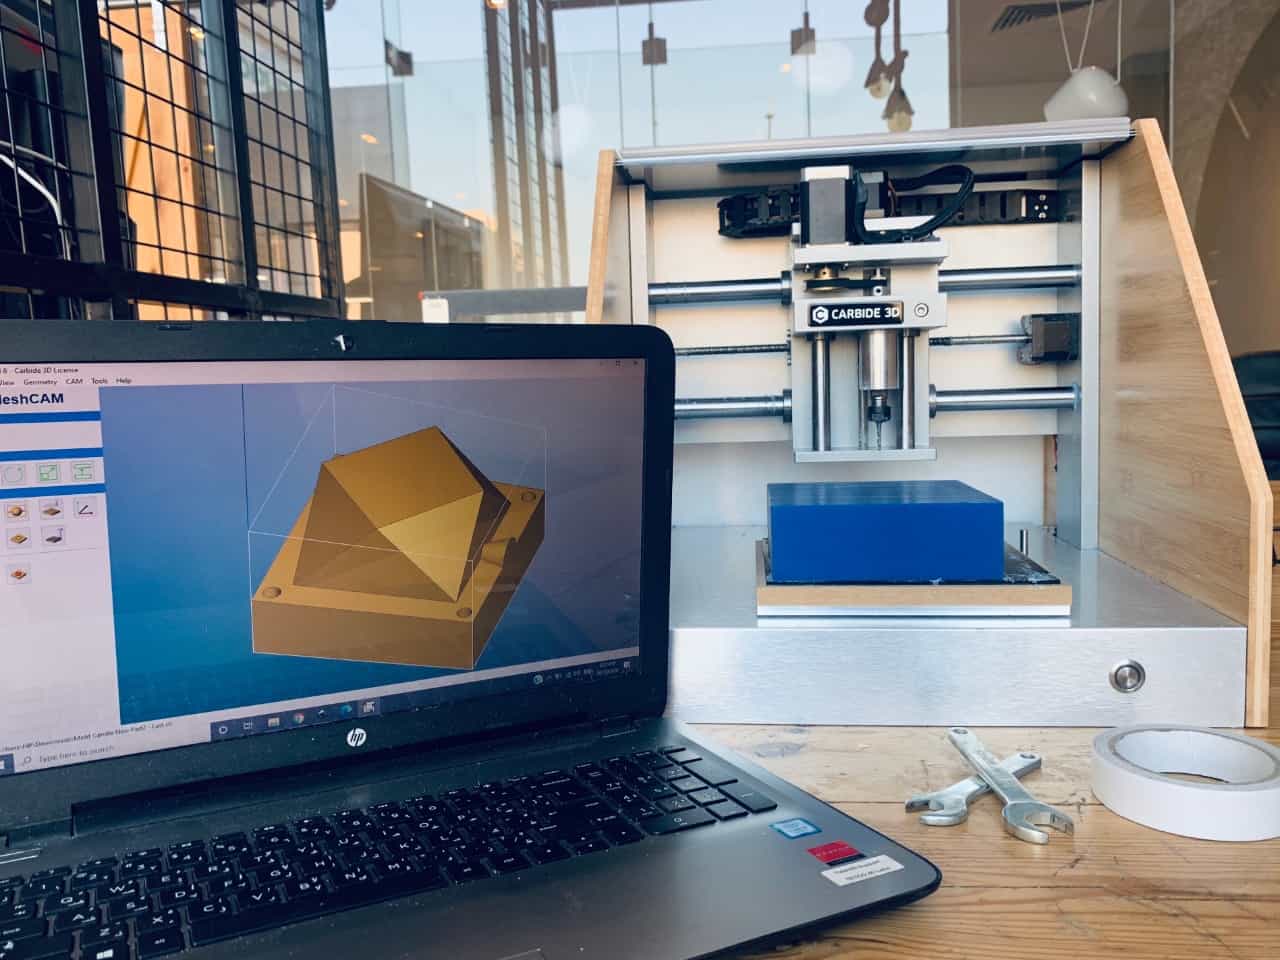
MeshCAM Software
What is MeshCAM Software ?
It is an easy to use 3D CAM software to help machine the existing CAD files.
MeshCAM Software Interface :
The MeshCAM user interface is pretty sparse. Almost all of the operations and commands are driven from a smattering of icons positioned on the left-hand side, which the user works through sequentially.
The first step is to import the model as STL file. MeshCAM only works with STL data.
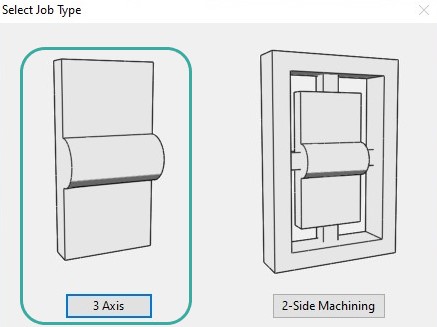
The system asked about the type of job that I have got planned. MeshCAM supports 3-axis cutting, 4-axis if we have a rotary axis on our machine, and two-sided cutting. I chose 3-axis cutting.
I faced an issue after importing the model. The scale of the model was so small. I searched about this problem and I found that MeshCAM offers built-in tools to assist with scaling a part if we get a mix-up with units.
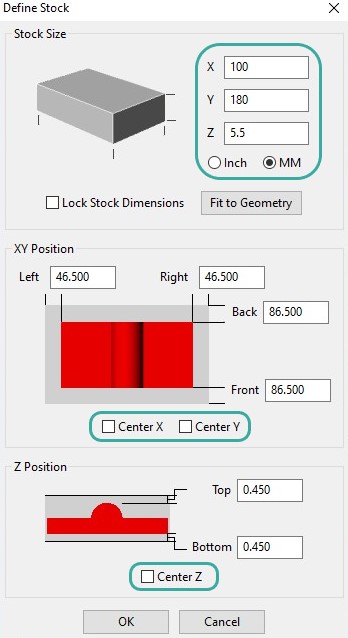
I defined the stock dimensions for the model. I measured the modeling wax material.
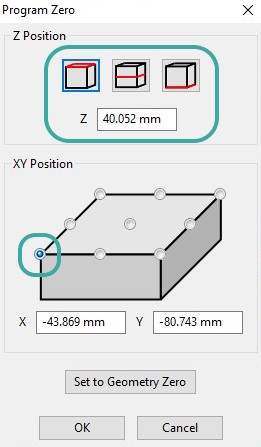
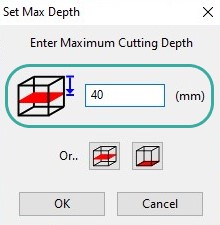
I set the workpiece zero and configure depths on the material. So that does not make the end up driving the cutter into the machine.
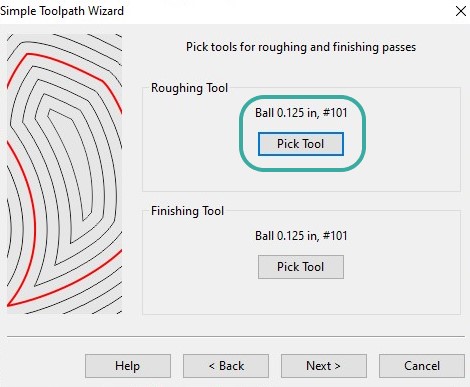
The next step is to define the toolpaths (speed/ feed and cutter dimensions) MeshCAM includes manual tools, as well as an Automatic Toolpaths Wizard, which work nicely for quick jobs.
I chose the bit 0.125 inches.
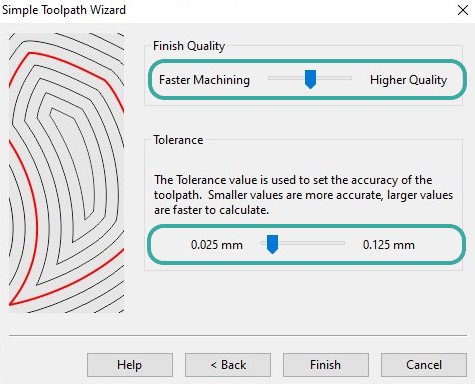
I identified the finish quality and tolerance. The tolerance is a value that sets the accuracy of the toolpath. Smaller values are more accurate, larger values are faster to calculate.
Then, I generated the toolpath. The MeshCAM includes simulation tools to give us a feel for how our job will run and how long it will take.
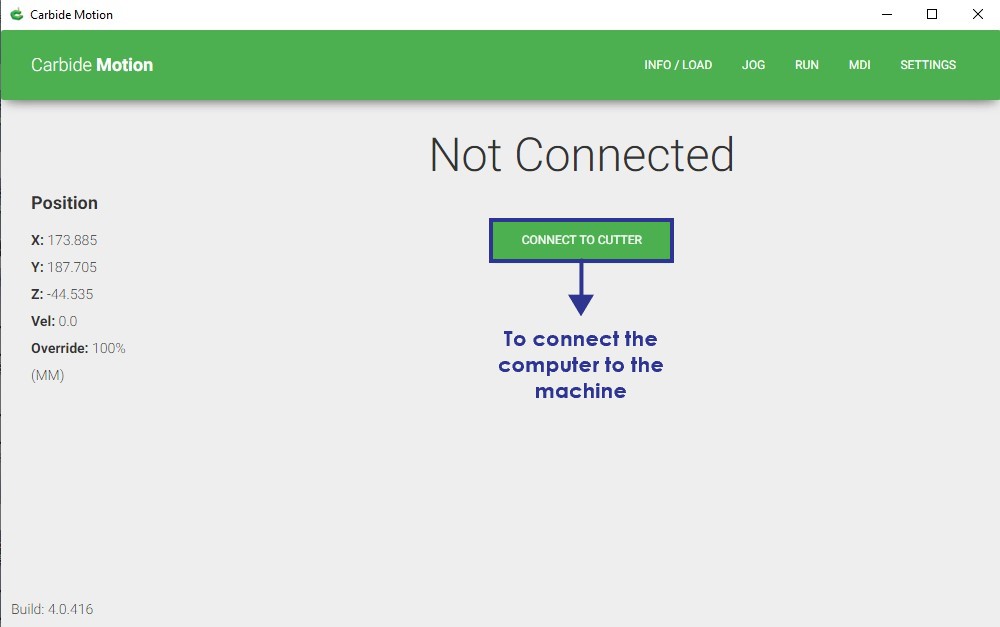
Carbide Motion Software
What is Carbide Motion Software ?
It is the machine control software used to operate the Nomad CNC machine from Carbide3D. This software allows us to jog the machine, home the machine, load G-Code, create offsets, and allows some manual control of the machine via the MDI.
Carbide Motion Software Interface :
Carbide Motion Features :
First I opened the software then I connected the USB cable to the computer. After that I clicked on the ‘Connect Cutter’ Icon in the center of the window to connect to the machine.
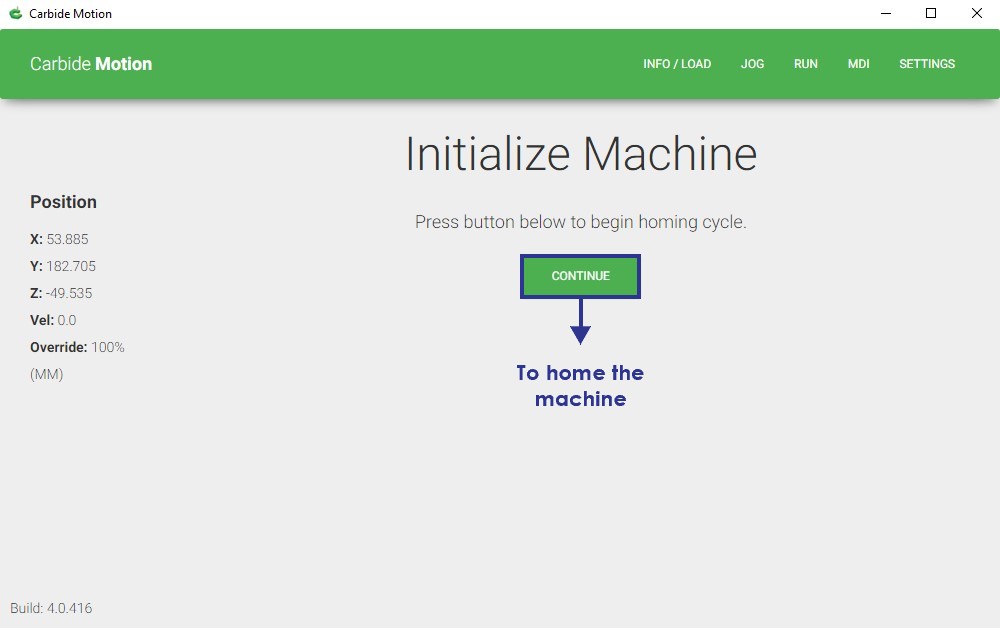
After the software has connected to the machine, the Initialize screen will be presented. I clicked on the ‘Initialize Machine’ button to home the machine.
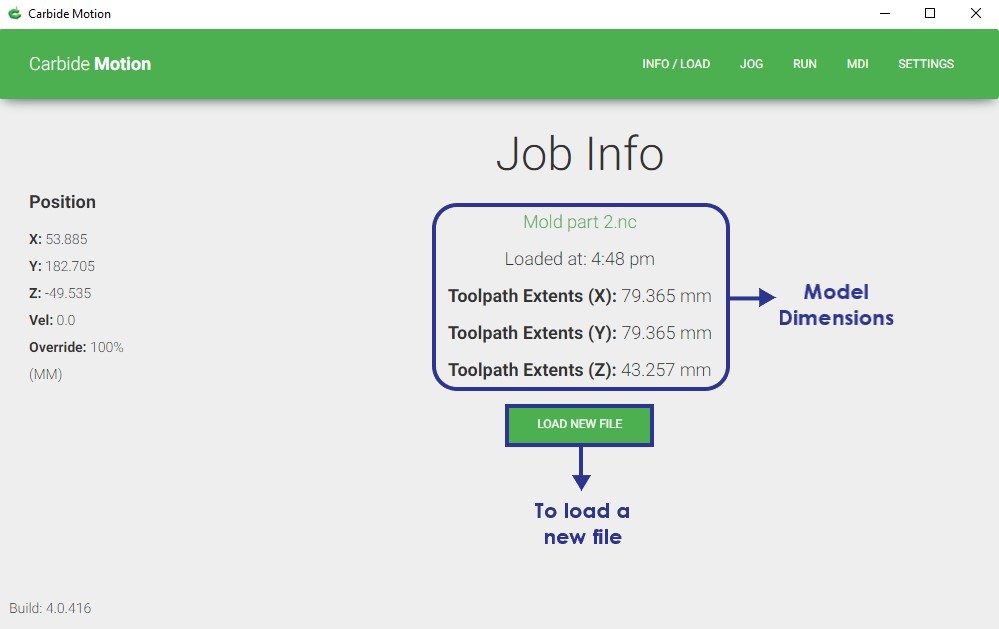
The next step I loaded the G-Code file.
I clicked the jogging feature to move the machine by clicking the appropriate arrow button to position the zero.
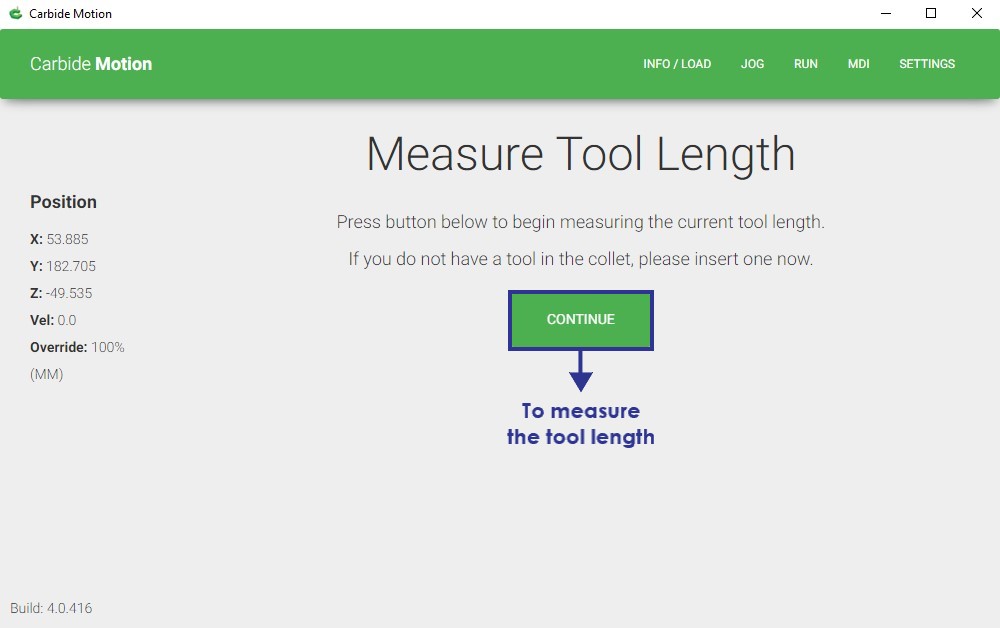
Depending on what type of jogging we are doing, changing the increment size can speed up the process of getting to our desired location.
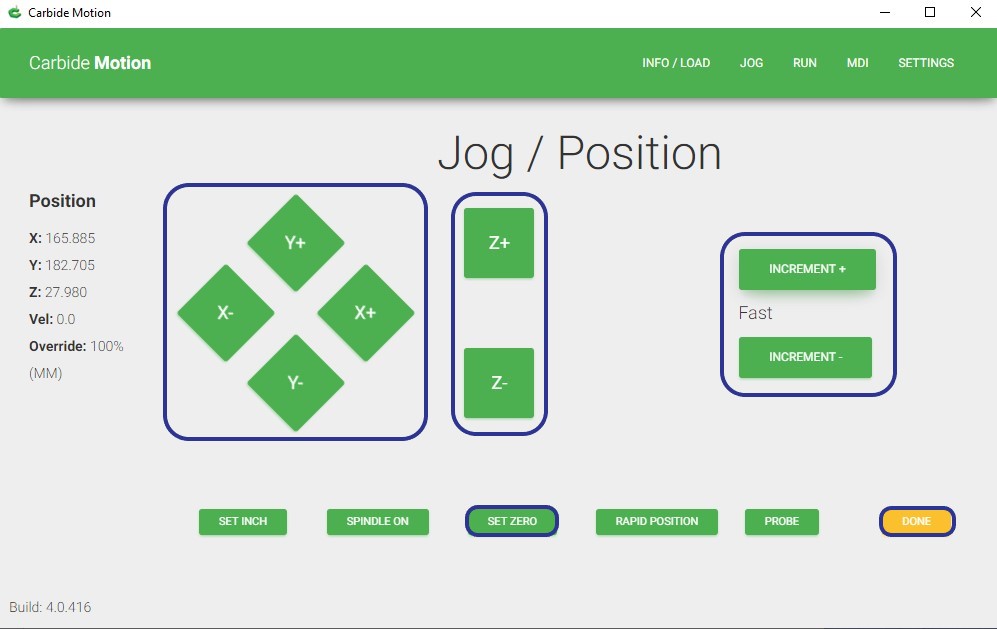
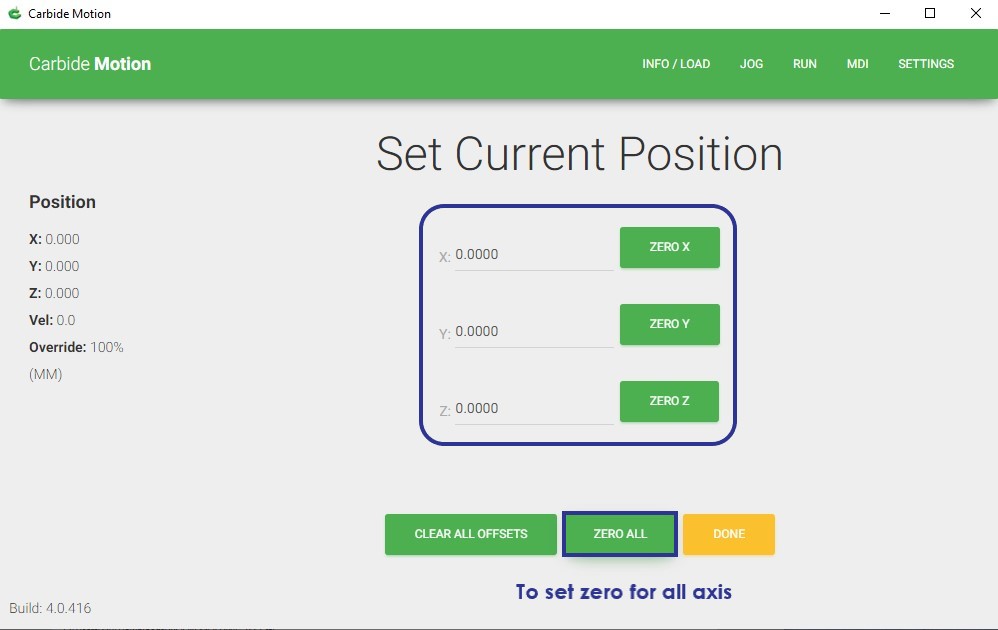
After I have positioned the machine (via the jog menu) to the starting point, I used the Set Zero button to zero out all of the axes
.
The last step, I clicked on RUN then the start button to start running the machine.
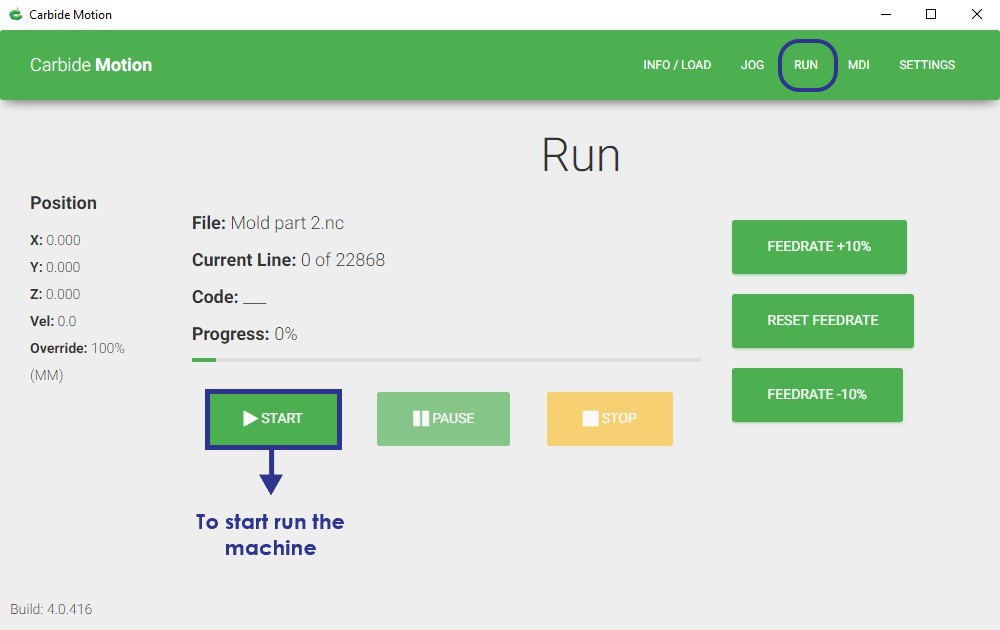
Milling The Design :
I srarted run the machine to mill the design on the wax.
We learn from mistakes !
Yes, I did it !
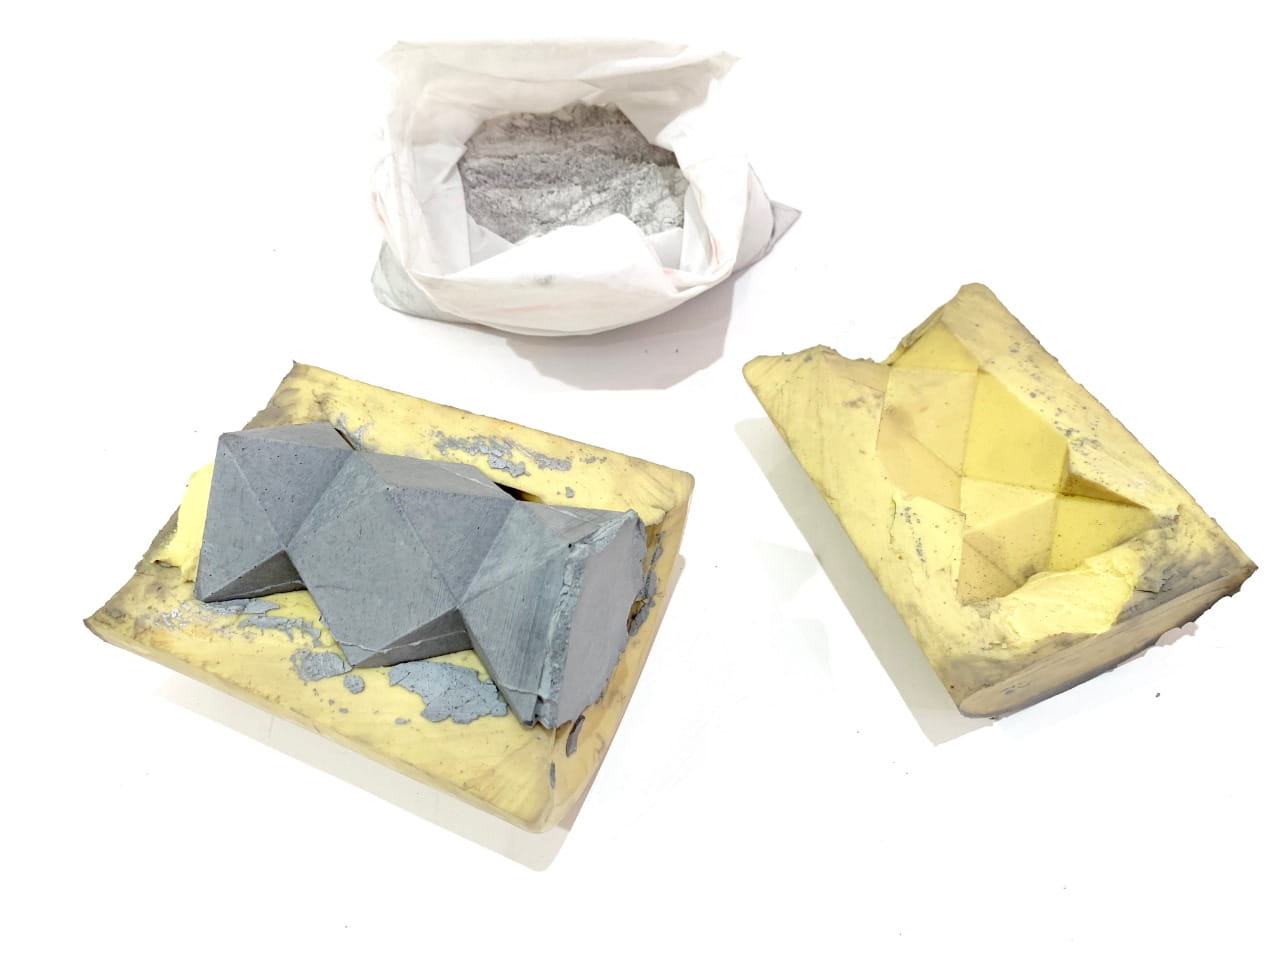
Making The Flexible Mold :
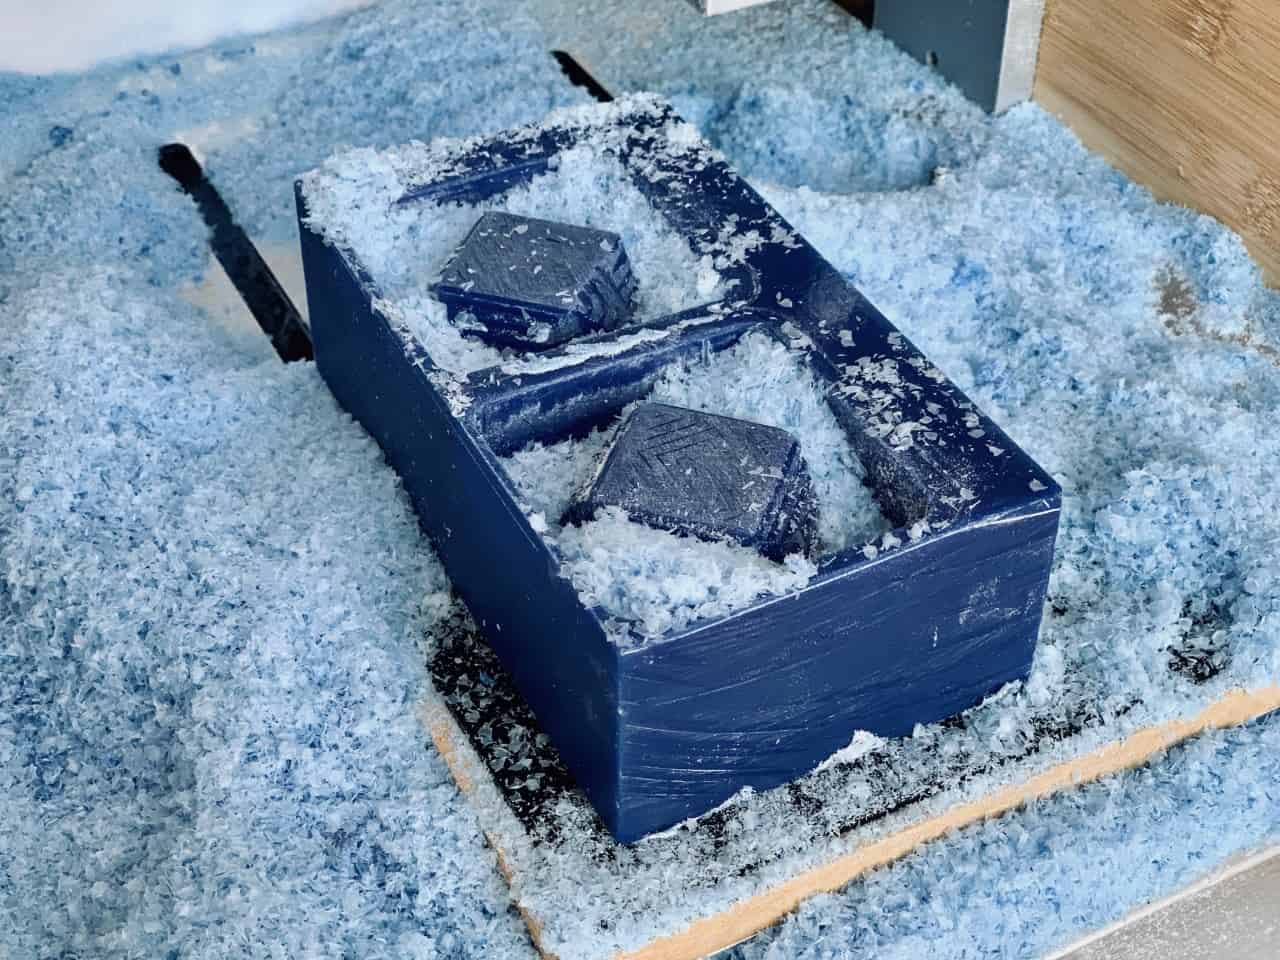
After I milled the design on the wax material, I made a flexible mold by using polytek rubber material that I have mentioned before.
To make the mold I put the polytec material A and B in 2 pots with the same ratio then mixed them together around 10 minutes. After that, I poured them on the model and spent a couple minutes tapping the wax on the surface of the table trying to get as many bubbles out as possible then left it to dry for 16 hours.
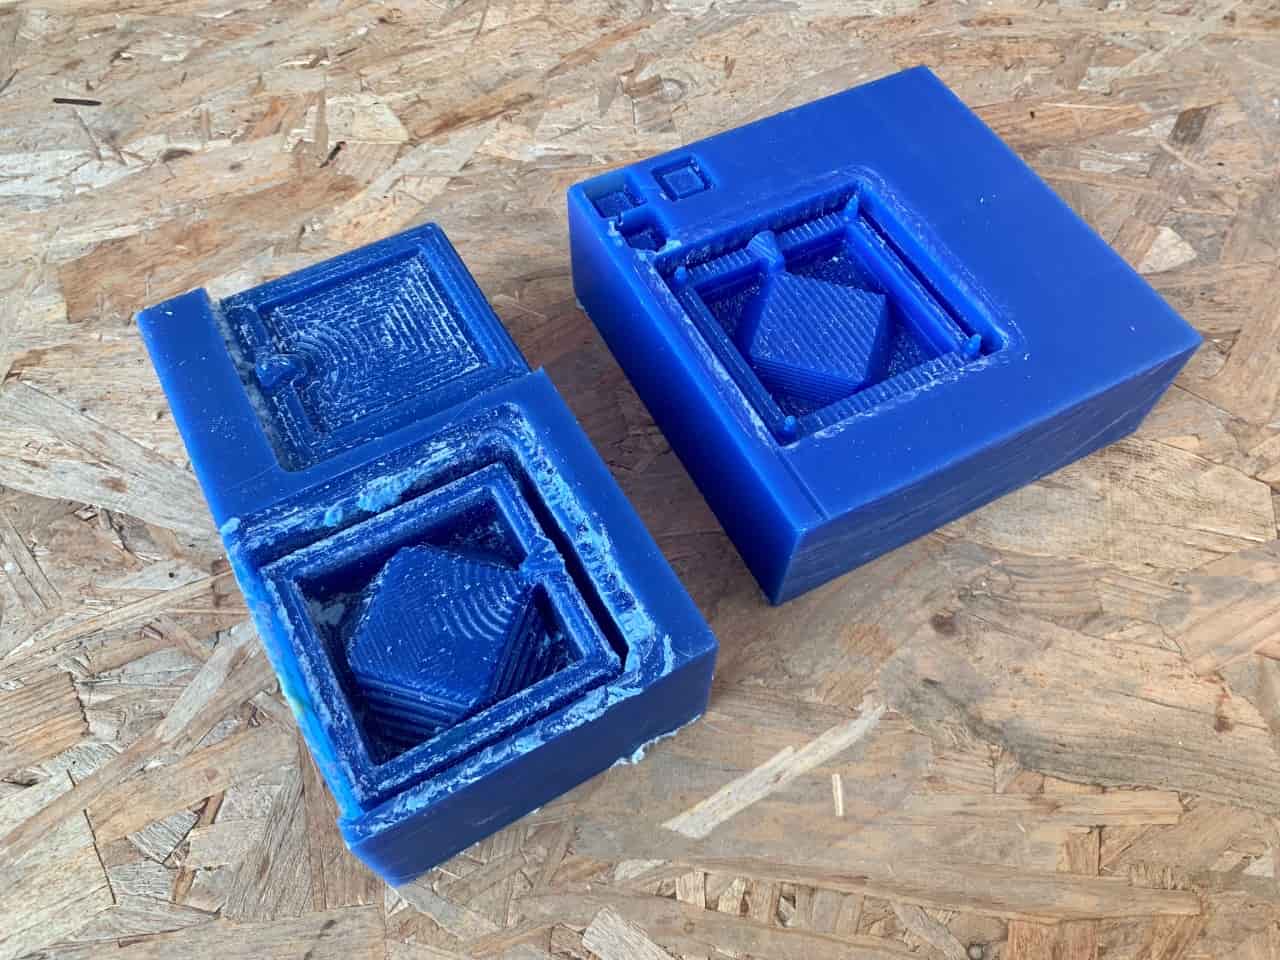
The result !
Making The Cast !
Materials Needed :
First, I closed the two sides of the mold togather and I used tape to close them tightly . Then, I placed the wick into the flexible mold. I used the microwave to milt the wax. After melting the wax, carefully I poured the hot wax into the mold.
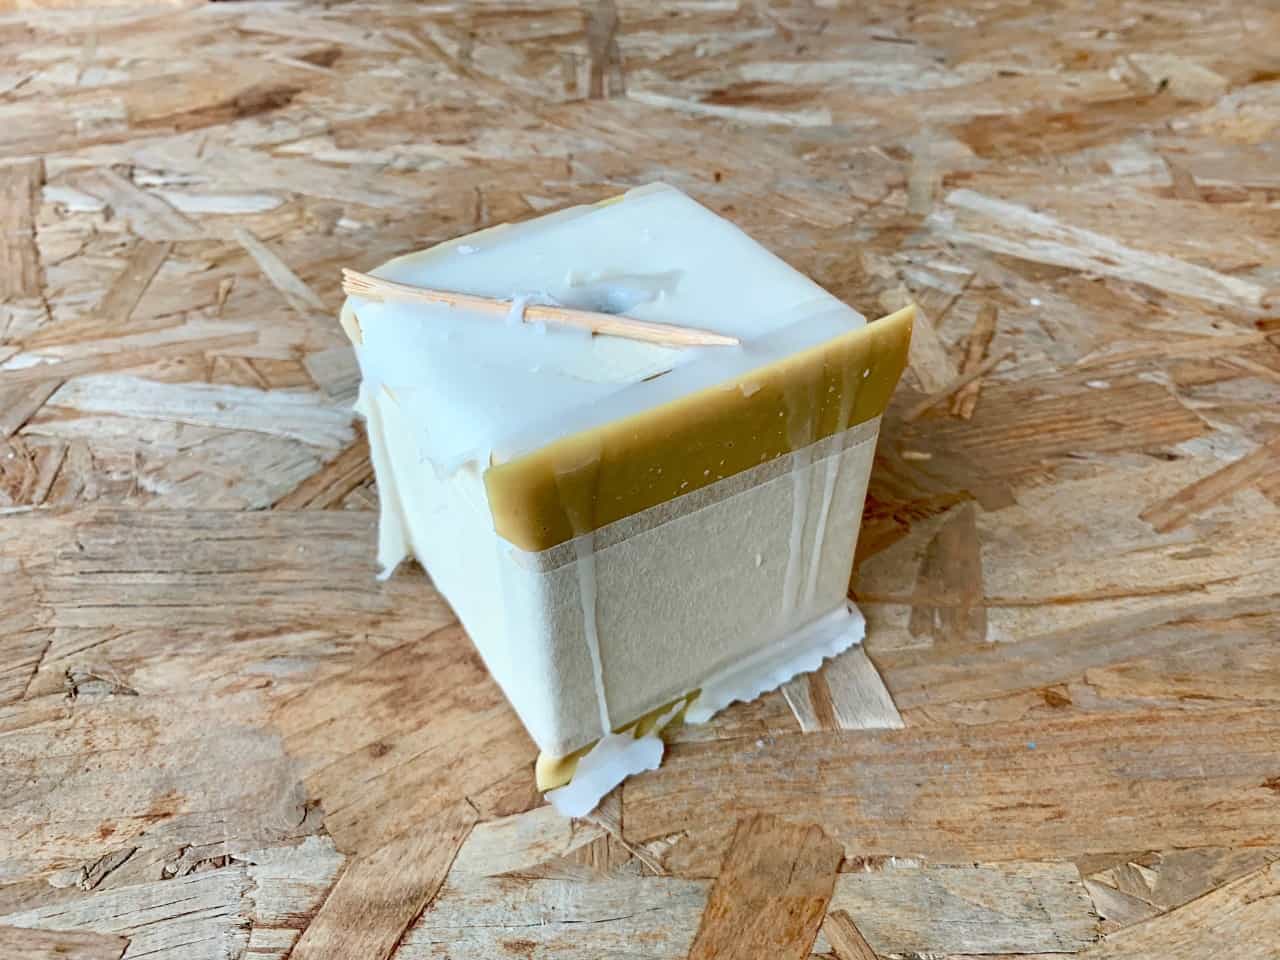
The Final result !
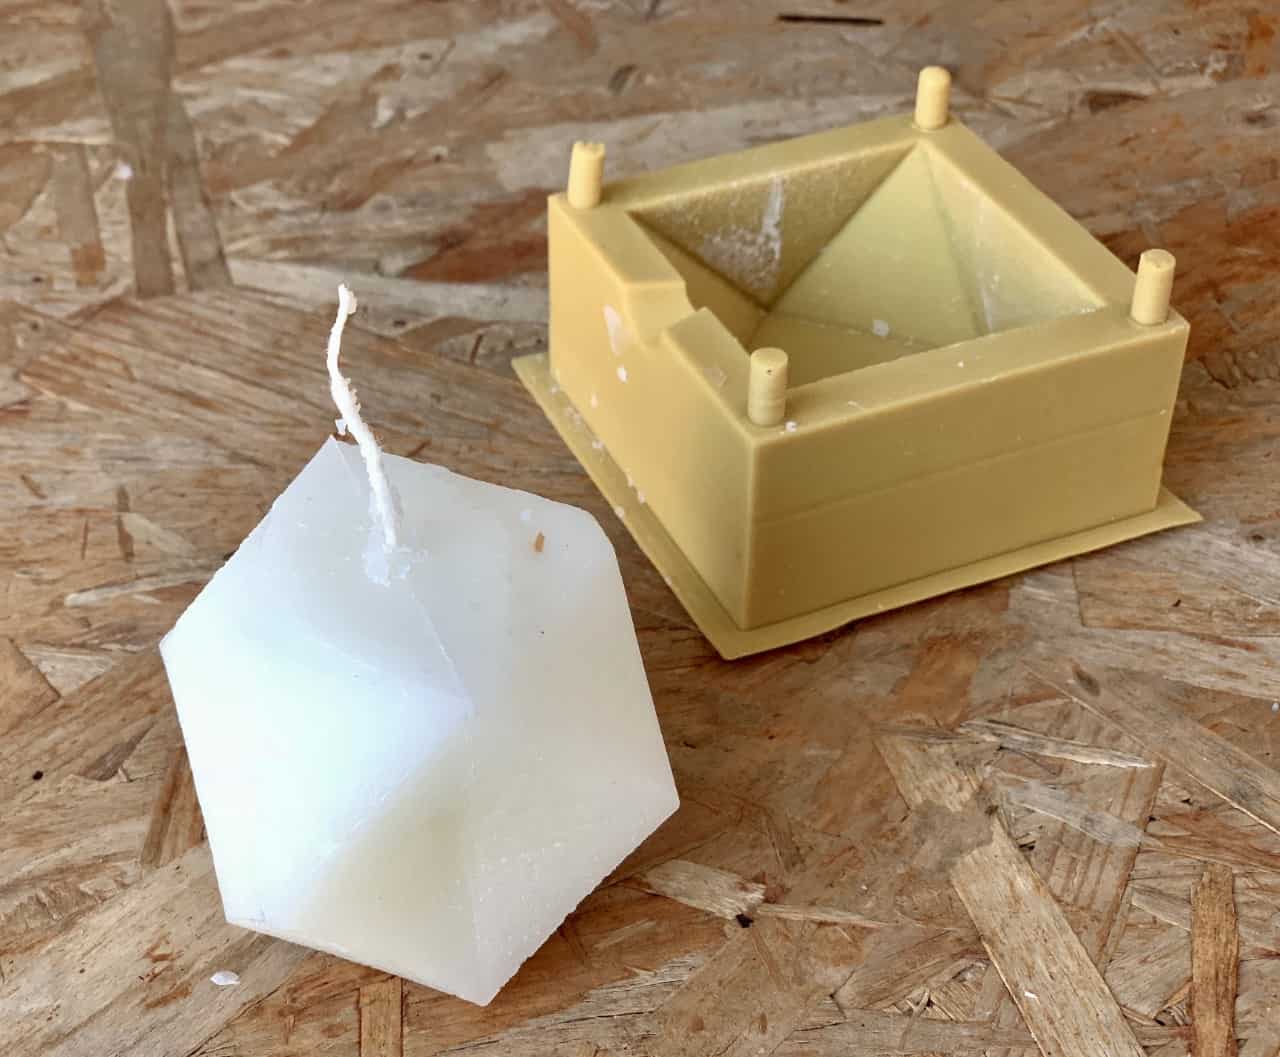
To know how to make the candle watch the vedio !
Practice more and more!
I really like molding and casting! It’s hard but fun at the same time. I decided to make a complex object and print it with a 3D printer then make the mold.
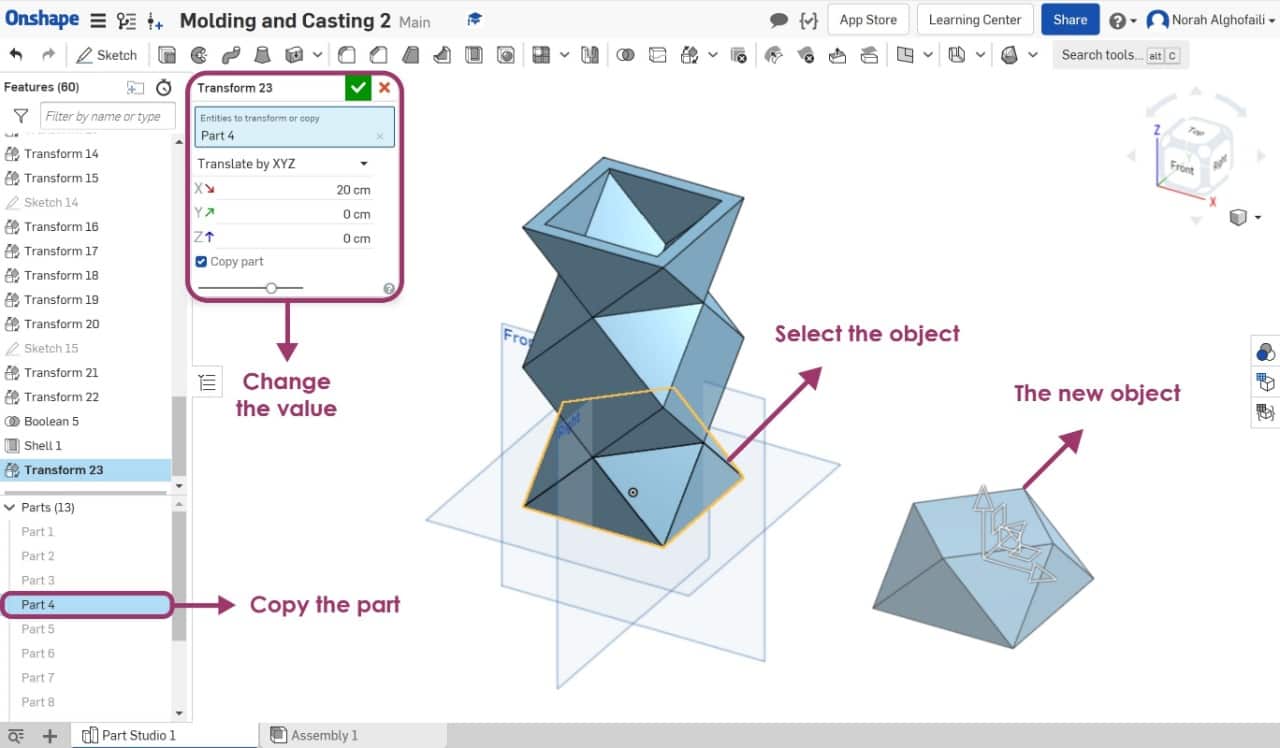
I made the following design by making copies of the previous object then combined them together. This object will be a flower pot.
First, I selected the object then the part and I clicked the right click to choose copy and I changed the translate value.
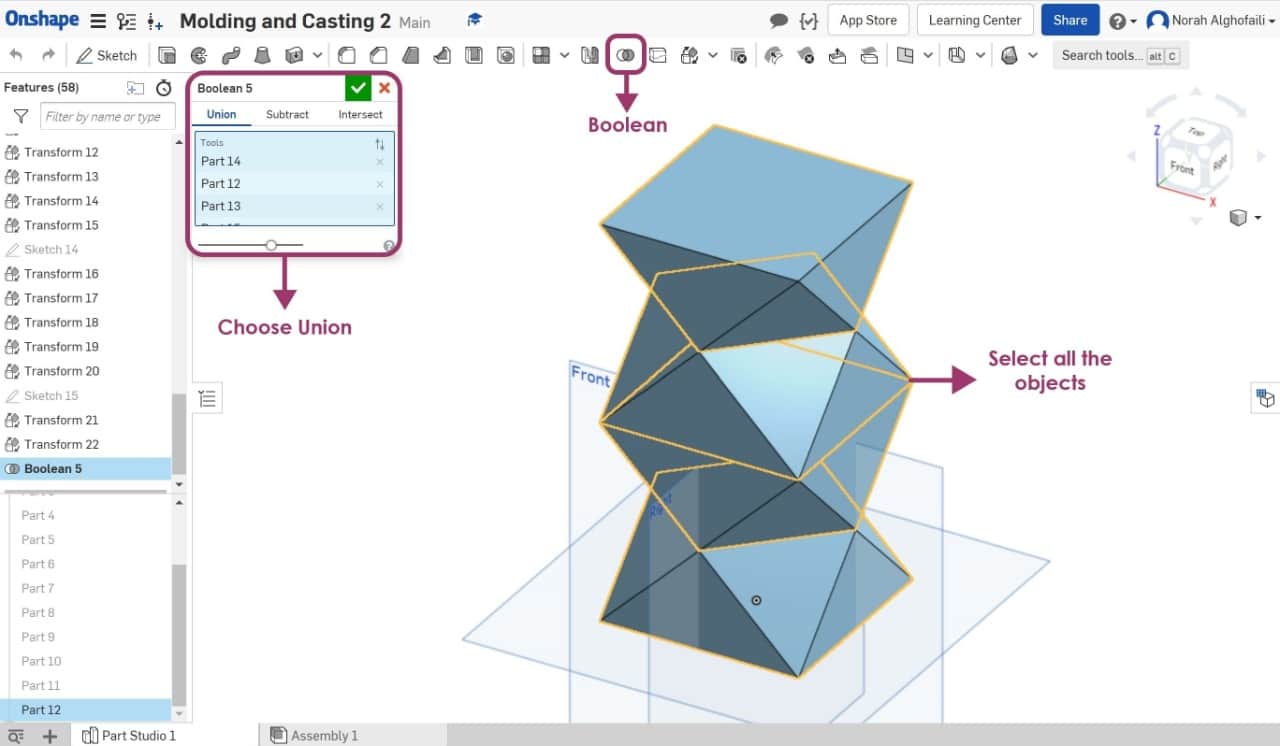
After that I combined the object by selecting all the parts then I chose boolean and union.
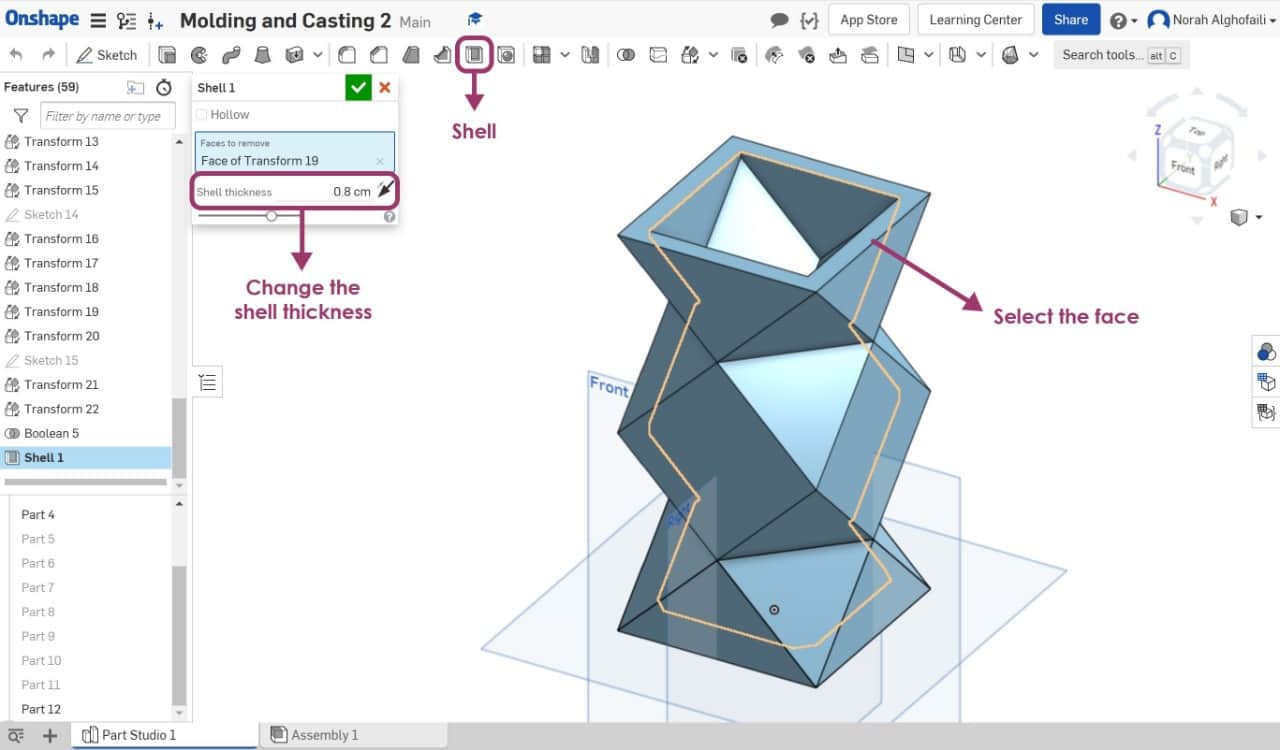
To make the object emptied from the inside I chose shell then clicked on the top face then I changed the shell thickness to 0.8 cm.
The final result ! I selected the object then saved it as STL file.
After that, I printed the design by using 3D printer then I made the flexible mold by following the same process.
The final result ! Wow They look Awesome !