Applications and Implications
Finally!! We have a break this week. So, we have enough time to think more about our final project. For this assignment, we are supposed to answer the following questions to propose the final project that integrates the range of units covered.
As stated in Principles and Practices Assignment, the project is Shake Your Brain !
What will it do ?
It is a kit called Shake your brain. This kit/device is a game, brainstorming tool for students to solve problems and generate new ideas by playing through the SCAMPER method. SCAMPER is a creative, easy-to-use brainstorming technique that helps generate new ideas or improve existing ones. SCAMPER method contains 7 phases.
The students will start the journey by choosing an existing product, service or idea which they want to improve or which could be a great starting point for future development. Then, they will answer some questions that help students to analyze and dig deeper with problem solving. The device will guide the students in an interactive way.
Who's done what beforehand ?
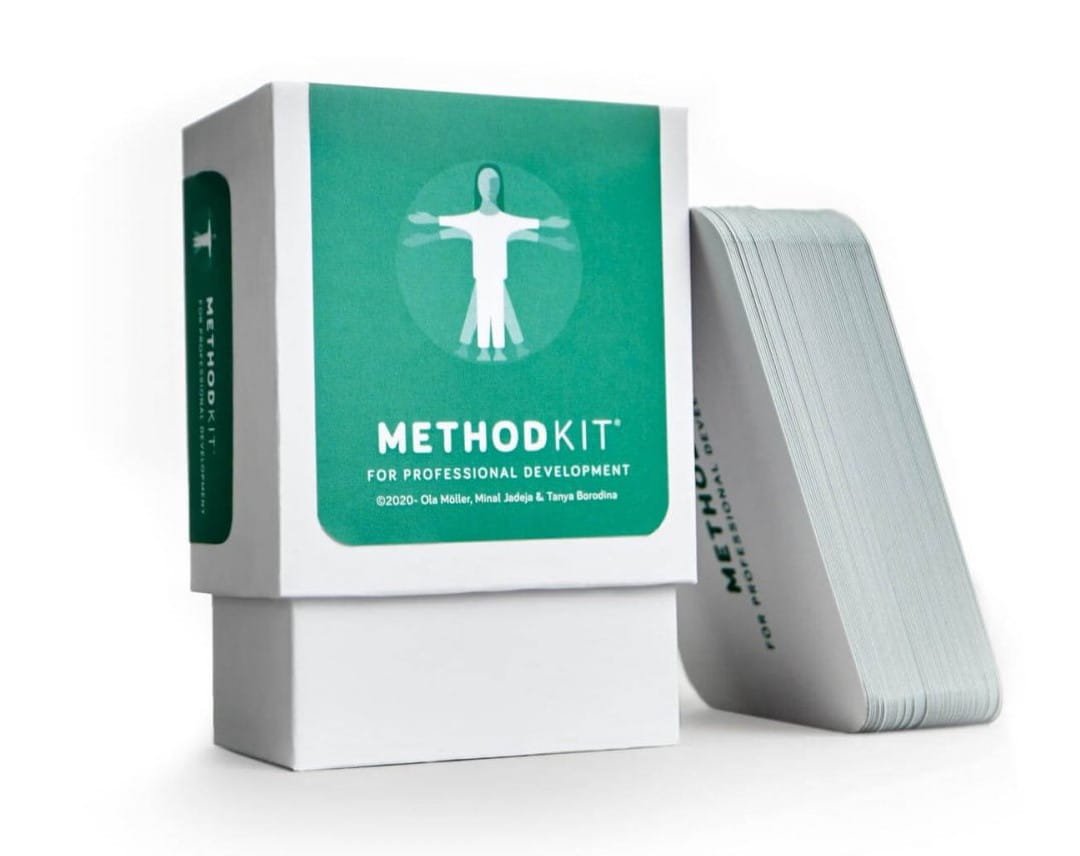
This kit is inspired from Method Kit Cards. Each card presents an approach that helps you think about the topic from a new angle. I’m going to make a device that communicates with the students to be more fun while using the cards. Each card represents an approach that helps you think about the topic from a new angle.
What will you design ?
The project will consist the following :
For the 2D and 3D parts, I will design the structure of the device by using OnShape software. I am also planning to design the game board by using Autocad software and the package of the product by using Illustrator software.
For the electronics part, I am planning to use Atmega328p microcontroller and I am going to design the PCB by using Eagle software.
What materials and components will be used ?
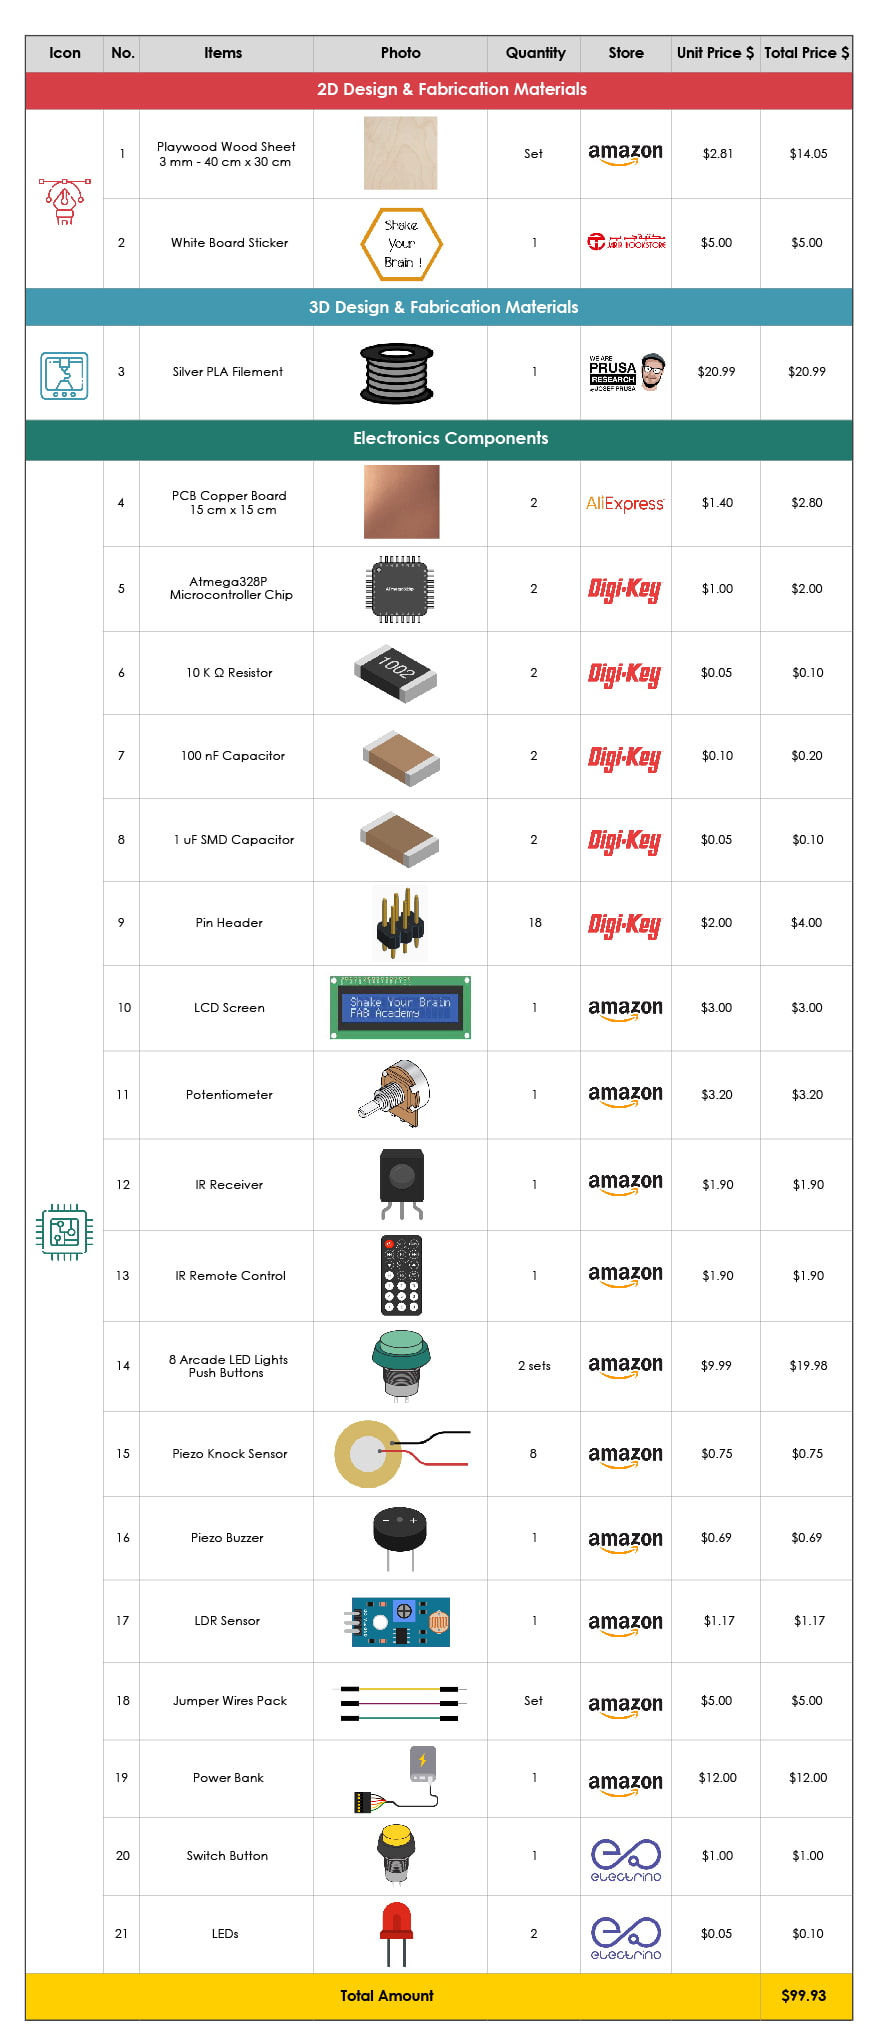
In the final project, we are supposed to use 2D, 3D and electronics. The material that I will be using are :
2D : The board and cards will be fabricated by using wood material.
3D : The case of the device will be fabricated by using different silver PLA filement.
Electronic Components : The electronics components that I am going to use in this project are :
Where will come from ?
Most of the materials and electronics components that I have mentioned are available in our lab but some of them I could not find them locally in our country like Arcade LED Lights Push Buttons. I ordered them from Amazon US and I hope to receive them before the final presentation because as you know with Covid-19 most of the shipments are getting late.
Our LAB got all the materials from different local and international stores.
How much will they cost ?
What parts and systems will be made ?
In my final project, I decided to make two systems then integrate them together.
The first system will be a memory game. The basic overview of this game is that the 8 Arcade push buttons LEDs blink in a certain, random pattern and the student has to imitate the same pattern. If the student enters a pattern incorrectly, the Red LED will turn on. During the memory game the timer will start. Memory games help us to improve our memory and warm up our brain.
The second system will be created sequentially. I am planning to use the IR Module and extract the code for each IR remote control buttons. The numbers will be added randomly in the code. So, the student will choose any number and if he/she picks the right number the green LED will be turned on and the student will be the leader of the round. After that the round will be started the student will be asking and answering questions after finishing the round they will knock the piezo sensor to go to the next step.
What processes will be used ?
Designing :
Using Onshape software to design the case of the device and Illustrator to design the package of the product.
Fabrication :
Additive fabrication :
3D Printer : Using a 3D printer to fabricate the case of the device.
Subtractive fabrication :
Laser Cutter Machine : Using laser cutter machine to fabricate the cards.
Vinyl Cutter Machine : Using Vinyl cutter machine to Make the white board stickers for the cards.
Milling Machine :
Using a carvey milling machine to fabricate the PCB circuit.
Soldering :
Using the soldering to solder the following components on the PCB board :
Programming and Testing :
Connecting the electronics components then program the Atmega328p. microcontroller, Input and output devices.
What questions need to be answered ?
I have some questions that will help me to build this project.