THIS IS A CREATIVE WEEK!
This assignment aims to build and program an interface and application to the user by using different tools. It is very interesting to work on this assignment because it is a new thing that mixes programming and visual art.
What is a user interface ?
A user interface (UI) simply means that a person controls a software application or hardware device.
Examples of UI in our daily life :
There are many examples of user interface in our life. Some of them include:
What is a graphical user interface ?
Graphical user interface (GUI) is a computer program that enables the user to interact and communicate with electronic devices through the use of symbols, visual metaphors, and pointing devices.
Group Assignment:
In the group assignment, we have to compare as many tool options as possible.
There are many different tools that we can use to build applications and interfaces. Some of these tools include such as :
We did some research about these tools to know the difference between them.
MIT App Inventor
MIT App Inventor is a simple visual programming environment that allows everyone, even children, to develop and build fully functional applications for Android smartphones and tablets.

LabView
LabView is a software design platform and development environment for a visual programming language designed for the fast development of any engineering application that requires test, measurement, or control.

python
Python has various toolkits for developing graphical user interfaces (GUIs).The most important toolkits are :

Processing
Processing is a flexible graphical library and a programming language software sketchbook, designed for the visual arts community to learn how to code within the context of the visual arts.

What is the language used in processing software ?
Processing is built on Java language. Java is a powerful general-purpose programming language. It is used to develop desktop applications, mobile applications, big data processing and embedded systems.

Individual Assignment:
In this assignment, we were supposed to write an application that interfaces a user with the input and/or output device that we made.
I decided to use processing software to design the interface because Prof. Nail said; “If you like working in Arduino IDE, you will automatically like working in processing”. So, it will be easy for beginners to use this software. Instructor. Yousef also recommended that we should use processing.
Processing is a great place to start this week!
Processing Software
First, I’m I am going to download processing software.
To download the software, click on this link: Processing Software

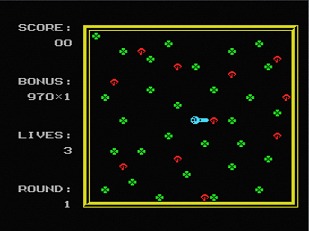
This is the interface of the processor software :
To learn and understand the processing software, I watched a lot of tutorials. Below are the links:
Processing Functions:
Most processing programs you will find will have two main functions declared already. The first one is "void setup" and the second one is "void draw".
void setup()
The word void means, the function will not return anything.
Setup function is used to set the application's properties such as, size, background color and framerate.
void draw()
The void draw is a function that is executed every frame of the application's life.
Example :
I found some examples in the processing website : Examples.
I tested hue color by using the below code in the processing software. "Hue is the color reflected from or transmitted through an object and is typically referred to as the name of the color (red, blue, yellow, etc.) Move the cursor vertically over each bar to alter its hue".
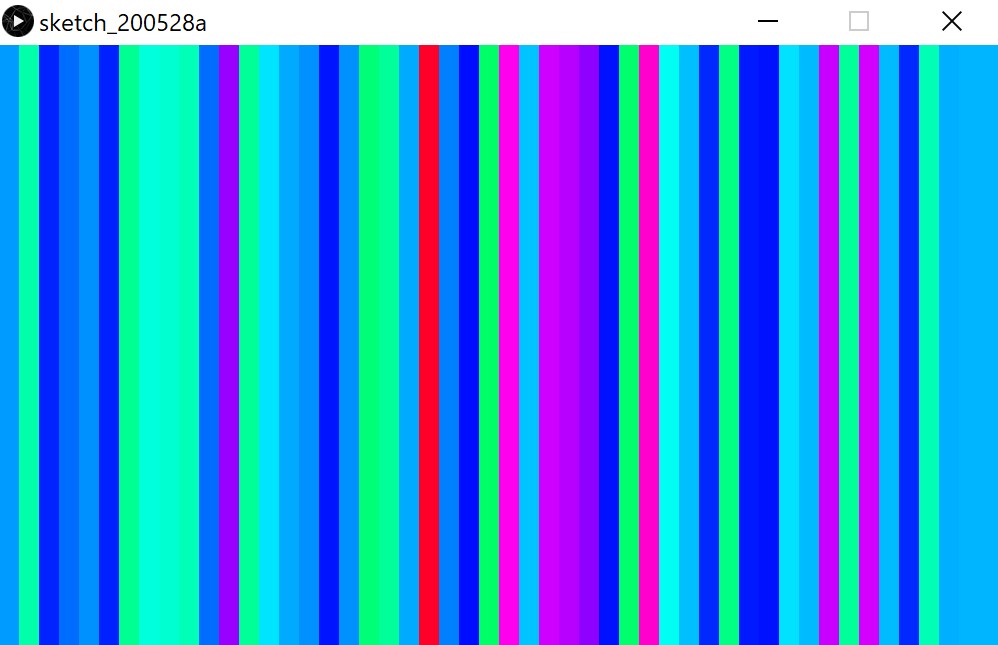
There are some functions that we can use in this example:
int barWidth =   ;
int lastBar =   ;
size(width, height);
colorMode();
The code :
The example :
Now, I am going to make a SNAKE GAME !!!!
I love this game. I played this game when I was a child using old devices. I never imagined that I would design and program games by using some interface and application softwares! Wow! This is really amazing!
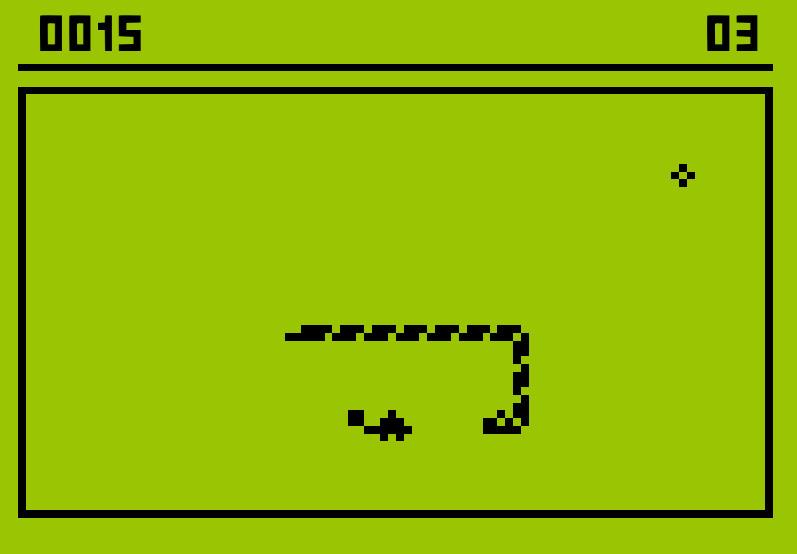
Let’s Make it !
1. Open Processor software > Write/Paste the code.
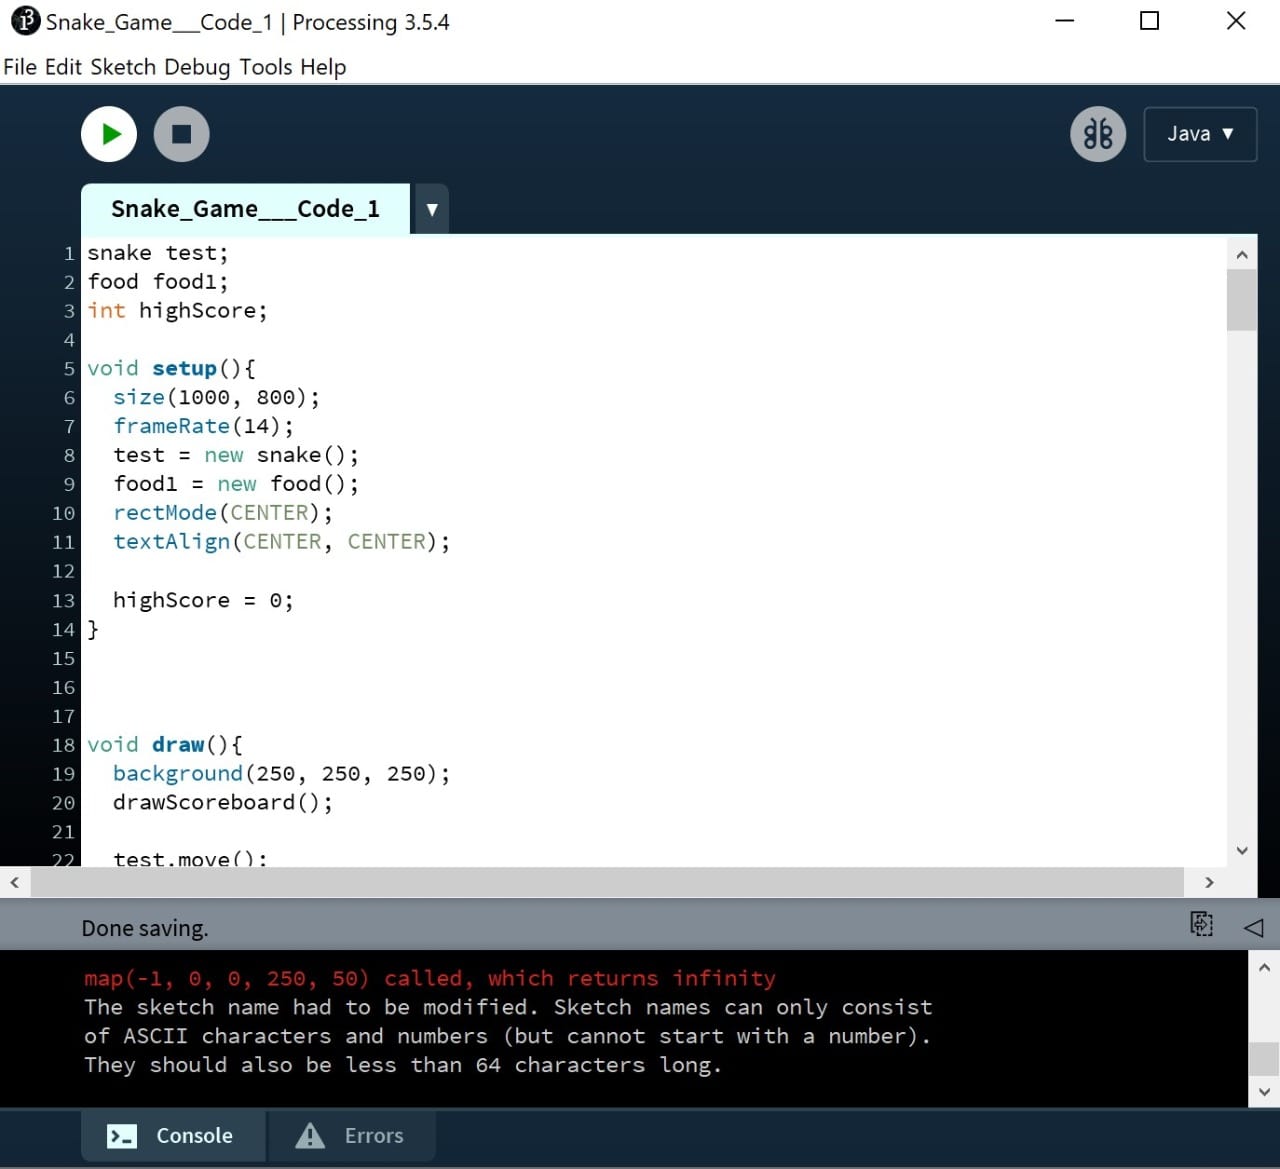
The Code :
2. Click on Run > Snake window will be shown.
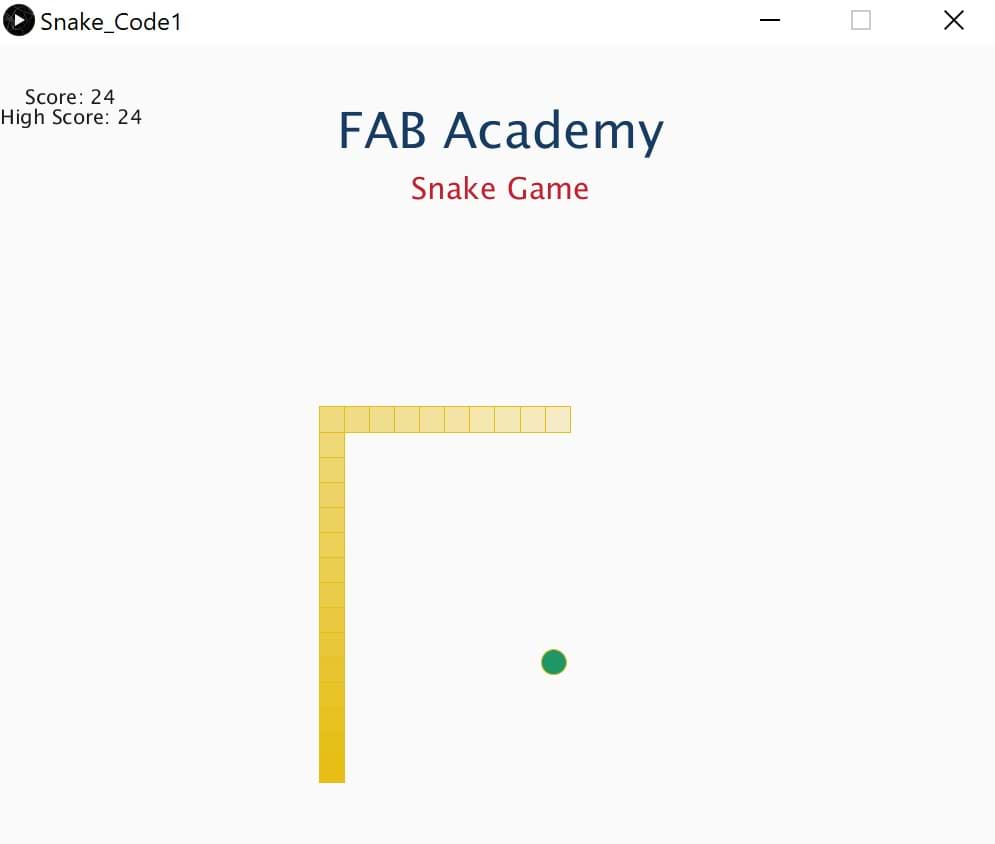
Now, you can play by using arrows keys on the keyboard!
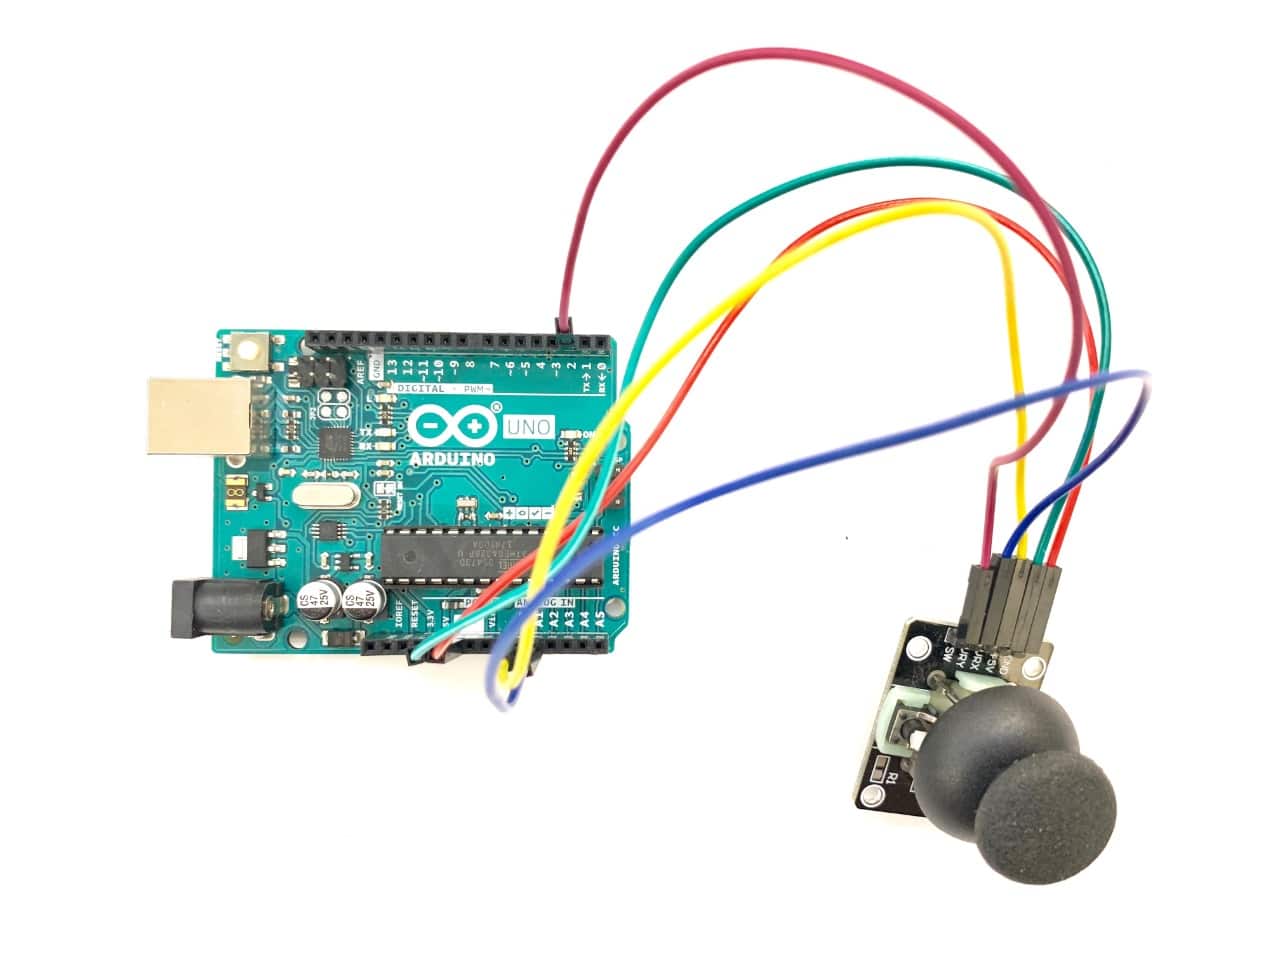
I decided to control this snake by using a joystick sensor input device, and connect processing software with Arduino.
What is a joystick module ?
Joystick is an input device. It is used to control the pointer movement in 2-dimension axis. One potentiometer is used to get the analog output voltage for X-Direction movement and the other potentiometer is used to get the analog output voltage for Y-Direction movement. This joystick also contains a switch which is activate when you push down on the cap.
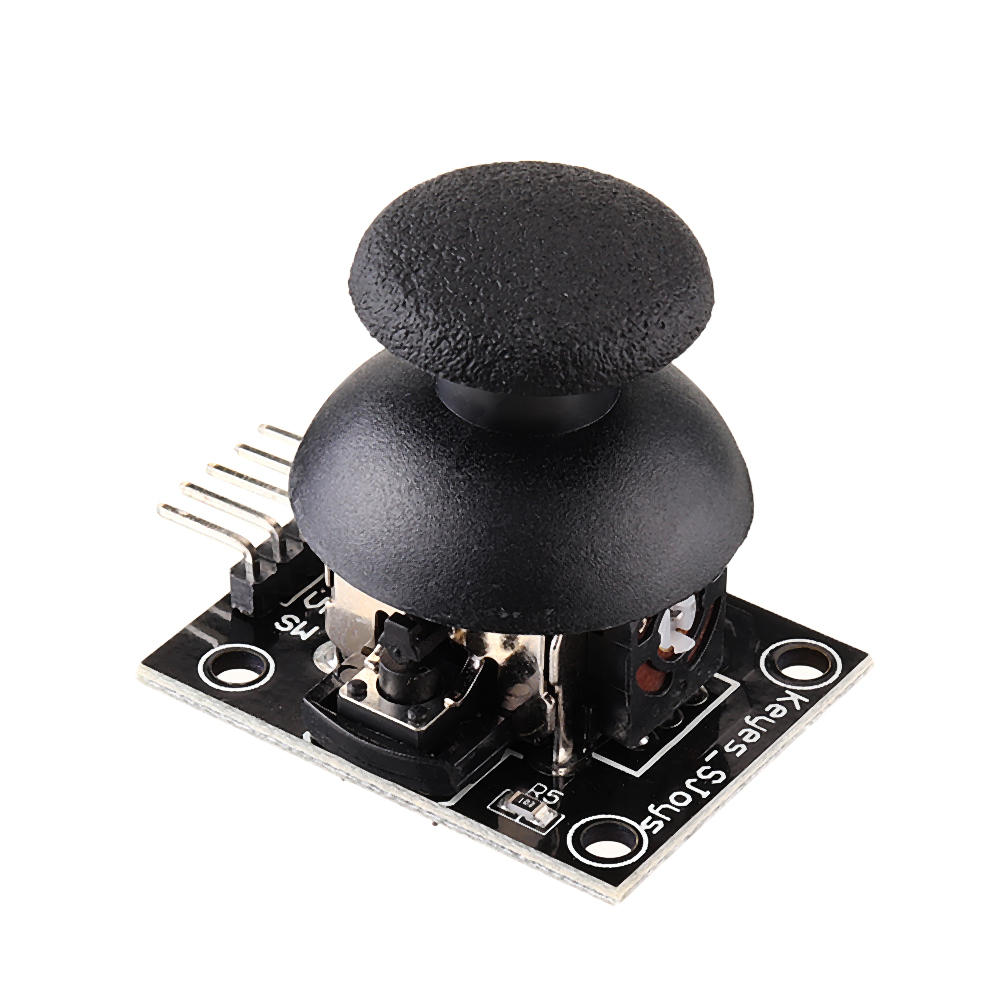
Joystick Module Pinout :
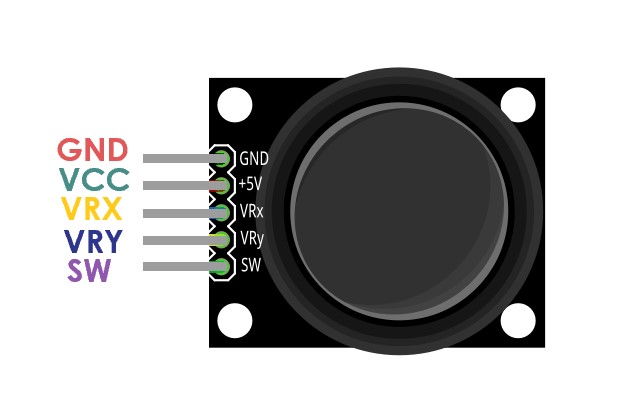
GND is the Ground Pin which connects the GND pin on the Arduino.
VCC supplies power for the module, which connects it to 5V output on the Arduino.
VRx gives readout of the joystick in the horizontal direction (X-coordinate l Right and Left).
VRy gives readout of the joystick in the vertical direction (Y-coordinate l Up and Down).
SW is the output from the pushbutton.
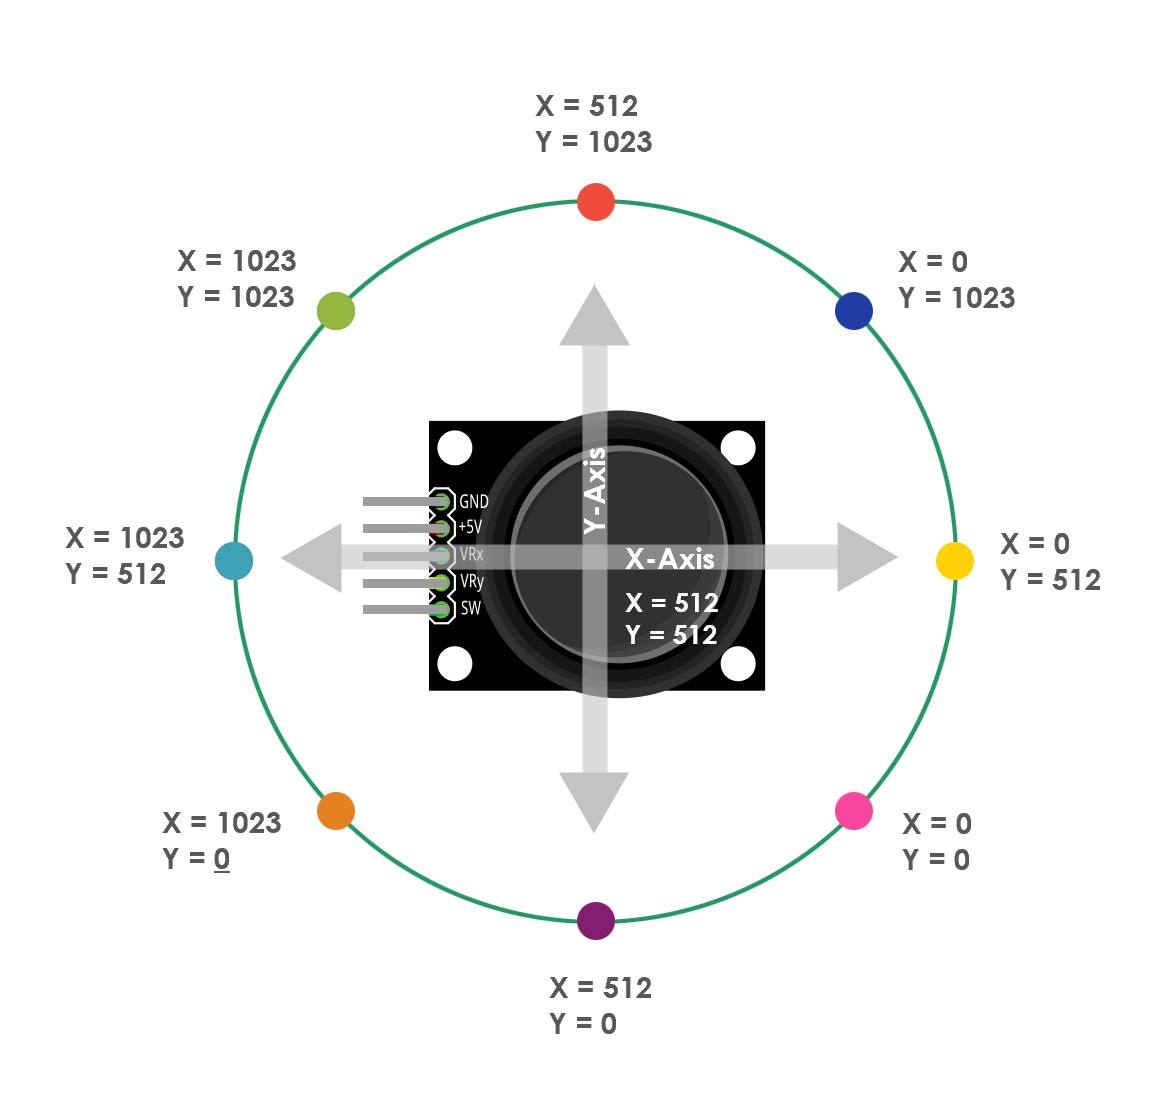
The graphic below shows the X and Y dimensions when pushed in various directions.
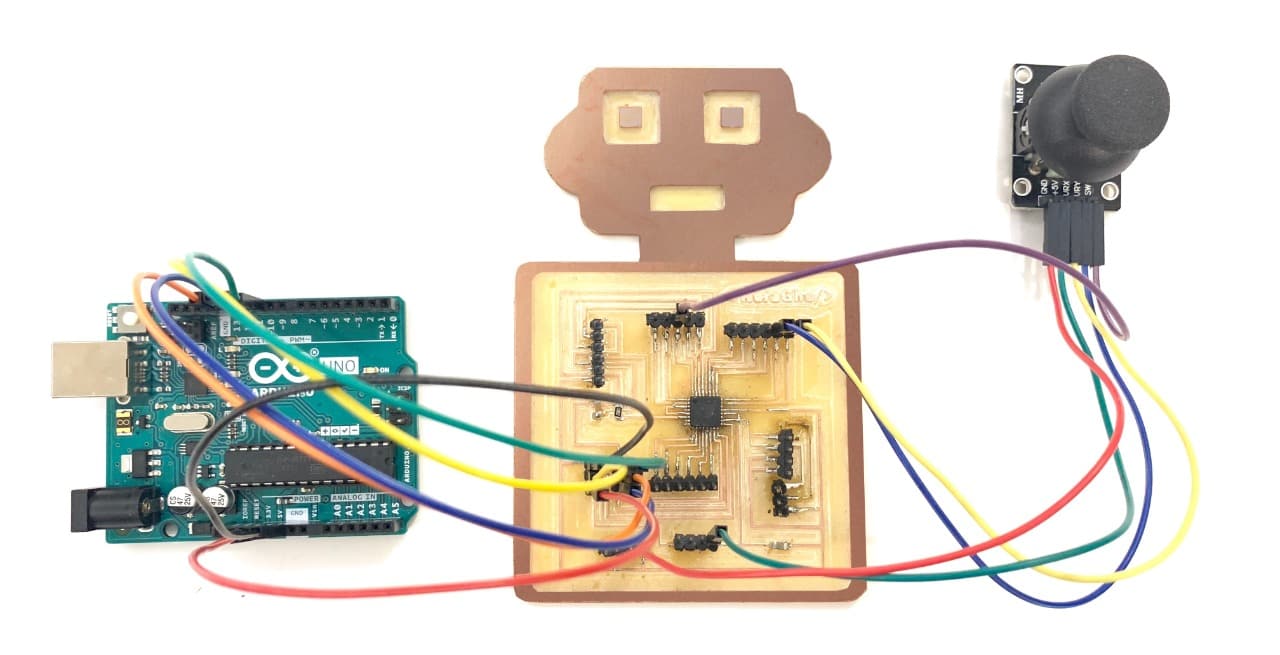
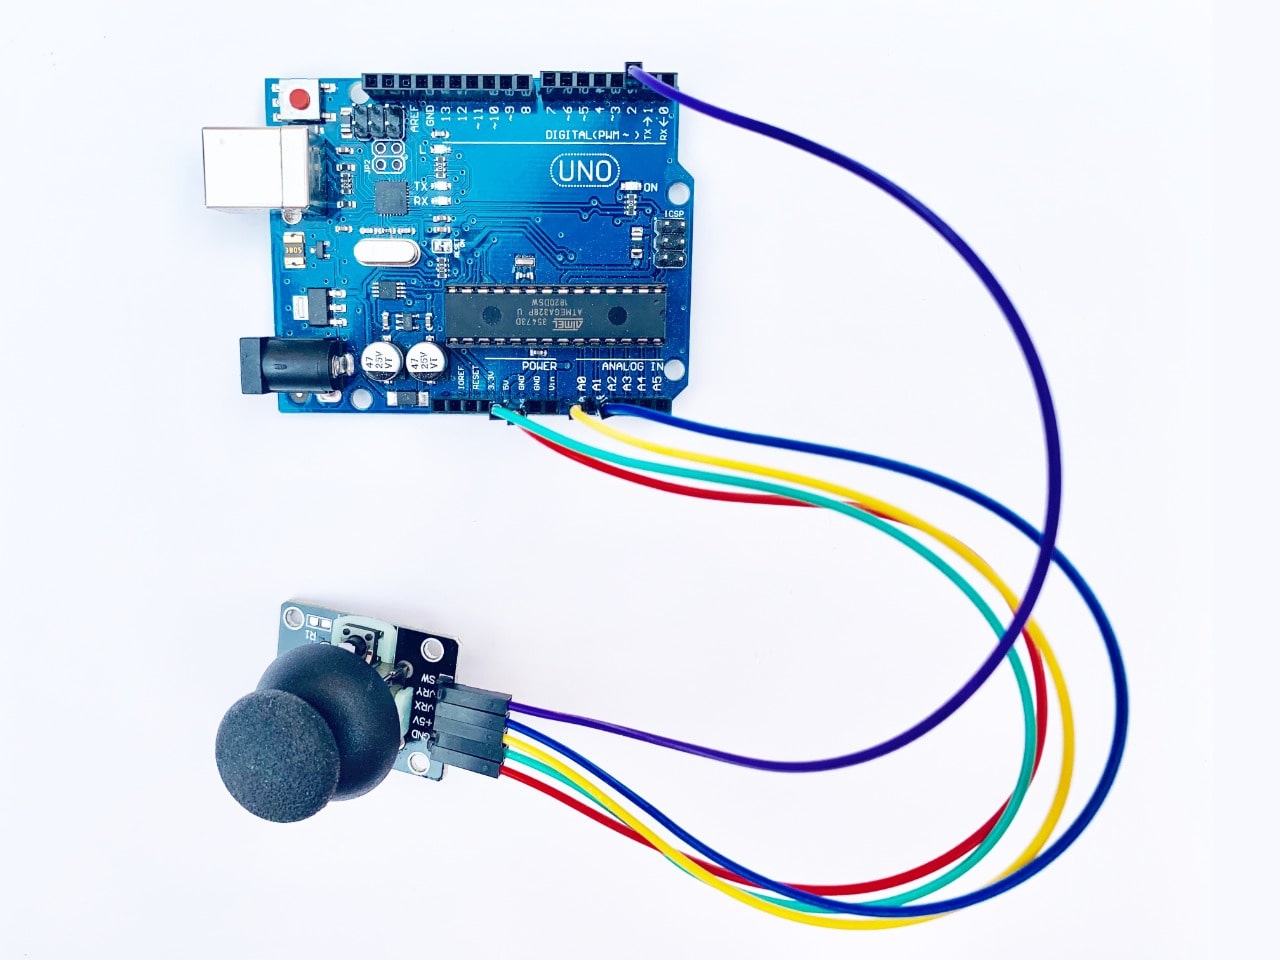
Arduino and Joystick Connection
1. Connect the joystick sensor with Arduino.
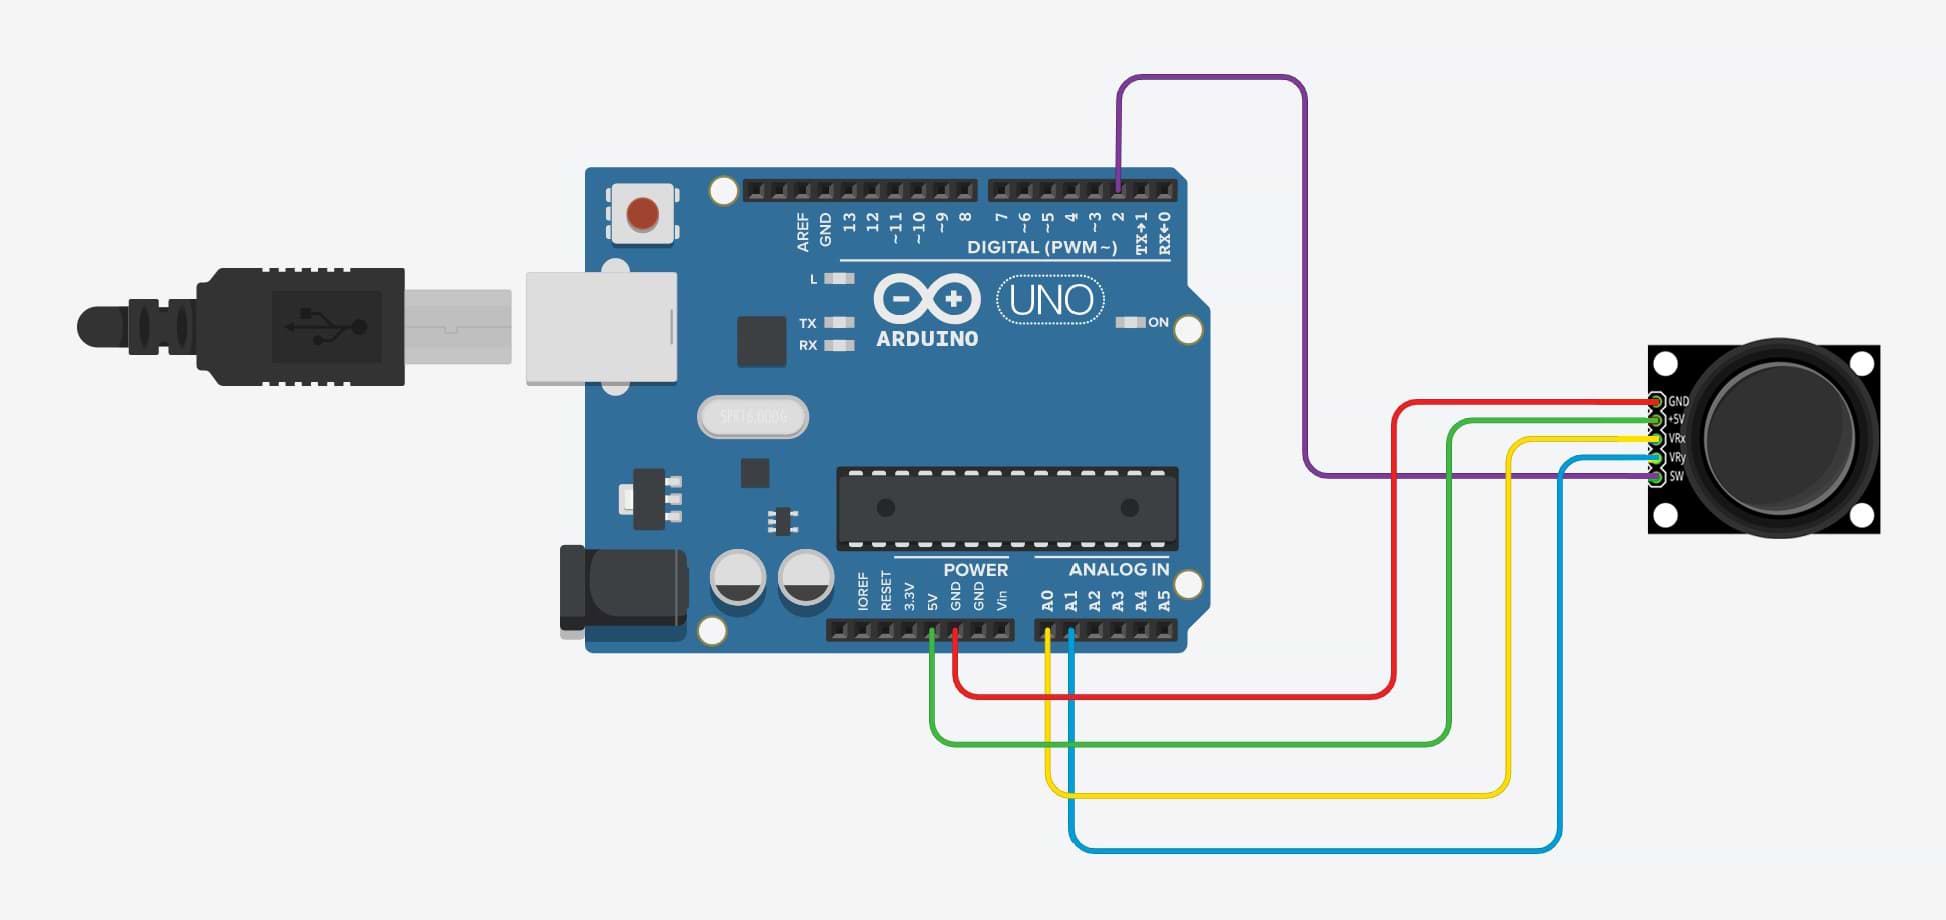
2. Open Arduino software > Write/Paste the code > Connect the USB to the port > Go to tools and choose the port > Verify > Upload.
The code
To indicate the pins and directions of the joystick sensor, we will follow the steps:
void setup() {
  pinMode(2, INPUT);
  pinMode(A0, INPUT);
  pinMode(A1, INPUT);
Serial.begin(9600);
}
void loop() {
  int s= digitalRead(2);
  int x= analogRead(A0);
  int y=analogRead(A1);
Go Up
if (x >700){
    Serial.println("60");
  }
Go Down
if (x <300){
    Serial.println("61");
  }
Go Right
if (y <300){
    Serial.println("62");
  }
Go Left
if (y >700){
    Serial.println("63");
  }


}
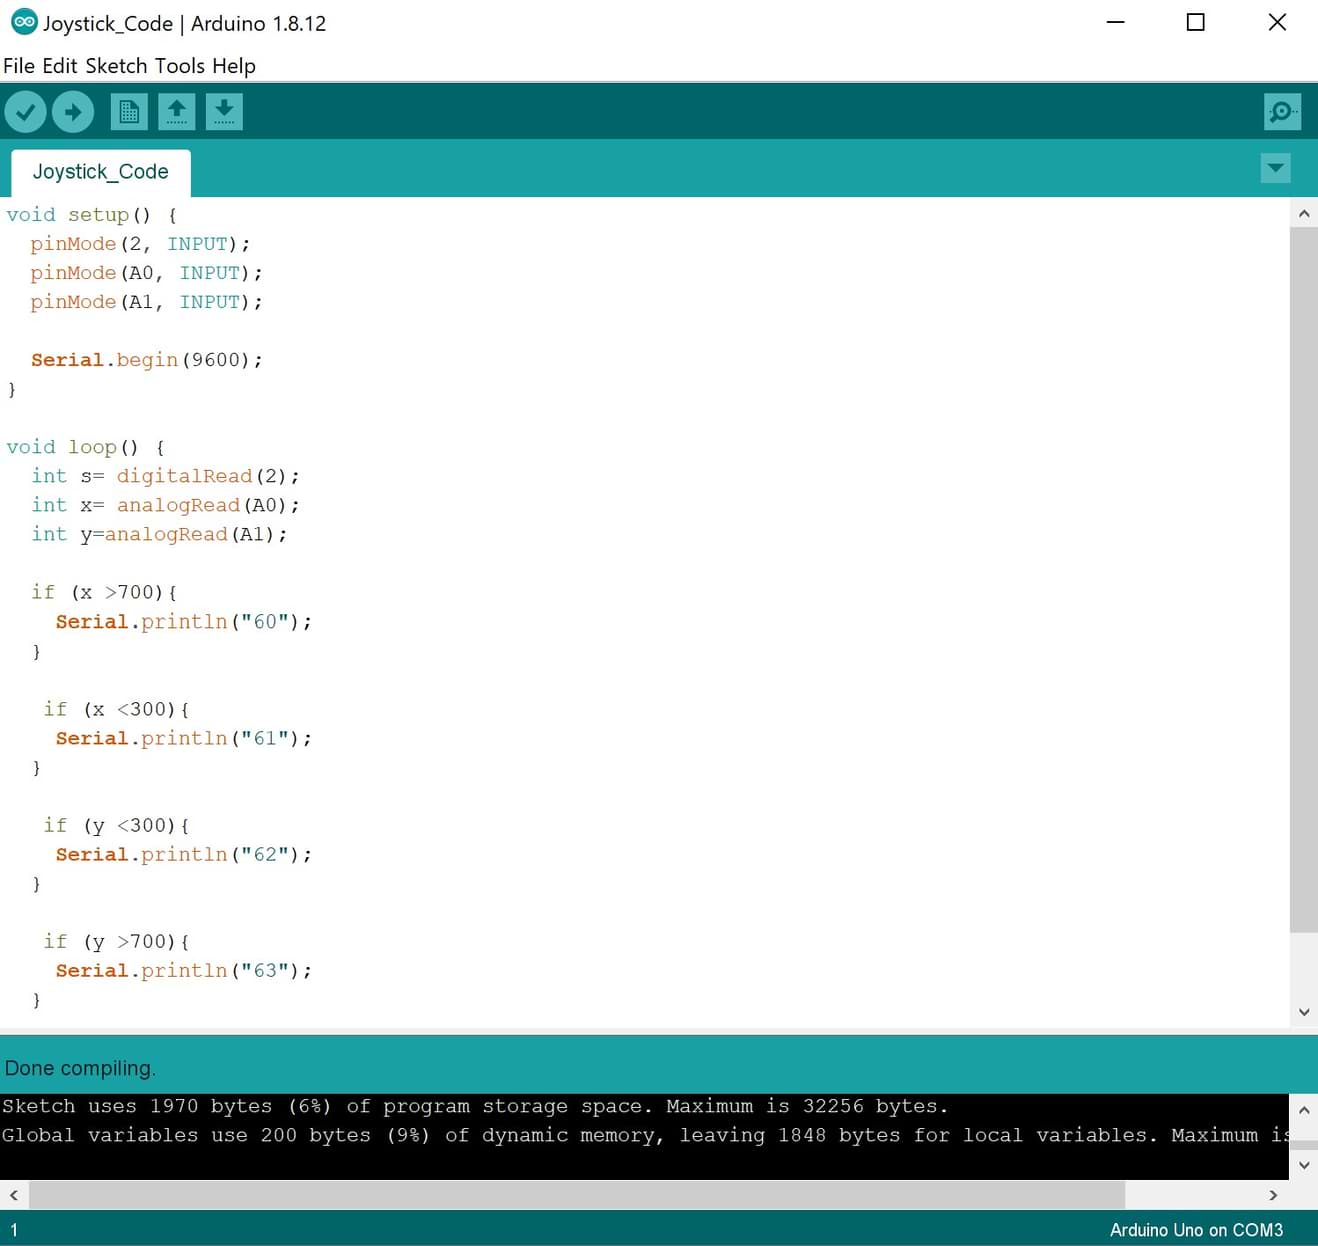
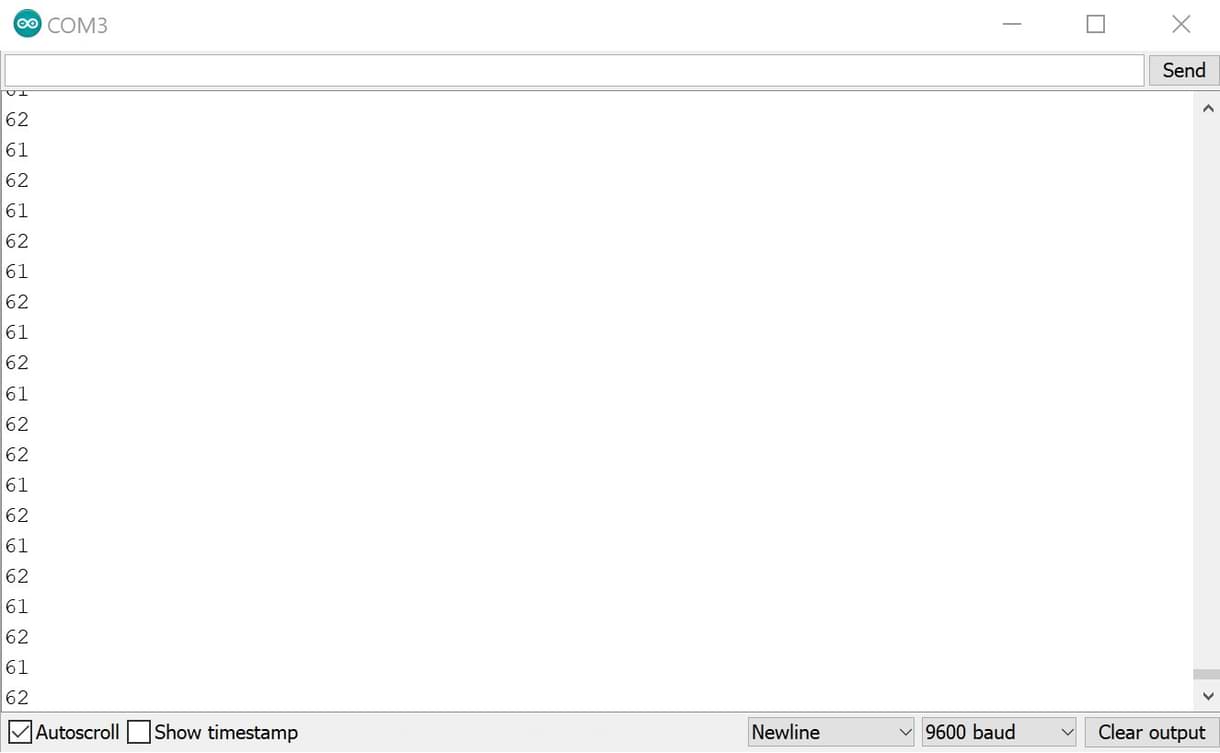
3. After uploading the code to the Arduino, open the serial serial monitor and test the directions of the joystick sensor.
Now, let’s learn how we can make Arduino communicate with processing:
The processing tool can be made to communicate with Arduino boards from a computer device by using serial communication to send data from processing to Arduino. The Serial library reads and writes data to and from external devices. It allows two computers to send and receive data. This library has the flexibility to communicate with custom microcontroller devices, and to use them as the input or output to processing programs.

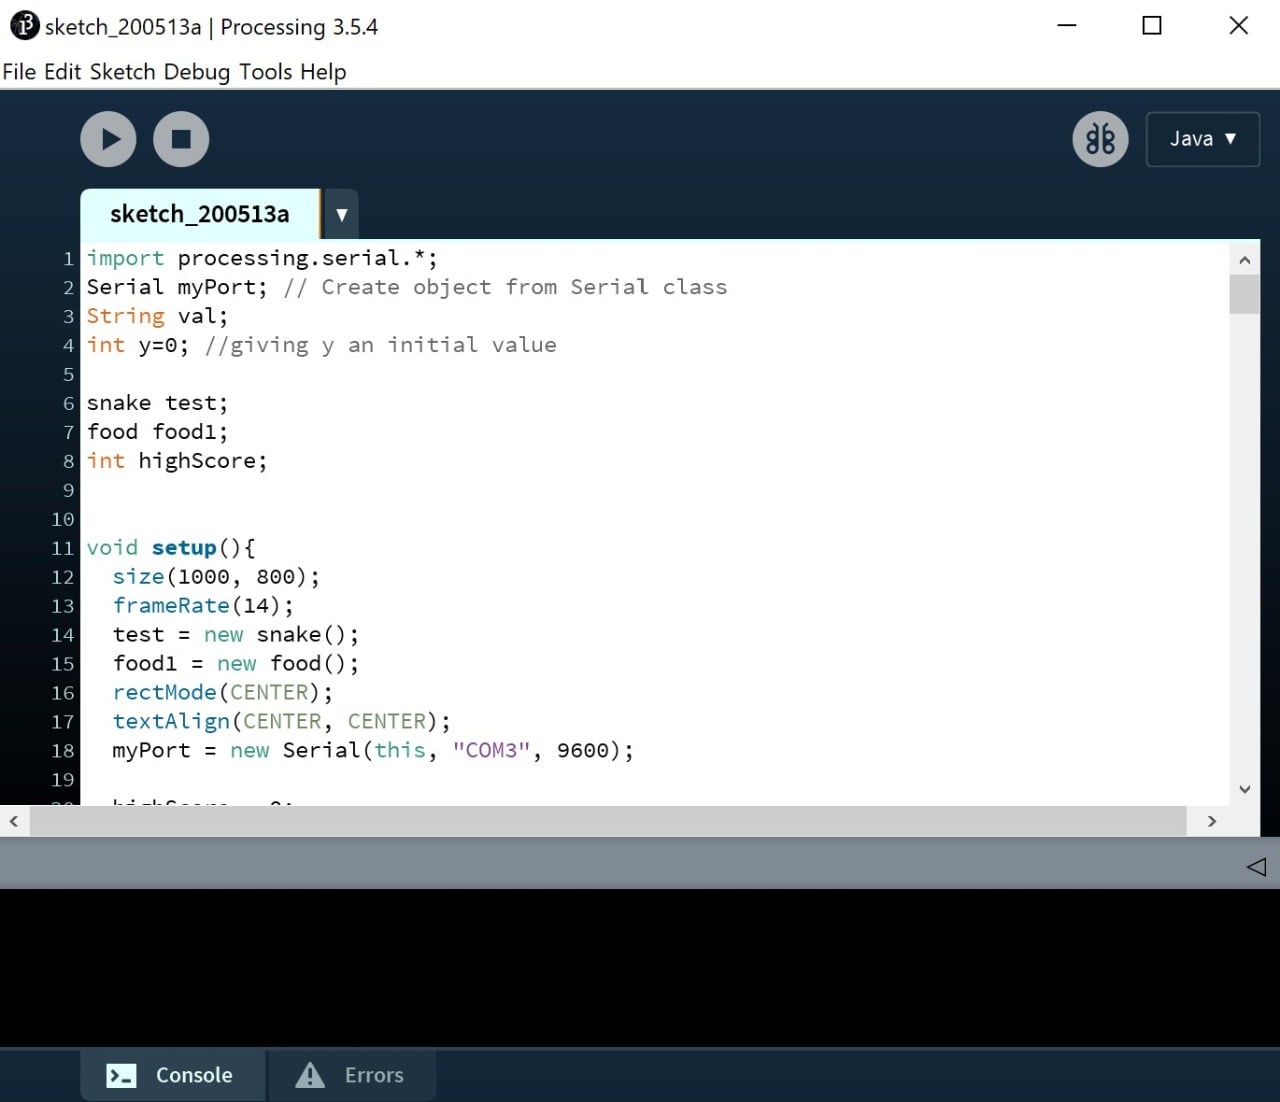
Now, I am going to edit some commands in the processing code to communicate the Arduino with processing.
1. Write this command.
import processing.serial.*;
Serial myPort; // Create object from Serial class
String val;
int y=0; //giving y an initial value
2. Add the serial port (com3) and the bude rate 9600 in the void setup command.
void setup(){
  size(1000, 800);
  frameRate(14);
  test = new snake();
  food1 = new food();
  rectMode(CENTER);
  textAlign(CENTER, CENTER);
 myPort = new Serial(this, "COM3", 9600);
3. Change this part of the code to switch the control from the keyboard to the joystick.
void keyPressed(){
  if(key == CODED){
    if(keyCode == LEFT){
      test.dir = "left";
    }
    if(keyCode == RIGHT){
      test.dir = "right";
    }
    if(keyCode == UP){
      test.dir = "up";
    }
    if(keyCode == DOWN){
      test.dir = "down";
    }
  }
}
The new code
/*void keyPressed(){

 while (myPort.available() > 0) {
    val = myPort.readStringUntil(3);
    if (val != null) {
      try {
    y =Integer.parseInt(val.trim());
   if (y== 60) {
        test.dir = "left";

    }
 if (y== 61) {

test.dir = "right";
    }

    if (y== 62) {

test.dir = "up";
    }

      if (y== 63) {
test.dir = "down";
    }


}
catch (NumberFormatException npe){}}}}*/
4. Add this command in void and move to indicate the directions.
void move(){
    while (myPort.available() > 0) {
    val = myPort.readStringUntil(13);
    if (val != null) {
      try {
    y =Integer.parseInt(val.trim());
   if (y== 60) {
        test.dir = "left";

    }
 if (y== 61) {

test.dir = "right";
    }

    if (y== 63) {

test.dir = "up";
    }

      if (y== 62) {
test.dir = "down";
    }


}
catch (NumberFormatException npe){}}}
The final code !
I added this code in processing software, and then I clicked on Run.
I faced some issues after running the code. I noticed the joystick was working in the wrong directions. I changed the directions from the code and finally the joystick worked properly !!
Now, Let’s Play !!
Arduino Test :
PCB Test :