wk.13-Networking & communications
“fabunalduino” - Making the fabduiono local version
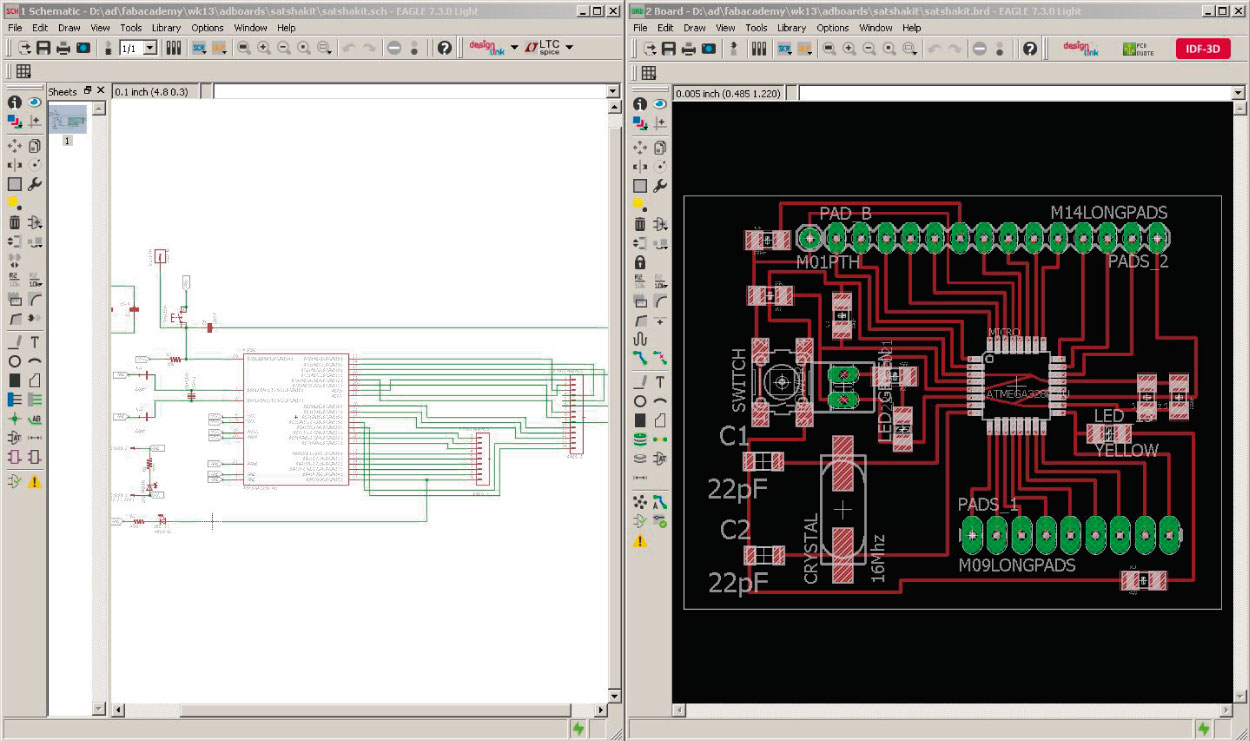
Fabduino last fab academy versión
Fabduino local versión
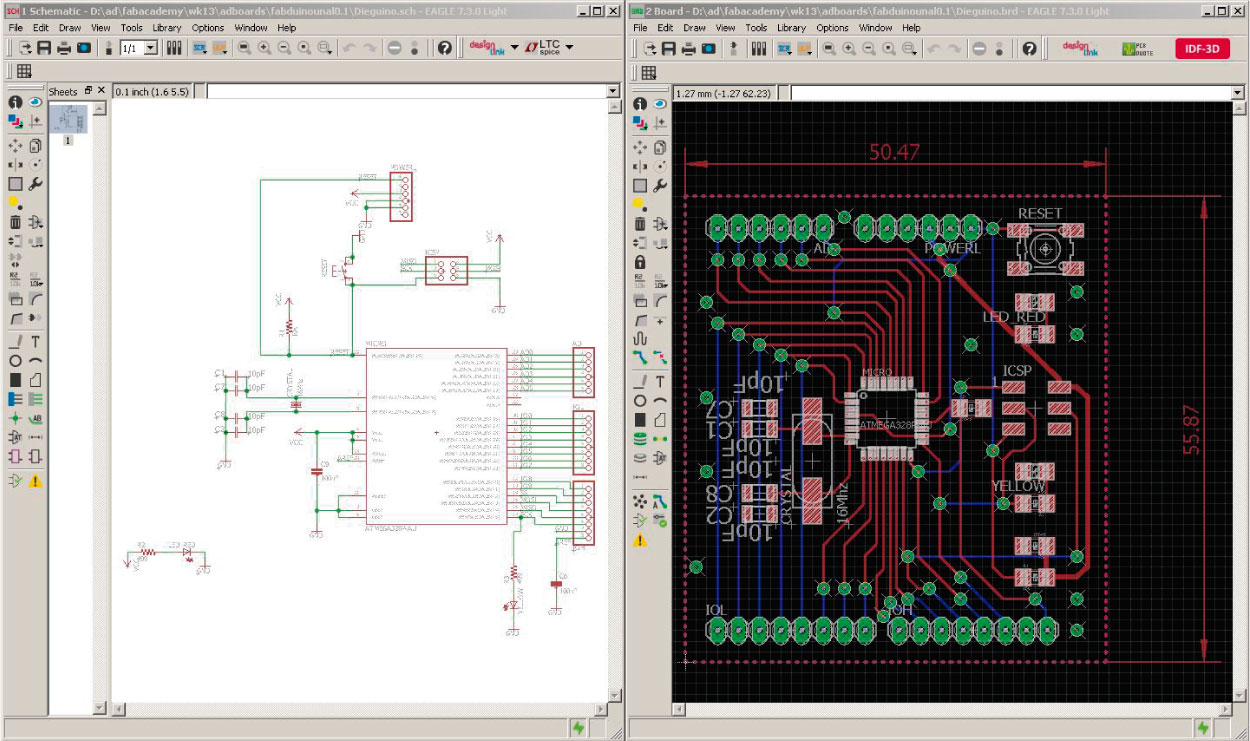
The fab team decided making the fabduino board local version, because we working with the arduino IDE and in this, is less difficult the run, test and develop a program, and also because the fabduino board do not run compatibility errors, this version was done with the tutors physics partners (with more support of our local tutor and great physic buddy Diego Londoño), taking as the base the Satshakit board, and basically the fabunalduino have the following modifications:
Resulting piece

Programing the arduino board

For the programing of the “fabunalduino” board i used the previous same tutorial page, where basically, I program the "fabunalduino" with a normal arduino using this as a ISP (this loading the arduinoIsp code).
Code development
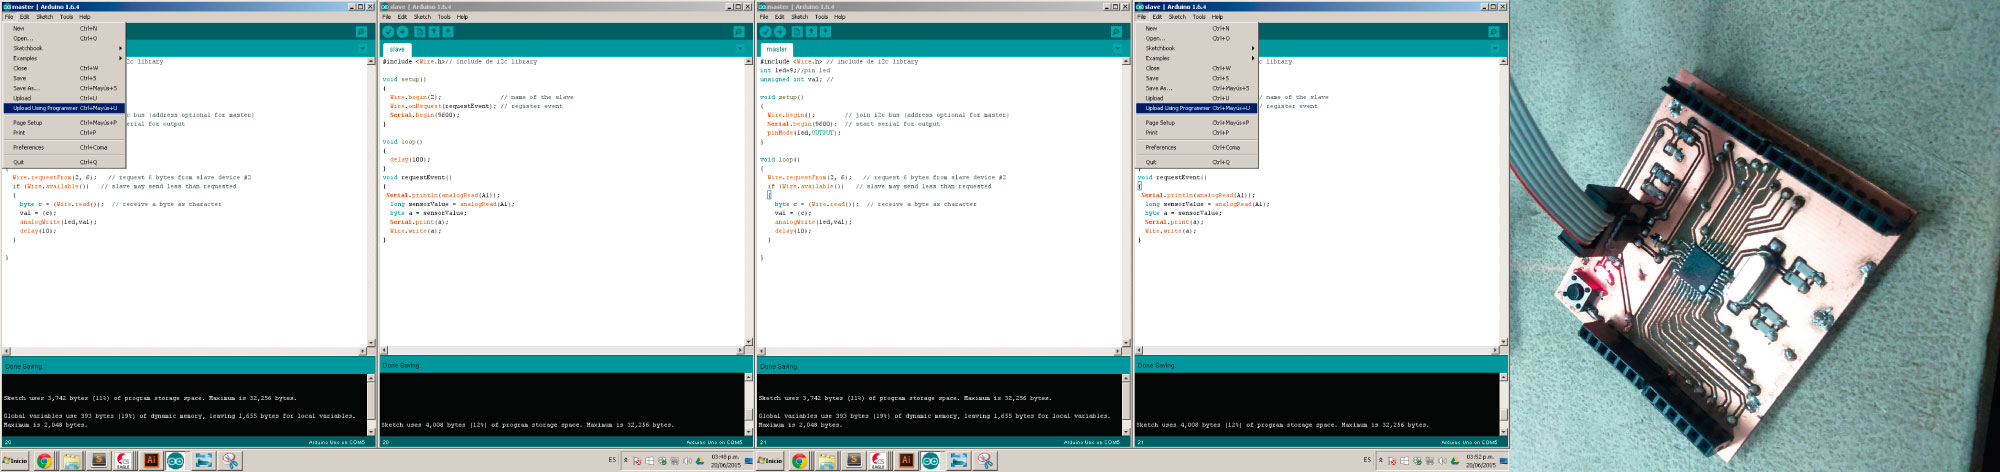
After of fabricate the board, i do a test code for the check of the "fabunalduino", following do that, I write the code for the networking between the "fabunalduinos", these using the library of teh arduino of the I2C protocol (wire Library) where basically, i work with a master (for the LED) and a slave (for the input potentiometer).
#include// include de i2c library int led1 = 8; //pin led int led2 = 9; //pin led int led3 = 10; //pin led unsigned int val; // void setup() { Wire.begin(); // join i2c bus (address optional for master) Serial.begin(9600); // start serial for output pinMode(led1, OUTPUT); pinMode(led2, OUTPUT); pinMode(led3, OUTPUT); } void loop() { Wire.requestFrom(2, 6); // request 6 bytes from slave device #2 if (Wire.available()) // slave may send less than requested { byte c = (Wire.read()); // receive a byte as character val = (c); analogWrite(led1, val); analogWrite(led2, val); analogWrite(led3, val); delay(10); } }
#include// include de i2c library void setup() { Wire.begin(2); // name of the slave Wire.onRequest(requestEvent); // register event Serial.begin(9600); } void loop() { delay(100); } void requestEvent() { Serial.println(analogRead(A1)); long sensorValue = analogRead(A1); byte a = sensorValue; Serial.print(a); Wire.write(a); }
I2C protocol
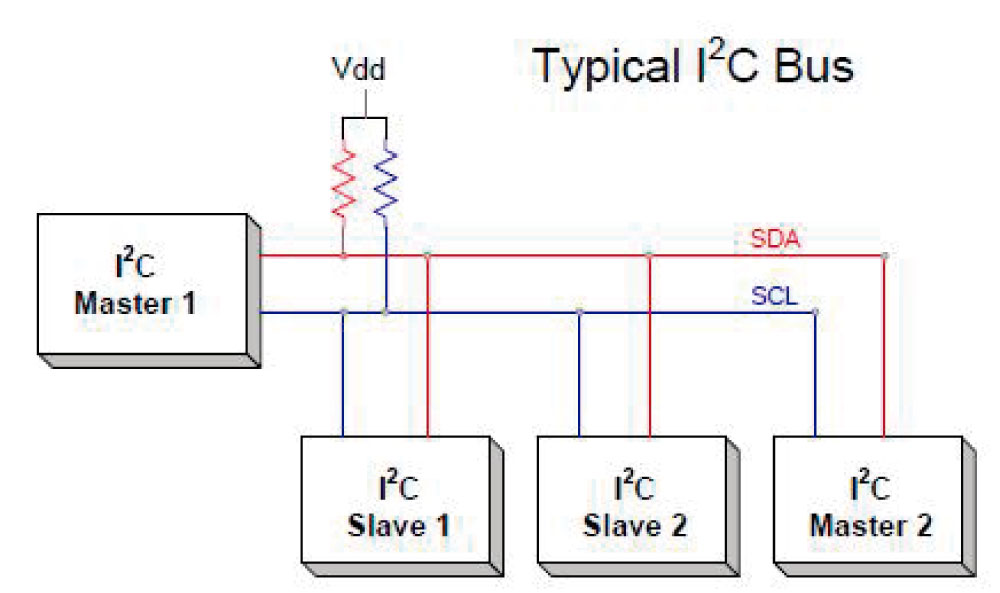
This is the image of the operating protocol with the code between the "fabunalduinos", also i do precision that I gave power to the master with a normal arduino and to the slave with the FTDI cable.
Final board
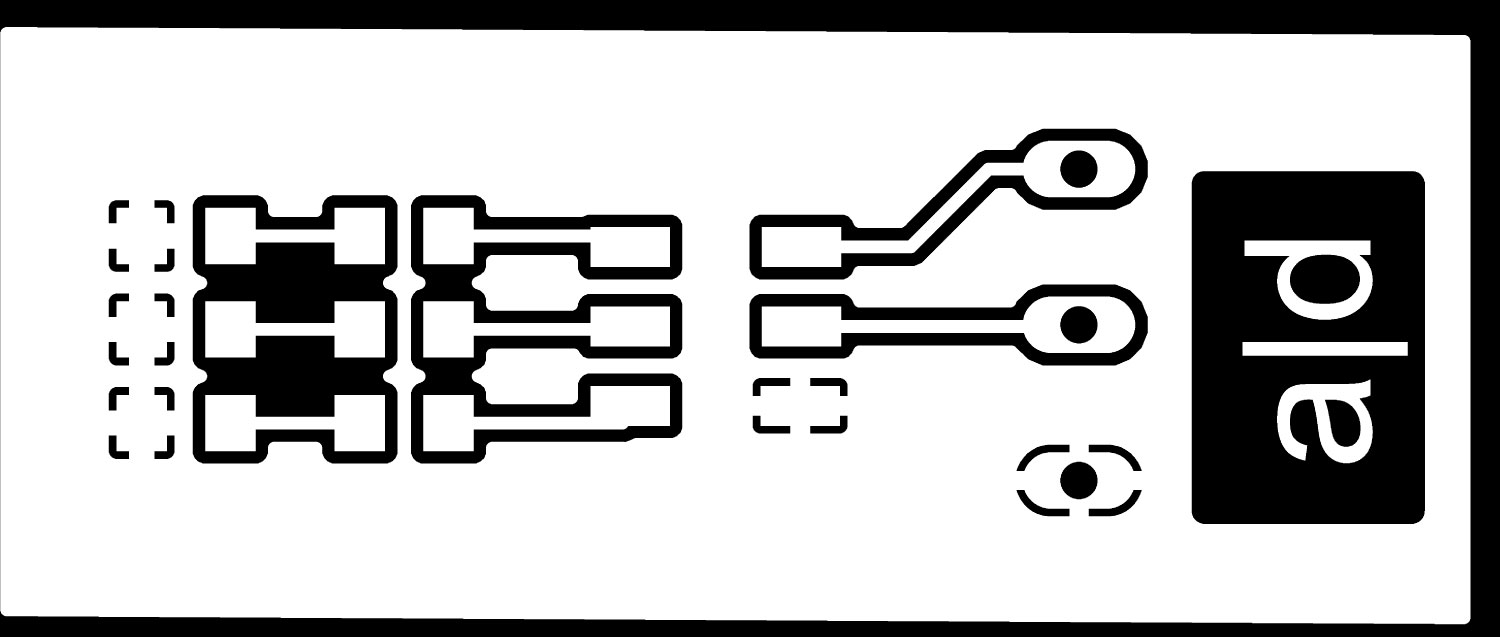
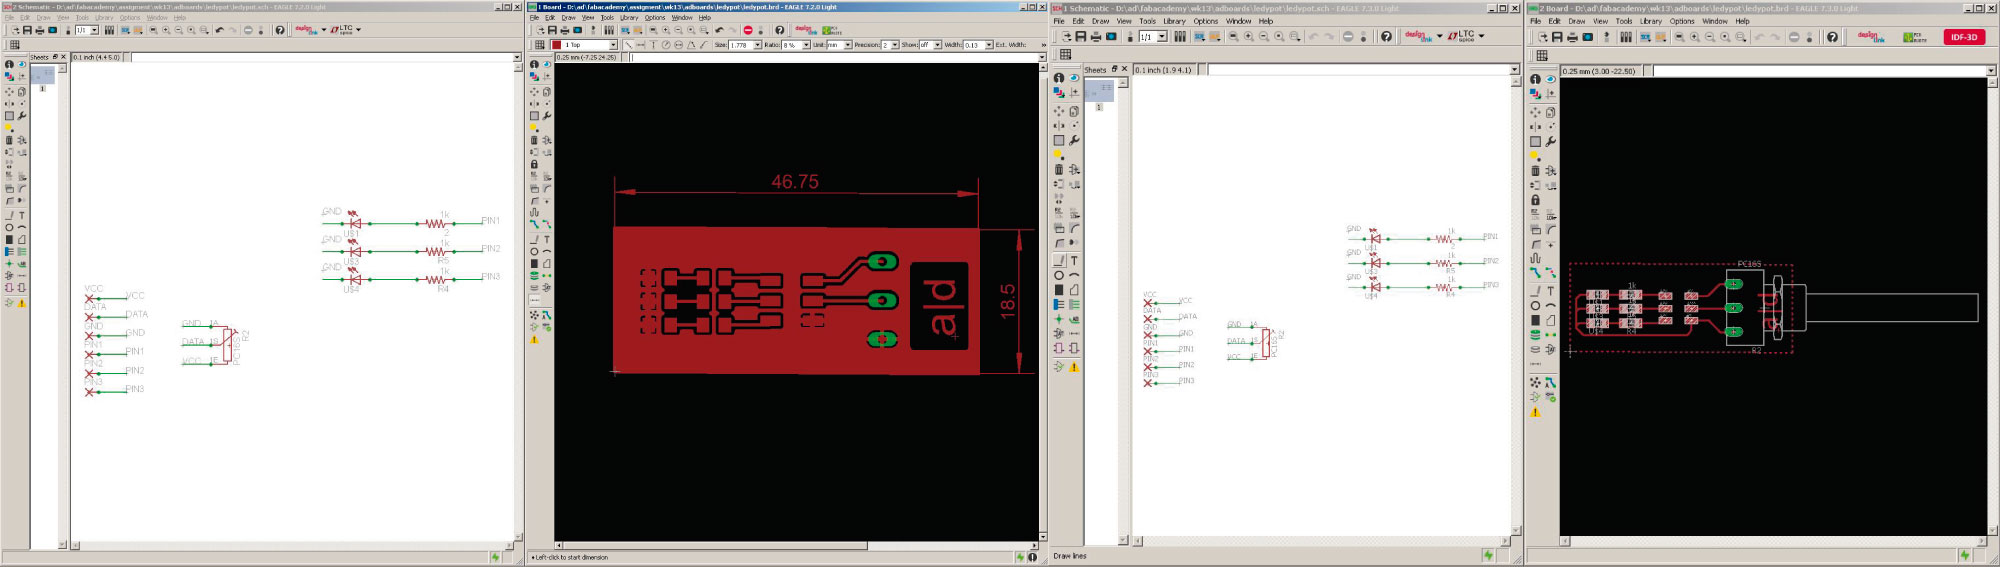
With the previous test, i design a small board for the run the program, in this case i create a circuit with the 3 LED, 3 resistance and one potentiometer, to follow the testing done in the protoboard and in the arduino interface, all this with the next component list:
Connections & Result
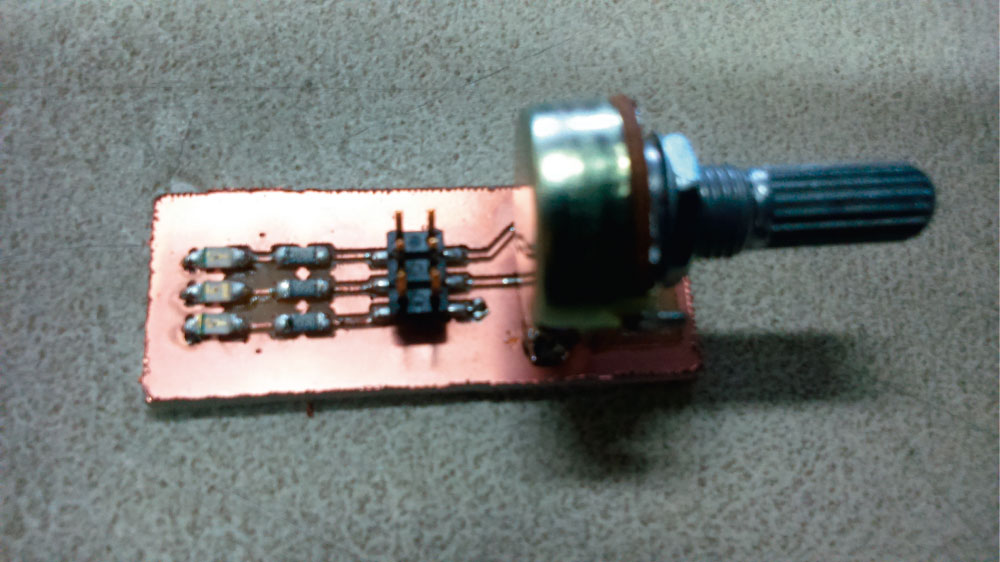
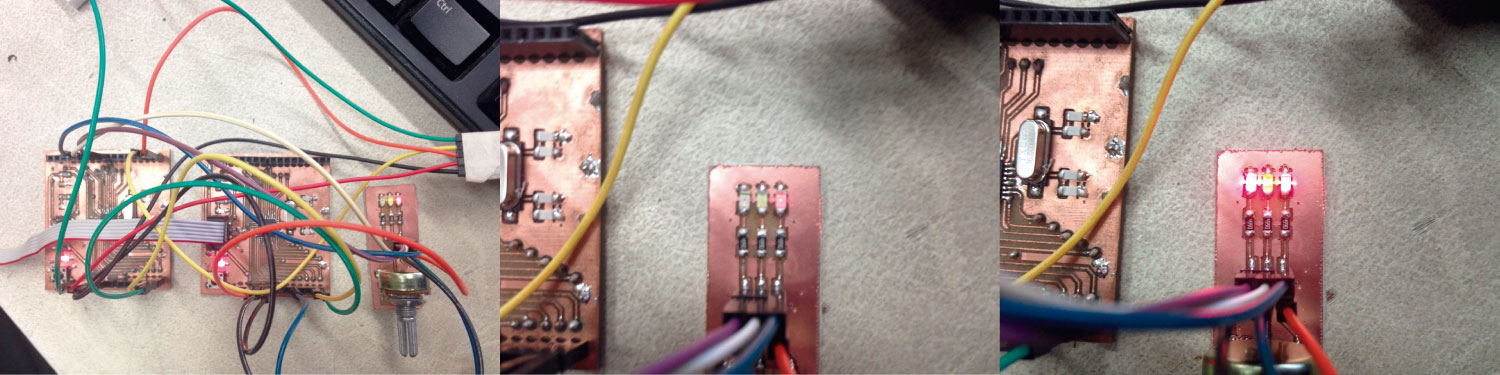
After the welding process of the components, I connect the networking system and i run the previous code in the new board.
Program in action
Learning & Fabunalduino experience
In the creation and work process with the fabduino local board, i think that is a powerful tool, because allowed me integrate several device with a simple device"fabduino" and also allowed me work more hard in the part of code development, because this element does not have many errors of interactions with the arduino IDE and for this is much more enjoyable create and write code with this device, so I think my learning in this assignment is oriented to the development to the fabduino device and understand how this works, also how integrate two and more microcontrollers for that works together in one function, that for my exercise was created lights variations with a potentiometer, and the last that I understood better how functions some components into the boards, in this case how the capacitor, in the case of fabduino off 10uf, can enable the efficient works of the FTDI cable, because if this lack the cable does not work.