wk.03-Computer-controlled cutting
Vinyl cut process
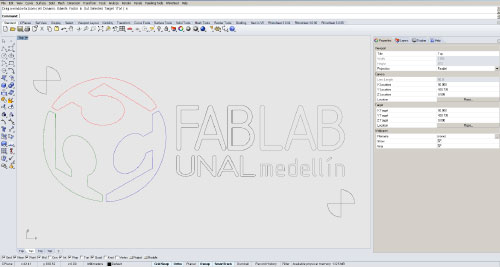
The initial idea to execute this assignment was develop around the group impression of the access logotype for the fab lab. nevertheless, because of the scale, and the participation of all member of the group we decided to make an scale design to tag the laptops of each person in the group. Our intention was to explore an object cut with many different colors, where step one was the design and digitalization of the vectors.
Part division, layers or cutting segments
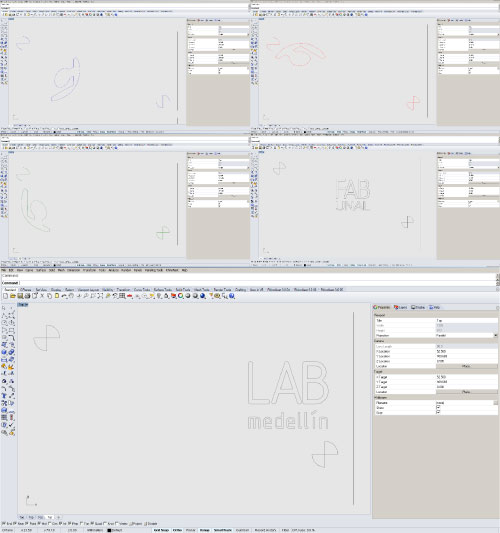
After the designing stage, i continued to generate the cutting files, process that consists on dividing each part between the material or the color of the vinyl, and then putting some reference elements which overlaid between them, allow me to have the last piece.
Testing and verification of the cutting parameters
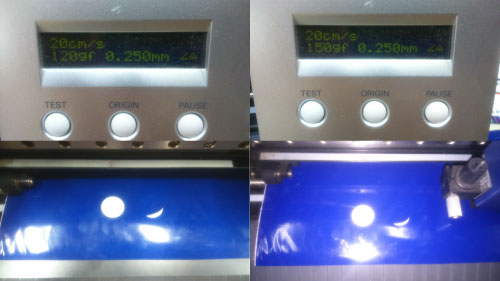
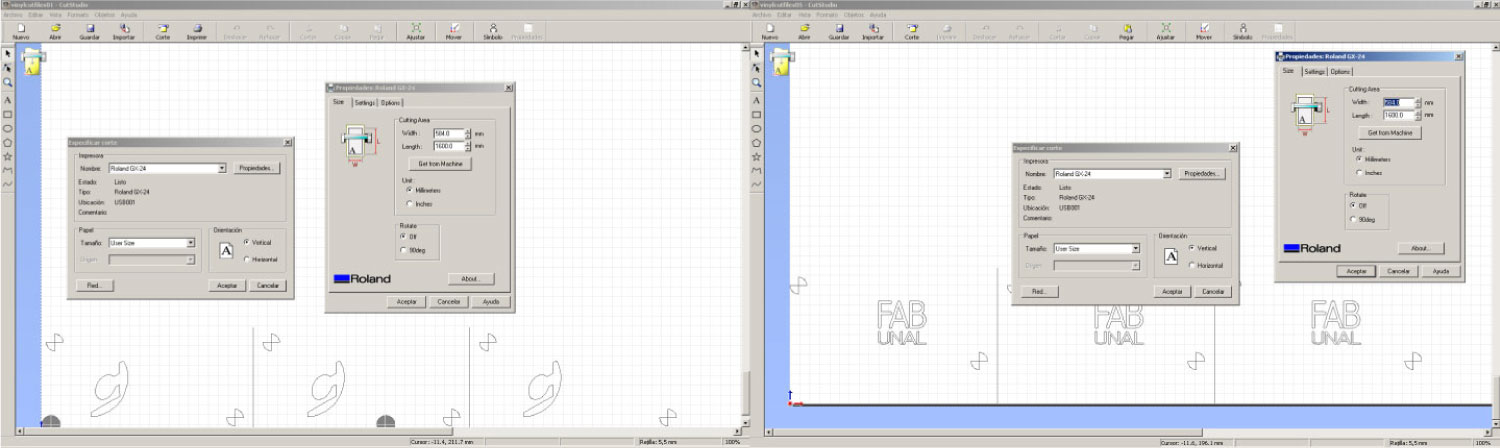
I worked with the Roland vinyl cutting machine "Roland Gx-24", and considering that each kind of material represents a brand new experience, i cut two testing circles, using the software CutStudio to generate and send the cutting process to the machine (i used cut studio instead of “fabmodules” because this last one had installation problems and didn’t work as expected), where the speed, movement and strength settings: the first testing circle "speed = 20cm / s - force = 120gf", and the second one "speed = 20 cm / s - = 150gf force". These parameters where efficient regarding to the element cutting, but the second testing had better results with the object extraction.
Cutting and fabrication of the piece
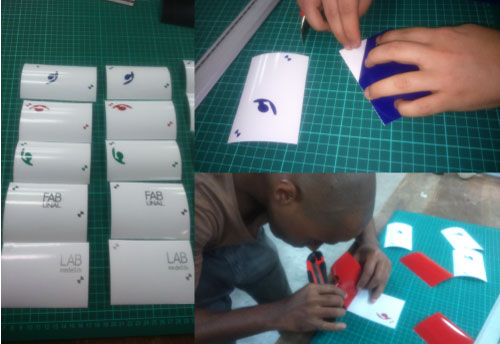
I proceeded with the cutting of each part of the logo, but i must mention three relevant aspects; 1- I had to use of the parameters mentioned before, because of the different shapes of every piece. 2 - the selection of a bigger strength on the bigger pieces, like the one of the image of the logo. 3 - I determined that it was easier to extract the pieces cut with lower pressure, because the moving speed could not be configured. These aspects were relevant to avoid mistakes like moving of the tiny pieces of the letters so they didn’t lift up from the spreadsheet.
Surface fixing (laptop)

As i obtained the cutting pieces i put each of them, fixing them by layers or colors of every one of them, finishing the process with the coupling of the guides (i suggest to start by the guide that has a wider space)
Laser cutting process

Initially i decided to work in the local laser cutting machine “Laser MasterCNC” with 4 mm cardboard, then i tested the tolerance and the assembly elements, through the creation of a series of unions, with 0.5mm width, starting from 4 mm (cardboard’s width), and reducing it to 3.7 mm. this last one was optimal with fixing and assembly.
Design of final piece

The design was developed in the “rhinoceros” software and the idea was to create an envelope for light “efl”, this with the intention to work with lighting on the final project, accompanied by some inexpensive material that would allow me to apply a texture pattern (created on grasshopper), which i worked on the previous assignment, to give it flexibility and variation to light.
Fabrication

I generated the fabrication files starting with the extraction of the cutting vectors, it’s placement on a work plane “x-y”, and afterwards the process of nesting (using RhinoNest software). The base material for this project were two pieces of cardboard of 600x300 mm (leftover material from the epilog laser), and a third one of 800x 500 mm (leftover material from the local laser machine).
Testing of finishing texture and cutting process

By a suggestion of my local tutor, i thought it was convenient to test the speed and power of the machine, to obtain and efficient and clean cut, where i determined as a speed 30 (referenced unit on a scale of 1:100), and as power the next variables 35, 40, 60, 70, 80 (referenced units on a scale of 1:100); i chose power unit 35, because it was the more efficient for the cutting and extraction of the piece.
Final result & assembling tutorial
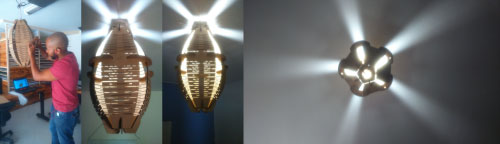
Finished the cutting process, i started to assemble the obtained pieces, and their placing on the proper room (my bedroom), and i also recorded a video, where i show how easy is the assembling process of the pieces of the element.
Experience
The work in this assignment i resulted interesting, because i learned some the possible tools and strategies for the fabrication of my possible final project. and allowed me more explore the softwares which i know.