wk.09-Molding & casting
First test model
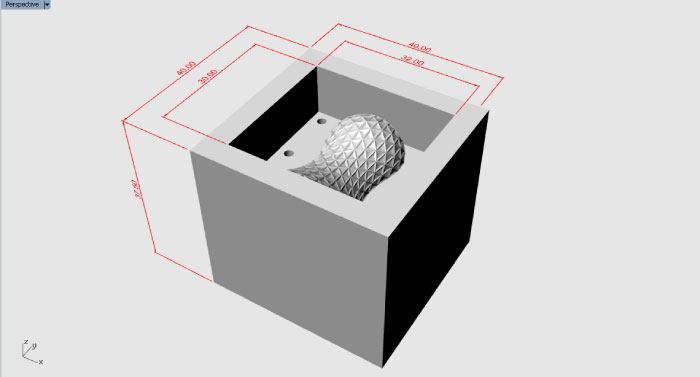
I start this week assignment with the design of a shot cup, because of the size the element could have. But thinking the machining timing I decided to make a chocolate candy that follows the same shape principles of the initial object. I modeled as in the lasts assignments in “Rhinoceros” and its plugin “grasshopper” because of my idea to work with parametric and generative design.
Starting with the fabrication process
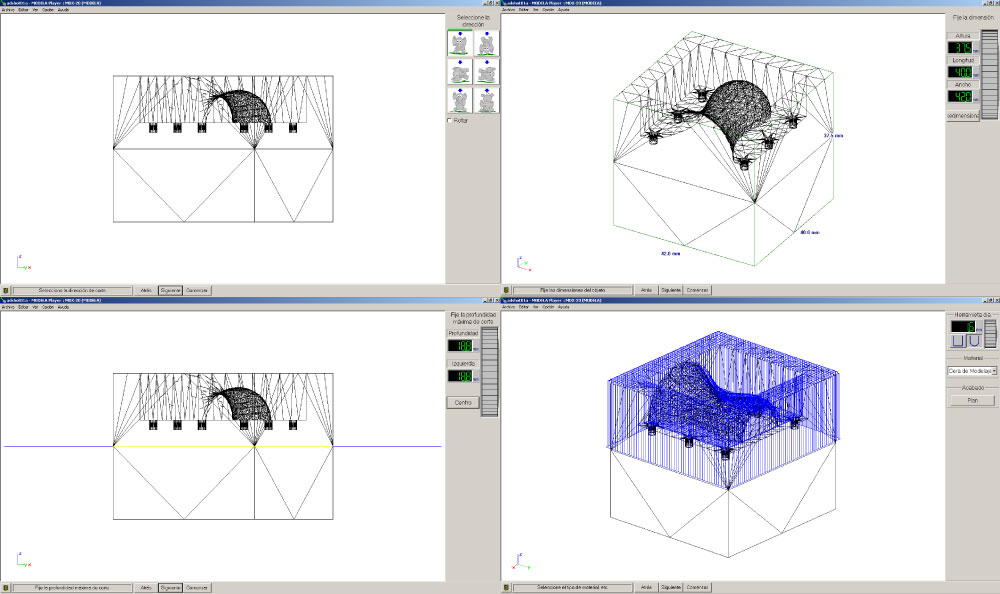
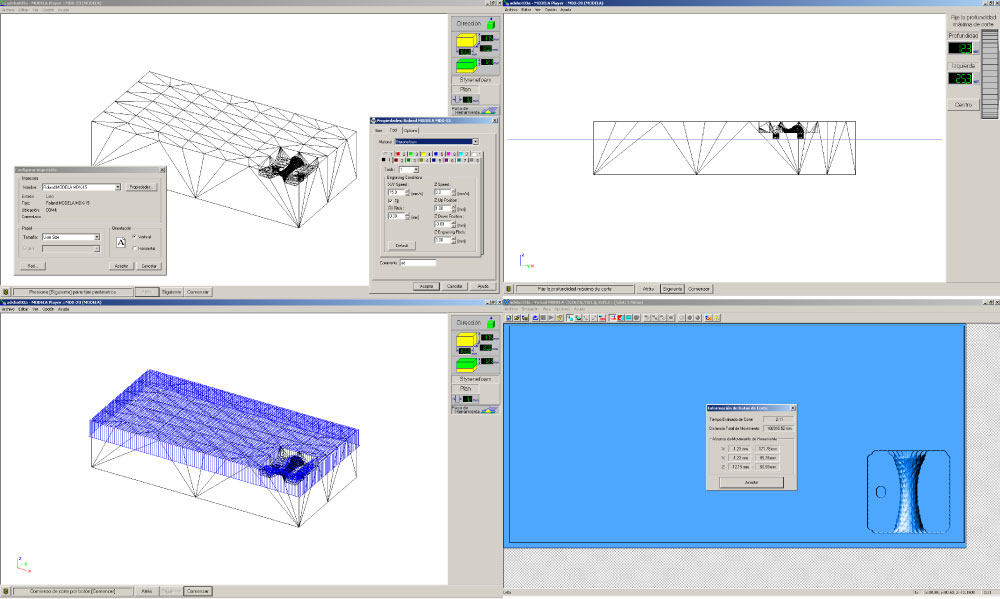
Designed the object I generate the milling process in the Modela Player Software, very friendly software that show us step by step the process that will be develop. First of all, import the .stl file in the modela player interface, latter defines the object orientation, scale and dimensions, the cut depth (in this case you need know the length and diameter of the tool you´re going to use), define the work material and the shape and dimensions of the tool (plane or rounded). After then select the type of process (Scrabble “plan” or finished “fino”). For this first test I choose because of the object dimensions and the level of detail that I want to get a 1/16” (1.58mm) end mill rounded. For the material I used molding wax and as machining process “scrabble” plan.
More Configurations
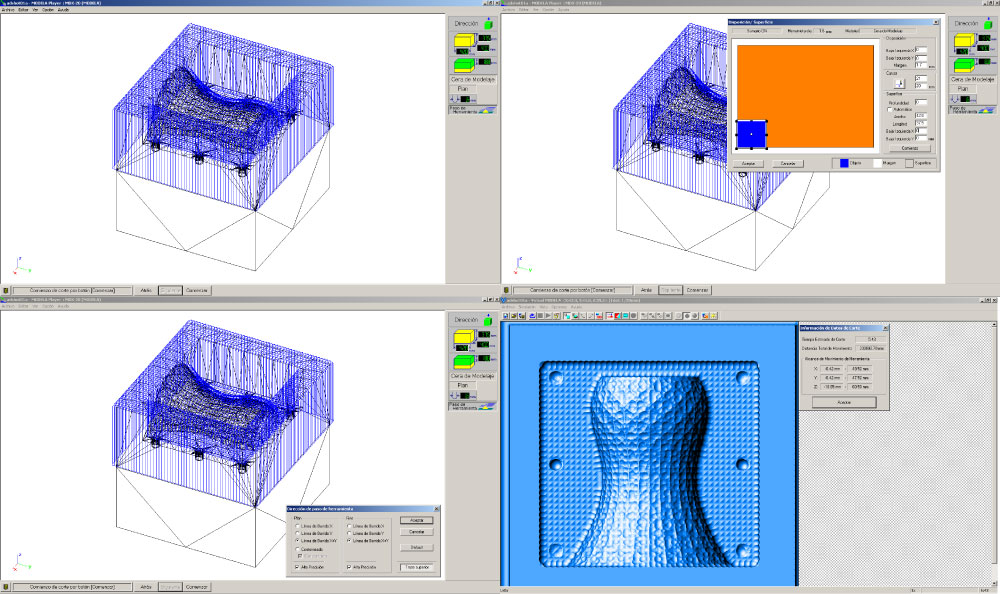
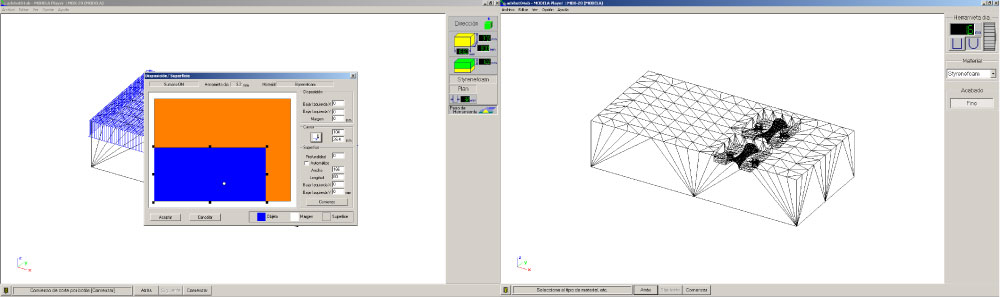
Taking in account the preview recommendations I define the work surface parameters, as the margin (I didn’t use margin for this element), the milling direction for the scrabble process in the X and Y axis process that I recommend because it allows you to have a detailed model but increasing the machining timing. This can be visualized in the virtual modela software. In this process and in general I work with a "work speed" in the x-y axis of 15.0 mm/seg and in the Z axis of 2.0 mm/sec.
Finished Process (fino)
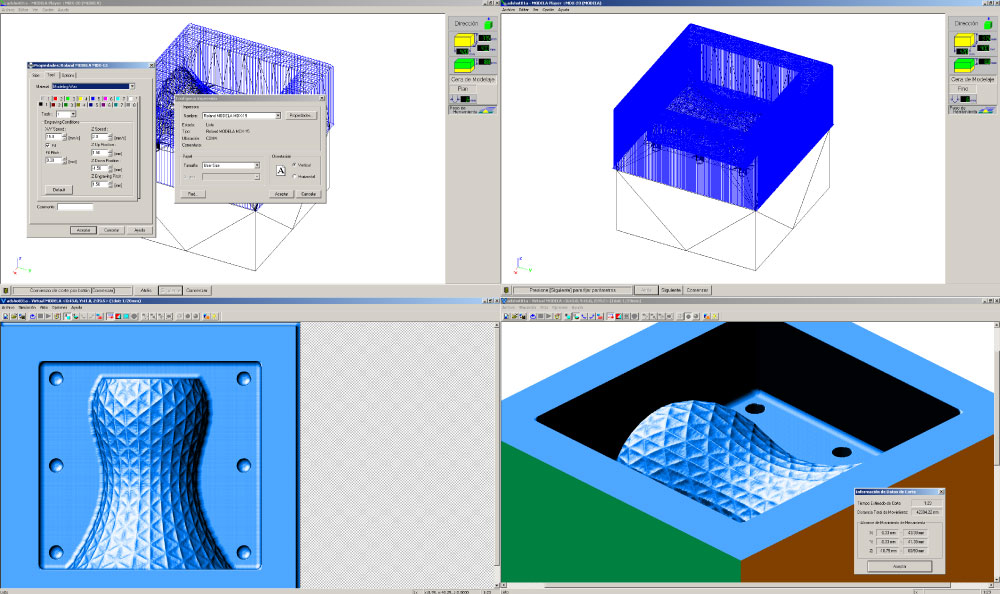
Completed the process of the scrabble of the element, I made the finishing process of the piece. I used the same settings of the last process.
Final Mold
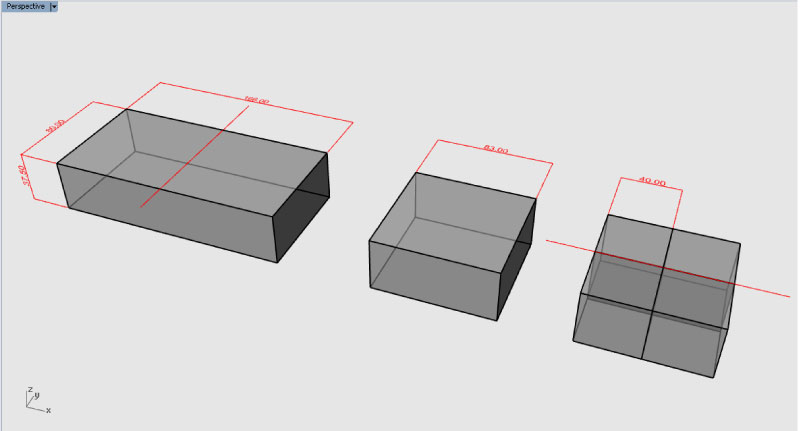
As in the first test mold, I designed the final element in “Rhinoceros” and its plugin “Grasshopper”, considering the work area, because the base material (molding wax) was divided for two people. Then I decided to work with a minimum area to produce many elements.
Work area
Generative element
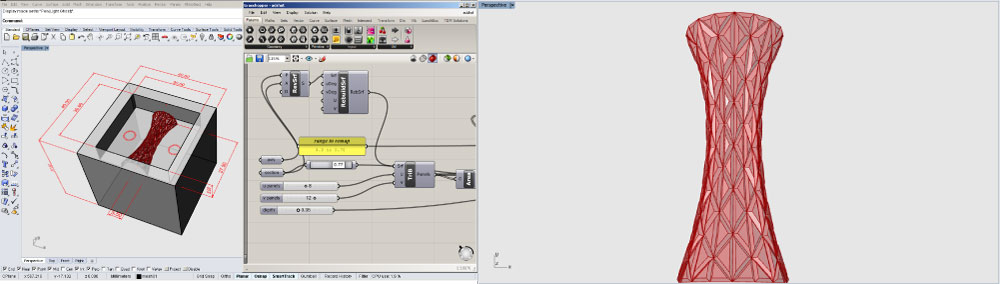
knowing the work area, i designed the piece of this assignment. First of all thinking in a central axis and the section base (curve), then i did a revolution to 180° (radial extrusion) to create a surface, for later apply a triangulated pattern, with the grasshopper definition i can control the U-V divisions and generate many formal results.
From N.U.R.B.S. to Meshes
I develop the model as N.U.R.B.S. (non-uniform rational B-spline), but for the fabrication is much better turn the polysurfaces into meshes, because the time of the file exportation reduces and we have control of the polygon number of the mesh.
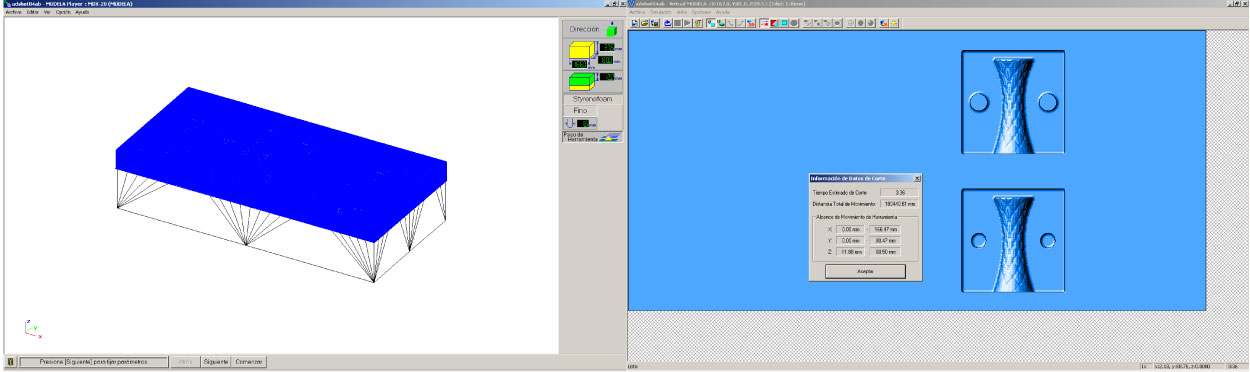
Fabrication process - roughing process “Plan” - mold “A”
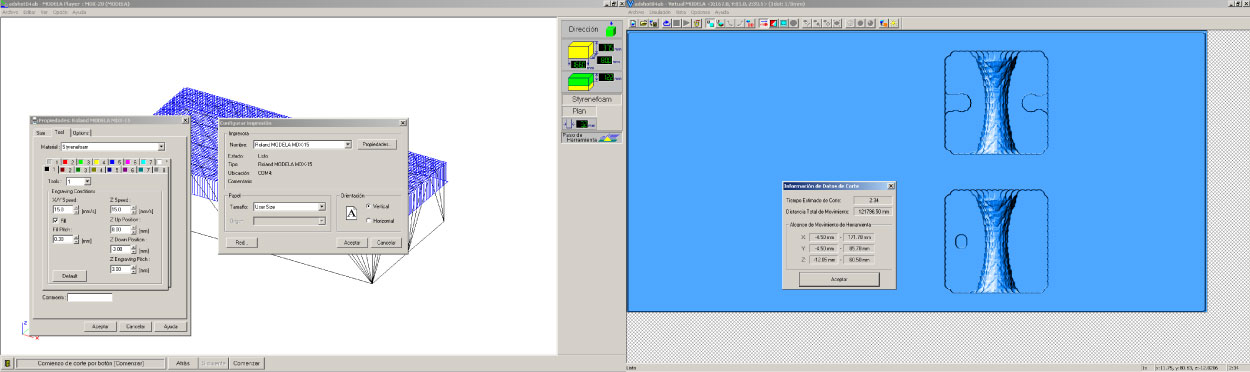
The next step consisted to create the cutting process for the machine and produce the piece, i did this in the ModelaPlayer software with the following parameters; material, work speed in the “x-y” axis= 15mm, work speed in the “z”axis, tool displacement length in the “z”=1mm, cut deep=3mm, cutting depth layer= 3mm, global cut deep= 12.3mm, shape and diameter of the tool (flat or plane “⅛”=3.2mm”), type and direction of cutting layer (roughing or Plan in the “x-y” axis). The total time for the machining of the piece was “2:11 - hr:min”made in the VirtualModela Software.
Finishing process “Fino” - mold “A”

Made the roughing process, I decided to make the finishing process for the optimization the machining timing, and only having to send the machine processes, with the parameters in the same way as in the roughing process, but but with variations in the shape and diameter of the tool (rounded to 1/16”= 1.6mm), type and direction of cutting layer (finishing or “Fino” in the “x-y” axis). the total time for the machining of the piece was “4:04 - hr:min”
Roughing process “Plan” - mold “B”

For this process, I applied the same parameters of the mold "A" process but with the following change; global cut deep=8.2mm (cutting length of the tool) , and in the machining time simulation = 1:55 “hr:min” (by the form of the model).
Finishing process “Fino” - mold “B”

In this part of the process, i worked with the same parameters and variations of the previous steps.
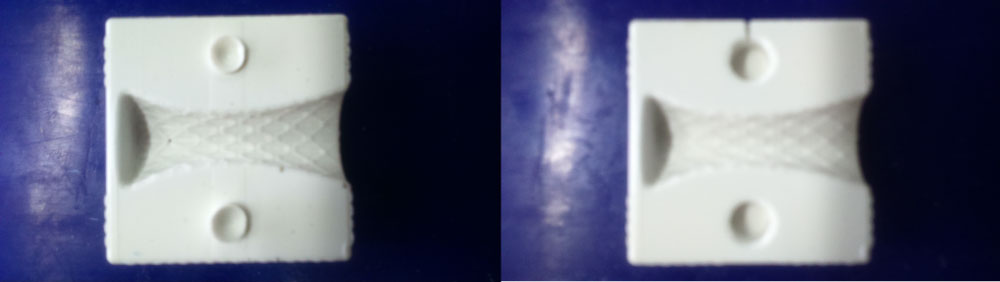
Final piece and conclusions
Only has been necessary to send a machining process (mold "A") to have clear how the machine and software works, concluding: as first aspect, the tools selected for the work process functioned efficiently (by shape and model scale), as well how the cutting process in "x-y" axis of the element (by more definition and fidelity of the piece), and as a last, I recommend have displacement length in the "z" axis of 5mm "z up position" (to avoid failures in large millings, in the case of the ModelaPlayer).
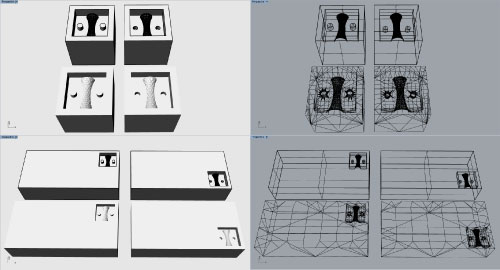
Fabrication of the final model

I did the machining process of the molds "A" and "B" in the same material piece (molding wax), for the time and machining optimization, i placed all the parameters the last cutting process but modifying the following points: working speed in the "z" axis =15mm/s (z speed) and the displacement length in the "z" axis of 8mm "z up position".
Settings and roughing process simulation “Plan”
Settings and roughing process simulation “Fino”
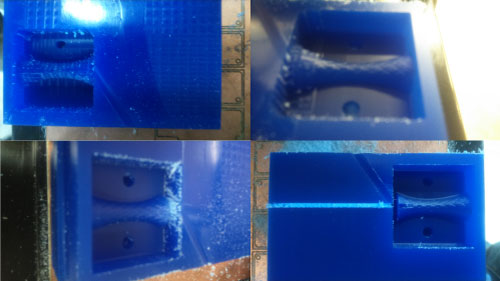
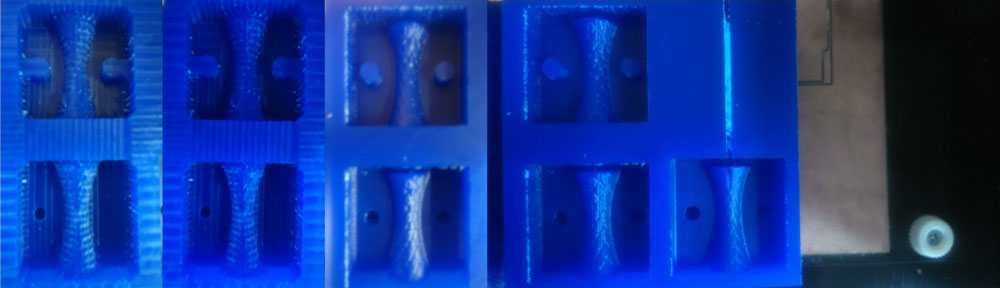
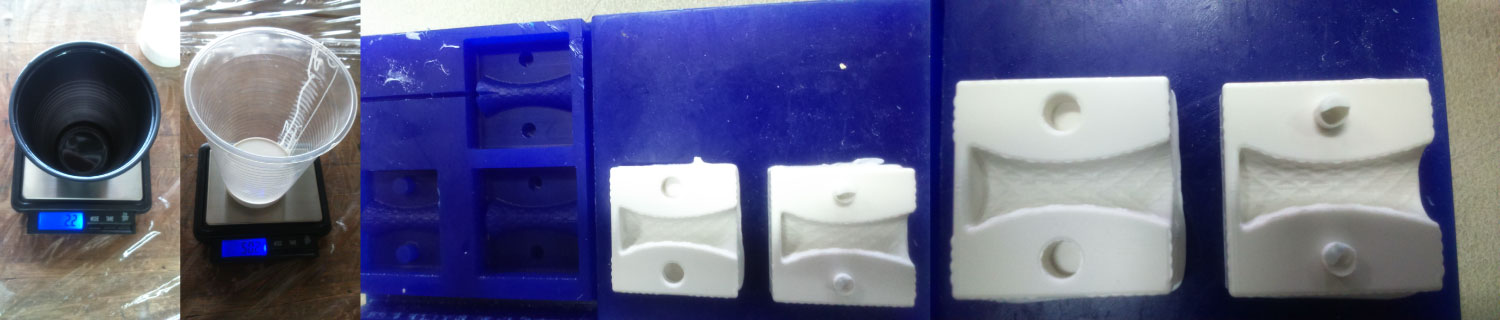
Process and resulting pieces
Preparation of silicone molds
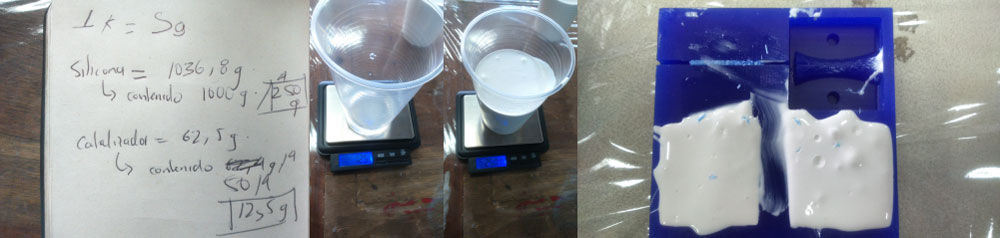
I decided to work with a silicone mold, that has a very practical method of preparation, the silicone is prepared with two substances, the first the silicone mix (1000g) and as second the catalyst (50g). I worked with a little part of all material to make and experiment with several molds, and I divided the silicone into proportional parts for the maximum use of material "silicone=250g/catalyst=12.5g" (once pour the silicone mix, shake and move the piece of 20 to 30 min).
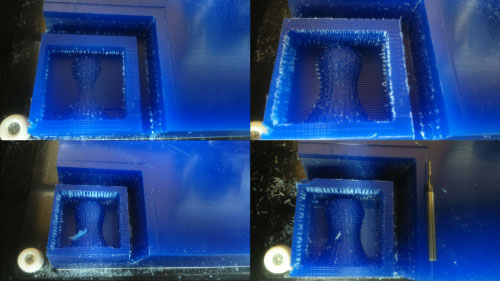
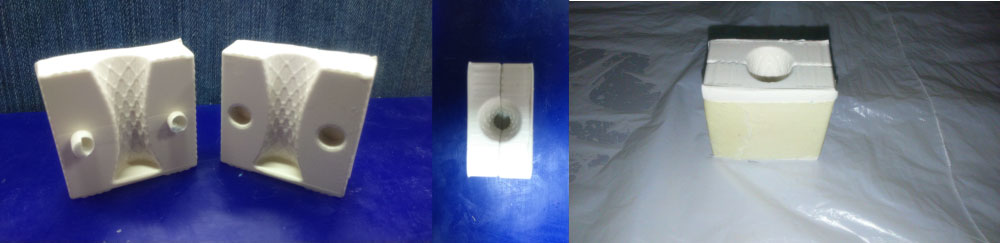
Extraction of the piece
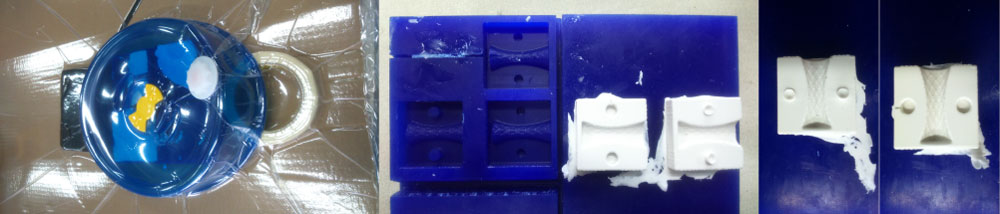
For this exercise i worked for recommendation of the local tutor with vacuum bags, also using a cardboard base and a plastic transparent shell, for remove the air of the molds, (this for a period of 2 hr every 5 to 7 minutes). after the previous process, the piece "mold" was left drying during 18 hr approximately.
Mold “1”
In this case I proceeded with the correction of the parts for a much better appearance and functionality of the element, this process is done by removing with scalpel of all material excess (of the edges).
Final mold
The lab team decided to do another piece with less silicon, this by waste of the first mold but with the same proportions for the all pieces (silicone=50g/catalysator=2.2g).
Mold “2”
The elements were extracted of the same mode just as the pieces process of the mold "1" (but in this occasion the molds show some bubbles in the small parts of the junctions).
Final chocolatte piece
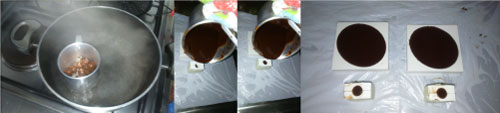
I worked with the spheres of melted chocolate by water bath process (this is more practical and easier at the pour butter in the hot chocolatte).
“Grasshopperlatte”
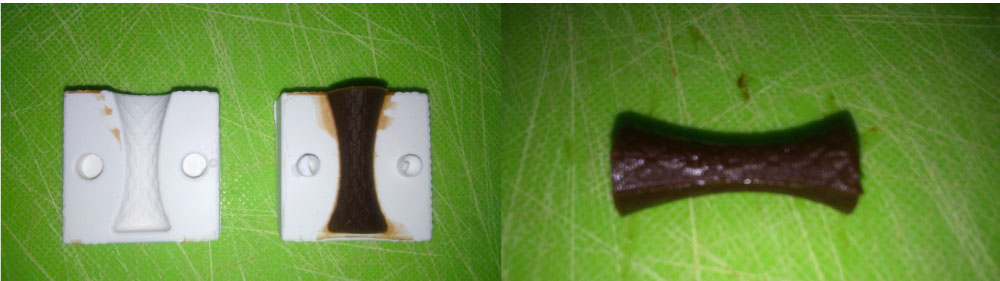
Once the chocolate is poured into the mold, this was left cooling overnight (for 8 to 10 hours).