wk.05-3D scanning & printing
3d scanning process “pastu”

In the first exercise of the assignment, i worked to 123d Catch software for the 3d scanning, where i chose a simple object "the pastu sculpt" for the process. Also the lab team received the photogrammetry course of the Andres Hincapie architect for the fundamental and practical aspects of the 3D scanning in 123d Catch" (color and composition background "let's hope so very clean and monochrome", label and guides reference "in possible yellow", and the correct sequence of the photos "between 15 and 20 images starting and ending at the same picture").
3d scanning process “ad”
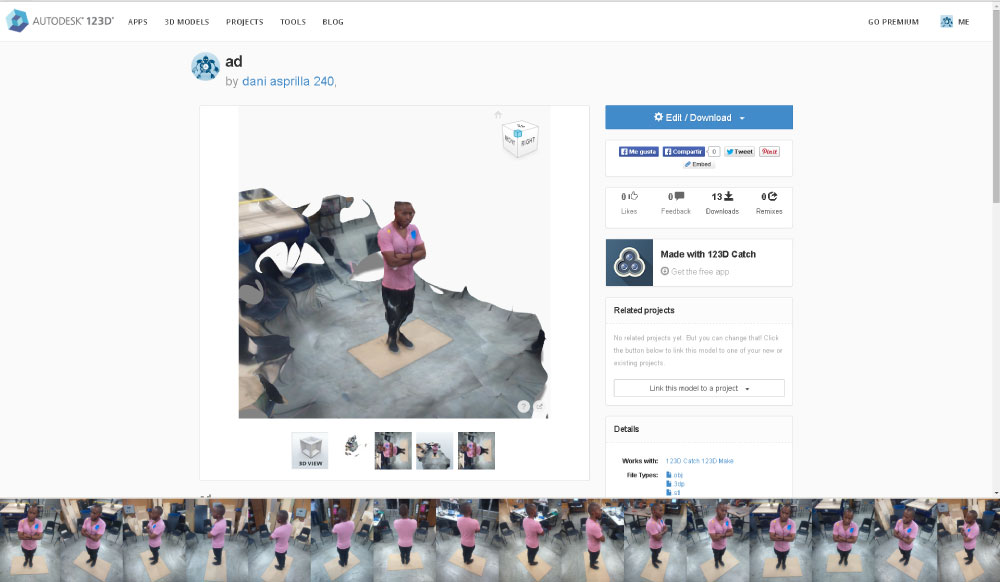
The lab team decided do a grupal scanning of all member, with the tecnicas learned for the Andres Hincapie course.
Linking model with augmented reality
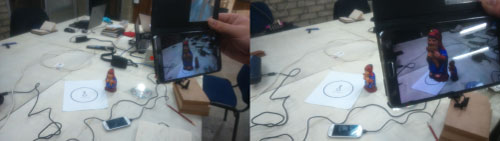
Once finished the first model, and again with the Andres Hincapie tutorials the lab team worked in the unity3d, software interface "augmented reality, modeling and rendering software", because we wanted explore how incorporate and display a 3D model in a real context, the process was with the Andres Hincapie code (a process really short but extremely complicated), but exist a very powerful cellphone app augment that have less process that UniTy.
Cleaning of the digital model “pastu”
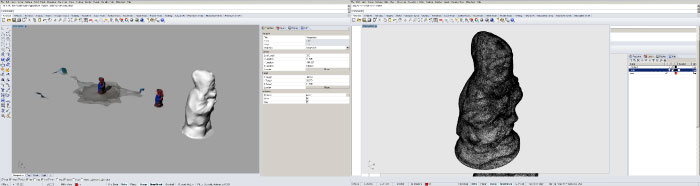
I cleaned the model in the Rhinoceros software because is necessary for the optimal impression and the size file, simplify the polygon number of the model.
Cleaning of the digital model “ad”
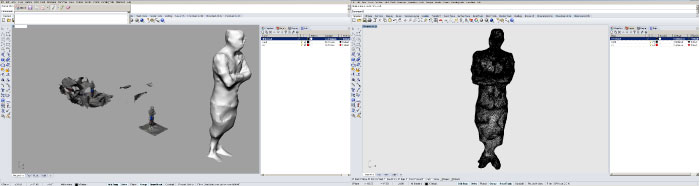
Unlike the first model this resulted more complicated to edit, because not ideal subject color and position.
3D object design
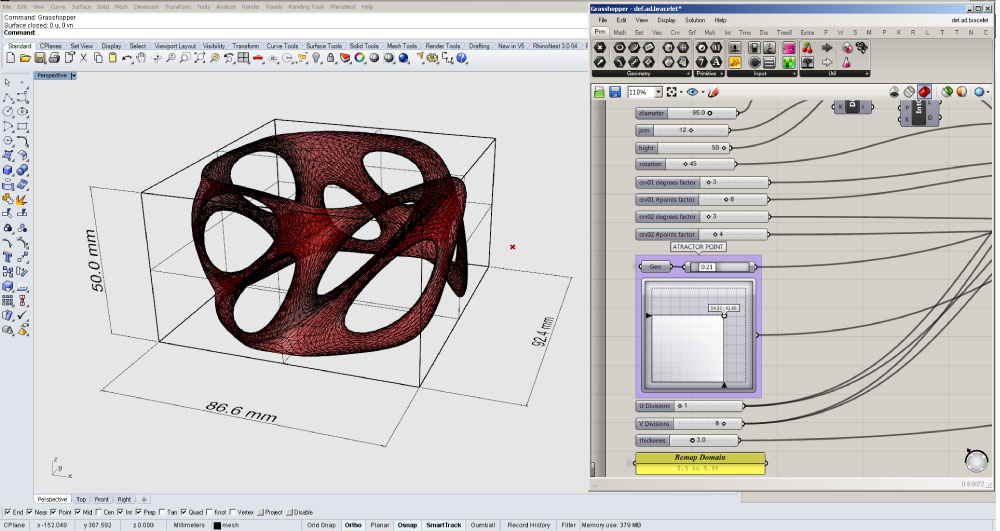
I developed the model in the RhinoCeros Software and his complement GrassHopper, because and wanted crate my handle as a parametric model with variations in the dimensions, shape and more aspects of the conformation.
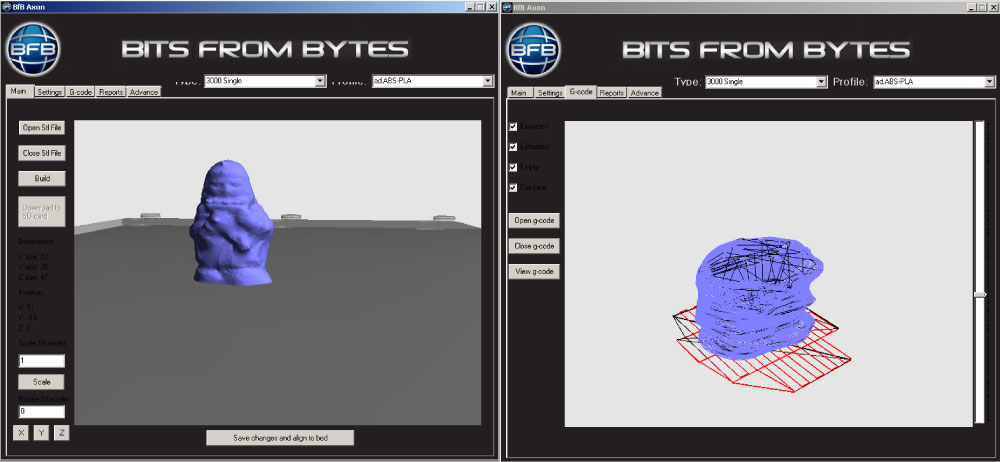
G Code generation
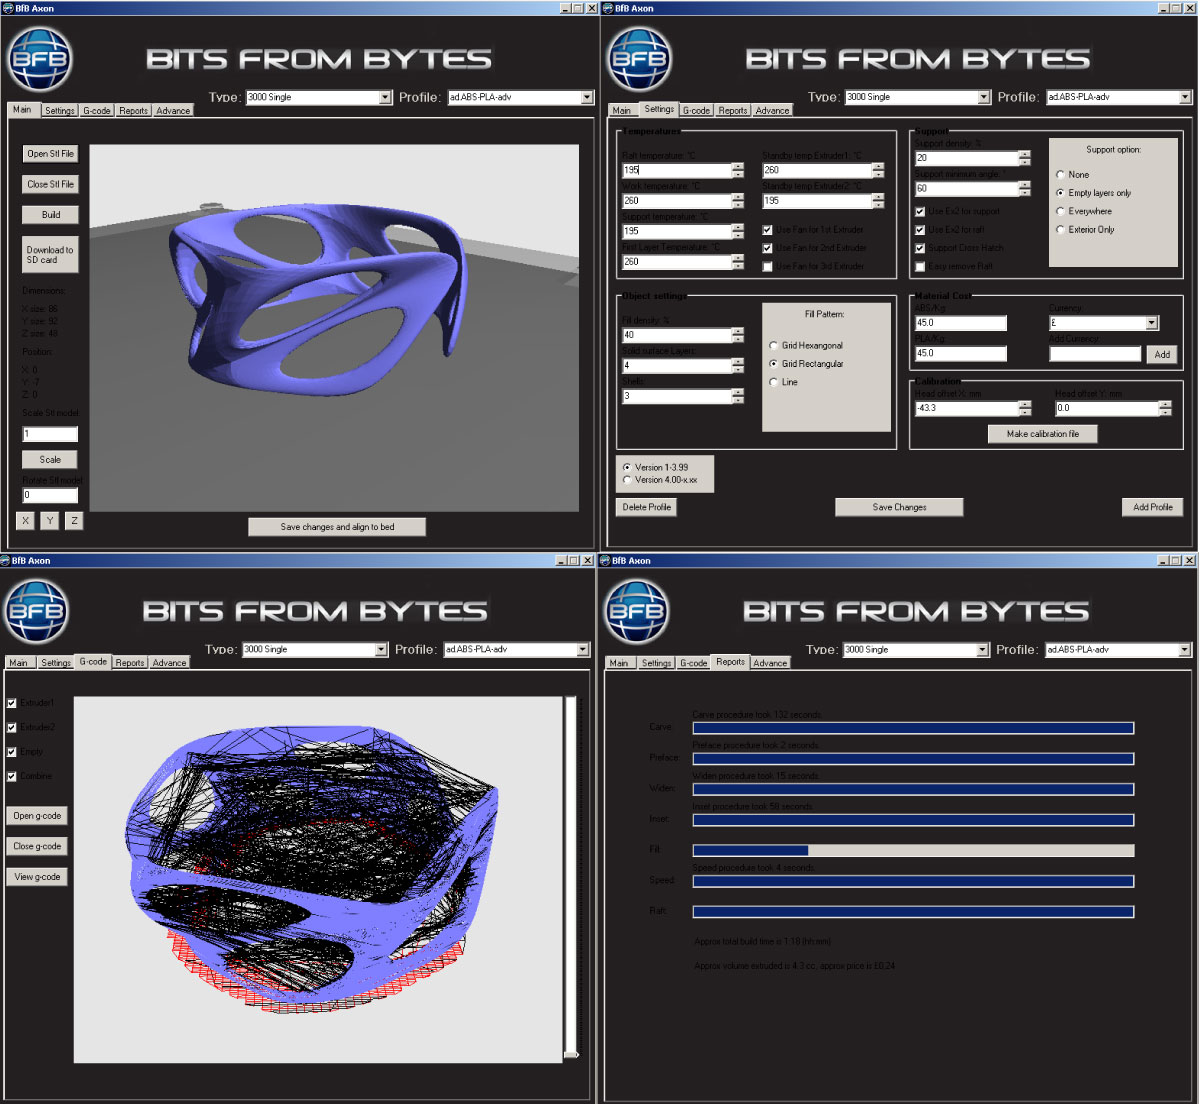
For this process i worked in the interface Axon BfB of the 3dTouCh machine, first import the .stl model in the program, then I put the following printing parameters; impression type=single, profile=ABS and PLA (combined profile of the two materials "ABS" "Acrylonitrile butadiene styrene" for the element and "PLA" "Polylactic acid or polylactide" for the base), also the specifications of the speed, volume, density and more aspects as the machine works (displayed in the superior images).
Advanced settings.
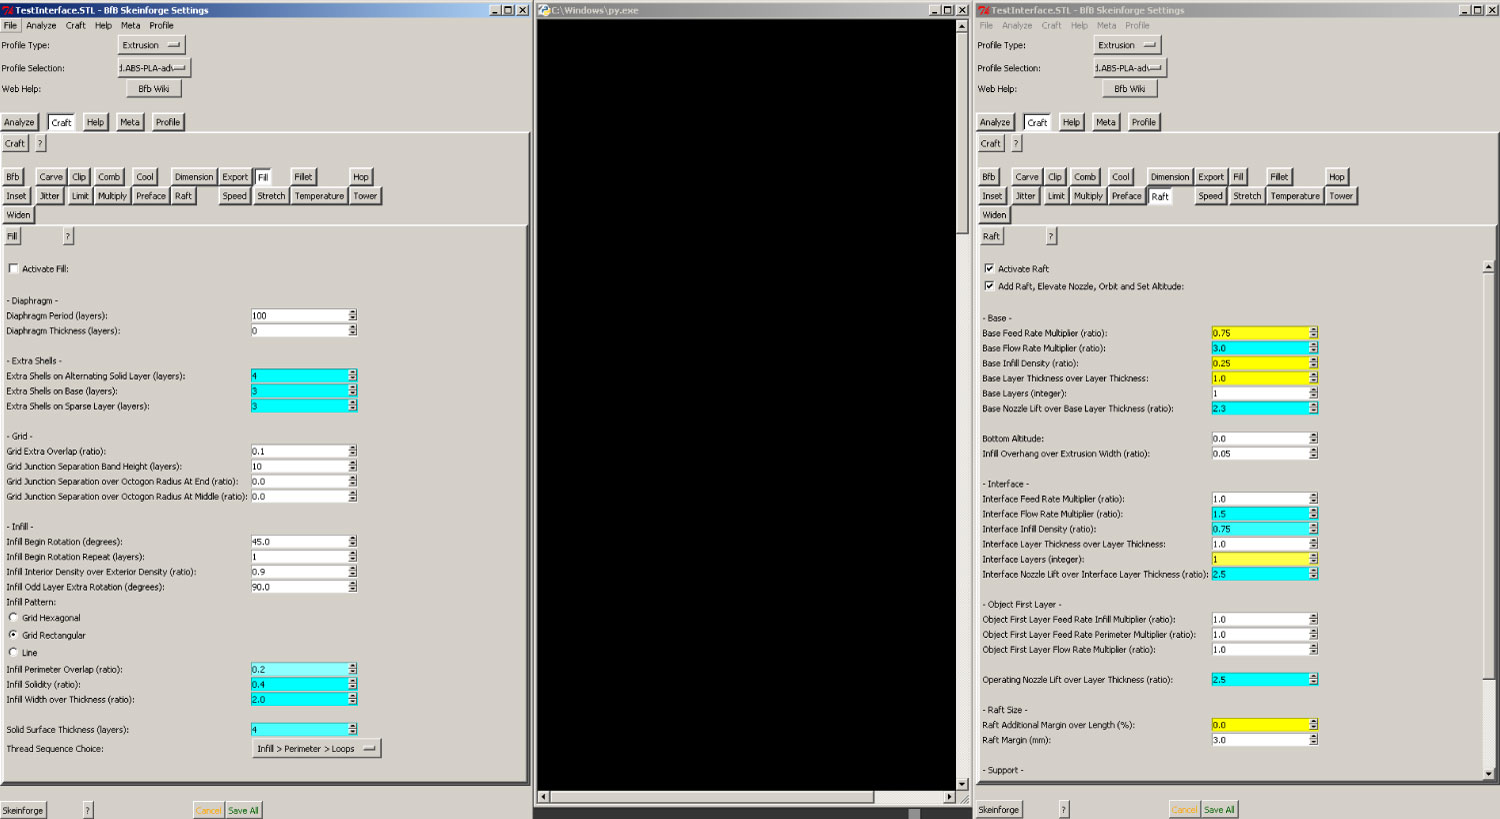
This are extra configurations where i have detailed control of the all machine functional aspects, this is a PythoN interface and i can edit the G code process.
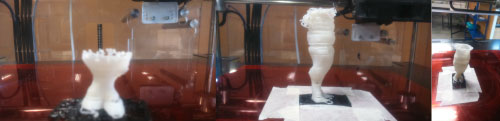
Printing 1
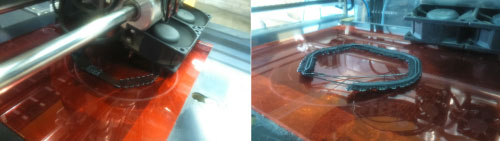
First and by recommendations of the latin america instructor Tochiro Tabushi, i put an acrylic 3mm sheet in the machine plastic base (by the poor conditions of the base and a much better fixing), the I send file to the machine with the specifications of the previous steps. In the print process i observed that element not fixing to the base because the object shape and his minimum support surface.
try 2

With the previous parameters and knowing the all problem process, again i sended the .bfb file to the machine but in this occasion fixing the base element with the tape.
Finished product
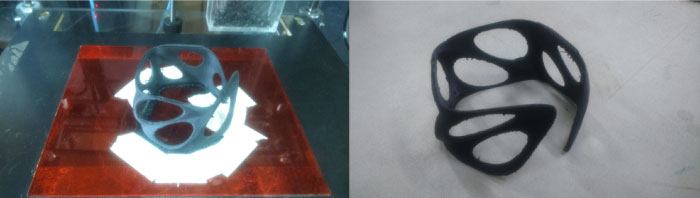
In this process the tape and his work for the fixing object.
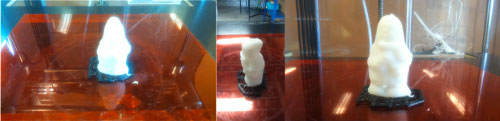
Extra 3d printing
I decided to printing the first scanning object, because the successful process in object designed, with the same parameters that my handle.
Result
Extra 3d printing #2
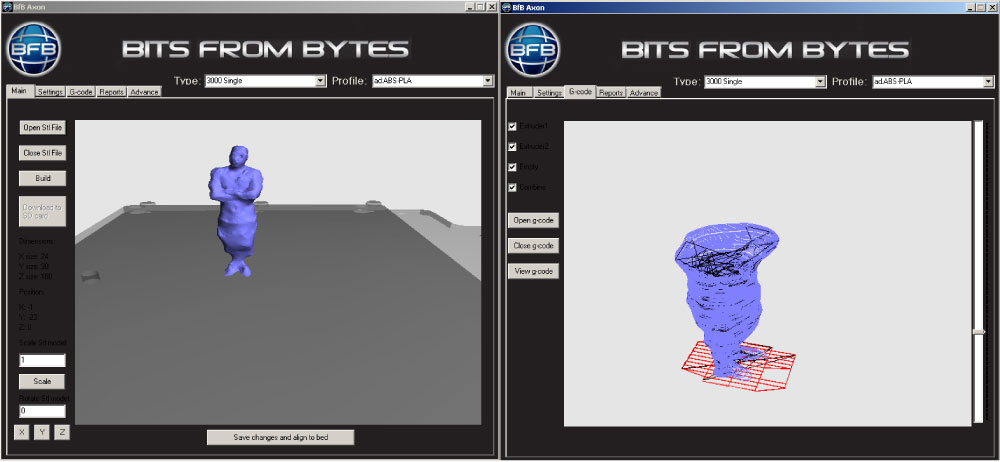
This is a failed print because the problems model as scale, shape, dimension and the impression type (empty "only edges").
3Doodler printer
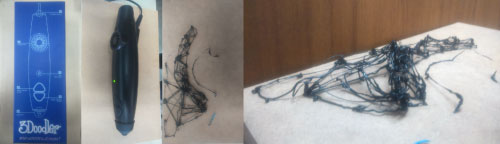
I had chance to experiment with the manual 3d printer, and the process result me interesting, because is a combination between traditional draw and the 3d modeling. this process is tedious and need some practice but is really interesting.