wk.07-Embedded programming
Understanding of the attiny44
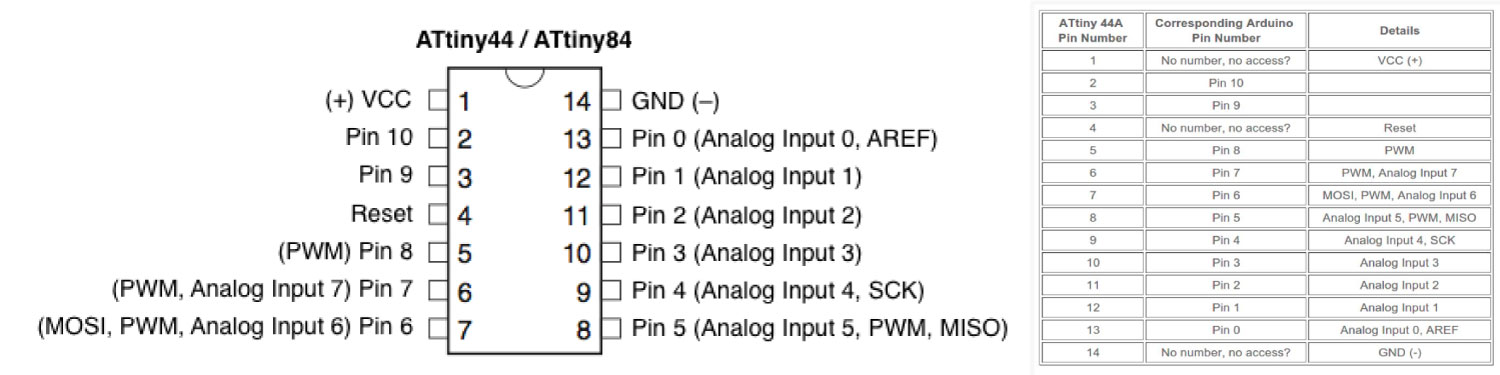
As first, i think that is really important know how work the attiny44, for this i recommend read how functions this in the attiny44 datasheet,this because so to write the code is necessary know the PINS (inputs and outputs) and how this integrate in the arduino IDE, for this and in general the attiny44 works very well in the Arduino IDE, because he is of the same family "ATMEL" that the Atmega328 (Arduino microcontroller), also is important understanding how functions the attiny44 pins in the arduino environment, for know as program the microcontroller, as is shown in the top image.
For my the attiny44 and after that I read the data sheet is a good microcontroller for testing process and for run short codes, because this have not for my many possibilities of PIN both of input as output, for this i think that use is convenient for the small programs with two or three inputs and outputs.
"Programming process & some tips"
In this assignment, I will program the board designed in the previous week, I used the arduino IDE for create the code in the Attiny44 microcontroller. the previous following a web tutorial where show the parameters for the programing the the attinys microcontroller and how write code in the Arduino IDE for this, also i suggested this web page for more specification and information of how is programing in the attinys. Finally is really important for this process as the FabISP and FTDI process, download and install the next list of drivers:
Code Loading
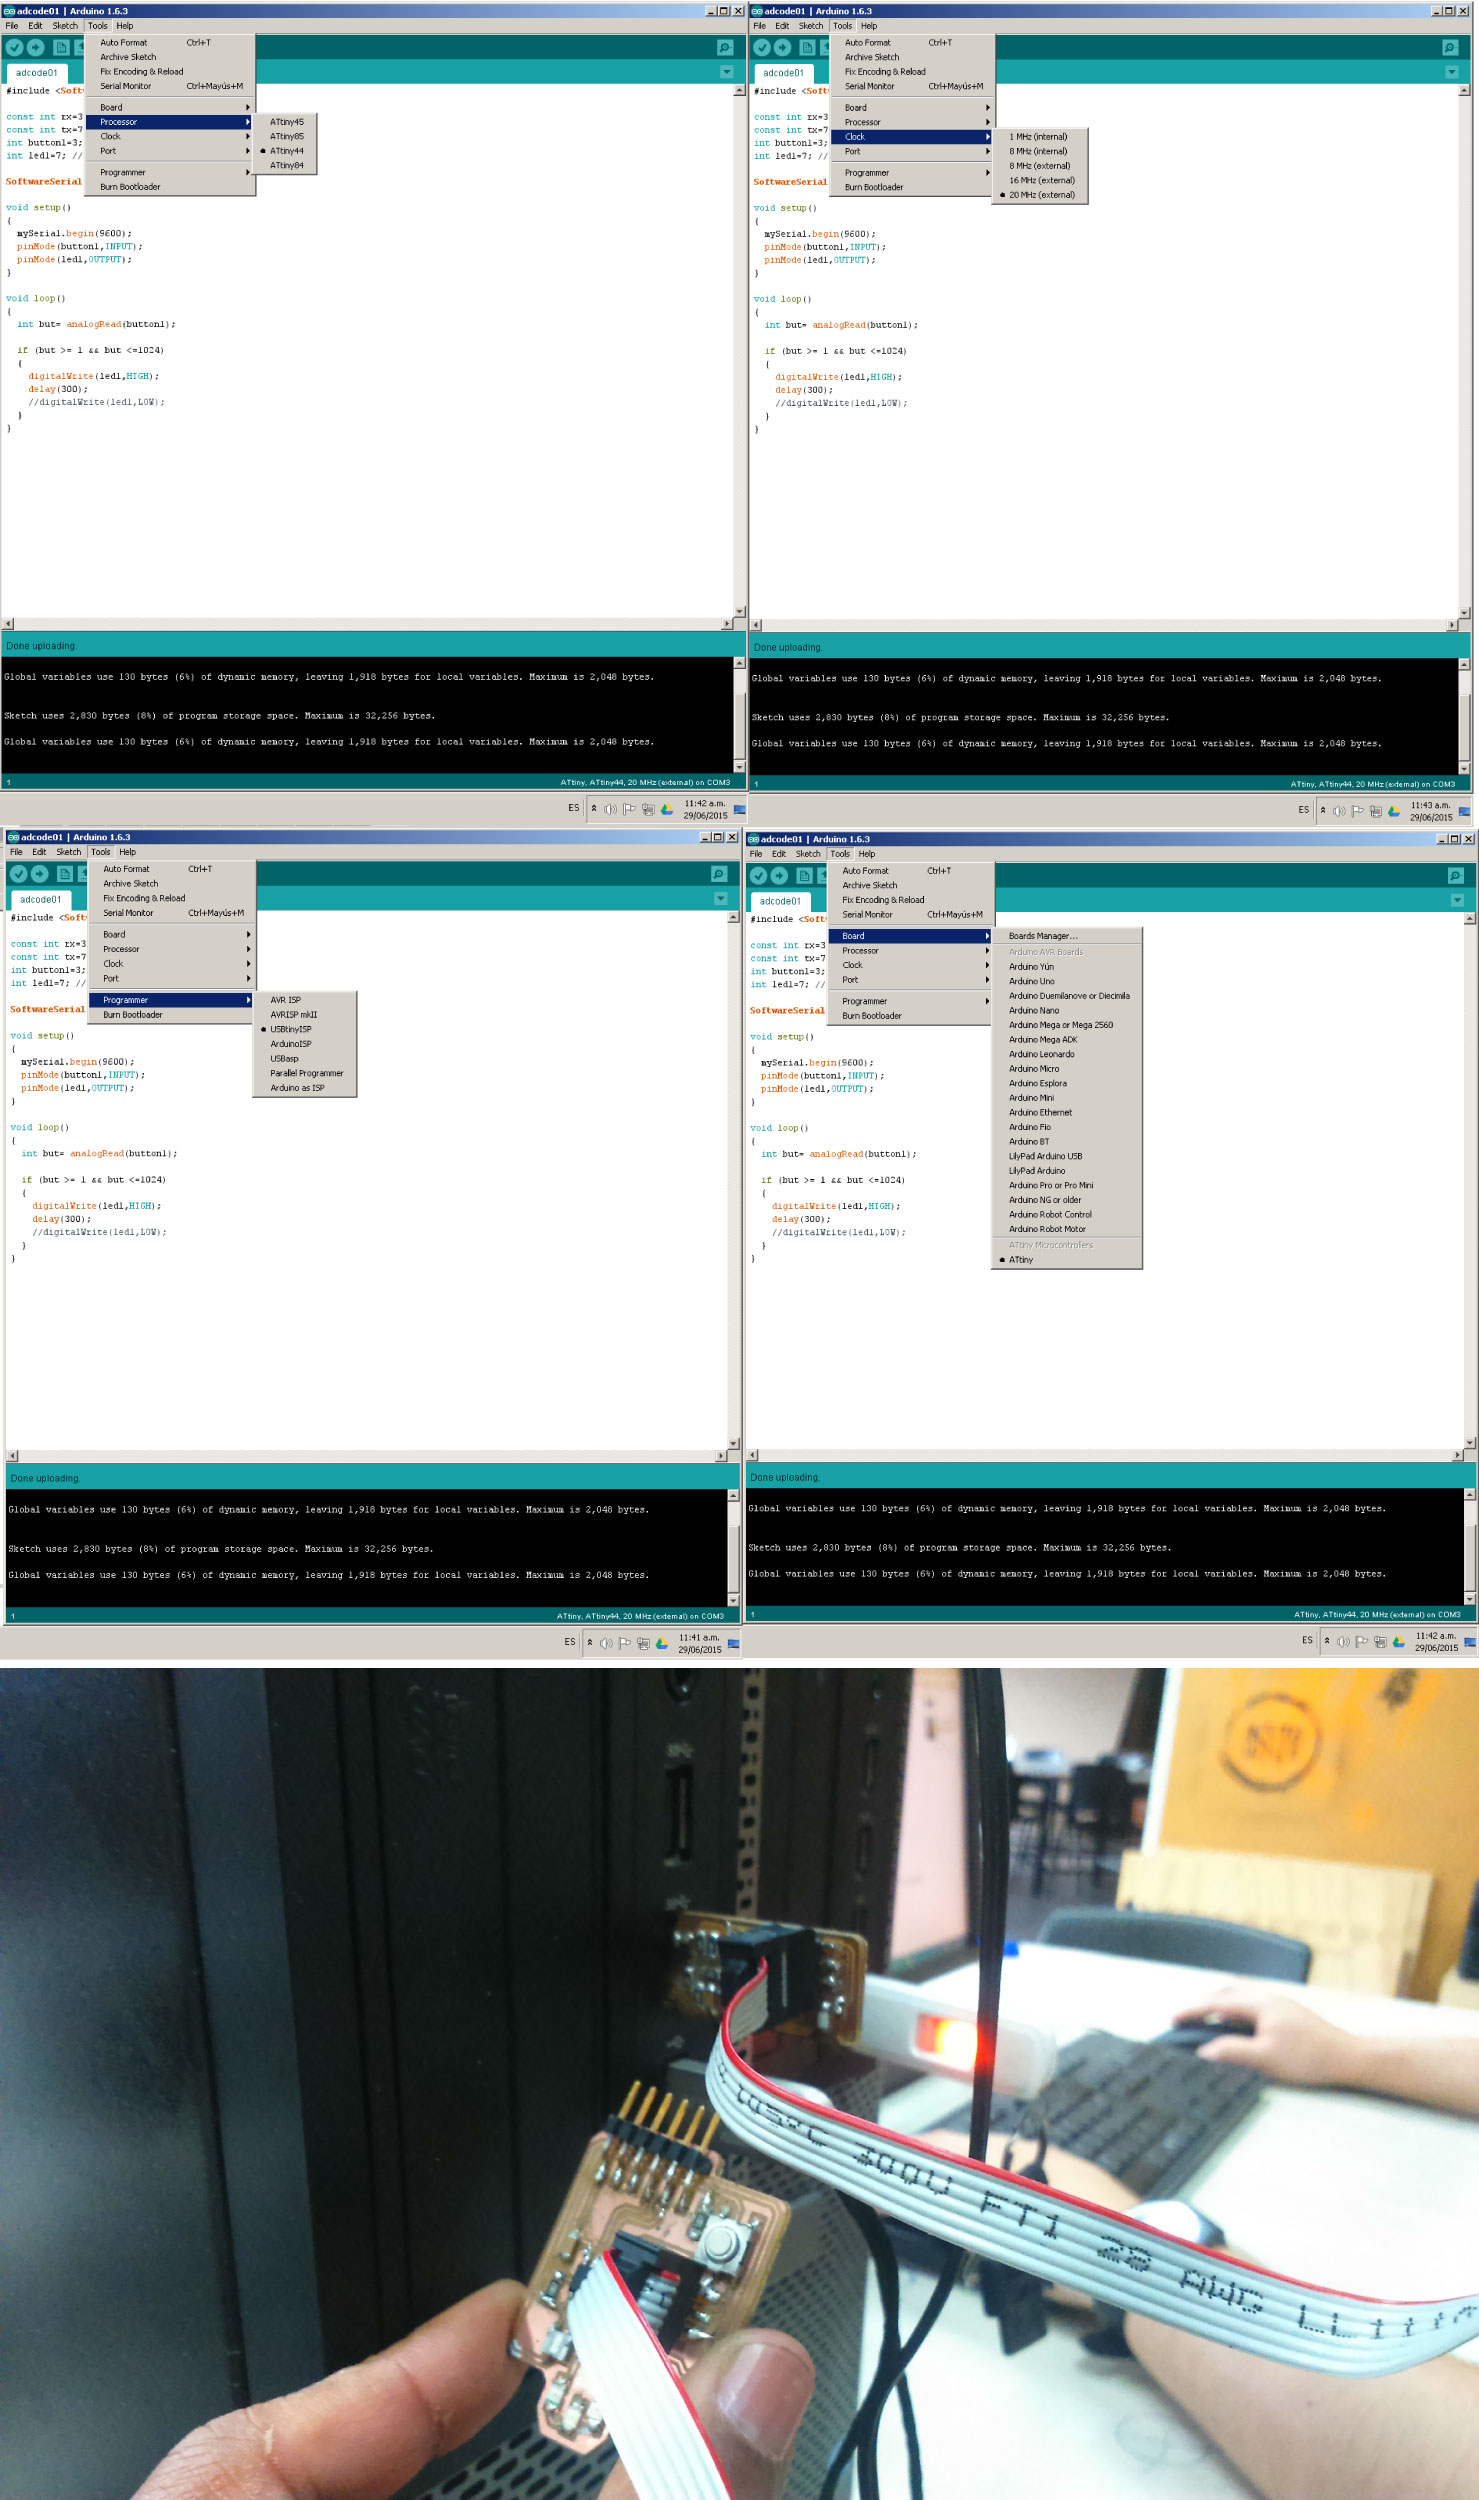
In this case and for use the fabISP and FTDI, I program a microcontroller, using the fabISP and the arduino IDE,with several differences in the usual programing process, because you need have a count the libraries and previous steps of the driver installations, an with this is necessary the following changes process:
The last three steps are combined into one if you working the 1.0 arduino IDE version.
- Code
const int rx = 0; const int tx = 1; const int led1 = 7; //Pin 6 in attiny44 const int button = 3; //Pin 10 in attiny44 int buttonState = 0; #includeSoftwareSerial mySerial(rx, tx); // RX, TX void setup() { pinMode(button, INPUT); pinMode(led1, OUTPUT); mySerial.begin(9600); } void loop() { buttonState = digitalRead(button); mySerial.println("val"); mySerial.println(buttonState); if (buttonState == LOW) { digitalWrite(led1, HIGH); } else if (buttonState == HIGH) { digitalWrite(led1, LOW); } }
The code is really easy and simple, and what he does is lights the three LED when I press the button.
Using the FTDI for the power supply
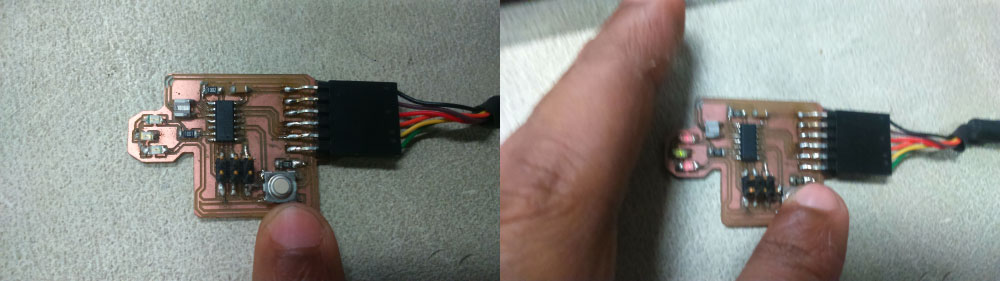
After of programing the board, I can use the FTDI wire for the load a new code (the code does not need changes) or for give energy to the board, and see the code run.