wk.08-Computer-controlled machining
Creating the “Cobra-Chair”
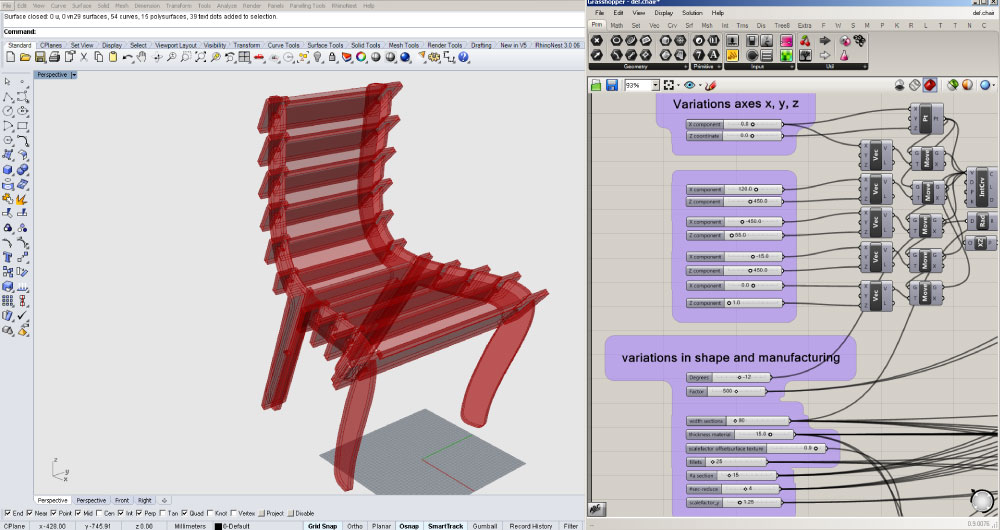
For this assignment i developed a prototype of a furniture “chair” with mechanical joints in the same pieces, and also with variations in the shape (in the developing of elements, sections and systems of joins), also in the materials behavior (flexibility pattern used in the previous assignments). This object was designed in the Rhinoceros software and his complement grasshopper, by the intention of generate a entirely parametric model with data or variable to change.
Flexibility pattern designed
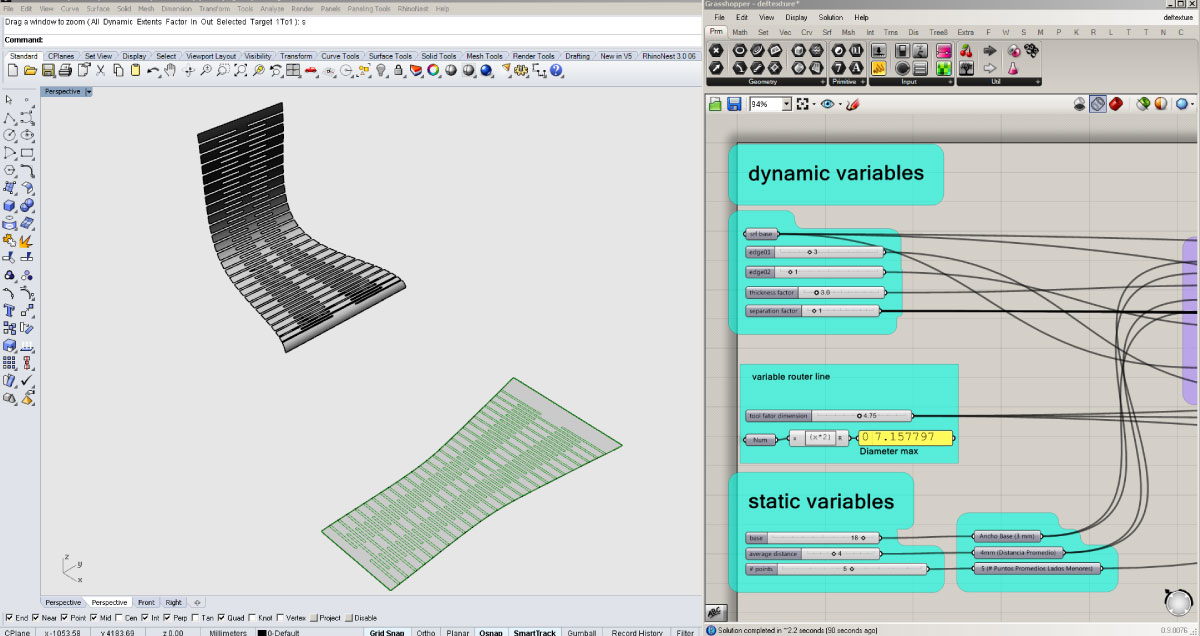
I decided explore the behavior of the pattern in differents materials and shapes, for this I used this texture in the chair design, specifically in the surface to sit.
Digital model prototype “cobra-chair01”
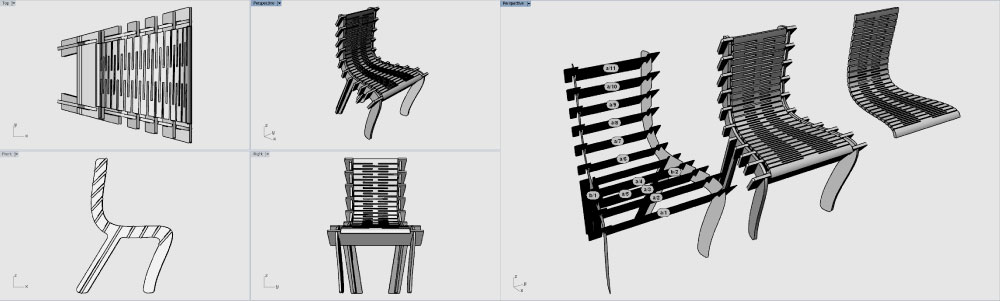
In this part of the assignment, i created the general digital model, the pieces to fabricate and the labels for the construction of the chair.
pre-Manufacturing process
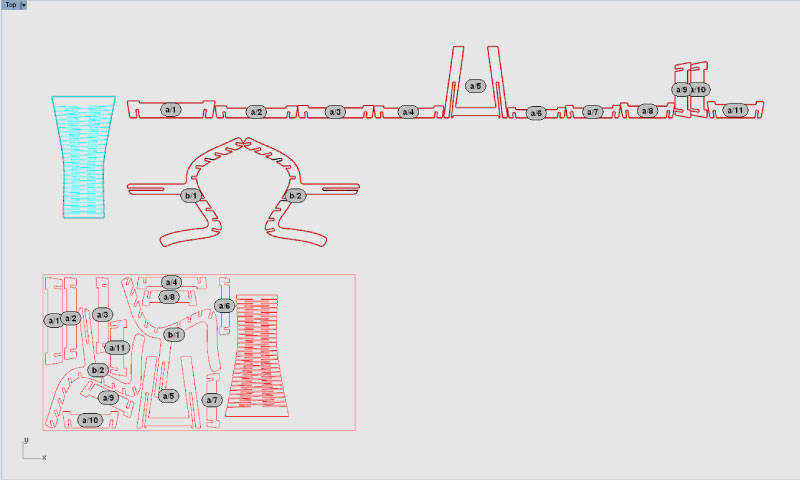
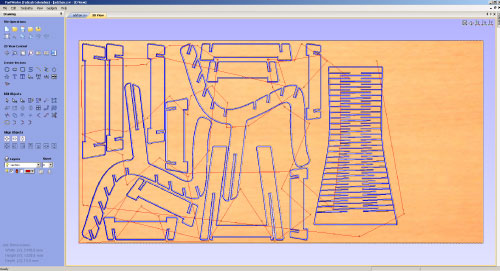
In this point, i did the nesting process with rhinoceros complement "RhinoNest", using the following parameters; material (MDF-HR for 1220mm x 2440mm x 15mm), minimum distance between pieces (15mm) and minimum distance between pieces and the sheet edge (20mm).
First settings

For this process i used the Patworks 3.5 software based in the interface of Vectric CUT2D", personally i recommend this software because is a easy interface for the objects production. now for this element I used initially the following setting; sheet dimension 1220mm x 2440mm, material thickness 15mm, then i did the fillets for the joins to 3.5mm , also choose the filets styles (normal, dog-bone, t-bone), and the last step consisted of the points drill creations (to the fixing screws).
Cut process generation - Drilling process

With the previous process, I did the cut process of the material and the tool to use, first i selected the tool dimension to work (1/4"), then i adjusted the cut parameters of the drilling process; cut depth=3, tool diameter= 0.25 inches, rpm= 12000, feed rate=5.0 and plug rate =1.0. In the profile procesa i configured; cut depth=16.5 (for the material complete cut), tool diameter= 0.25 inches, rpm= 12000, feed rate=3.0 and plug rate =1.0, and for last the number and/or depth of the trajectories (pass depth= 6 passes to 2.75).
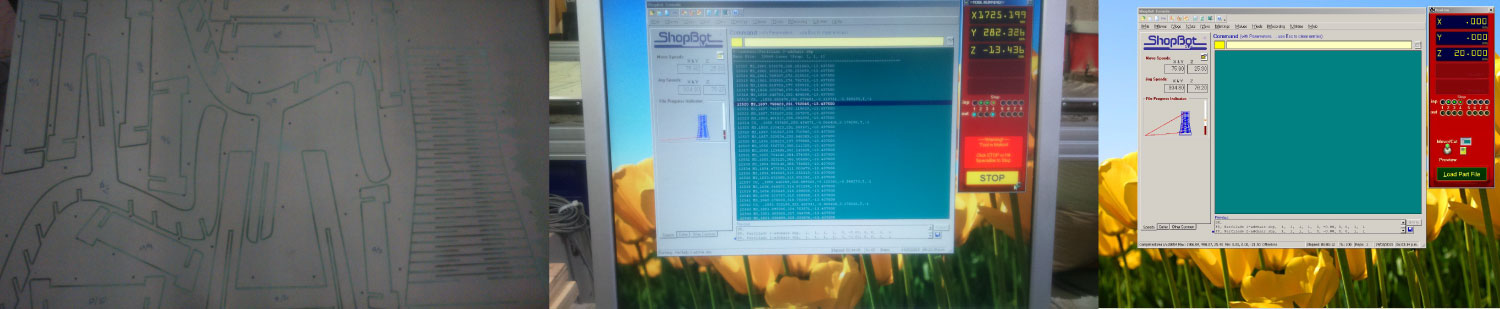
Cut process visualisation
Tolerance and joints testing
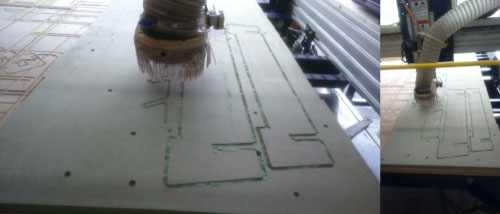
First put the aspects of material placement (material sheet, drilling and screw fixation), then I configured the " x,y,z" axis (the calibration of the axis "z" is done with the metal plate "sensor" of the ShopBot machine) and prepare the "Shopbot" machine for the cut process (heating process),
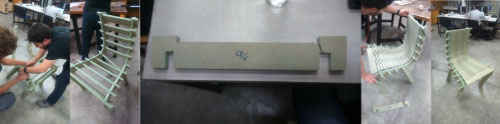
Resulting test
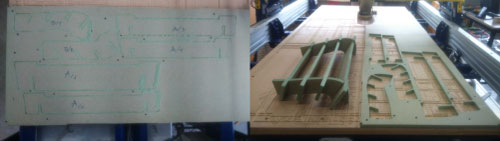
Of the previous test, I conclude that the tolerance range is too big, so i set the dimension to the thickness limit of the material. (between 15.5mm and 16mm)
Cut process
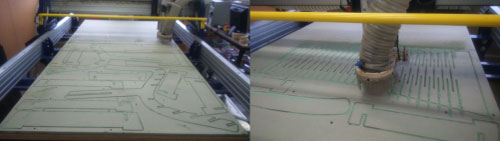
Finalization the cut process
Finished the cut process, i proceed with the withdrawal of the elements. The machining time was 1:50 “hr:min".
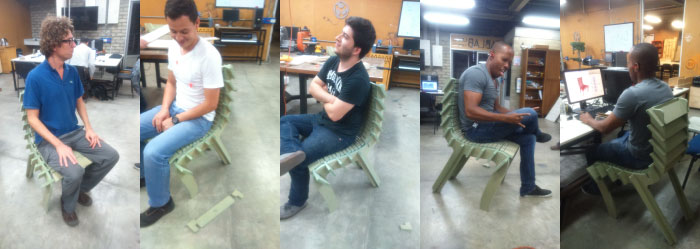
Final prototype assembly
Once completed the cut process and the pieces extraction, i proceeded with the assembly and final test of the object, where faulted me one piece because the tolerance dimension was very small for the element conformations (15.25mm - I repeated the part for the assembly chair).
"Cobra-Chair" experience
I really liked this process because i did the all design and fabrications process of the objects of the assignment, thinking in the dimension, tolerance, composition and the chair shape.