
week 3: computer-controlled cutting
week 4: electronics production
week 5: 3D scanning & printing
week 8: computer-controlled machining
week 13: networking & communications
week 14: interface & application programming
week 15: applications & implications
week 16: mechanical design & machine design
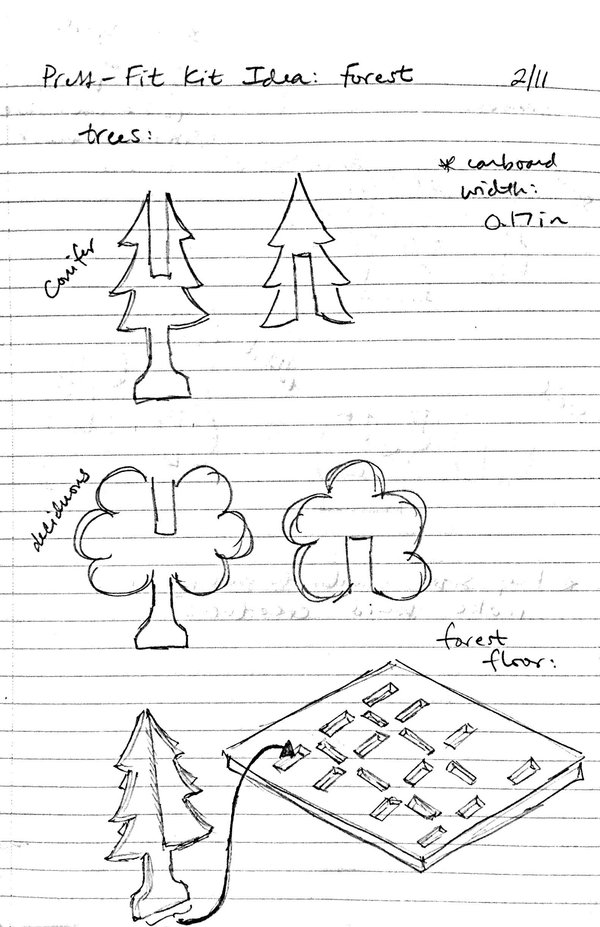
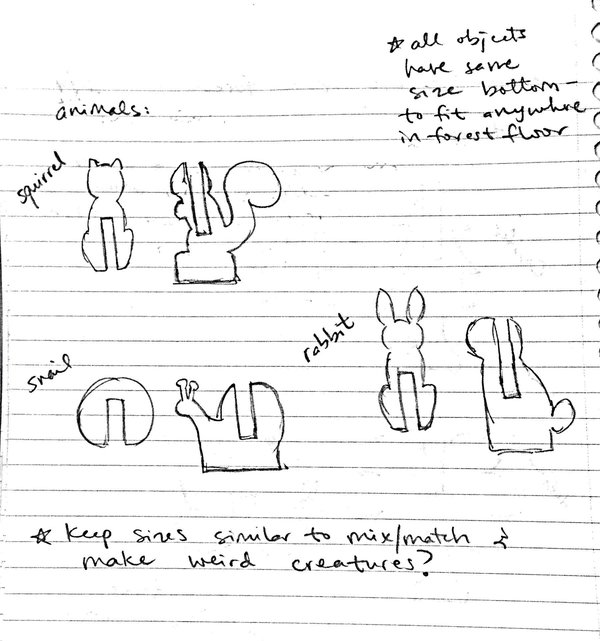
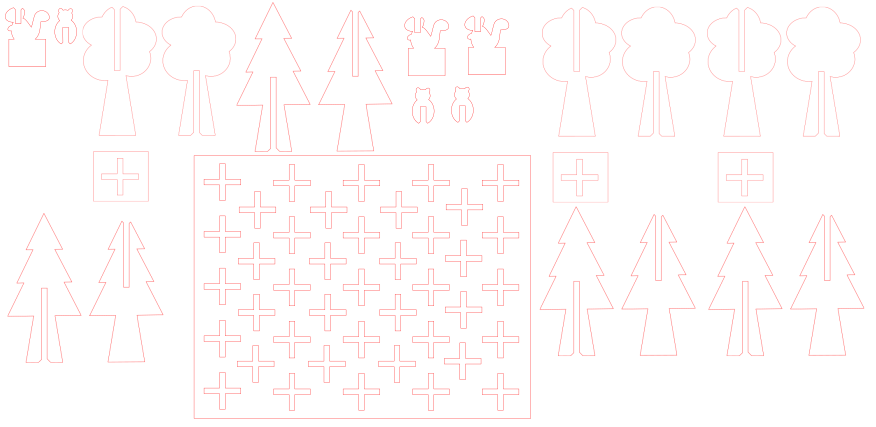
This week I'll be building a kit of pieces designed to be press-fit together in mutliple ways. My idea is to make pieces to create various forest scenes. Trees (and possibly animals) would consist of two pieces each, that fit into each other in order to be three-dimensional. All the different kinds of pieces would have identical bases, and there would be a forest-floor piece with slots oriented in various directions and the correct size to fit the bases of the other pieces. The idea would be that the trees and animals could be placed anywhere on the forest floor to create a variety of different scenes.
my initial sketches:
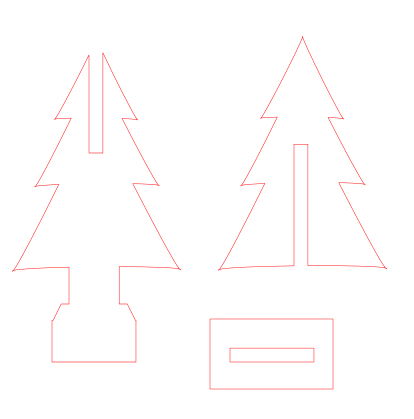
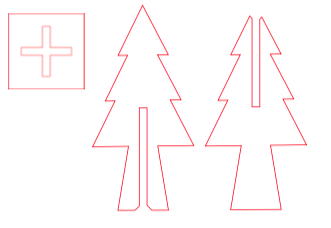
I started with a simple tree design in Inkscape, made by combining several triangles and rectangles using the union and difference functions.
I cut this out of cardboard on the lab's laser cutter - my first time using it, so I needed a little coaching in remembering all the steps (setting the focus, adjusting the print settings, etc.).
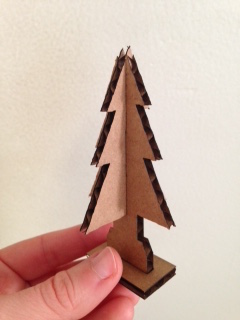
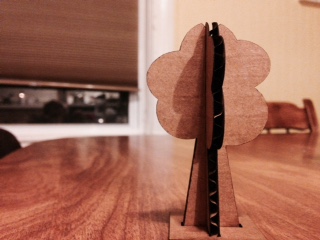
It worked pretty well: the tree is a good height, it's symmetrical and it stands up in the base. However, the fit is a little loose. I made the slots 0.17" wide, based on a previous measurement of the cardboard's thickness, but upon measuring it again it's definitely closer to 0.16". Also, I forgot to chamfer the edges of the slots, and I can see, especially on the tree with the slot on the top, that the corners would soon get worn and dog-eared.
I rectified these issues in my next test design, making the slots narrower and including the chamfer on the edges. I also extended both tree pieces all the way down to the trunk, figuring that an X-shaped base would also add stability.
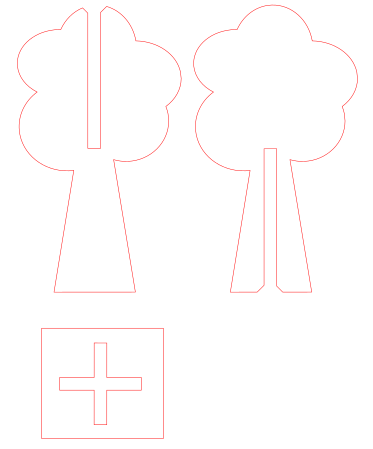
Finally, I finished the kit by adding a squirrel to hang out among the trees. Initially, I used the freehand drawing (pencil) tool and a Wacom board to draw it, because I didn't think I would be able to get the shape I wanted using the simple shapes. This required quite a few attempts, adjusting the smoothing on the pencil tool and fine-tuning the individual nodes on the drawings to get it right. It came out pretty good, but after practicing with adjusting individual nodes, I found I could get it to look nicer by using the simple shapes, namely different-sized ovals, and playing with angling them and adjusting individual nodes. For the squirrel, I kept the flat base (instead of the X-shaped base) because its shape is asymmetrical. This meant that the two pieces that make up the squirrel, fitting together through the squirrel's body, wouldn't have been centered, so the X at the base would have been off-center and wouldn't have fit into the forest floor. The complete kit in Inkscape looks like this:
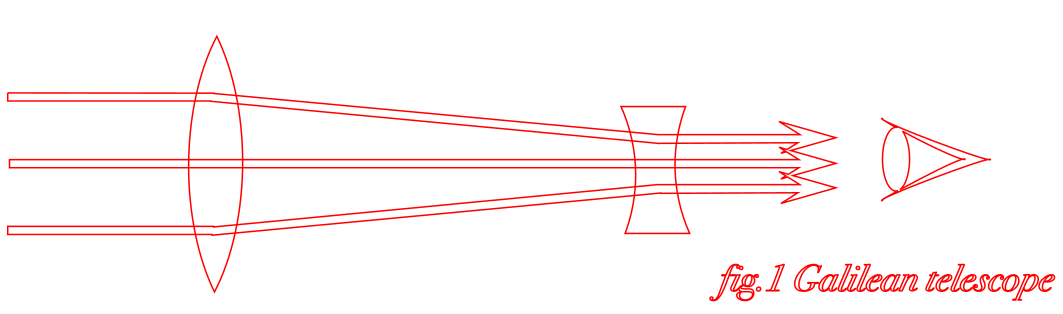
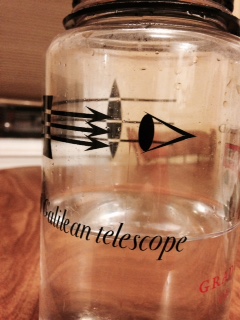
In addition to making a press-fit kit, I also learned how to use the vinyl cutter. In honor of Galileo's birthday this week, I used Inkscape to make a simple ray diagram of the telescope he used to make his observations of the moon and planets.
The first time I cut the sticker our on the vinyl cutter, I just used the settings that were already set, and the small lettering on the sticker was a shredded mess. Lowering both the force and the speed allowed the entire sticker to be cut smoothly, although weeding around the letters was still pretty challenging. In the end, though, I managed to come out with a sticker for my water bottle that I'm really pleased with.
Jenny Kostka Fab Academy 2015
