week 3: computer-controlled cutting
week 4: electronics production
week 5: 3D scanning & printing
week 8: computer-controlled machining
week 13: networking & communications
week 14: interface & application programming
week 15: applications & implications
week 16: mechanical design & machine design
My second idea for my final project is still something for my classroom, though it's less immediately practical. One of the subjects I teach is Astronomy, and every Friday we have a discussion of current events. There are certain spacecraft we end up following pretty closely - a couple of years ago, for example, it was the MESSENGER mission, which became the first spacecraft to orbit Mercury. Next year, I expect we'll be paying a lot of attention to New Horizons as it studies Pluto up close for the first time.
My project idea is to create a visual representation of that tracking, choosing 3 or 4 spacecraft and using RSS feeds of news stories about them.
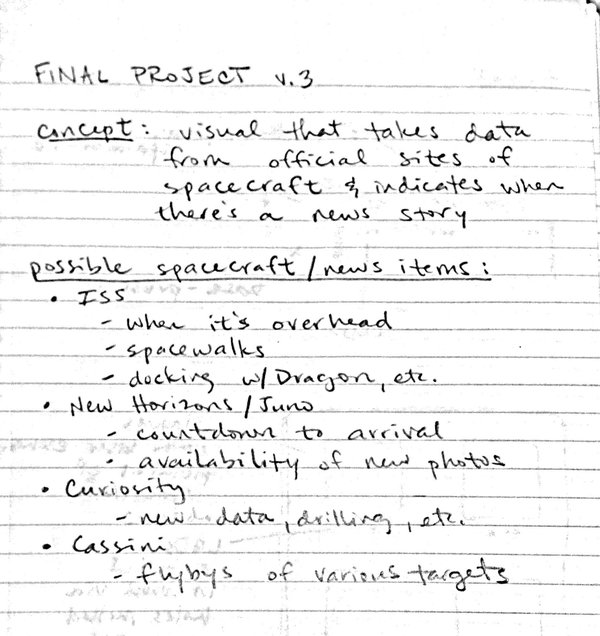
There are a couple of different ideas I like for the visual representation itself. Both would incorporate LEDs to indicate that a new story had been posted, or (in the case of the ISS) that the spacecraft was currently passing by overhead. For missions that are en route to their targets, like New Horizons or Juno, there could be a countdown clock too.
One way to go would be a wooden base, housing the LEDs, with 3D printed representations of the spacecraft attached. This would depend on me being able to find design files on a site like Thingiverse, because I wouldn't be able to model something so complex myself. So far I've found files for the Mars Curiosity rover.
The other representation would be a poster-sized flat wooden base that could be hung on the wall like a poster, with smaller plywood plaques that have line drawings of the spacecraft laser engraved on them.
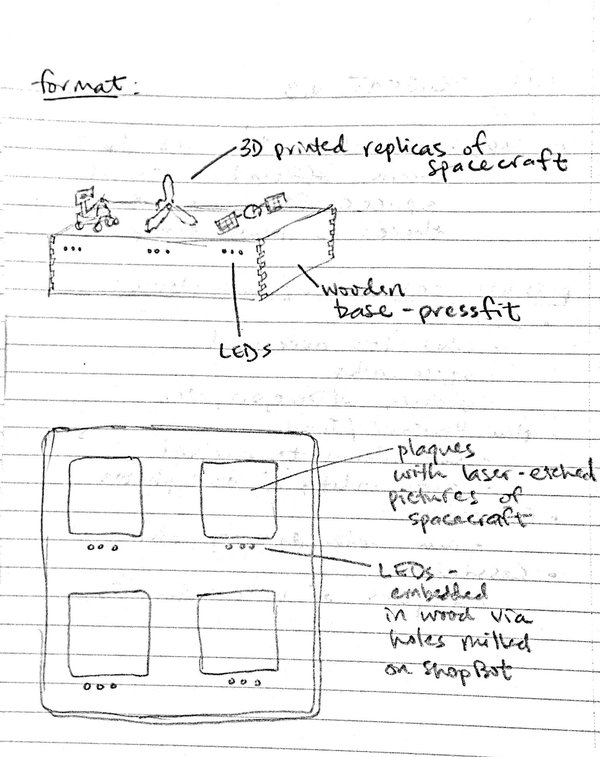
In both designs, it would be important that the pictures or models of the spacecraft be modular, so that they can be swapped out as the class decides to track a different set of missions.
The project (clever title TBD) will consist of visual representations of up to four active spacecraft plus a digital display for each (a small OLED screen). The displays will show some kind of real-time data from each spacecraft, e.g. an arrow and the words "Look up!" when the ISS is passing overhead, or a countdown showing how long until New Horizons enters orbit around Pluto. The project will be modular, so as new spacecraft are launched and older ones are retired, they can be swapped in and out. The project will be displayed in my classroom next year, and my hope is that it will be something my students look at and talk about on a regular basis, and will increase their awareness of space exploration.
The ISS tracker is one of many online applications to find the position of the ISS. Given your latitude and longitude, you can even have emails sent to you to let you know when it will be overhead.
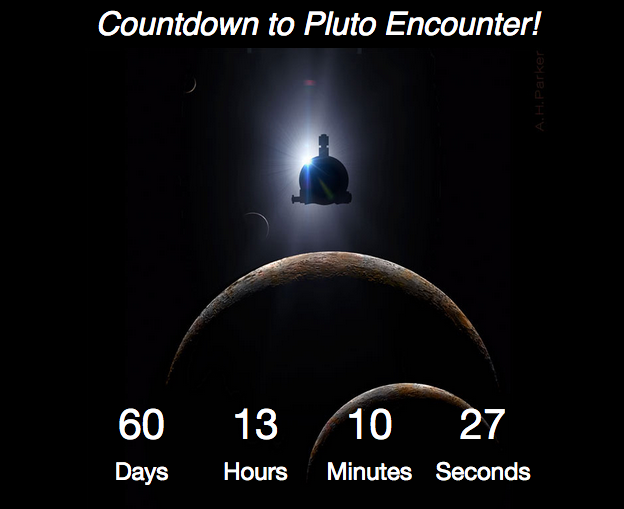
See Pluto Now is, again, one of several places online to count down to this summer's encounter with Pluto.
There are similar online resources to keep track of Cassini, Juno, Curiosity, and pretty much every ongoing mission. What I would like my project to do is to collect these in one visual display that will be always in front of my students (instead of something they have to actively decide to visit online).
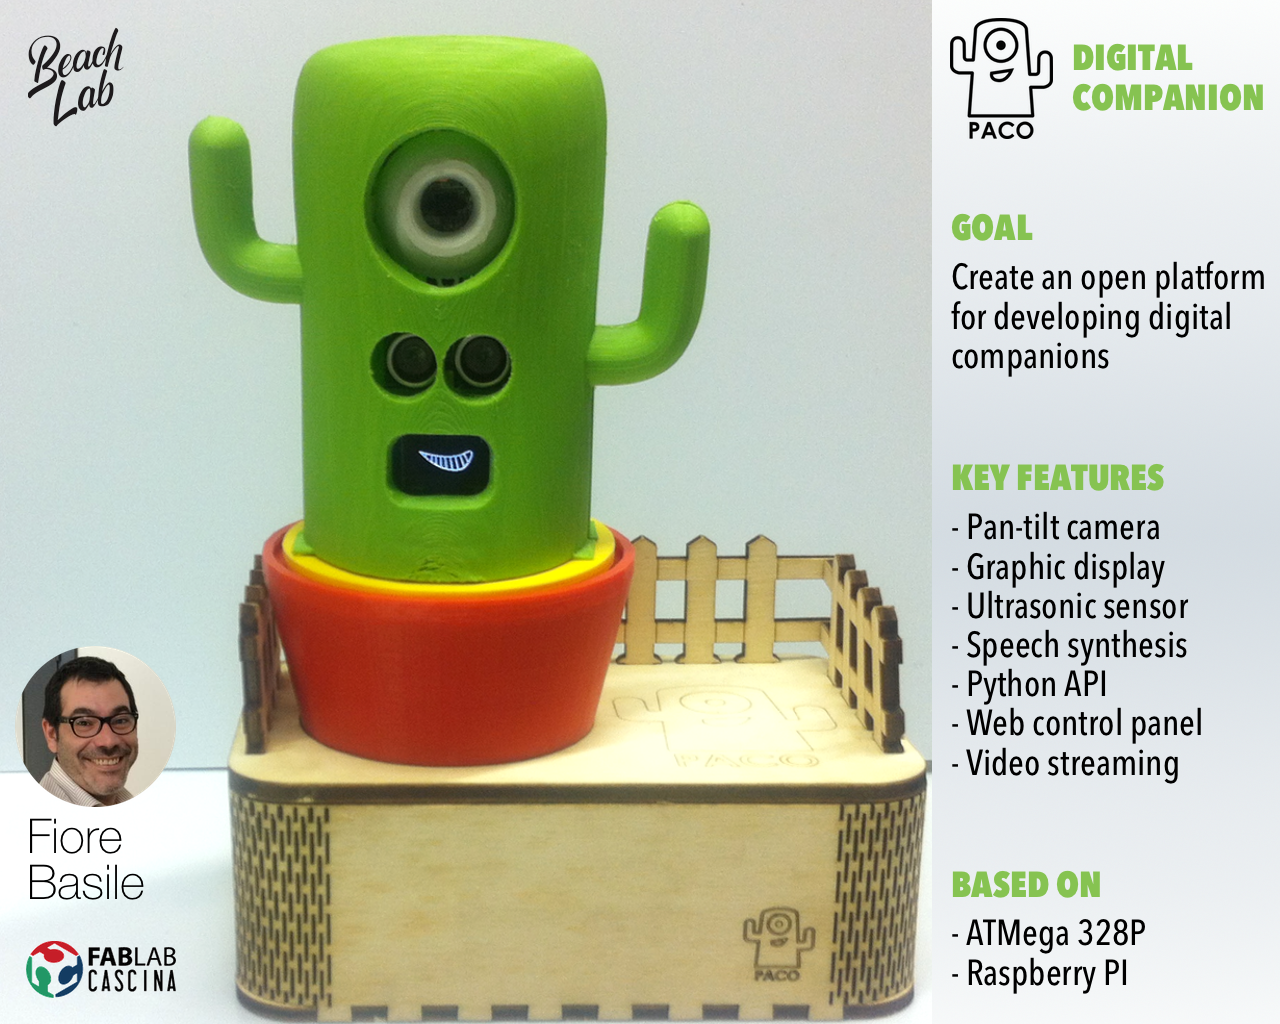
For the form factor, there are several projects from last year that are helping me think about what I'd like my project to look like:
For the electronics, I will make a small network where a Raspberry Pi connects to the internet and gets the data, then sends the data to individual OLED boards to be displayed. For the housing, I will make either a laser-cut base and several 3D printed models, or a flat machined base made from MDF and several laser-etched plaques.
Pretty much all the supplies will come from AS220, though I do have a Raspberry Pi at home I can use, and I may also have to order the OLED screens.
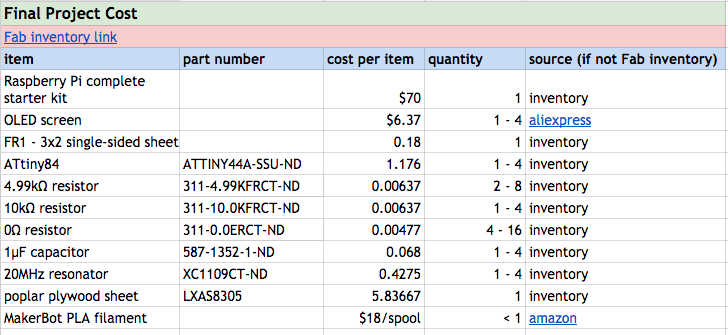
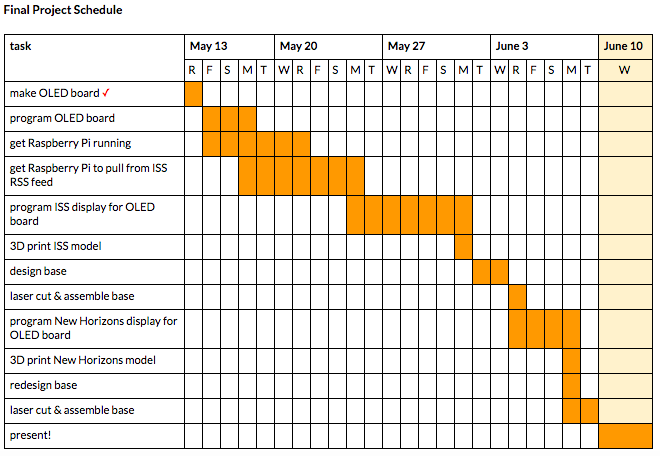
I put together a tentative schedule, that would get me to a display with two spacecraft.
I'll know the first iteration of the project is successful if it displays real-time data from a spacecraft. The bigger goal is to make it work for multiple spacecraft, and to house it in an attractive display in which new spacecraft can be easily swapped in and out. The ultimate goal - how I'll really know it's successful - is if the displays spark ongoing interest and discussion from my students around space exploration.
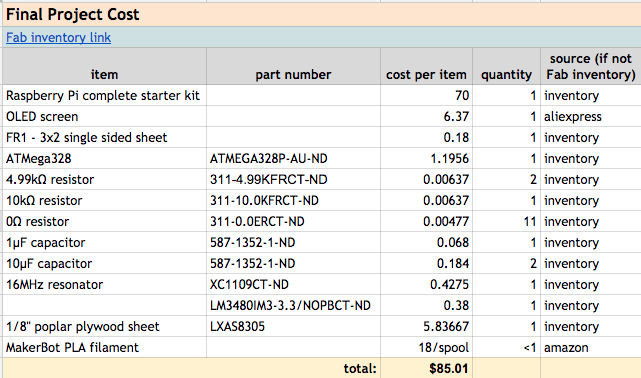
For the electronics, I made a small network consisting of a Raspberry Pi and one breakout board with an ATMega and an OLED screen. The Raspberry Pi used Feedparser to pull headlines from an RSS feed and send them out using serial, then the other board read those headlines and sent them to the screen using I2C. For the display, I laser cut plywood to make a stand that featured living hinges and cutouts for two OLED screens, as well as a 3D printed model of the Curiosity rover.
All the materials except the OLED screen (which I ordered) came from AS220.
The initial schedule I made fell apart almost immediately, for several reasons:
Luckily, the original schedule included time to do a "second round" of the processes - repeating the design, building, and programming for a second spacecraft. This didn't happen, but I did get everything completed for a single spacecraft.
Jenny Kostka Fab Academy 2015
