THE FAB ACADEMY 2014
CIRO MEJIA ELIAS

THE FAB ACADEMY 2014
|
|
|
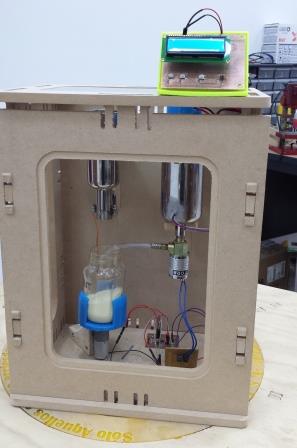
Project Development Track progress, complete your final project. a) What tasks are completed, and tasks are? The mechanical assembly and electronic production are completed. Electronic assembly and the test of the metering and implementation of programming is pending. b) What has worked. What does not? So far it has worked all that is planned, the global infrastructure of the machine on MDF, steel dispensers and components produced in the 3D printer. No cover in PLA or ABS LCD, there are problems with 3D printers working parts or components of large size and many features. c) What questions need to be resolved? Why no LCD Cover was printed on the Replicator correctly? All the tests I've done have failed. The DC motor will have enough strength to mix when the bottle is full. According to the datasheet of the engine should achieve. d) What happens when? Not execute programming required, I need to finish. If I can not align the servomotor with the paddle horizontally. e) What have you learned? By making the machine I learned to create the routing of electronic boards with Eagle, to mill them in Modela, to program with arduino Ide, the uses of electronic components datasheet, handling machines like Shopbot , Replicator, Modela and Legend. Documentation during development. The beginning of any project is the idea, that idea is sketched on paper: 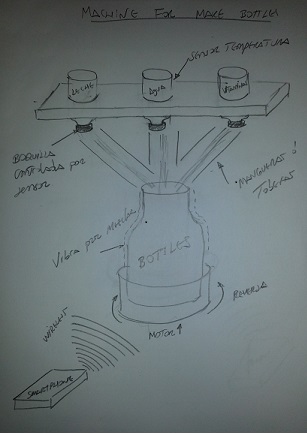 The sketch led to CAD software, using Inventor Professional Some components in the design sketch 2D 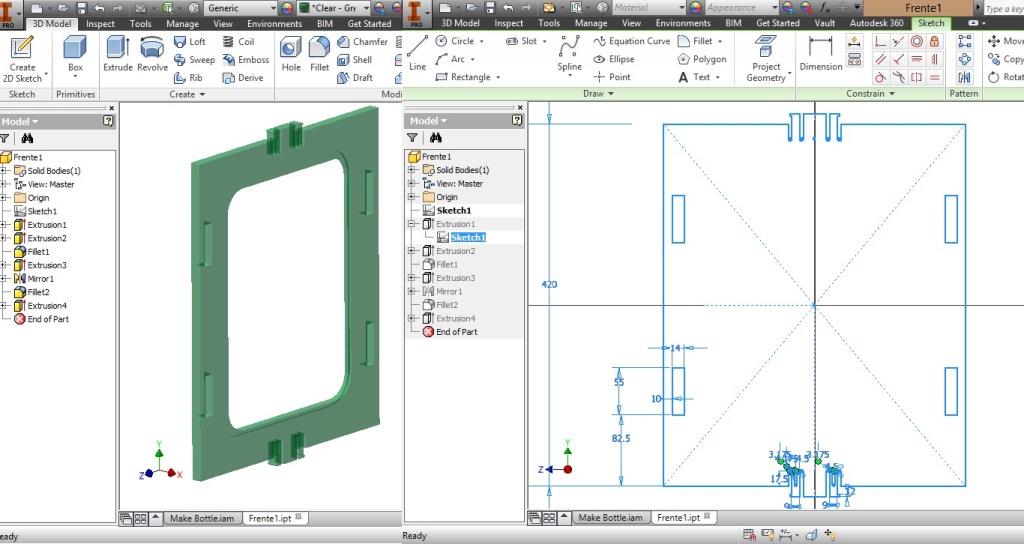 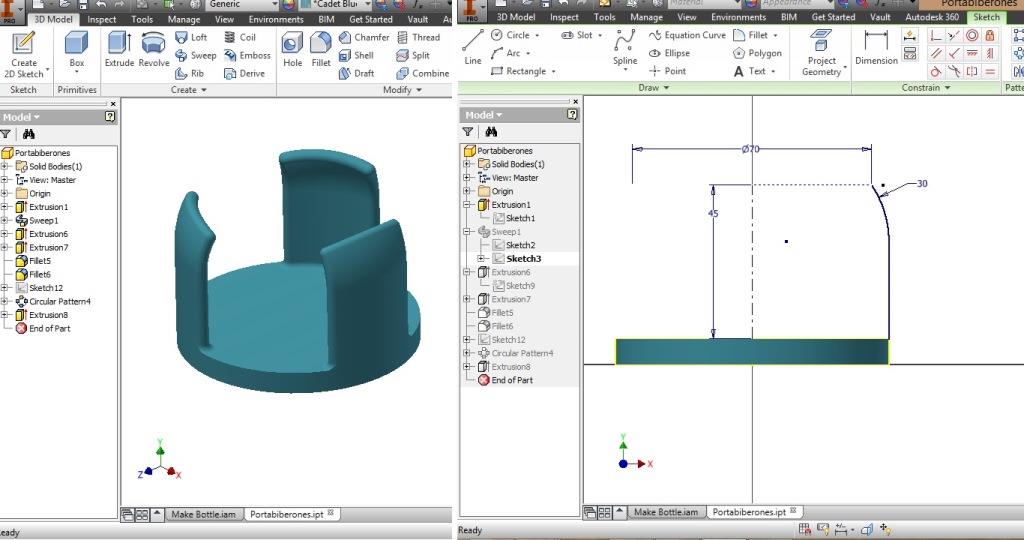 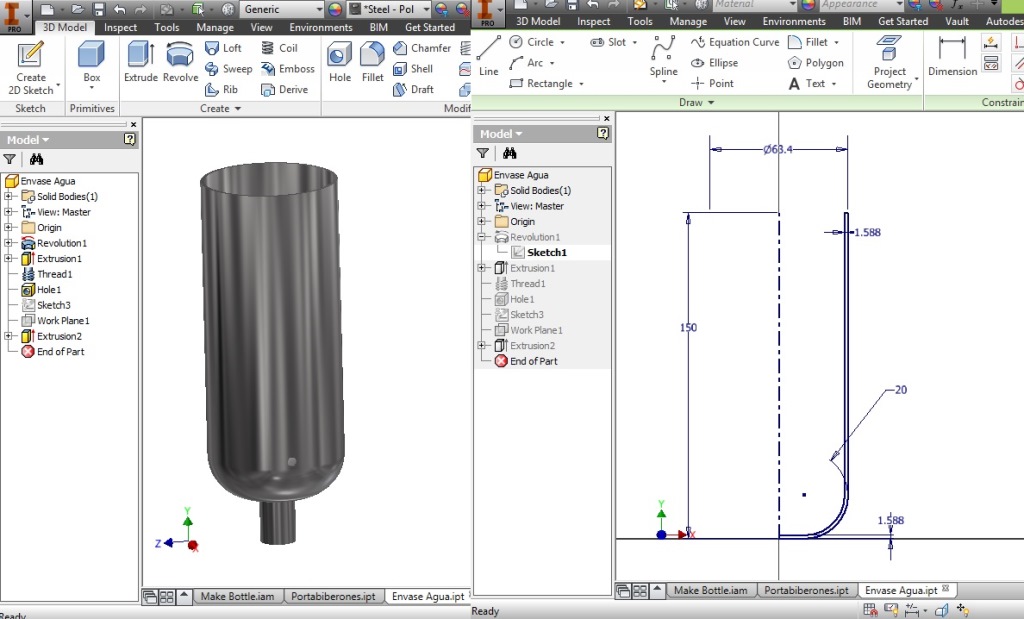 Below the 3D design of the components before assembly shown in the software: 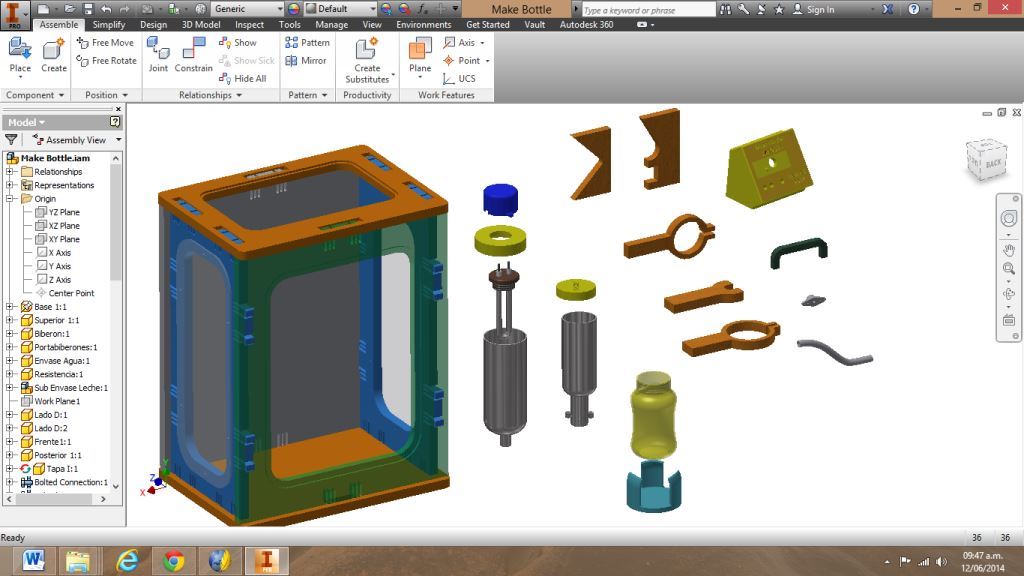 After the design had to machine the general structure of the machine Working Machining ShopBot in 12mm MDF and Tool 1/8 ". Should be noted that for this work use the knowledge acquired in the allocation of computer assisted machinery, as well as the use of press-fit. The routing of the tool shown in the software Partworks 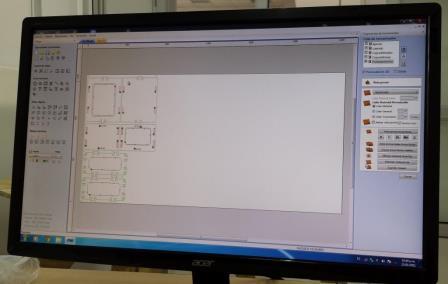 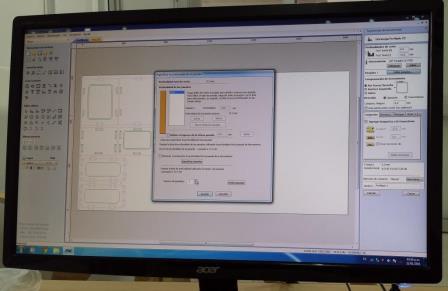 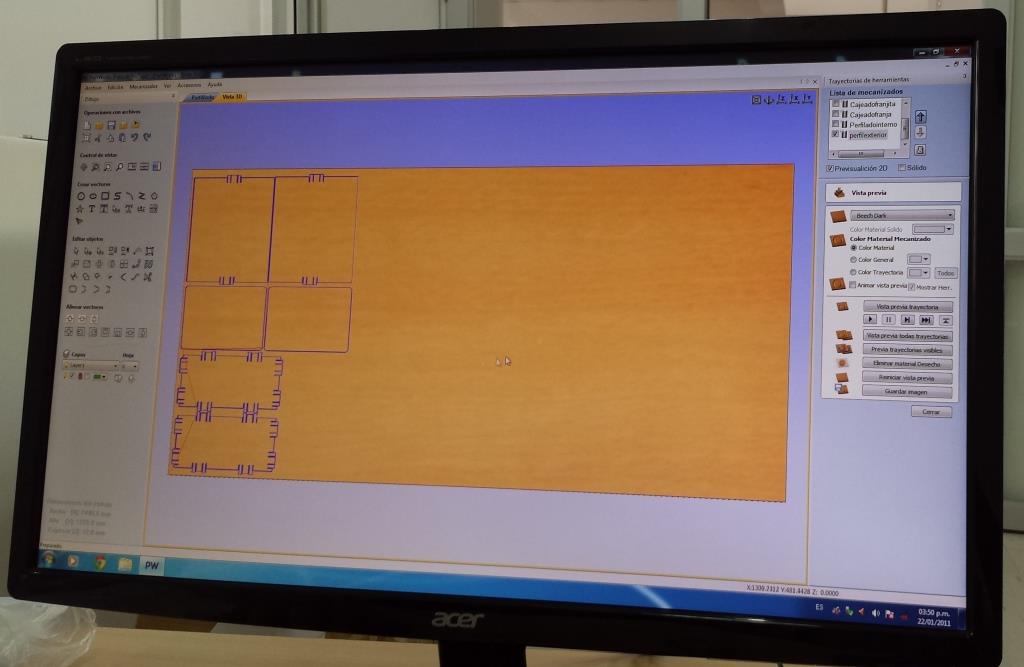 Plotting the ShopBot 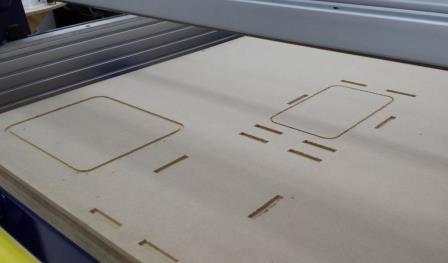  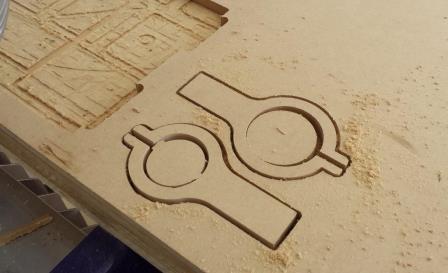 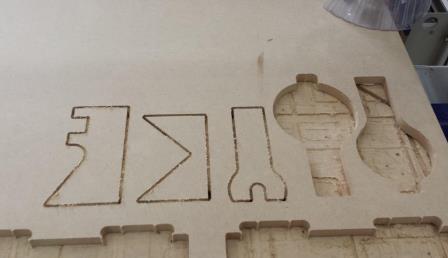 Laser cutting work in Legend with 2mm thick acrylic, use the knowledge acquired in the allocation of computer controlled cutting. 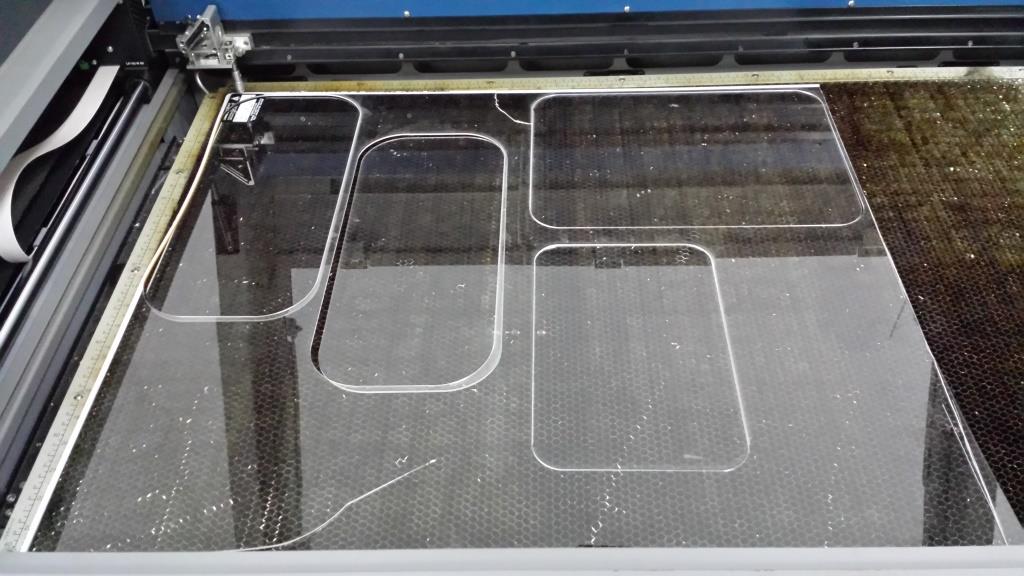 Some components passed through the 3D printing process Printing of top water dispenser 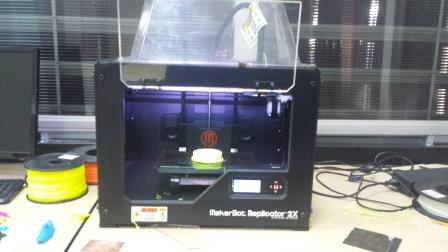 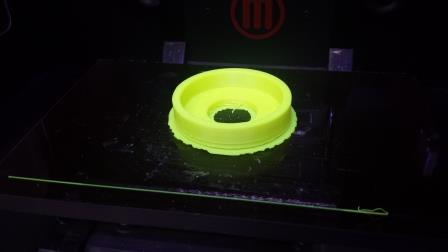 Printing base LCD and door handles of the machine  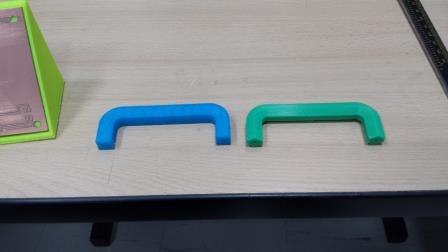 Support bieberon DC motor and coupling 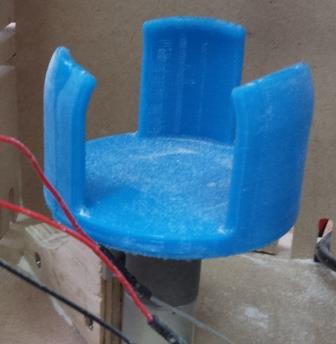 Routing and machining of electronic boards. Four films for the electronics of the machine were created, this was done with the Eagle software and plotted with the Model, this configuration was the same as was used in the machining allowance "electronics production": a) Board engines. b) Board for LCD c) Board for power supply d) Relé Board for electrical resistance. e) Besides the Fabduino Anna Kaziunas was used for the control of these boards. 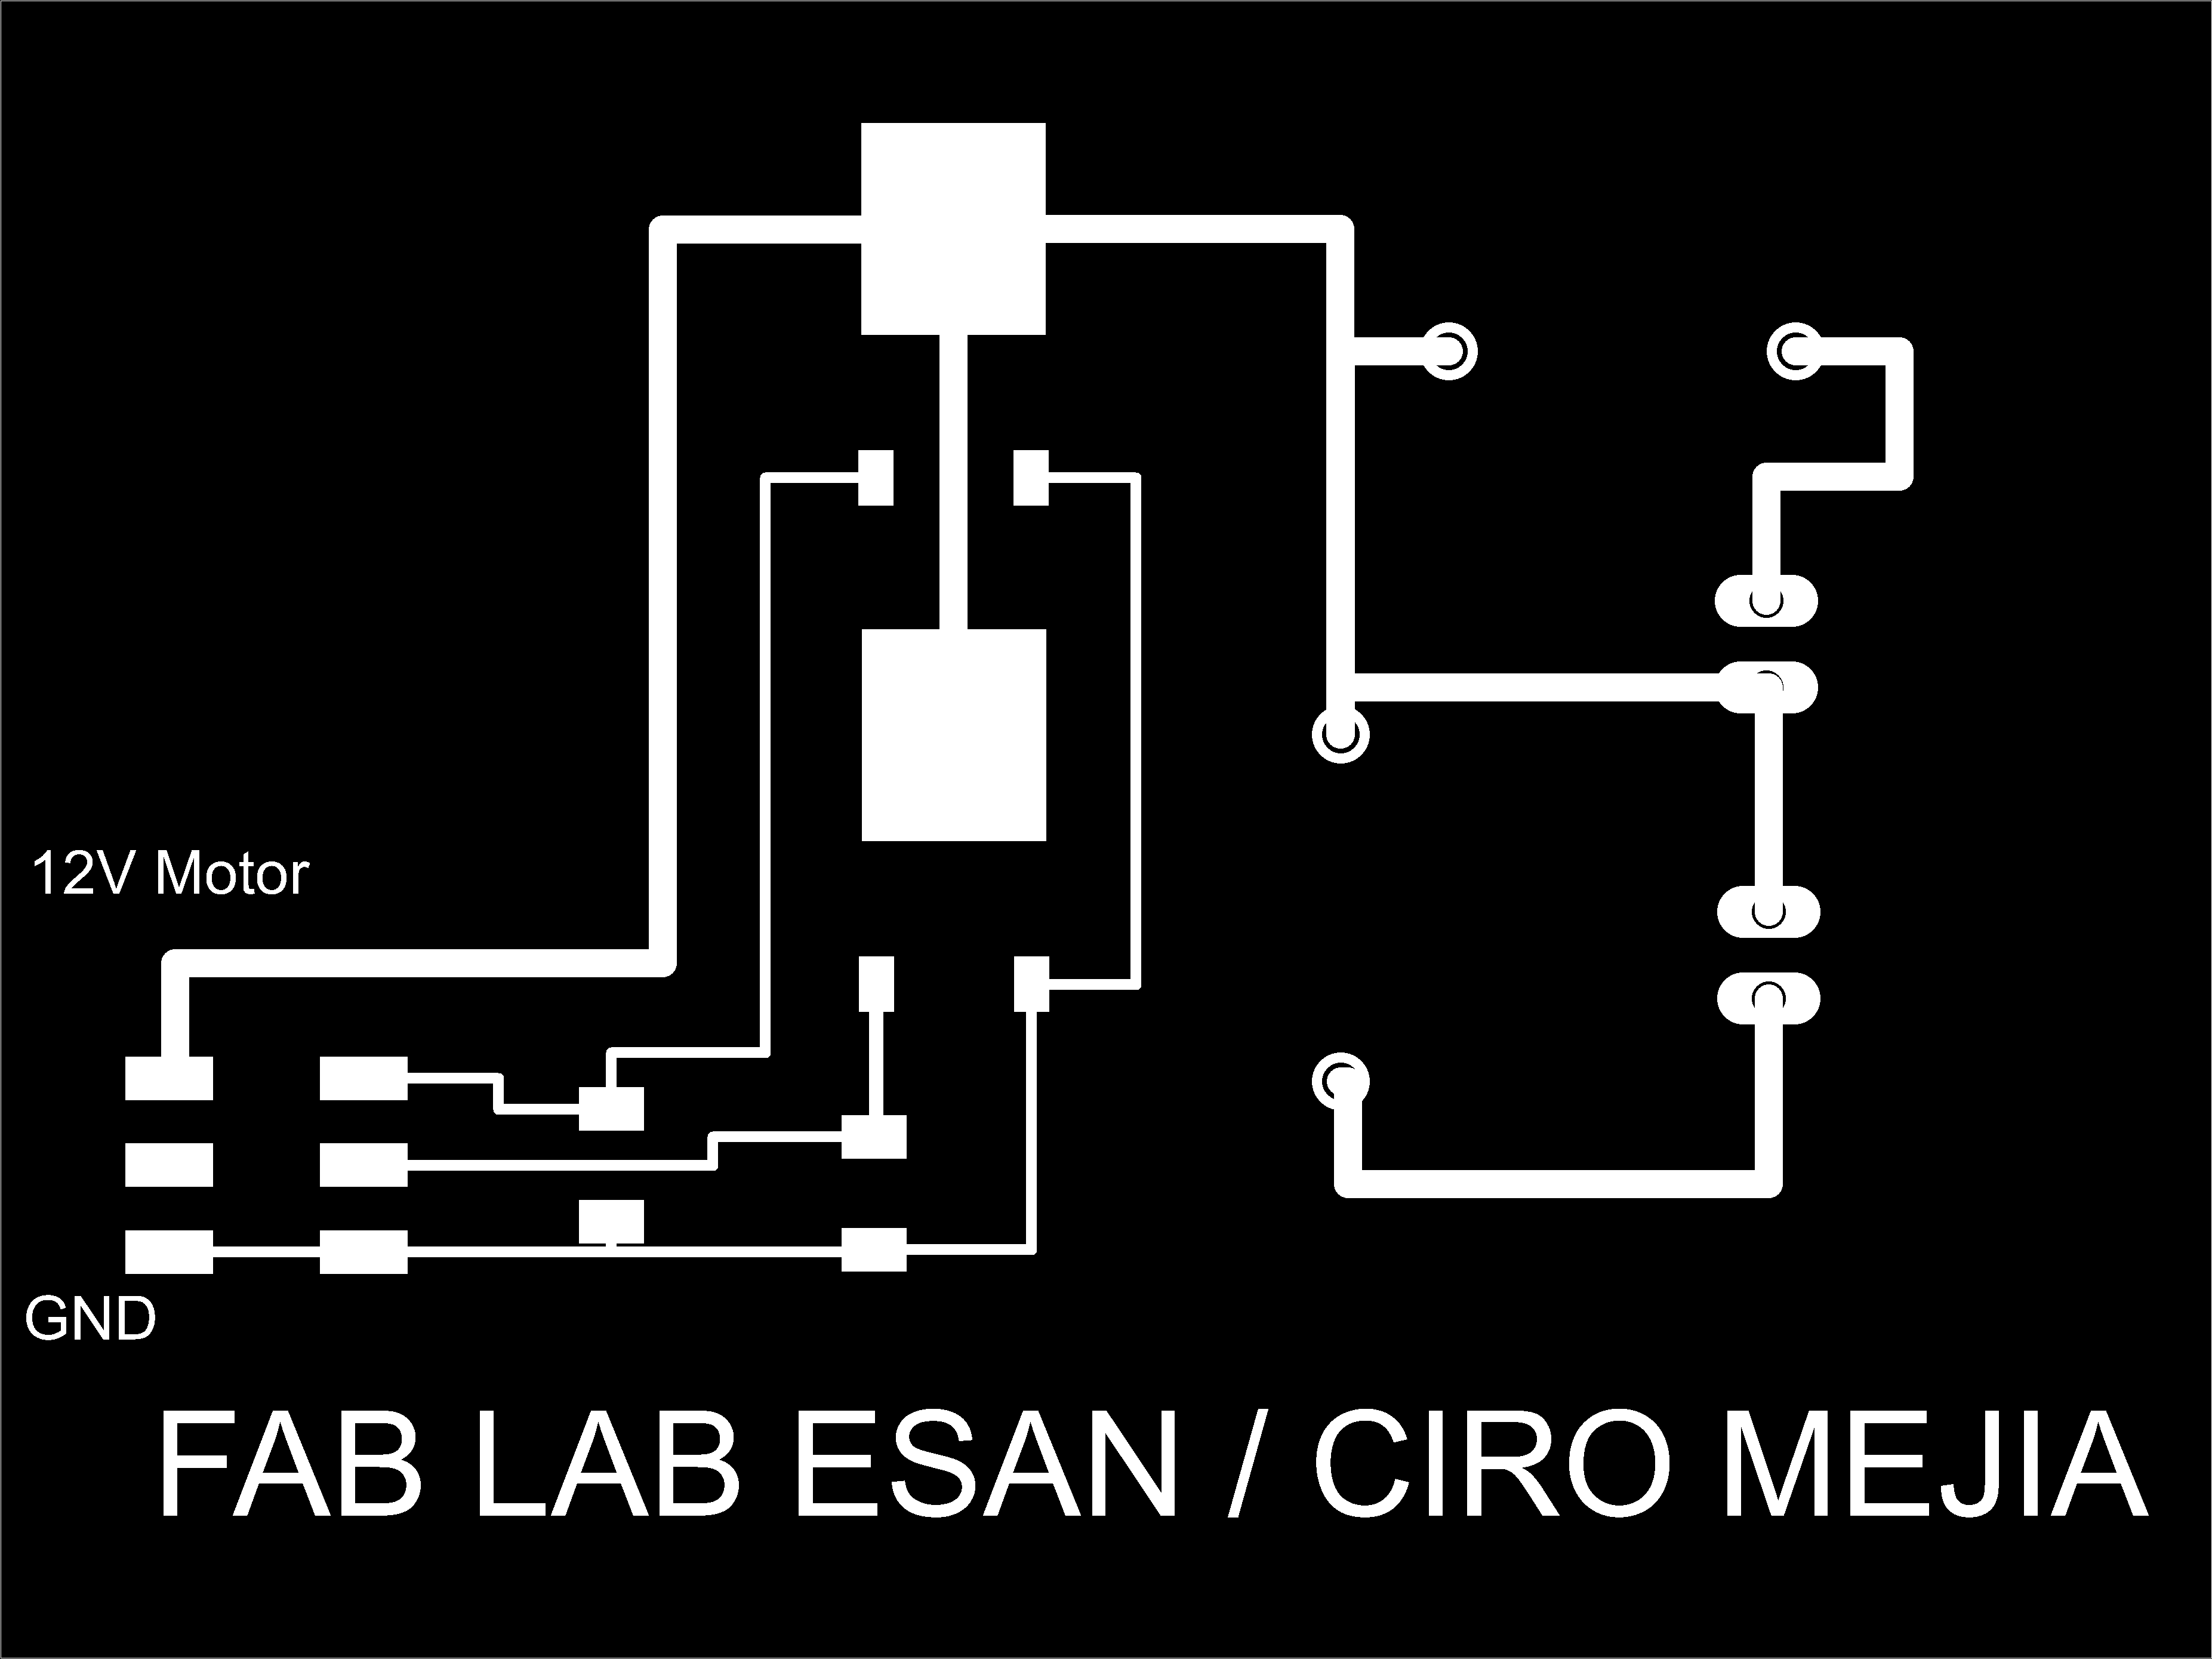 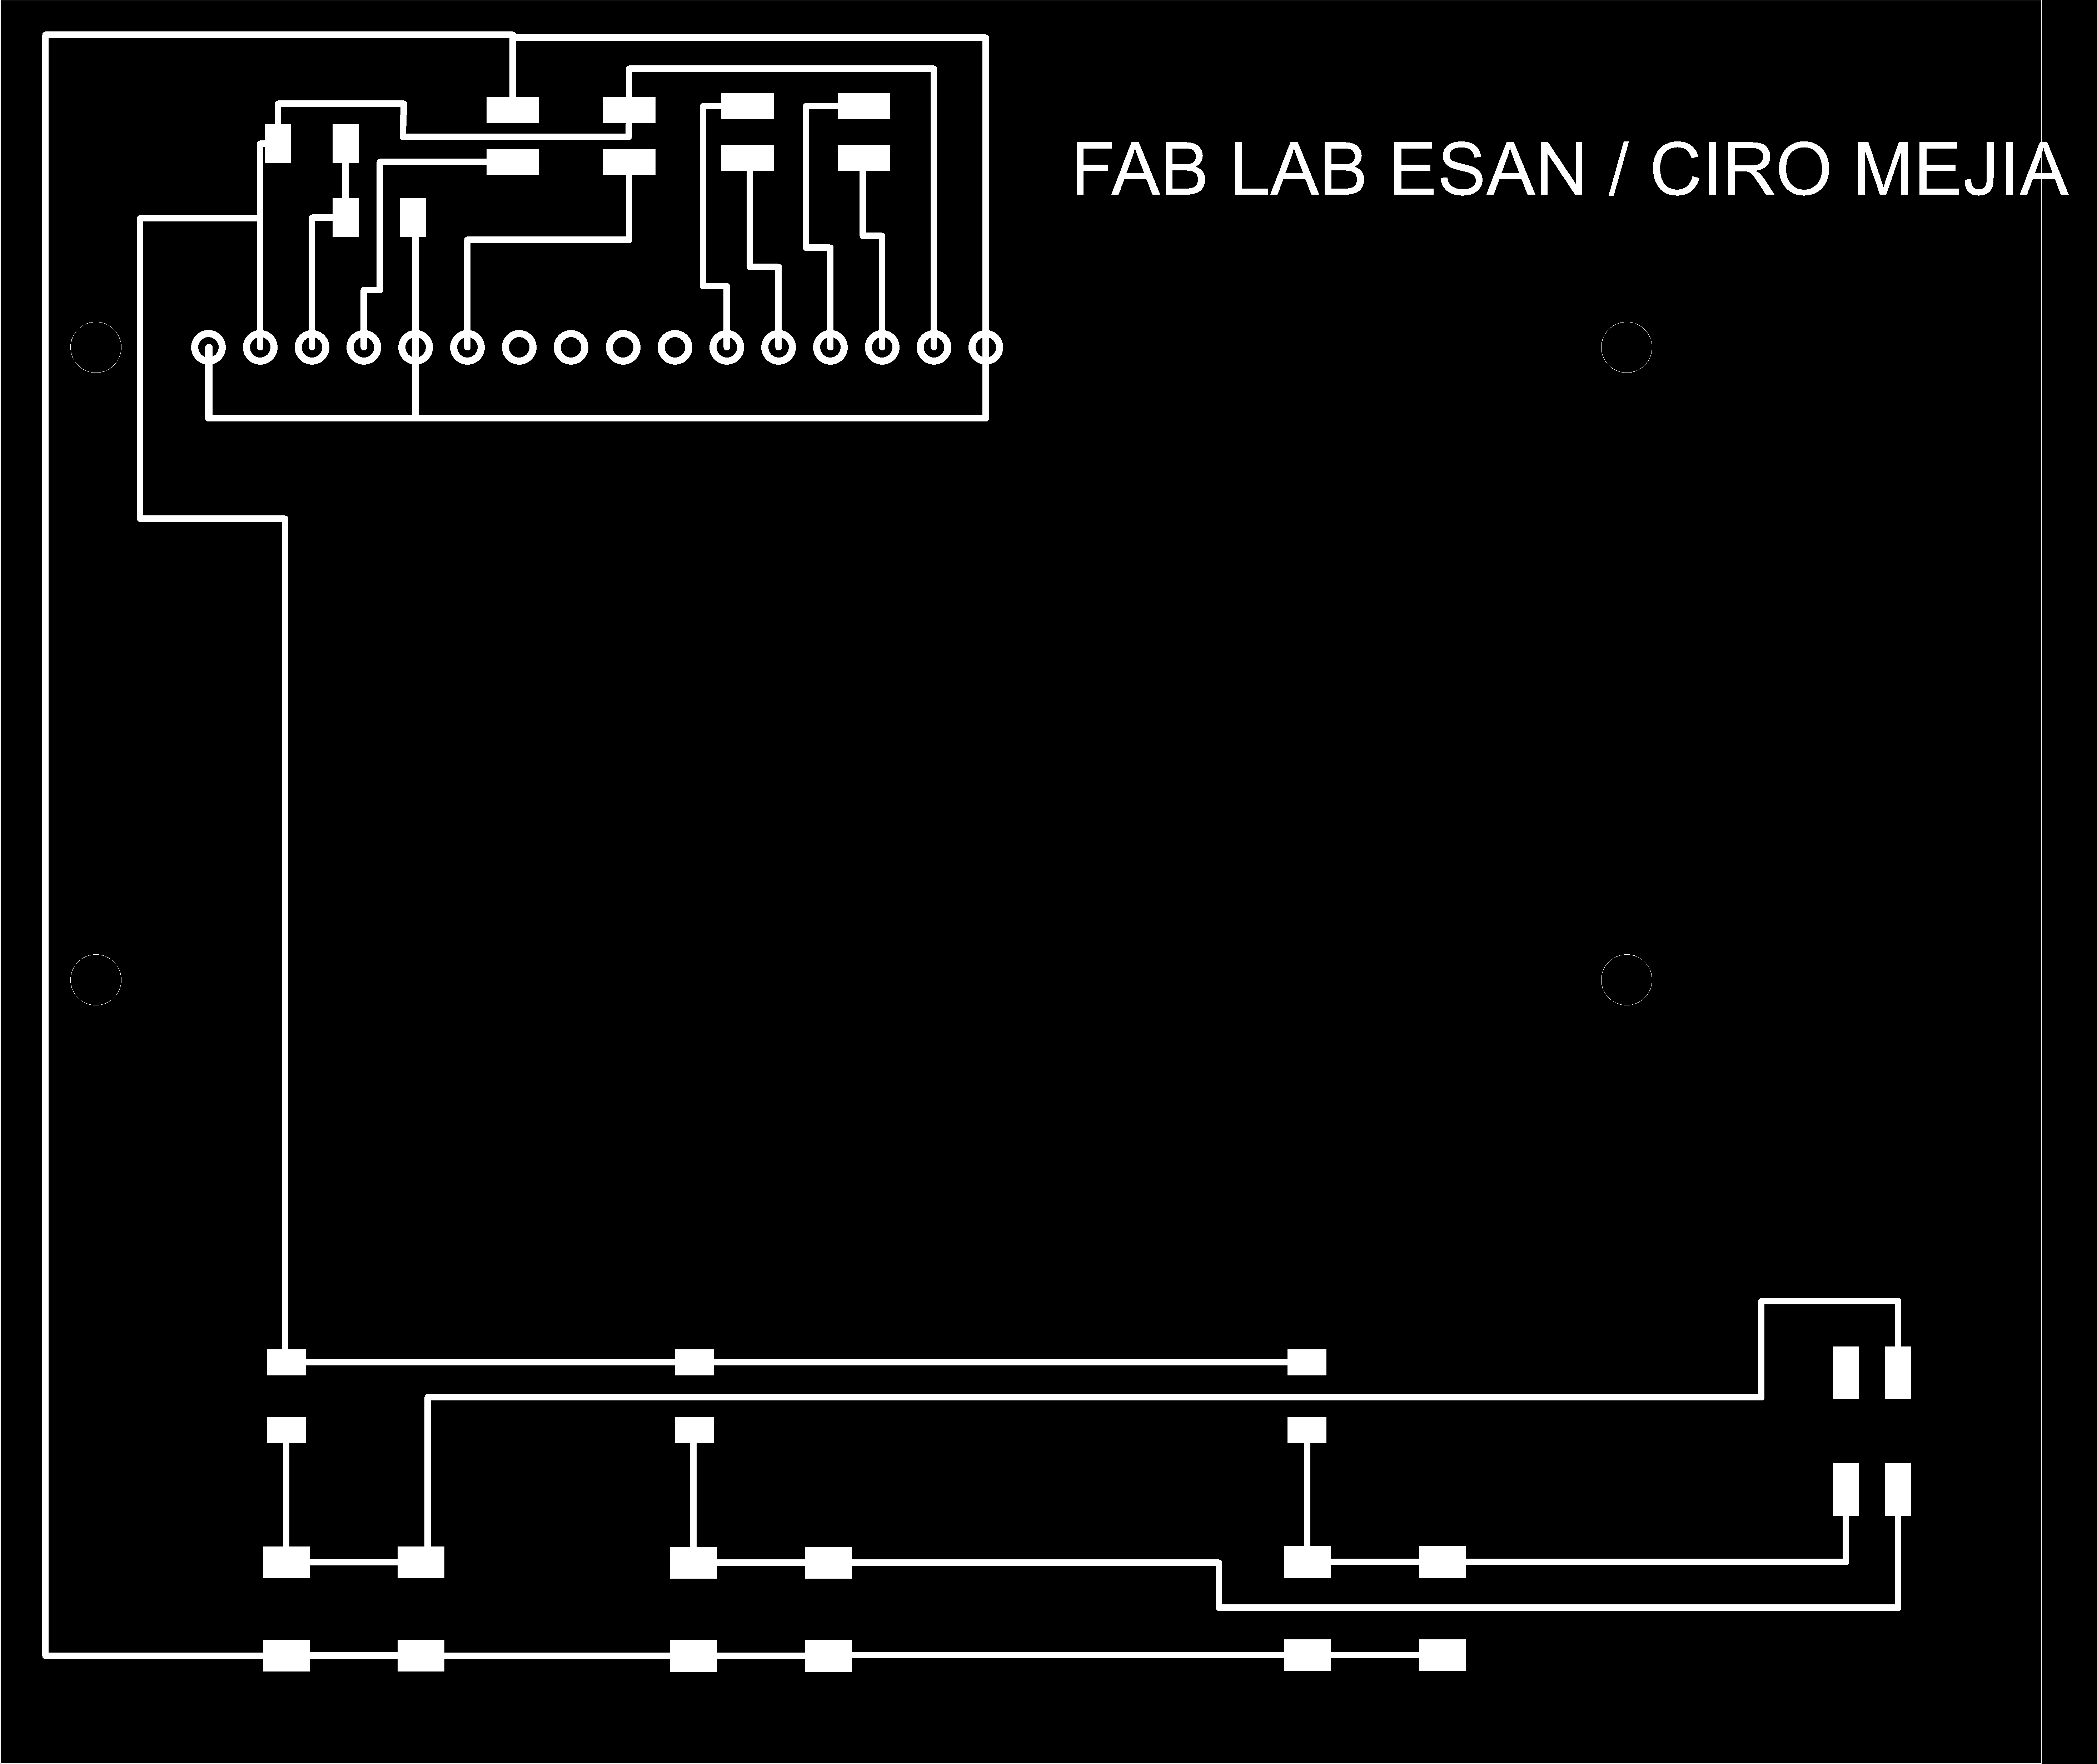 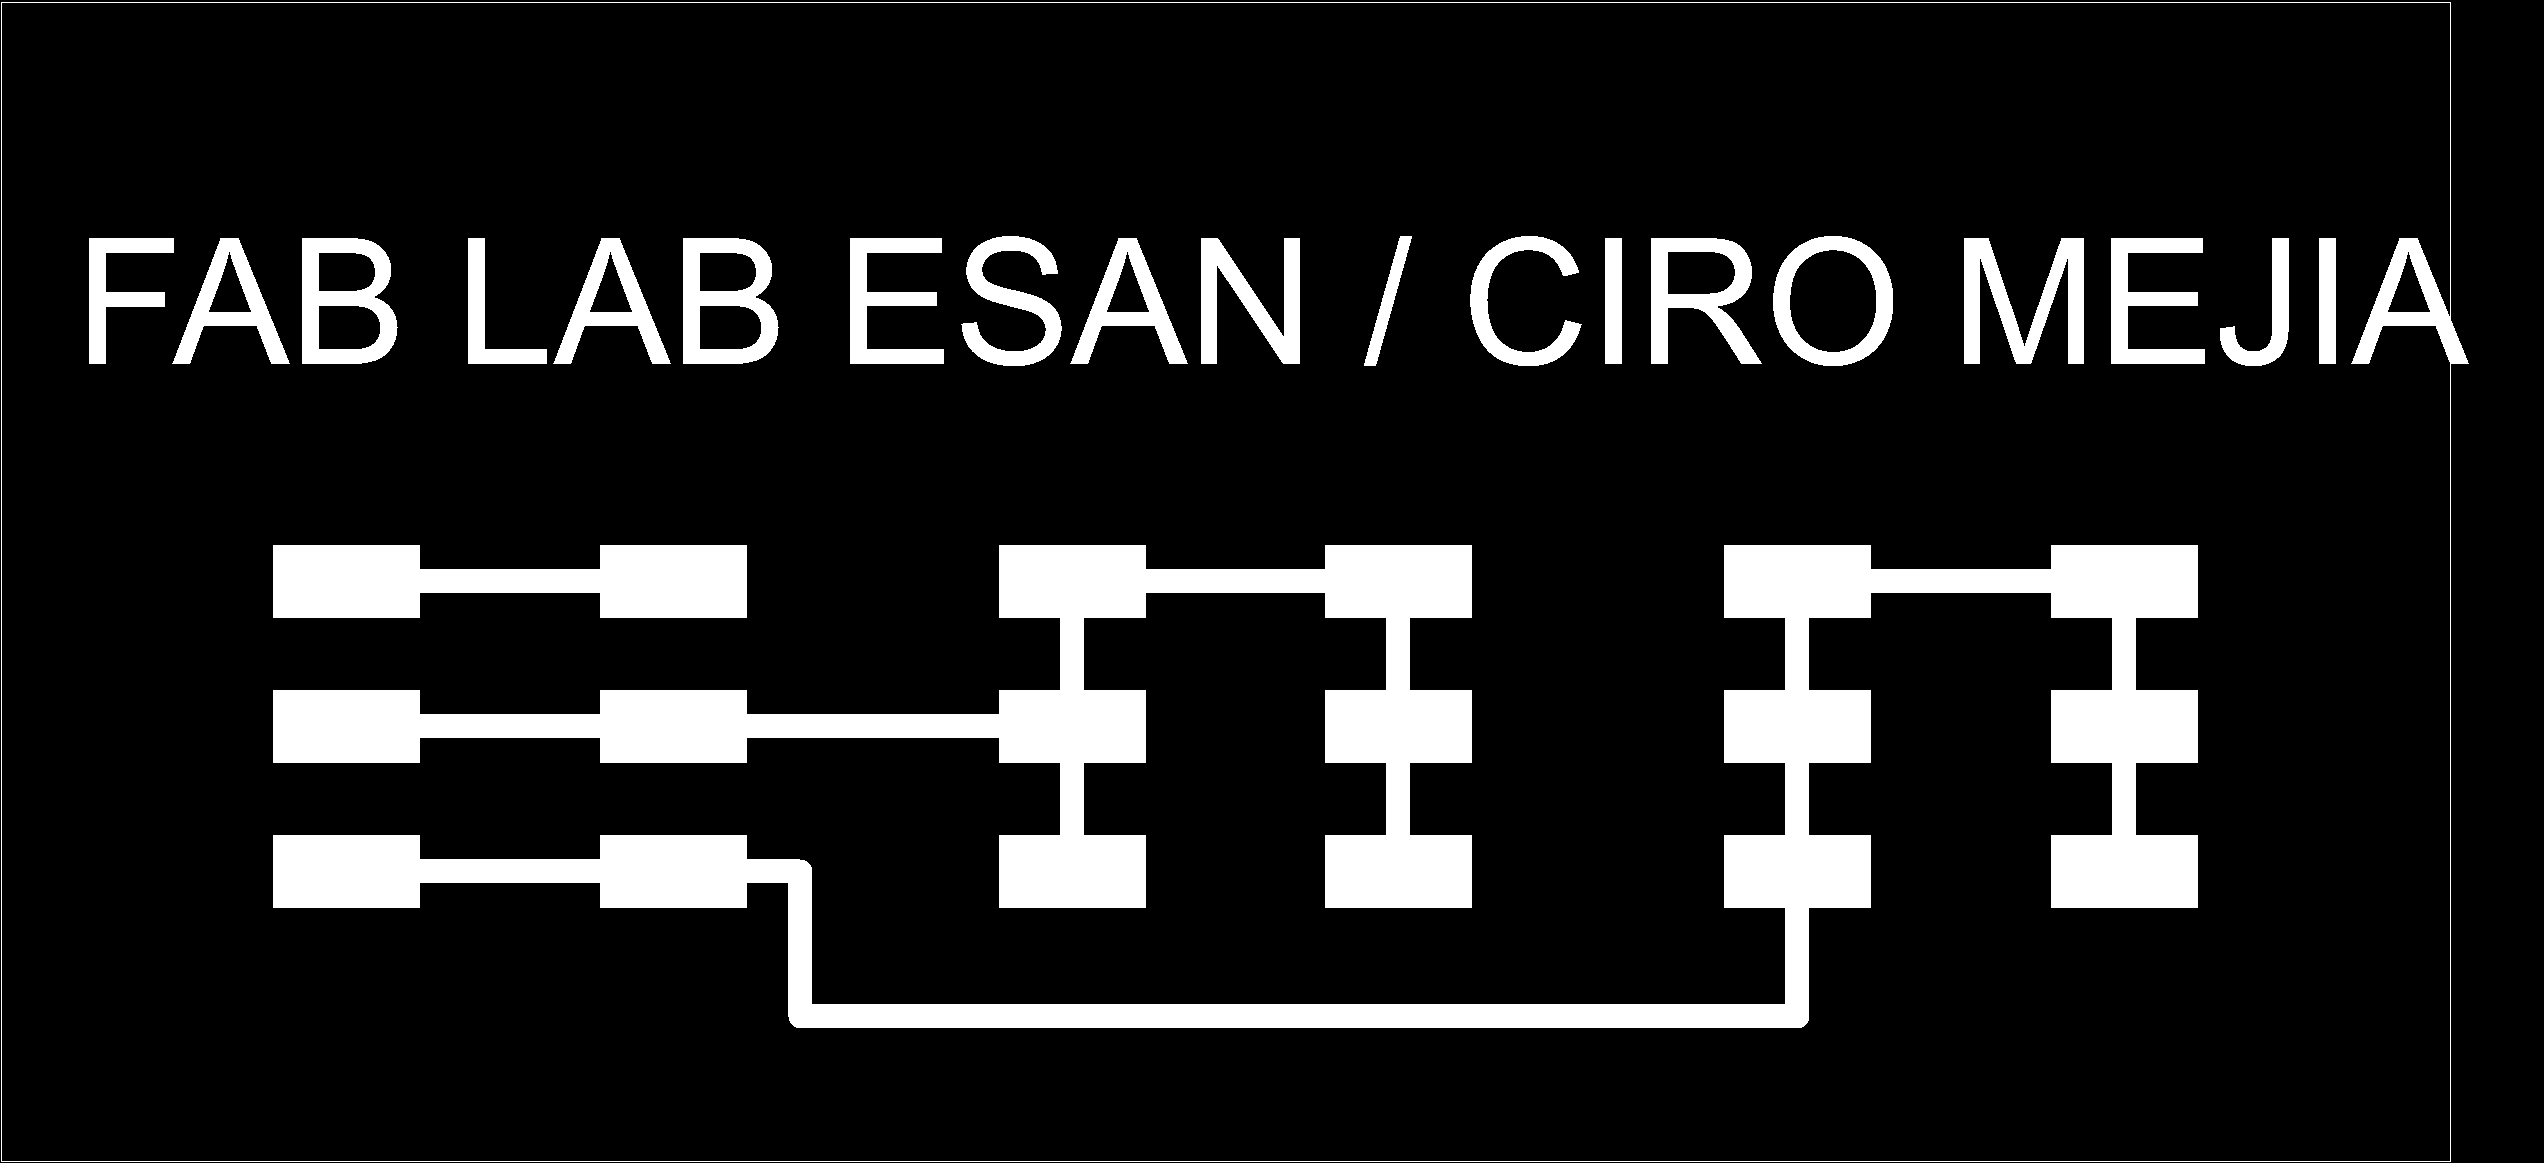 a) b) c) 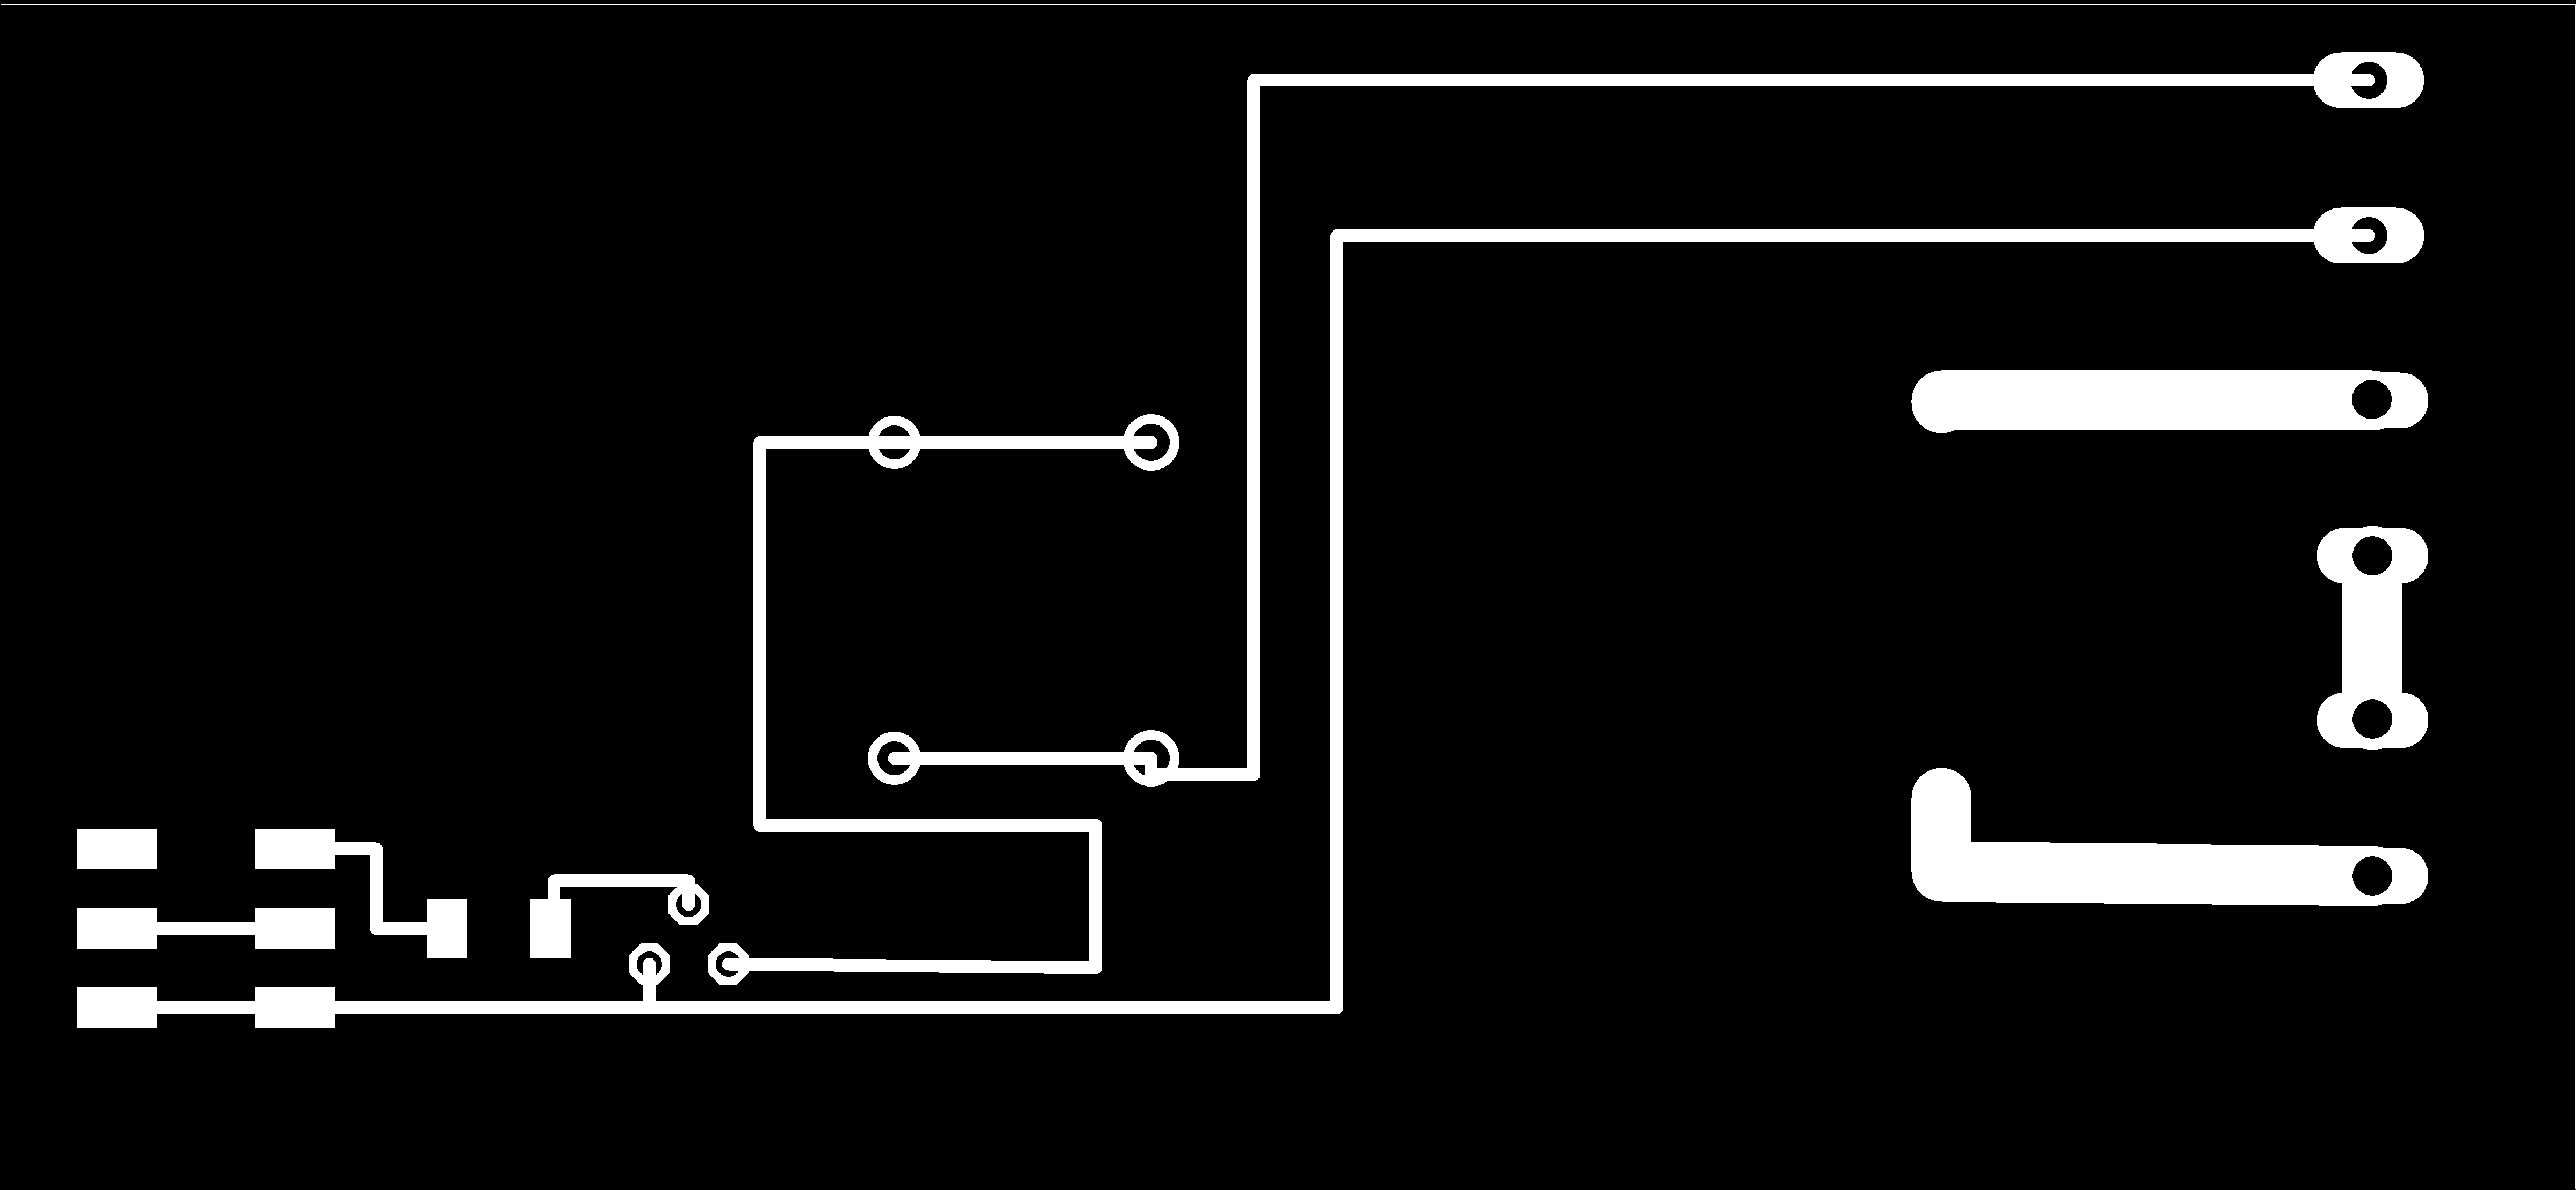 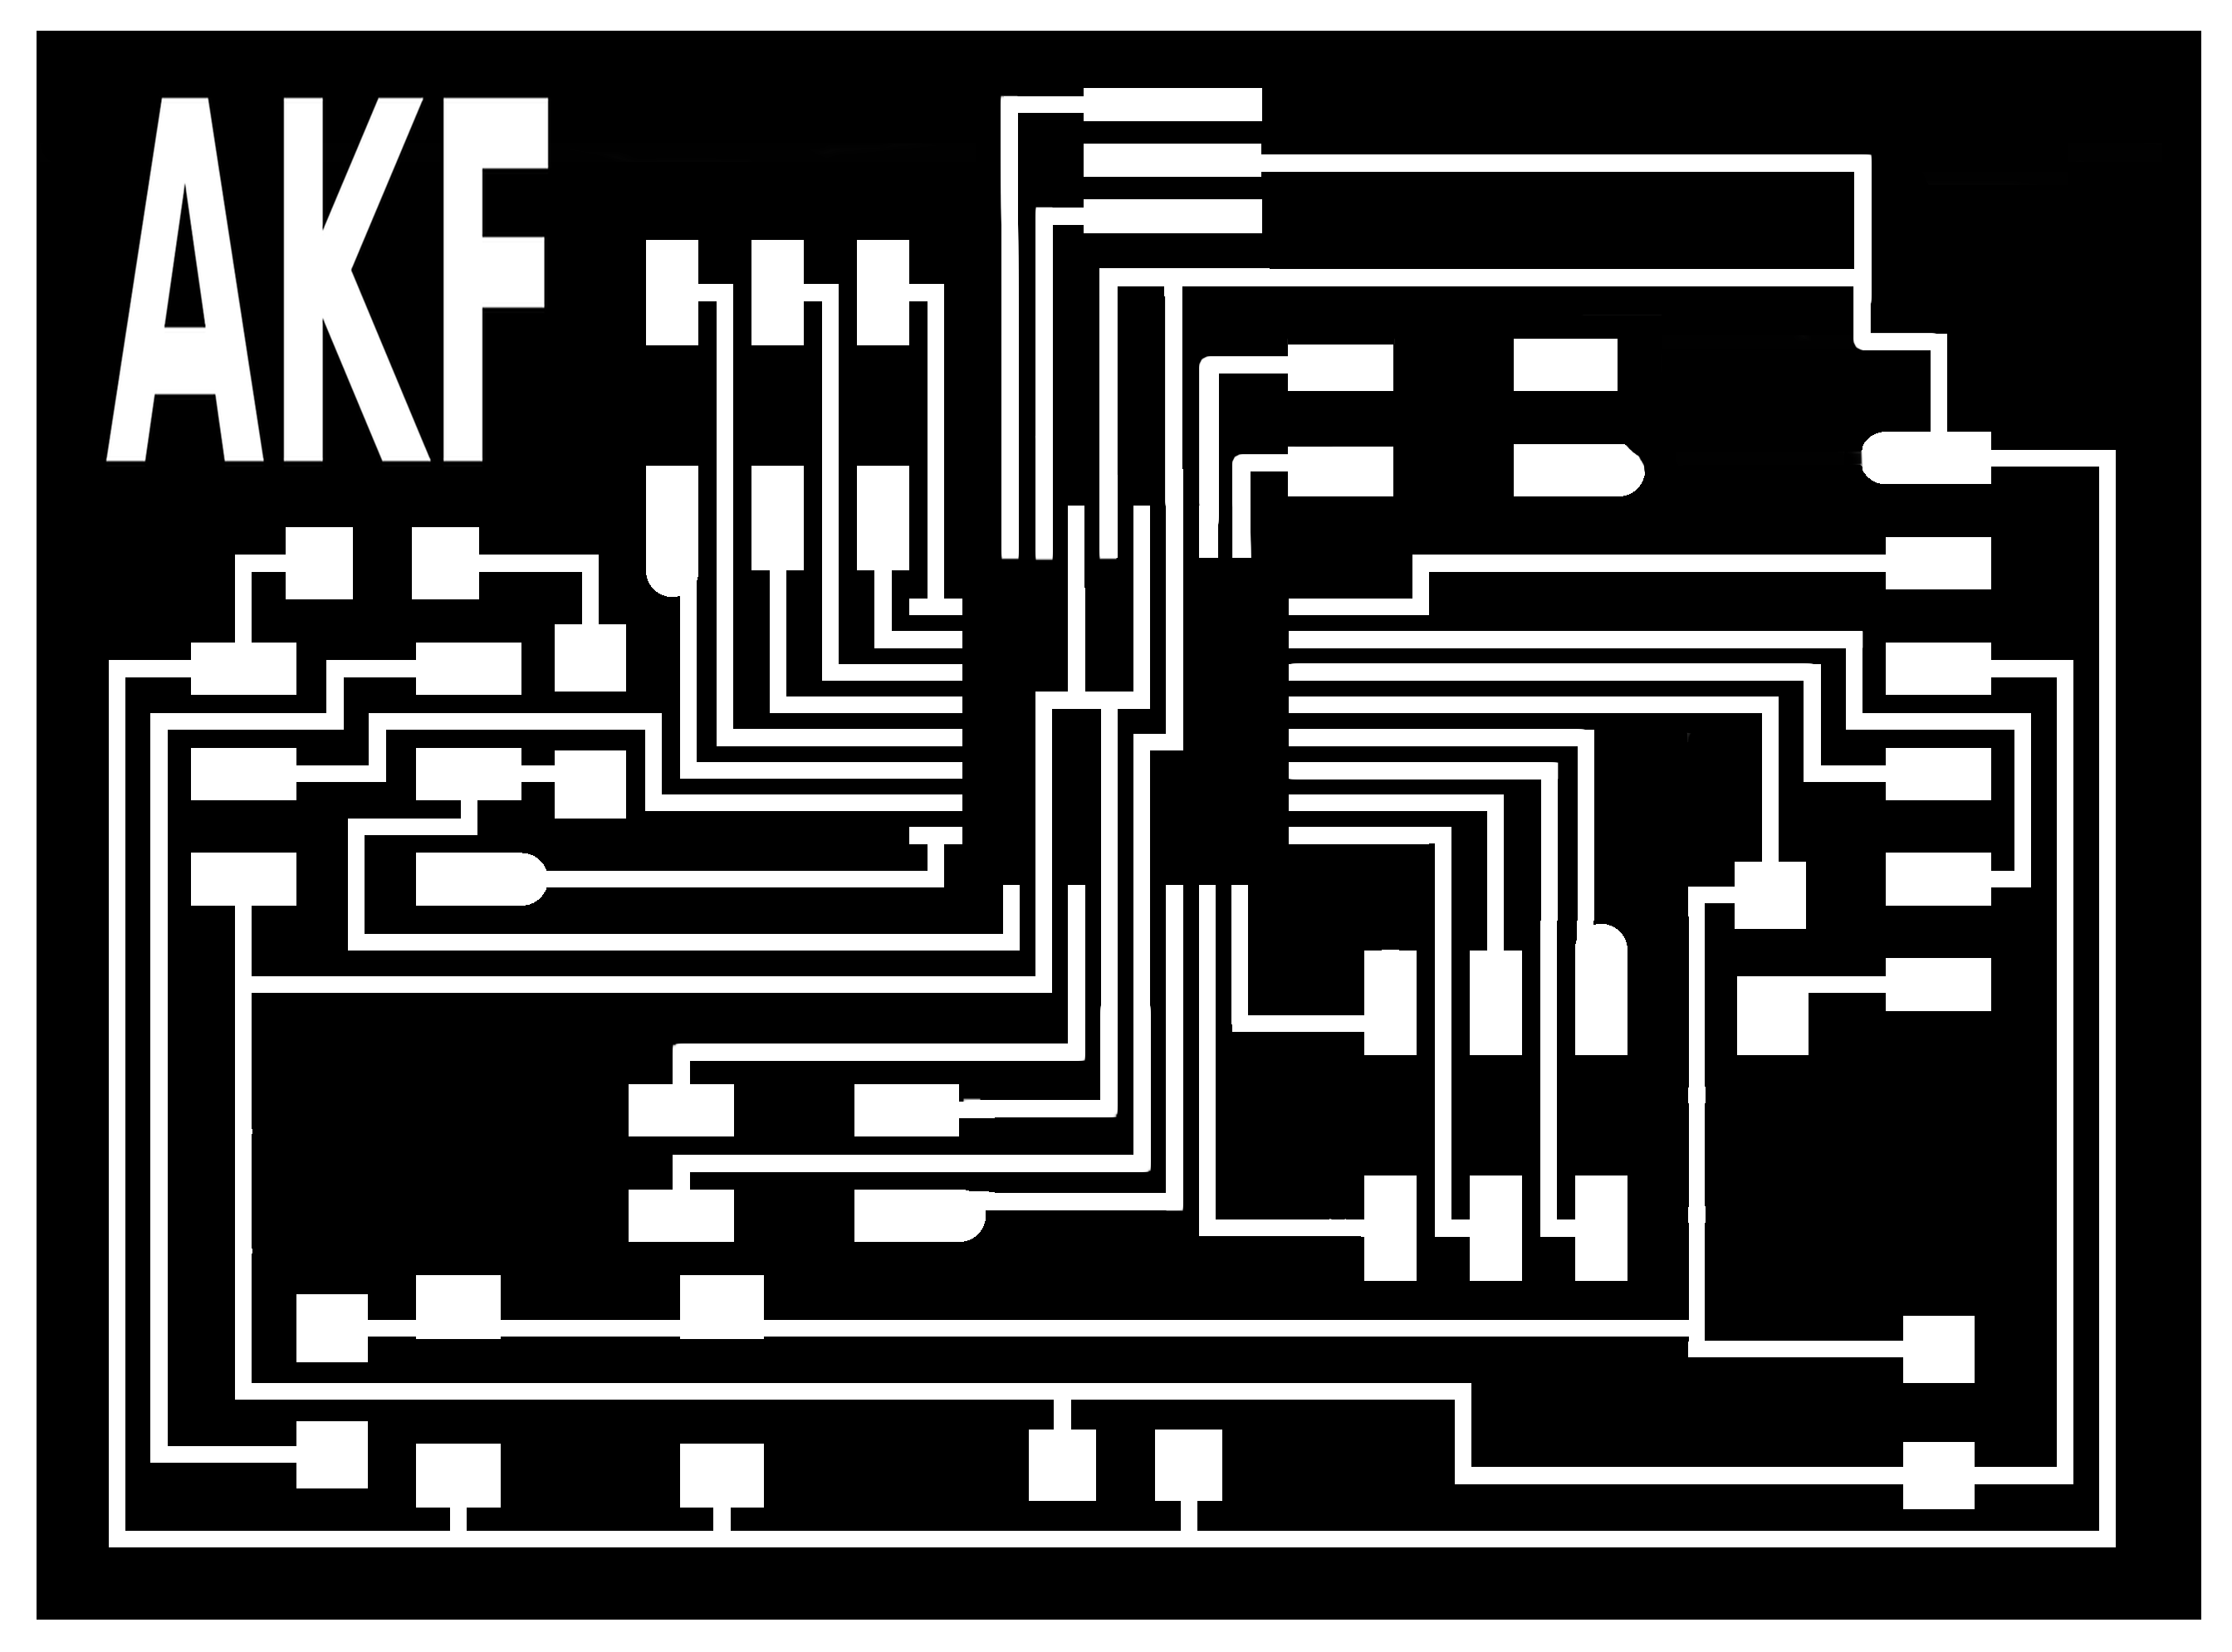 d) e) Plates welded components is. 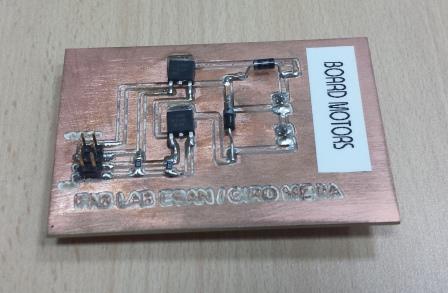 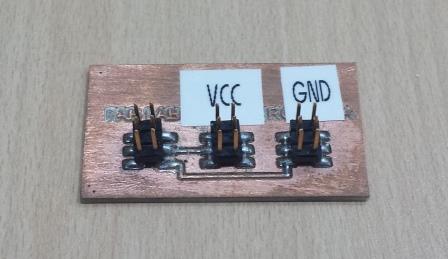 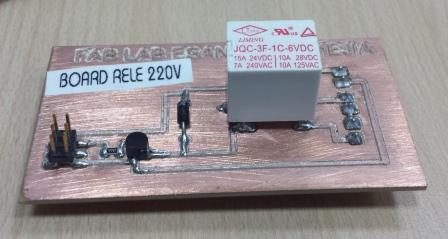 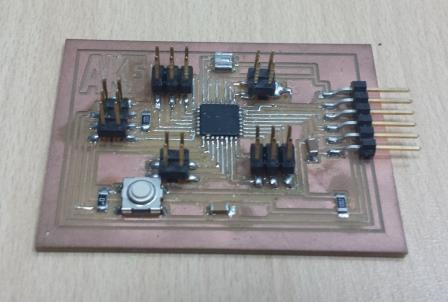 Installation structure and components. For this work tools like rubber hammer, screwdriver, drill, etc was used. The connections between the components and the structure is fixed with bolts and nuts. a) Installation structure in MDF 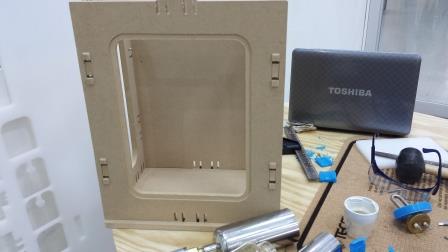 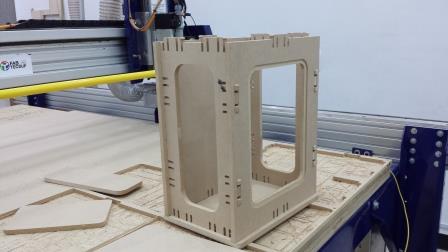 b) DC Motor Assembly and bottle holder 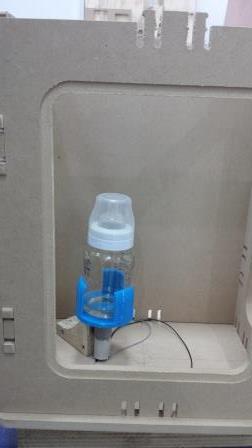 c) Brackets mounts dispensers 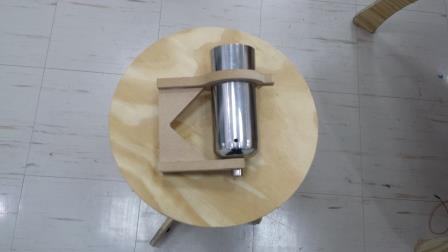 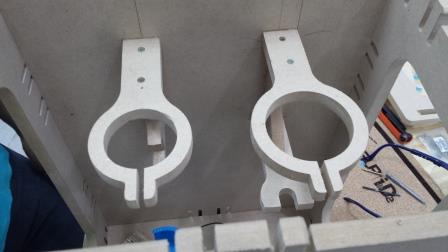 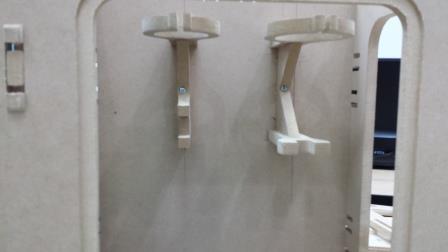 d) Mounts dispensers 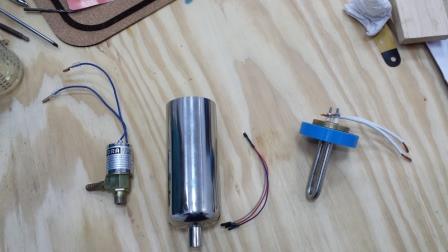 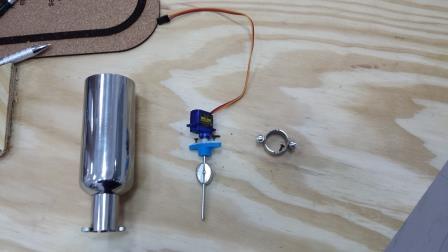 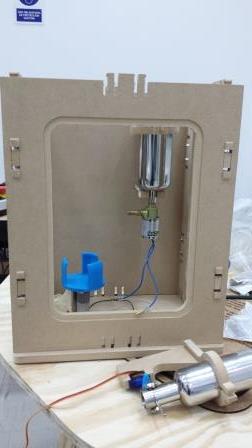 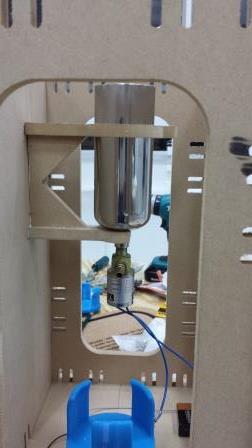 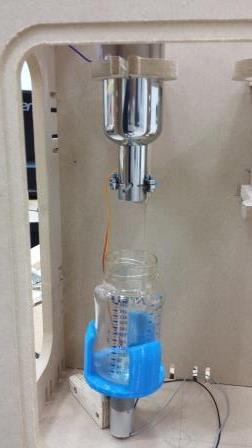 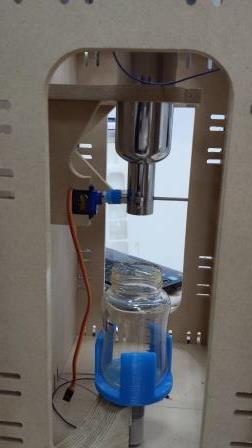 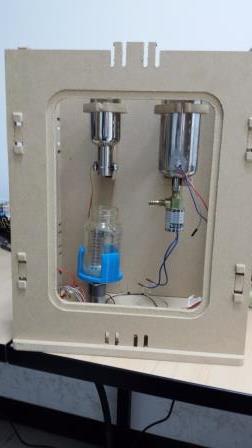 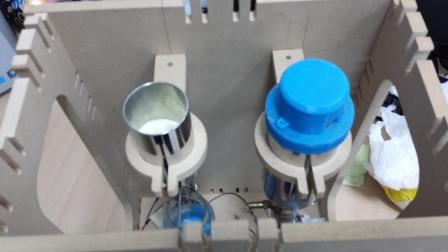 e) Installation of electronic boards 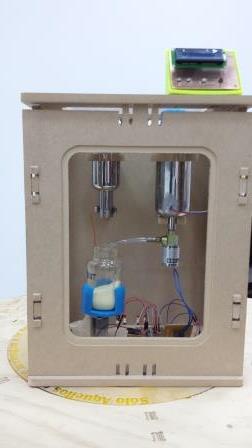 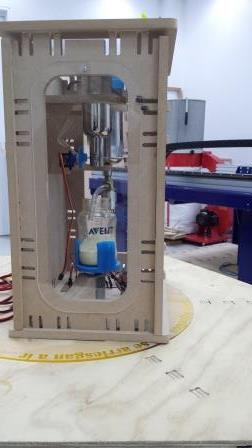 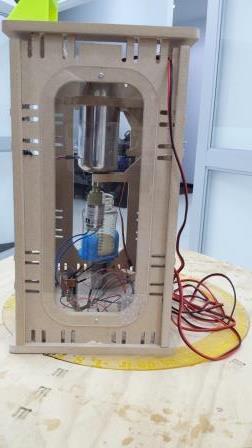 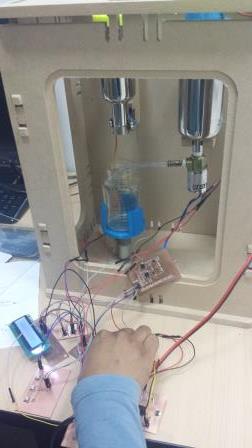 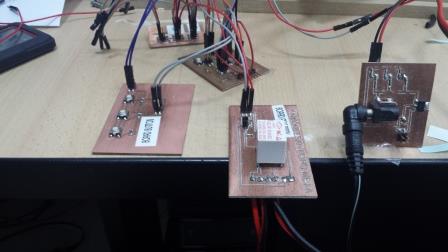 f) Support the electronic plates 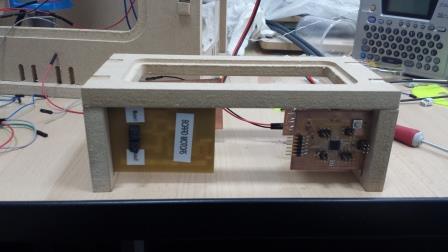 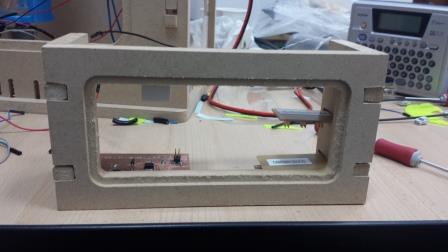 Final presentation of the machine assembled
 Programming code in the Arduino IDE Program the Arduino IDE is easy and intuitive, in my case I have taken computer courses in college where Dev C++, which is well like Arduino was used. The rest is just logic and know the ins and outs because you digital or analog is the ATMega 328, this can be seen in the Datasheet component or also on the website of the academy. 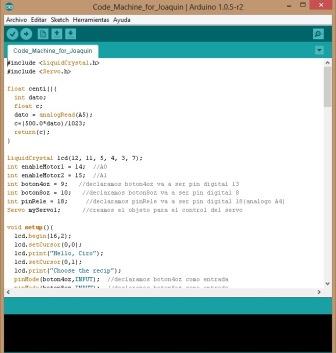 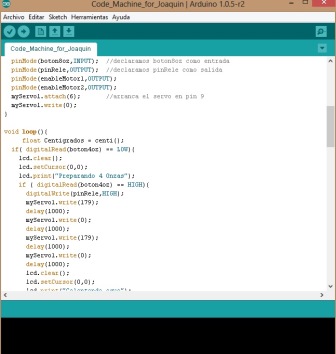 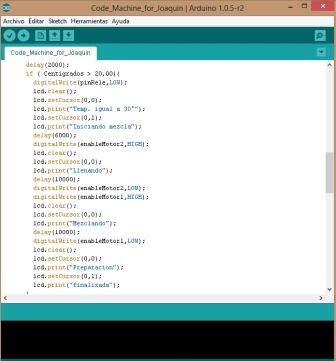 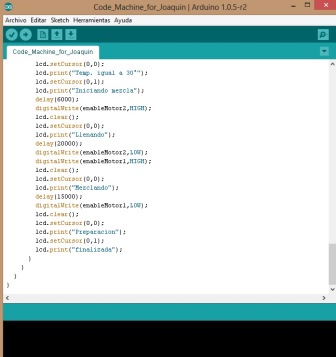 Video of running the machine 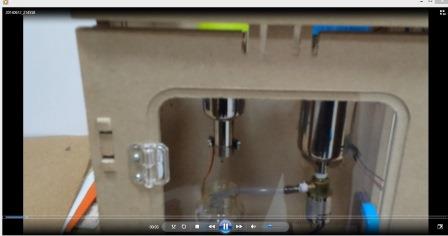 | |