6. 3D Scanning and printing
This week I reforced my knowledge about 3D printing and I made the first scanning of my life! I find 3D scanning is a incredible tool.
Group Assigment
3D Printing
For this class we came to MakerGroup , Saadin Solah‘s 3D printign business. I saw 2 diferent styles of 3D pringting there was FDM printers (Ultimaker) and SLA’s (FormLabs)
We donwload a test in Thingiverse to test the design rules of our 3D printers.
- Open the STL file in CURA
- Select a 3dprinter
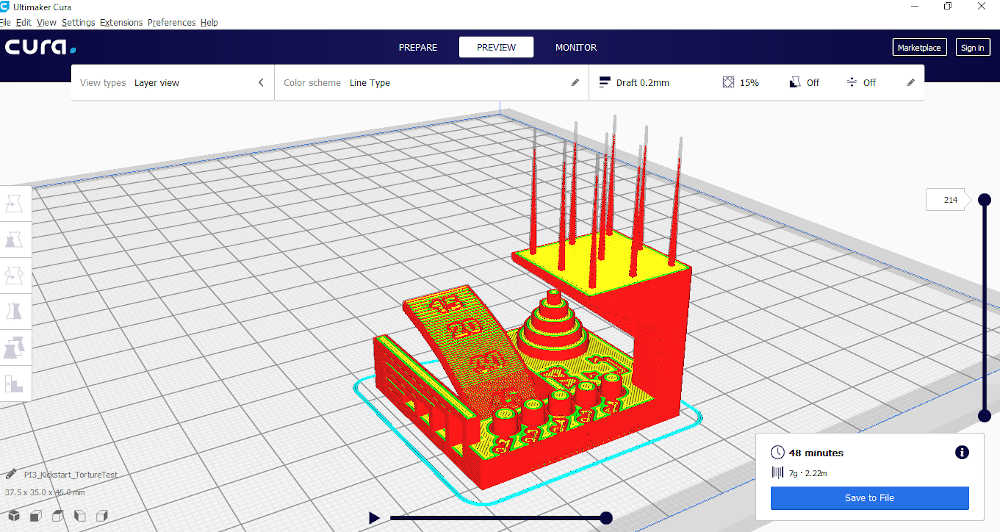
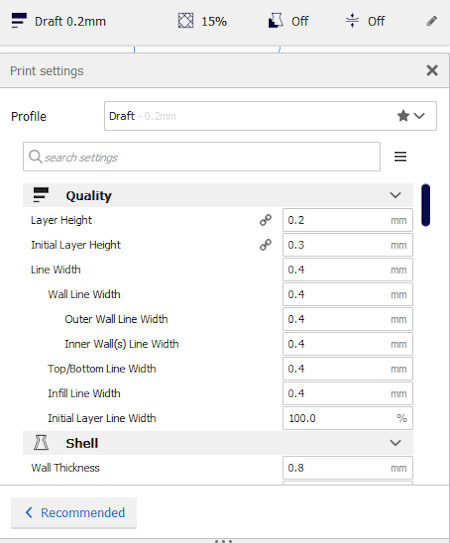
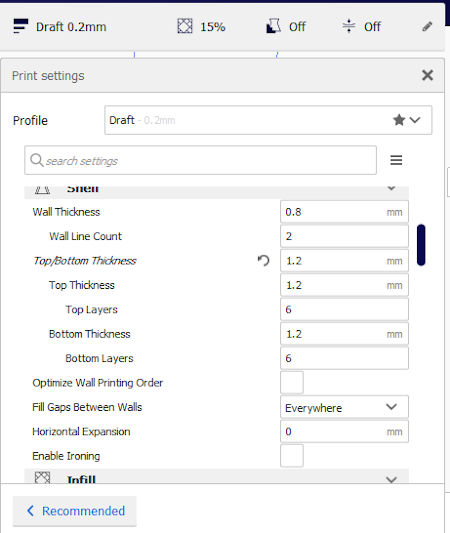
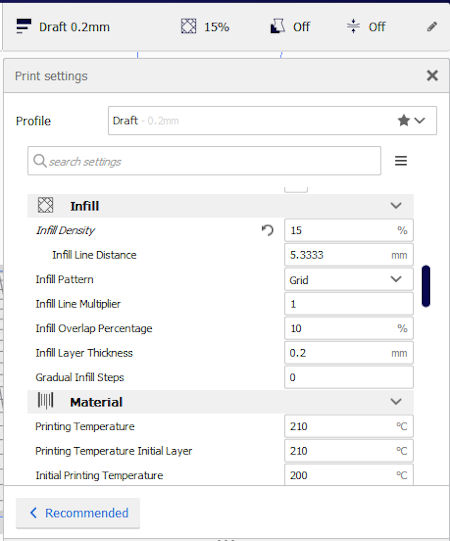
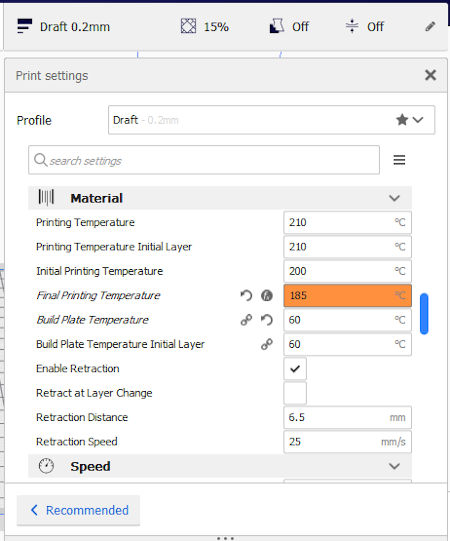
Then we make the settings with the values our tutor gave us. We didn’t put any supports because the idea of the exercice was testing the printers capacity in terms of precision and vertical printing capacities.
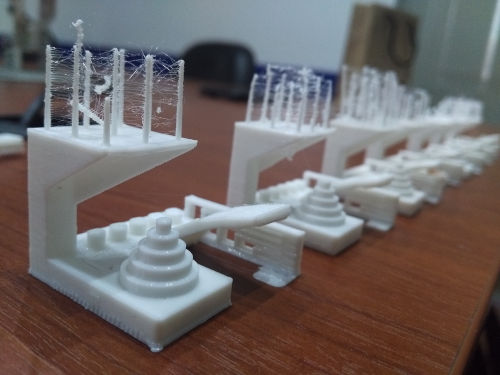
Finally we print some those test in diferent printers.
Download the Test for group assignment here
Conclusion
Testing with 3d printers shows me that printing’s quality can be improved by setting variations like:
- Profile
- Printing temperature
- initial printing temperature
- Final printing temperature
- Speed
Also there is a very small dimentional increasment between the digital model and the final printing. This is due to a gravity factor.
3d FDM 3d printers’ limits are vertical surfaces without supports and very small layers like a 2mm diameter tower.
We didn’t test with SLA printers but I learned that it is much more precise than FDM. Here some information:
“Stereolithography (SLA or SL; also known as stereolithography apparatus, optical fabrication, photo-solidification, or resin printing) is a form of 3D printing technology used for creating models, prototypes, patterns, and production parts in a layer by layer fashion using photochemical processes by which light causes chemical monomers and oligomers to cross-link together to form polymers.[1] Those polymers then make up the body of a three-dimensional solid. Research in the area had been conducted during the 1970s, but the term was coined by Chuck Hull in 1984 when he applied for a patent on the process, which was granted in 1986.[2] Stereolithography can be used to create prototypes for products in development, medical models, and computer hardware, as well as in many other applications. While stereolithography is fast and can produce almost any design, it can be expensive.” from Wikipedia
Individual Assignment
Designing and printing an object
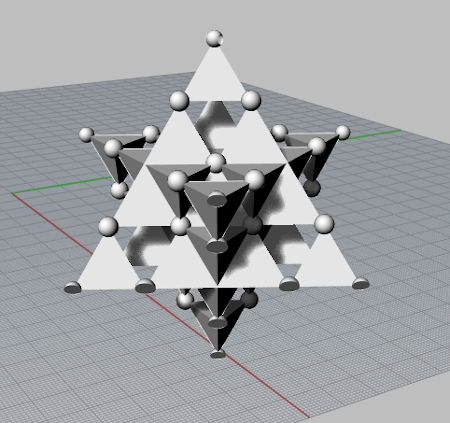
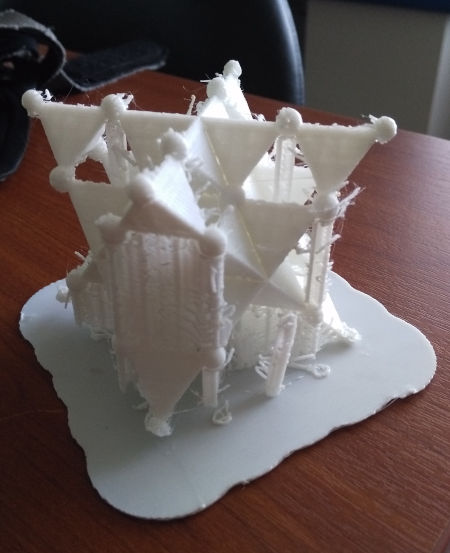
I designed an isotropic vector with tetrahedrons and spheres in Rhinoceros.
I have a feedback from Saadin, he told me that the base parts of my printing were gone to be better if I turn them into plane surfaces. So I took this advice and I cut the base spheres to a half.
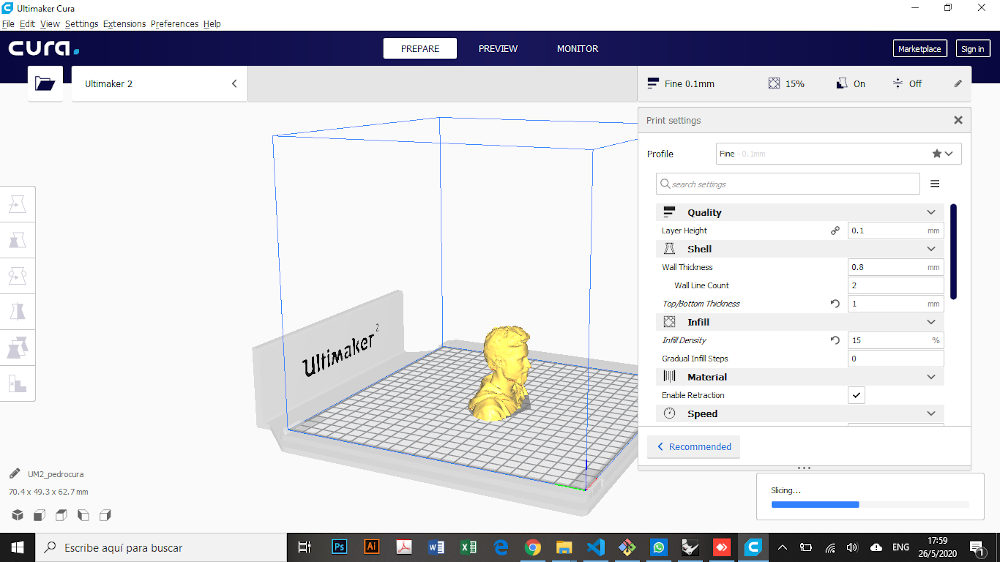
Then I opened it into cura and I set it the same that we did in the group assigment. The unique diference was the profiling set. I put FINE instead of DRAFT.
Dowload the isotropic vector here
Conclusion
To design my shape I created tetrahedrons and I put them together by a geometrical logic. I designed almost the entired shape using the commant mirror. I already had experience with 3D printing and I knew that the tetrahedrons corners will not be correctly joined, so I add a little sphere by corner to make a solid joint.
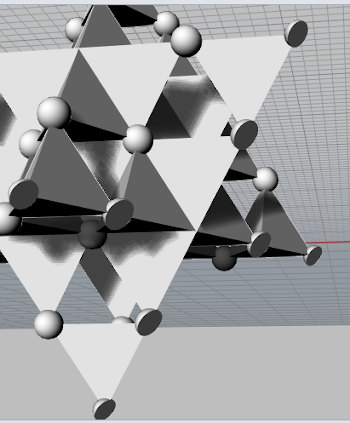
I think it would be very hard to manufacture this shape even with a 5 axis cnc machine because there are void spaces inside the shape. The milling tool would need to move 360 degrees in all axes an even if it could there are small joints that could be broken by a milling tool.
Additive fabrication allows us to produce object with gaps and can be incredibly precise. The limitation I can observe is about de size of objects we can make.
Scanning and printing an object
I was really not familiarized with 3D scanning and found that really usefull and fun.
We make a scan of myself and visualized it in cura.
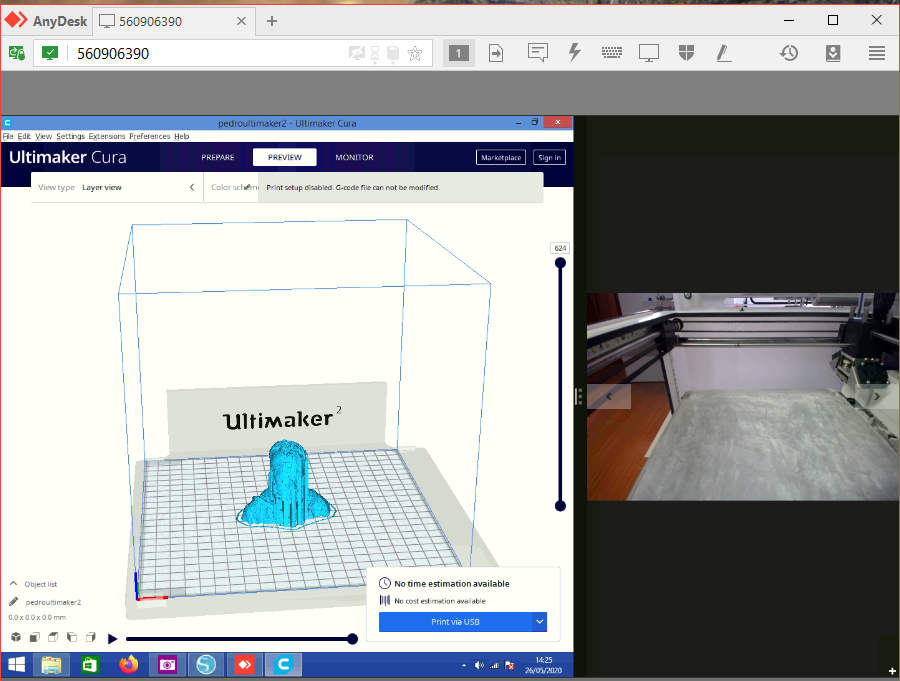
We did not print our scannings but during the confination my lab enabled a system to use the machines in a remote way. So I took the opportunity to print my 3d Scanning.
So here the remote 3D printing process:
-
Download Anydesk
-
Open the program and follow the steps of the manual downloadble here
-
Copy the stl file to the linked desktop
-
Open CURA in that pc and open the file to print
-
Click onto print via USB
-
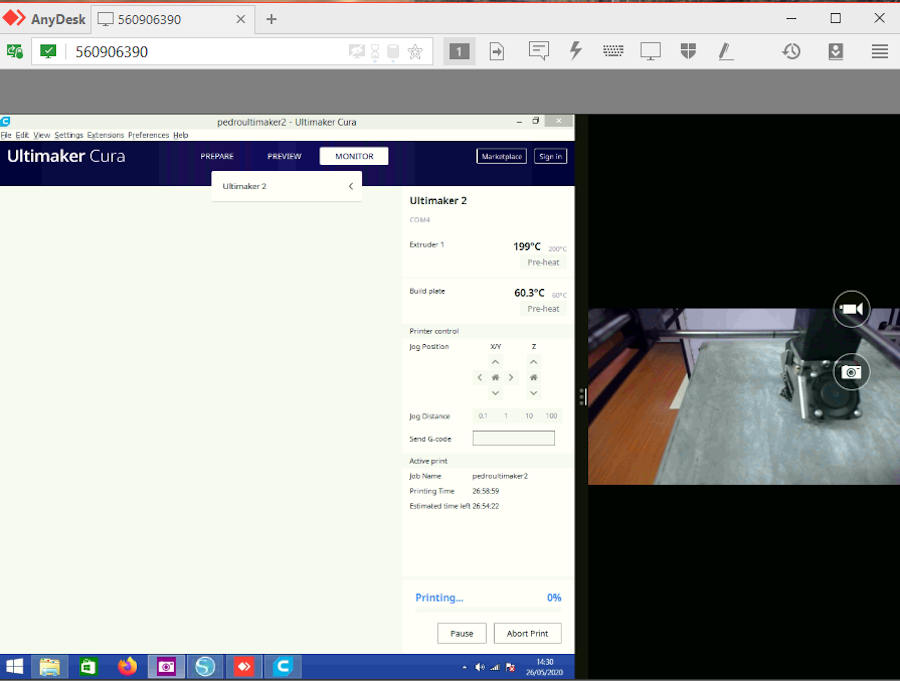
Pre-heat the extruder and the plate if you upload a GCode file
-
Put on 0 the x,y, and z axes.
-
Wait the temperature reach the settings values
-
Print!
Hero shot!
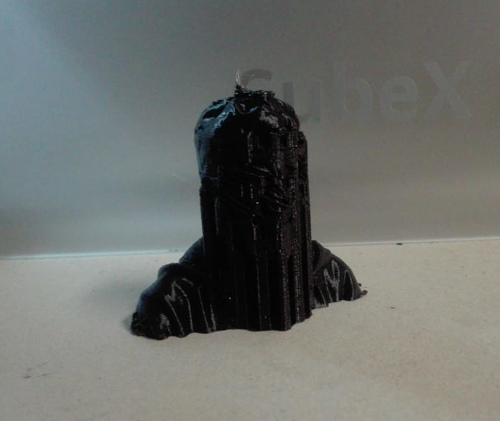
Download the Scanned and printed “me” here
Conclusion
There are many ways that replicate a 3d object in a digital space can be usefull. The most advantage thing about this tool is the way we can improve ergonomy in the objects we create. By scanning parts of the human body and design object in funtion of that shapes. Also for organic inspired design it can be very use full. By Scanning nature generated shapes we can obtain very useful structures and beautiful shapes.
Learning outcomes
-
[x] Identify the advantages and limitations of 3D printing
-
[x] Apply design methods and production processes to show your understanding of 3D printing.
-
[x] Demonstrate how scanning technology can be used to digitize object(s)
Have you?
-
[x] Linked to the group assignment page
-
[x] Explained what you learned from testing the 3D printers
-
[x] Documented how you designed and made your object and explained why it could not be easily made subtractively
-
[x] Documented how you scanned and prepared an object (for 3D printing)
-
[x] Included your original design files for 3D printing (both CAD and common format for 3D printing)
-
[x] Included your hero shots