18. Mechanical design and machine design
Group Assigment page
Machine Design
Mechanical design
For this assigment we decided to tranform a CUBEX 3d printing machine into a 5 axis milling machine.
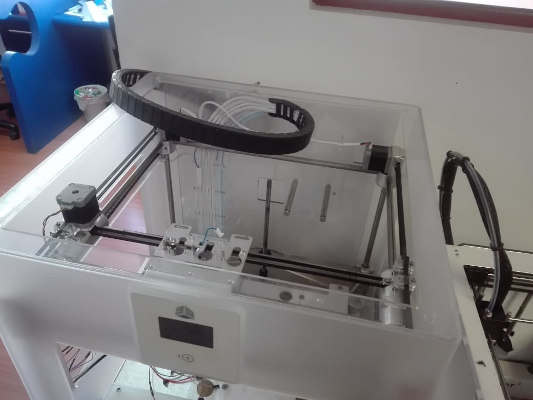
We took an exisiting 4 and 5 axis mechanism as an example to model our machine and we choose to put each motor just on the axis.
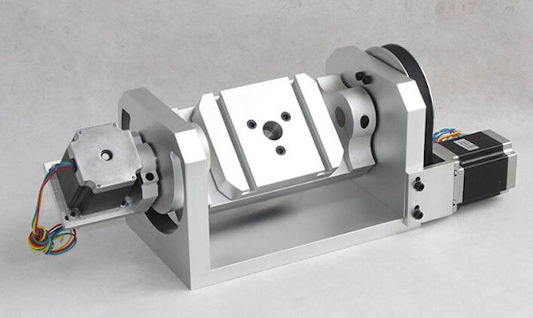
So in one week we designed in 3d the 4th and 5th axis adaptation to our 3d printing machine. We helped our selfs with a 3d model of one of the motors we had. Downloadable here
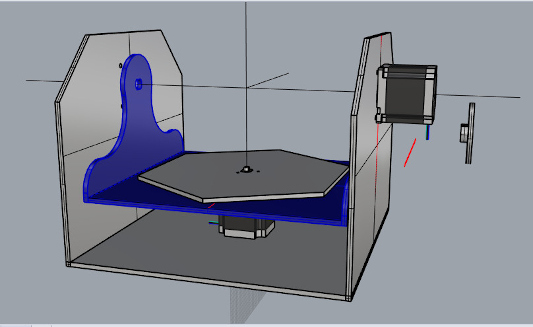
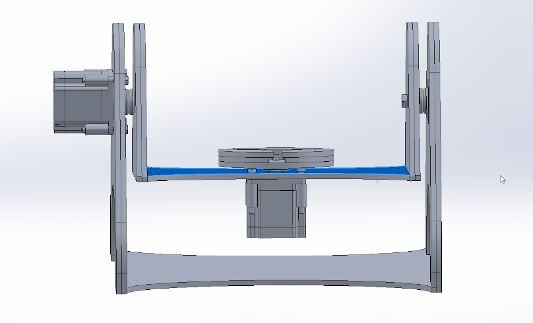
First I make the design itself in Rhino, thinking essentialy at the mechanism. After that, roberto improved the design in SolidWorks.
Download 2nd Design file To that time we already had the 2D plans to cut MDF boards in the laser machine:
But there was an error about the thikness of the material. We thought there was 5mm thikness MDF available in the lab but there was 6mm, so we were pushed to change the design. We take the oportunity to duplicate each part of the machine to make sure the parts don’t bend.
We considered that this design will be to hard to make so we decided to redesign the machine structure

We added some finger joints, designed the axis A for the motor’s axis fit perfeclty in it and modeled two assemblies to print them in 3D.
Machine fabrication
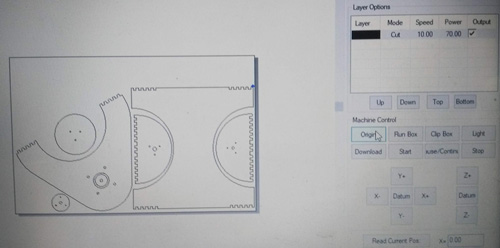
We cut the MDF (6mm) boards in the laser machine with power 70% and speed 8mm/s first. After we change the speed to 10.
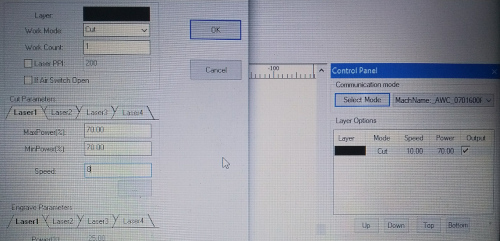
Laser machine cutting
- Click on Origin
- Click on Download
- To be sure that the cutting area fits with the material surface: click onto the Run Box.
- Finally click on Startto run the machine.
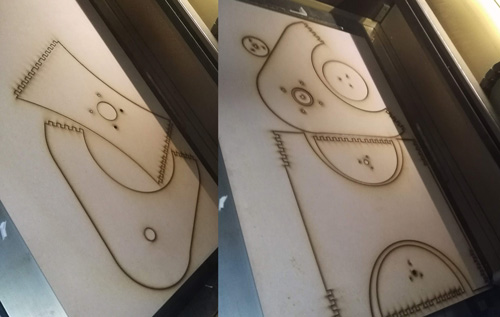
The pieces were correctly cutted.
Assembling
But the fingerjoints didn’t fit correctly so we used glue and screws to join the parts.
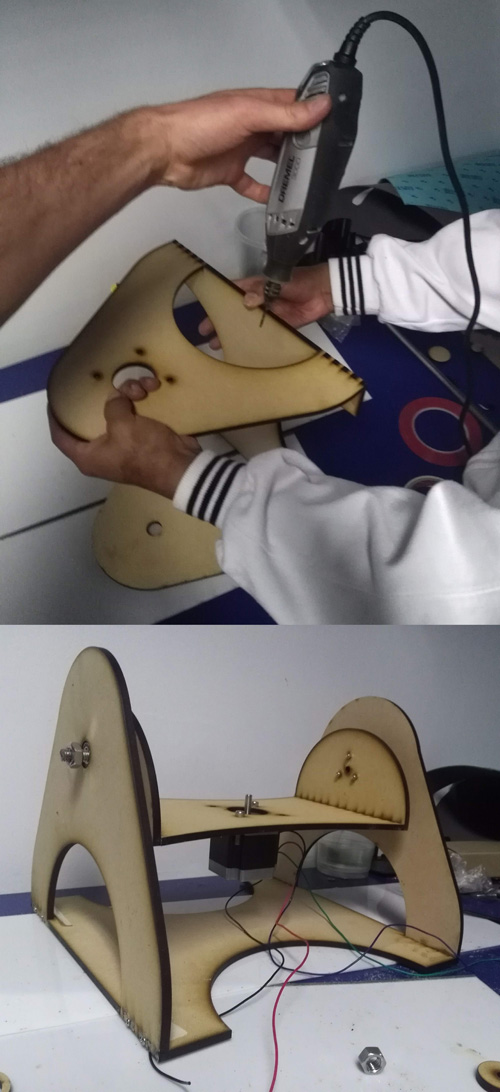
3D printed parts
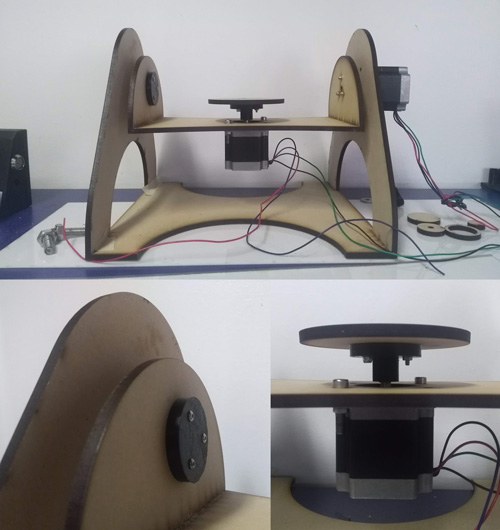
The previous picture shows the structure without the 3D printed pieces. Those parts where printed remotely.
Unfortunately the holes to fit the motor axis and to pass de the screws were to small and we had to sand them.
After that we proceed to join them to the machine.
Electronics
For this part we had to know the motors we were using:
- voltage reference
- current reference
- drivers we’ll use to make them work
This will be a 5 axis machine so we’ll use a CNC Shield too.
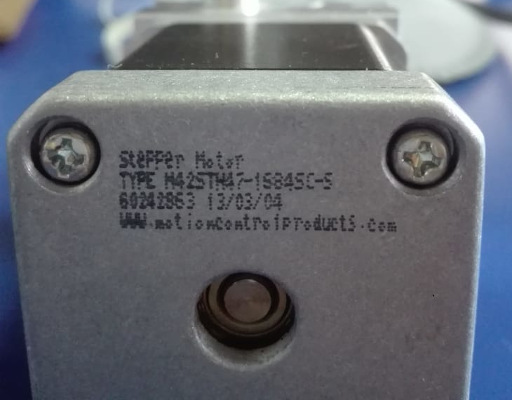
Voltage max= 2.8 V
Current max= 1.68 A
Driver: DRV8825
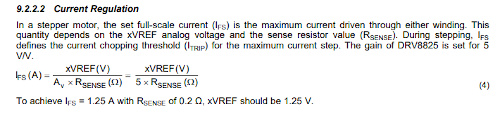
The previous formula allows us to find the value to calibrate the driver, so:
Vref = Imax x 5 x Rsense
Vref = 1.68 x 5 x 0.1
Vref = 0.84V
but we want the driver works at 70% of its capacity so:
Vref x 0.7 =0.58V
With this value now we can calibrate our driver using this tutorial
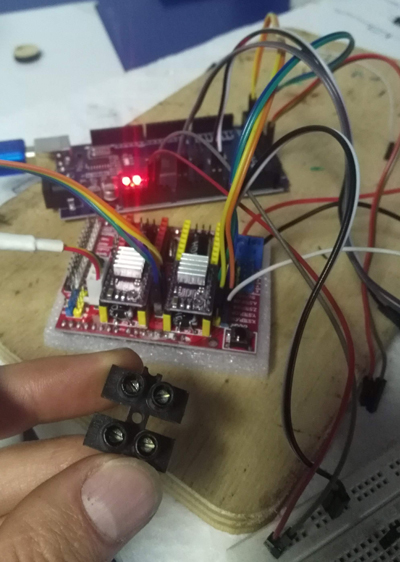
Once the machine was assembled with the stepper, we proceed to connect the drivers and the motors to the the CNC sheild following schematics.
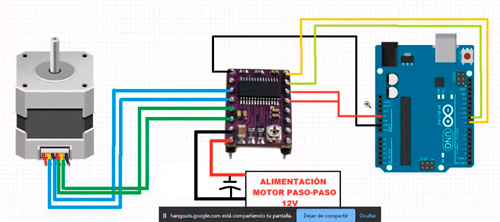
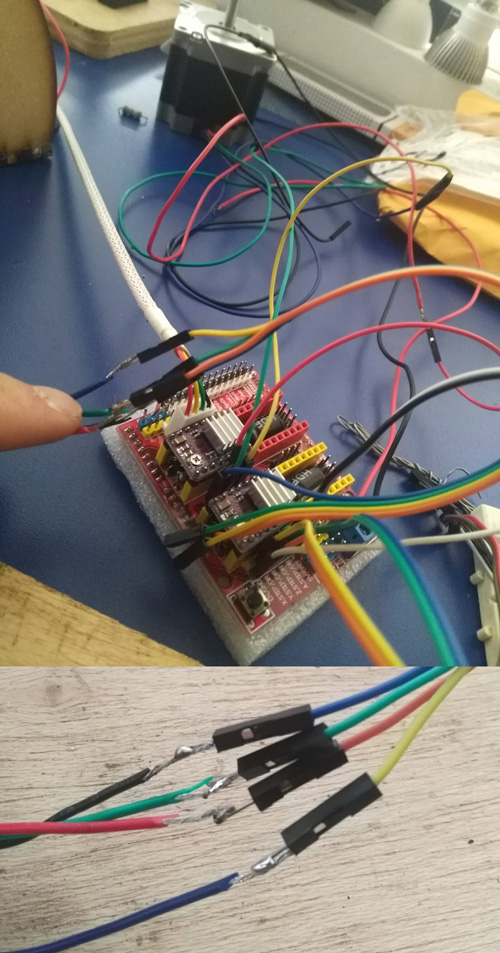
We connected the CNCshield to an Arduino mega using 2 pins per driver, one for step and the other for direction.
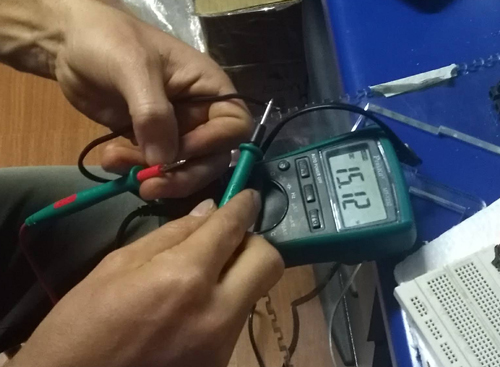
The last thing we did before charging the code was to connect the current for the motor. For that we use an adaptation between a laptop charger and a wire. We had to identify the positive and the negative wire, for that we use the voltmeter.
Programming
We search a code example for driver DRV8825 in the web to make a first moving test with the steppers. We took DRV8825this one. We modified the pin configuration to the Arduino pins we were using and ten we charge the code in the ArduinoMega.
The first was a 100 steps program. After I play changing the steps, acceleration and speed values.
Finally a modified the code to move both steppers at the same time.
Learning outcomes
[x] * Work and communicate effectively in a team and independently
[x] * Design, plan and build a system
[x] * Analyse and solve technical problems
[x] * Recognise opportunities for improvements in the design
Have you?
[x] * Documented the machine building process to the group page
[x] * Documented your individual contribution to this project on your own website
[x] * Linked to the group page from your individual page as well as from group page to your individual pages