13. Interface and application programming
Group Assigment
App Inventor
Documenting my process
We were introduced to AppInventor, an online software for application and interface design and programming. It is similar to Tinkercad but applied to interface programming.
We learned first the structure of the interface and the way to add components to the smartphone’s screen. We looked essentially to the user interface icons and their grafic editing
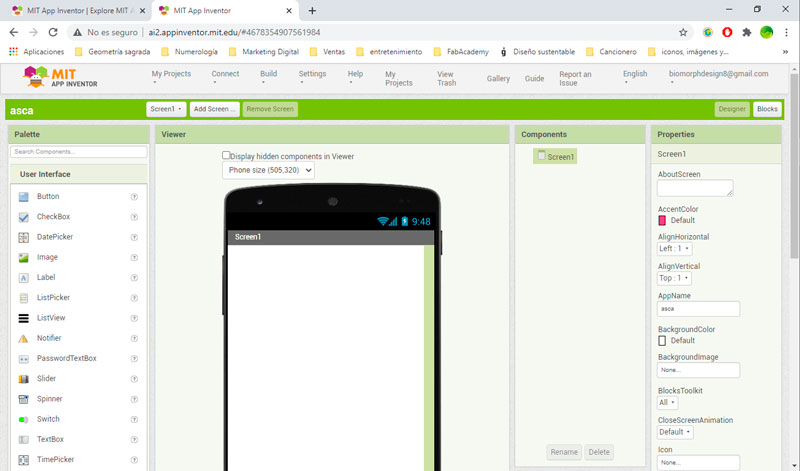
Then we passed to the programming part clicking in the blocks button up to the right.
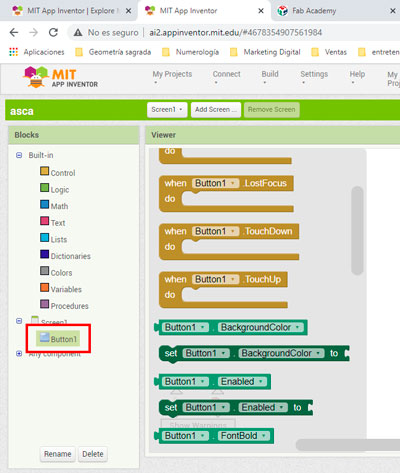
Here, by clicking in the element I added in the previous screen (button), I can see the available programming options for that interface component.
I wanted to develop an application for my smart mug final project. The idea was to have 3 temperature options and a bluetooth connexion to the mug device.
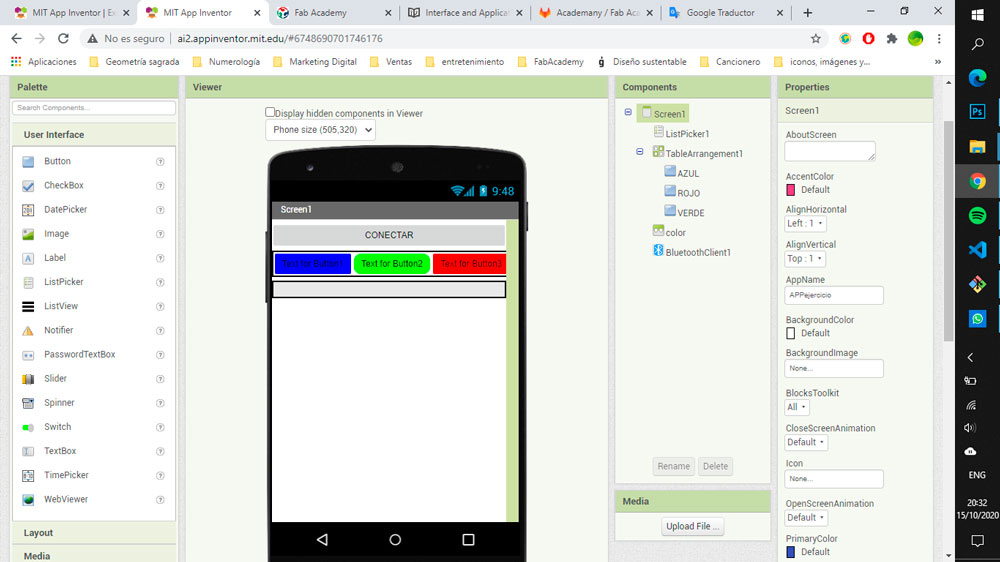
So up here is what the user interface looks like.
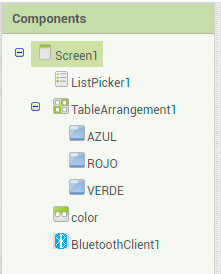
I took the following components
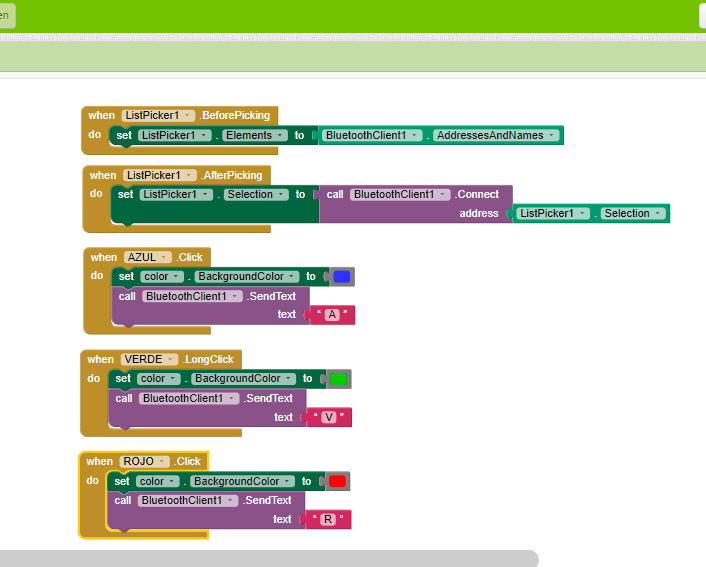
And here are the programming blocks.
Explaining the UI
This is an application linked to the Smart mug. It allows the user to select one of the 3 temperatures proposed.
Components
- ListPicker: for bluetooth
- Bluetooth Client
- Button 1: Red | 55C
- Button 2: Green | 58C
- Button 3: Blue | 62C
- Horizontal Arrangement: To show the selection
Bluetooth
First of all I need to link the phone with the mug via Bluetooth. The bluetooth button is a listpicker, because I need a list of the bluetooth devices available around. I selected two control blocks for BEFOREPICKING and AFTERPICKING. When an element of the List is picked, the connection starts.
Options
When a temperature option it picked, I want to send a message to the mug’s bluetooth device for it can react to that selection. At the same time I want the colour indicator on the app turns on. For that I took a control block for each temperature and I introduced two diferent actions for each of them: the color changement and the message sending.
Problems
I couldn’t realize the bluetooth connection because once the soldering of the HC-05 bluetooth device was made, it was not detected by other devices.
Hero video
I reach to make the bluetooth work and the color indicator too, but I didn’t reach to make it work with my board because of a problem with the bluetooth device.
Processing
We started by creating the grafic elements in a specific sized interface by code.

Then we make those grafic elements interactive by click onto them.
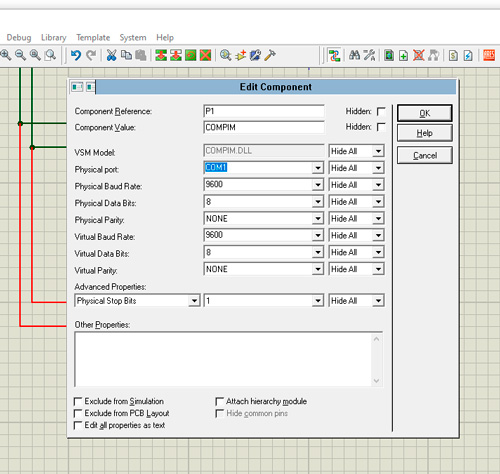
After that we start a serial comunicatio between a board simulation and our processing interface.
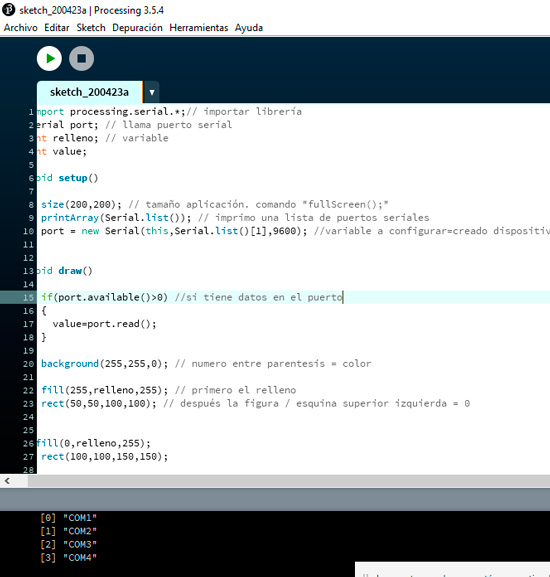
Here we are printing the signal to be sended to the interface
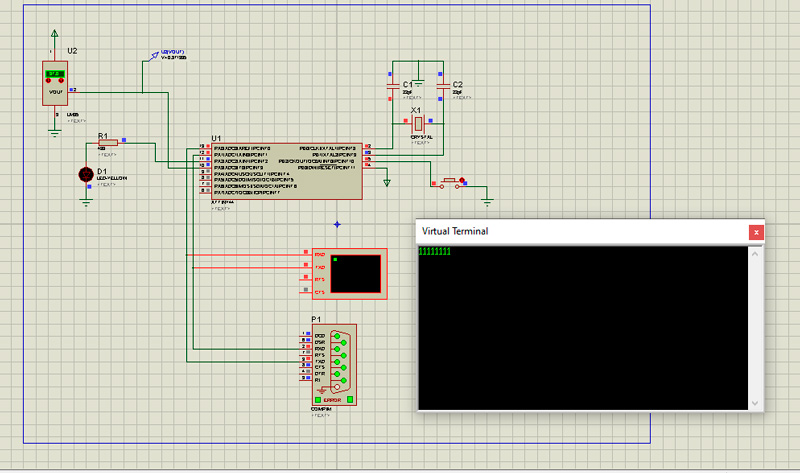
Here is a GIF about the action of receiving a signal and make a reaction about it.
Files
Hero video
Learning outcomes
[x] * Interpret and implement design and programming protocols to create a Graphic User Interface (GUI).
Have you?
[x] * Linked to the group assignment page
[x] * Documented your process
[x] * Explained the UI that you made and how you did it
[x] * Outlined problems and how you fixed them
[x] * Included original code (or a screenshot of the app code if that’s not possible)
[x] * Included a ‘hero shot/video’ of your application running with your board