Wildcard week
1. Weekly Brief Summary
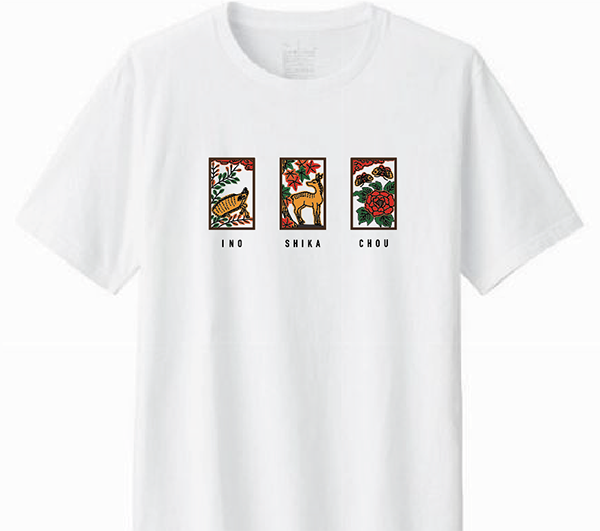
I embroidered my T-shirt with a digital embroidery machine [brother PR1050X].
I made a design with Adobe Illustrator.
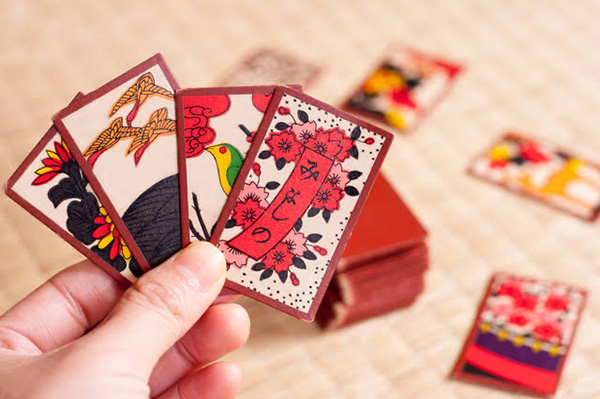
The design was based on the traditional Japanese card game “HANA-HUDA.”
The data we created was written in WMF format.
I edited the embroidery data using [Embroidery PRO NEXT].
I used the maximum size [360mm x 200mm] embroidery frame and 5 colors embroidery thread.
2. Weekly Assignment Requirement
Individual assignment
Design and produce something with a digital fabrication process (incorporating computer-aided design and manufacturing) not covered in another assignment, documenting the requirements that your assignment meets, and including everything necessary to reproduce it.
Possibilities include but are not limited to wildcard week examples.
Learning outcomes
- Demonstrate workflows used in the chosen process
- Select and apply suitable materials and processes to do your assignment.
Have you
- Documented how you made your creation
- Described problems and how you fixed them
- Included your design files and ‘hero shot’ of the result
3. Description of Assignment Work
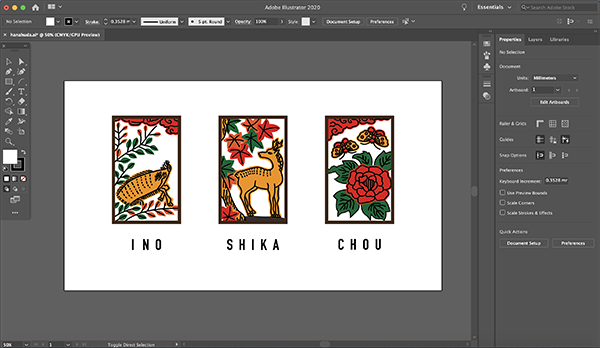
Creating a Design
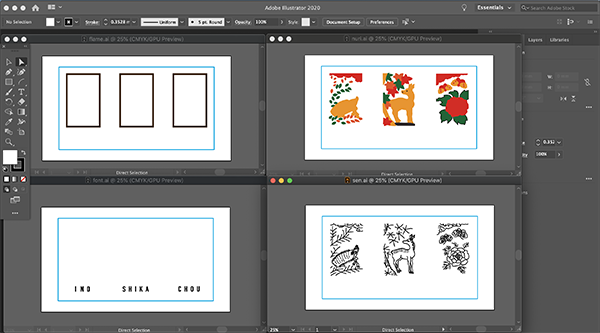
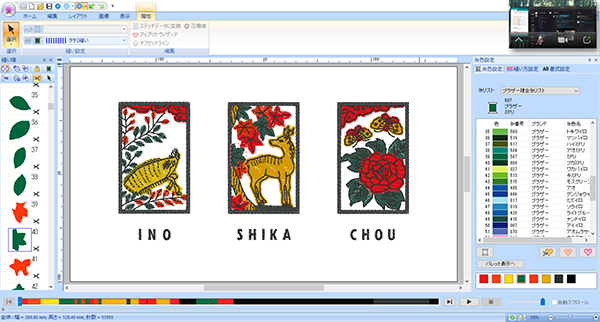
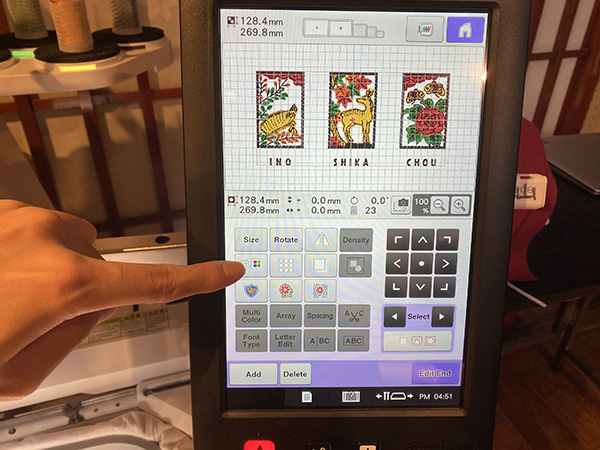
This time, I created the original design using [Adobe Illustrator]. The design is based on the traditional Japanese card game, Hanafuda. In this card game, there is a special pattern combination called “Ino-Shika-Chou”. I decided to embroider this design.
Ino-Shika-Chou
Complete Image
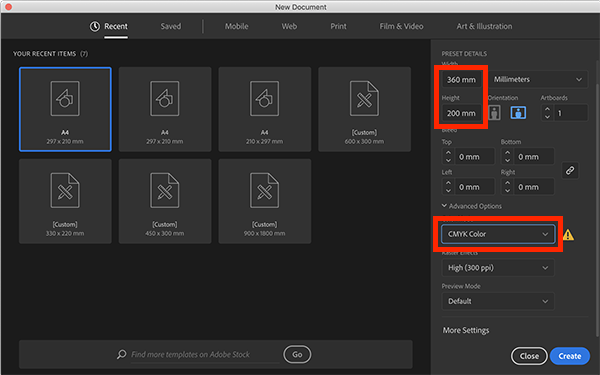
This time, I use a hoop of [360mm x 200mm] size, so set the size of the artboard with the same value.
Also, create the color mode as [CMYK].
Here are some tips when creating design data.
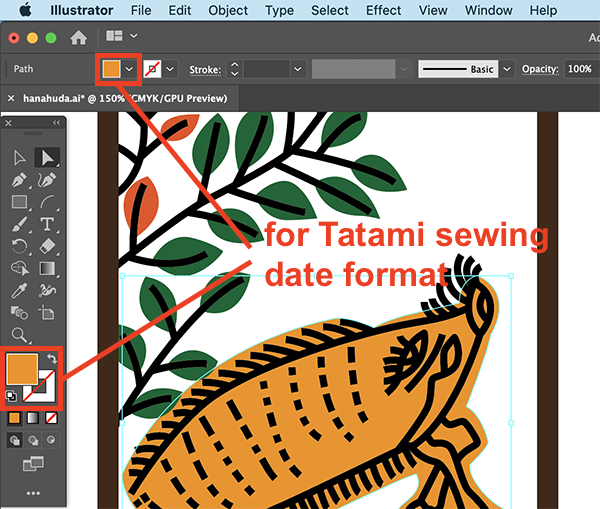
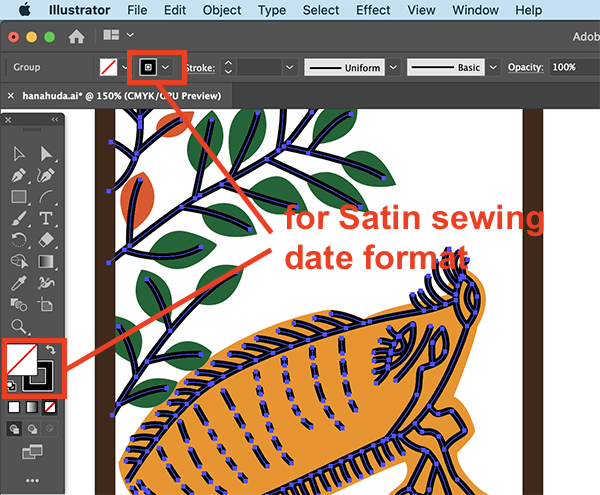
That is to create the part you want to “tatami” with “paint data” and the part you want to “satin” with “line data”.
If you do not make this setting, you will not be able to edit with the sewing method you want when you read the data with “Embroidery PRO NEXT.”
- For Tatami Sewing・・・Create the same color with the same embroidery thread
- For Stain Sewing・・・Line thickness can be embroidered up to a minimum width of 1 mm
Also, save all the data for which you want to set different sewing methods separately.
Finally, these data are combined using “Embroidery PRO NEXT”.
When merging data, it is difficult to match the exact position if there is no guide frame.
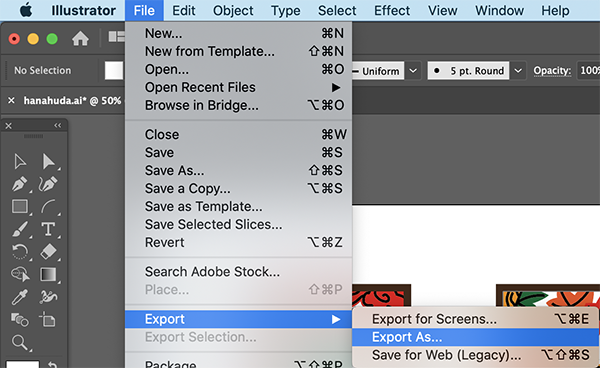
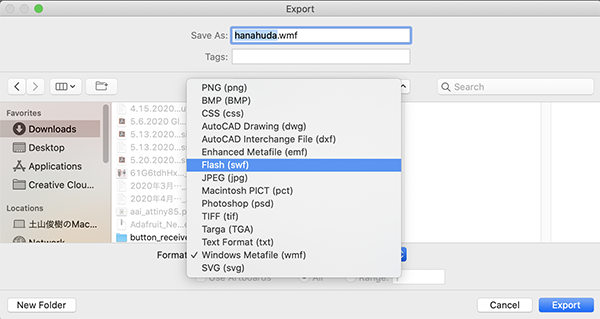
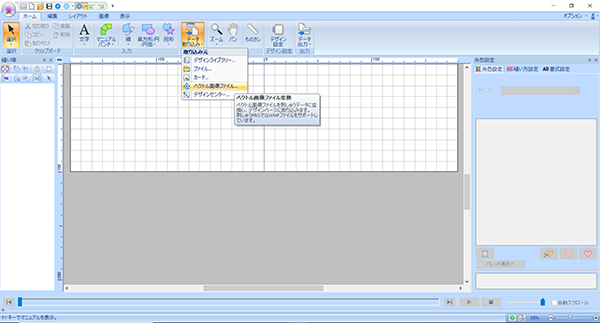
To export vector data that can be edited with Embroidery PRO NEXT from Adobe Illustrator, select [WMF] format from [File] → [Export] → [Export As…].
↓
Create Embroidery Data
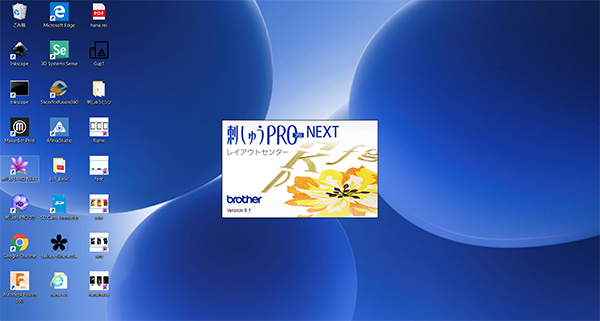
Embroidery PRO NEXT
[Embroidery PRO NEXT] is an application that cannot be used without a computer with a card reader connected via USB.
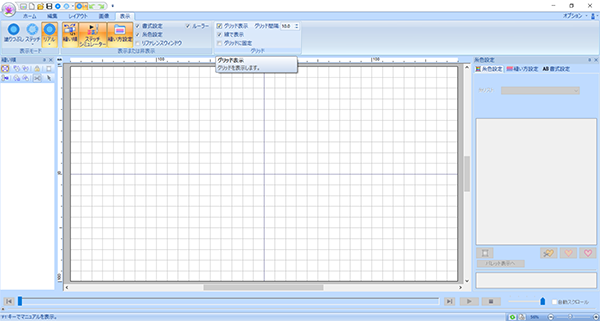
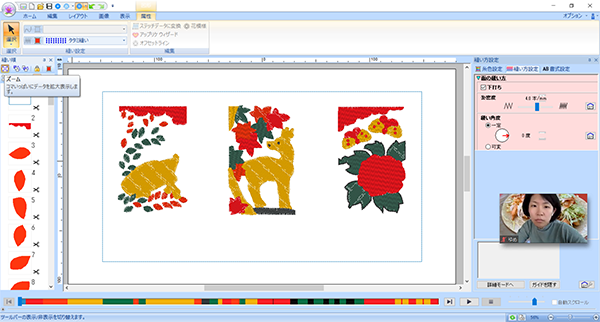
Open [Embroidery PRO NEXT].
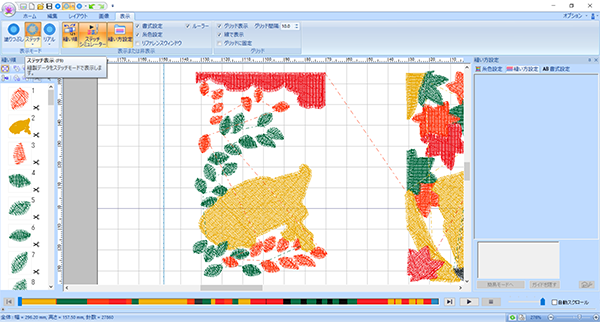
It is easier to work by first checking the [Grid View] from the [View] tab.
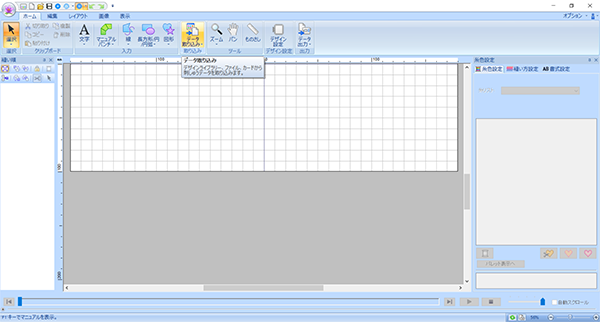
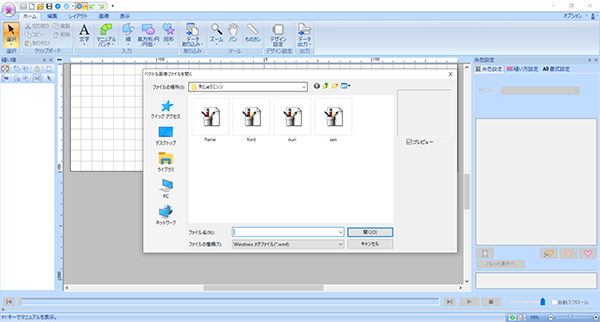
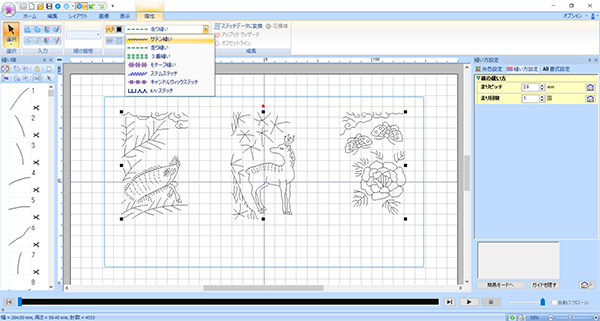
Open [Load data] on the [Home] tab and load the [WMF] file created earlier from [Vector image file conversion].
↓
↓
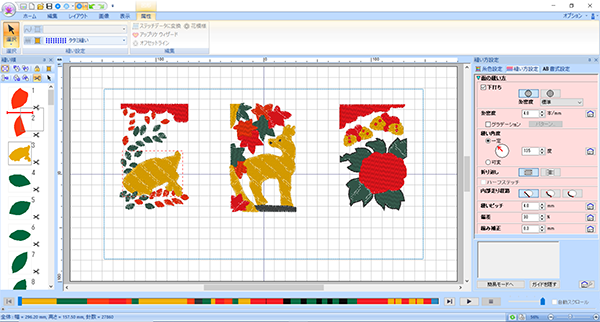
Edit Line Data
The first data to edit is [Line data].
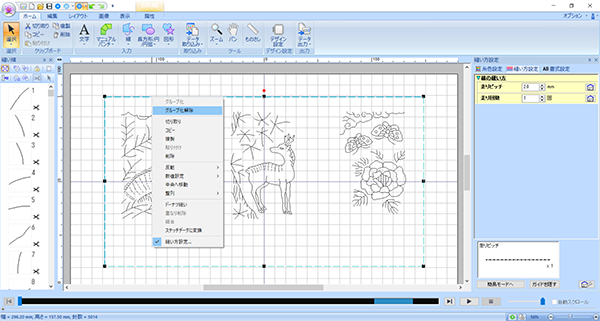
Since the read data is [grouped], [ungroup] is performed to edit the data.
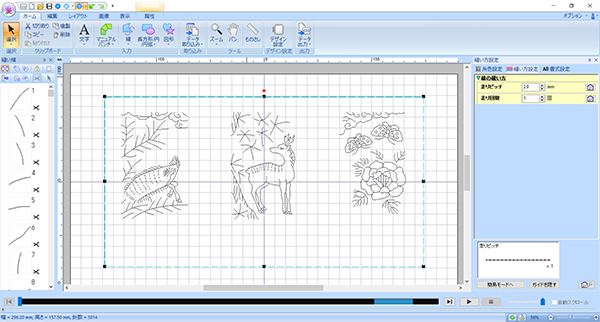
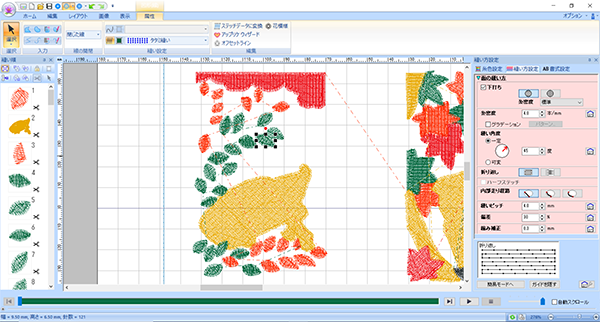
How to sew can be confirmed and set when the [Attribute] tab is opened.
All of this data is set to [Satin sewing].
After that, set the width and density of satin sewing from [Setting the sewing method] in the right window.
This time, satin width is set to [1mm] and thread density is set to [4.0].
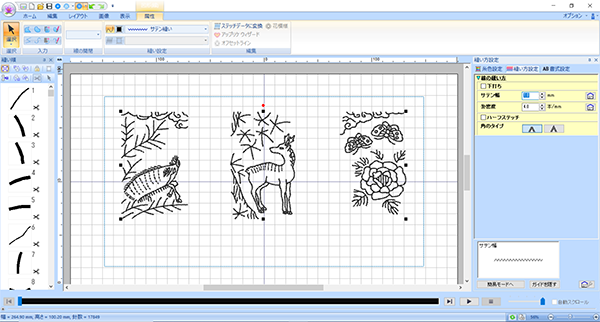
From the [Embroidery PRO NEXT] icon on the upper left of the screen, execute [Overwrite] of the data to create [PES data].

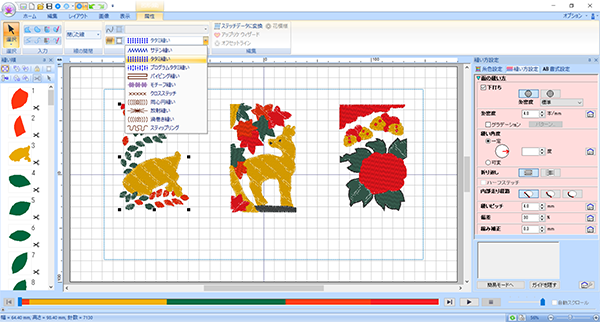
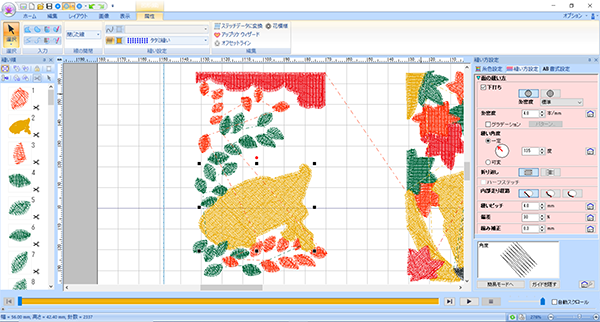
Edit Fill Data
The next data to edit is [Fill data].
All of this data is set for [Tatami sewing].
I found a problem here.
Some parts did not load properly.
- Black eye part of deer
- Butterfly wing pattern
This is because the data created was too small.
You need to correct the data in [Adobe Illustrator].
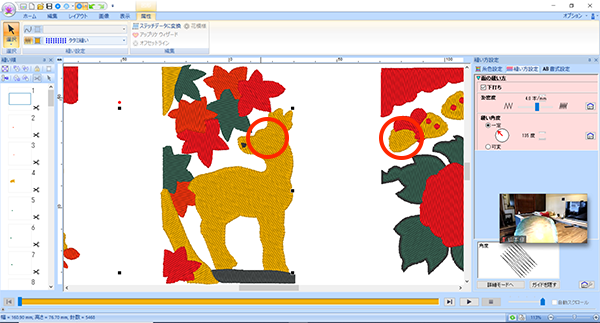
Open [Fill Data] and increase the size of the problematic part a little from [Object] → [Path] → [Offset Path…].
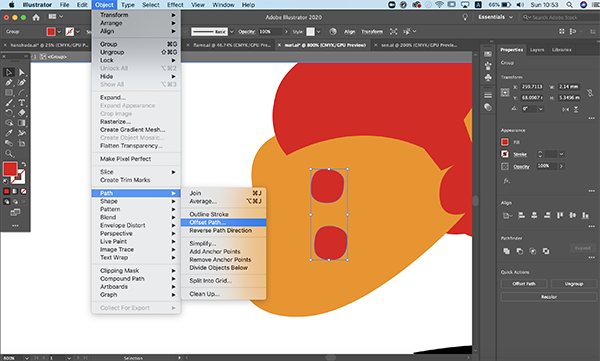
When I checked the corrected data again with [Embroidery PRO NEXT], it was read without any problems.
Next, the sewing order was set.
The sewing order can be changed on the layer on the left side of the screen.
The one with the smallest number is sewn first.
By setting the sewing order for the parts, you can express depth and three-dimensional effect in the embroidery.
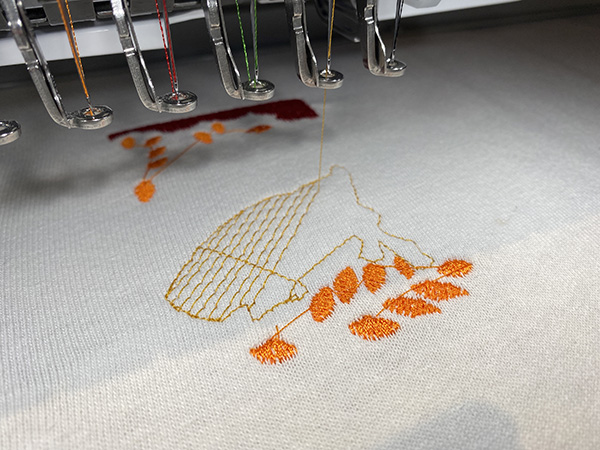
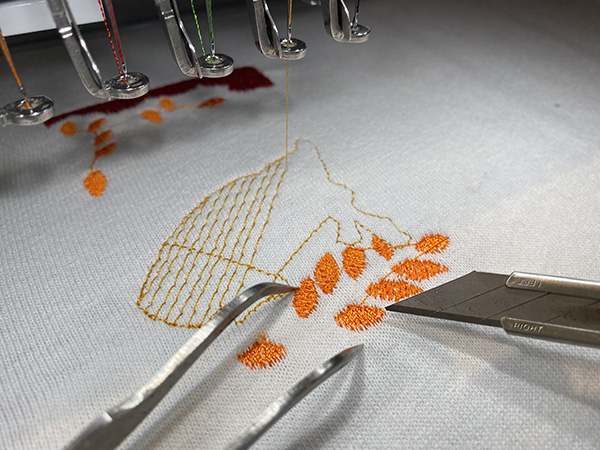
In addition, since the embroidery is expressed by a single stroke, a thread called “walking” is applied between the embroidery.
You have to cut each piece by hand, so it is necessary to reduce the number of crossings as much as possible.
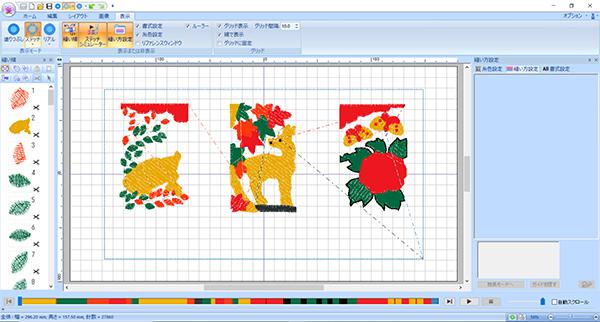
After that, the direction and density of the tatami sewing were set from [Setting of sewing method] in the right window.
In the case of Tatami sewing, you can express a three-dimensional effect when exposed to light by sewing overlapping embroidery at different angles.
This time, the overall thread density is set to [4.0].
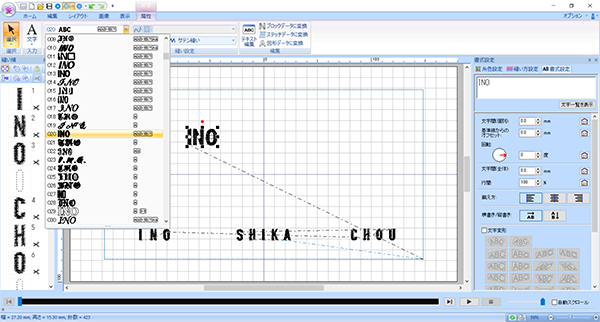
Edit Character Data
The last edited version is [Character data].
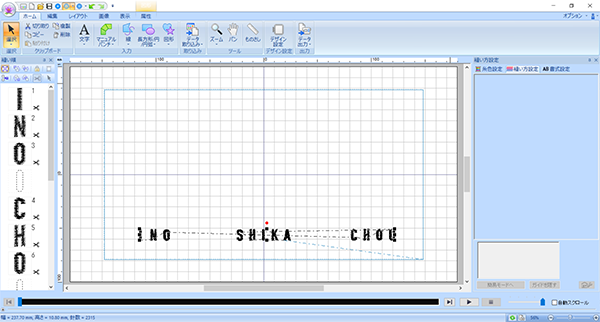
For embroidery of characters, it is easier to embroider by using the template prepared in [Embroidery PRO NEXT].
The reason is in [Stitch Data].
The character data prepared in [Adobe Illustrator] will reflect the setting of Tatami sewing.
In this case, as the letters get smaller, the threads may become entangled or the letters may be crushed and disappear.
On the other hand, the template is created in a data format for embroidery called [Stitch Data], which allows you to embroider beautiful characters that are clearly visible even when they are small.
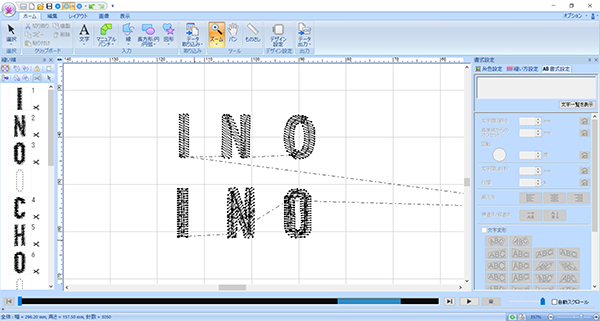
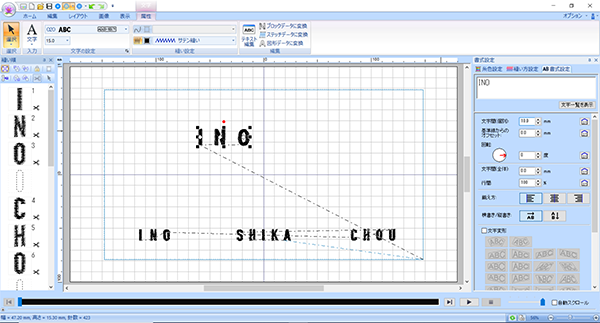
So, I searched for a font close to the original design in the [Text Tool] template on the [Home] tab.
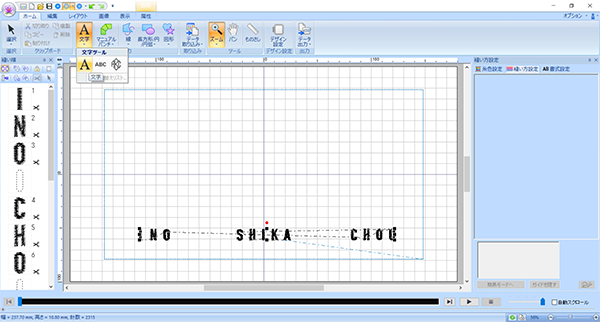
You can edit the character spacing with [Format].
Check the Embroidery Data Preview
Finally, I merged the embroidery data created so far in the order of [Fill data] → [Line data] → [Border data] → [Character data].
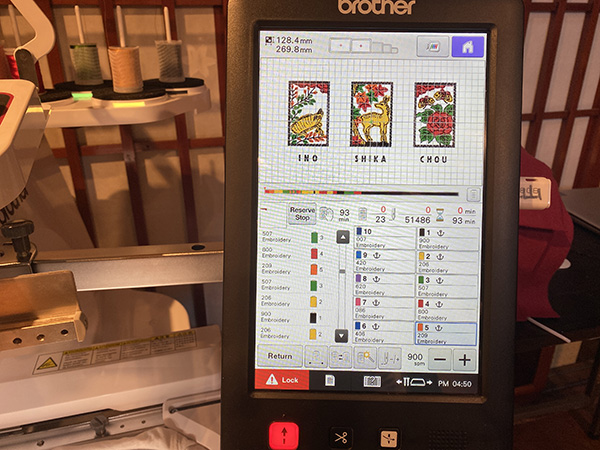
Then, I worked to match the color of the thread to be used with the thread color setting in the right window with the color installed in [brother PR1050X].
Finally, I checked the preview to make sure there were no mistakes in the sewing order.
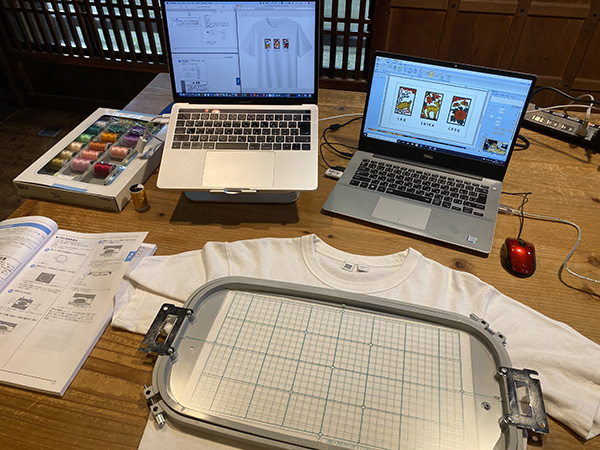
Preparation for Embroidery
brother PR1050X
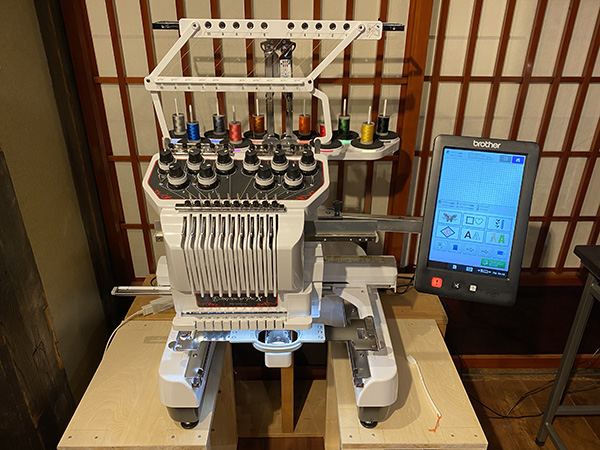
Ten colors of embroidery threads can be set in [brother PR1050X].
Also, there are four types of hoops, and the one we used this time is a [360mm x 200mm] size hoop.
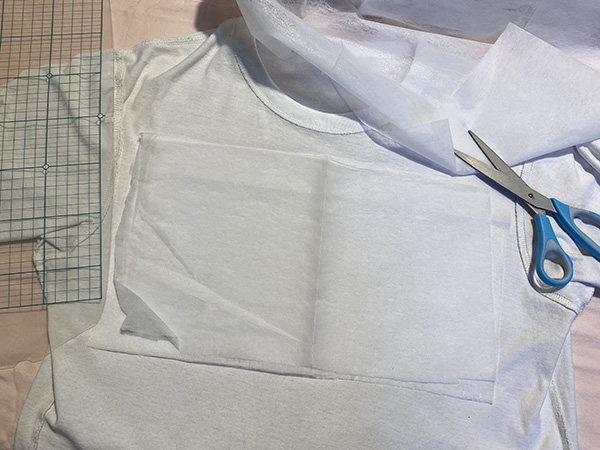
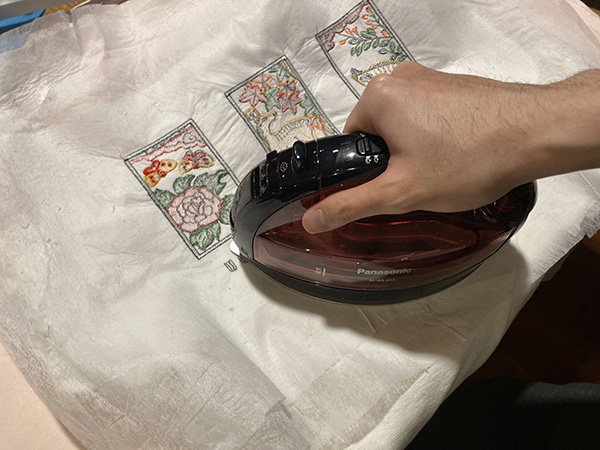
First of all, a sheet called “Adhesive core” for reinforcing the cloth is glued to the embroidered area using an iron. This time I used a [soft type] adhesive core.
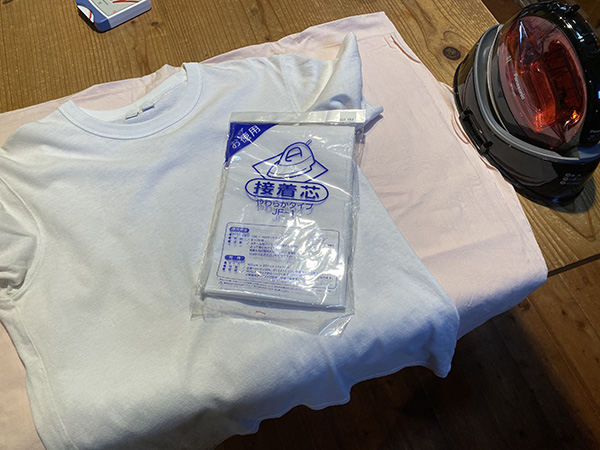
I put the adhesive core for the embroidery area on the T-shirt that was turned inside out.
However, when I attached the T-shirt to the embroidery frame, I could not firmly attach the cloth.
So, I widened the range of adhesive cores to be stuck and piled up more than one to strengthen the strength of the cloth.
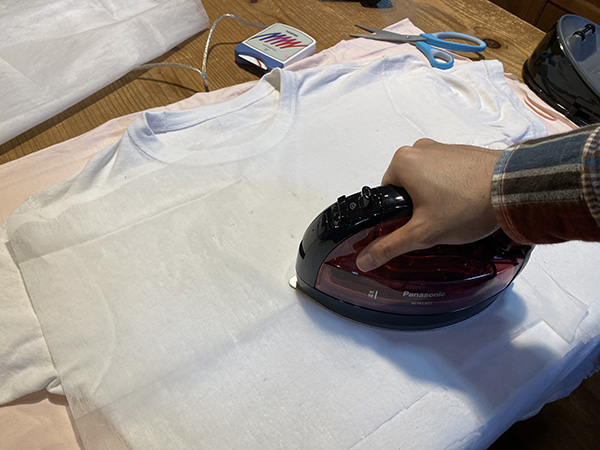
When using an iron, set the temperature to 180 degrees and apply pressure from above.
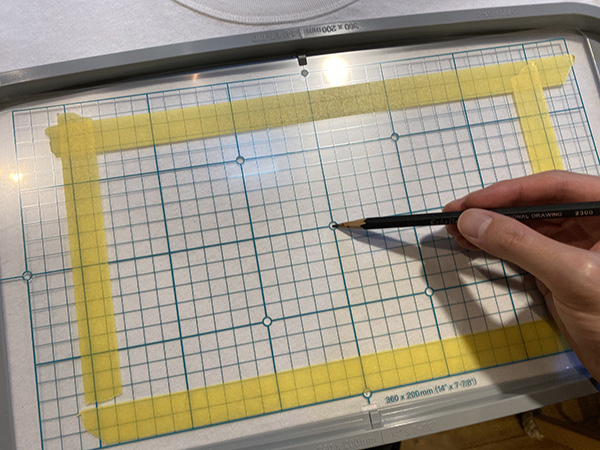
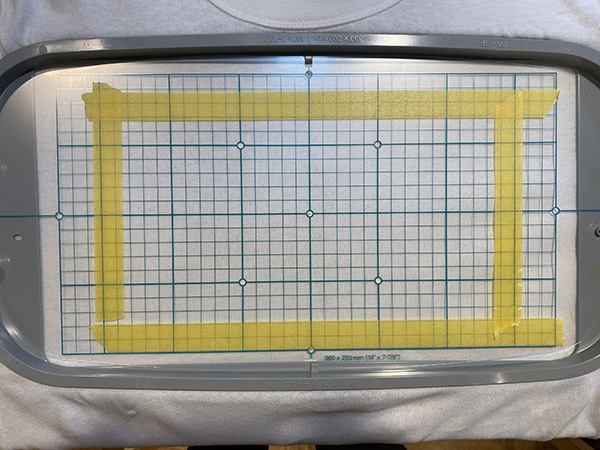
When I set the embroidery frame on the T-shirt, I used the grid-displayed parts called [Embroidery Sheet] to align the location of the T-shirt with the embroidery location.
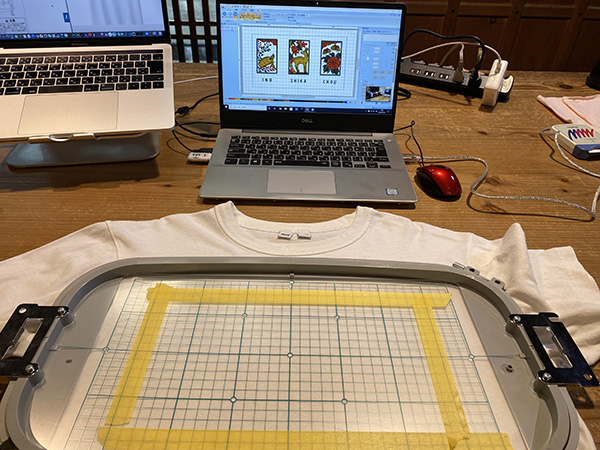
Set the embroidery frame on the embroidery sewing machine.
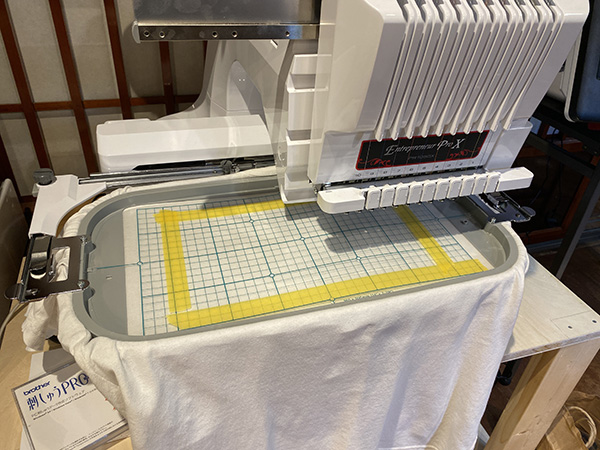
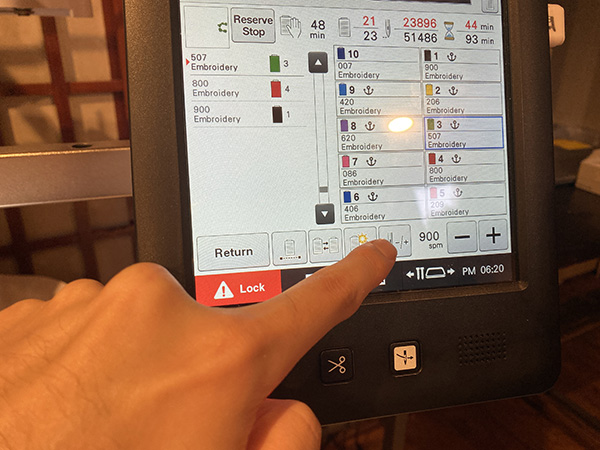
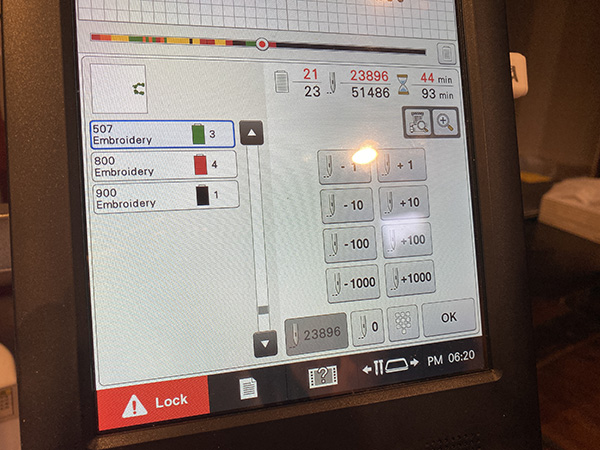
Insert the USB memory storing the [PES data] into the right side of the operation panel and read the embroidery data.
It is necessary to confirm from the embroidery thread setting button that the color of the embroidery thread to be sewn this time matches the thread setting on the sewing machine side.
Start Embroidery
Embroidery After setting the sewing machine side, embroidering starts.
When the embroidery starts to be sewn, there is a bridge called “Migashi” that has nothing to do with embroidery. You can make beautiful embroidery by cutting out this [walking] at any time.
As the embroidery progresses, the sewing machine often stops moving due to thread breakage or bobbin thread loss.
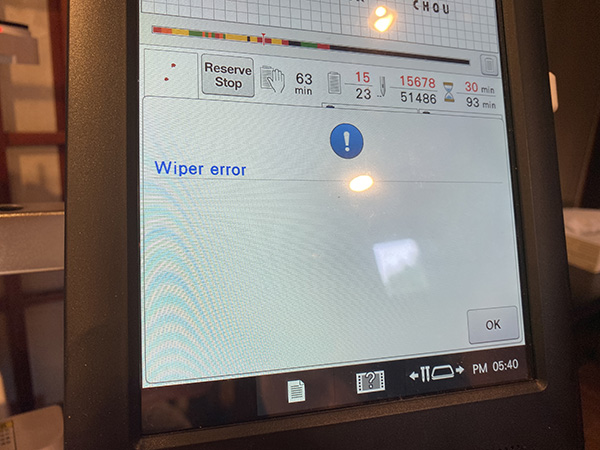
In that case, it is recommended to rewind the sewing sequence by about 20 stitches from the operation panel after resolving the cause of the error and then restart embroidery.
This time, it took about two and a half hours to finish all the embroidery.
This was much slower than the estimated time confirmed in the preview because I frequently cut [walking] or exchange threads.
Where Failed
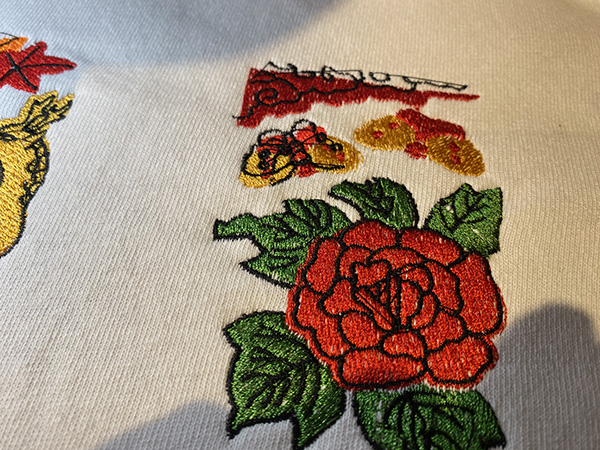
With this embroidery, the embroidery of the last sewn pattern has shifted.
This is because the cloth shrinks due to the embroidery, and the sewing position on the sewing machine side and the actual position shift.
Finishing
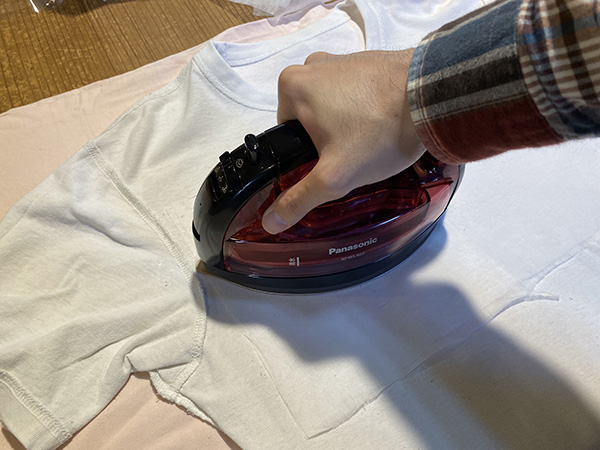
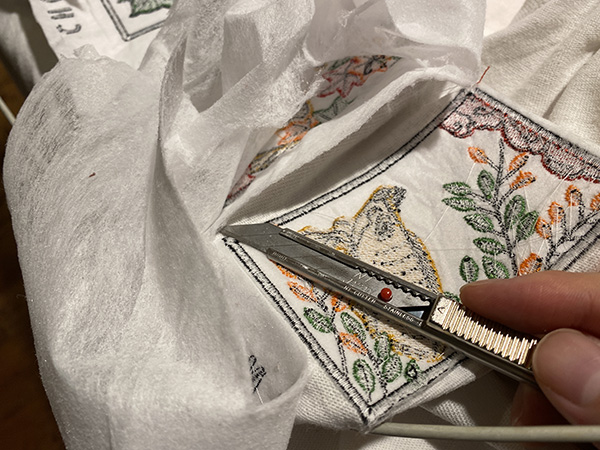
Remove the T-shirt from the embroidery frame, turn it over, and then use an iron to remove the adhesive core.
The adhesive core easily peels off when heated. The part that was difficult to remove was removed using a cutter.
Finished T-shirt

5. Description of Important Weekly Learning Outcome
I once made embroidery using [brother SOLEIL 120E].
This time, I used the [brother PR1050X] for the first time and realized its high functionality.
Work time is shorter than brother [SOLEIL 120E].
However, the techniques for fine embroidery are common.
The larger the amount of embroidery, the smaller the fabric becomes, and the difference between the position of embroidery and the data changes greatly.
Therefore, I used reinforcing materials such as adhesive cores.
However, the adhesive core I used this time was flexible, so I could not fully reinforce the fabric.
As a result, some embroidery failed.
Also, it is possible that the embroidery frame I used was too large to secure the T-shirt to the frame.
6. Links to Files and Code
7. Appendix
None