12. Output Devices
In this assignment I will use a 16 character by 2 lines LCD display, using the I2C protocol and an Arduino Uno, and programming it with Arduino IDE. to learn more about the I2C Protocol and how it used and the method of its work in general which is out of the scope of this assignment please visit the following link https://i2c.info/
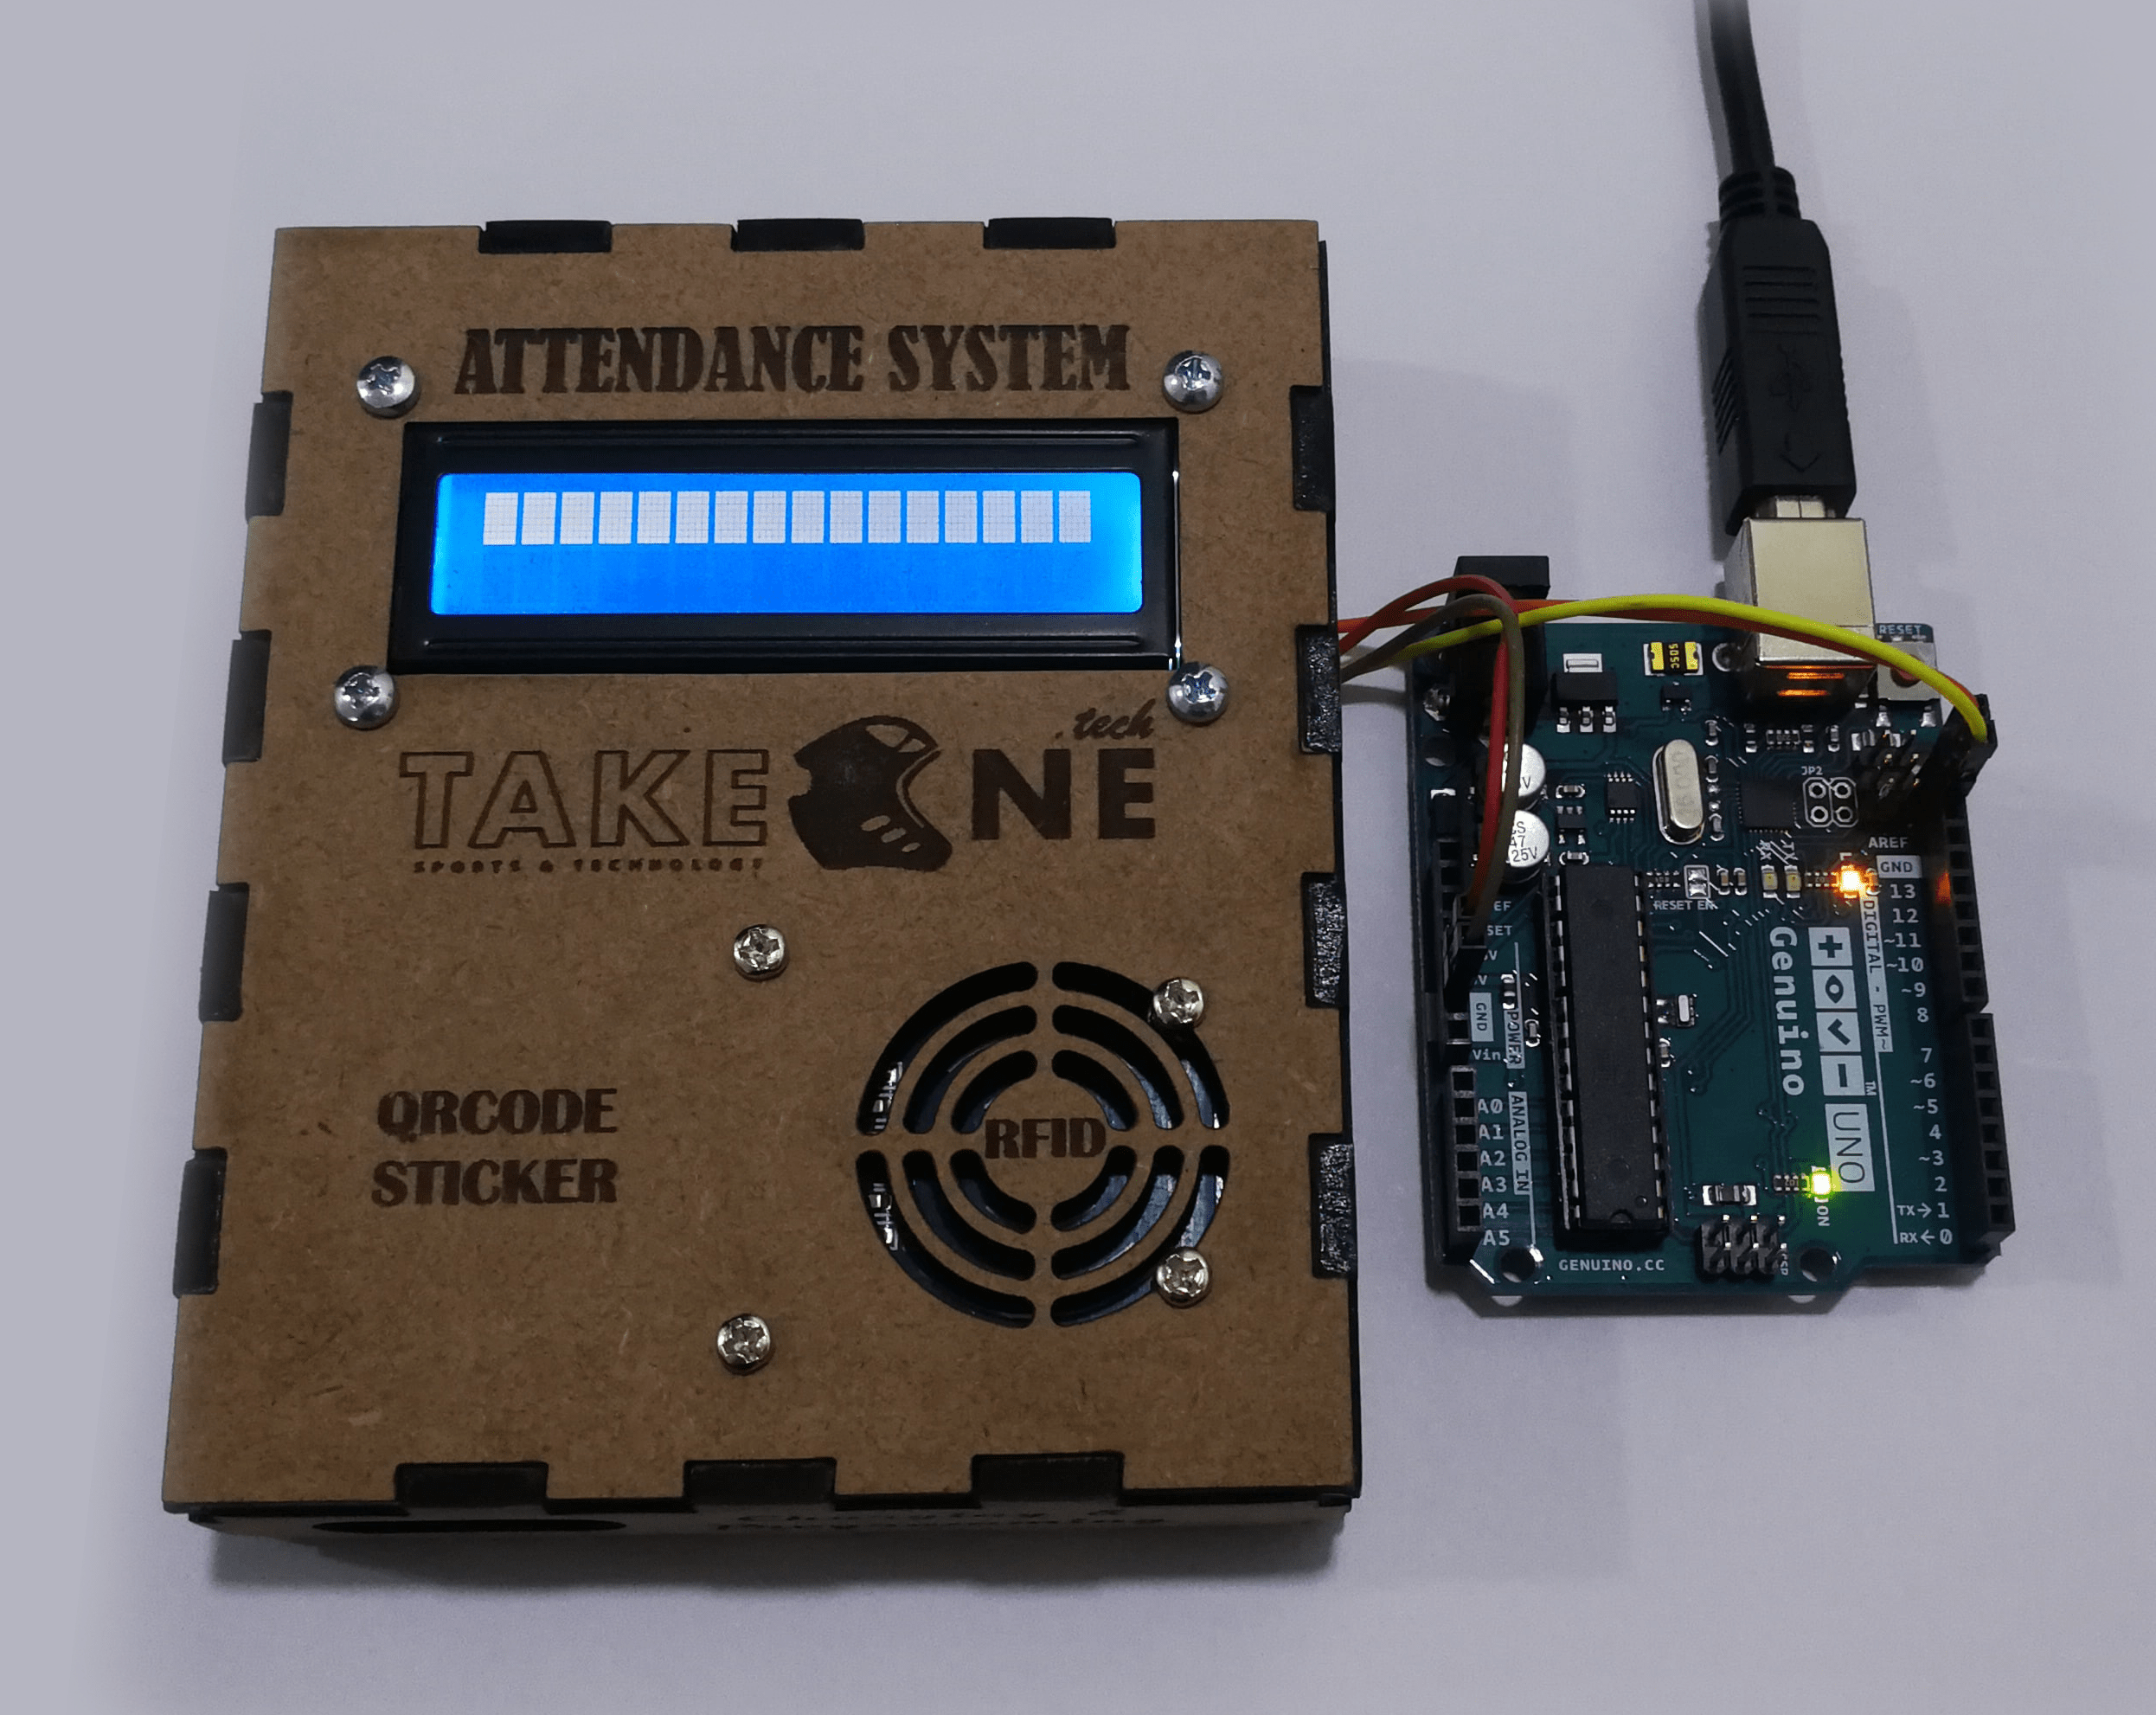
Important Note: I started using the Arduino board but later I used my own created board from my electronic design
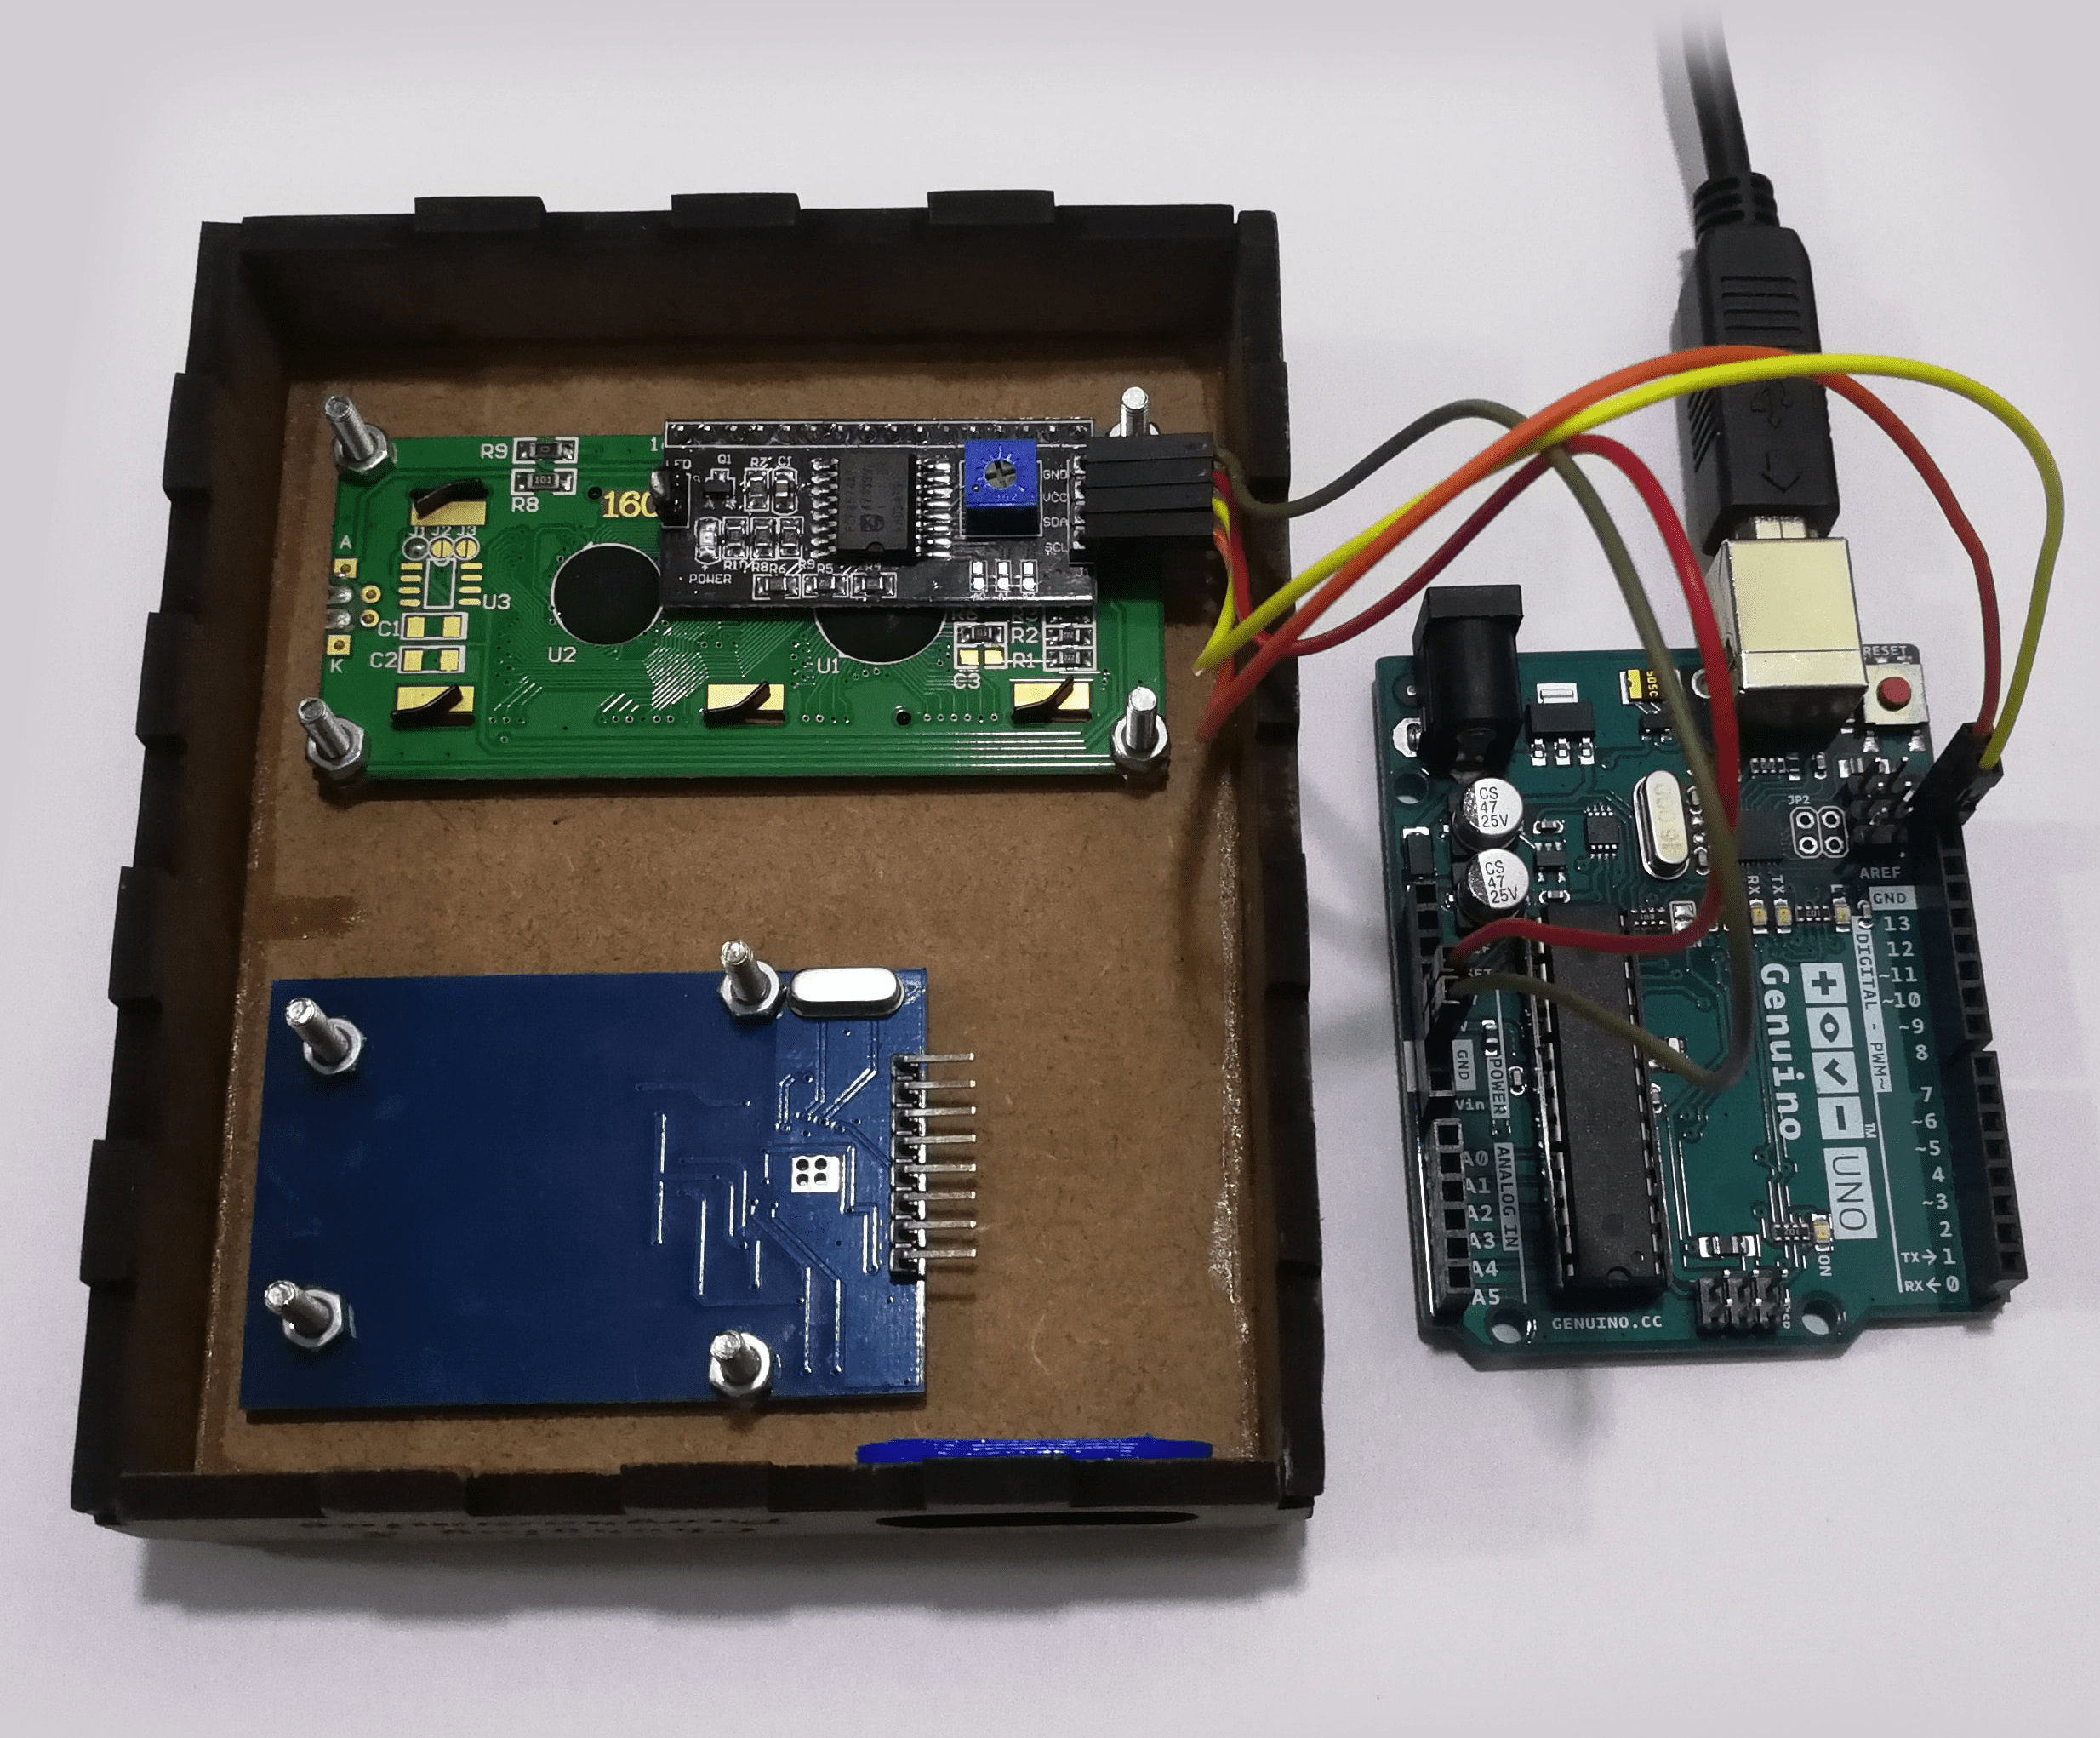
Wiring The Display To Arduino Uno
Since the I2C protocol is a synchronic serial data type made specially for connecting multiple devices over the very same bus, you can talk to each module separately by their address. there for it requires only two pins along with the +5V and GND
- VCC -> 5V
- GND -> GND
- SCL -> SCL
- SDA -> SDA
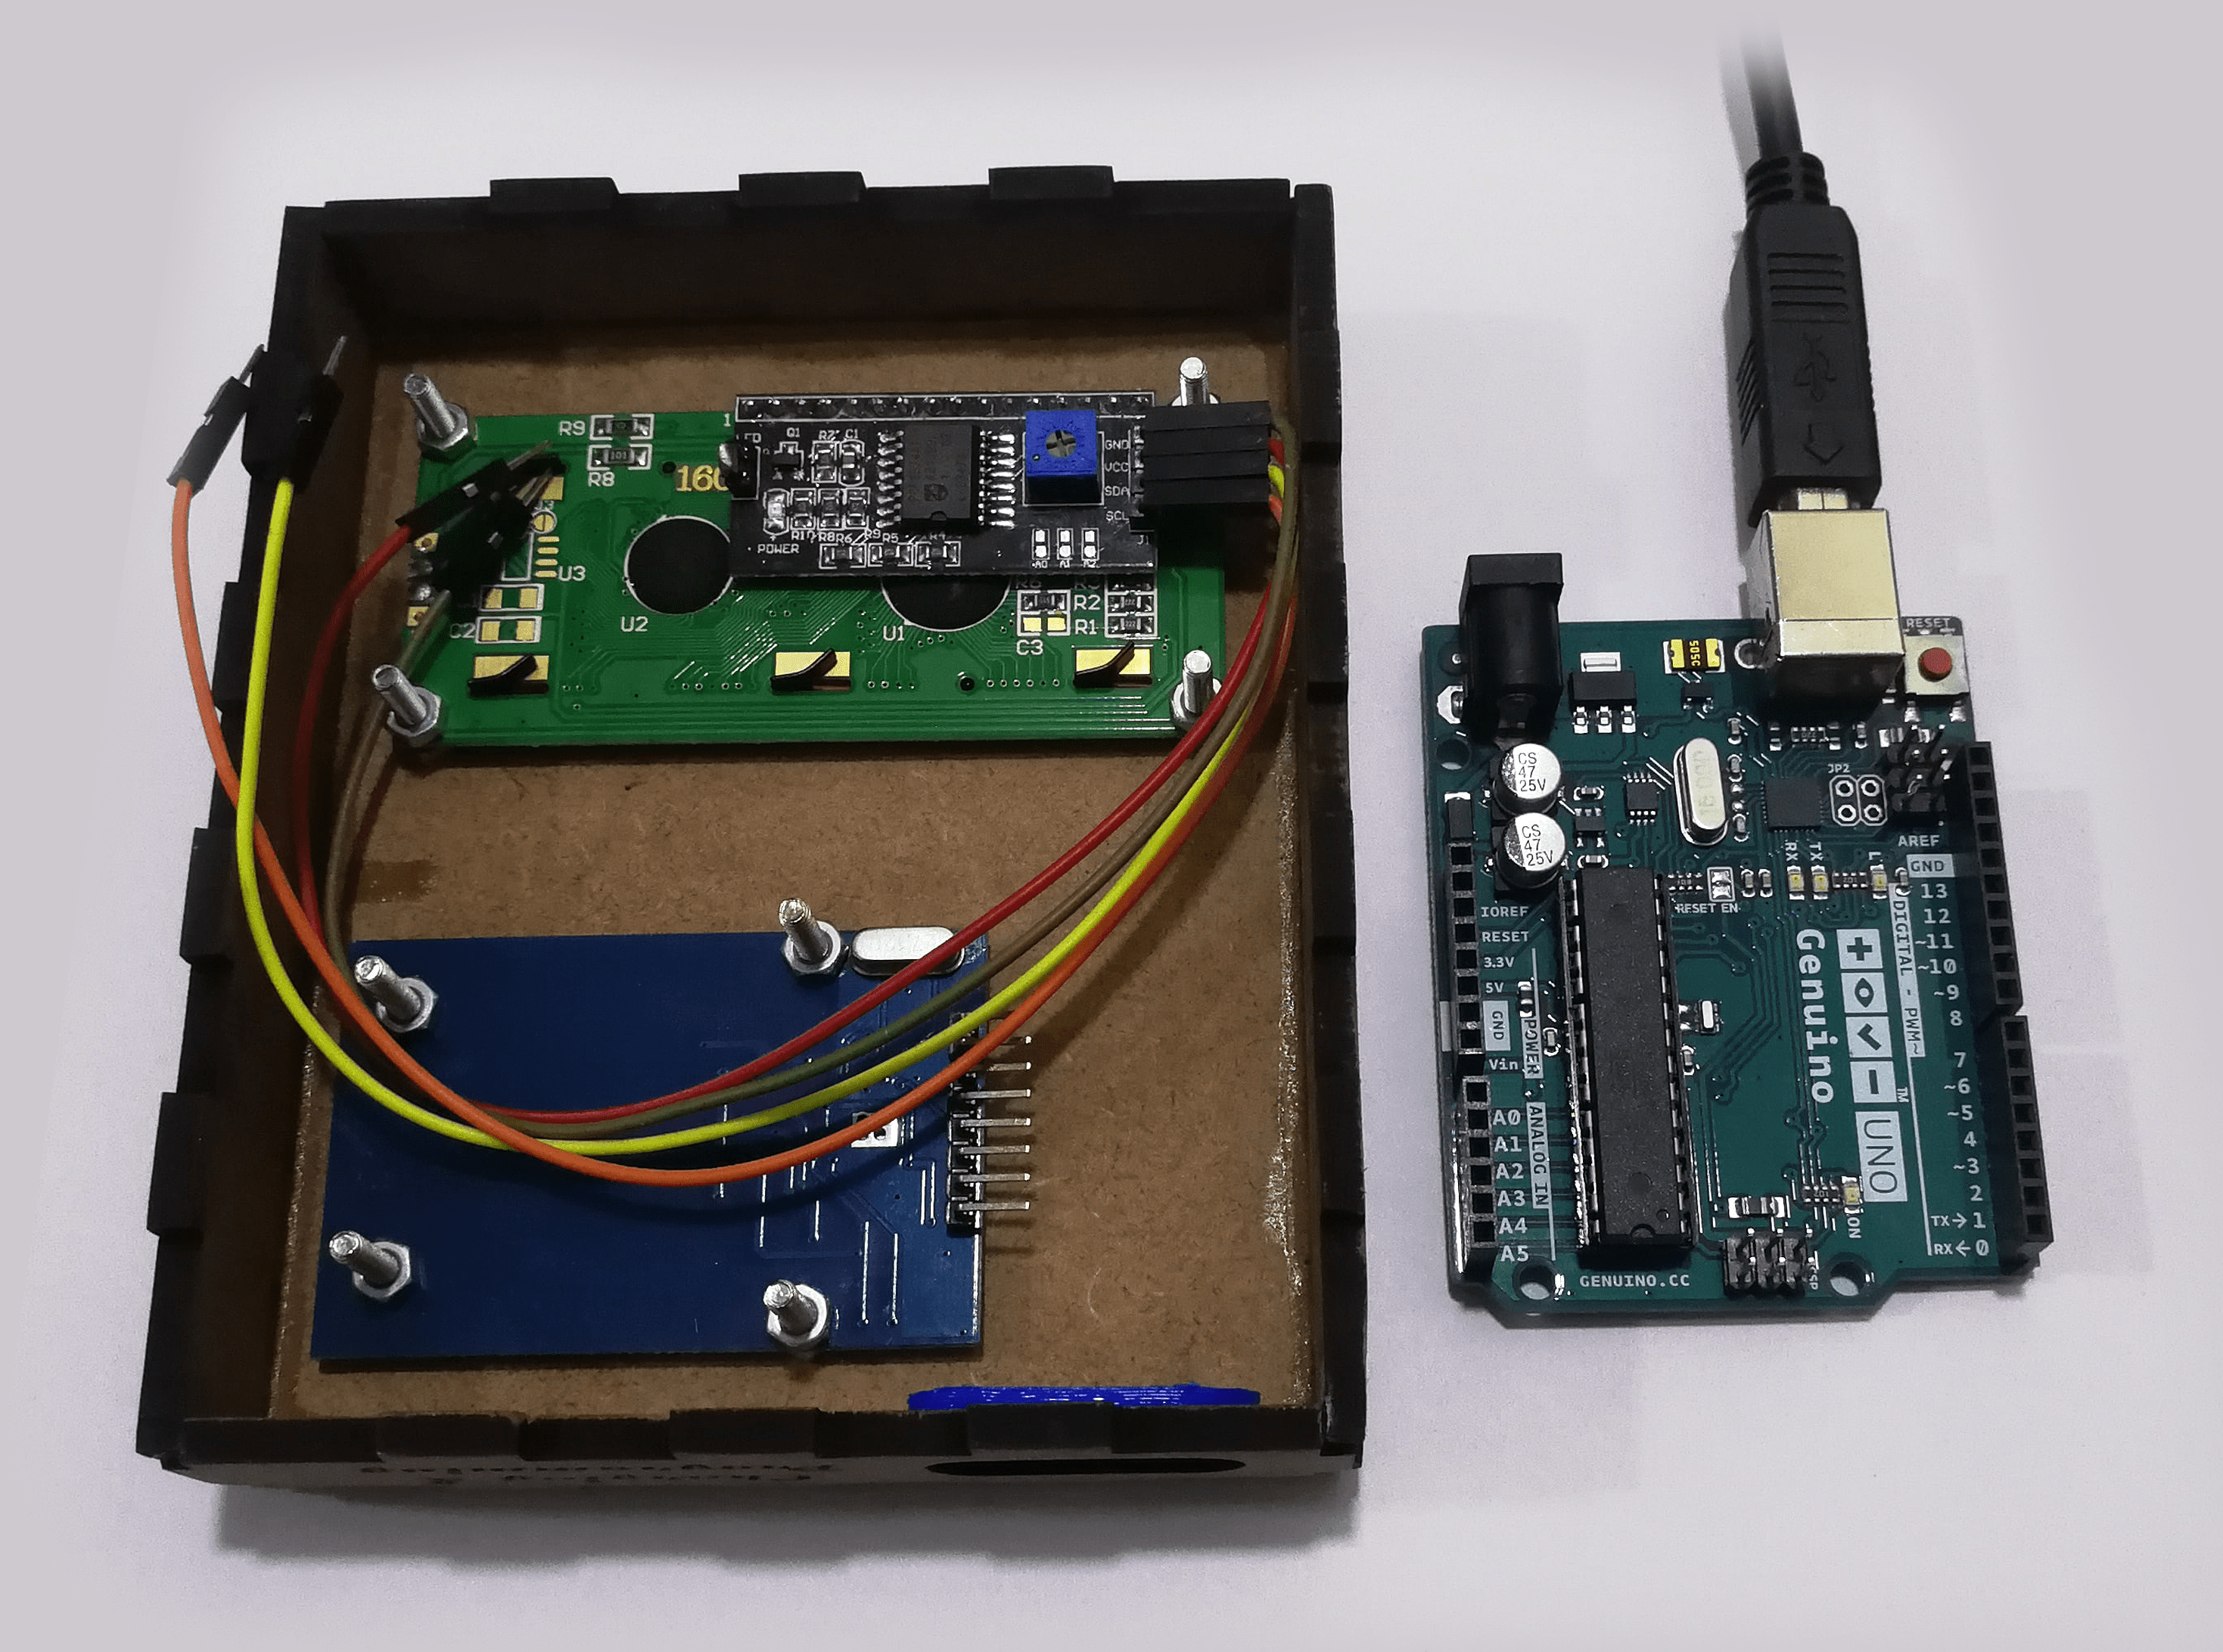
after connection is done between the I2C Bus On Arduino To LCD module,
connect the USB cable, you will find that the LCD display lights up and display a full top line of boxes. at this point we are ready to move on to the next phase of the programming.
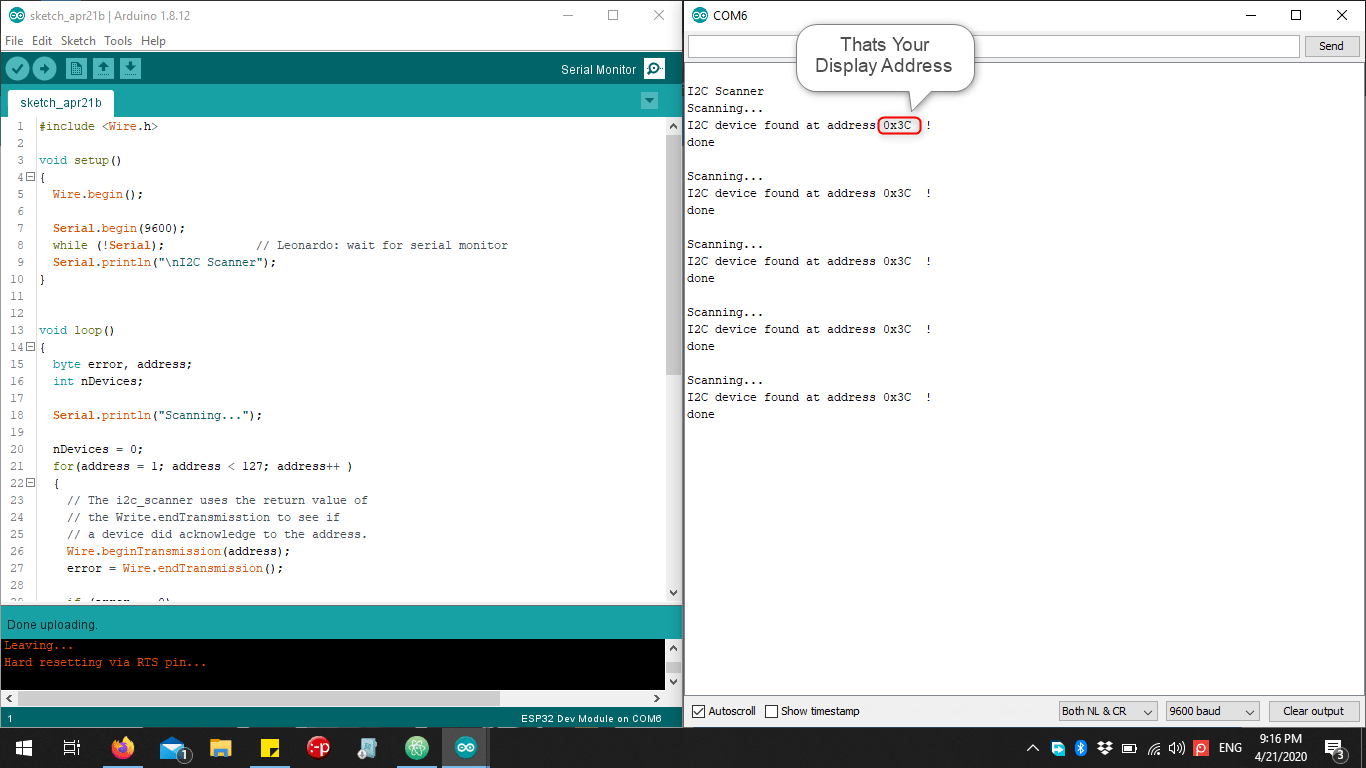
Finding Your I2C Connected Modules
at first glance you may not know the address of your display because they usually are 0x27 hex or 0x3C or 0x3F, in future the new modules my have different addresses, so these is a small program upload it to you Arduino and it will start displaying the addresses of the devices connected. the source of the code is from Arduino playground https://playground.arduino.cc/Main/I2cScanner/
Here is the code just copy it and past it in a new Sketch
#include <Wire.h>

void setup()
{
 Wire.begin();

 Serial.begin(9600);
 while (!Serial);             // Leonardo: wait for serial monitor
 Serial.println("\nI2C Scanner");
}


void loop()
{
 byte error, address;
 int nDevices;

 Serial.println("Scanning...");

 nDevices = 0;
 for(address = 1; address < 127; address++ )
 {
   // The i2c_scanner uses the return value of
   // the Write.endTransmisstion to see if
   // a device did acknowledge to the address.
   Wire.beginTransmission(address);
   error = Wire.endTransmission();

   if (error == 0)
   {
     Serial.print("I2C device found at address 0x");
     if (address<16)
       Serial.print("0");
     Serial.print(address,HEX);
     Serial.println("  !");

     nDevices++;
   }
   else if (error==4)
   {
     Serial.print("Unknown error at address 0x");
     if (address<16)
       Serial.print("0");
     Serial.println(address,HEX);
   }
 }
 if (nDevices == 0)
   Serial.println("No I2C devices found\n");
 else
   Serial.println("done\n");

 delay(5000);           // wait 5 seconds for next scan
}
Downloading I2C LCD Display Library
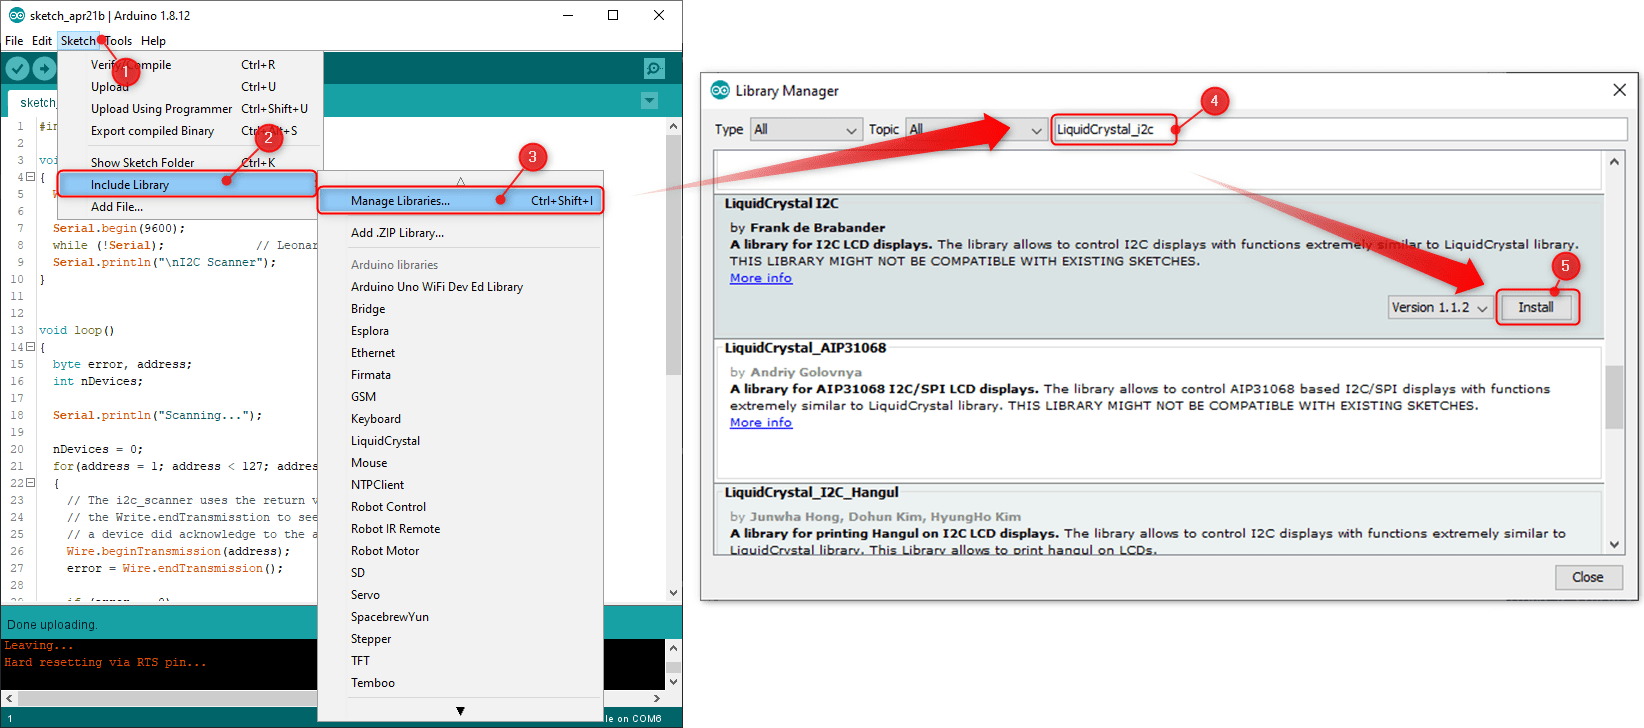
For writing on the LCD display you need to download a library called LiqudCrstal_I2C. you can do it directly from library manager, or by going to their github page https://github.com/johnrickman/LiquidCrystal_I2C
Here Is How To Do It On Library Manager For Ease, follow the steps numbered on the screen.
Writing Something On LCD Display
you can find example for the library, if you see through the following picture.
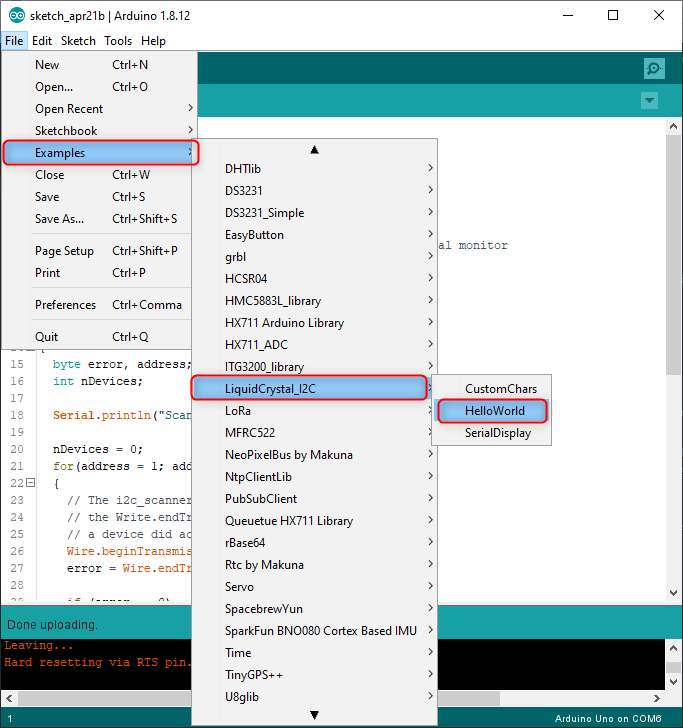
this will help you understand how the I2C LCD Display works and how to display text and symbols on it. how ever I am going to share my code and you can copy and past it in a new sketch, but make sure of you LCD I2C device address discussed in the section above.
and after this I will explain each and every command of the LCD Display and what does it mean.
#include <LiquidCrystal_I2C.h>
LiquidCrystal_I2C lcd(0x3C,16,2);

void setup() {
  Serial.begin(9600);
  lcd.init();
  lcd.backlight();
  lcd.clear();
  delay(1000);
}

void loop() {
  lcd.clear();
  lcd.setCursor(0, 0);
  lcd.print("Hello Ghassan");

  while(1) {

  }
}
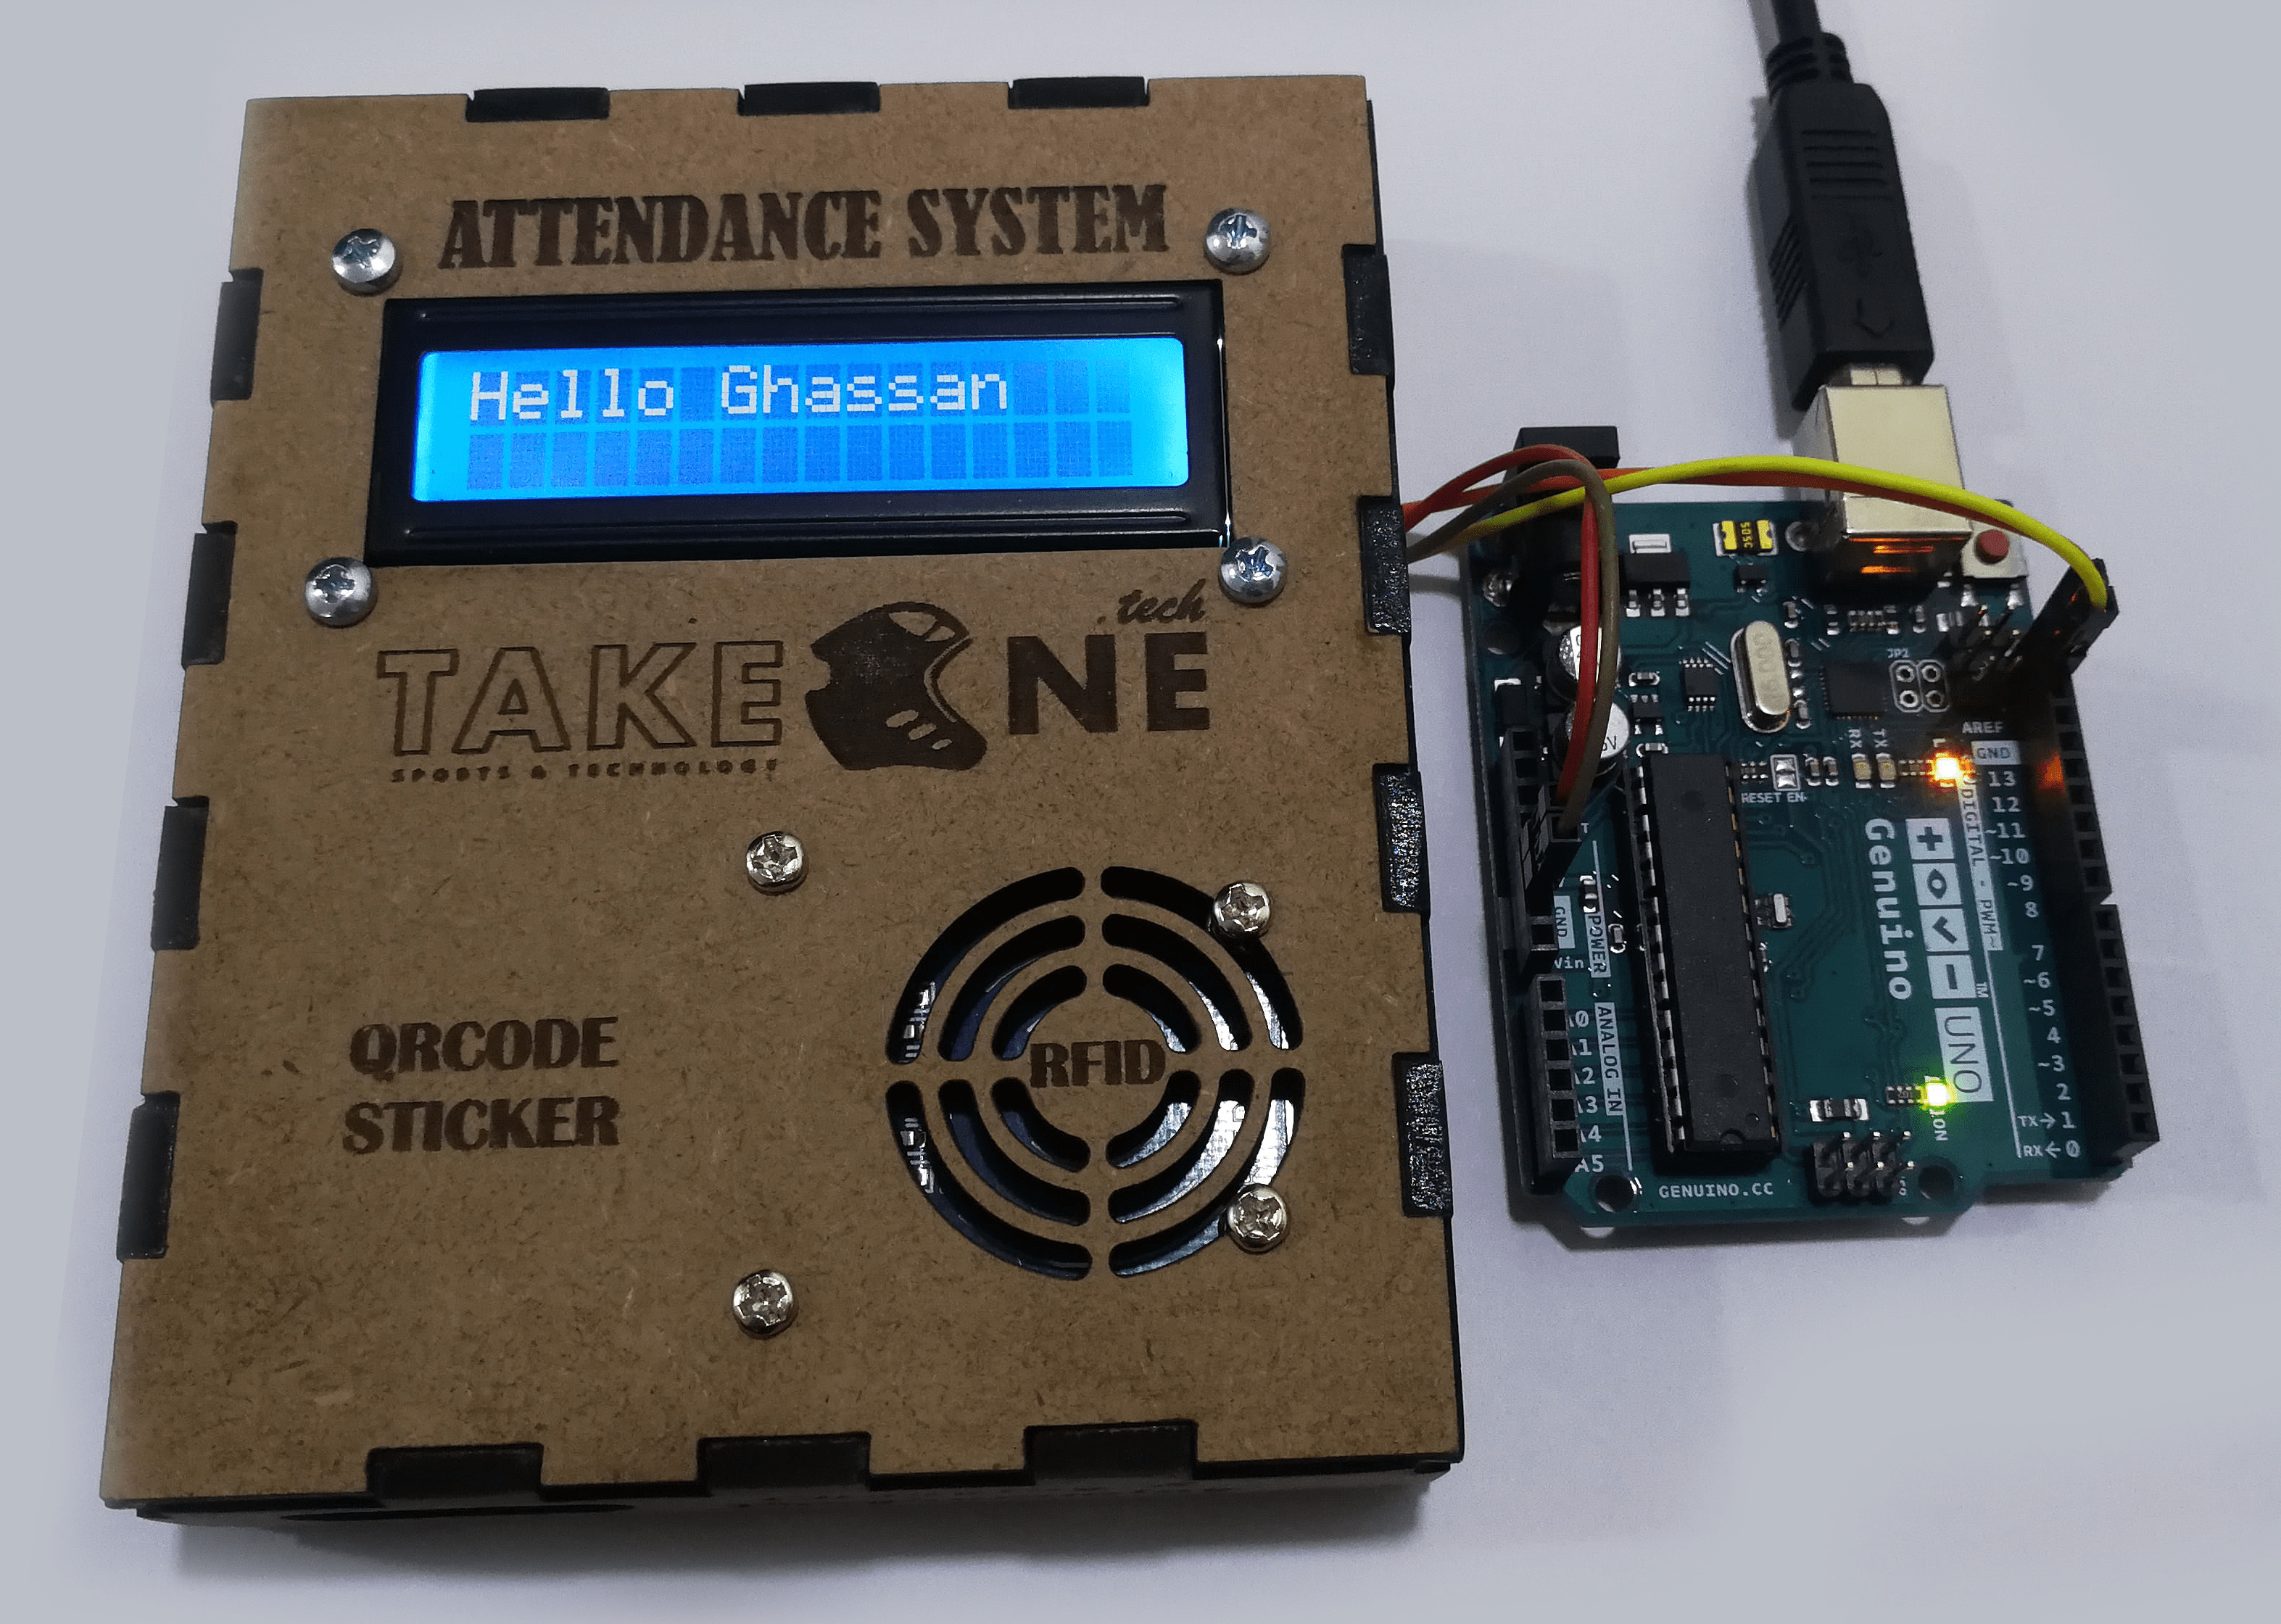
The result is shown in the image below
Including The LCD Library
Adding the library at the top of the
#include <LiquidCrystal_I2C.h>
Creating an instance on an LCD library to use its commands, this requires 3 parameters
- I2C LCD Address In Hex => 0x3C
- Number Of Characters Per Line => 16 Characters Per Line
- Number Of Lines => 2 Lines
LiquidCrystal_I2C lcd(0x3C,16,2);
all the above should be made outside of the void setup() and the void loop() to make it public and accessible in all the program sections. This two codes is to start the LCD library use by initializing it, and to make the letters visible we turn on its light.
lcd.init();       \\ Starting To Make It Work
lcd.backlight();  \\ Turn On the LCD Light
incase you want to turn of the backlight, in order to save power.
lcd.noBacklight();
by this command we clean all the display and wipe out all the displayed letters.
lcd.clear();
by this command we can select which place and line we want to start writing from this command takes two parameters
- The character position from the left side
- The line “0 is the top line, 1 is the bottom line”
lcd.setCursor(0, 0); // character position, line position
to display something on the screen after setting your starting position from the command above
lcd.print("Write What Ever You Want To Display");
Applying Same Example On My ATTINEY84 board
this is the Hero shot of this lesson. this circuit was design and produced on the week 7 -> click here

Group Assignment
Please Click Here