9. Embedded programming
Read a microcontroller data sheet and program your board to do something.
Group assignment
Calcul time for complexe algorithm
- Using C with Arduino
- Using Firmata with pyFirmata
- Using NodeMCU
Datasheet
To look the datasheet of the attiny85, you can look by using the summary of pdf file or just make a research using Ctrl+F. The datasheet is composed by this big parts :
-
General board configuration
-
Contains micro controller architecture, register and stack informations
-
About different memories : Flash Program Memory, SRAM Data Memory, EEPROM Data Memory, I/O Memory
Power Management and Sleep Modes to reduce power consumption
-
To execute code on external or internal events like pin change
-
To know how you can set and use pins
Timer example
sei: Set Global Interrupt enablesleep: Enter sleep, waiting for interrupt
IDE
For this week, I decide to try two IDEs to develop software for microcontrollers, the both of them are complete, you can check if the code compile, compile the code, upload it in the microcontroller, using averdude and you can have acess to serial monitor utilities. The first one is Arduino (the most common IDE for arduino community and makers in general), and the other one is vscode (it's the community opensource version of microsoft visual studio) integrate with PlatformIO.
Use the FabIsp
I spend lot of time to understand why my FabISP doesn't working, and without fabISP, I need to deal with arduino as ISP. I try by all the ways but nothing to do it's not working. After all, we understood with the team in the lab, that you need to plug another alimentation to be able to program the board with the FabISP. So I used an FTDI board to alimente my FabISP.
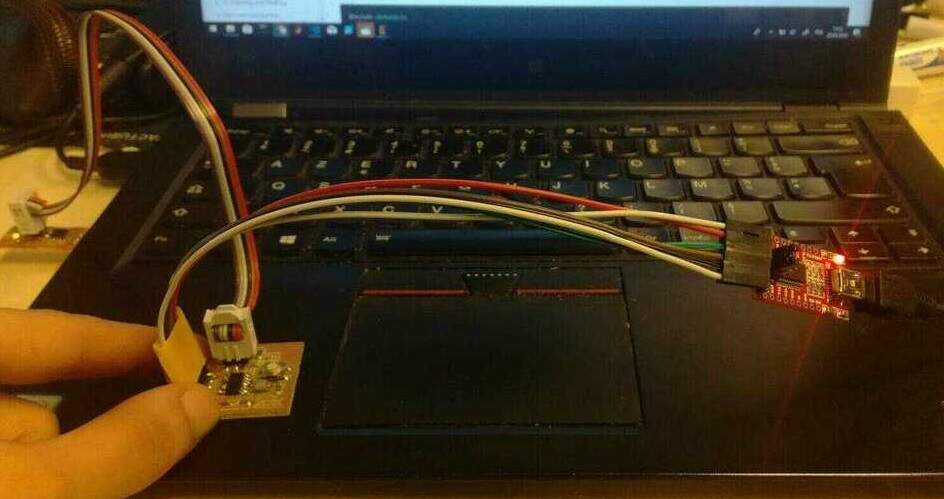
Furthermore, for windows users (like me), you need to install the usbtinyisp firmware if you want to visualze your fabisp.
Arduino IDE
They are few documentation online to understand and know how to use the Arduino IDE, in the context of the fabacdemy, you need to be sure that you have Attiny library installed in the IDE (how install arduino library).
Configuration
Before to start coding (you can also do it before uploading code), you need to set some configurattions options:
- Port :
Tools>Port>COM17 - Programmer :
Tools>Programmer>AVR ISP(for arduino ISP) |UsbTinyISP(for the fabISP) - Board :
Tools>Board>ATtiny24/44/84 - Processor :
Tools>Processor>ATtiny84 - Clock :
Tools>Clock> Depends how the attiny was lfused
Upload the code
Once the code is ok, you can Verify (compile the code to see if it's ok) the code using the shortcut Ctrl+R and Upload (send the compiled code to the board) the code using the shortcut Ctrl+U. You can check the status of each operation by looking on the bottom of the IDE the console output.
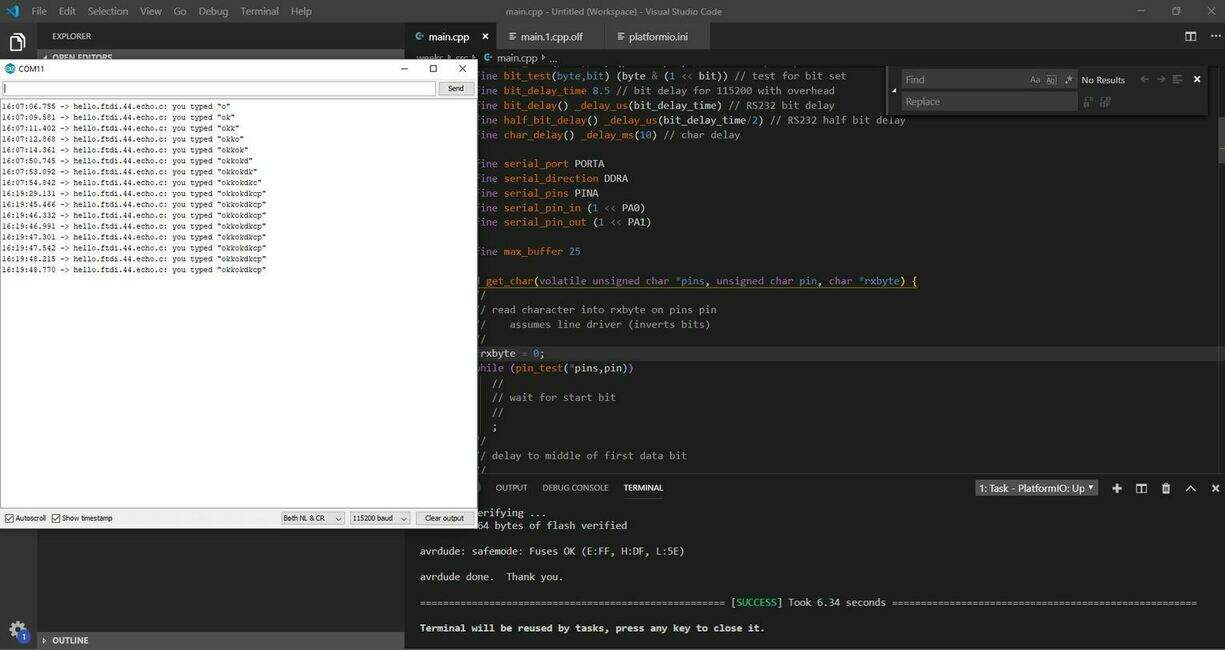
Serial monitoring
The serial monitor is really usefull for developping and debugging board. For me the arduino IDE serial monitor is not the most ergonomic software but he's really usefull. To use it, you need to click on the wen icon or Tools > Serial Monitor, or Ctrl+Shift+M.
I tell that it was not ergonomic, because of one things, in the side of baudrate selection, you can define if you want to add some special characters (\r, \n or both) when you sending message, and if you don't care about that, you can have some problem to decode your messages. By default, the value is set to Both NL & CR, I recommand to select No line ending.

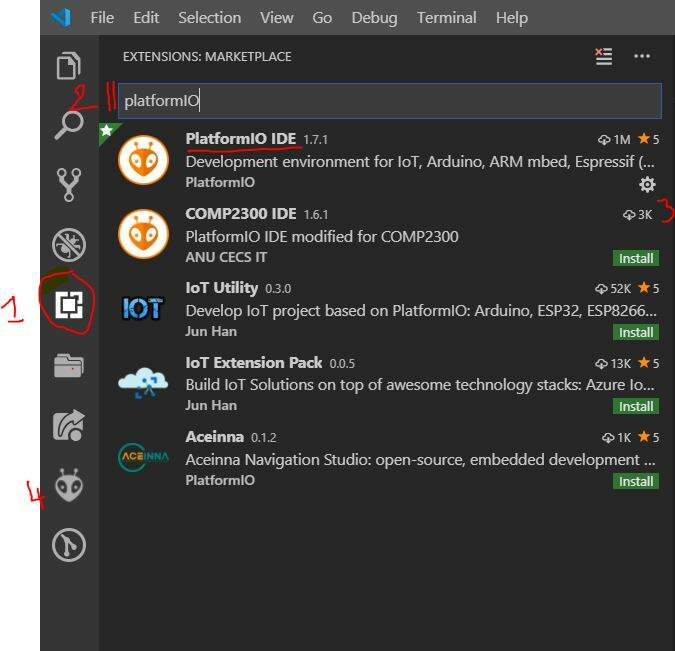
VScode with PlatformIO
Vscode is a famous IDE in the world of web software developer. Build by strong community, he has many extensions, and it can be used for almoast any language. One the thing that I liked with VSCode, is the integrated terminal, really usefull for debugging and task launching. The other side, PlateformIO, initially, based on Atom the opensource IDE of github, it was devlopped to support nodemcu boards, but he was extended after that for others platformes.
Installation
- Download VSCode
- Got to the section
Extension - Search
PlateformIO - Click on
installandreload - Go to the section
PlateformIO
Configuration
Like with the Arduino, before to start, you need to define configuration, but instead to make it by clicking in the interface, you need to define config file called plateformio.ini. Need to define some charectestics :
[env:att44]: name of the current configurationplatform: The equivalent ofBoardin Arduinoupload_port: This option specify the upload_port where sending firmware to board.upload_protocol: The equivalent ofProgrammerin Arduinoboard_build.f_cpu: The equivalent ofClockin arduino, value can be equal to20000000Lfor the hello boardupload_flags: Place to customize averdude uploading, to update fuses for example
So here you can see one simple example of the plateformio.ini for an attiny84 with an external clock of 20Mhz.
[env:attiny84]
platform = atmelavr
board = attiny84
board_build.f_cpu = 20000000L
upload_flags =
    -Ulfuse:w:0x5E:m
The advantage of this system of configuration, is the possibility to have many configuration possible (develop, test, clocks, production), and switch easly between configurations. For more details, please, go there.
Use Arduino as ISP PlatformIO
Set the following variable in plateformio.ini:
upload_protocol = stk500v1
upload_flags =
    -P$UPLOAD_PORT
    -b$UPLOAD_SPEED
Upload the code
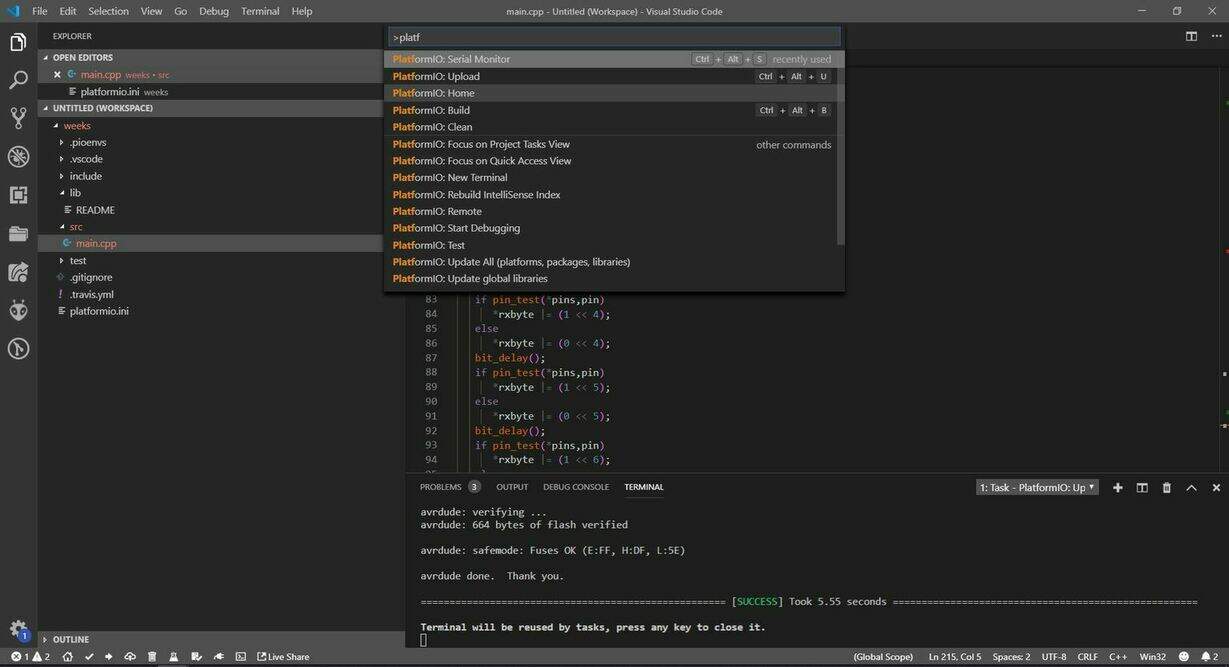
To upload the code from the vscode and platforme io, they are few options, using the CLI of plateformio or using the command palette of vscode, or use the shortcut Ctrl+alt+U.
Arduino IDE vs PlateformIO
Arduino IDE is clearly more accessible for begginners, all is in the same place and all the principale configuration can be accessible from the user interface.Howeover, I think PlateformIO has many advantadge, the possibility to set many configurations, vscode IDE (many usefull shortcut and extension for code editing, and compatible with many languages). The disadvantage of Plateformio, is the pin naming when using the arduino framework, for example A7 pin in Arduino, will be not understable by platformIO, you need to specify PA7.
So I will use, vscode with plaformio for text editing, fuses board, upload pure c code, but I will use Arduino IDE to upload arduino codes and I will use his serial monitor more usefull for debugging, than my small bottom terminal.
Note: I'm in the finish of the fabacademy, and I understand one of the biggest frustration of my fabacdemy, the clock managing, I told that, the setting of clock in the settings of arduino, change the fuse mode, and I found that arduino IDE didn't do that, the settings of clock permit only to define the frequence of time in the arduino code, like when in the pure C we need to define the `#define F_CPU 20000000UL``for timer cycle. So now all my fuses update will be maid using platformIO
Programming
So for the programming, I maid two examples, one with pure C, I used the neil code to make an hello ftdi, and an arduino code to program an interrupter (click -> led on, click-> led off, serial monitor communication).
Hello Ftdi
For this, example, I take the Neil code, I try to use it, I had many and many troubles, but in the end the problem was the fuses of board who was not correctly applied. So I checked what's going on if update fuses to internal 8 Mhz and set the variable F_CPU, and it's work for the both.
You can download the plateformIO project, just by clicking here.
Error clock
When I try to get the serial output using the arduino IDE or PlatformIO, but in the two cases, I couldn't reiceve the communication. To be able to catch something, I need to use different baudrate in my serial software monitor.

To fix error, be sure that you correctly fused your board or set the right clock config.
On/off
Using the arduino IDE and Arduino framework, I programme my board to make a simple program to switch on/off the led of th board. The state of the led can be changed from the button or from the serial monitor. I put some commentaires to have code more understeable.
#include<Arduino.h>
#include<SoftwareSerial.h>
#define rxPin 0
#define txPin 1

// Constants
#define ledPin A7
#define btnPin 8

// add simple quote convert character to ascii
const char16_t SWICH_SERIAL_ON = '1';
const char16_t SWICH_SERIAL_OFF = '2';

// Variables
volatile int switchPrevious = 1;
volatile int switchState = 0;
volatile int isOn = 0;

// Serial software
SoftwareSerial myserial(rxPin,txPin);

void setup() {
    pinMode(ledPin, OUTPUT);
    pinMode(btnPin,INPUT);
    switchPrevious = digitalRead(btnPin);
    myserial.begin(9600);
}

void loop() {
    switchState = digitalRead(btnPin);
    if ((switchState == 0) && (switchPrevious == 1)){
        isOn = 1 - isOn;
        digitalWrite(ledPin, isOn);
        // delay to prevent other events
        delay(20);
    }
    switchPrevious = switchState;
    if (myserial.available()) {
        char16_t inChar = (char16_t)myserial.read();

       if (inChar == SWICH_SERIAL_ON) {
            isOn = 1;
            digitalWrite(ledPin, isOn);
            myserial.println("On");
        } else if (inChar == SWICH_SERIAL_OFF) {
            isOn = 0;
            digitalWrite(ledPin, isOn);
            myserial.println("off");
        }
    }
}
⚠️ The arduino code works only when I fuse the microcontroller for internal 8Mhz or internal 1Mhz and then I update the clock in the configuration (as describe on the top).
Results
- Serial software doesn't work also with arduino and my board
- I spend a lot of time to understood why it doesn't work but with no success
- When I succed, to deal with clocks and understand why it doesn't work, I was so happy.
The timers problem
I had this problem with all attiny that I maid, the clock does'nt work, even for the final project, the only way that I find to be able to use them, was to use the internal clock of 1Mhz of the attiny84.
I try to understood why, but after some feedbacks, I think it's certainly because of attiny that we have. Because when I try to use the internal 8Mhz, it doesn't work also.
edit : I found the solution, it was fusing topic, for mere details, read on the top.
Video demonstration:
What's next ?
- Read and read datasheets to understood all the concepts
- Learn more about addressage and bits operations
- Progress in low level languages