6. 3D Scanning and Printing
Design and 3D print an object (small, few cm3, limited by printer time) and 3D scan an object
Self 3d printer troubles
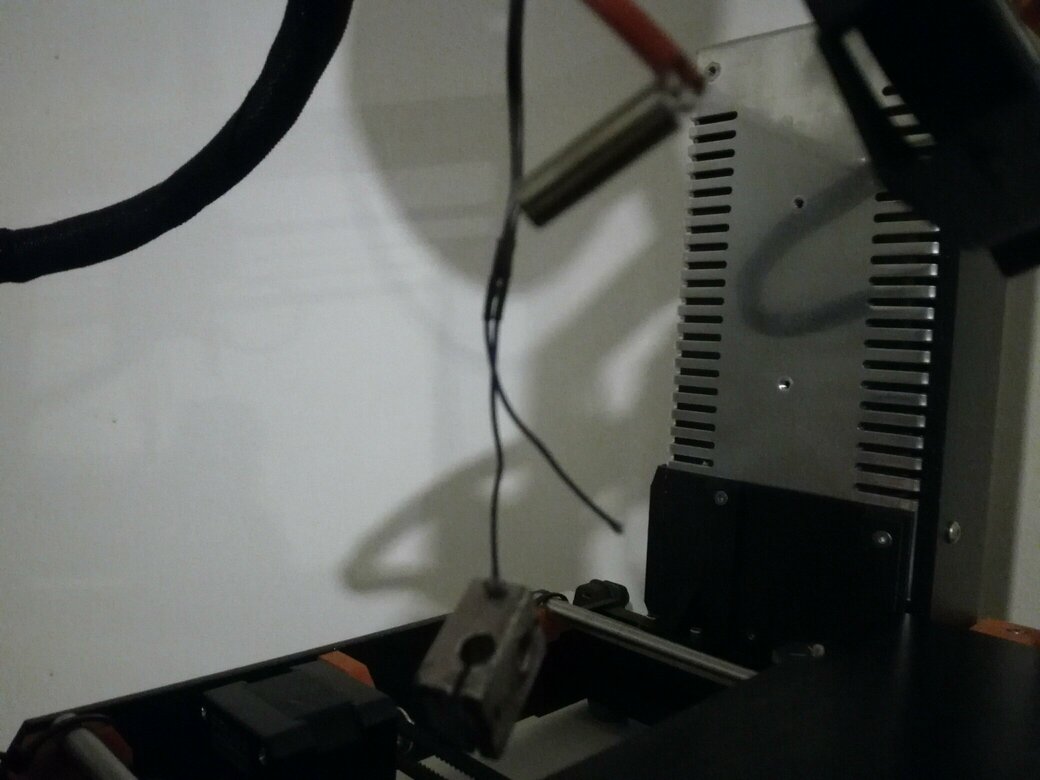
I had some problems with my buse thermistor, I decide to replace it during this week. I was used to disassemble and reassemble it, so I try to replace it.
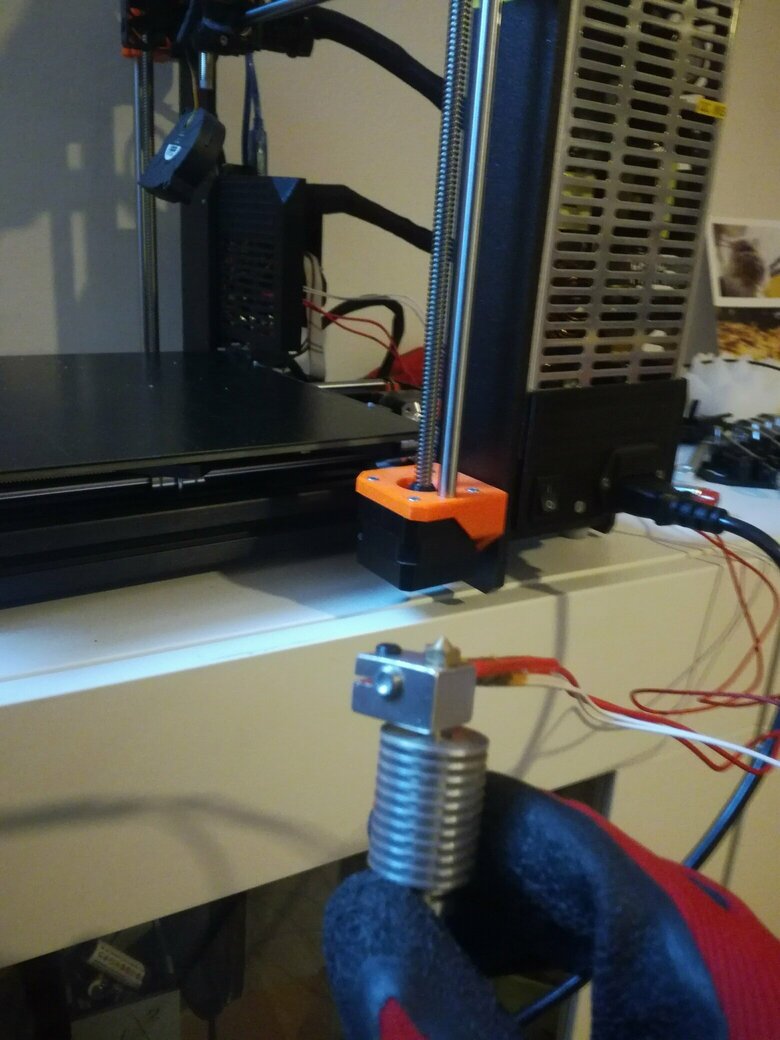
But unfortunatly, I was not able to do it, and I discover another problem, I don't know if I broke an other part. So I will take it in the lab and see with the fab tool what's going on.
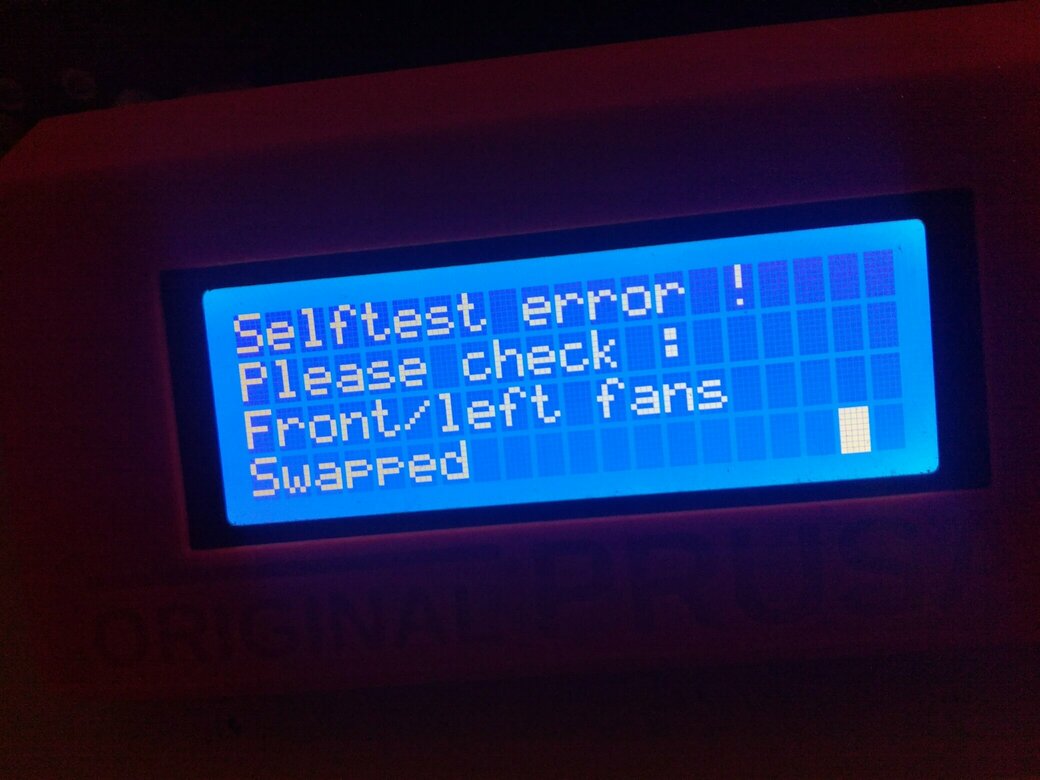
I give up 😢 But I will take in the lab to see what's going on.
Characterization of the 3D printer
With our group, we maid a characterization of our 3d printer, the ultimaker 3, and maid a little comparaison between the Ultimaker3 and Creality CR-10S, you can find the documentation by clicking here.
Design and 3d print an object
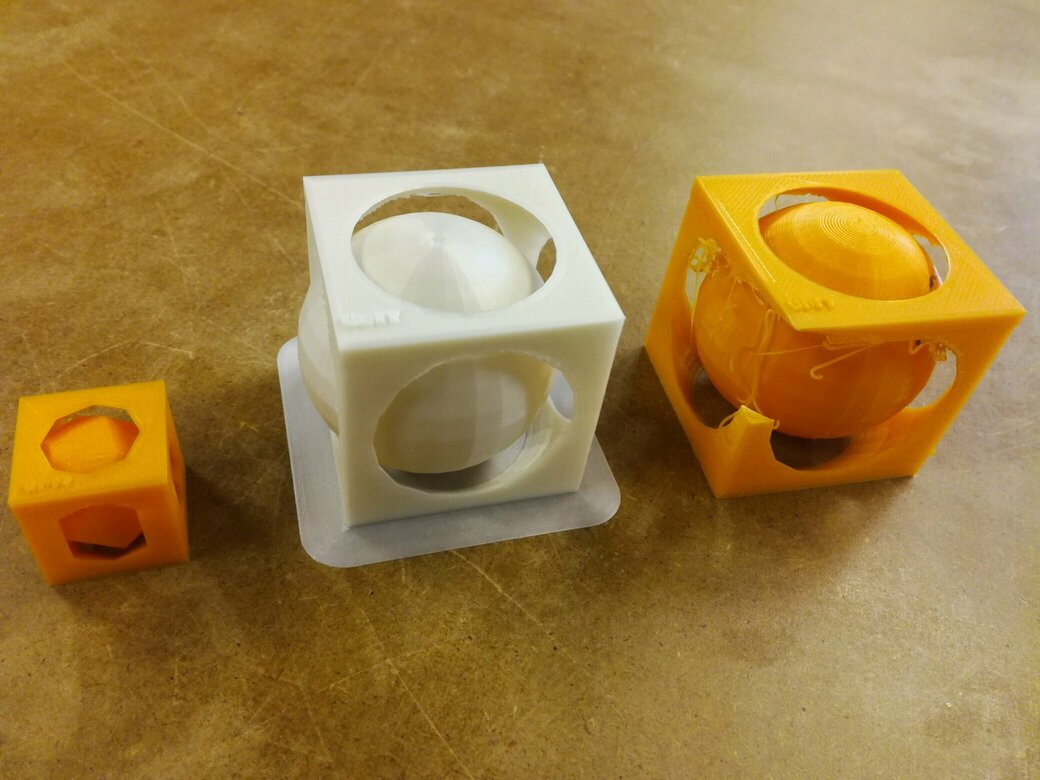
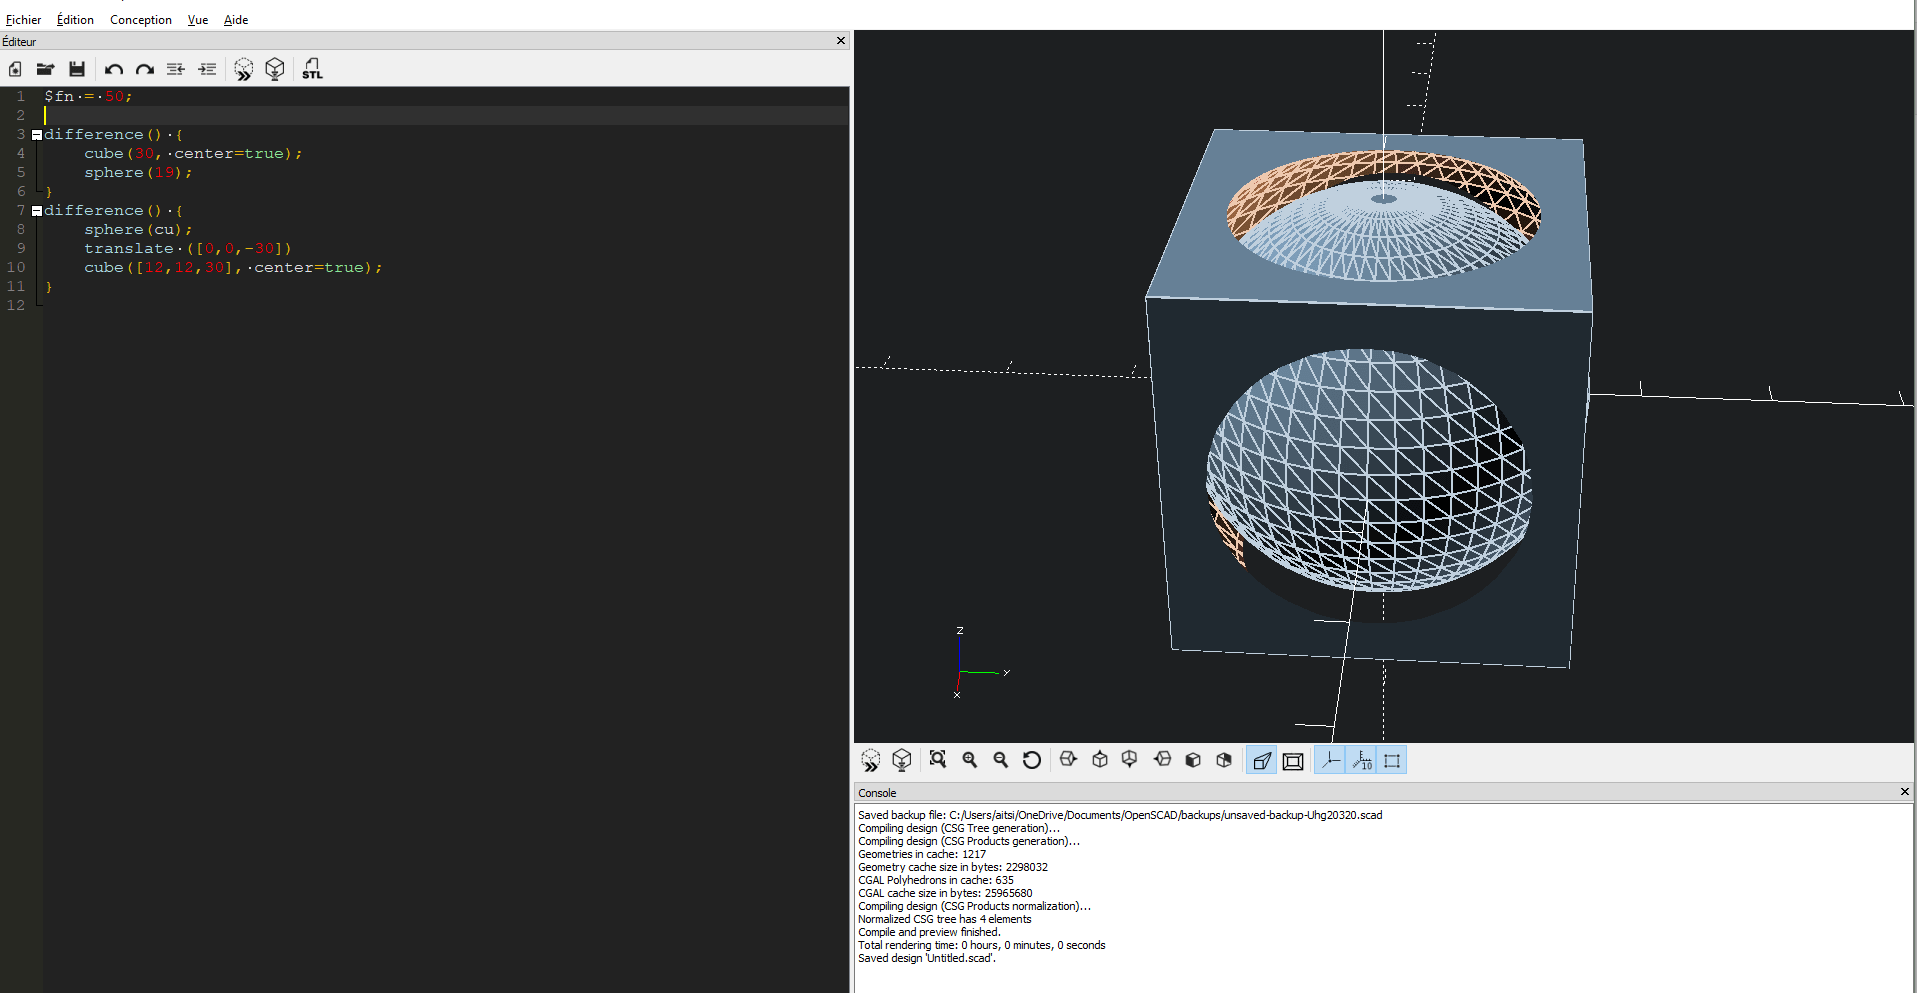
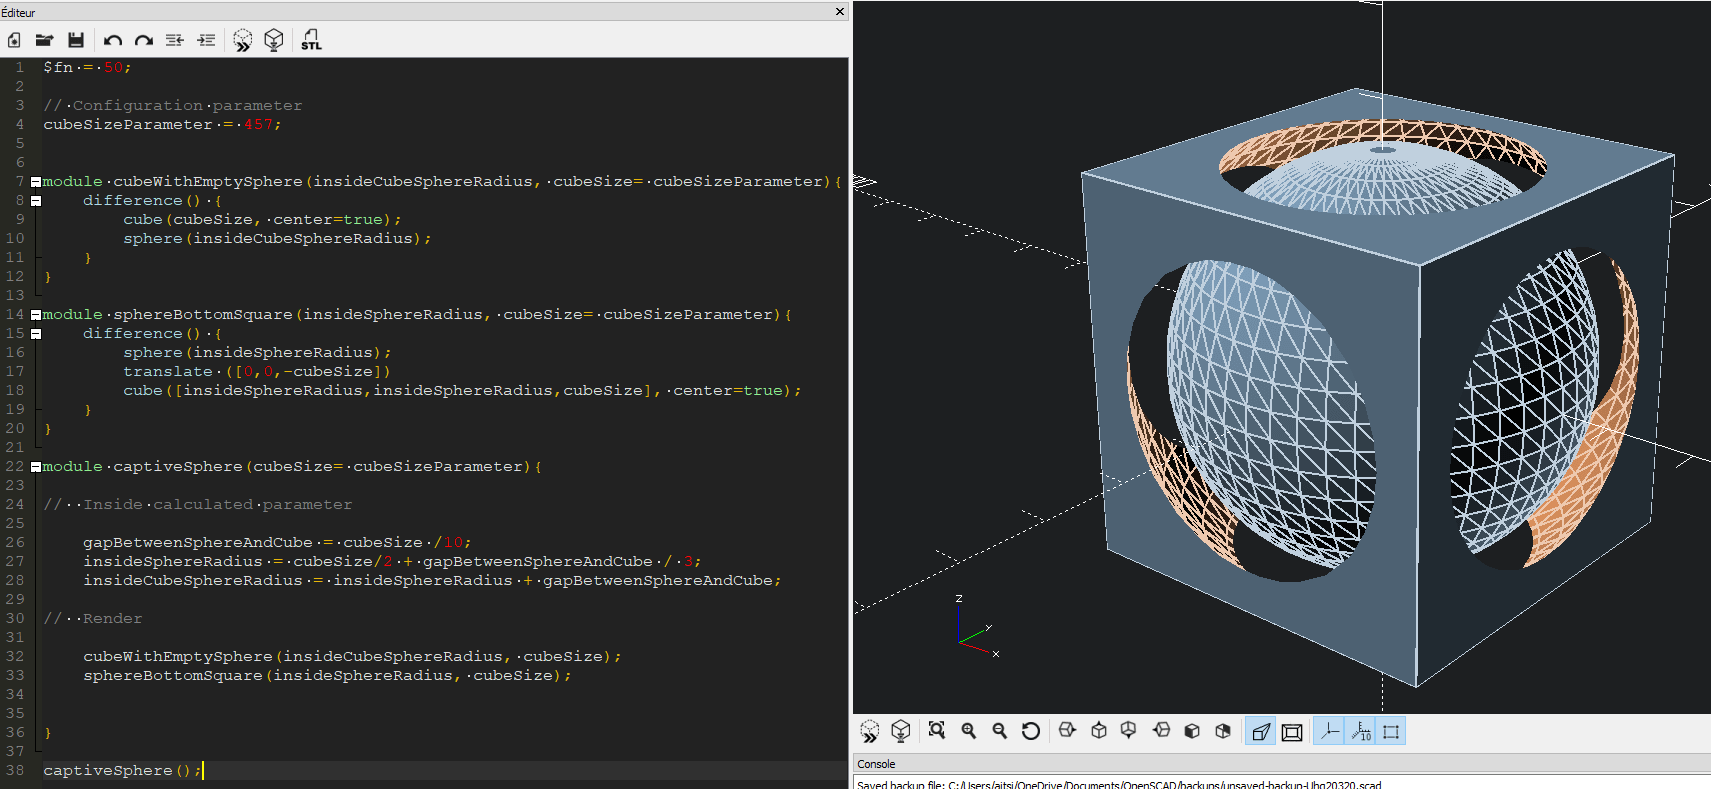
Design the captive sphere
Inspired by some thingiverse projects, I want to make a parametric captive sphere, and try the mode two colors of the ultimaker.
Find a simple example on thingiverse
Make it parametric
Try with big size
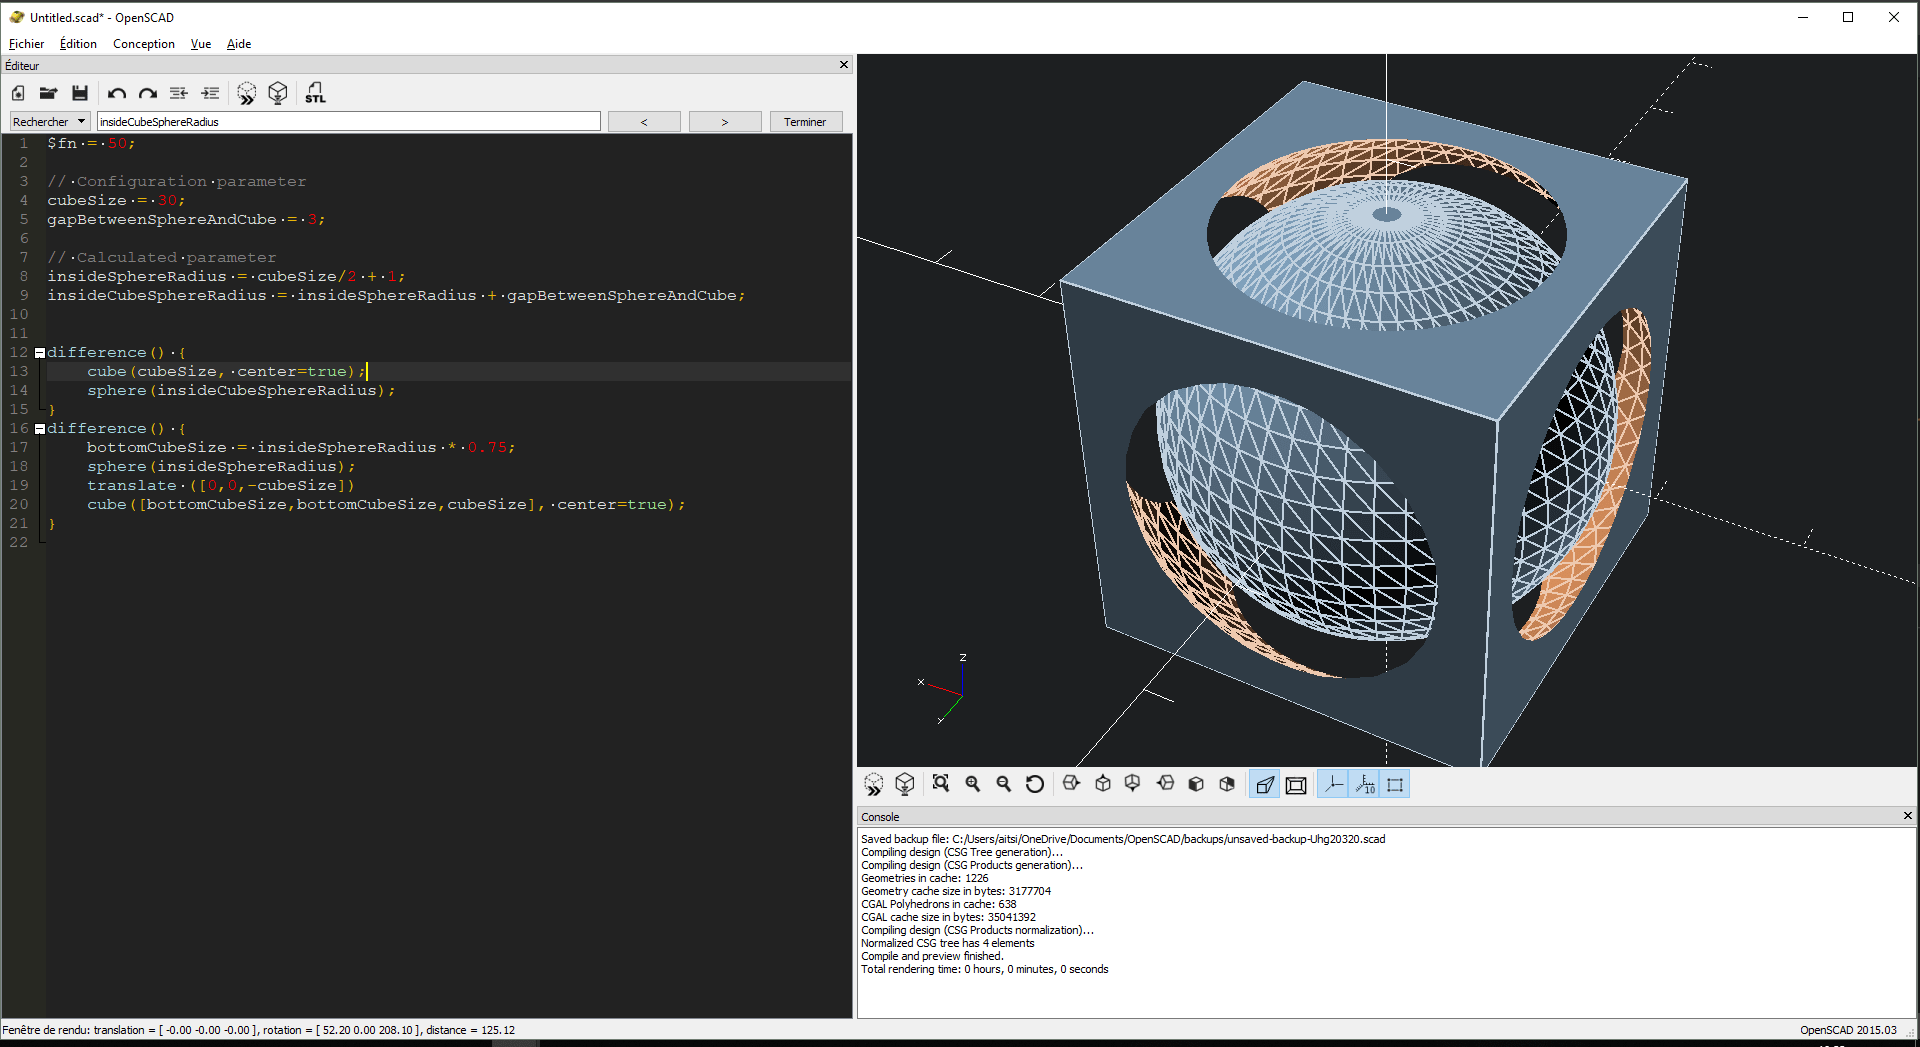
There is a problem, the fixing parameter couldn't,
gapBetweenSphereAndCubeandinsideSphereRadiusneed to be calculated in function ofcubeSize.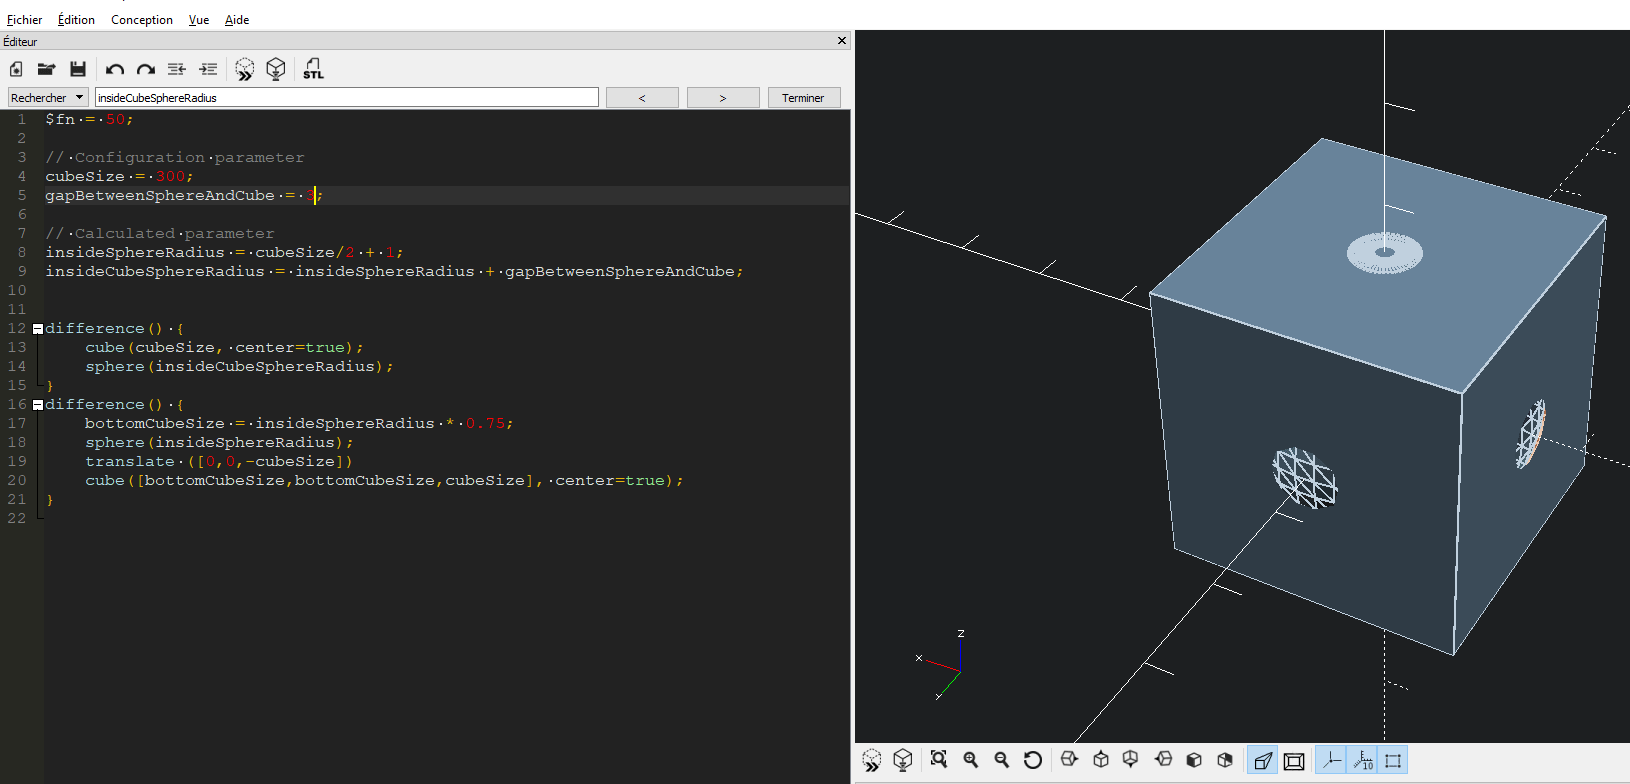
Let's be more parametric
I create all this variable, by deducted the relation and test with multiple value.
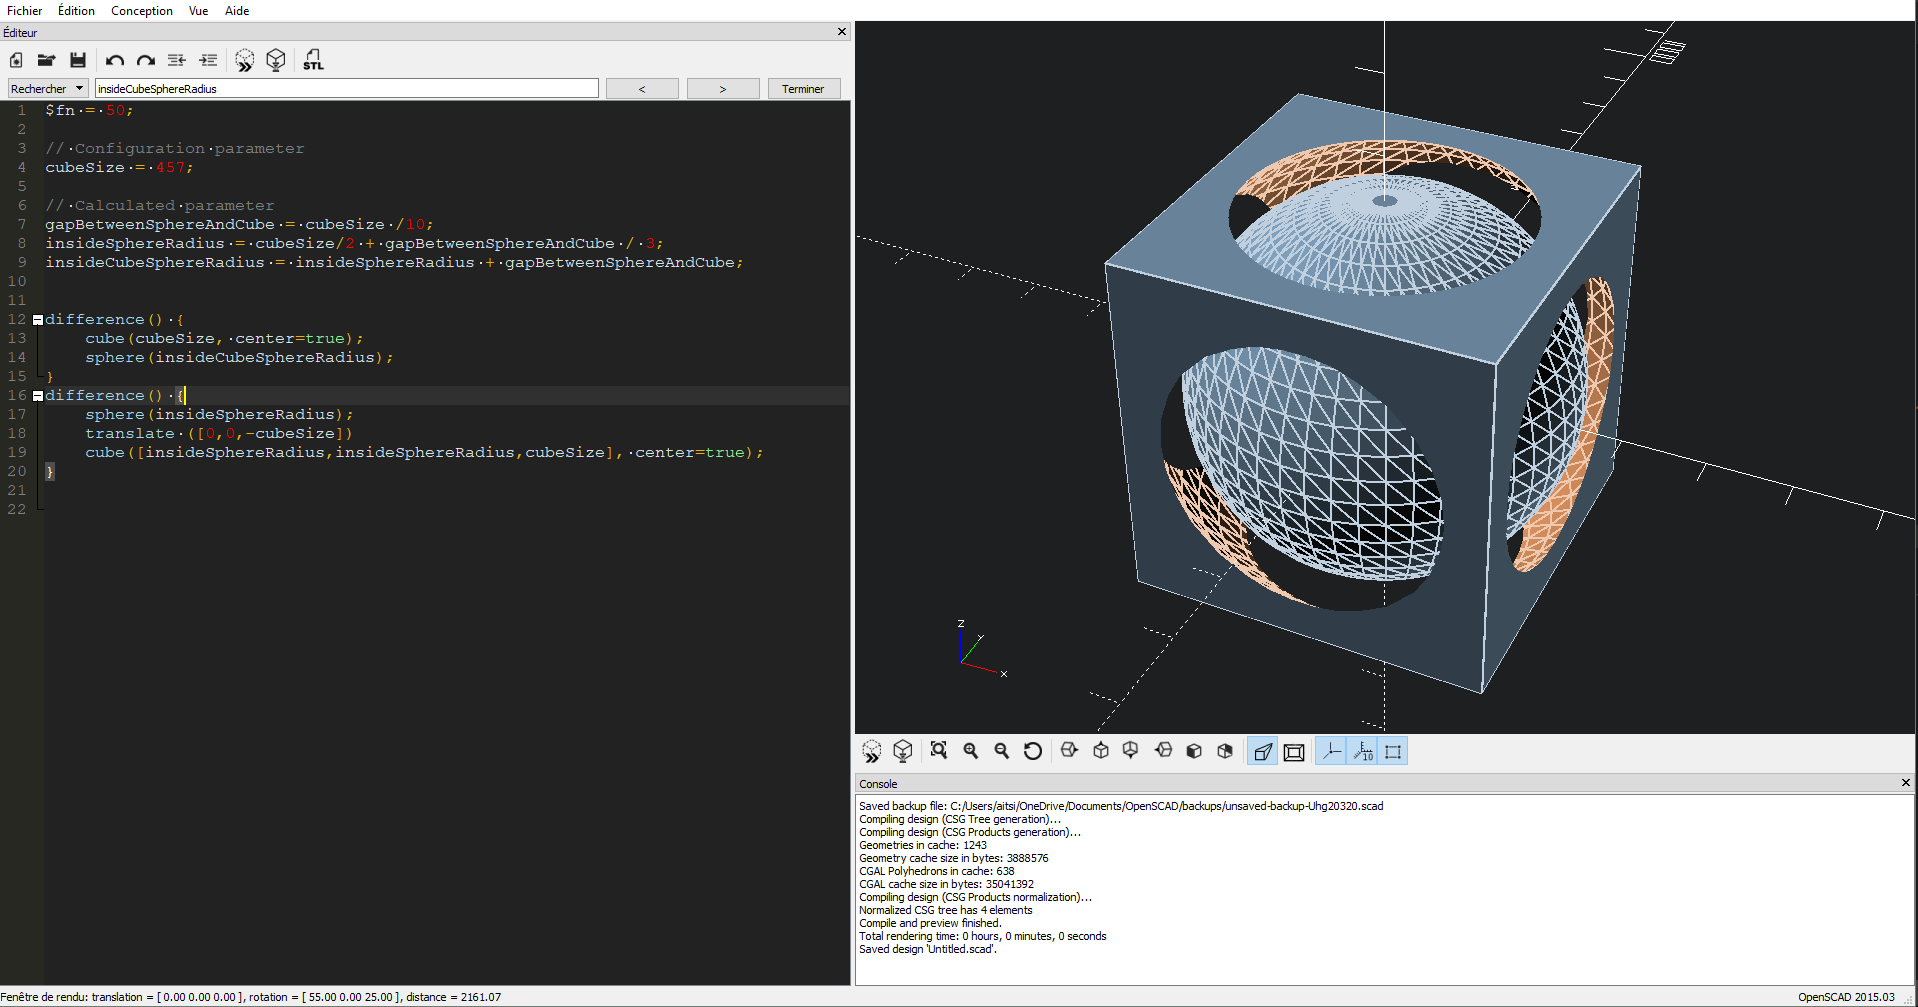
Let's create module
Let's play with
$fn$fn = 6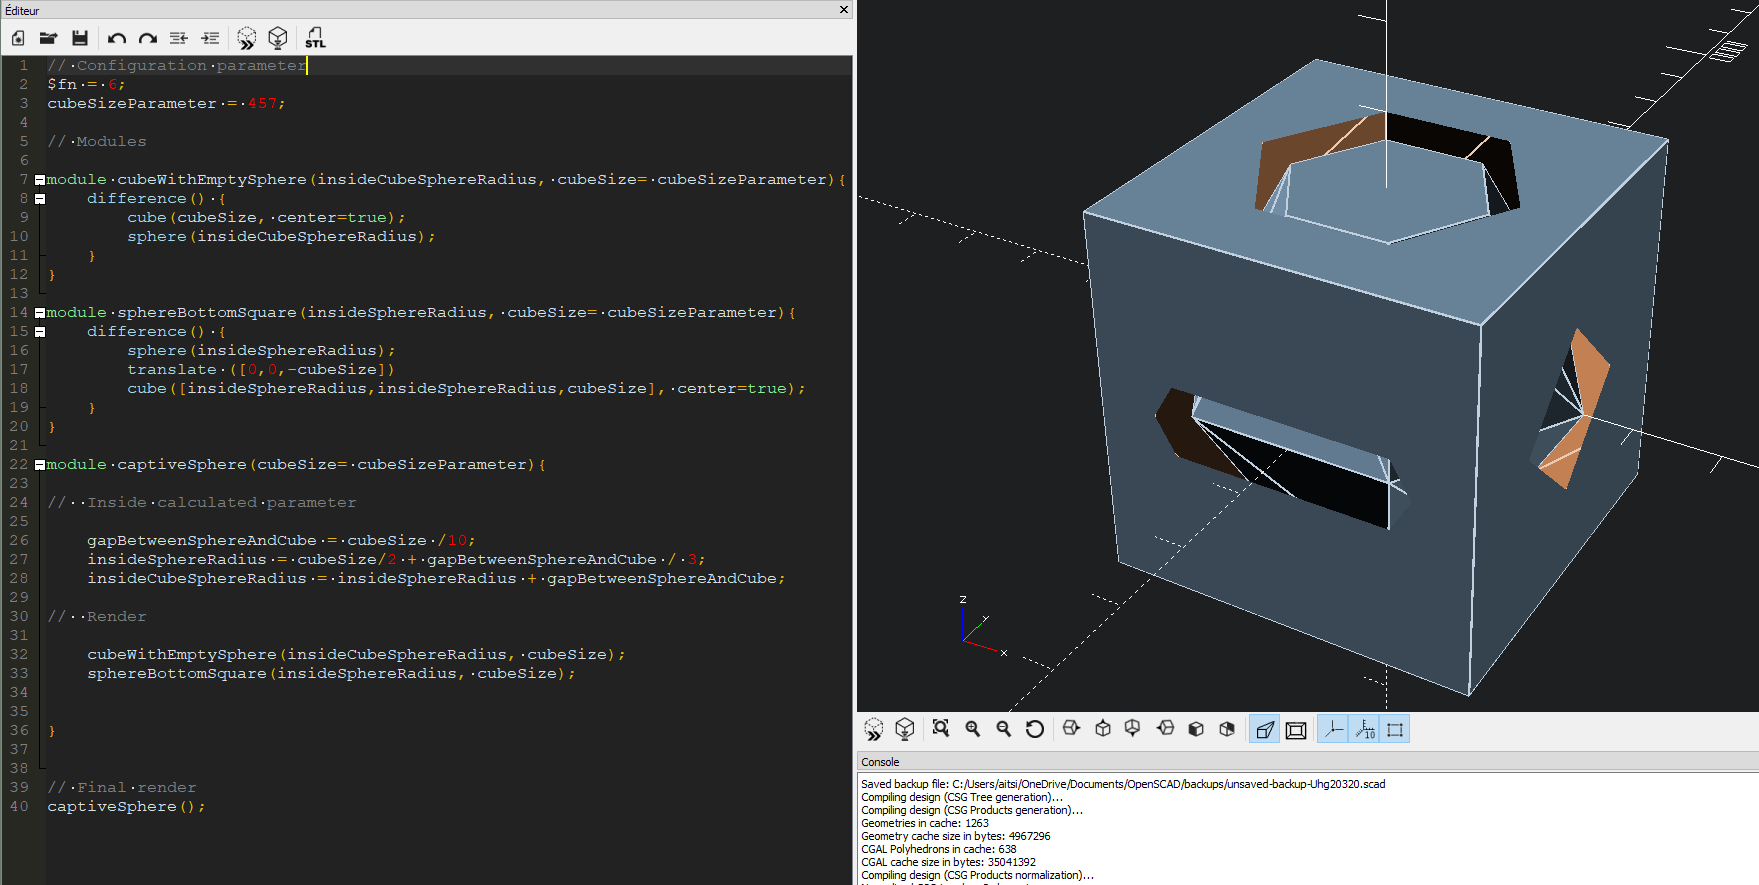
$fn = 8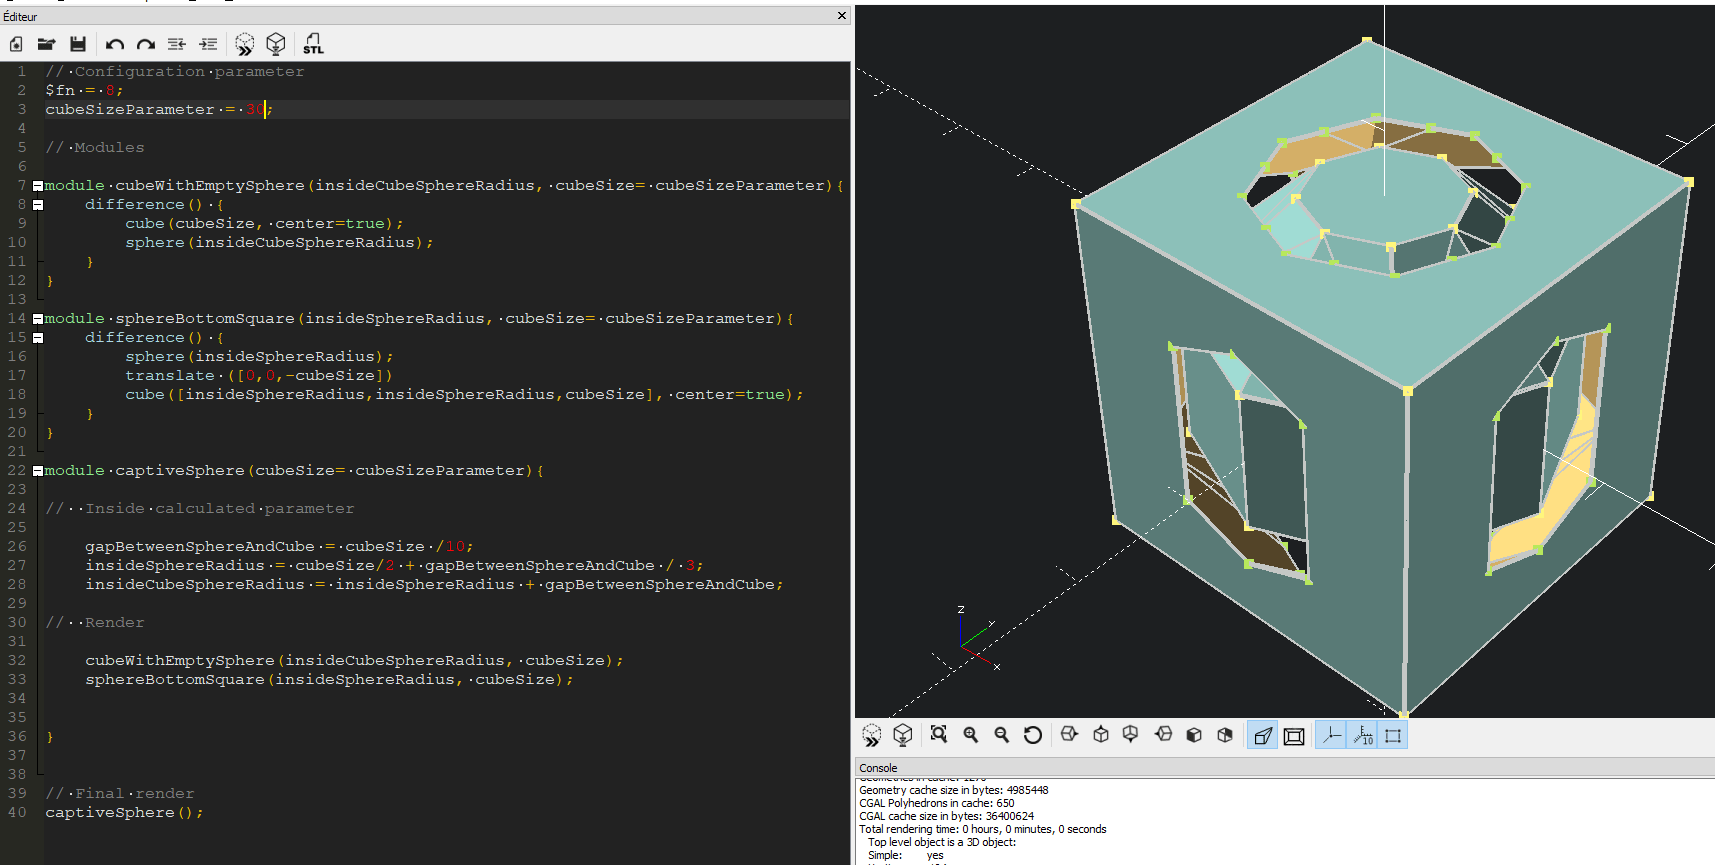
$fn = 30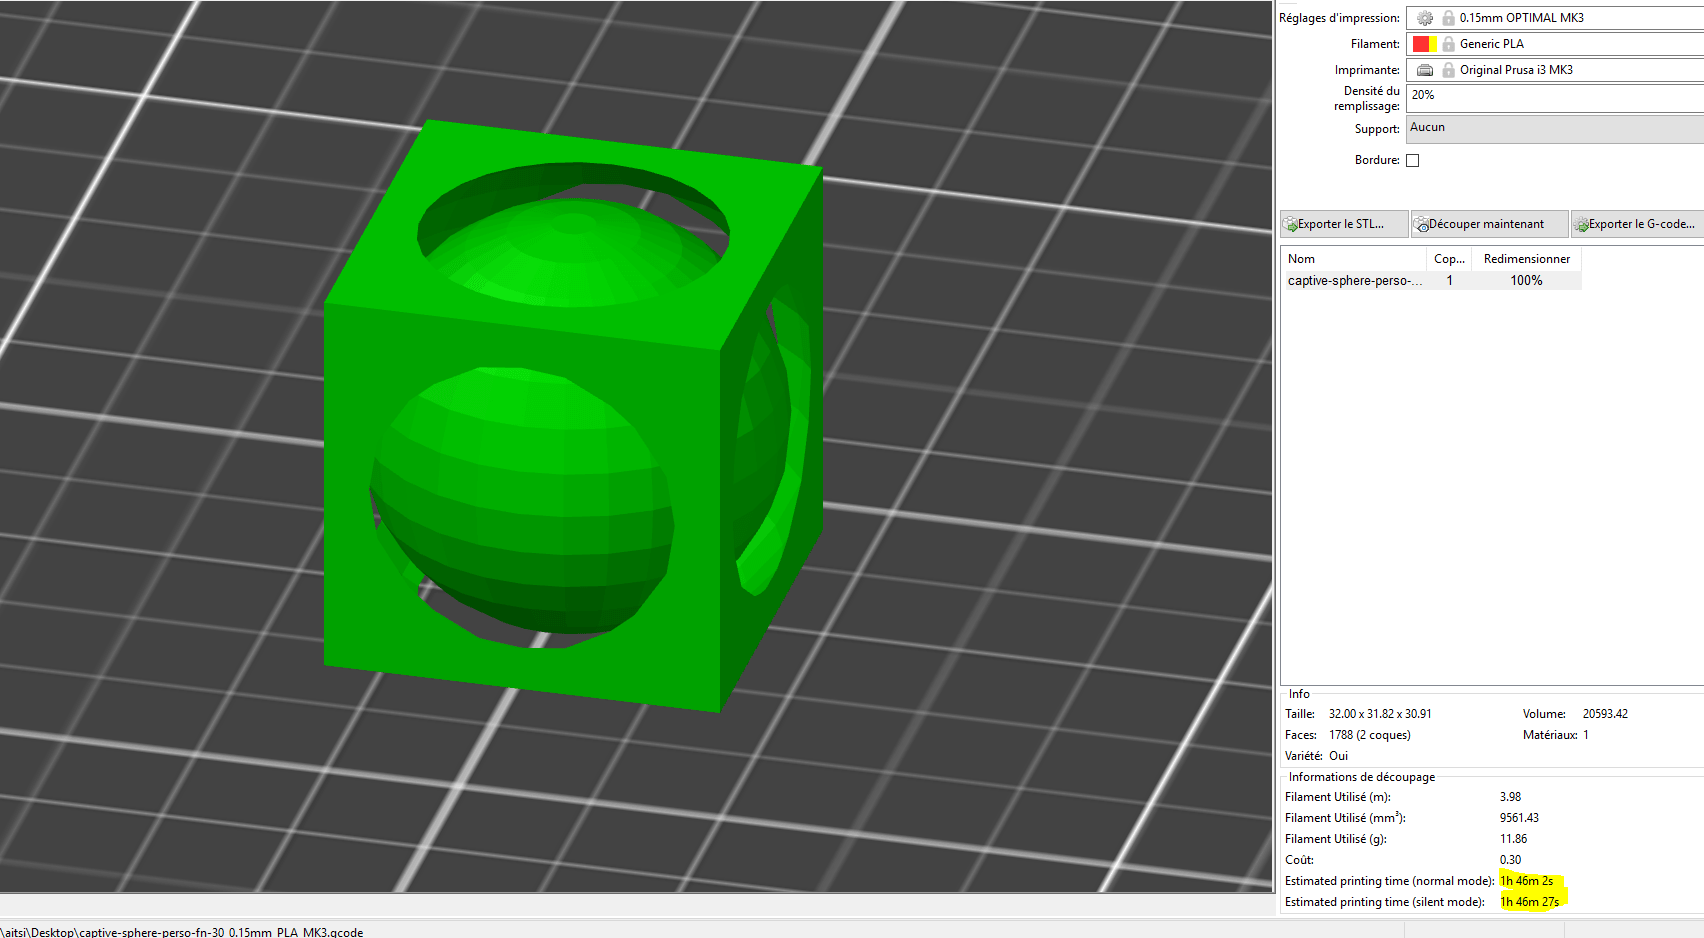
$fn = 100
$fn = 360
The render is too slow, because it's the perfect circle so it's hard to the machine to get the full result, the render take 9 minutes, 20 seconds
But the print time seems the same.
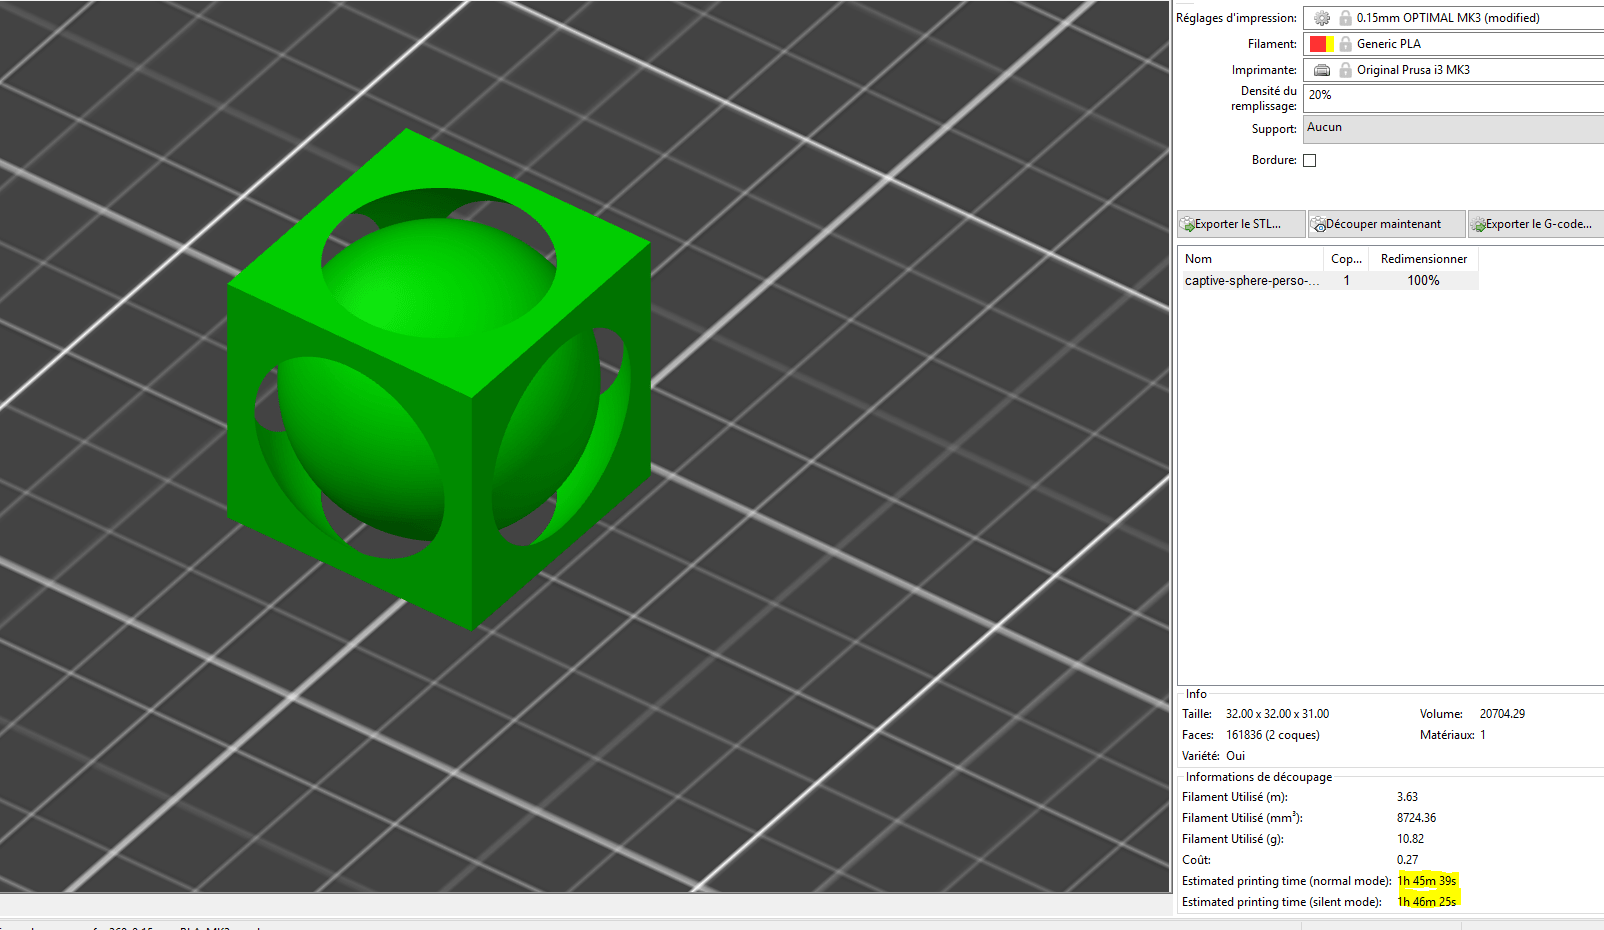
I tested a lot of variant, but I really like the result with
$fn = 8😄Add colors I want to test the mode with the two extruders, So i will add some colors to my openscad.
To define colors, in openscad, you can use rgb (rgb(R, G, B) =
color[ R/255, G/255, B/255 ]), or give juste the name color (likered). For more details go there.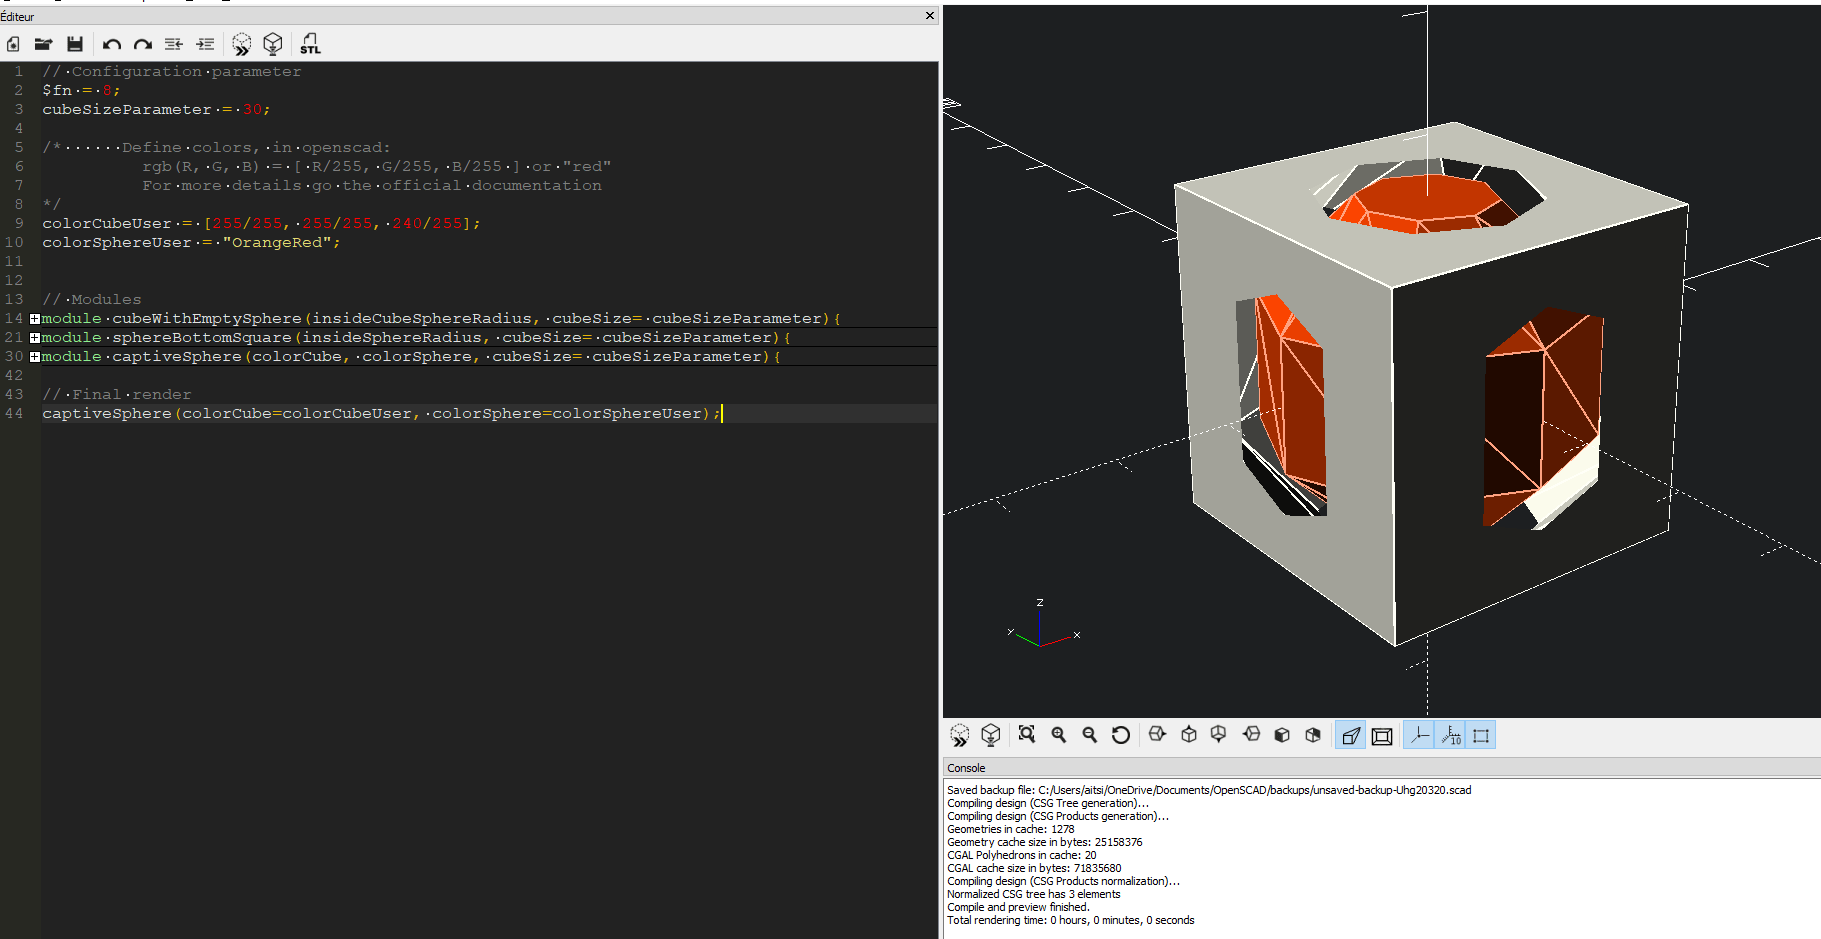
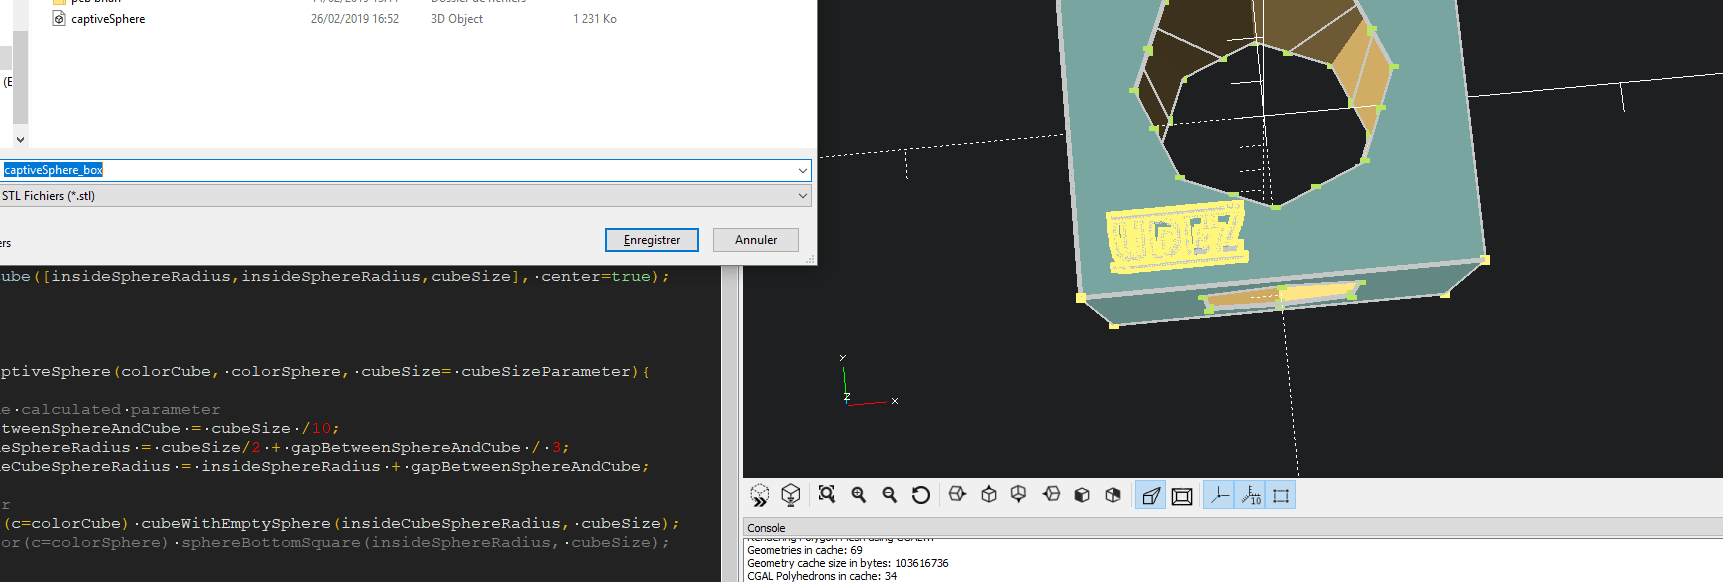
Result file
One of the most render that I liked was this one available on the bottom, you can download it, just by clicking here.
'
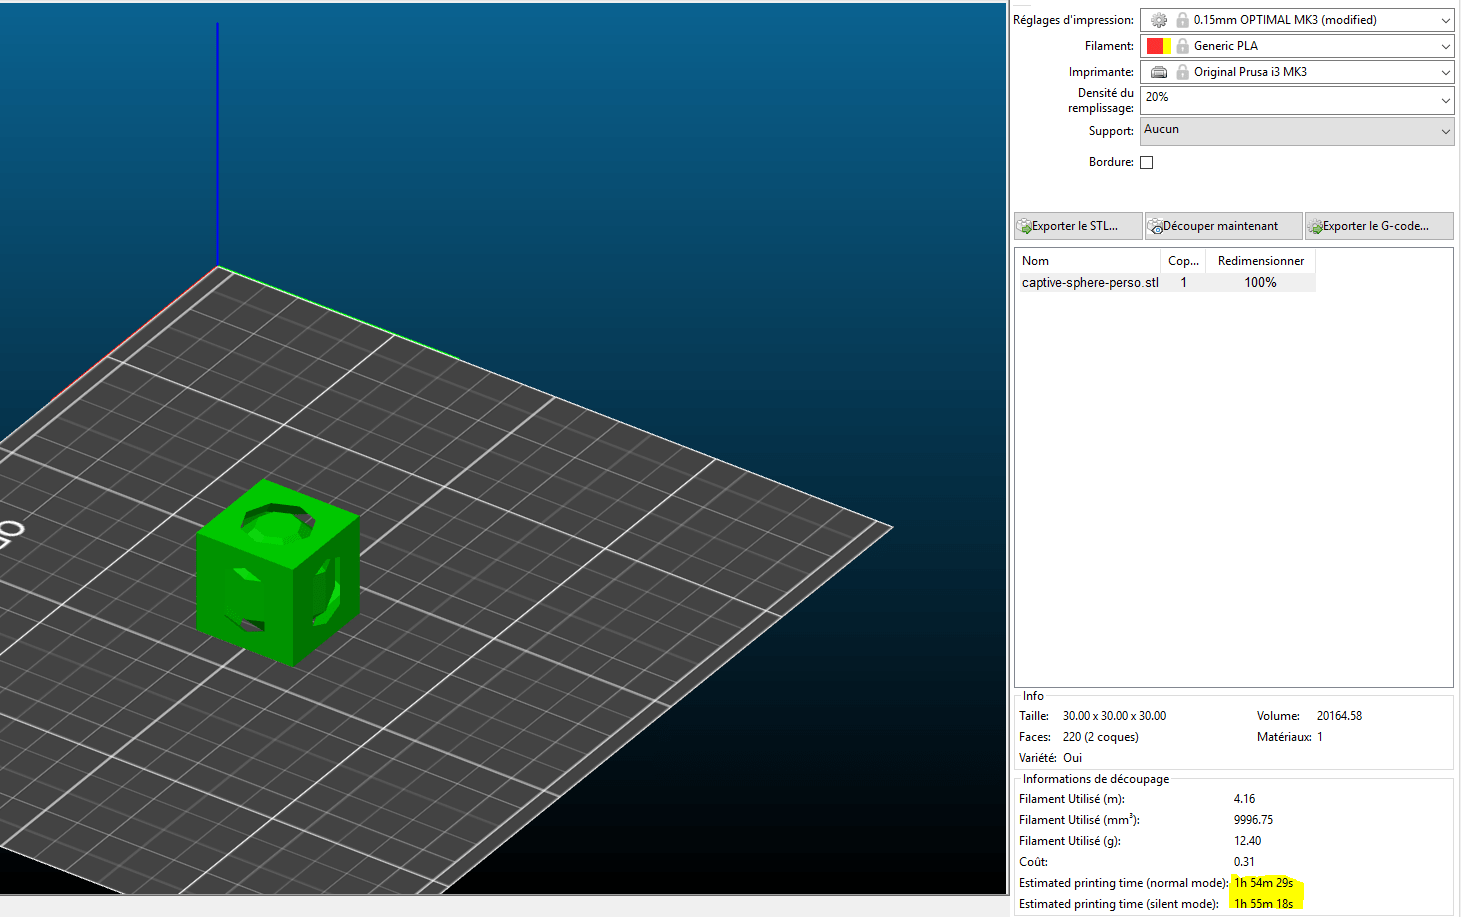
3d print it
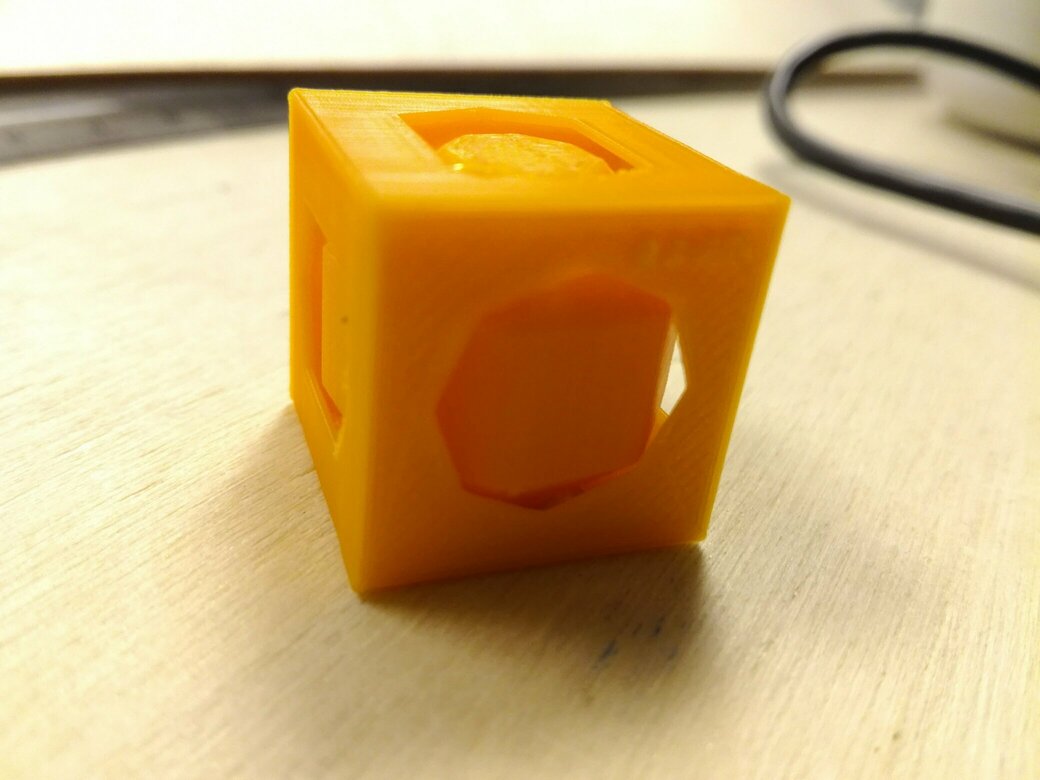
First print
For the first print, I used the CR100.
Openscad parameter
$fn = 8cubeSizeParameter = 20
The sphere was well printer, it's clean and all the things was smooth.
The cube was printed as well, they are just some failures on the top openess in the sides parts.

Two colors print
Openscad parameter
$fn = 8cubeSizeParameter = 20
Modelisation
Unfortunately we could'nt export the colors from openscad. So, as I said at the top of this page, they are some tricks to do with slicers, or mesh tools to have multicolor in models made by openscad. Even the AMF export does'nt work.
I want to test the two extruders of Utilmaker 3, so I use Cura for make the configuration. I need to export each part of the model.
After that, for each of part I select the right extruder. For me it's just two part, the cube with Extruder 1 and the sphere with Extruder 2.
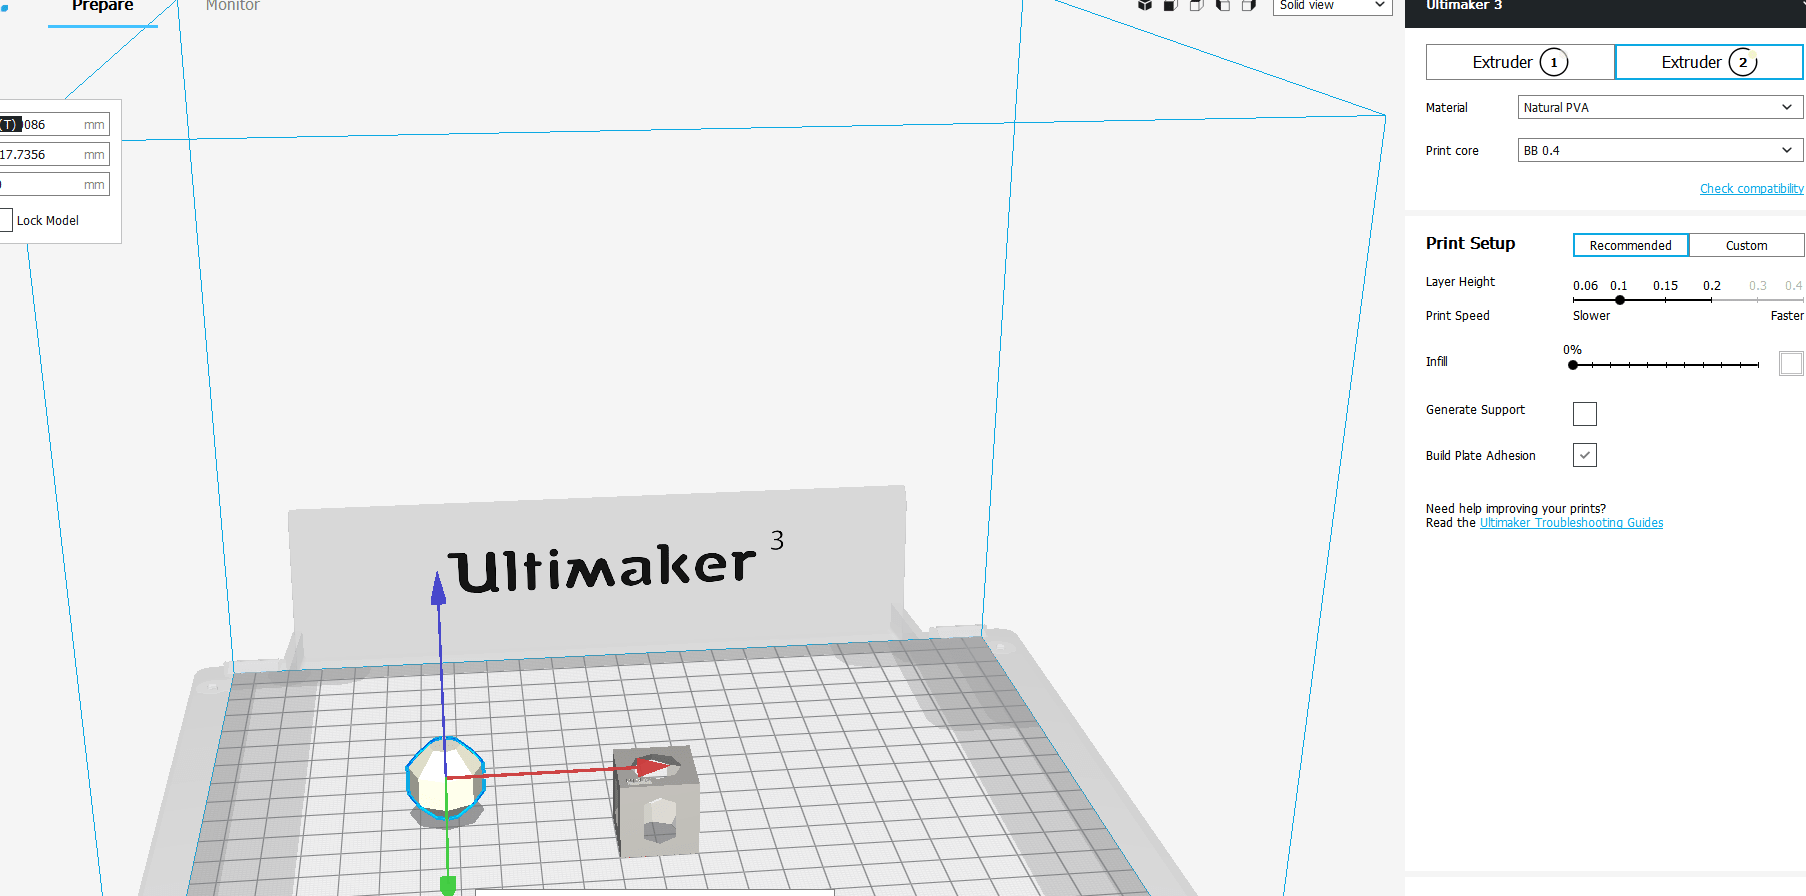
When it's done, select each part and right click to merge the part in one model.
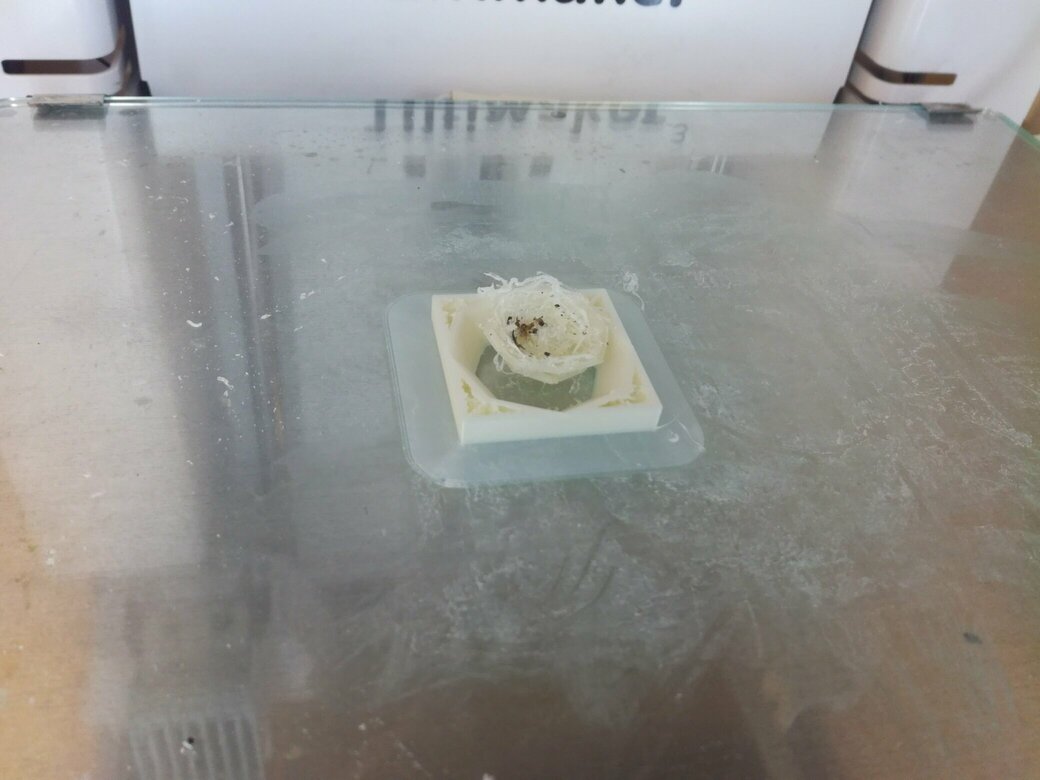
We only print PVA in the second nozzle of the ultimaker, so I ty to print with it but it was a failure.
I need to test others tools like Povray, or alternative to see if I can facilitate the processus.
Cr100 vs Ultimaker 3
Openscad parameter
$fn = 30cubeSizeParameter = 40
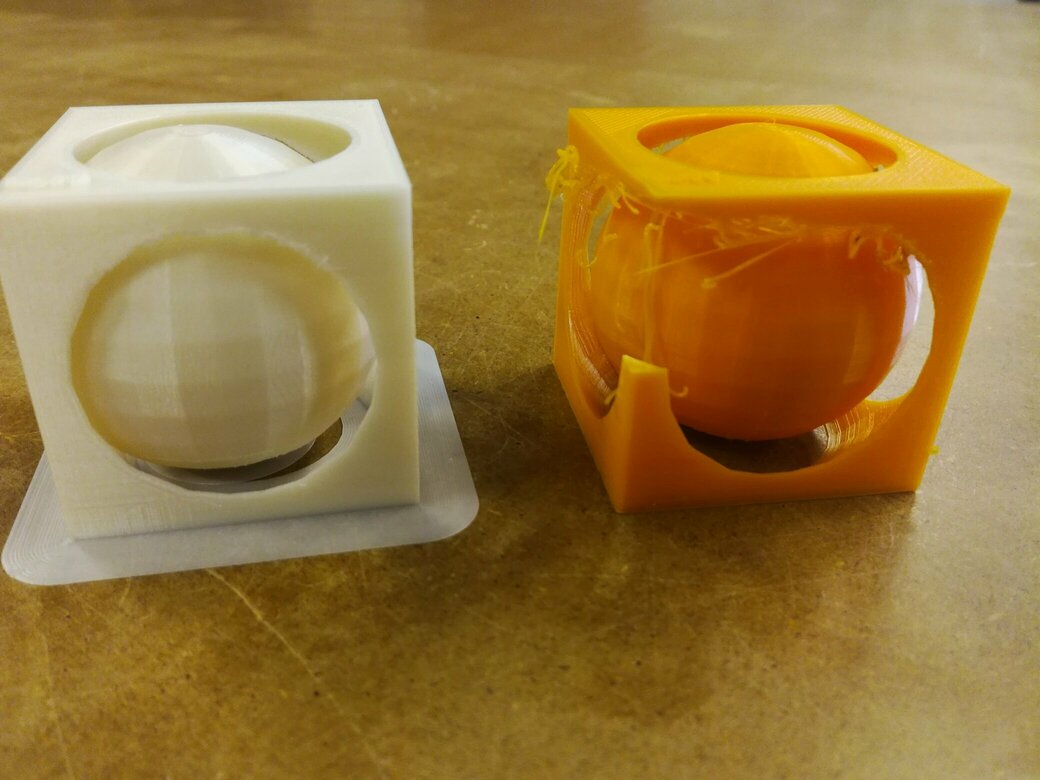
- The print time seems equal
- The spheres have the same quality
- Utilmaker have better management of constraints
Openscad file
Here you can download the Openscad file, or you can see the script file on the bottom:
// Configuration parameter
$fn = 30;
cubeSizeParameter = 40;

/*      Define colors, in openscad:
          rgb(R, G, B) = [ R/255, G/255, B/255 ] or "red"
          For more details go the official documentation
*/
colorCubeUser = [255/255, 255/255, 240/255];
colorSphereUser = "OrangeRed";

logoFile = "../images/UDEZ_logo_cutter_mini.png";

logoFile2 = "../images/udez_logo_2.dxf";

module logo(cubeSize= cubeSizeParameter) {
    translate([-3*cubeSize/8,-3*cubeSize/8,cubeSize/2+0.6])
    scale([0.1, 0.1, 0.01])
        surface(file=logoFile,center=true, invert=true);
}
// Modules
module cubeWithEmptySphere(insideCubeSphereRadius, cubeSize= cubeSizeParameter){

    difference() {
        union(){
        cube(cubeSize, center=true);
        logo();
    }
    sphere(insideCubeSphereRadius);

    }
}

module sphereBottomSquare(insideSphereRadius, cubeSize= cubeSizeParameter){
    difference() {
        sphere(insideSphereRadius);
        translate ([0,0,-cubeSize])
        cube([insideSphereRadius,insideSphereRadius,cubeSize], center=true);
    }
}


module captiveSphere(colorCube, colorSphere, cubeSize= cubeSizeParameter){

//  Inside calculated parameter
    gapBetweenSphereAndCube = cubeSize /10;
    insideSphereRadius = cubeSize/2 + gapBetweenSphereAndCube / 3;
    insideCubeSphereRadius = insideSphereRadius + gapBetweenSphereAndCube;

//  Render
    color(c=colorCube) cubeWithEmptySphere(insideCubeSphereRadius, cubeSize);
    color(c=colorSphere) sphereBottomSquare(insideSphereRadius, cubeSize);
}


// Final render
captiveSphere(colorCube=colorCubeUser, colorSphere=colorSphereUser);

//linear_extrude(height = 1, center = true, convexity = 10)
//		import(logoFile2);
Scanning
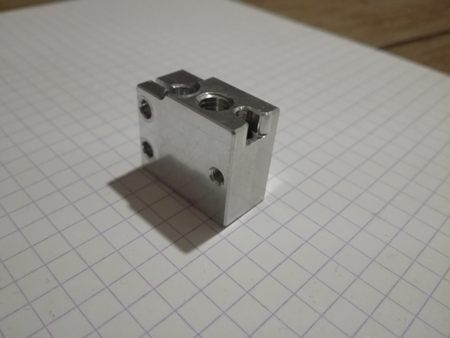
First try: scan the volcano extruder
For this assignment, I try to scanning a volcano extruder from E3D. I try to use VisualSFM without success, then I used the application SCANN3D. When you using the application, you are helped to take pictures. There is a little tutorial in the first to explain how to do it. I take 42 pictures but the result was to hudge, and to export you need to pay the application, so I didn't pay because I wasn't satisfied by the result (⚠️ I lost screenshot of renders). I think, the object will be hard to be scanned, because it's in aluminium, and I think the light is to reflected and it can't be scanned easly.
Meshroom scanning
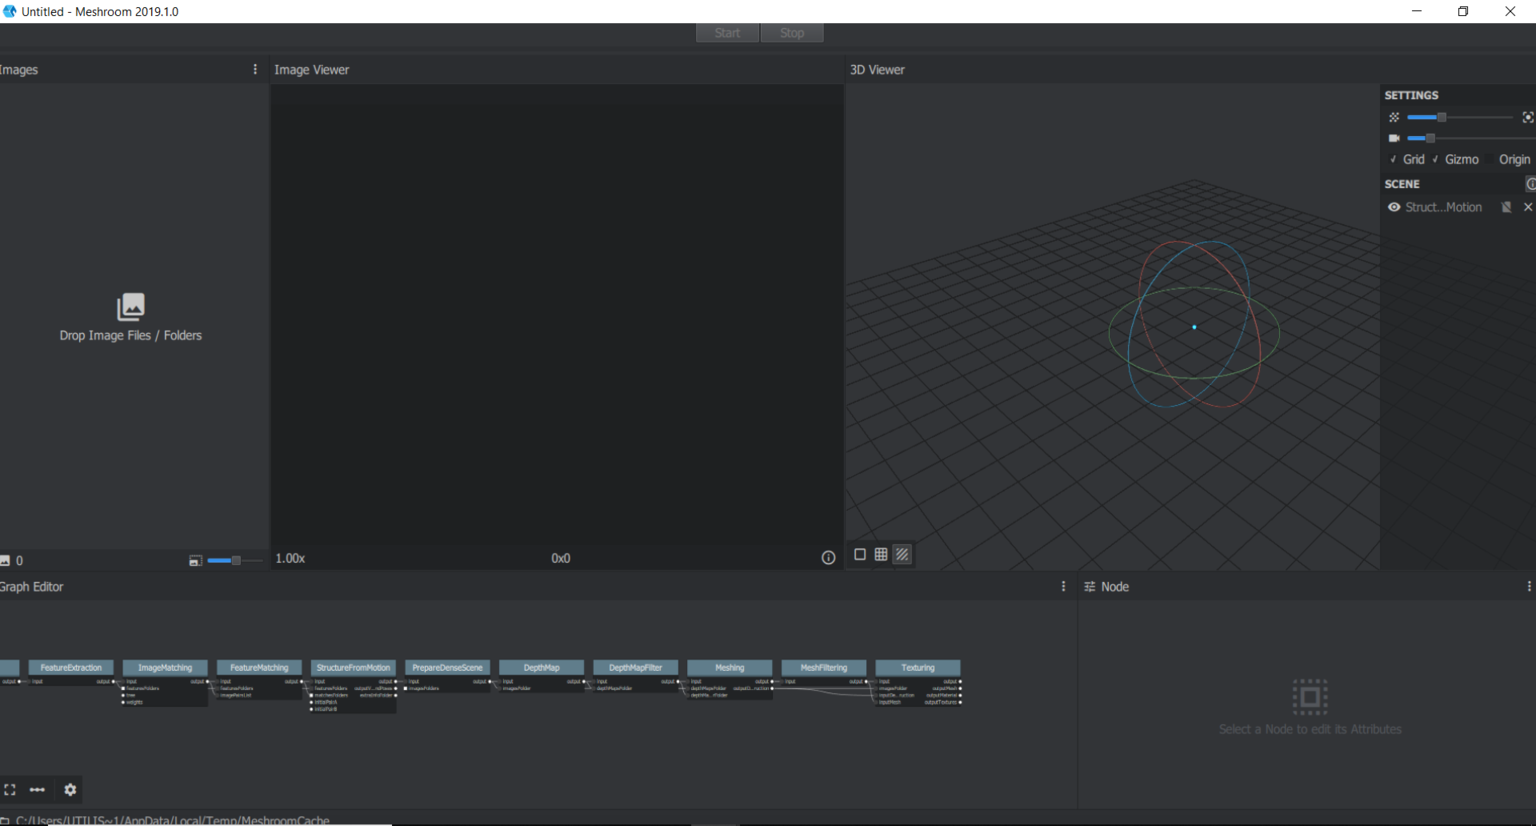
To validate, this week I tried to use meshroom, an open source photogrammetric software, he works a little bit like Mods, they are several module connectable on each of them, and they are many possible customization. Usually to use meshroom, you need to have NVIDIA GPU with Cuda installed. So I try to use it with my personnal computer, I try to understand the documentation about how to use it without cuda, Draft Meshing butit was not concluante I already have an error "No cuda founded".
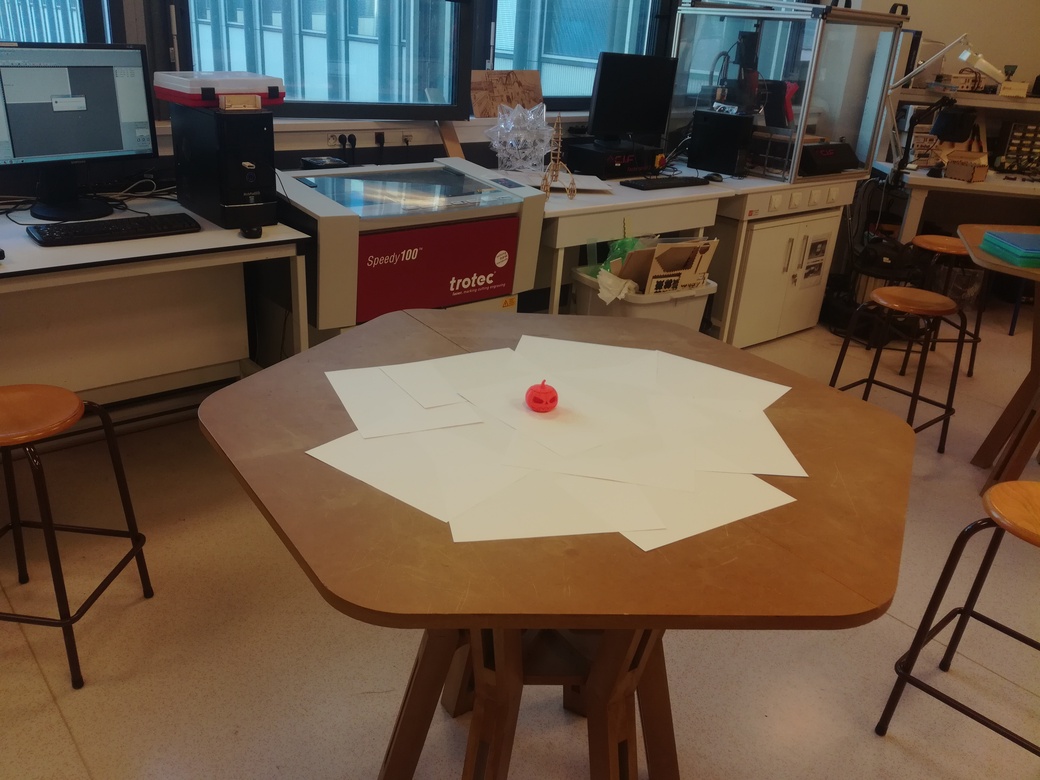
Then I took a a computer of a lab with NVDIA GPU and Cuda installed, and I decide to scan 3d printed pumpkin. Before to use the software, I placed the pumpkin in the center of table with some white papers around the scanned object. I turn arround the table and takes pictures from my smartphone in all angles and I upload pictures in the computer.
The first step is to upload pictures, when it was done I try to directly launch the Compute button, but it doesn't work, so I looked a video tutorial to know how it works and what is the best way to start.
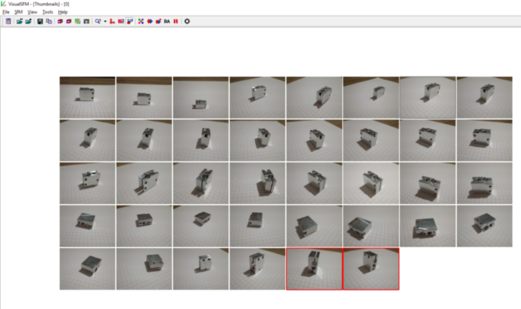
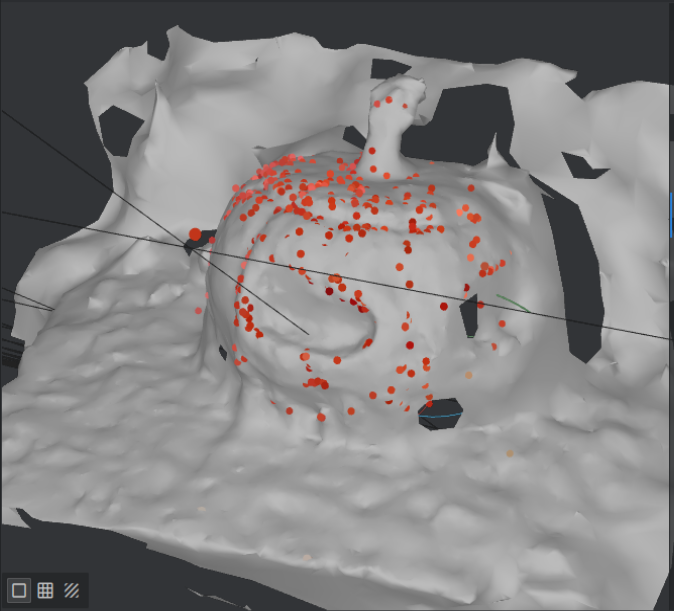
So from the video, I learn that I need to first compute StructureFromMotion, by right click in the module on the graph view and click on Compute. Then Meshroom, will generate differents maching points from all the pictures. Strangely from the 37 pictures that I give to meshroom, for this computation, he dectect similitude only on 20 pictures, so he recognize maching point only in one side, maybe I need to take more pictures in the future.
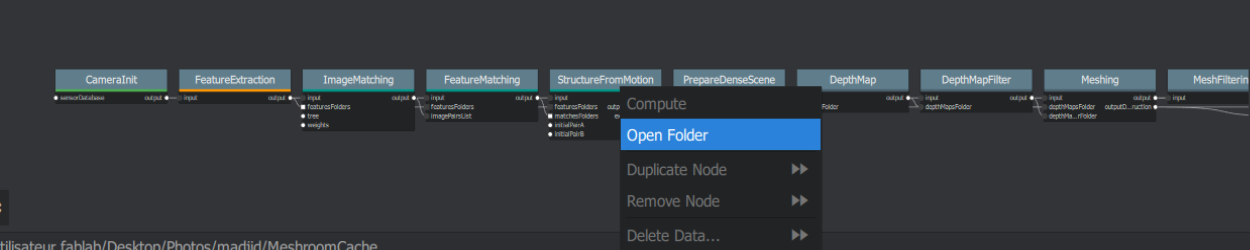

After this step, as StructureFromMotion, I need to compute Meshing and Texturing to have the result. Because of what I describe in the top, I have only a half of the renderer, but I found that really exciting, and I want to know more how to configure meshroom. Because for the exercise, I really stay simple. You can click the above screenshot renderer or download it just by clicking here for the obj file, and for texture click here.
I tried to make rendering of the object in the web browser, but it was too slow, so I remove it (even the library seems work in the demo example).
3DF Zephyr
- Install the free software version
- Workflow > New project
- Import less then 50 pictures
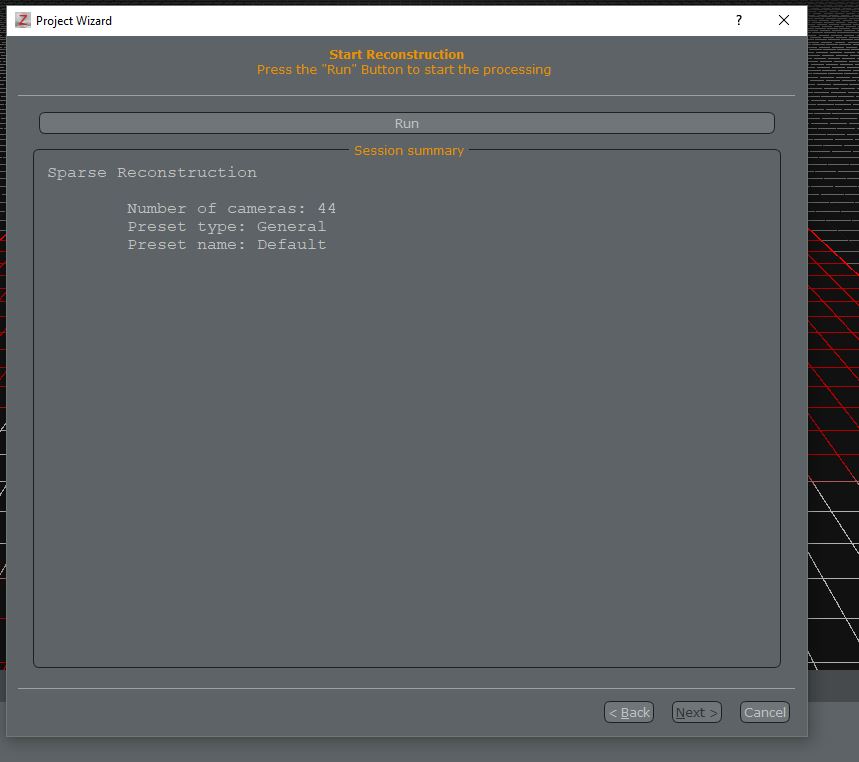
- Click on run
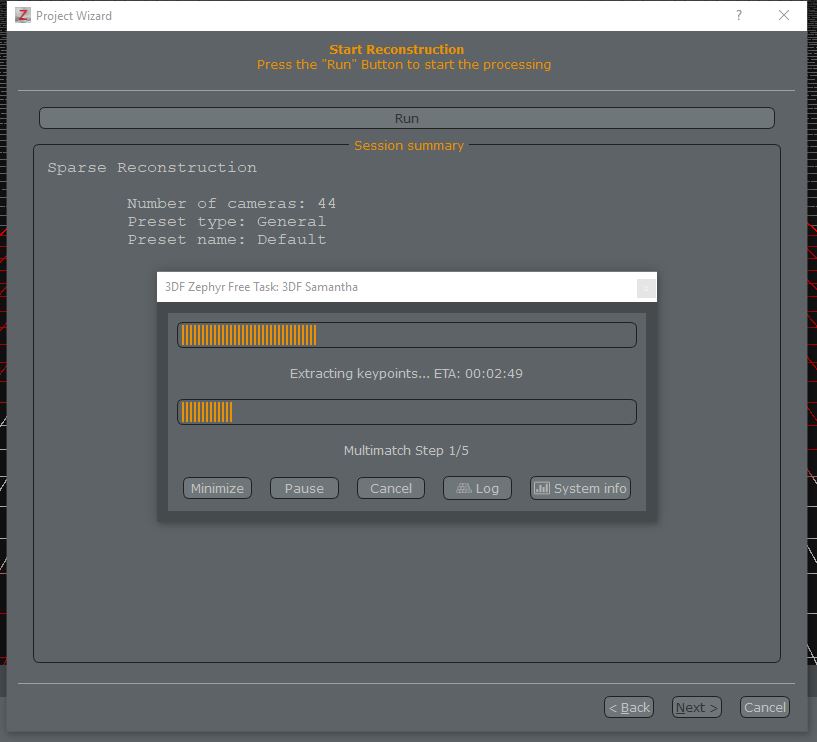
- With my free version, I did'nt get any relevent result, the software takes only 50 pictures, it's hard to find the good pictures that the software needed to made the scan.
Qlone
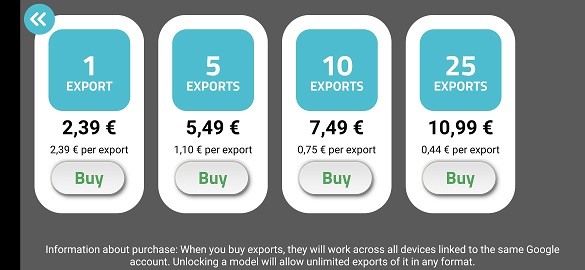
After all, I decide to use Qlone application for this exercise, the application use photogrammetry technology and it's freemium, that's mean it's free, but you have some paid features. So in the free version, you can only made the scanning in one time, when it's done you could'nt update/improve it and you can only export it to sketch fab as an object or as video. But if you want to export the obj, stl or ply file or improve the scanning, you need to upgrade to the premium version of the application. So here on the bottom, you can find the export prices. For this exercise, I will not paid, I will use the free version and export to sketchfab to show the result.
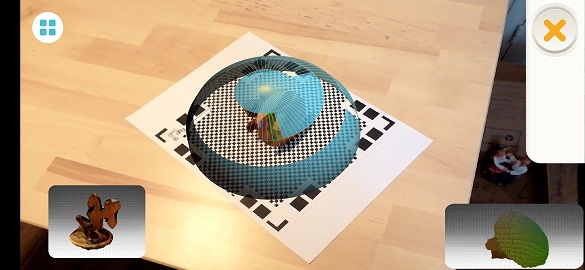
Before to start the scanning, you need to print the help scanning paper in the dimension that you prefer. In my case, I use standard A4 format. The bellow video of Qlone, explain all the functionnality and how the scan works.
First try
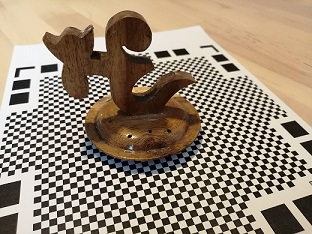
For the first try, I used a mini sculture maid by hand, I put it on the middle of the paper that I printed before. Then I start to follow the instruction of the application.
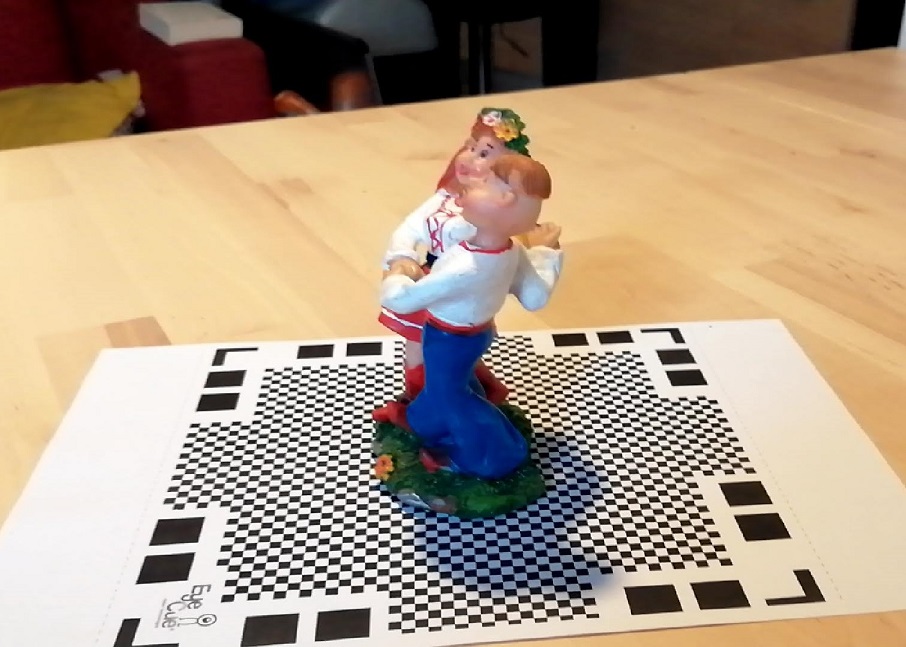
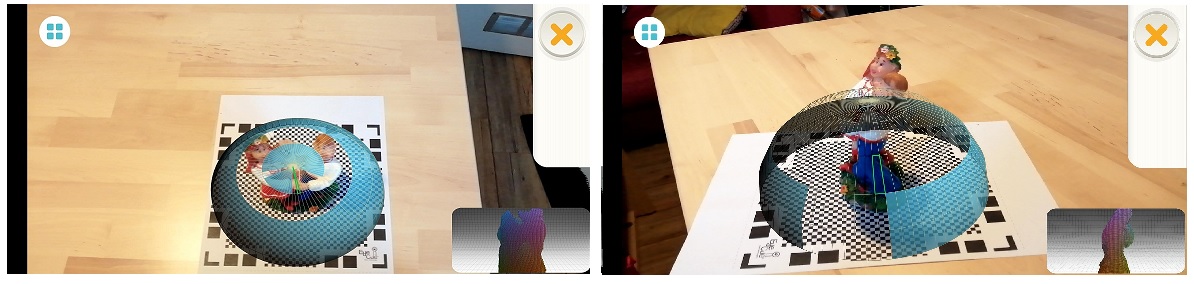
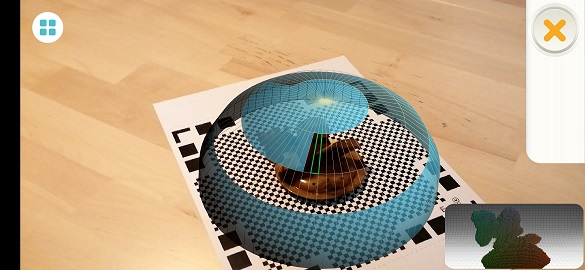
After the placement of the object to scan on the paper, there is a record button on the left of the screen and sphere all around the scanned object. So the goal, is to capture all the square of the sphere. To do that, you need to turn around the object or to turn the paper, the direction hasn't importance, all you need is to capture all squares of the sphere. So I clicked on the record button to start the process.
Then after I scanned all the object, the application need some time to process and to get the result. There is two steps it takes a minimum of 2 or 3 minutes to compute the result. I didn't think that they use the smartphone to compute the result, the smartphone does'nt overheat, so I suppose they use web api to compute the result.
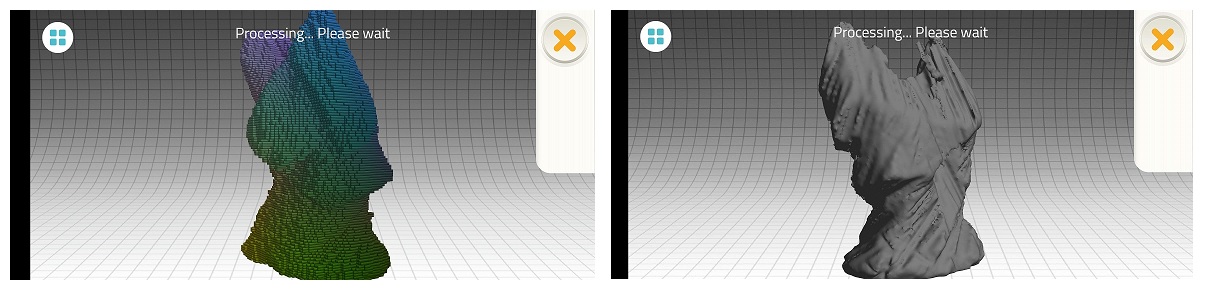
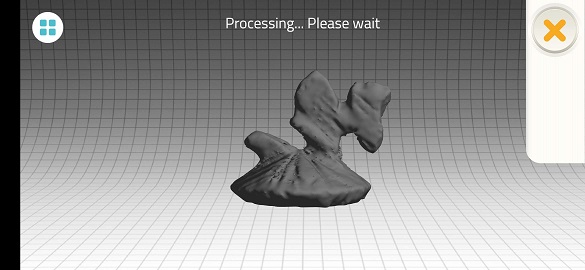
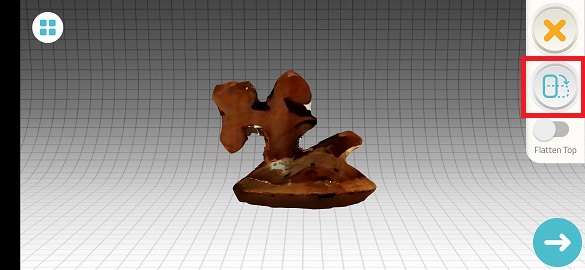
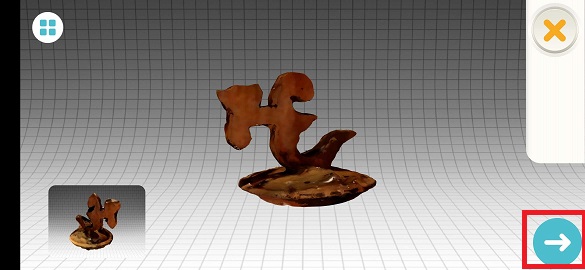
The result was not relevant, too many imprecisions, I think the object is may be to complexe for the free version. For the curiosity, I tried to see what is the flatten top option, I suppose that it is for the objects with flatten top, that it is not my case, but let see.
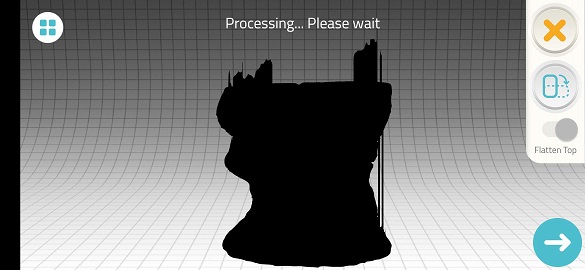
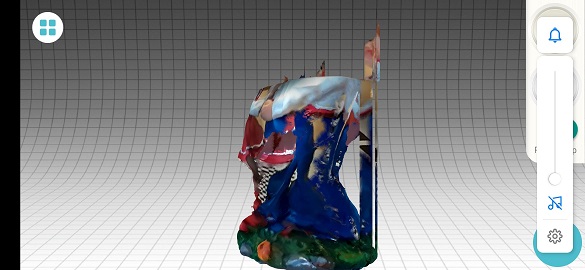
As you can see the result is worst the first rendering exported on sketchfab, you can see the rendering just here:
Second try
So, for the second try I take one more simple object for the scanning. Like I describe on the top, I made the process to begin the scan.
The result is good, but it's not enought good with details, so I decide to test the option reverse object. The goal of this option is to improve the scan, all the need is to rotate the object, and making the same process, and then the application will compute the two results.
The last result is pretty cool, and I'm happy with it, I think it could be more precise if I paid the application and make some retouch on the model, but this result is pretty cool, the two position help the application to be more precise, and getting better rendering. So to save the model, all need is to click on the blue button. And the the model is on the gallery, and it can be exported.
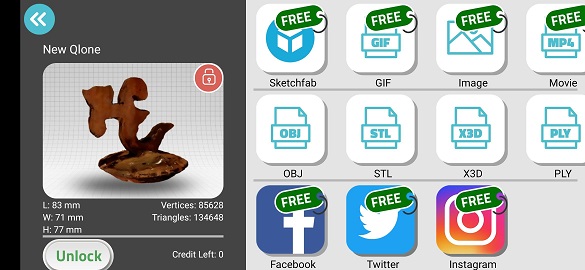
So, here you can find the result of the 3D scanning of the second try: