18. Wildcard week
So happy to have Wildcard Week! And then Neil said the word “textiles”!
Assignment
Our assignment for this week is to incorporate textiles and electronics.
~~Make a garment or other wearable that includes something you have learned about electronics.~~
Brainstorm and Draw
For my assignment, I will create a wearable for my standard 14” babydoll for whom I have made some furniture.
I started by drawing the 14” babydoll shirt. It looks like this:
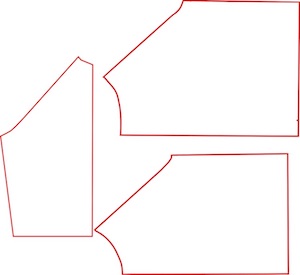
To size it for your doll, use the chest dimension. Leave two inches for stretch material. Less if you will leave the back open or use an easy closure such as velcro.
File with fold File without fold
Cut and Sew
This takes about 1/3 yard of fabric.
The shirt piece with the lower neck line is the front.
I originally thought to cut the front piece and sleeves on a fold but when I set it up in the laser cutter, I realized how much trouble that would be. I redrew the pattern for no-folds. Now it looks like this:
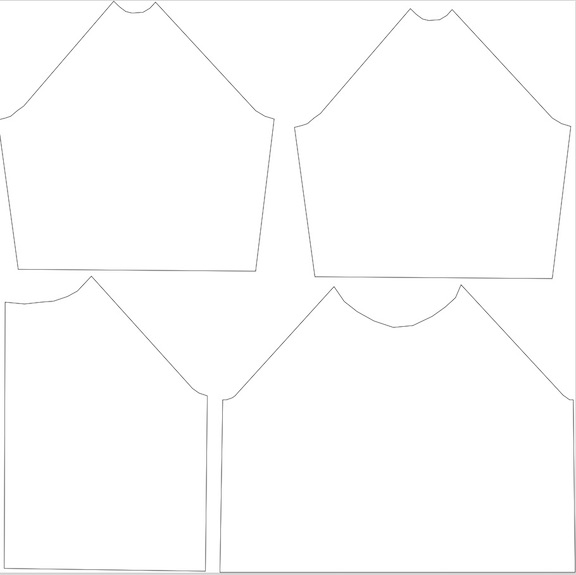
This was much easier!
After I cut out the sample from a cotton tea towel, I saw that the sleeve was too long. I shortened it by a bit more than an inch.
The pattern assumes 1/4” margins.
Turn the rough edges to the inside and zigzag them down. (Or you can use a pretty stitch, too.)
Sew velcro pieces on the backs so that you don’t have to put the shirt over the doll’s head. Alternatively, you can put big hook and eye closers in the back and not worry about it being open. Or sew buttons and make loop closers. If you are a button hole kind of seamstress, go for it!
– Final Fabric –
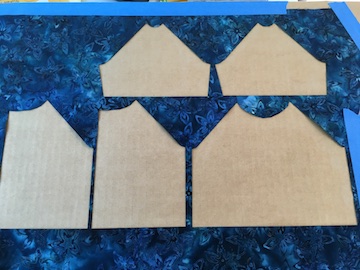
I mounted the beautiful blue batik cotton fabric on a piece of cardboard for the trotec laser cutter. I have a special setting for cotton at low power (60) and high speed (6). It came out perfect!
To sew the shirt:
- with wrong sides facing each other, sew the sleeves to the front piece starting at the shoulder.
- Sew the two back pieces to the other side of each sleeve.
- press 1/4” of the neckline under and stitch it down.
- Press 1/4” hem on each sleeve and stitch
- fold the shirt inside out and stitch each side together and all the way down the arm.
- fold 1/4” along the entire hem and stitch
- fold 1/4” on each back piece. Stitch velcro to each side.
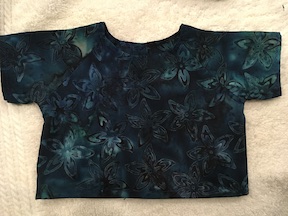
Sewn together, it looks like this:
LED Sew-On Additions
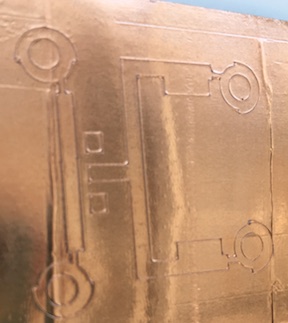
I created a coppertape outline for the vinyl cutter like this:

I stuck it onto an oval piece of cardboard-backed fabric and soldered on the LED and a small resistor. (Notice that I used the same blue batik so that the electronic pieces would blend in a bit.)
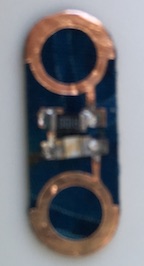
I made another outline for the vinyl cutter for the 3V battery holder.
To cut this copper tape on the viny cutter: Speed = 10, Force = 30.

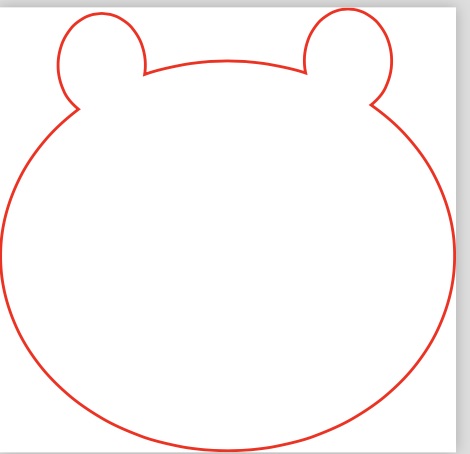
And put it on this bear-face shaped cardboard-backed fabric piece.
Here is the batterypad waiting to have the 3V battery holder soldered on.

Even though the copper tape was cut on the vinyl cutter exactly as I drew it, I thought the sides of the circles could use some extra copper. That’s why they look so messy now. :/
Sew on the LED and battery attachment
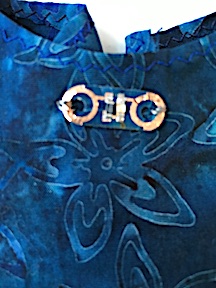
I got some conductive thread and used it to attach the ledpad to the front of the babydoll shirt and connect to the batterypack. It looks like this:


Revisions for next time
The 3V battery holder attachment that I made was much too heavy for the babydoll shirt. It kept dragging the shirt down off of the babydoll’s neck. I decided to put it in a small pocket instead. This means that the light is on when the battery is in the pocket but off when the battery is taken out of the pocket. I’m not really satisfied with it because of my concern that the battery is: 1) too heavy for the shirt and 2) not safe around small children.
Files: