10. Molding and casting
Assignment
Group assignment:
~~Review the safety data sheets for each of your molding and casting materials~~ ~~Make and compare test casts with each of them~~
Individual assignment:
~~Design a 3D mould around the stock and tooling that you’ll be using, mill it (rough cut + (at least) three-axis finish cut), and use it to cast parts.~~
Molding
This week I worked on various kinds of molding. I have done molds before, including sand casting, for art projects. My father made and used many molds for his hobby: making chocolate.
I experimented with several types of mold procedures (using equipment we have in our Lab and in the middle school lab) to learn about them.
1. Vacuum Mold Making
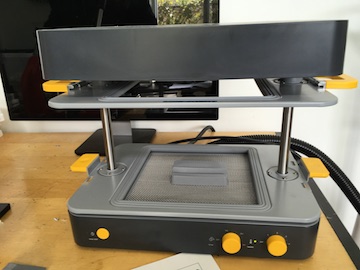
We have a vacuum molding apparatus at the middle school: Mayku by Formbox. Miguel and I went there to learn how to use the machine, make some sample molds, and debug (improve) the Instruction Sheet created for students.
The machine can make limited size (150mm x 150mm with a maximum draw depth of 130mm) molds.
It operates by heating a sheet of plastic that is then forced down onto the mold shape and the vacuum (just an ordinary small ShopVac) sucks the air out from under the plastic. It takes just a moment for the whole thing to cool down.
Instructions
.1. Put your object on the platform.
.2. Put the sheet of plastic on top of your object on the platform.
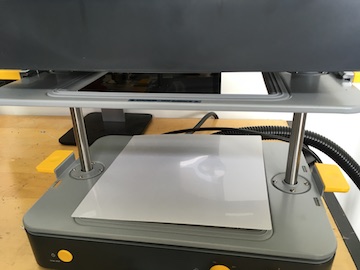
.3. Raise the plastic sheet to the top, turn on the heat (to 3 or 4) and the timer (to about 3 minutes).
.4. When it is hot enough to bow, lower it down onto the shape. The vacuum will turn on and suck the air out. (It’s easier to see with the clear plastic.)
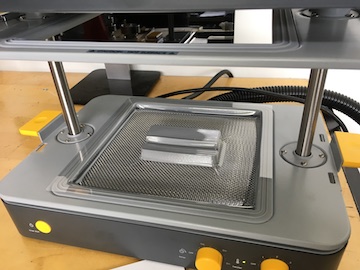
.5. When it is cool, you can remove it from the platform.
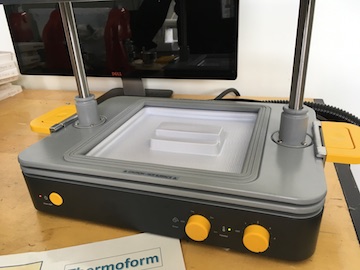
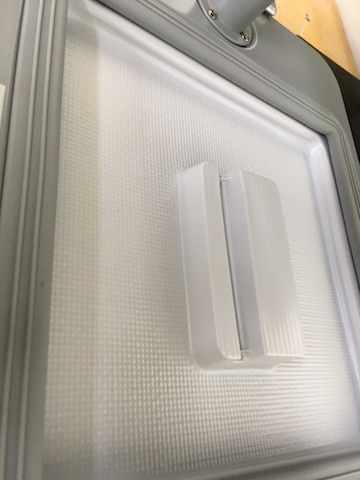
Super easy!!!!
2. Molding
Oomoo is a silicone rubber compound that looks really easy and fun to use. I like that it has a 1:1 volume mix ratio – cuts down on math errors – and it has a blue compound to mix with a pink compound to make a lovely purple color. That it will make a flexible mold will make it so much easier to release the form from the mold.
Miguel and I are pretty excited about making a foosball table. We want to make the figures on the table to look like “knights” because our school mascot is a knight (Go Milken Knights!).
Making the First Foosknight
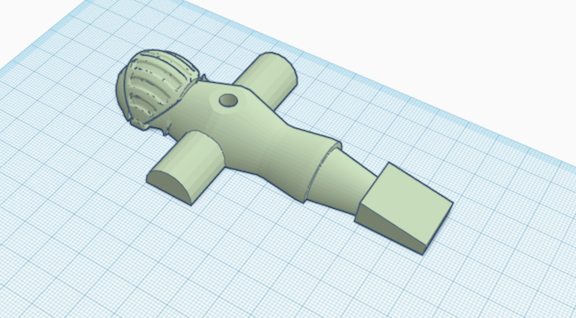
We need to locate a figurine to mold. They are all over eBay but we decided to make our own. I found a knight on Thingiverse designed by Toshiyuki Ishibashi.
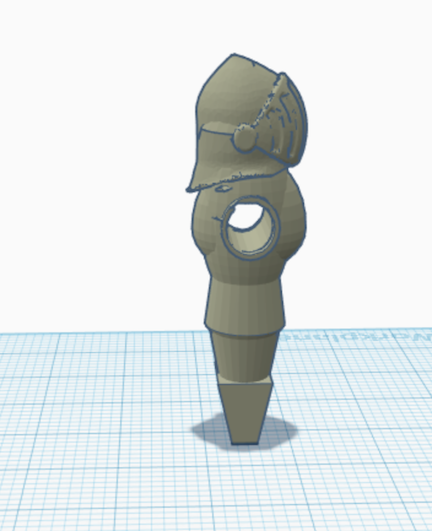
I cut his head off

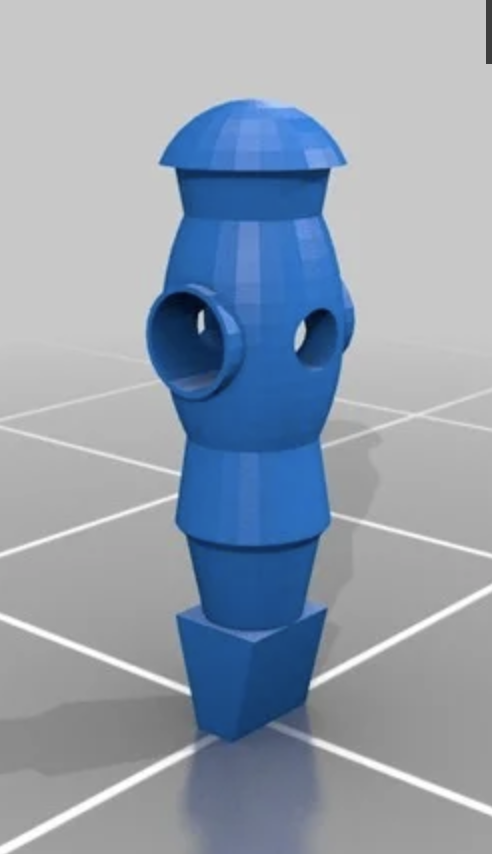
and attached it to the body of a androgenous foosball person I also found on Thingiverse. This was designed by d’Armond.
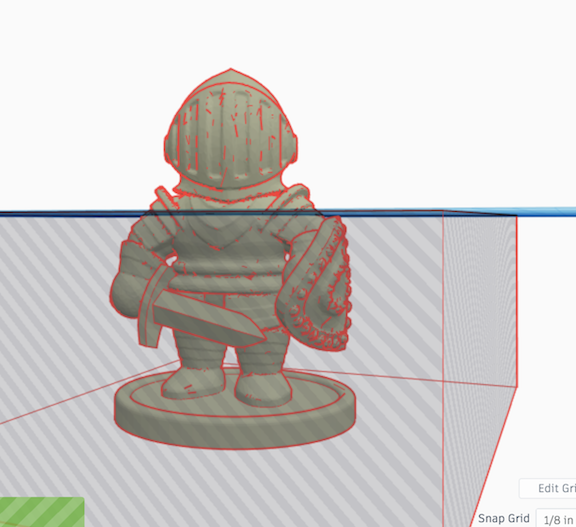
Then I cut him in half to make the front side and back side.
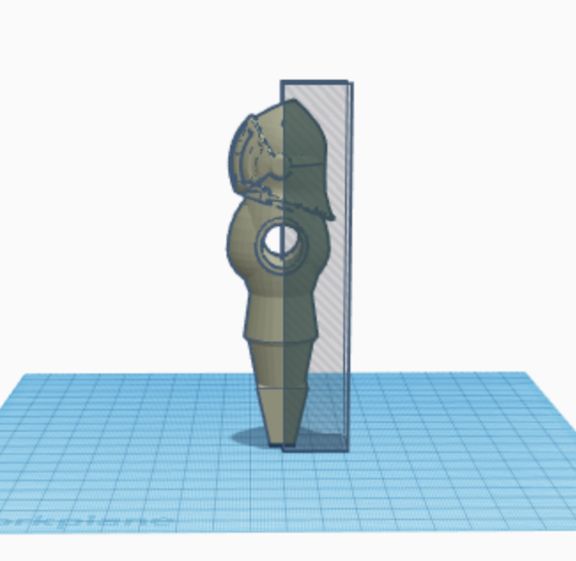
I laid the two side-by-side for the mold. If you look closely, you can see some errors from the Tinkercad tinkering. I’m thinking I should use the dremel to sand them smooth before we use the mold materials.
stl file link to my Tinkercad file
Using Ooomoo
When we went to use the Oomoo yesterday afternoon, we discovered that the yellow part was solid! We were able to mix the blue part but not the yellow. This makes sense, I suppose, because all of the supplies for our Lab were purchased nearly 3 years ago…and then no one ever used them…so that the Oomoo was past its useable life makes alot of sense. We’re replacing the Oomoo and will get a chance to do our mold as soon as it arrives from Amazon.
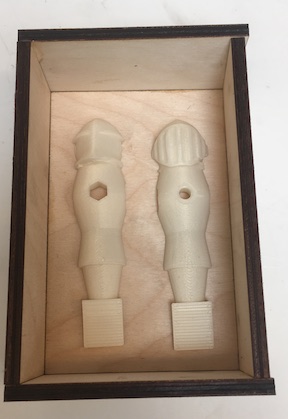
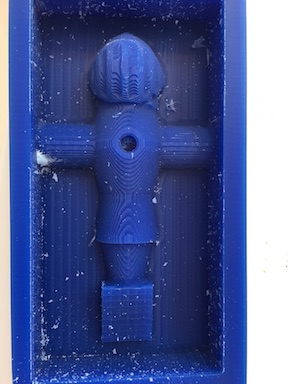
–Two days later – Today we had an opportunity to use our foosmen (foos-Knights) in a mold. We put the 3D printed FoosKnights in a box we made (from 6mm baltic birch plywood–glued together so it’s a one-use sorta box) and poured the Oomoo all around. We were concerned about the part in the middle that must stay empty for the rod.
The Bother of Bubbles
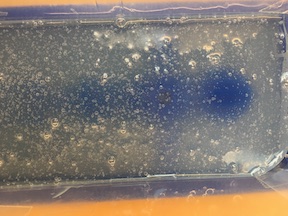
We did not experience much bubbling in this mold. Bubbles are typically due to moisture, according to the SmoothOn website. We had brand new Oomoo so it had not been exposed to opening and closing the lid repeatedly. We also have a sealed off room with constant airflow that eliminates the issue of moisture that may typically be in a classroom.
Before using the Oomoo, we watched this video that explains how to pour the mold mixture so as to eliminate bubbles. He demonstrates in the video that if you pour a long, thin, flat stream of goo, the air bubbles “tear open”. He says not to pour all over, but keep pouring in one place and let the goo flow into all of the places of the mold.
Last, from my earlier experience with molds (my father was a chocolatier), I slapped the bottom of the mold box down on the table a few times. The slapping has to be hard enough to jolt any of the left over bubbles on the surface but not so hard as to damage the mold box.
The Cure
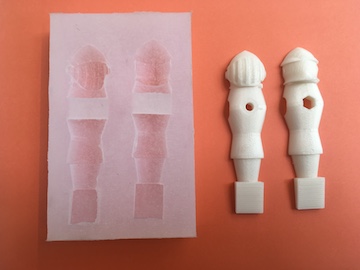
It took 4 hours to cure and then we took them out of the mold. We had to cut that place for the rod out on one side but it’s still connected on the other side so we think it will flop down back into place when we need it.
Here are the pictures:
You can find out about Oomoo here.
We followed the instructions in this video from SmoothOn
3. Machinable Wax and the Roland SRM-20 machine
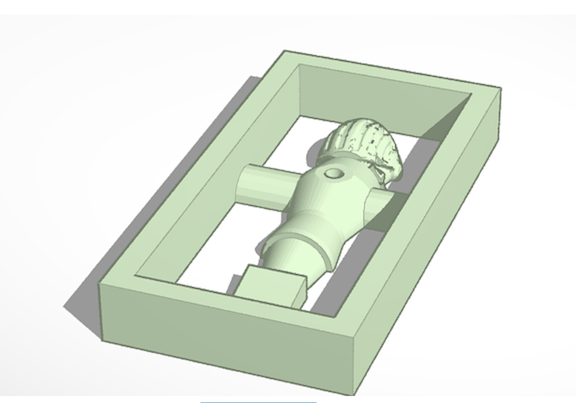
Since we already had the foosKnight file, I just had to make a minor change to it to get it ready for the millable was. I put a rod through the back to ensure that space would be negative so that the foosKnight fits onto the rod.
Then I put a box around him to hold the Oomoo mold material.
I downloaded that new stl file.
Then loaded the stl file into the Roland SRM-20 software (Modela Player 4). I bought some new endmills for the machine that are specific to this kind of milling. I set up the “rough cut” for the Standard End Mills SRB032 (.032”) that just arrived from Carbide Depot. When I put in the first parameter, the software added the rest of the parameters for this round end mill. It’s .11 inches in diameter and a good tool for the rough cut of the foosKnight. It’s pretty big so it will get through the empty space quickly, but not so big that it will leave alot for the finishing bit to do.
I set up the millable wax block with doublesticky tape on top of my sacrificial plexi piece. (I’m pretty sure that I will never be able to pry that plexi off of the surface of the Roland Mill table.) Then I set up the X and Y Origin point about a quarter inch away from the top and the side of the blue block. The FoosKnight should snuggle right in the middle of the 3” wide wax block this way so he will have sides around him to create the mold. It turns out that the wax block and the foosKnight were made for each other.
I know I need a fine end mill for the “finishing” cuts so I chose the .032” ball end. I registered it in Modela with new parameters for millable wax that Modela provided.
The SRM-20 set up for millable wax is the same as using it to mill the pcb boards. Create Origin points (X, Y and Z) for the end mill and click on the Cut button.
Create the tool paths
This process is straight-forward using Modela (although it is alot of steps)
- Save your file as .stl
- Open it in Modela software File –> Open
- Then Set –> Model
- In “Size and Orientation” Turn your model in the direction required for your millable wax block (I had to turn mine sideways at 90 degrees). Make note of the x y and z coordinates. It tells you how big Modela thinks your model is. the next tab is Origin. Click the left front of the box. (The circle closest to you.) We need this when we set Origin on the SRM-20.
- Click OK and go to the next process Modeling Form.
- Look at your margins. If they are fine, just go with “Automatic”. I had to adjust mine so that a box would be created around the foosKnight. I set the top margins to 0 and the side margins to 1/4”. Because I had to turn my model, the top and side margins are inverted.
- The next tab is depth. Make sure it looks correct based on the depth of your model.
- Don’t adjust the next tab (Slope) unless there is some reason that you want a sloped wall in your model.
- Check the next tab (Cutting Area) to make sure it is smaller than your brick of millable wax.
- Click “OK” to go to the next step - creating a New Process. This is your milling process so pay attention.
- You can “Surface” your millable wax – make sure the top is level – using a big, flat end mill.
- Then you create the “roughing” process. Click “next” and select a Top down cutting approach.
- On the next screen you will choose your end mill. I created new ones for the new end mills I bought. I’m using the Standard End Mill SRF 125. It’s .125” in diameter (or 3.18mm).
- Click through the “next” buttons to check the cutting area. Be sure your entire model is inside. The start height should be zero and the end height should be the depth of your model.
- Choose “Contour Lines” and “Down Cut”.
- The next screen should be setting the cutting parameters. If you chose everything correctly up until now, you should not have to change anything here. It just took the settings you have given it for your model and your end mill.
- Click “next” for the final screen. The name should be “Roughing” and some number (Roughing3). Be sure that “Right Now” is check and click “Finish”.
- Now you should be on a screen that shows your model on the left and the order of your cutting on the right in a list. Note that if you need to chicken out right now, you can highlight your cutting processes and click on the X for “Delete”. Otherwise, if you click on the icon that shows an end mill cutting in the lower righthand side of this screen, you can begin the process.
- You will go through this same process to create a “Finishing” process with a smaller endmill. If you want to see your Roughing product before creating your Finishing process, that’s fine. After Roughing, the machine will stop for you to change out the end mill, so you can vacuum up all of the wax shavings and take a good look at your model following Roughing.
Click on the wavy lines icon for creating the tool path and the software does it for you. When you are ready to begin, click on the “Cut” button.
This is what the foosKnight toolpath looked like in the software.

The Roland did a great job on our Brave FoosKnight positive! I can’t say exactly how long it took for the whole thing. It was close to 5 hours.
Make the Negative and then the Positive
We went through the same process with Oomoo and made a negative mold from the milled wax. You can see some bubbles on the top of this mold but they will not cause any problems with our positive. This was the second time these jars of Oomoo have been used so it is more likely that moisture has gotten into the mixture.
We built a box that holds the negative mold and a rod that will go through the middle of all of the fooKnights. It’s a clamp-together box so we can use it many more times.
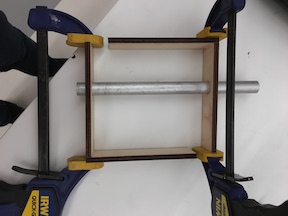
Then we used the Smooth On epoxy to make the positive. The epoxy has that same 1:1 volume ratio. We used a disposable plastic cup and stir rod to mix the two parts together so we didn’t have to worry about washing anything. We left him to cure over the weekend. The instructions suggest a 24 hour cure time.
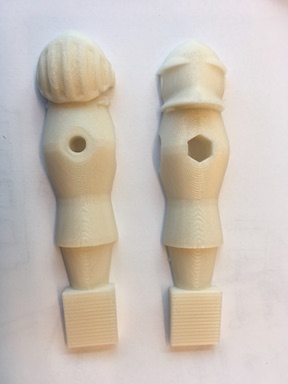
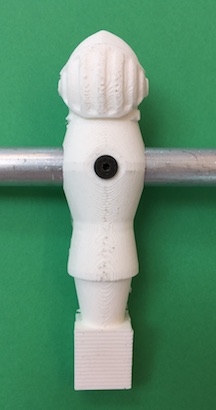
This is a picture of the foosKnight in the mold with the rod going through him. My original idea was to cast the foosKnights directly onto the rod so we would not need to screw them tight onto the rod, but my research showed that the screw is necessary anyway to keep them from slipping around.
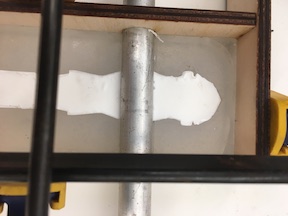
He looks great! (Notice the hole in his chest for the screw.)

Assemble the Brave FoosKnight on the Rod
I rubberbanded the FoosKnight onto a rod and drilled a hole all the way through the rod.
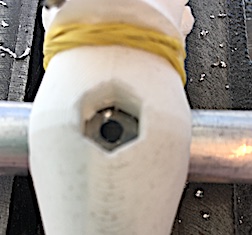
I stuffed the hole in the back with a nut precisely the correct size: 8.6mm
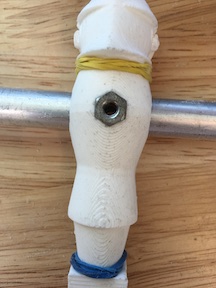
I applied acrylic glue front and back and clamped the foosknight onto a test rod.
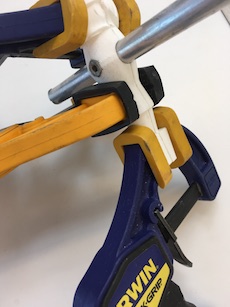
When the glue was dry, I screwed the button screw into the front.
Hero Picture
MSDS
The material source data sheet for Oomoo (link below) says that there is nothing hazardous in it. Only normal safety precautions are necessary when using this product: Wash your hands before and after use. Don’t ingest it. Don’t put it in your eyes. Don’t let small children use it.
What I wanted to know, that I did not see on the MSDS, was if I can use it to make lollipops. I thought the kids would like to have knight-head lollipops. But Oomoo is not suitable for that use according to the SmoothOn website. They recommend their Smooth Sil 940 for food.