6. 3D Scanning and printing
Learning outcomes 1. ~~Identify the advantages and limitations of 3D printing and scanning technology~~ 2. ~~Apply design methods and production processes to show your understanding.~~
Have you
- ~~Described what you learned by testing the 3D printers~~
- ~~Shown how you designed and made your object and explained why it could not be made subtractively~~
- ~~Scanned an object~~
- ~~Outlined problems and how you fixed them~~
- ~~Included your design files and ‘hero shot’ photos of the final object~~ and the scan
Our Experiences with 3D printing and scanning: Advantages and Disadvantages
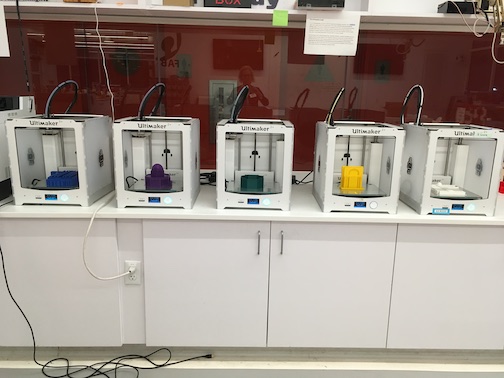
We do quite a bit of 3D printing here. We have 5 Ultimaker 2+ machines, a Prusa i3, and a Stratasys Connex machine.
Disadvantages: We have struggled to find the right kind of filament for the Ultimakers but I think we might have it now with MatterHackers. We have also struggled with the nozzles but I have found a work-around quite by accident. I have only been here since August and I found the Lab was disorganized. Therefore, when I just recently located the boxes and boxes of extra nozzles in the back of a cupboard in a brown box that was not labeled, I wasn’t really surprised. All of the .4 nozzles were missing but all of the .6 nozzles were there in their boxes, brand new. So, I installed the .6 nozzles but did not change the instructions for the slicing software (We use Simplify3D) so the students sliced for .4 nozzles and printed with .6 nozzles and their prints came out awesome!!!
The 3D printers are not easy to repair so we must typically use an outside service. This creates expense for the Lab and makes it nearly impossible (still) for an average person to have a 3D printer and use it successfully at home. The new Prusa, for example, is a terrific machine but it is finicky. When it breaks, it requires many hours of youtube education.
Advantages: When the printers are working, they are a great design tool with easy-to-learn software. They help our students think three dimensionally. As additive constructors, they help the student visualize the “slice” approach to building.
We also have a few scanners including iSense (that attach to an iPad) and an Einscan with a rotating platform. In the next month or so, I will also have a Prusa 3D printer. A student convinced me that it and its software will be better for a student Lab.
More Advantages: Here are our Ultimakers. They are great work-horses. This is Dr. Lichti’s Art & Architecture class projects. They are making interior and exterior models of some of the World’s sacred spaces such as the Dome of the Rock and the Church of the Holy Sepulcher.
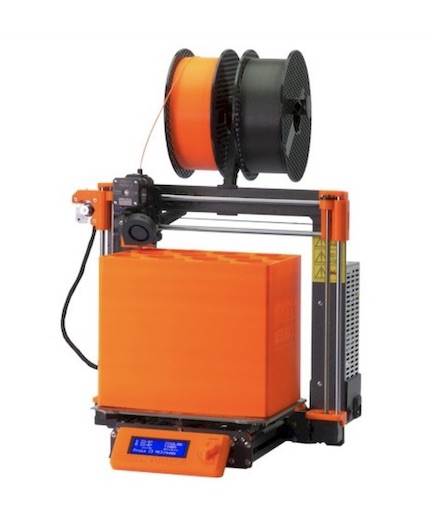
This is the Prusa_i3 I just bought. I think it’s a good idea for students to have experience on different machines so they are not intimidated when they get to college (or whereever) and see a different machine. A 3D printer should be their friend regardless of what kind it is.
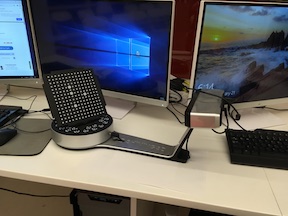
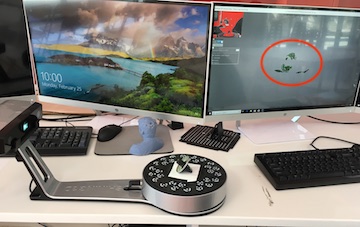
This is the Einscan scanner. It has a rotating platform. An advantage of the scanner is that it would be easier to replicate existing models with a scan of them. One disadvantage is that the affordable technology isn’t that good yet. As you will read below, when I tried to scan something I needed to replicate, I could not scan it because it is black. The scanner apparently doesn’t see black well.
Software What We Use
I teach Tinkercad here at my high school. I teach it because it satisfies my 4 rules:
- It’s free
- It’s online so portable
- It’s super-easy to use. I can teach you the basics in 10-20 minutes
- and it will do about 75% of what you will ever need
I admit that it has limitations regarding complexity but most of us will never need something that complex. Most of us just want to make a small gadget, create a simple design, or complete a school project. When your designs get too complex for Tinkercad, we have OnShape and FreeCAD. There is little end to 3D rendering software.
We use Simplify3d to splice. It was here when I got here but we are looking at other software. The advantage to Simplify is that it is flexible. It has many choices and many opportunities to change and experiment with settings.
The disadvantage is that it has many choices. When students start playing with the settings, not knowing what the settings mean or what they will do, they waste time and materials on failed prints.
The Ultimakers came with Cura. The advantage to this software is that it is pretty much foolproof. Just adjust extruder nozzle size (it defaults to .4mm nozzle but we are using .6mm) and go. I like this for our students who will probably just make one or two models while they are here for the anatomy class. The disadvantage to this software is that it is only for the Ultimaker printers. It’s not portable to the Prusa.
Our Assignment
individual assignment: - design and 3D print an object (small, few cm, limited by printer time) that could not be made subtractively
A woman from our alumni community showed me her old (not antique, just old) stove knob. She said she’s been driving around with it in her car for about a year, looking for a solution. In the meantime, she cannot use her stove.
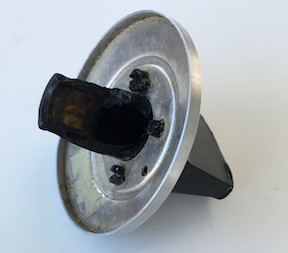
It looks like the plastic snapped after years of use. I said “We can make you a new one!” and in that moment I knew I had my individual assignment for this week. It looked like it would be easy to recreate. I didn’t take many screen shots but this is what I have.
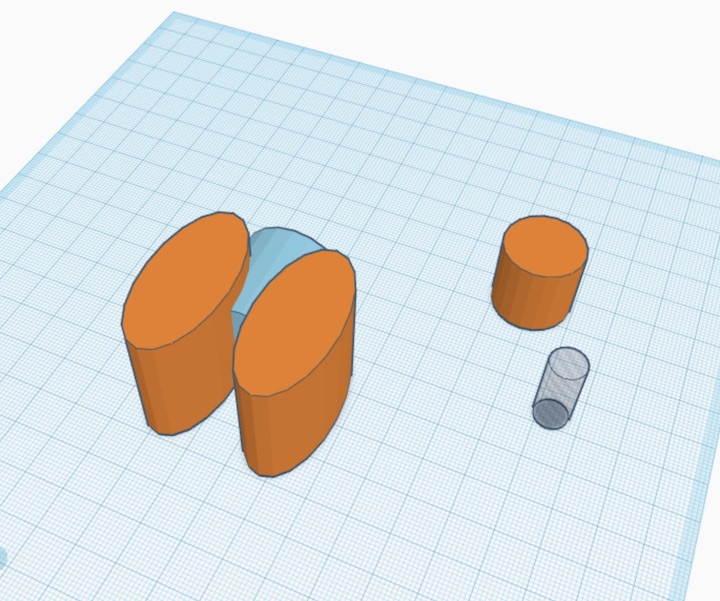
Early
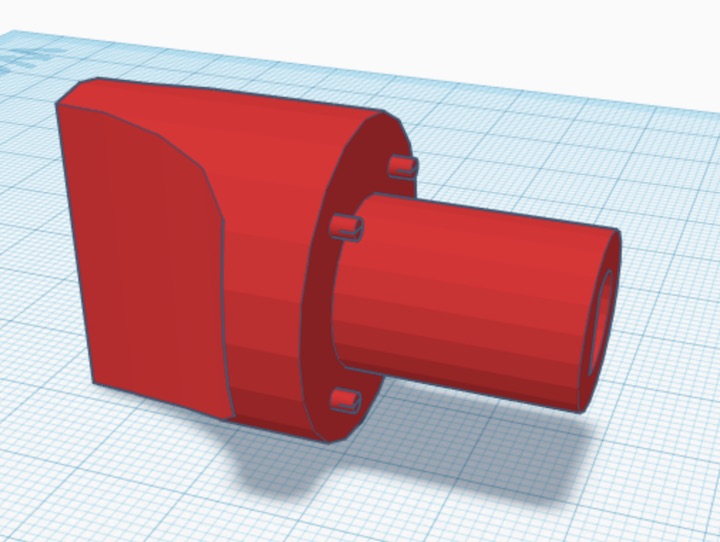
After some work
And the final
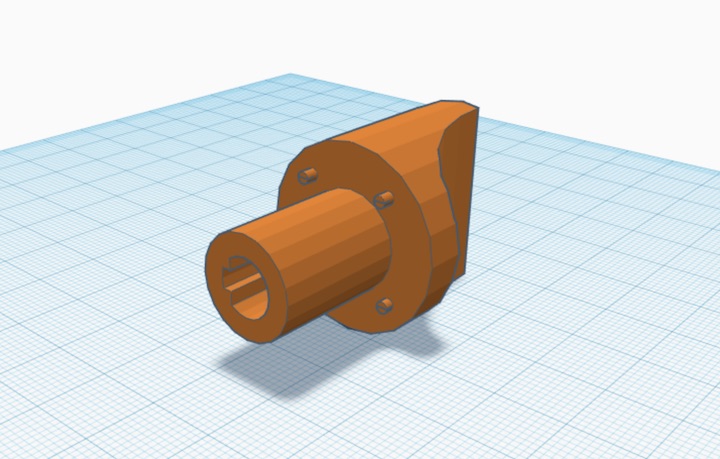
This object could not have been built subtractively because of its intricacies on all of its sides. It also has a hollow space in the stem.
We tried to scan the knob but our Einscan did not appreciate the black knob. If you look at the red oval in the picture, you will see that the scanner only picked up the part of the knob that is silver.
After the knob was rebuilt, I 3D printed it in white filament and then the scanner worked. See below.
Individual Assignment Printer Details
Nozzle: I used a 0.6mm nozzle, sliced for a .4mm nozzle, and printed with MatterHacker PLA. Primary Layer height: .25 Top and Bottom Solid Layers: 3 Wall thickness: 2 Infill: 15% Nozzle temperature: 210 Build plate: 60 Filament Diameter: 3mm Flow: 100% Print speed: 60mm/s Travel speed: 100mm/s Support: on Build plate adhesion: We typically use a brim unless I’m concerned about the model sticking to the plate, such as very small models or those with “feet”. In this case, I used a raft so that the support would have something stable to stick to.
Second project
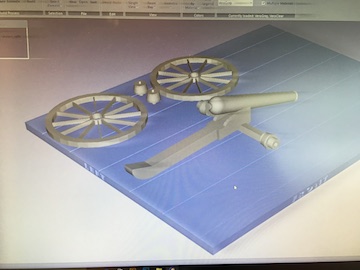
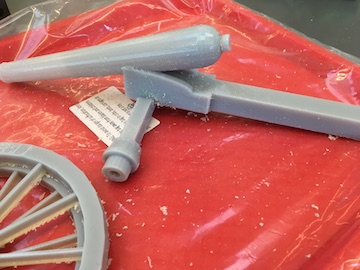
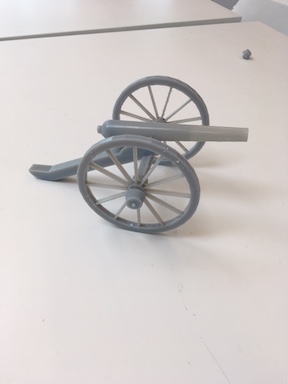
The Prop Master from our Theater Department came to ask for a Civil War cannon. Sure! No problem! Because it is a complex model and includes a tube shape, we printed it in the Connex Stratasys polyjet printer. Cleaning the support material off the model is something to deal with. We have tools, compressed air, and a waterjet to help us. When planning your Lab, be aware of the tremendous footprint of this machine. It’s not as big as the Haas CNC machine, but it takes up 6’ x 5’ easily. And the polyjet materials are quite expensive. This is another piece of equipment in our Lab that has not been used in the past but it makes sense to me to use the equipment to teach students so long as we have the funds to keep doing it.
In this case, it was the Theater Department teachers that learned how to use the machine. Now that they know, they can bring their students and teach them. This is a beautiful piece of work!
Model on the plate in the software:
Model printed and complete:
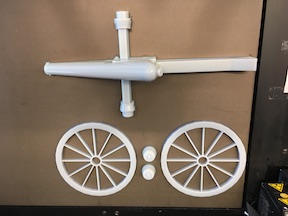
Model partially cleaned:
Model put together:
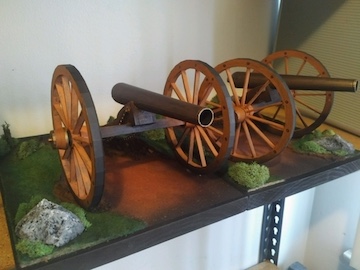
Model painted and used in our theater production.
Instructions for using the Stratasys printer.
- Put the USB in the slot in the back bottom left of the computer.
- Use the ATEN box to change screens. Touch the orange-ish button on the left.
- Click YES or OK at any prompts.
- From the TRAY SETTINGS screen, click Insert.
- Find your model on the USB drive and double click on it.
- Use the “Hand” to move your object around on the tray but it’s best to leave it where the software has put it.
- Be sure you are on TRAY SETTINGS
- Choose “single material”.
- Choose your color (gray or clear or black)
- On the TRAY SETTINGS menu click on each one and wait for the information:
Placement Validate Estimate Build – “Build” gives the instruction to build your object.
- Give your object a name to Save. (It should be your first name, please.)
- Change screens using the ATEN box by touching the green button on the right of the box.
- Click the red circle to give the instruction to the Stratasys to begin the Build.
- Click the square if you have to stop the Build.
The barrel part object could not have been made subtractively in any efficient manner. I thought about shaping and hollowing out a dowel for the barrel part but it would have been an arduous task.
Printer Parameters
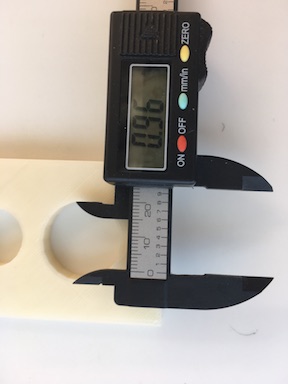
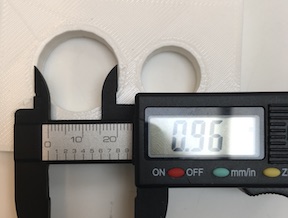
I thought it would be interesting to see the difference in precision between the new Prusa and our older Ultimakers. I made a file called test_holes. It’s just a flat block with a 1” hole and .75” hole.
Here’s what it looks like from the Prusa. The 1” hole is .96” and the .75” hole is .72”. This explains alot about what happened with replacing the GE Stove Knob. It was difficult for us to get the right fit because we didn’t have this information earlier.
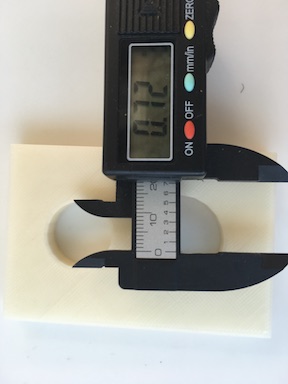
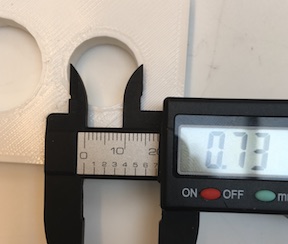
On the Ultimaker, the 1” hole is .96” and the .75” hole is .73”. These results surprised me because I thought the Prusa would be more accurate than the Ultimaker.
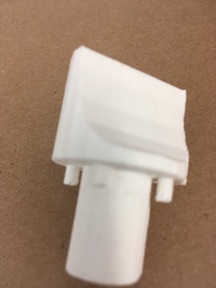
Using the Einscanner
We have an Einscan Scanner in the lab. To demonstrate its use, I downloaded my GE Stove Knob Model file from Tinkercad and printed it out again today. June 18, 2019. Here is a picture of that print. Now I will scan it.
Instructions
- Name project
- make sure your have checked “With turntable” and changed the 180 turns to 12 turns
- Check that your align mode is “turntable”
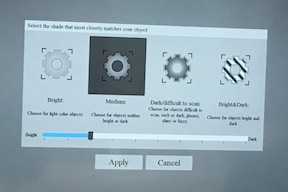
- Choosing “Texture” or not means you are asking it to scan for a specific color or not
- To set the brightness, watch in the screen for preview re brightness. Use the slider rather than just clicking on a choice of low medium high.
- Click play button and the scanner will turn 12 times, scanning your object.
- do a second scan with the object laying down and the software will “stitch” the two scan sets together.
- click “Mesh”. Choose “watertight” for a rendering that has no holes. The software will intuit how to fill the holes.
- choose “Medium” detail. It will take some minutes to process. My small GE Stove Knob was 15+ minutes.
Your save as options are sol, ply, obj.
You can scale your object on the next screen.
Screen shots
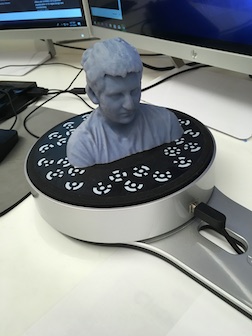
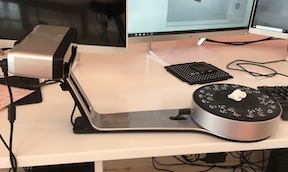
Here is the scanner with the knob on the turntable.
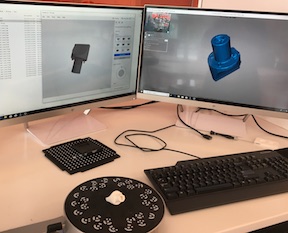
In this picture you can see the rendering of the GE Knob on the screen and the knob on the turntable in the foreground.
Files
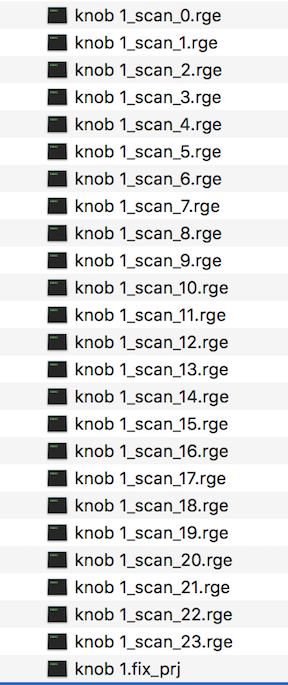
You can see in this screenshot that the scanner made 24 rge files and stitched them together to make the knob.
I tried to add the files listed below but could not because the files are SO large that I cannot compress or zip them into a small enough format to load them here. Below is a link to the obj file on my Google Drive.
