3. Computer Aided design
Assessment
-
~~Model (raster, vector, 2D, 3D, render, animate, simulate, …) a possible final project, and post it on your class page.~~
-
Learning outcomes ~~a. Evaluate and select 2D and 3D software~~ ~~b. Demonstrate and describe processes used in modelling with 2D and 3D software~~
- Have you ~~a. Modelled experimental objects/part of a possible project in 2D and 3D software~~ ~~b. Shown how you did it with words/images/screenshots~~ ~~c. Included your original design files~~
This week is all about computer aided design. I have been working with Inkscape since August when I came to the Guerin Lab. Because I am a teacher, I like to use software that has a low-bar entry point (so that students have early success) but also have depth (so that students can go deeper and do more sophisticated work). Inkscape was working beautifully for me in this regard until mid-January when our Trotec laser cutters decided to stop speaking to Inkscape. Nevertheless, we will continue teaching it and students will have to adjust to the few extra steps to save their work as a pdf file and use CorelDraw to communicate with the laser cutter.
We like Inkscape because it is free, but it is also a bit funky (read: buggy) and there is no one to call when it isn’t working. There are some forums, but I did not find any help there for my printer-driver problem. So, there is an argument to be made for using paid-for software so that there is some help somewhere. I also could not find anyone local to teach Inkscape, unlike a bigger program like OnShape or Illustrator.
Tinkercad is also easy and free. I have taught it to 3rd graders and I teach it now to high school seniors. It is really easy to learn but, as Neil said, it has limited computing power. I have had large files fail to download because, Tinkercad says, they are too complex.
Blender seemed like a good choice some years ago but I found it difficult to use. They have a new version so I will try again for animation. (Blender 2.80)
FreeCAD’s spreadsheet connection to make parametric files looks like it would solve my problem of sharing files with people using different materials (like shifting from cardboard to 6mm plywood), but if they don’t have FreeCAD or they don’t have the time to learn it, this won’t do them any good.
Research
Inkscape – 2D Design
Inkscape is free. It sits ontop of XQuartz so installing it on the Mac is not for the faint of heart. But it has been reliable for our middle and high school students. I made all of my dollhouse furniture in Inkscape.
Our workflow for Inkscape changed when our laser cutters stopped reading Inkscape files. Now we save our Inkscape files as pdf on our computers. Then we move to the laser cutter’s computer and open the pdf in CorelDraw. We ensure that the red lines are 255 red and “Hairline” in order to use the Corel printer driver. Note that CorelDraw opens the file slightly smaller than your original. Here I made a 100x100mm box in Inkscape and save as a pdf, check it in CorelDraw. It is 99.704 x 99.705.
This difference doesn’t typically mean anything in the work we do here with students but when you are working with a press fit, it is a big difference.
I drew the majority of my final project pieces in Inkscape and saved the files in pdf. When I get to CorelDraw, I can scale them up to 100% by using Transform at 100.3%.
Livingroom files
Livingroom files in svg format. Zipped file.
Kitchen files
All kitchen Files in svg format. Zipped file.
I built these some weeks ago and do not have screenshots of building them. Here is some video of me using Inkscape to design some kitchen chairs.
I can teach Inkscape basics to students in 15 - 20 minutes. Then they can explore on their own. When they need more than the basic shapes, fill and outline colors, it is easy to teach them the next layer of the software.
To model in Inkscape: When you open the program, you are presented with a sheet of paper-looking thing. This is just a way to orient you in space. (The space in Inkscape is infinite and that causes users to get lost in space. If you use the magnifying glass injudiciously, you can end up completely lost.)
Start by drawing a shape with one of the common tools. For example, use the box shape to draw a box. Now change the outline color by holding the Shift key and clicking on one of the colors along the bottom of the screen. To change the Fill color, just click on the color in that row of colors. Easy!
Here’s a copy of my cheatsheet on using Inkscape.
I do alot of work with other people’s files. Often I have to completely redraw a file because we work with 6 mm birch plywood but everyone else seems to be using 1/2 inch plywood. In the lesson today, Neil showed us how to use “clone” instead of “duplicate” in Inkscape to create notches that will all change when you change one. This would make it so much easier to move from one medium (like cardboard) to another (like wood). That was super helpful!
Workflow for Inkscape
- Design in Inkscape on a lab laptop
- Save as pdf onto the Desktop
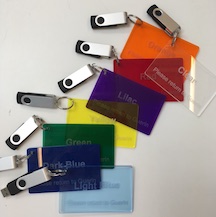
- Save your file onto USB drive. Remember which color!
- Plug the USB into one of our two Trotec laser cutter/engravers
- Open your file in CorelDraw
- Make sure all red (cut) lines are in 255 red Hairline
- Use Control + P to push your file to Job Control (JC)
- Click on Properties
- Change to the Guerin Approved material you are using (3mm Baltic Birch, 6mm Baltic Birch, or 3mm Acrylic)
- Click Apply
- Click Print
- Wait for the JC icon to glow orange and then click on it
- Use the Laser Control Pink Sheet to ensure the laser is in the right place
- Drag your job from the top of the JC list to where the laser X is on the plate
- Click the Update button to see how long your job will take (Remember, you cannot walk away from the laser cutter for any reason!)
- Click the Ready button to start the laser
OnShape – 3D Design
Many of our robotics students use OnShape. It’s a good way for them to share the parts they design for the robots. We like that it is cloud-based and free for students.
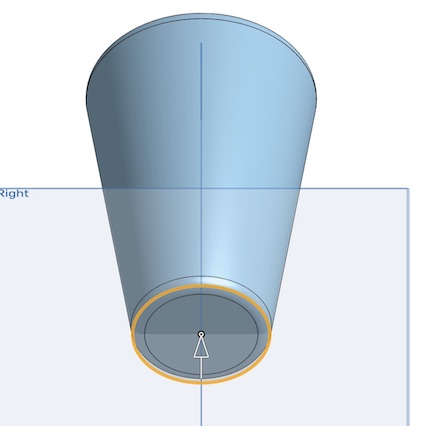
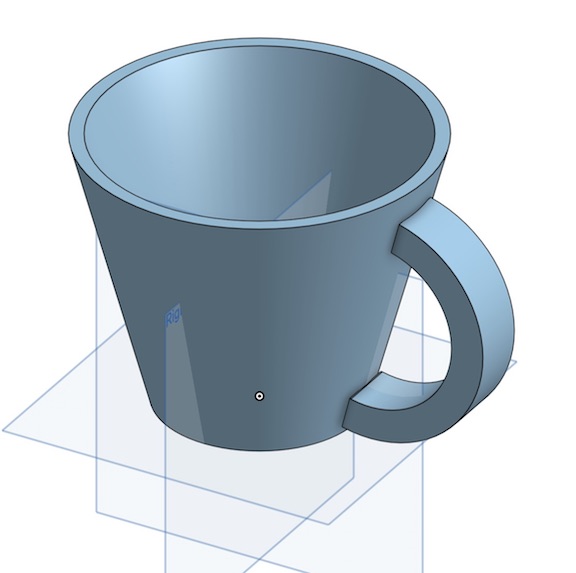
I worked with OnShape for this week’s lesson. It was difficult at first to understand the idea of a plane and a sketch. I watched a few beginner tutorials (I made a mug) and then asked a student to help me with it. Learning one-on-one is usually a good idea for me.
Here are some pictures of my progress:
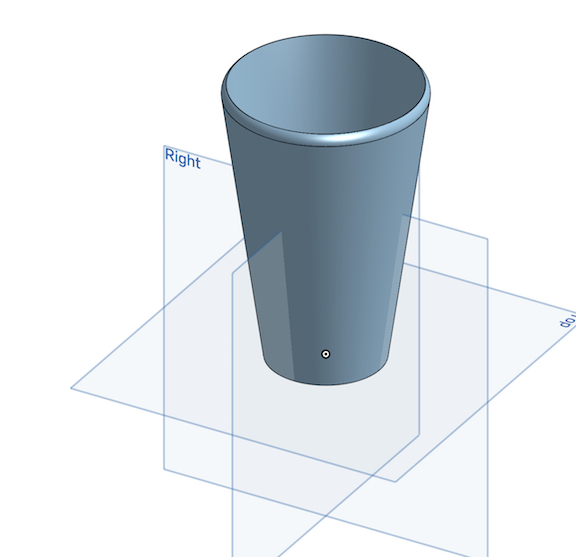
(Sorry I forgot to take early-mug pictures.)
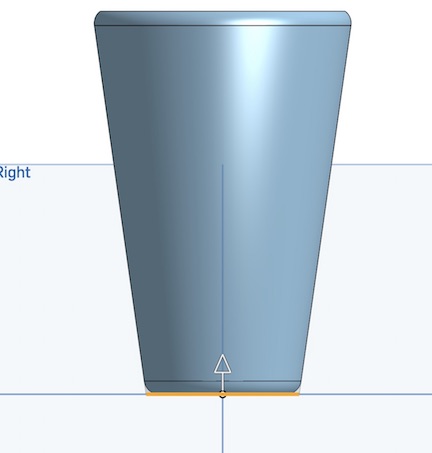
I put camfers around the bottom to give my mug some class.
I had a difficult time with the handle. I had to draw a new plane with a new sketch.

Ultimately, I made the mug shorter to match the size and shape of the handle I created with the help of a friend.
FreeCAD
FreeCAD is free and easy to download and install. It will make a good tool for our students.
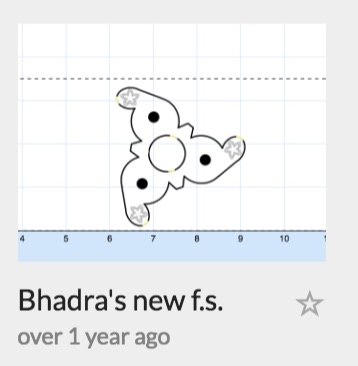
I have very small hands so when I make myself a fidget spinner, it has to be very small. I made one several years ago on my Carvey machine. (designed in Easel). Today I made a new one using FreeCAD. The design is similar, but not the same.
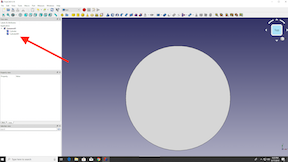
In FreeCad I make a new project, then open the Part screen and drop in a cylinder. I make it 7mm tall, 28 mm in diameter by changing the numbers in the sidebar.

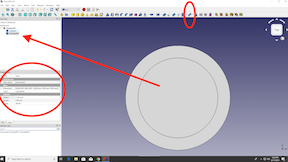
Then I duplicate it and make the second one as big as the bearing for the fidget spinner: 7 x 22mm.
You can’t see it because it’s right on top of the first one. But you can see in the screenshot that there are two cylinders there.
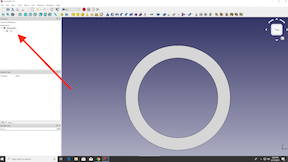
I had to make the second cylinder as high as the first (7mm) so that its ring would show up. You can see that in the next picture.
I select the outside circle first (Cylinder), then choose the inside one (Cylinder001). Then I use the “cut” command from the toolbar. FreeCAD will “cut” the second object from the first.
Now I have a center ring for my bearing. That “object” has been renamed “Cut”.
I make a duplicate of “Cut”. Notice that both objects are named “Cut” and they are on top of each other.
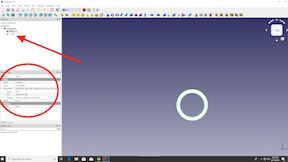
When I move the new one over to 26mm, I have 2/3rds of my new spinner.

I duplicate another and rename my circles so I can keep track of them. (Right click—>Rename)
I make another duplicate and use the Position screen to move it to the left.
Now my three rings are ready to be printed out on the 3D printer.
Tinkercad - 3D for the 3D Printer
I know some people will laugh at this application because we teach it to very young children, but if you are teaching older kids or adults, it’s a great tool because you can teach all of the basics in 15-20 minutes and then they can explore what they can do! If you try to teach OnShape to an adult, you will lose your audience after about 20 minutes. (That’s the rule, btw, for attention span in 2019.)
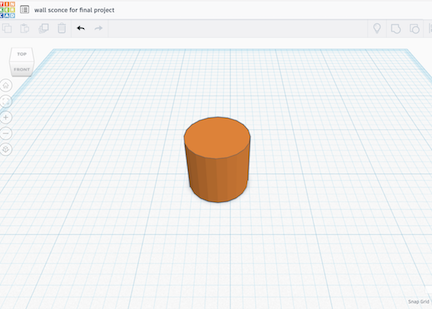
Wall Sconce file Faucet fixtures Sink
Screenshots of Making the Wall Sconce in Tinkercad
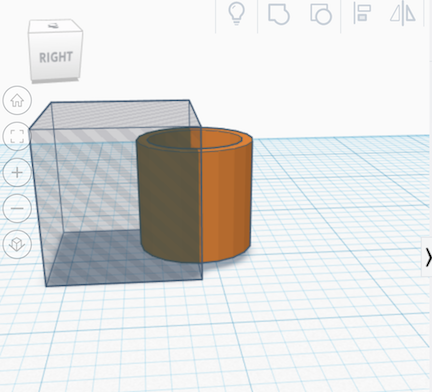
- Put a cylinder on the workplane. It’s the perfect size just as it is to start with: 1” x 1”
- Drag a “hole” or “negative” cylinder on the workplane and put it inside the first cylinder.
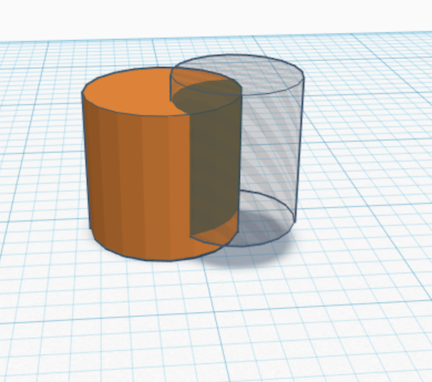
- Make the hole .75” x 75” center it in the original cylinder using the Alignment tool.
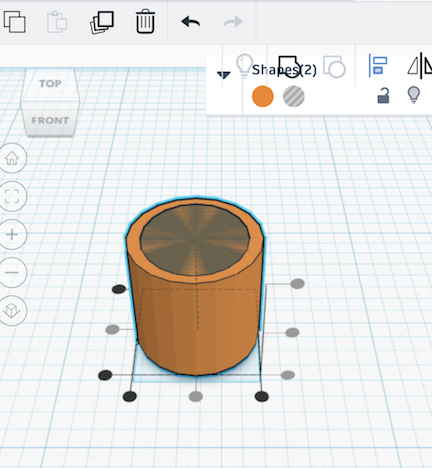
- Group the positive and the negative using the Group tool. Now you have a cup

- But you need half a cup, so put a “hole” square on the workplane and cover up half of your cup.
- Use the Group tool again to cut your cup in half.
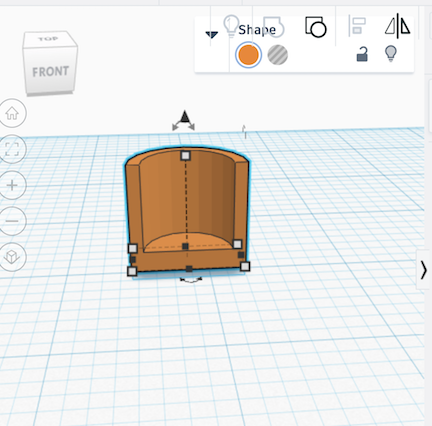
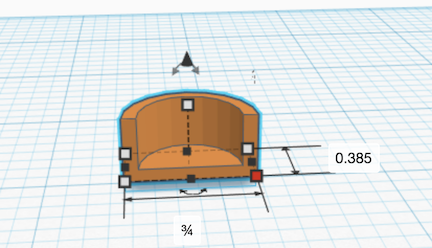
- Adjust the height and width of your sconce to .38” tall x .75 wide
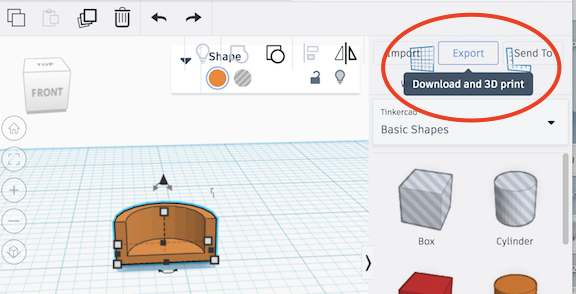
- Download your file as an .STL by using the Export button.
Easel and Carvey
If a lab doesn’t have much money, a small CNC router you can buy is the Carvey Machine by Inventables. (http://www.inventables.com) Easel is the online app that is drag-n-drop shape-oriented very much like Tinkercad. It’s perfect for 8” x 12” projects…like fidget spinners. I used Carvey and Easel with my 5th graders a few years ago when I was at a different school. We all made fidget spinners in the Carvey. (The other teachers were not very happy about all of the students having fidget spinners!) This was a great project to teach some beginning physics concepts. See the pictures in the Gallery below to see how cool their designs were!
My Opinion on the Tools I Evaluated
Freecad
I found Freecad pretty user-friendly when I went back to it a second time to make the fidget spinner and then, later, to do my parametric design. I believe these basics can be taught to our students within a 2 or 3 class period timeframe. There are not as many good quality videos on this tool and that makes it less desireable.
OnShape
I had a lot of trouble with OnShape both times I used it so I do not think I can teach it. However, many of the members of our Robotics team use it successfully. It is free to students and on-line which makes it good for collaboration–something we teach here.
Inkscape
I like Inkscape as a teaching tool. It is free. It is very easy to use and teach (20 minutes to get started). But it no longer talks to the laser cutter so that makes it less desireable.
CorelDraw
We use CorelDraw’s printer driver to communicate with the lasers and the vinyl cutter. It is more complicated than Inkscape and it is expensive, so it is not a good teaching tool. However, teaching this software would cut down on the number of steps it takes to use the lasers (and the vinyl cutter).
Tinkercad
I like Tinkercad for the same reason I like Inkscape. I can teach the basics in the amount of time I am usually given for this learning (about 20 minutes) and it’s free. I like Tinkercad for students because their models do not get lost, unlike our experience with Inkscape.
Useful links
Gallery