16. Interface and application programming
This week’s assignment is: choose a programming language, learn it, build a GUI in that new language, and code your GUI to communicate with an output device that you have already created. You have one week to accomplish this task. Go!
Python as a Programming Language
I have some experience with Python and Neil thinks it is an “beautiful” programming language. Additionally, it is native on my mac computer, so I’ll go there and use that.
To be honest, my experience is limited to teaching 3rd graders how to draw with Python’s Turtle. You can see my lesson plans here
Everything I learned about Python, I learned from this guy.
His youtube channel is called “Kids Can Code”. (You gotta love this guy.)
Then I found another guy at Penn State. He is teaching teachers how to make GUIs. Toughest audience in the world.
I also found this young man “entire Python course in 4 hours”. He was straightforward and gave good (short) examples.
Interface
I use IDLE shell for Python. Although Python runs straight from Mac Terminal, it’s not editable there. To make the code editable, the IDLE shell works well and it’s free. PyCharm sounds good but it comes with a pricetag.
Tkinter
This word is pronounced many different ways by all of the people in the videos I watched. I have settled on Ta-Kinter as my pronunciation, or TK for short.
Tkinter is the base library for creating the GUI. It contains all of the widgets you are likely to need (like buttons). It needs to be upfront in your Python code.
I downloaded and installed a new Python 3.7 for my mac. It came with TK built-in. Cool!
To get your Python to see your TK, open Terminal and type “python” at the command line (no quotes) and in the next >>> line type
from Tkinter import *
This imports all (asterisk) of TK into your program but that will be okay. You can just use what you need.
TK has nice commands like window, label, title and they are exactly what they sound like they are. It allows you to include gif files as static pictures.
GUI Design
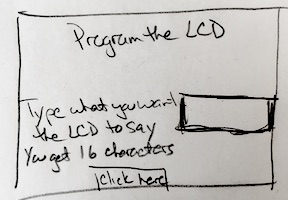
My GUI needs to be simple. I am asking for user input like “Type something to display on the LCD:” and then a button to click to export the user input into the LCD through the serial port.
I need: 1. a box (frame) 2. instructions to the user (label) 3. a place for the user to type into (entry space) 4. a button for the user to click to push what’s in the entry space to the LCD
Here’s my sketch:
Here is the draft code (18 lines) for the GUI interface:
from tkinter import *
root = Tk()
top = Frame(root)   # Create frame to hold entrys
top.pack()          # Pack top frame
l1 = Label(top, text="Program the LCD")
l1.pack(side=TOP)
l2 = Label(top, text="Type LCD text")
l2.pack(side=LEFT)
e1 = Entry(top, bd=5)
e1.pack(side=LEFT)

l = Label(root)
def callback():
   x = e1.get()
  print(x)

bottom = Frame(root)    # Create frame to hold button
bottom.pack()           # Pack bottom frame
b = Button(bottom, text="Click to send", command=callback)
b.pack()
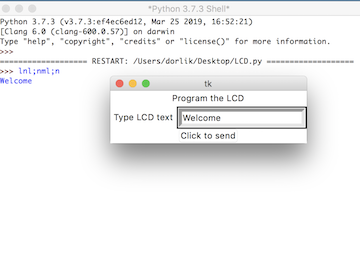
It looks like this:

Make it talk to the LCD
I used some of my Arduino code to initialize the LCD pin-by-pin, deal with the Arduino serial port, and communicate with Python when the User inputs text in the GUI. This code will sit in the Arduino and wait for information from the User via my laptop. It looks like this:
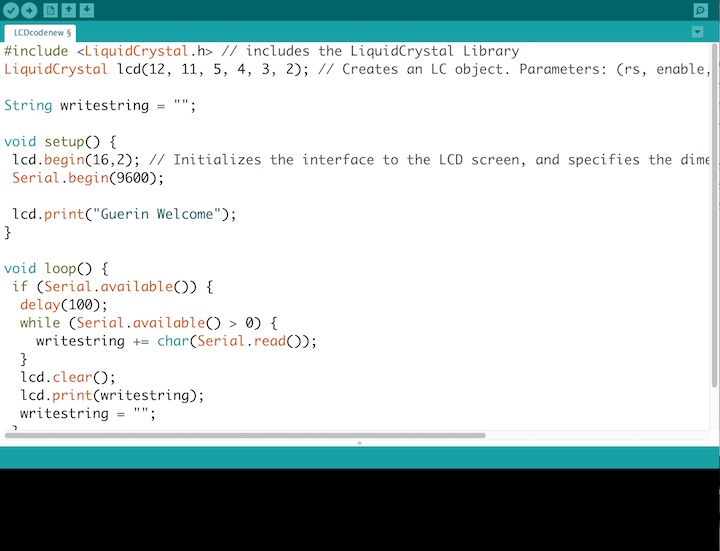
Nevermind that lcd.print command. User input will overwrite it.
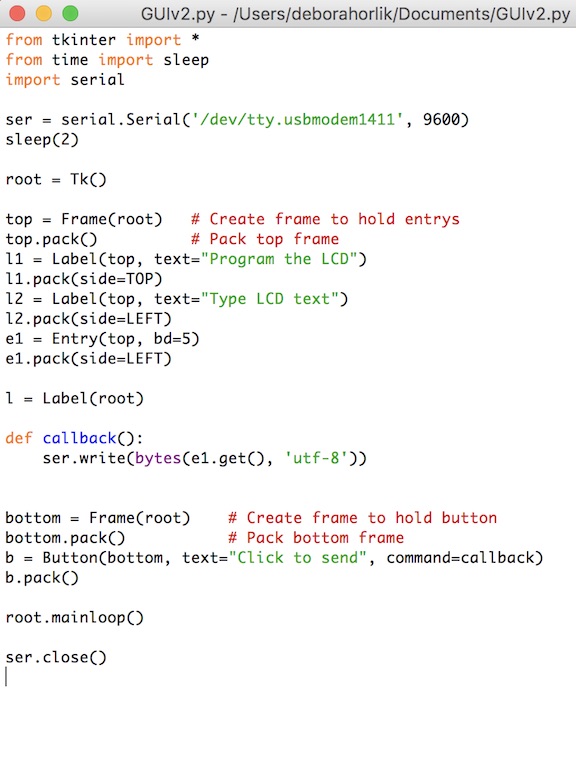
Then I had to write some code in Python that would:
- open a serial port from my laptop (my USBmodem)
- take the user input
- push it to the LCD attached to the Arduino
Here’s what my code looks like now.
When the user does this:
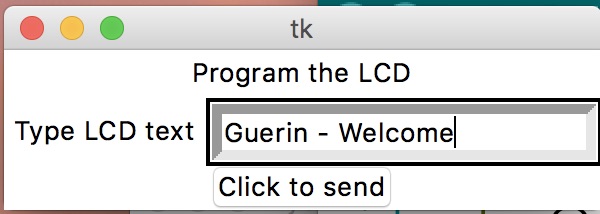
the python code takes that user input and pushes it to the LCD so that it looks like this:
Impressions
I liked working with Python. The commands felt very natural-language-like. Using IDLE made it easy to type, make typing errors and fix them, and find the code errors and fix them. Finding the serial port language was difficult. Terminal allowed me to list (ls) the ports and gave me the exact (tty) language that Python wanted.
This Assignment without Arduino
Now that I can communicate with new pcbs through Parallels, Blair said I should re-do this assignment without the Arduino. I thought I could use my hello.LCD board from Output Week through a GUI on my computer but that turned out not to be the case due to the structure of the board (it has no FTDI). I had to remake the LCD board with the FTDI for it to work with a GUI.
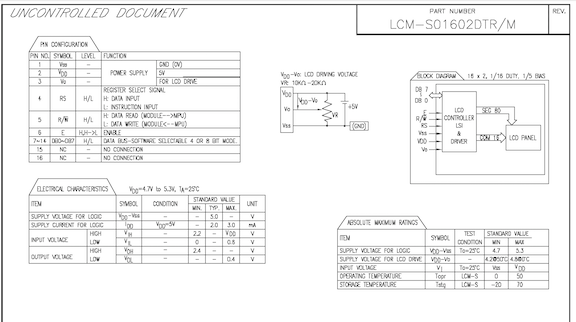
First I read the datasheet to be sure the LCD was compatible with the 5 volts it would get from the FTDI cable. Good news!
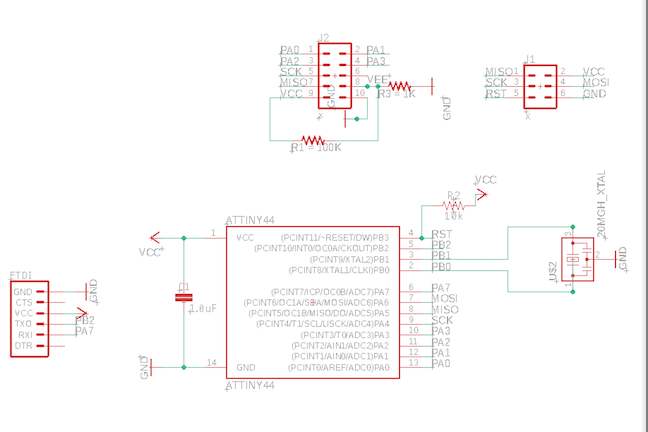
Then I used Neil’s Bridge board (from networking week) schematic as a guide for adding the FTDI to my old LCD board and made a new LCD board. It looks like this:
I took the 5v regulator off of the original board as I will be powering it through the FTDI. I need the TX pin to talk to the ATTiny44 to push the signal from my Python GUI for the interfaces week.
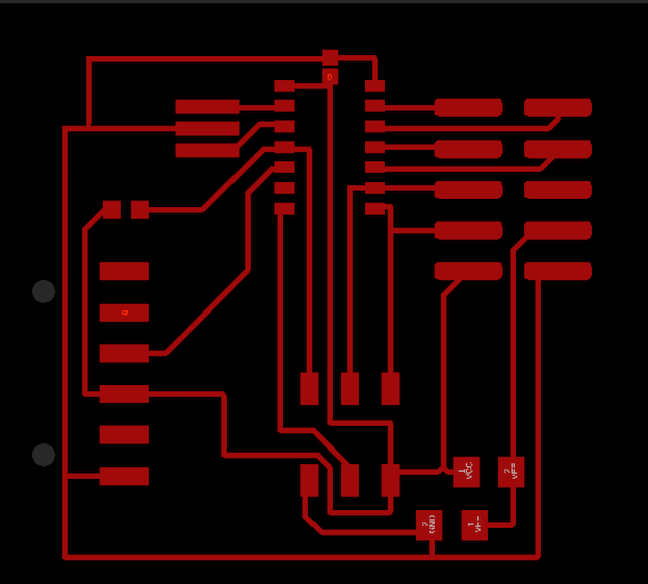
I did the routing in Eagle without the assistance of AutoRoute because I already knew where the traces had to go.
I exported the png and milled it on the Roland SRM-20. Then I gathered my parts from the partslist downloaded from Eagle.
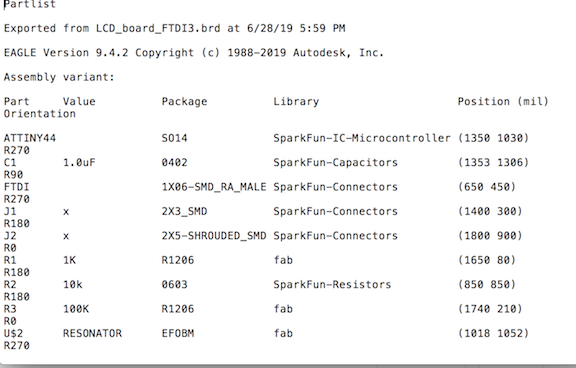
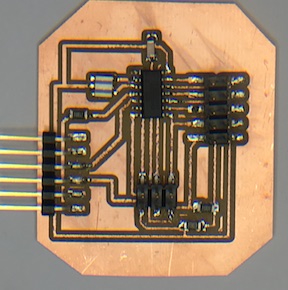
The board looks like this when it is milled and stuffed.
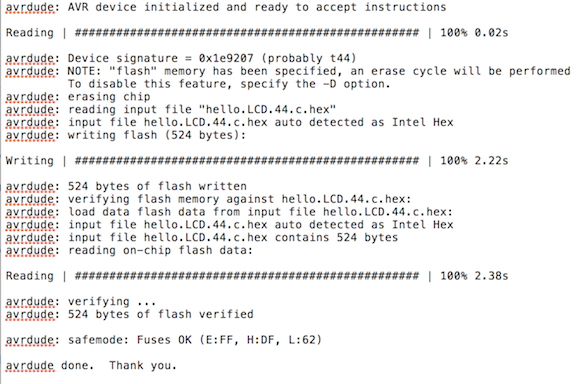
Then I booted up Parallels and flashed it with my c code. It uses Neil’s code but adds in the BasicSerial3.h and BasicSerial3.S code that I need to communicate with the Tiny44 via FTDI. I modified the c code to send the two Serial files to the microcontroller. It’s always so exciting to see this:
When the LCD comes on it says “Hello to the World” because that’s what Neil’s c code told it to do.
Interface for LCD through the GUI
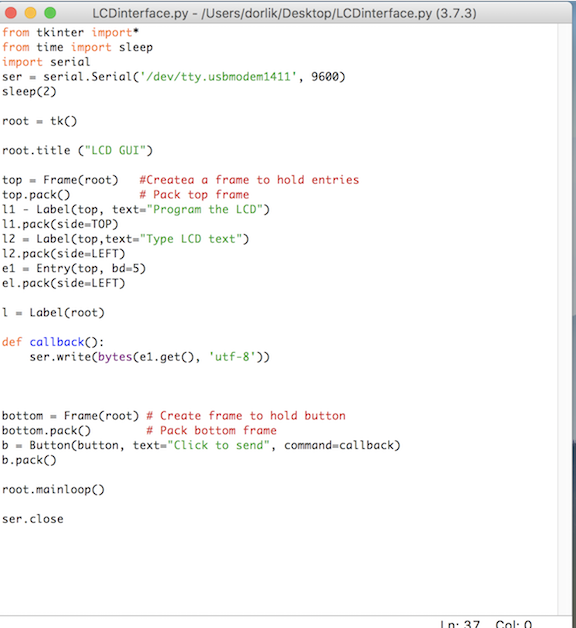
I re-wrote the python to talk to the LCD through the FTDI cable.
The problem with the code and the MacBook is that every time I plug in the FTDI cable, it registers to a different USB port. To know what USB port the FTDI cable is using at any moment,, type ls /dev/tty.* in Terminal. It tells me:
/dev/tty.Bluetooth-Incoming-Port

/dev/tty.lpss-serial1

/dev/tty.lpss-serial2
Then I change that line in the code. But Python still doesn’t see the LCD. It’s not connecting through the serial port.
This is what the GUI looks like when it is running.
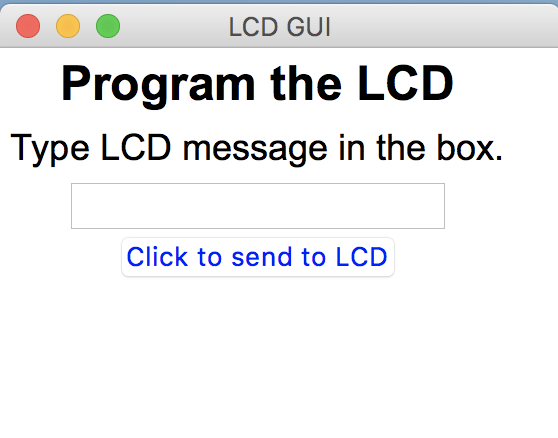
You can see here that the GUI works through IDLE shell. When I type into it, the message shows up in IDLE.
GUI does not speak to the LCD Board
Talking serial-y to the LCD turned out to be harder than just designing and making a new board with a FTDI connection.
Communicating to the LCD through the LCD board is still a work in progress. It could be because of the Mac.
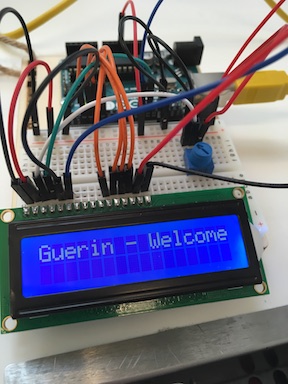
When it first would not work through the GUI, I connected it via FTDI cable and plugged it in through Ubuntu in Parallels. It gave me the Welcome to Guerin message so I knew the LCD and the board were still working. The Attiny44 let me flash it with different messages.
When I go back to the Mac and try to connect through the FTDI, it does not communicate with my LCD.
The python code works. I do not get any error messages on the code but I also do not get any messages or even lights on the LCD. Every time I ask for the serial port, I get different information so there’s no way to write the port into the Python GUI code.
I’m not sure why this happens and I’ve de-bugged it for too many hours. It’s very unfortunate because I built the new LCD board so that I could program the LCD through this GUI.
I have done a lot of reading about problems with Macs and serial ports. I could not connect to or program anything until I got Parallels because the Mac could not communicate with the serial ports. To address that problem, I downloaded “serial” from the Apple Store. It claims to make connecting with serial devices seamless. Just run Serial in the background. But this fix doesn’t work either.
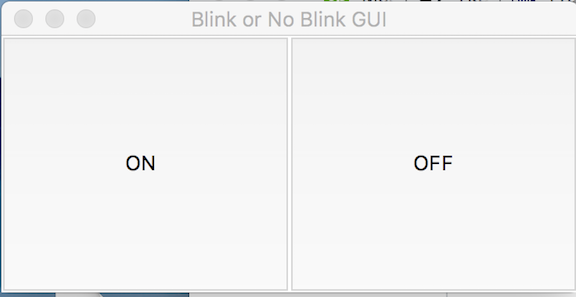
Interface GUI for LED Board
As a fall-back, I wrote a little GUI to communicate with a blinky board I built for Embedded Programming week. The GUI to speak to that board with an LED looks like this:
The code that creates the GUI and communicates with the board:
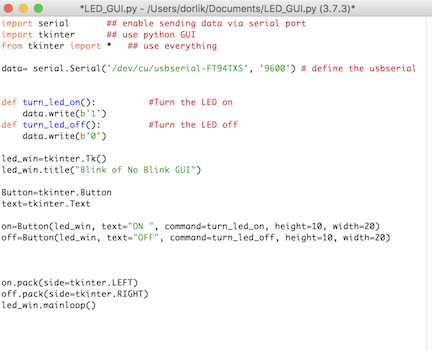
When the user clicks the on or off button, the LED acts accordingly.
Final Thoughts
I am disappointed about the LCD board/GUI because I worked on it and planned for it for many hours.
Files
LCD board
The LCD board needs these two files to communicate across the serial port to the LCD
And here are the last few files that make the LCD respond to typing from the computer:
See Embedded Programming week for the files for the Blinky board.