8. Computer controlled machining
Learning outcomes
- ~~Demonstrate 2D design development for CNC production~~
- ~~Describe workflows for CNC production~~
Have you?
- ~~Explained how you made your files for machining (2D or 3D)~~
- ~~Shown how you made something BIG (setting up the machine, using fixings, testing joints, adjusting feeds and speeds, depth of cut etc)~~
- ~~Described problems and how you fixed them~~
- ~~Included your design files and ‘hero shot’ photos of final object~~
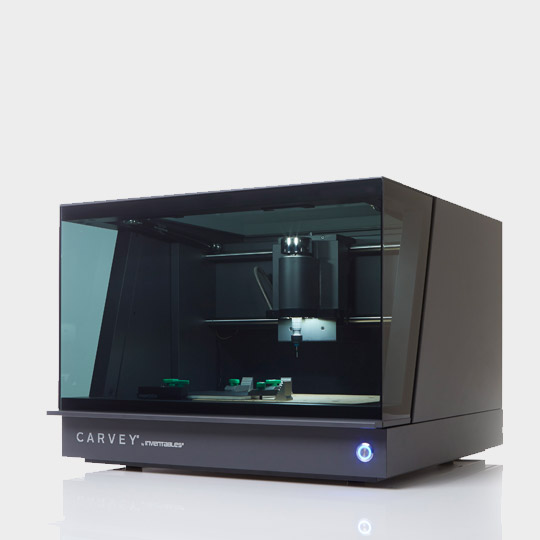
This week we are focusing on computer controlled machining. It may be possible to categorize laser cutters here, but we typically just talk about CNC routers as “machining”. We have a small CNC router that I have used with elementary age students. The Carvey Machine is a terrific entry-level CNC router that uses its own on-line app (Easel). Easel works like Tinkercad with drag-n-drop shapes. These kid-friendly products are made by Inventables. The Carvey fits on a table and has a plexiglass case around it to cut down on the noise. It’s great for projects like rubber stamps, wooden jewelry and (my favorite) fidget spinners.
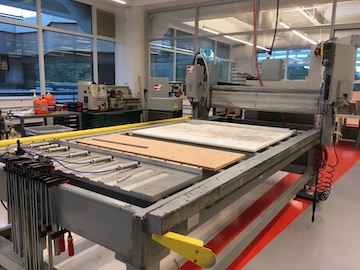
Our Lab also has a Haas CNC Router…It takes up a whole room. Primarily, this machine is used to create parts for our robots but we also build BIG things.
The Big Bus Project
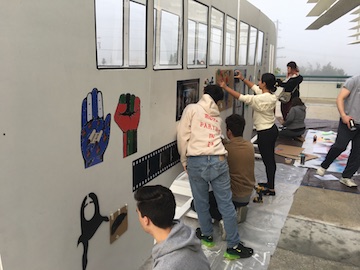
One of our teachers has a terrific imagination. He incorporates making, building, designing, imagining into his class “Israel Art and Architecture.” At the end of the semester, he teaches graffiti as a form of art and incorporates the political, cultural, religious struggles in Israel. Each student is assigned a personality. Half the class identifies with a Jewish person in Israel and the other half become Palestinians. These can be of any age and with different experiences. Once the student identifies with this new person, they design graffiti that goes along with that person’s beliefs. They make stencils on the laser cutters, design pixel art, and use other forms of graffiti. They write artists statements that explain and justify the art they have created.
In years past, students have graffitied on a canvas laying on the ground. This year, though, Dr. L and I brainstormed the bus idea. We’re going to build a life-size bus for the students to graffiti!
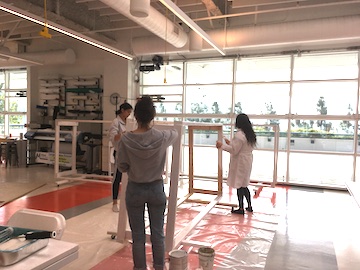
I have a team of seniors - young women - and I am teaching them how to use standard woodworking equipment as well as the CNC router. These young ladies have never even held a screwdriver before. I want them to have the experience of building something before they head off to college.
CNC Process
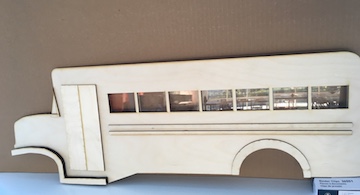
This project started with my bus prototype. I made it on the laser cutter and used Inkscape to design it. I had to sell it to the administration, the students, and the Social Sciences faculty. Everyone is excited about building such a big project!
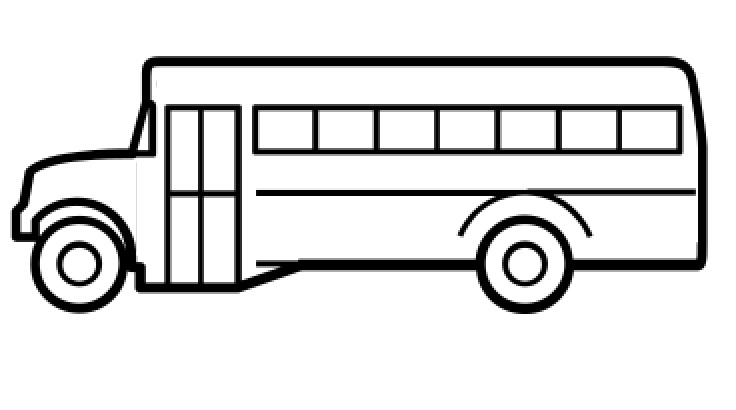
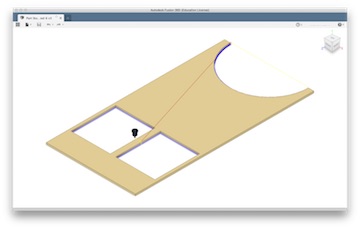
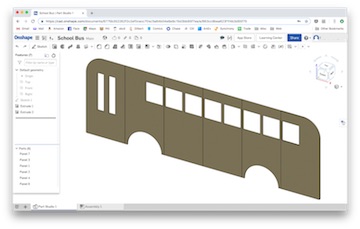
The next steps are translating that svg to Fusion 360 and then to OnShape so that we can cut out the pieces on the router. As it turned out, the bus changed from a school bus to a municipal bus (for strategic emotional reasons) so we started with a new picture when we got to Fusion 360. The new design is easier to CAD because the pieces are more symetrical.
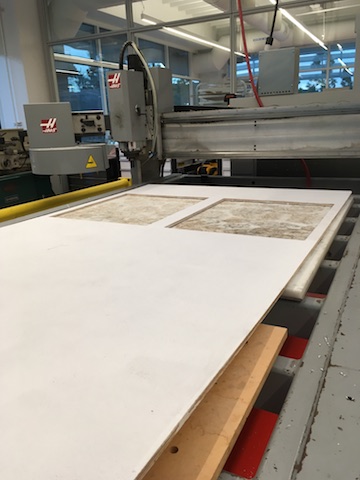
The left and right side panels are now the same so we can cut them two at a time. The front of the bus is different on the left and right so we’ll rout them separately. We’re using 4’ x 8’ sheets of plywood the there will be little waste.
Here’s what the panels look like in the software:
Fusion
OnShape
Here’s what they look like on the router:
Fixturing for the Bus
We figured out the relative size of our plywood to the size of our Haas CNC router. Then we clamped some 2 x 4s to the router as a positive stop and then calibrated that place to the machine so we knew where the zero was. (In other words, we built a frame for the plywood pieces by clamping 2 x 4s to the router bed. That allowed us to put new sheets of plywood into the same 2x4 fixture over and over and still have the same zero point.
Machine setup
We used a 1/2” flat end mill. Speed was 8000 rpm. Feed was 120 in/min (.0075” in/tooth)
Here are the files:
Making the frame
Cutting
We built the frame of the bus from 2” x 4”s. The team learned how to use the miter saw.
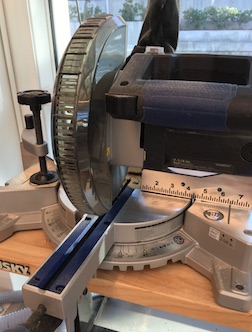
It was loud and scary at first. Over the two weeks, however, it became commonplace for them to measure, draw one straight line, cut on that line with the mitersaw.
Drilling
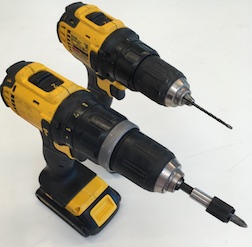
They also learned about pre-drilling holes with a drill (battery powered so it’s heavy).
They used a different drill bit with a screwdriver head to screw in the drywall screws. (We used drywall screws because we may have to take the bus apart and store it until the next class uses it.) They learned how to use a square (something they had never heard of) and a level (again, a new thing) to square and level the boards
Joints
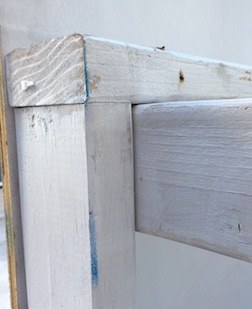
These joints are tricky because screws have to go into the same places. They had to make the vertical screws farther apart than the horizontal screws. This is all about 3D thinking - something this generation doesn’t think about much. They spend so much time in the 2D world looking at screens.
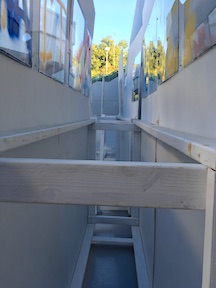
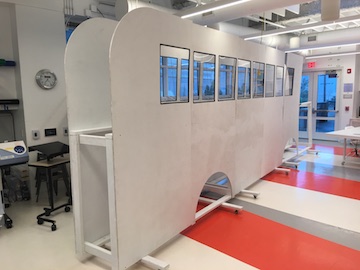
Eventually, the skeleton of the bus looked like this. Each section is 8’ long and 2’ wide. Each section will hold 4 full sheets of plywood, 2 on each side. There are three sections so, eventually, the bus will be 24’ long.
Casters
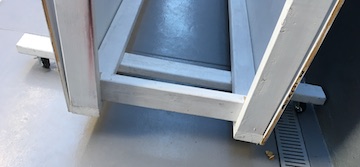
The casters are on a 4’ 2”x4” board. This was a lesson about how stable this big bus would be up here on our mountain where it is frequently windy. The team researched the casters and talked about cost vs. functionality.
They figured these things out: 1. The bus is heavy 2. we need to be able to move it 3. but we need to be able to park it 4. we have limited room and some narrow halls so it needs to be maneuverable
They decided on heavy-duty casters that have 360 degree rotation and a parking lock. They were about double the cost of the original casters they chose.
They need four casters for each section - a total of 12. They didn’t have any trouble with the math. :)
Windows
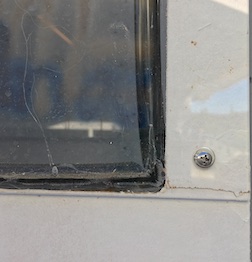
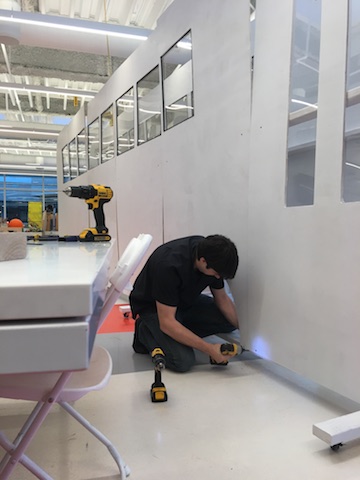
We ordered clear plexi for the windows but to save some money, we ordered a standard size. That meant that the plexi was the same height as the window – no overlap. The team drilled holes in the plexi and pilot holes in the bus panels. They used screws and a washer to keep the plexi from breaking.
Then they outlined each window with black rubber tubing to make it look like a real bus. Glue was an issue here. The wood frame did not like the acrylic glue but the rubber and the plexi didn’t respect wood glue. The team chose acrylic after conducting some tests. So far, so good. The rubber window gasket has withstood quite a bit of rain.
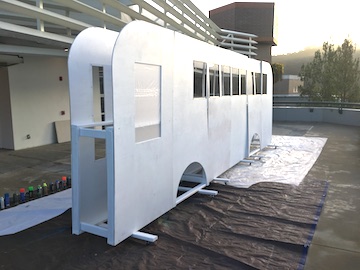
Painting the bus
The team also learned not to wear their nice clothes on the day we’re going to primer-paint the frame. We used outdoor, heavy duty “Kilz” primer paint. The bus will be outside and plywood will not hold up to the weather without two coats of paint.
Assembling the Bus
Assembly required a few people and clamps to hold the pieces on the frame straight. The team learned (the hard way) what happens when the panels are not straight and level on the frame. When they tried to put the frame pieces together, they didn’t fit. Luckily, drywall screws come out pretty easily.
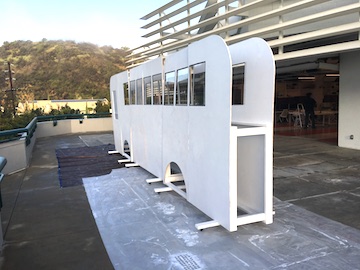
You can see it’s really BIG!
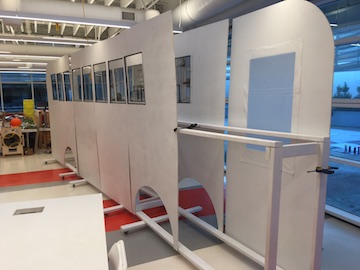
From the other way:
It’s a good thing that we have garage doors in our space so that we can get the bus outside for the students to graffiti it.
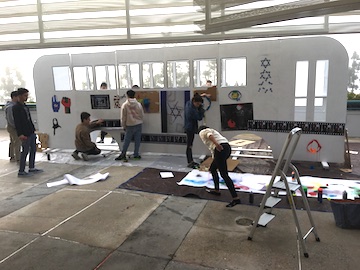
Using the Graffiti Bus
Here it is outside.
In this picture, you can see our beautiful mountainside view along with our beautiful bus:
The students are using stencils they made using Inkscape and our Trotec Laser Engraver/Cutter. This are primarily seniors so I’m really happy that they learned to use this technology before leaving us for college.