17. Machines
Assignment
This week we are supposed to build a mechanism - a machine - that has something to do with our final project. I decided right away to build a carousel. My final project is all about toys and children. I want to make toys that inspire children to use their imagination.
~~actuate and automate my machine from Week 15~~
Research
I did some research on how mechanical carousels work and discovered that it is not as simple as I thought it would be. I looked on a few websites.
What I did during Week 15 for mechanical design
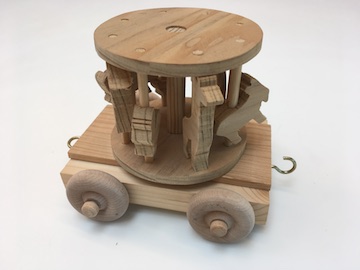
This is a picture of my inspiration - a carousel I made with a band saw and a jig saw. It has a 3.75” diameter.
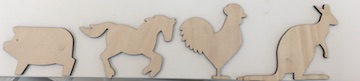
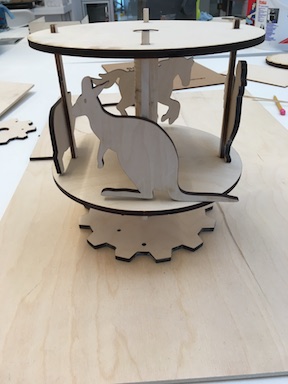
My new carousel is bigger so that I can make the animals go up and down. I want it less crowded than the original one, too. These are the new animals I made using the Trotec laser cutter. I downloaded the images from thenounproject.com, used Inkscape to turn the svg files into laser-cut-able shapes.
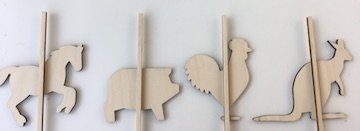
Then I laser-cut some posts and glued them on the backs of the animals.
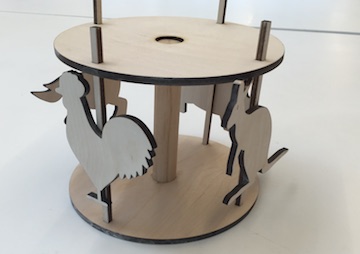
Then I laser-cut a top and bottom circle with holes for the center post and for the animal posts.
The animals fit nicely in their circles. The center post is a 1” dowel piece I found in the scrap box.
I spent some time determining how big the whole thing will be to do what I have planned. Then I cut the center dowel to the correct height and built the supporting box. This is the work in progress:
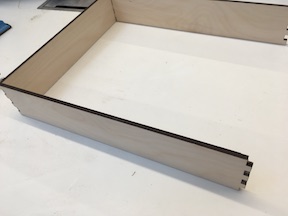
The base for the carousel is a box 3 inches tall and 14 x 12 inches. The top part of the box has a 9” hole right in the center where the carousel will go.
Gears
One objective when designing toys is to teach something so deep in the fun that the child doesn’t know abut the learning. With this toy, I wanted to teach something about gears and gear ratios without anyone noticing. I researched how to make gears but I didn’t want to buy any software. I looked at the one on the mods site but I couldn’t figure out or find out how it worked. At that point, I decided it would be easier to draw the gears myself. I looked around at various tooth shapes and experimented with them.
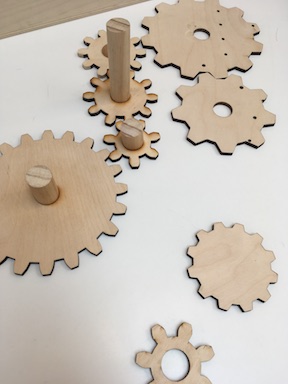
I was thinking “Where’s Neil now when I need him?” I decided on the chisel shape and made a board with several holes in it and put the gears in there and tried turning them. Over this several-day period, I discovered many things about gear teeth shapes but the big takeaway wss that the wood creates a lot of friction so even when the gears worked well, the friction made it very hard to turn. Perhaps a nice finish would make the wood less friction-y or maybe a different kind of wood. Maybe a remodel of this carousel is about finding a different (but affordable) material to make it from.
Time To Get to the Machine
It was about this time that I realized that I had to actuate and automate my carousel a week sooner than I had thought. I didn’t have time to keep experimenting with my gear-carousel-toy.
Hardware
I could reuse all of the parts of my mechanical carousel. I needed a motor to drive the gears and a power source for underneath the carousel, two servo motors to make the animals go up and down, an arduino to drive those servos, a battery pack (because the carousel goes around so the arduino must also go around), an LED strip and another battery pack for it, and an on/off switch. Oh! And some fabric for the canopy.
I bought a planetary gear motor from Digikey, and a $.79 light switch at Lowes. I had all of the other things in the Lab.
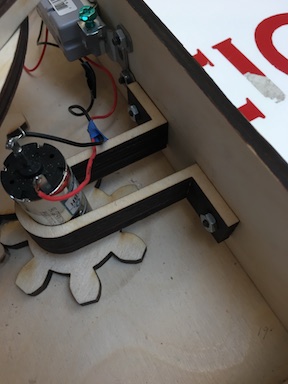
I built a press-fit motor casing to keep the motor secure to the wall of the base. It’s super tight! And press-fit the small gear to the bottom of the base.
Programming
I programmed the internal Arduino:
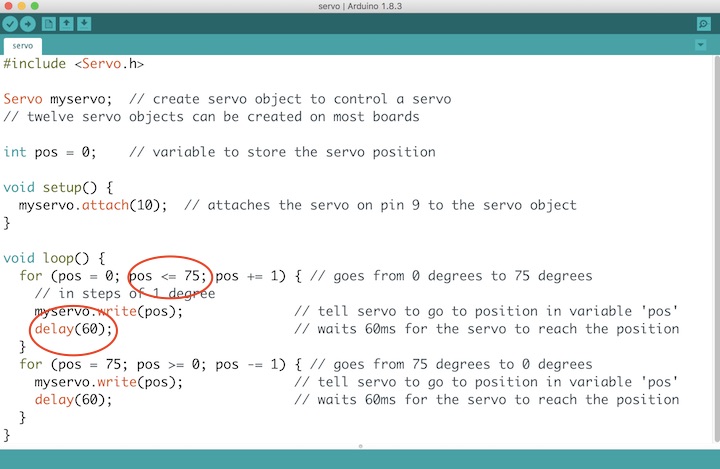
After watching it a few times now, I think the up and down needs to be faster. I can easily control this by changing the code and re-uploading it to the arduino board.
I could have two servos so that the other two animals go up and down, as well.
Another change I can make is to have the Arduino play a carousel song through a small speaker.
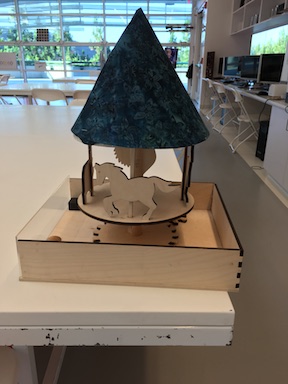
Building
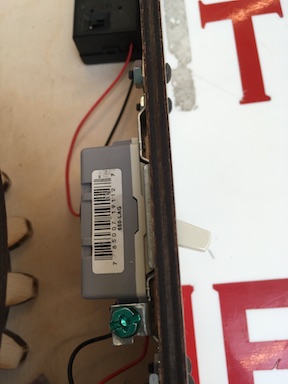
The 12” x 14” box was already made for the mechanical version of the carousel so I used that and put a piece of plexi on one end so you can see what’s going on inside. I afixed the servo to the top of the carousel and used cotton string to attach the servo arm to the top of the animals’ poles. (This turned out to be a bad idea because the cotton string stretched over time. The longer string meant that the animals don’t go up as far as they should anymore.) I attached two small pieces of wood with an eyelet screw to the top of the carousel to create some lift between the animal pole and the servo motor. (On a re-build, I can make these poles shorter. They made making the canopy more difficult than it has to be.) I installed a 9v battery pack with an on/off switch to the canopy with some double-sticy tape. (Velcro would have been smarter.)
I had to cut a hole in one side panel to install the light switch. It took 4 screws. (I don’t think those button screws look too bad.)
I installed the on/off switch and connected it to the 9v battery pack’s red wire. Then I soldered red and black wires to the motor and connected the red wire to the on/off switch and the black wire to the black wire of the battery pack. Voila! Gears move.
Video
Here is a video of the carousel working.
Here is a link to view my carousel presentation
Final Thoughts on this Project
There are a few things I would do differently in the next iteration. The most important is that the carousel toy is no longer educational.
Educational: Even with the plexi panel in front (allowing a child to look inside) no learning is going to happen there. There ought to be a way to keep the automation and actuation while keeping the education.
Gears: Gears are awesome! But they certainly vexed me in this project. A gear maker would be helpful for next Fall’s curriculum when we will be teaching (and making) gears.
Combinations: The LEDs and the servo motor ought to be on the same Arduino, right? The LEDs should flash or ripple or something. Also on this arduino’s back should be sound. Calliope music would be awesome!
Canopy: I don’t like the shape, but I love the fabric. Maybe flatter on top. Still thinking.
Note to self: Don’t use cotton string. It’s too stretchy. Find the fishing line.