Idea: What do I wear today?
Definition
- Problem description.
Young kids do not understand weather parameters as temperature, and cannot relate those to the amount of clothes they need - Current solution.
Parents/Educators just choose and give the needed clothes to the kids - Proposed solution.
An interface for temperature (in general weather values) young kids can understand - For whom?
Young kids that cannot yet understand temperature values neither relate that to the cold/warm feeling - Why?
I have some background in designing/researching on interfaces for kids in different learning environments. Two key words: tangibles and participation (I also have two young kids)
Background
Winters in Oulu can be quite tough. And sometimes it is difficult for new parents to know what clothes (how many layers) the kids need to wear.
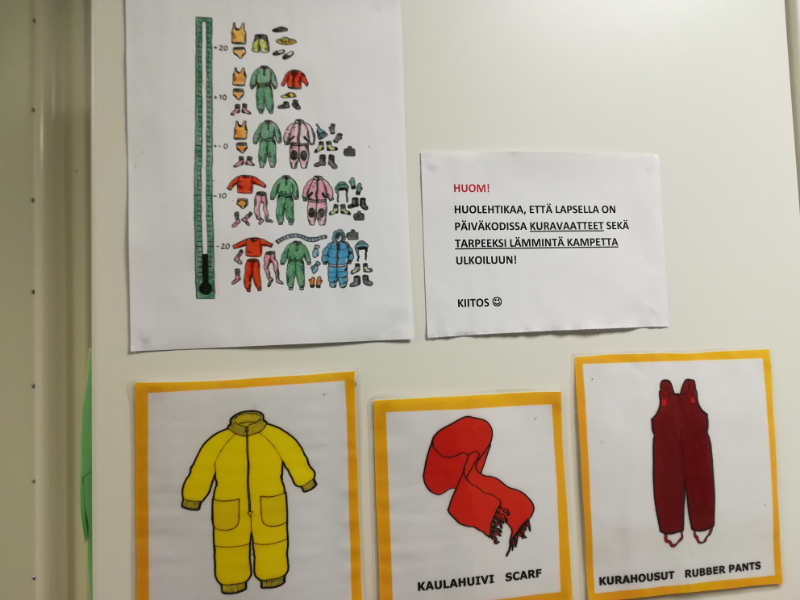
In many daycares you can find some kind of visual representation to help with that.
The picture on the right is from my kids daycare. There is a drawing of a thermometer. Then, on its right side, there are rows with different clothes. Each row corresponds to a certain range of temperatures, and it shows the different pieces of clothes needed.
This is definitely a good representation for adults. But what about kids?
Many young kids cannot read a thermometer. Other kids, who could maybe read the number, would probably have problems understanding how cold/warm it is outside. So they depend on someone deciding the cloths for them.
The "what do I wear today?" thermometer, would offer an "scale of clothes" (apart from the boring temperature scale) so the kids could better understand how cold it is by associating the temperature to the amount/type of clothes.
The representation of the normal thermometer will light up according to the temperature. And the same thing would happen with the "scale of clothes"
My plan is to have a tangible "scale of clothes"; which basically means to represent the clothes with actual fabric.
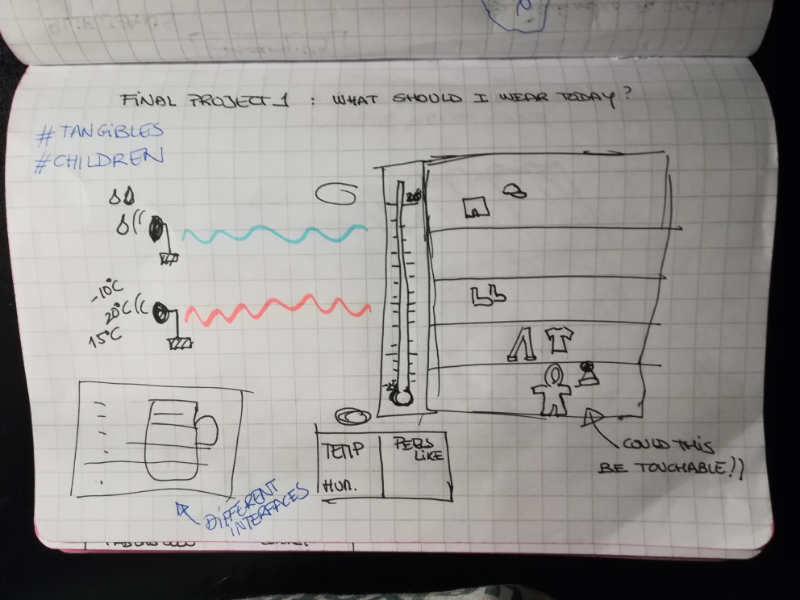
This could be the list top requirements:
- Temperature sensor
- Anemometer
- Humidity(?) sensor
- Display for values
- Nice and, preferably, tangible interface for the clothing scale
- Some type of cage for the sensors
- ...
Evolution
First designs (week 3)
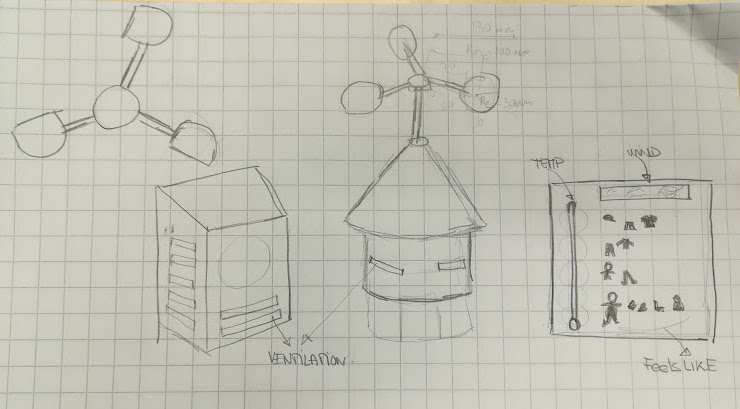
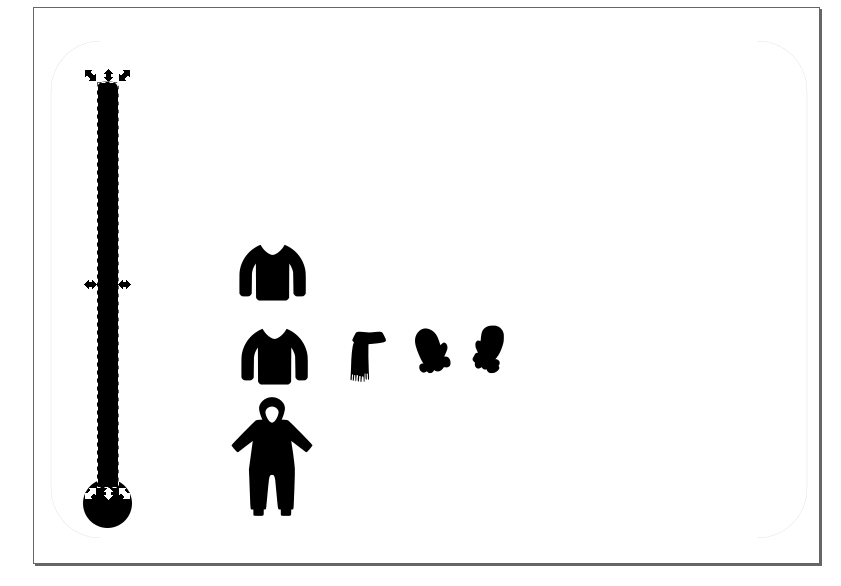
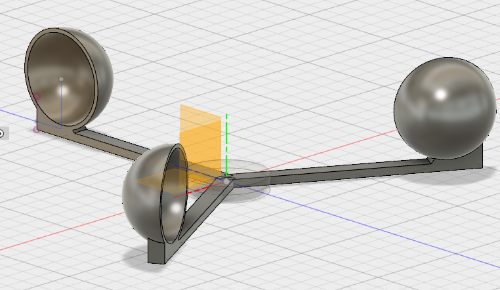
Week 3 has helped to think a bit more on the design, and how the UI should look. I have managed to do
- some design for the front UI
- some design for the weather station itself
First feedback: decisions (week 5)
I already got some feedback from Jani Ylioja. He said my initial idea sounded like two projects, and that I should decide with which part to start: weather sensors and simple interface, or get the data from somewhere and do a more detailed user interface.
Although I wanted to try the sensor thing, I thought that eliminating the tangible user interface would kind of put apart the initial idea completely: children, tangibles...
So I may go on focusing in the TUI
rethinking, redefining (week 6,7)
I decided to go on with the user interface, and try to get the weather data from an external source. (And maybe someday build my own weather station).
I have been trying to figure out how the interface should look. This is my new sketch:

- The design resembles a wardrobe
- I have added a small figure that could wear the clothes. Now thinking about
- how to identify if the piece of cloth is correct
- light the figure as the thermometer (?)
- which is the best way to make the figure
More designs and first makings (week 8)
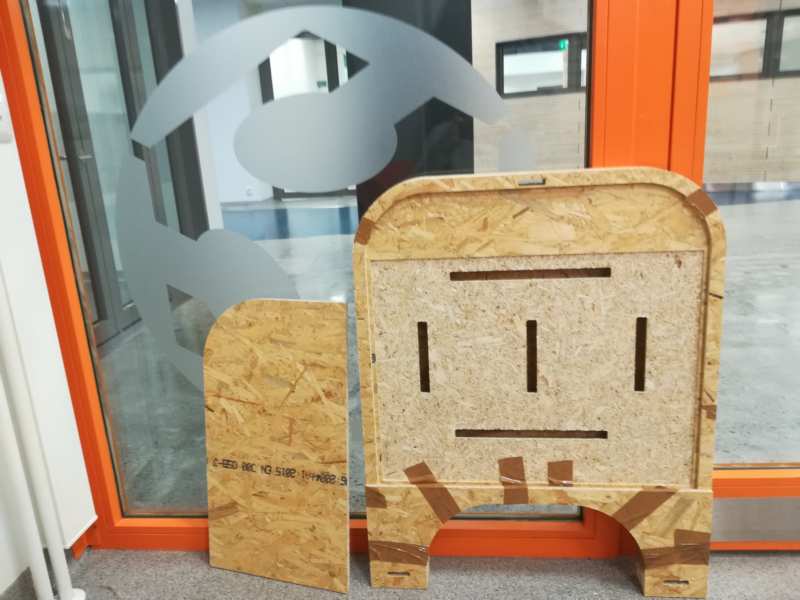
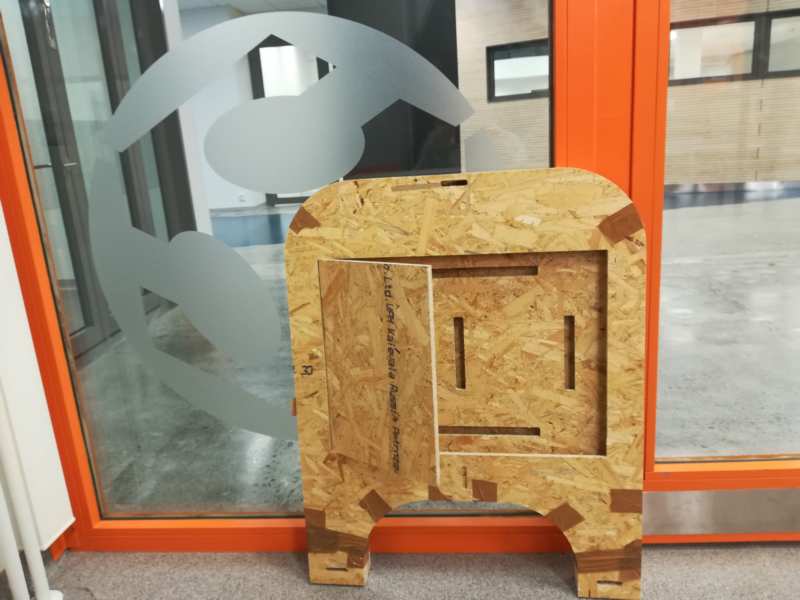
I have managed to make something for the final project!!
The wardrobe needs:
- A middle piece with a place (pocket) to put a board with the UI design. The board can be still similar to the one designed in
- Room on the back to put the electronics (should be accessible though)
- Room on the front for the "clothes" ...
- Round corners
- I would like to put other doors, and do some design on them (I love what Ola did with her big wardrobe doors)
- Handles... maybe in two weeks (Molding and casting)
- Hinges: these I plan to do with a 3D printer
Thinking about design (week 9)
The knobs (week 10)
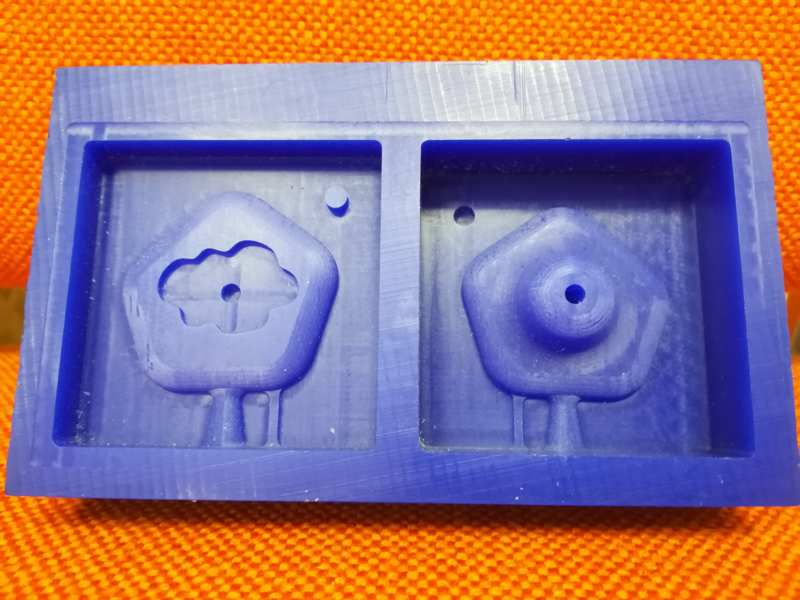
The plan this week was to cast the knobs for the wardrobe.
I wanted:
- A rounded design
- Some engraved feature (a cloud, a sun...)
- the hole for the screw
Sensor to detect if the door is closed (week 11)
The plan this week was to design, drill and program the board to detect if the doors of the wardrobe are closed, in order to switch off the lights
I wanted:
- One sensor per door
- Ligths off when door is closed
Charlieplexing LEDs (week 12)
The plan this week was to experiment a bit with LEDs, to see what I can do for the thermometer and the back board
I wanted:
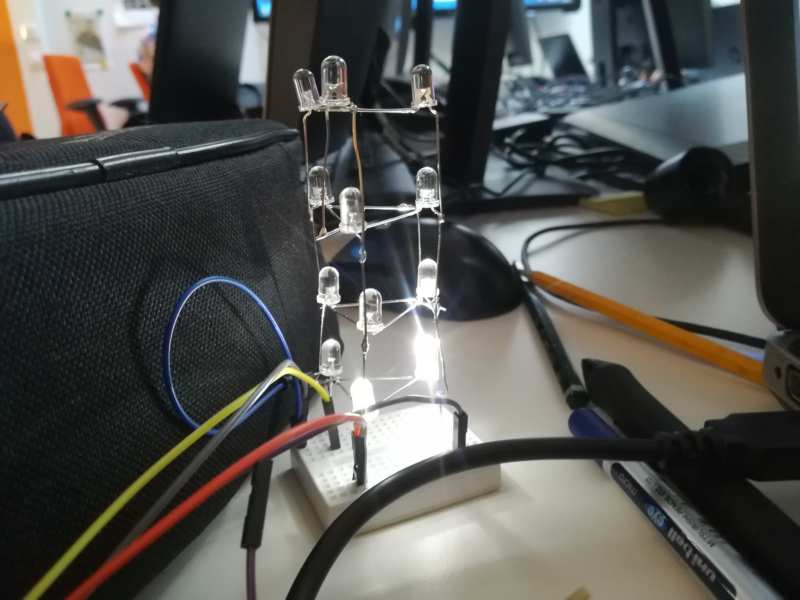
- to build a 3D tower of LEDs
- be able to manage each led, or layer of LEDs in the tower
User interface (week 13)
I have no plans, at this point, to develop any GUI for the final project. My interest this week is to advance understanding the communication between my boards (next week's assignment) using the serial communication that is necessary for the UI development.
Network (week 14)
This week I have made a first version the communication between my boards. I would like that, when the doors are closed, the leds from the thermometer are switched of.
Pushing the design (week 15)
This week I got the determination of really start pushing the final project. For that, I figured out I need:
- Plan the distribution of the board this will allow me to:
- Know the length of the thermometer
- Know the size of the clothes
- Know what else I can put in the board
- Design and build the board for the thermometer
- Design and build the board for the clothes
- Define the clothes for each row
- Design the hanging system: hanger, hanger holder
Testing embroidery (week 17)
This week I wanted to check how would it be to use the digital embroidery and to use the conductive thread with the sewing machine.
For the final project I want to add some leds to fabric, and using embroidery is a cool way of doing that.
Go to done summary
The "Doing"
Done in the assignments
- In Week 3
I did a
- better sketch of the different components needed
- Digitally designed also part of the elements.
- board for interface
- top part of the anemometer
- In Week 8
I did something big for the final project.
- In Week 10
I have designed and casted the knobs for the wardrobe.
 The knob
 - In Week 11
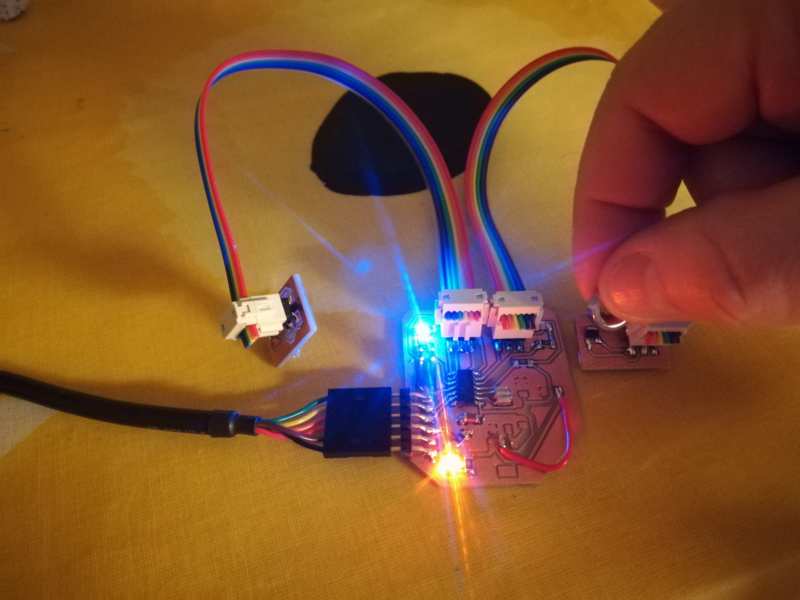
I have designed and programmed a board to detect if the door of the wardrobe are open or close. The doors will have a magnet attach that will contact the sensor when the door closes.
- In Week 12
I have designed and programmed a board to control some LEDs in form of tower, to experiment for the thermometer.
- In Week 17
I have designed and embroider a small design and I have managed to add conductive thread to the design.

