Our local instructor for this week is Iván Sánchez. This week we need to design and build a used interface for our input/output boards. I was thinking to use Three.js with Node.js. But finally, I have decided to go and use Processing, for three reasons:
- I have not used it before
- I know to build UIs, but I need want to understand better the communication with the boards
- I would like to be able to use the in and out boards with the same UI, so I prefer to focus in this
To Do
- UI for getting data from a board to the computer
- UI for sending data to a board from the computer
- Group work
The "Doing"
UI for getting data from a board to the computer
- Start getting data from serial
- Then, Print the data in processing
- And then, Do something with the data in processing
Then, I used Neil's code (
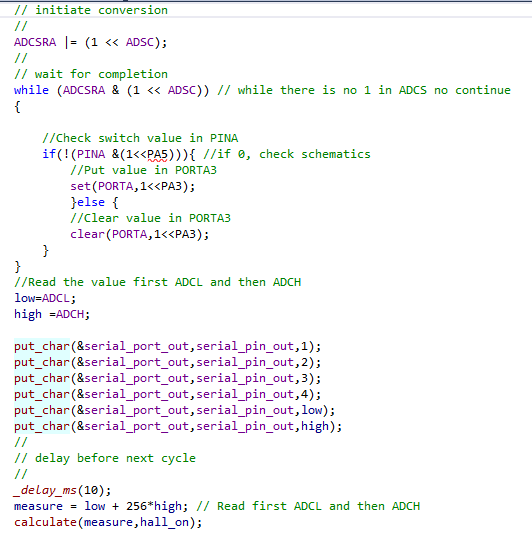
putchar function and preamble) to send data to the serial port from ATtiny44. Putchar sends a byte with start and stop bits. Then, before sending the value from the sensor, we need to send a preamble, so the receiver would know which are the two bytes that are data. So, each time the code enter the main loop , I check if there are new values from the sensor and then send them with a preamble of 4 bytes (1,2,3,4):
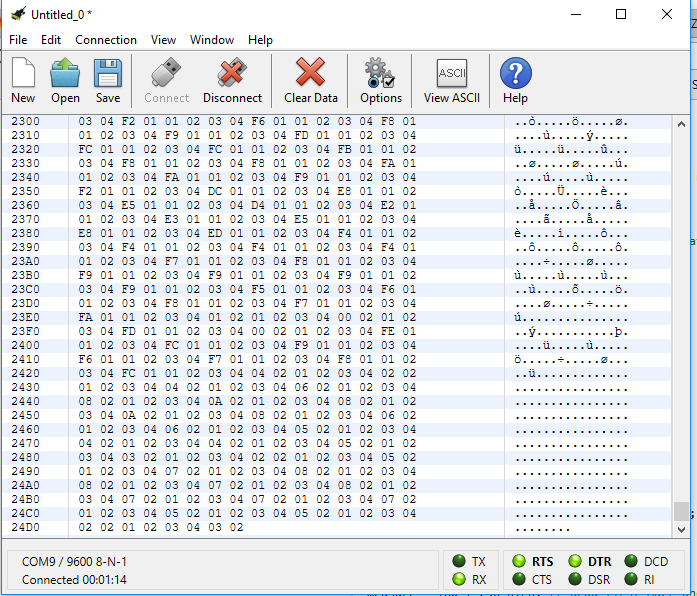
 CoolTerm showed something, good!
 Then I moved to processing. Processing is quite straight forward to use, as it looks. Things you need for a simple program printing for serial communication:
- define the variables
- The serial port number can be found in
Device managerand also in CoolTerm
- The serial port number can be found in
- implement the
setup()method - This method is executed once when the program starts
- The serial port number can be found also from the list, although I do not use that
- create the serial object
- implement the
serialEvent(Serial p)method- This method is called each time some data is detected in the serial port
- We read the serial input knowing how the serial output works (serial transmission from ATtiny44 described above)
- implement the
draw()method- The draw method is continuously called by processing any time there are changes. This behavior could be canceled with
noLoop(). But my UI is going to be dynamic, so I leave it as it is
- The draw method is continuously called by processing any time there are changes. This behavior could be canceled with
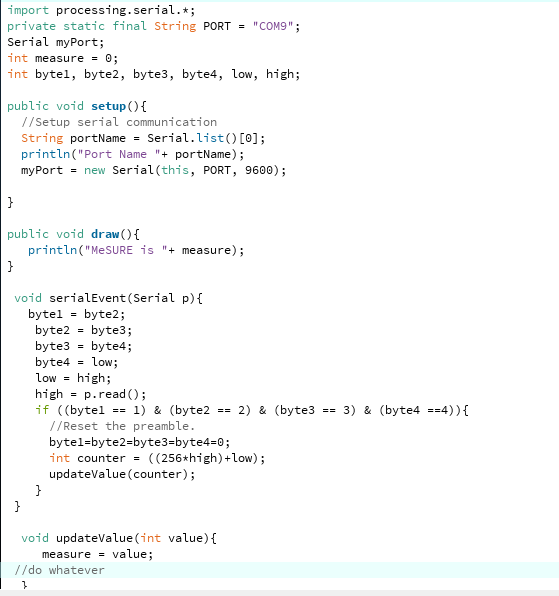 With this, I could check the values I was getting from the sensor:
- values between 0 and 512 for one side of the magnet getting closer
- values between 512 ans 1023 for the other side of the magnet getting closer
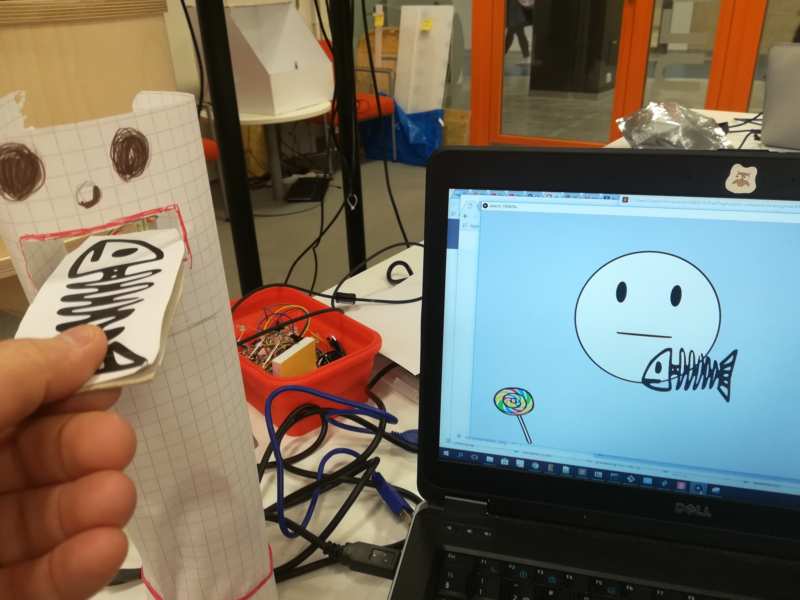
- A smiley face. The mouth size corresponds to the Hall Effect sensor values in real world.
- Static face drawing found in Google (see Resources section section). That code is for static smilie face. I would implement the code to vary the mouth size
- Mouth gets bigger if candy gets closer. The candy represents one side of a magnet in real world.
- Lollipop image found in Google with CC license (see Files section)
- Mouth gets smaller if fish-bones get closer. The fish-bones represent the other side of a magnet in real world.
- Fish image found in Google with CC license (see Files section )
- circle in the center with two ellipses (as eyes) and an arc with variable height to open/close the mouth according to hall effect data
- A picture of a candy and fish-bones that will move towards the mouth according to hall effect data
 Each element of the image has it's own draw method that I call in the implemented
 draw()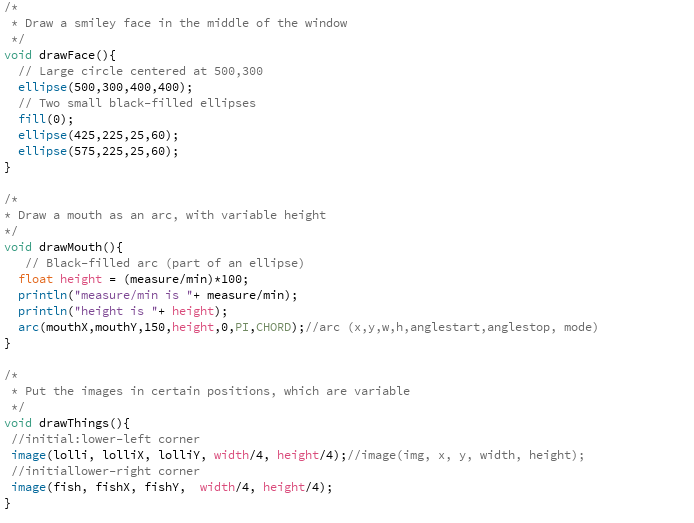 Each time a new value is received, in the
 serialEvent I call an updateData function that calculates the values for the X, Y positions of the images, according to the measurement received.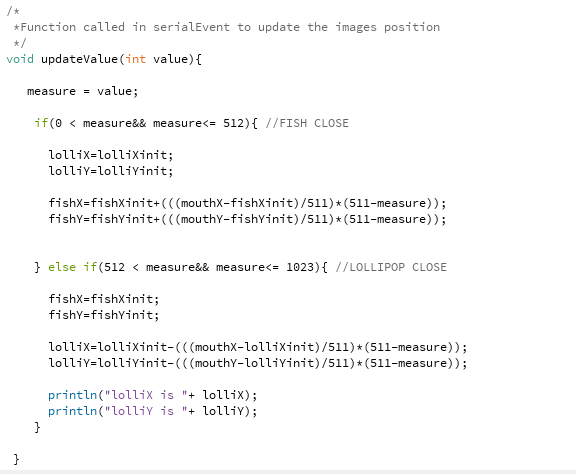 And these are the different results according with the magnet movement:
And now, make it a "bit" real world :
- I print the lollipop and fish-bones images, stick them together and put the magnet inside
- I create Pepe, a paper man with a big mouth, and I put inside the Hall Effect magnet
UI for week 10 in FabAcademy from Marta on Vimeo.
UI for sending data to a board from the computer
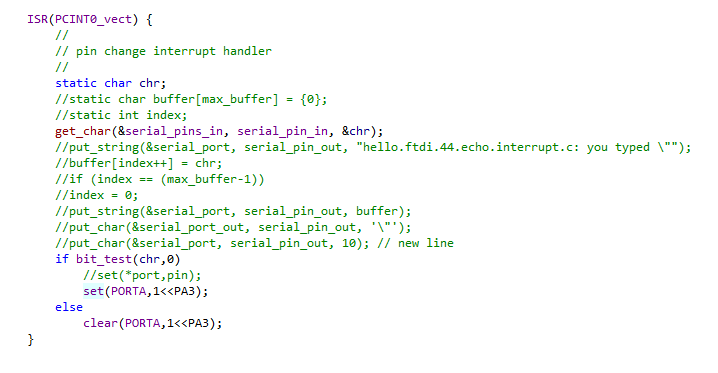
I have decided to read the data from serial in the ATtiny as one example I´ve found from Neil: a pin interruption, as I wanted to test interruptions. After modifying Neils code, (as I have a loop for sending hall effect sensor data to the computer that gets interrupted when receiving data from computer) to my own board, I have managed to make it work, but not completely:
- I managed to have the serial output working as described above: sending data in C ATtiny44 main loop
- I manage to handle a click event from the mouse in Processing
- I write to the serial port in Processing
- I read the data in the ATtiny44 with
getchar()from Neil in an interruption- I change a LED state with the information I get, as seen in the Interruption code
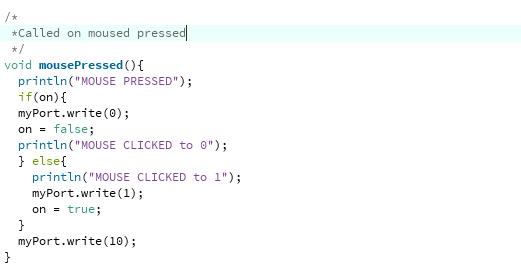
Processing code
In any case, I would try to isolate the problem, starting from removing the reading data loop from the interruption code. That is, react to the fact I am receiving data, and do not read the actual data. And see what it happens.
Resources
- Processing
- CoolTerm
- Basic code for drawing static smiley face with CC license
- hello.ftdi.44.echo.interrupt.c Neil's code for interruption
Once done
Summary
- I have implemented a serial output for my IN board
- I have implemented a serial input for my OUT board
- I have implemented a serial input in the computer with Processing
- I have implemented a serial output in the computer with Processing
- I have implemented a UI for the communication
- INPUT: A drawing changes gradually with the input serial values
- OUTPUT: A LED is switched on/off with each mouse click event
Difficulties
- As every week, lack of time.
- I cannot identify the problem with my interruption in the Code in the ATtiny44. I plan to come back to this, proceeding as described in the text to try to isolate the problem.
Learnings
- I have "learnt" how to implement interruptions in C for the ATTiny
- I may need to add a "pending" section, for those things not mandatory but that would be nice to have
Tips
- CoolTerm is a very nice serial terminal!
Files
- main.c C file for ATtiny44 send/receive through serial
- Assignment13UI.pde Processing file for UI
- lollipop image for UI CC4 Creative Commons from here
- fish image for UI. CC0 Creative Commons license from here

