
To Do
- Build a personal site describing you and your final project.
- Upload it to the class archive. Work through a git tutorial.
The "Doing"
Build the website
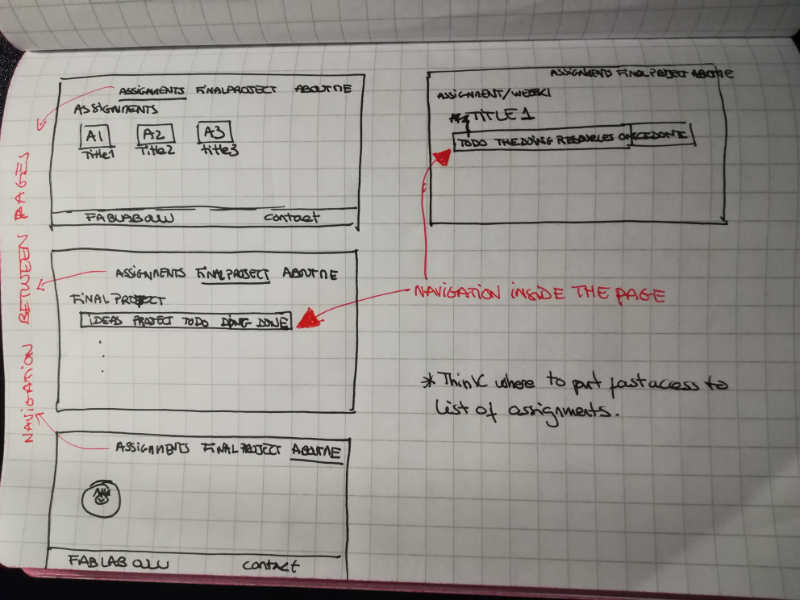
For this task, I decided to start by having a look to some of the personal sites from last year. I have some previous experience with web development. And I had quite a clear idea of what I wanted: simple design, organized and accessible. By checking last years sites, I noticed the amount of information each assignment has is huge. Thus, I decided the assigment page needed also some structure. I finally decided the design:
Our local instructor for this week, Iván Sánchez, gave us some recommendations about the page creation. He recommended not to create the page from scratch, and to use bootstrap framework to avoid headaches with resizing. He gave tips on editors, type of templates and where to find them among others. So I started to look for a template with a similar design to mine. I knew I would have to do some changes but I wanted those to be the fewest possible. Luckily, I found a nice template quite fast at bootstrapious
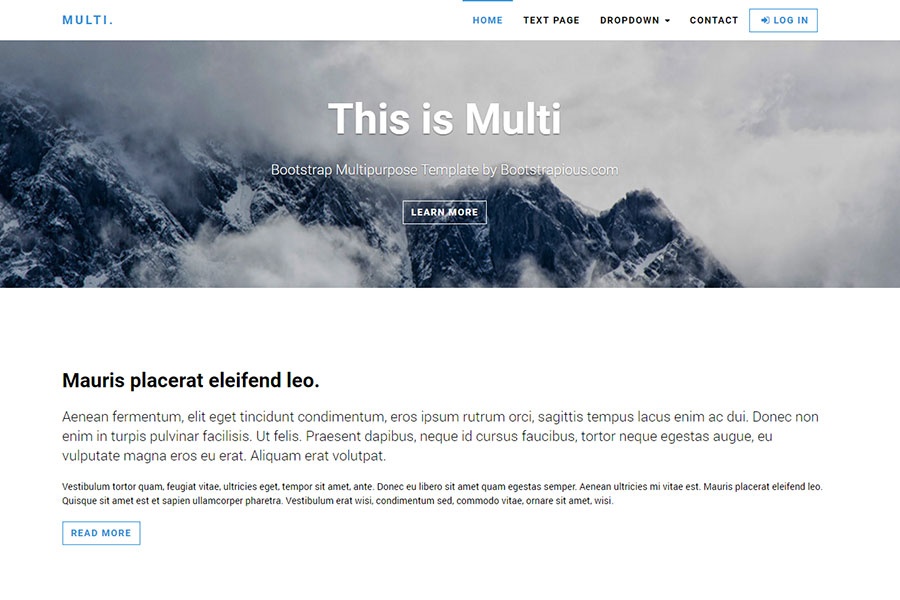
Once I downloaded the template, I started to edit it. I first removed a lot of html code I was not interested in. I ,for example, removed all the big pictues (banners and pages presentations); I removed all the structures that defined comments of users. Then, I added my own html code, to achive my own design, and started adding some content. As my design implied to have one page per assignment, I decided to create the template for that page, so I could easily replicate it later when needed. I created, as specified by the template developer, a custom.css file to add my own styles, or modify th existing ones. I, for example, changed the general background color. I corrected the upper navigation bar, that was not behaving as I wanted with the dropdown menu. I also added some javascript to correct a problem with the anchors to the pages: the fixed navigation bar created an issue with the positioning of the referencef id. Finally, I took from Iván's page an arrow that allows to go back to the top of the page, and I tailored to my match my theme.
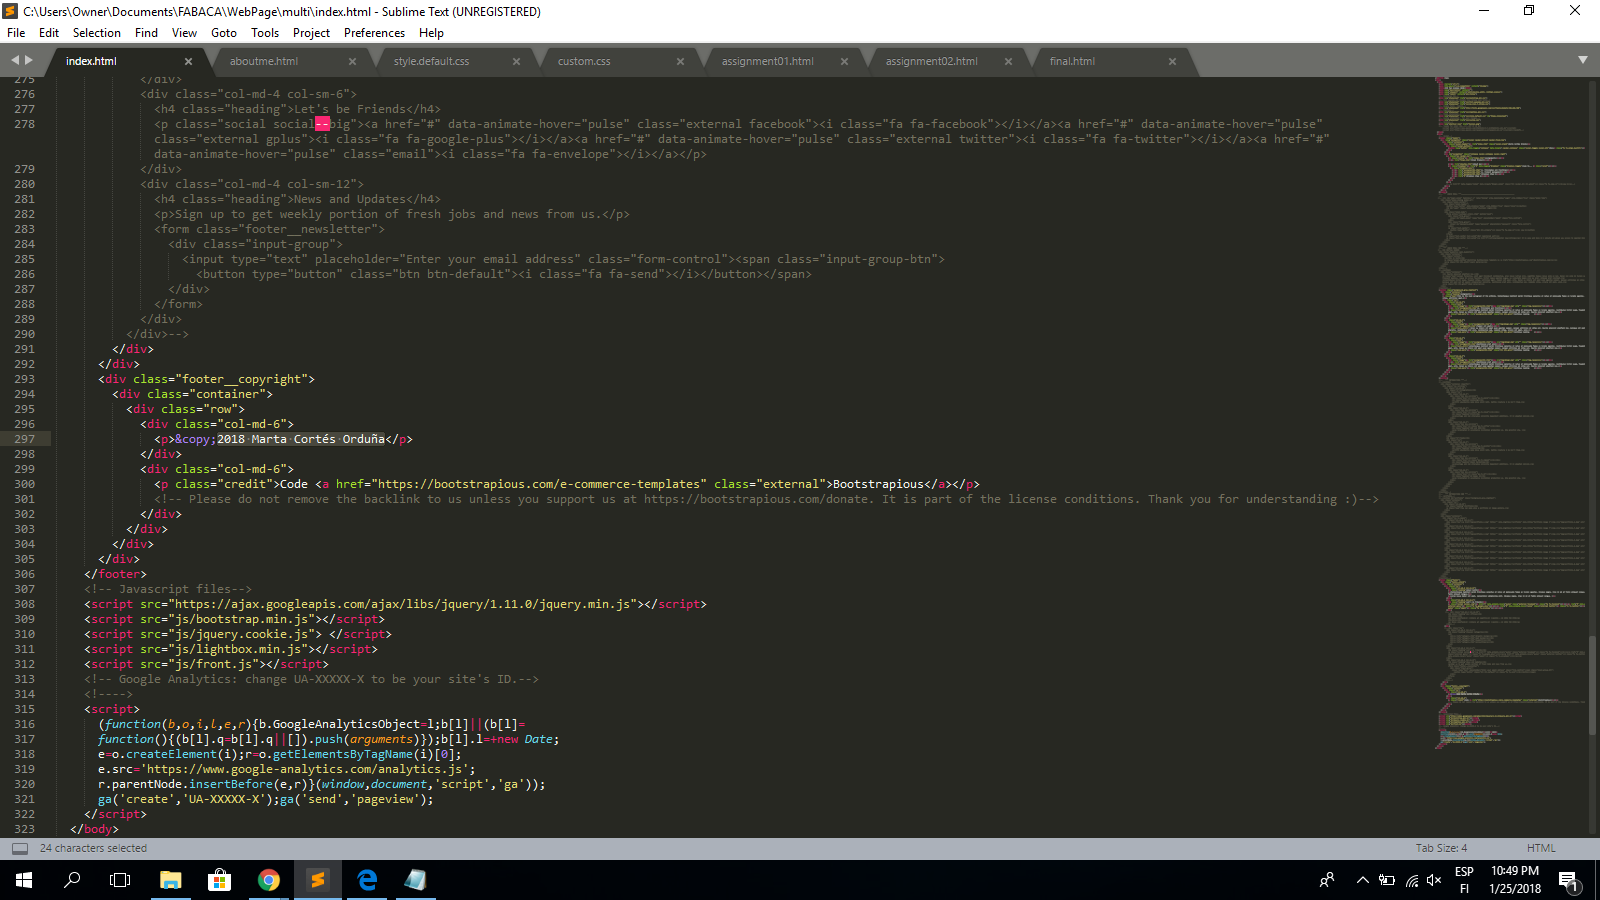
I chose to use Sublime Text for editing. I have been using Notepad ++ for a long time for Web development. I started to use Sublime Text some months ago for php programming, and now I decided to give it a go with Web development too.
Git: uploading the website to the archive
Before I started with the process, I decided to do the following git tutorials/guides:
- http://rogerdudler.github.io/git-guide/
- https://confluence.atlassian.virtues.fi/display/5OTCSE/Introduction+to+Git
- http://marklodato.github.io/visual-git-guide/index-en.html
First, clone the Fabacademy repository
First of all, I needed the account in fabcloud gitlab. I got an email the first week for creating it. We just then needed to change the password.
Iván gave us some recommendations on how to proceed to install and start using git. I followed his instructions and did not find any problems. These are the steps:
- Once logged in in the gitlab, you see a list with the projects of all the students of the Fablab. You just click on yours.
- When you want to clone to a computer for the first time, you need to generate a pair of public/private key to identify yourself with the gitlab server
- Open the Git Bash CMD and type
- The pair of public/private key is stored in: your_home_directory/.ssh as follows:
- id_rsa -> Private key
- id_rsa.pub -> Public key
- Open the Public key (id_rsa.pub) with a text editor and copy its content in https://gitlab.fabcloud.org/profile/keys (go to settings > ssh keys)
- Download the repo from the remote repository to your computer (creating a local repository). You need the URL shown in the details page of your project; it is labelled SSH
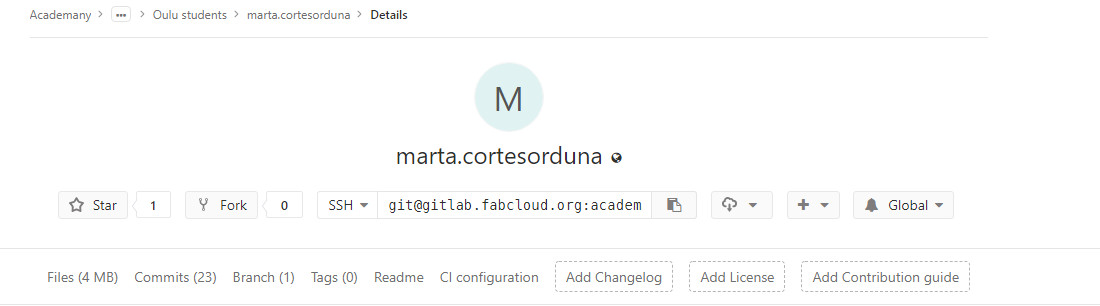 URL to clone my repositorry
The line of code for cloning a remote repositiory is
git cloneurl
To do this:
ssh-keygen -t rsa -C "your.email@example.com" -b 4096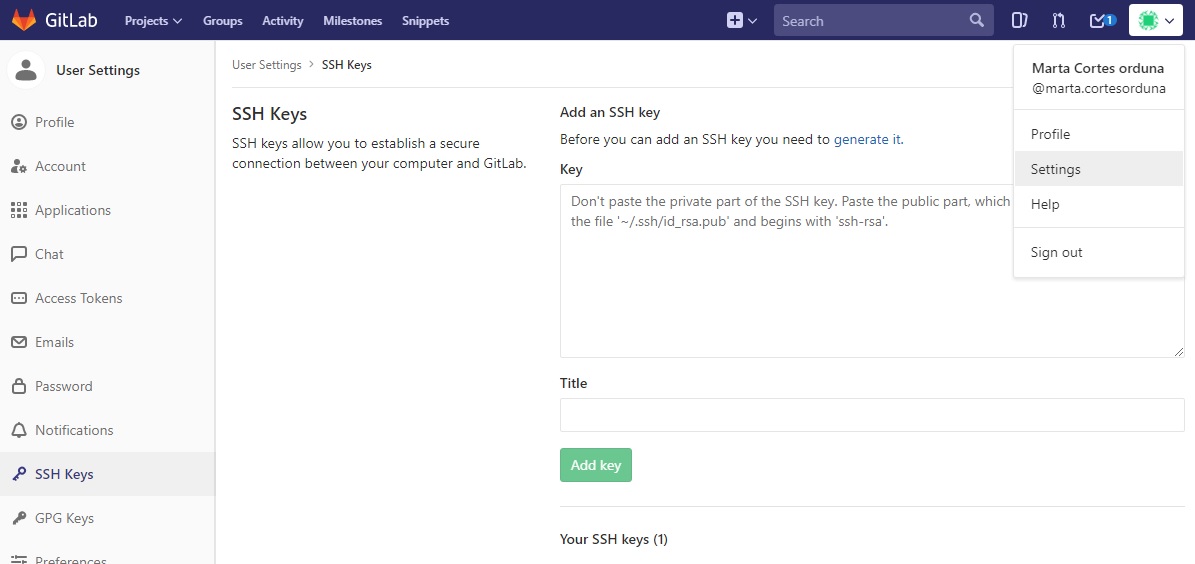
Second, upload the first version of the webpage
We have been strongly advised about the size of the files we upload to the repository. Iván pointed to the du command, to get information on the size of the files in our webpage folders. I checked with the du help option the options I prefered. I wanted the information about all the files, including folders and subfolders (which is given by -a) and I wanted the information human readable (-h). So, before starting the uploading process I checked by writing the following in the git bash:
du -a -h * | sort -rn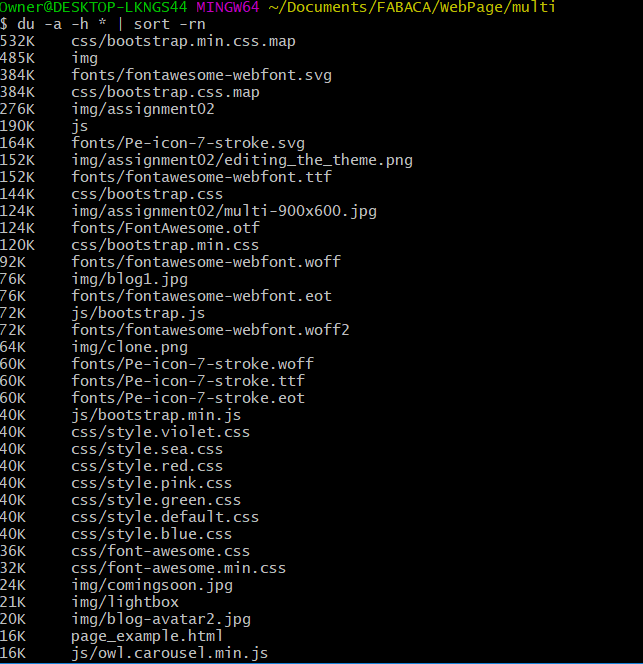
Once I am sure the sizes are OK, I proceed to upload the first version of the webpage. These are the steps to upload content to the remote repository:
Note: In case there are any discrepancies on step 1, you may need to merge the versions (do not force!) or review the changes manually.
git pull origin mastergit status--all, that adds everythinggit add {what}git commit -m {"descriptive text"}git push origin master
However, when I tried to do the first commit, I got the following error>
*** Please tell me who you are.

Run

  git config --global user.email "you@example.com"
  git config --global user.name "Your Name"

to set your account's default identity.
Omit --global to set the identity only in this repository.

fatal: unable to auto-detect email address (got 'Owner@DESKTOP-LKNGS44.(none)')Last thing to do was to add the necessary script to make the page public. For that:
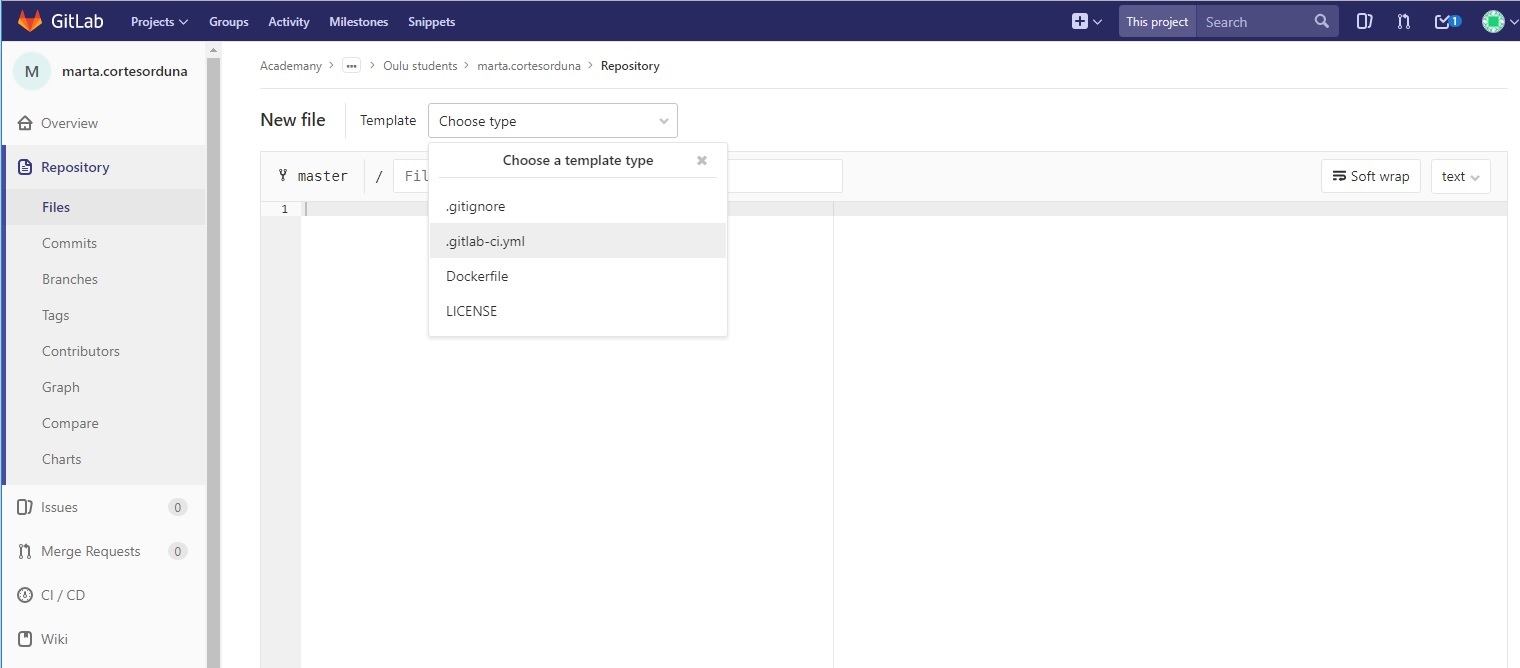
- An the main page of the repository, press the plus symbol to add a new file. This opens a new page.
- On the top of the New File page, for Template, from the dropdown Choose Type, choose
.gitlab-ci.yml - A new dropdown appears, Apply a GitLab CI Yaml template. Choose HTML. The New File is populated
- At the bottom of the page, change the commit message, and press commit.
- Do not forget to pull from your local repo
Resources
- Notepad ++, for editting the code, notes
- Sublime Text, for editting the code
- Git, as version control tool
- Multi Template, template chosen for my personal site
Once done
Summary
- I have created my personal site.
- I have learnt how to clone to my computer a repo from GitLab, and I have practised with the most common commands for git.
- I have checked some guides for using git.
Difficulties
Not remarkable difficulties this time
Learnings
Documenting is going to take a lot of time!
Tips
- Document as you go, whenever it is possible
- Do not forget git main commands (See)
- Always check files sizes before uploading!!!