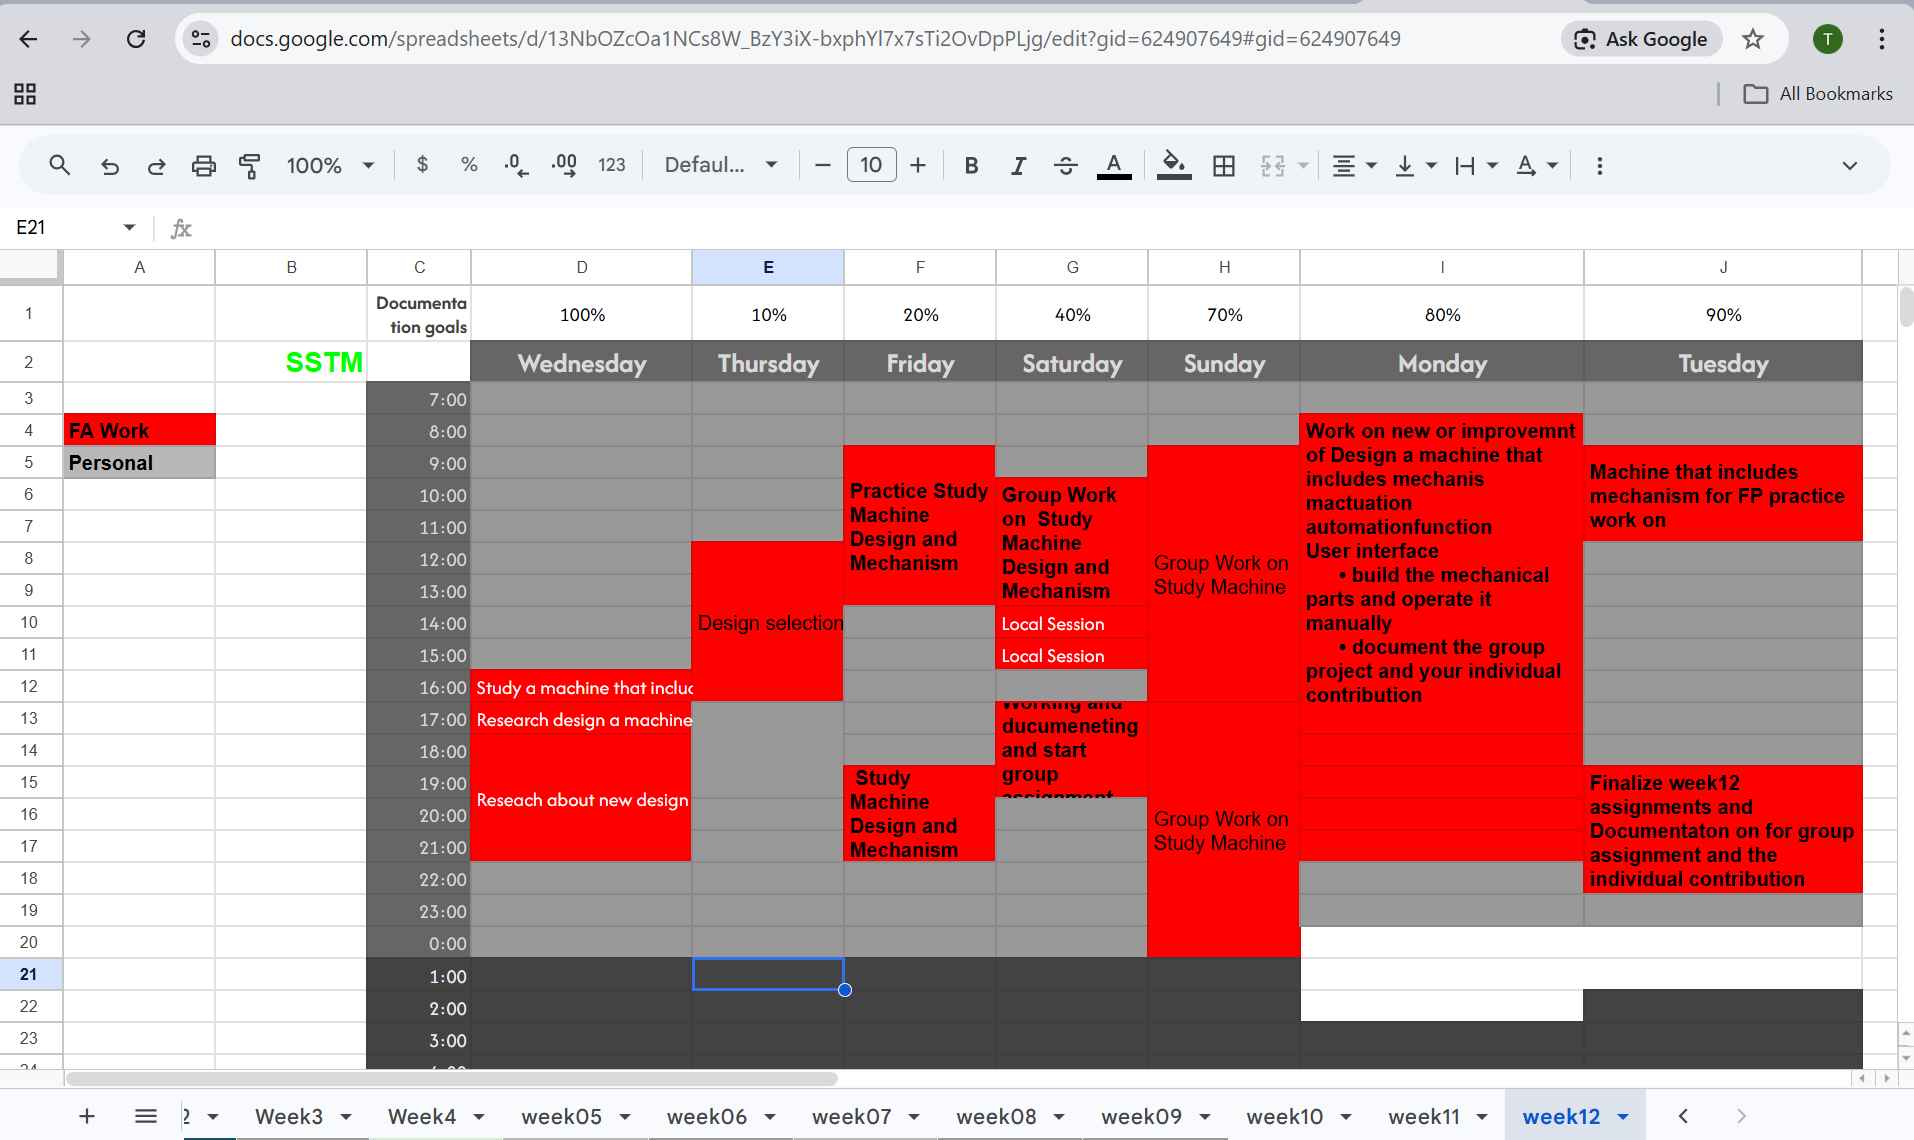
Week 12 Mechanical Design & Machine Design
SSTM
Group Assignment
Please visit our group assignment For the full concept
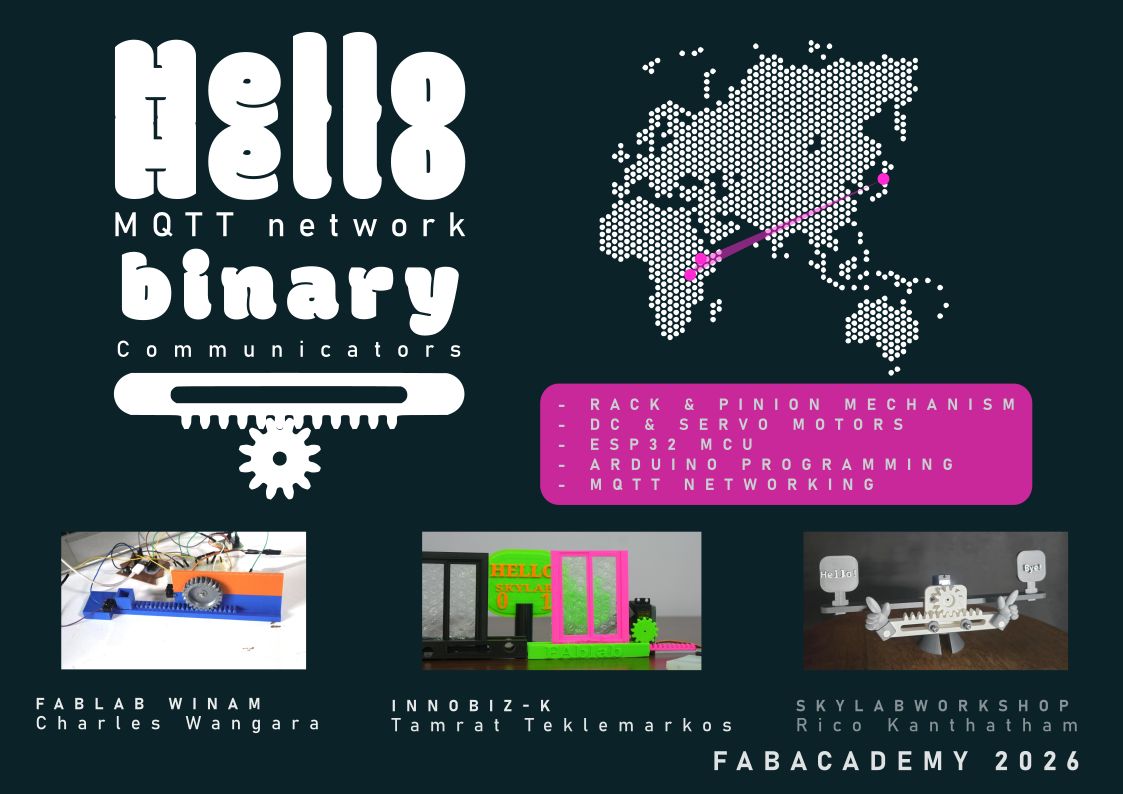 Group assignment cover page designed by Rico
Collaborative Machine Design Exploration and Individual Contribution
In this week, we worked as a team consisting of Rico (Instructor), Tamrat (me), and Charles to explore the principles of mechanical and machine design. Our focus was on understanding how different components such as motors, parts and control systems come together to create functional machines.
As a group, we analyzed multiple engineering projects in each of the center we working and discussed how each system works and function from MQTTs. We shared responsibilities by reviewing concepts, explaining ideas to each other, and connecting theoretical knowledge with practical applications to design made and test them in our center by Rico’s leading us as always. This collaborative process helped us understand not only the technical aspects but also the workflow of real engineering teamwork.
We learn from Rico’s about Machines… Design…Assemble and controlling
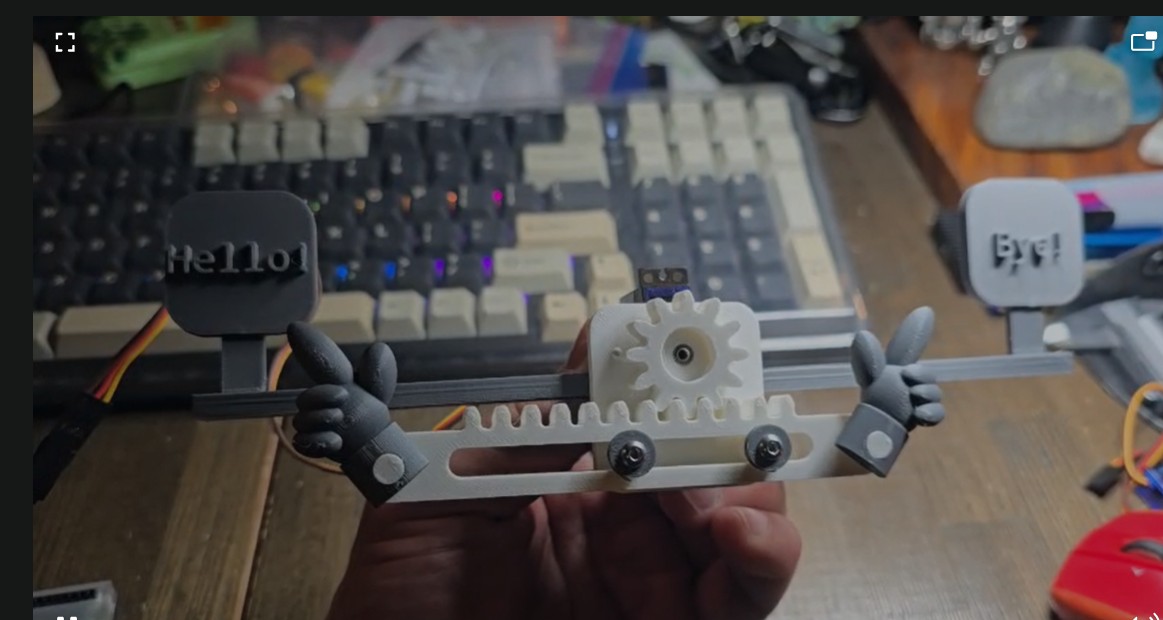
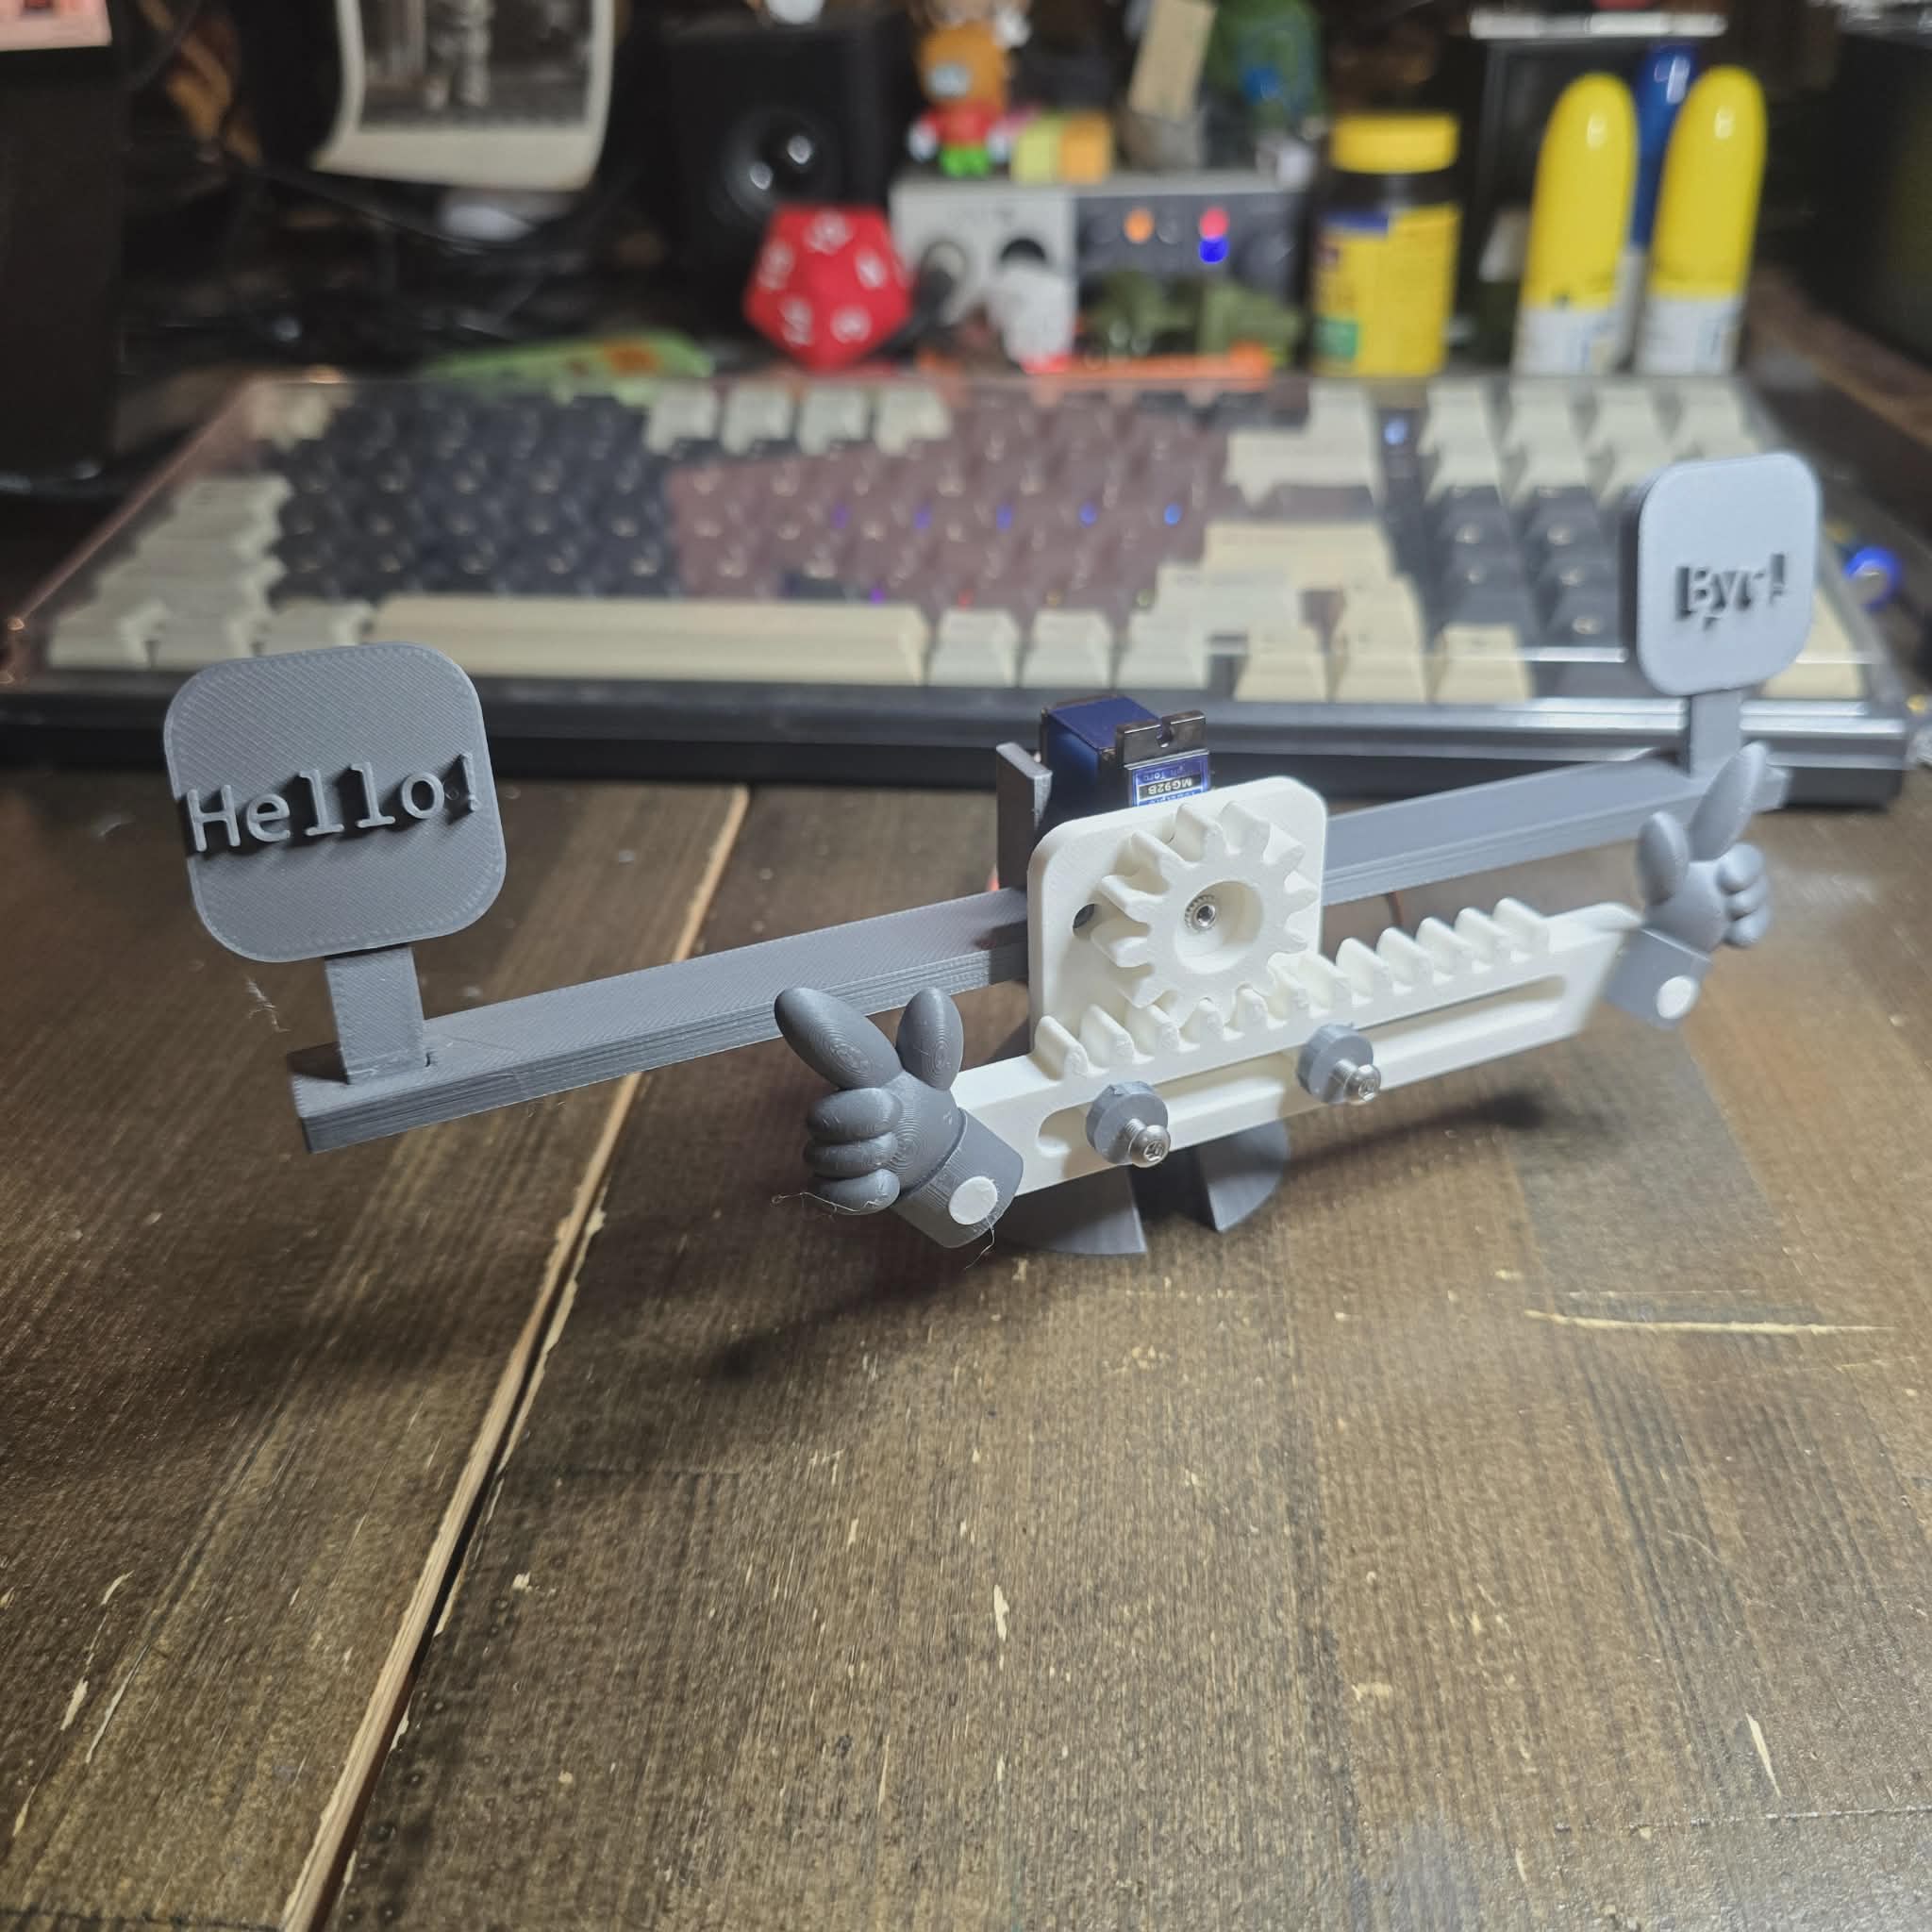
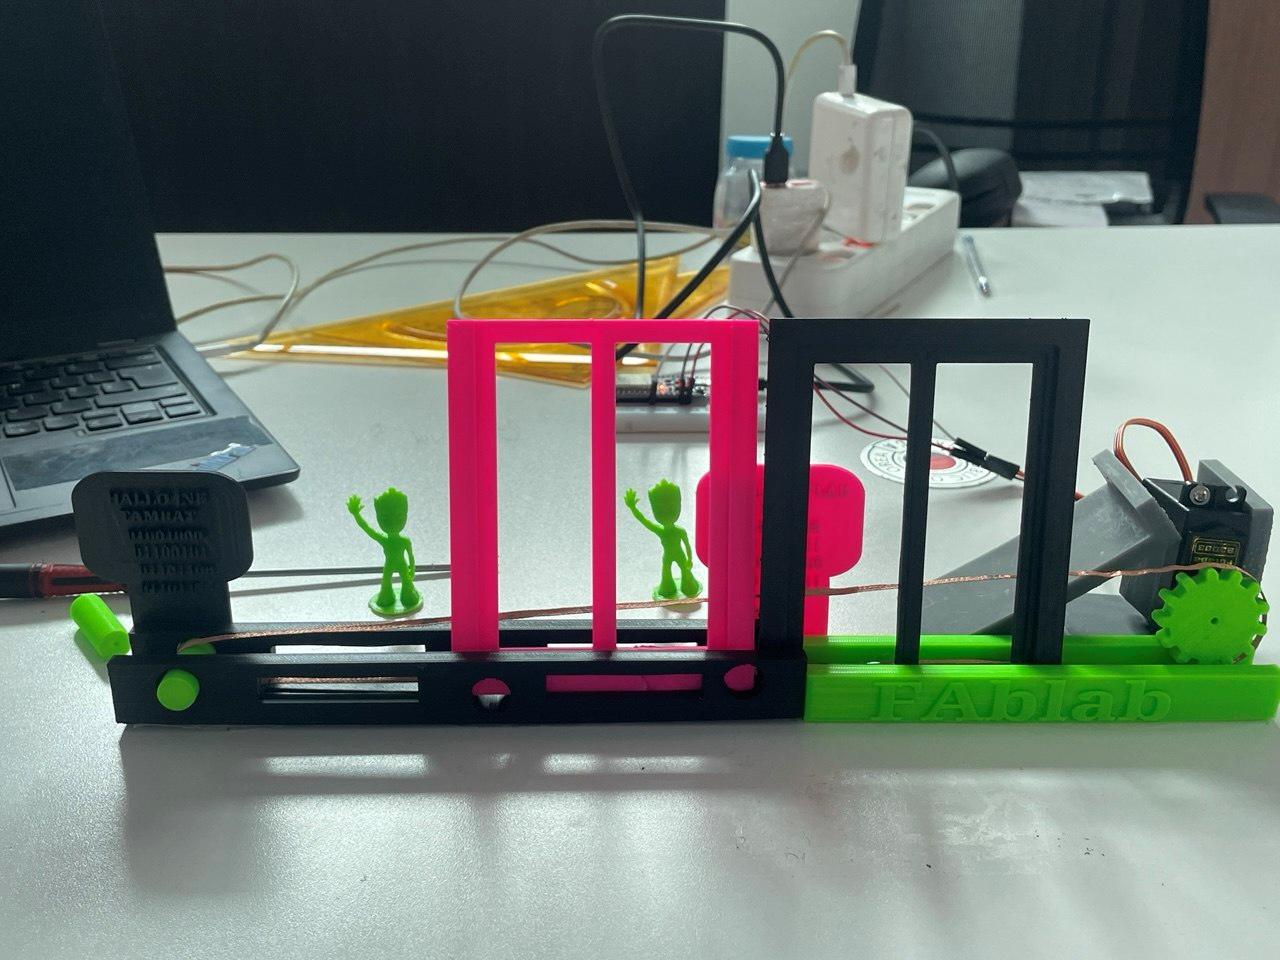
We work on Hallo-Hallo machine concept to control machines we built from our centers
In skylab Japan
- I learn how Design print and assembling from Rico’s and the group and waiting for my own one
-
Some image from Rico for us to group work practice
-
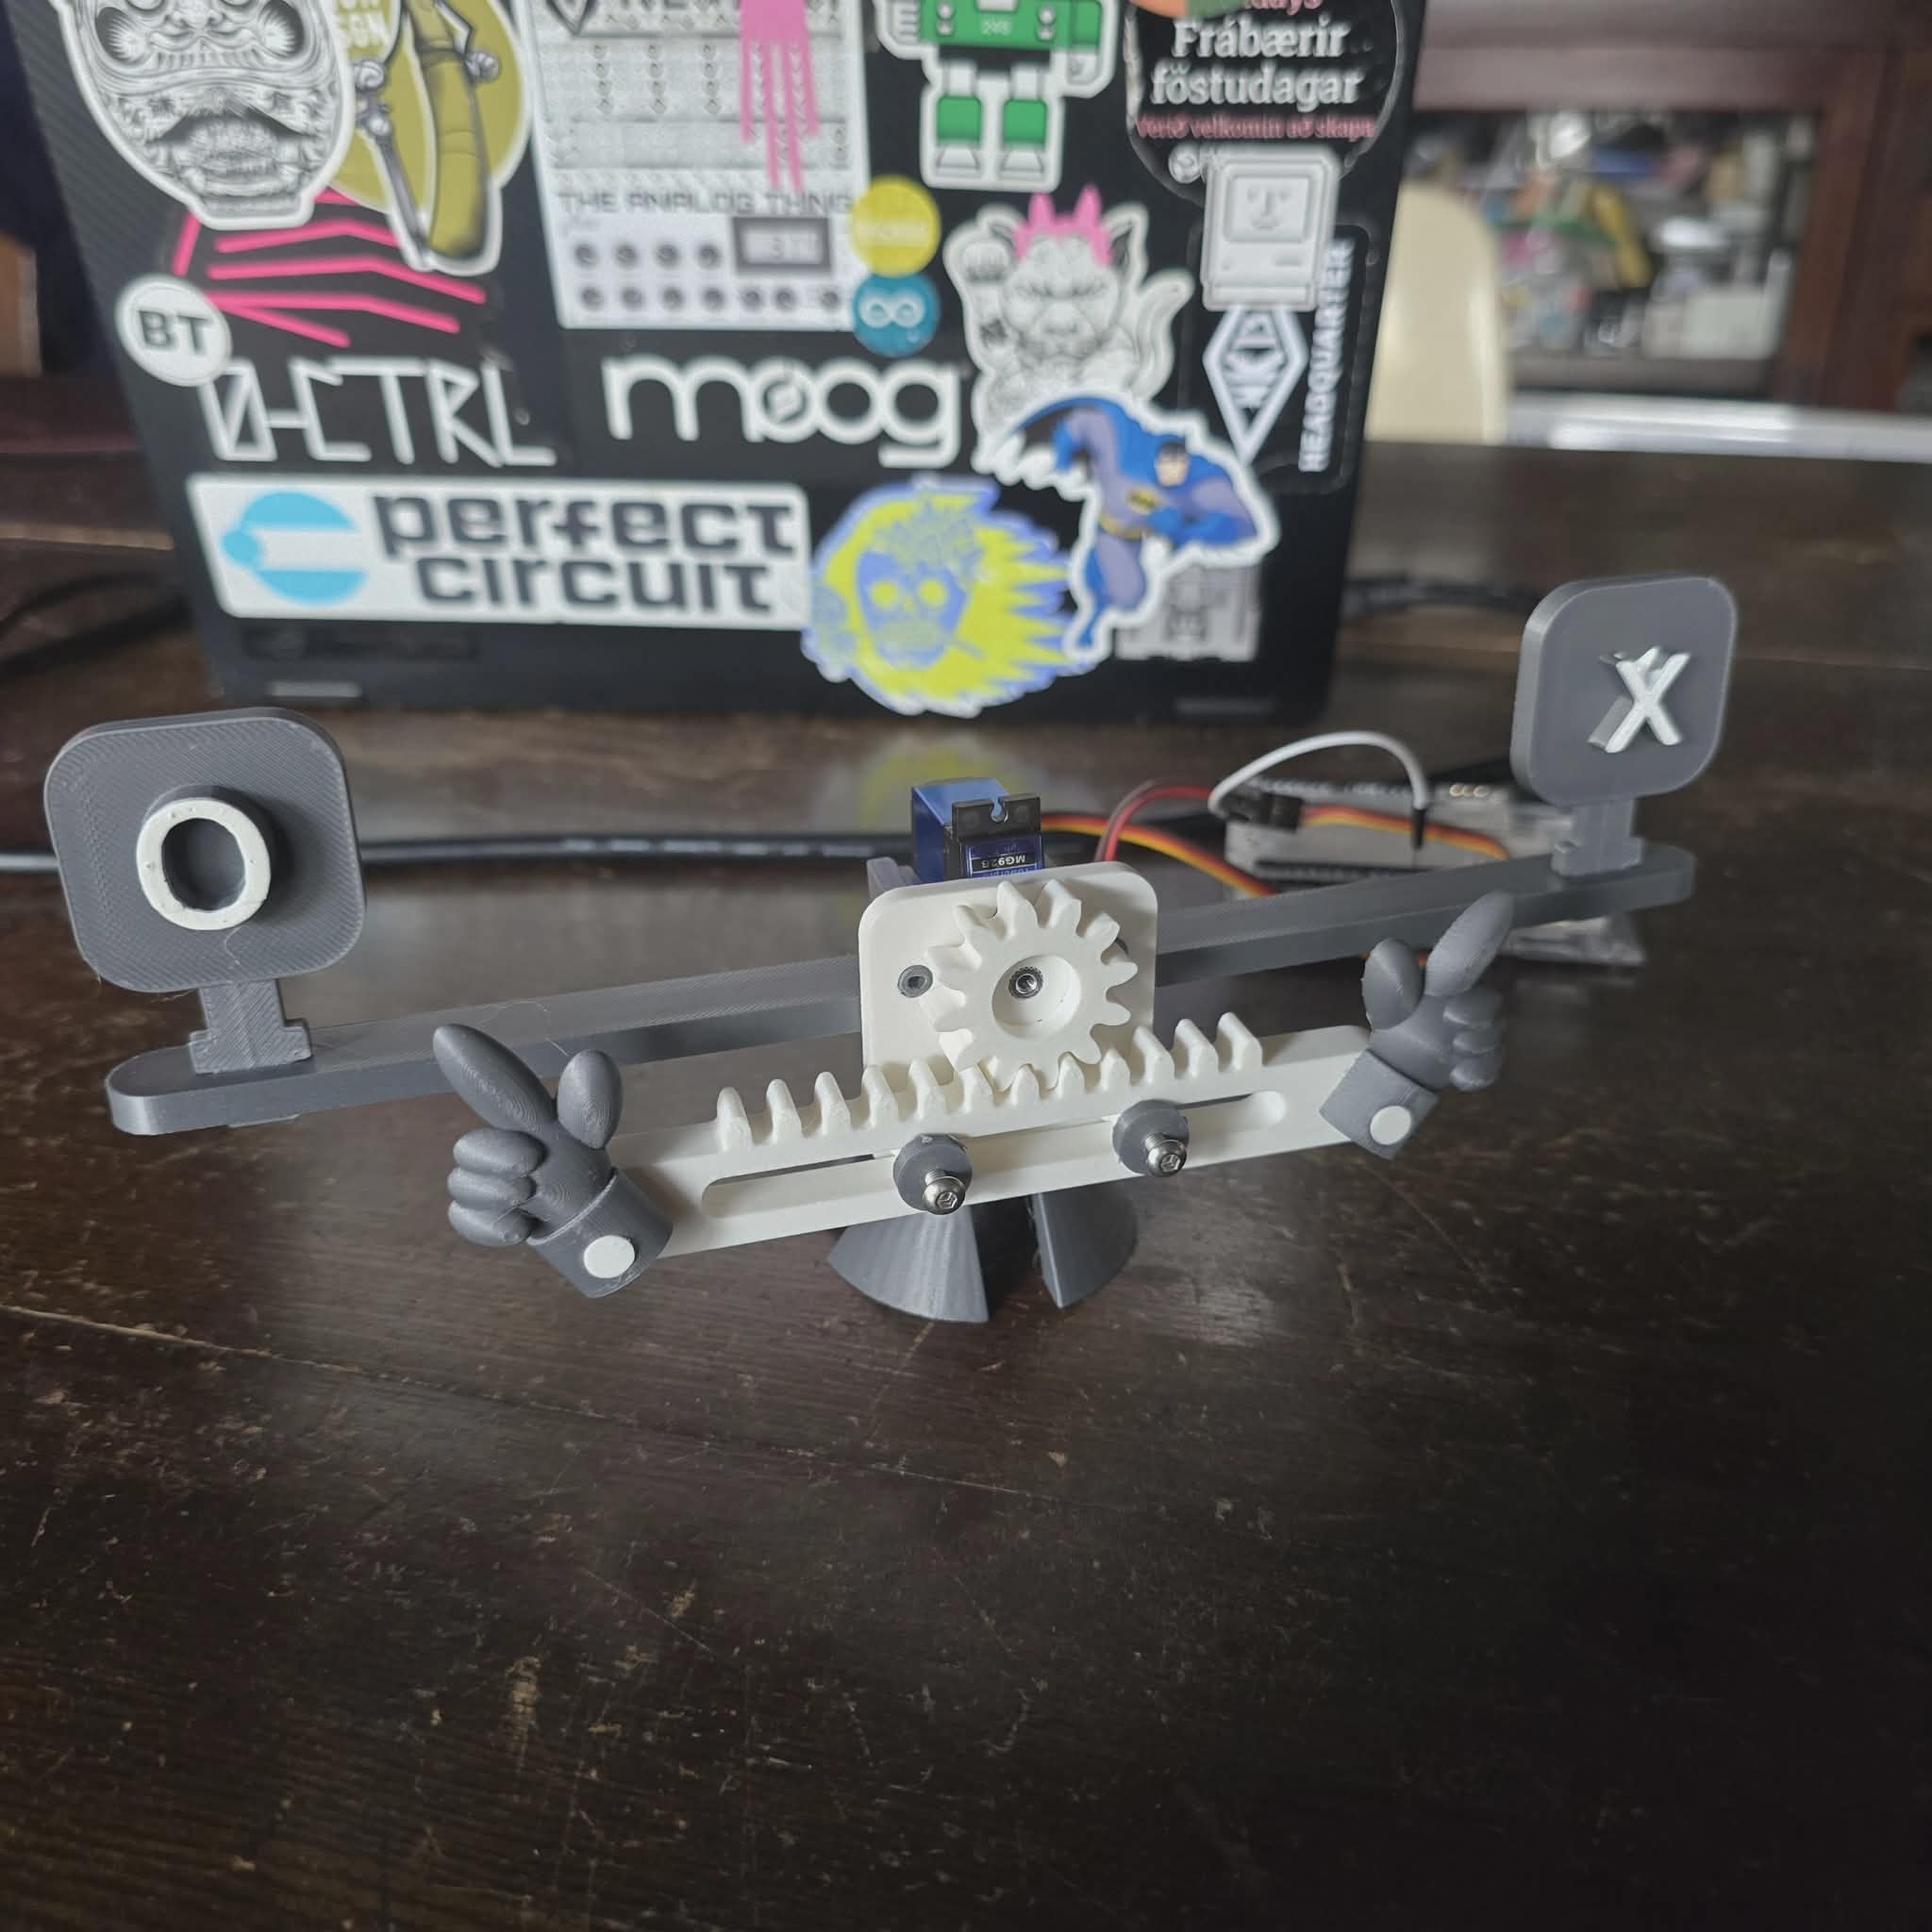
How to assemble our contribution by Rico
-
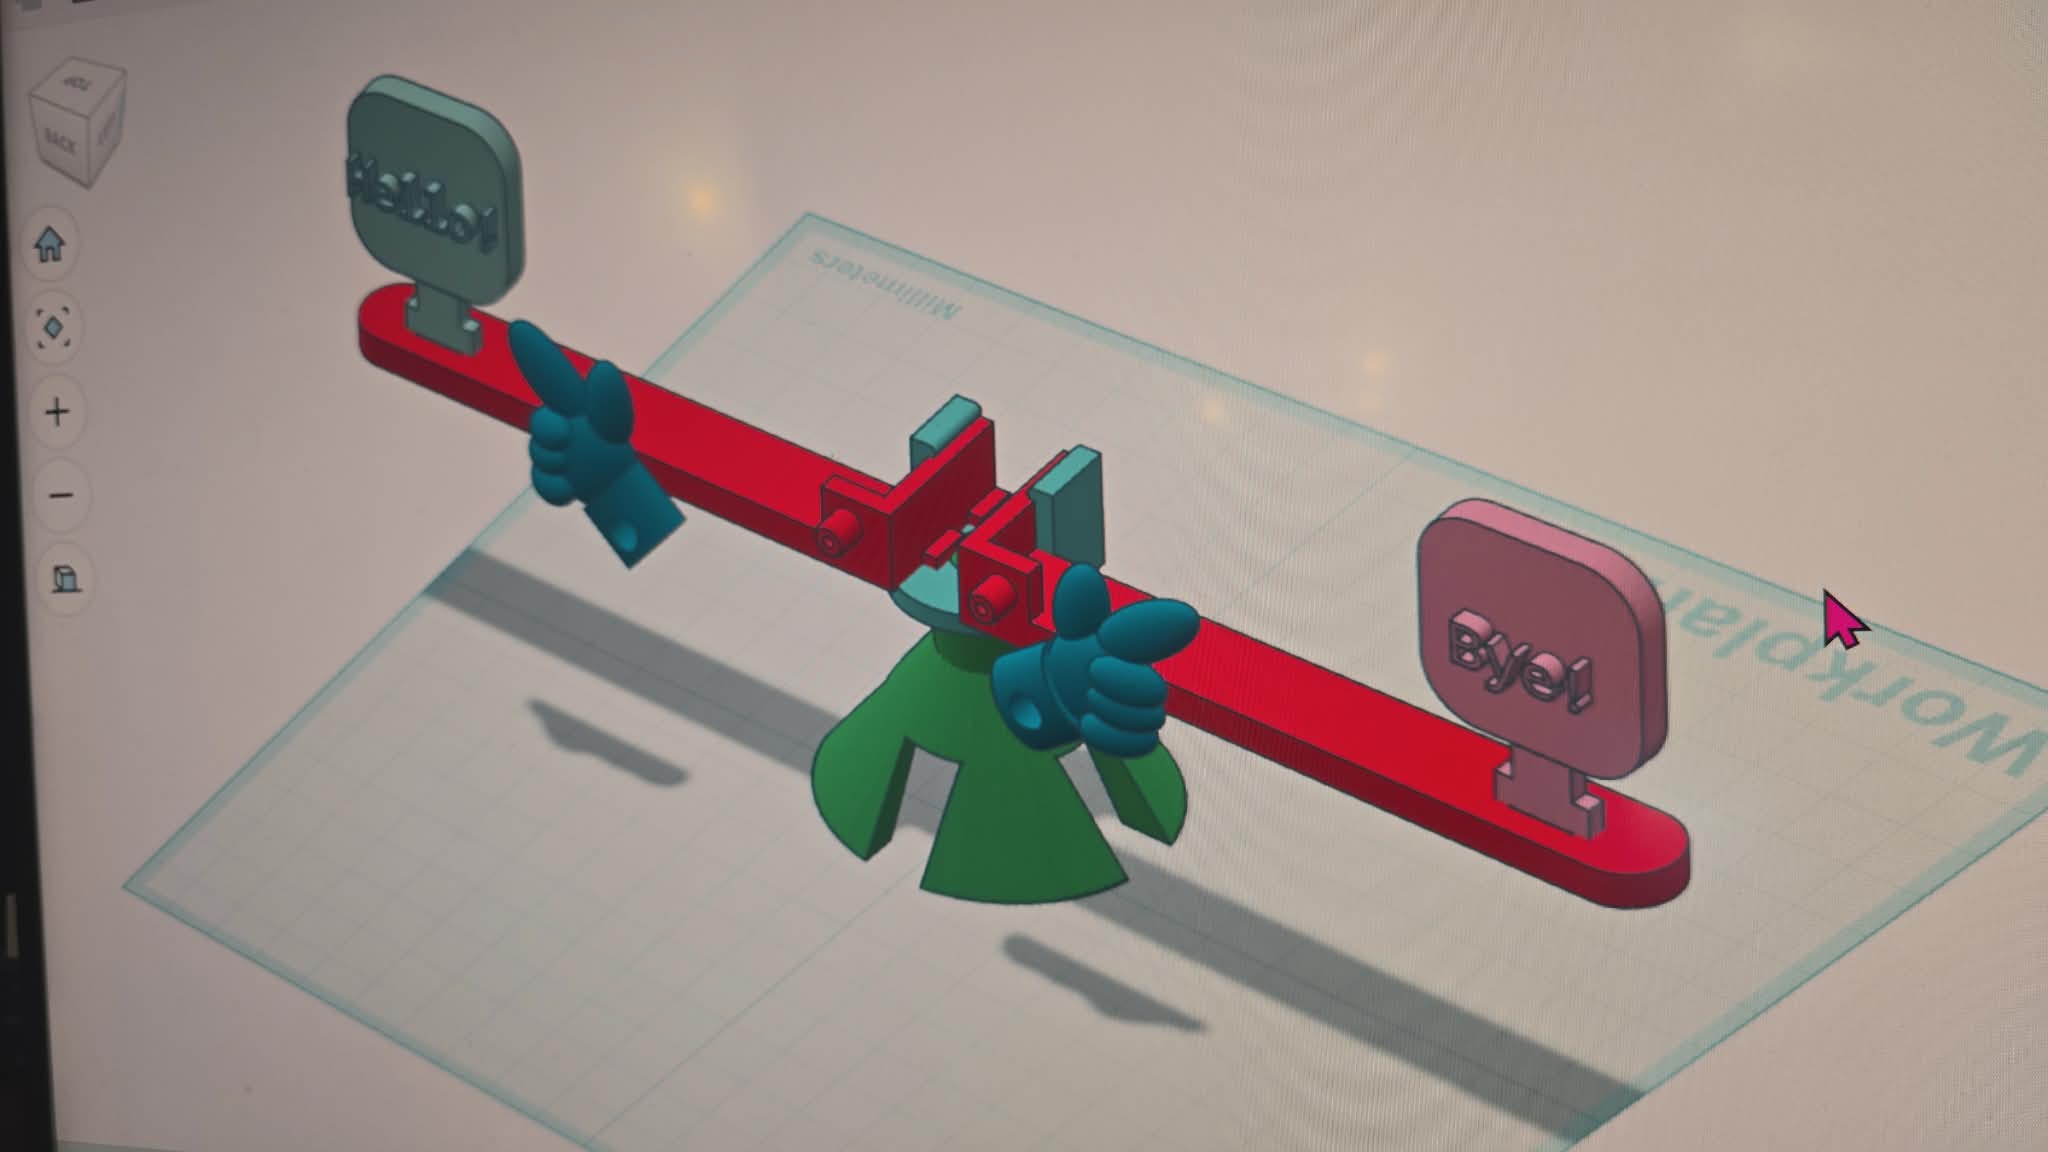
Hallo-Hallo project implementation controlling machine
in Winnam lab kenya
- Deign concept mechanism by Charles
- assembeled machine conveyor by Charles
in Innobiz-K INK Ethiopia
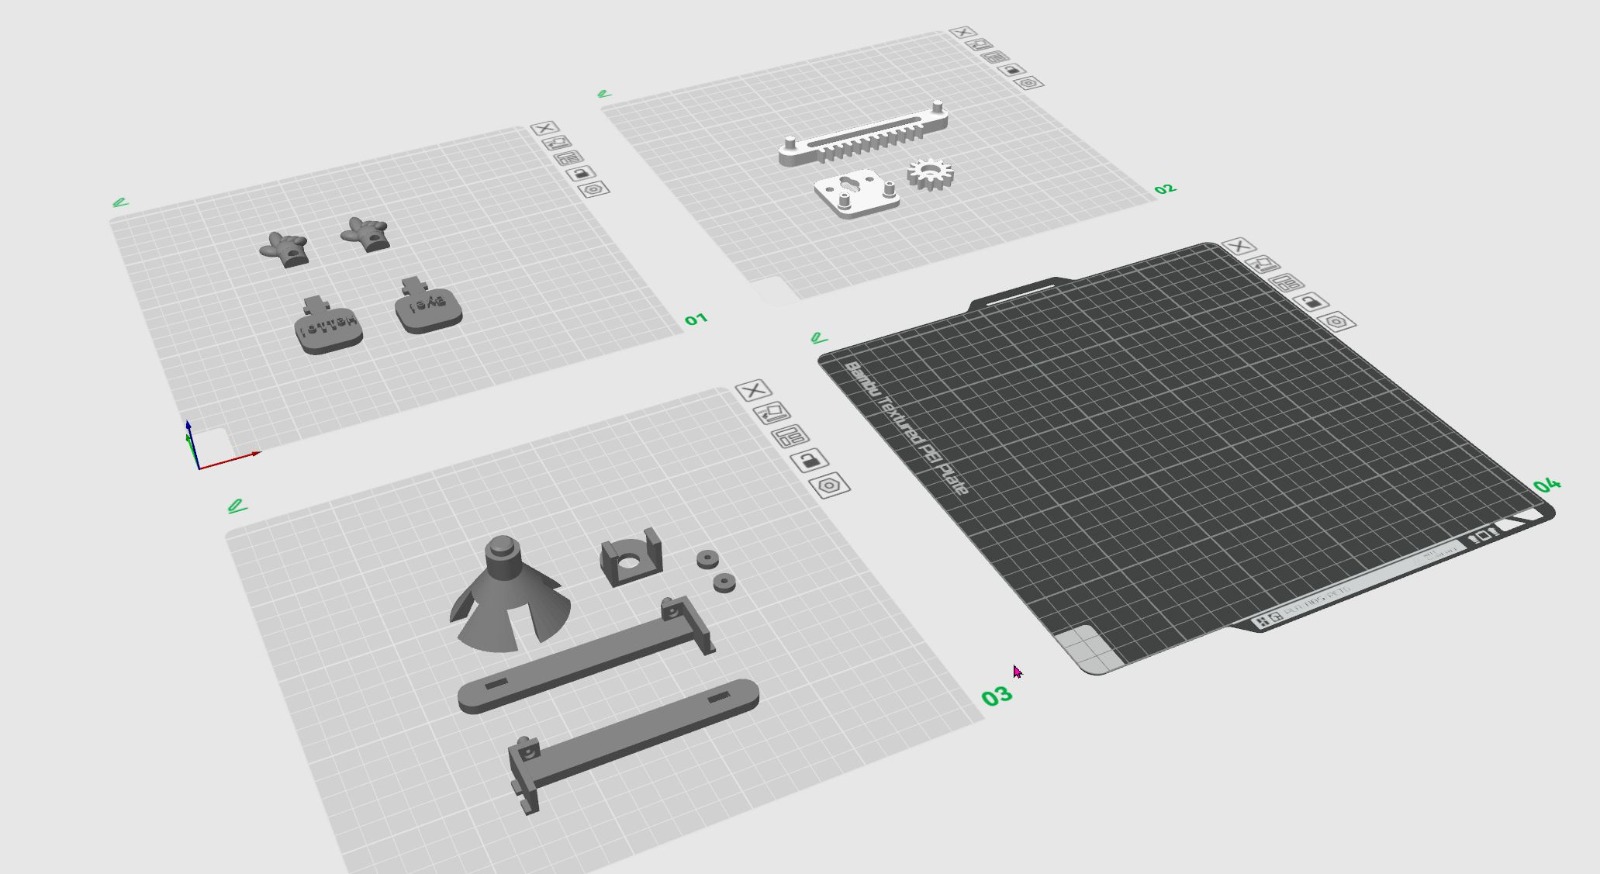
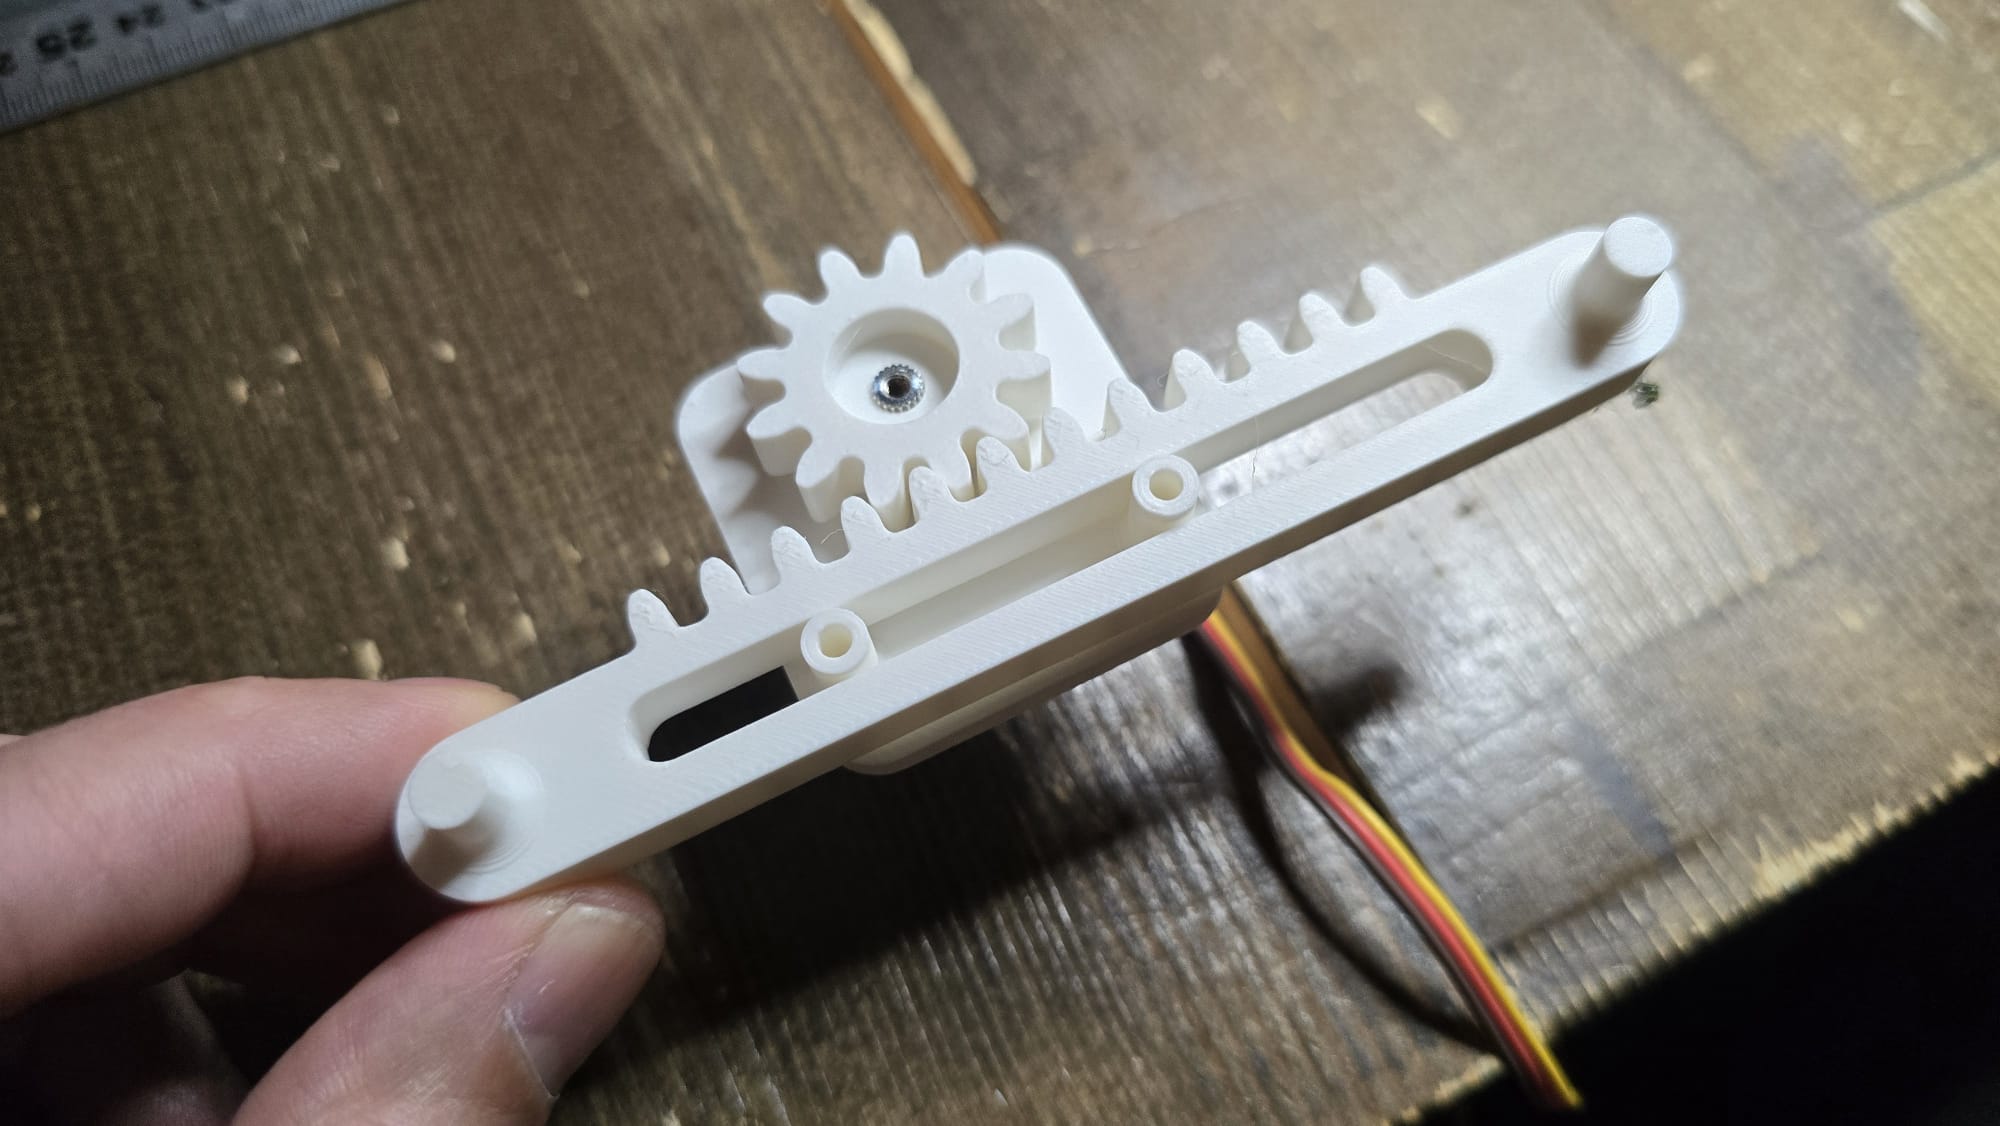
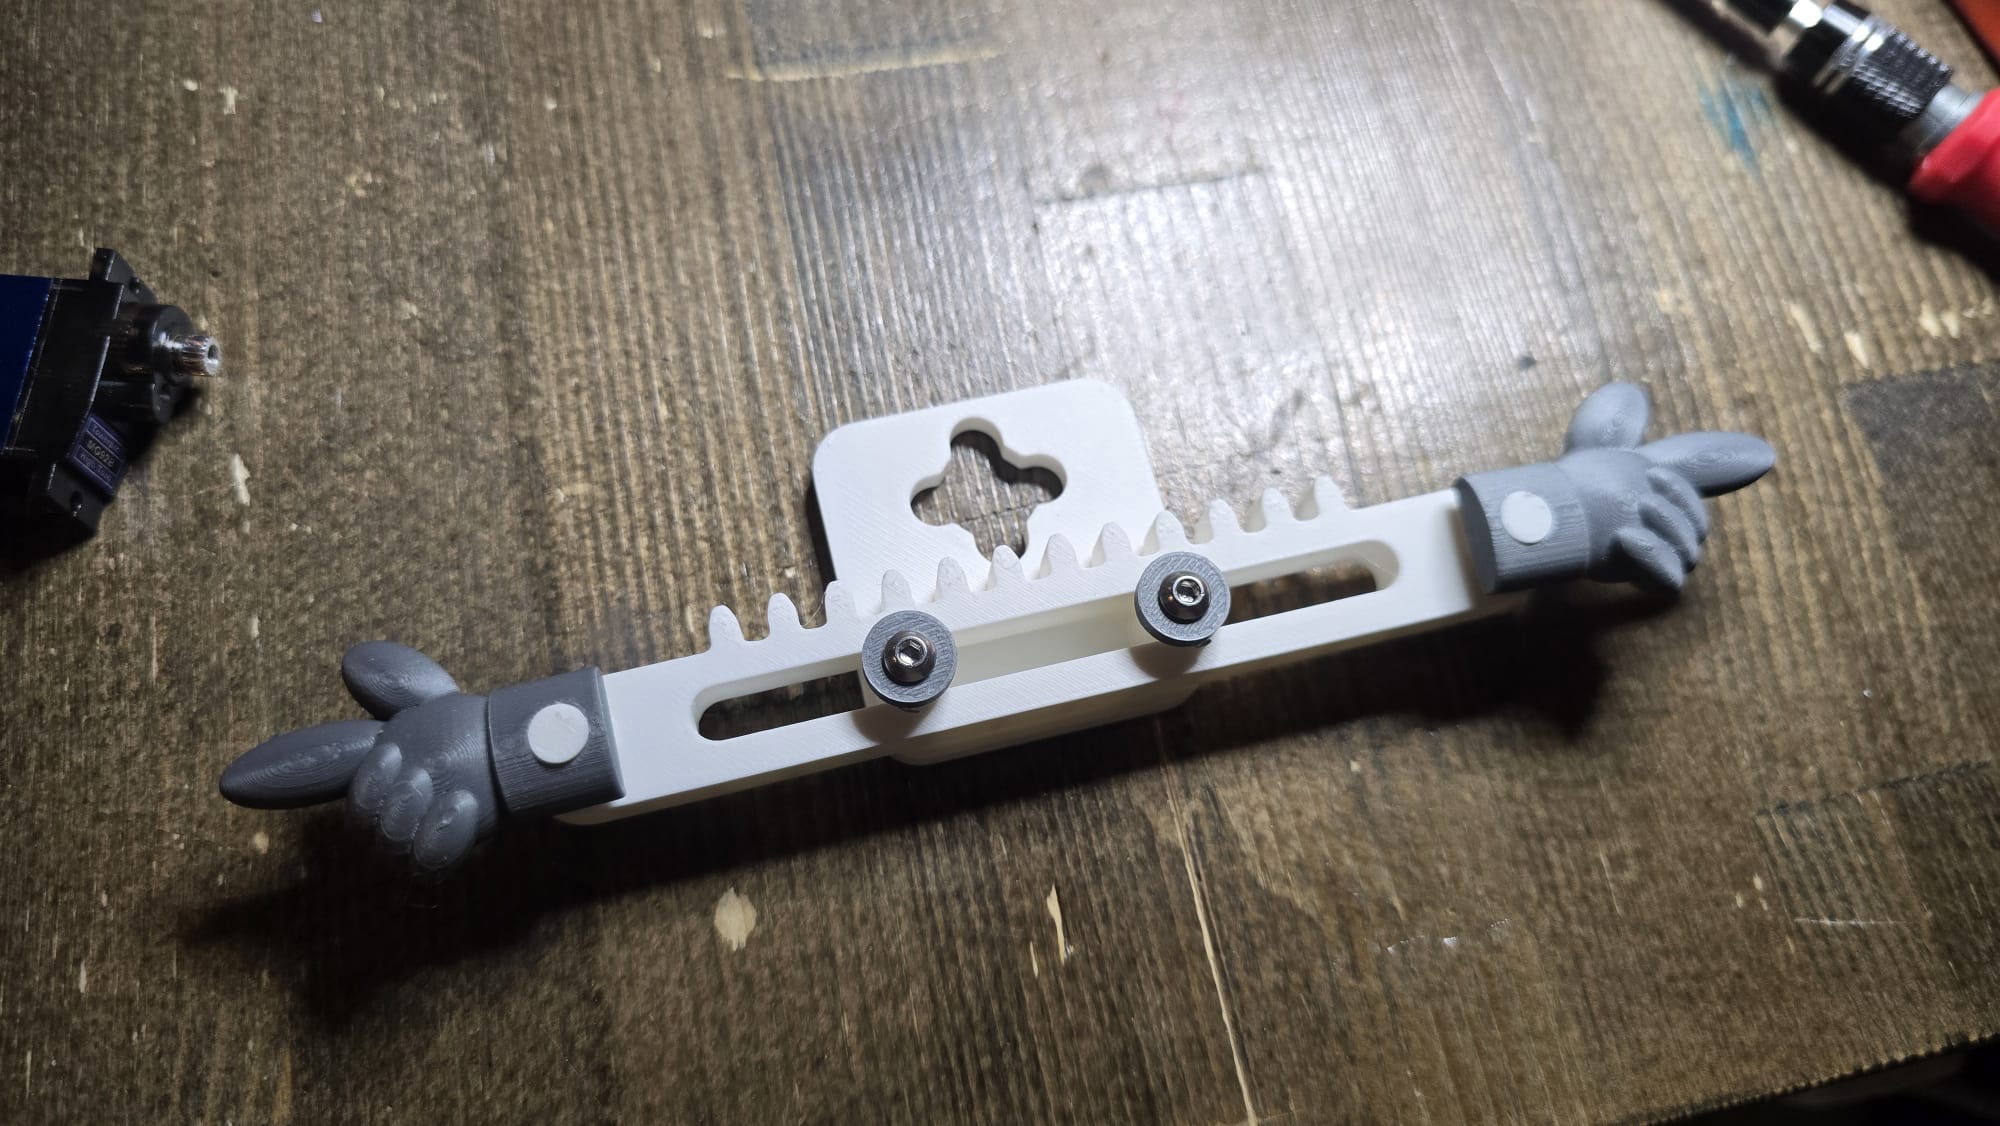
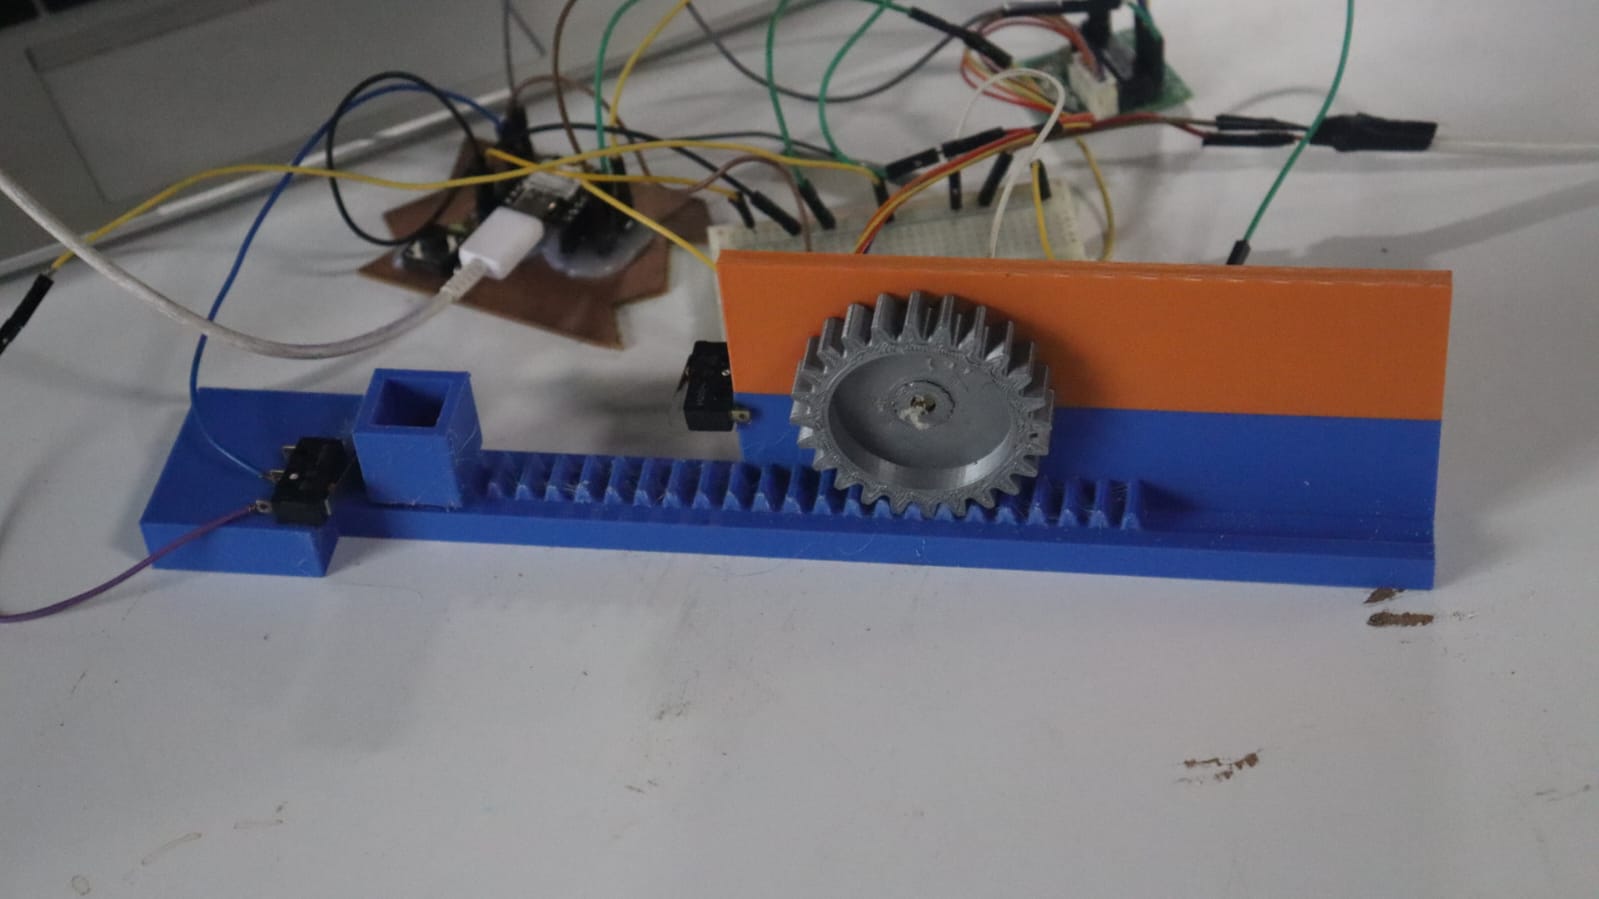
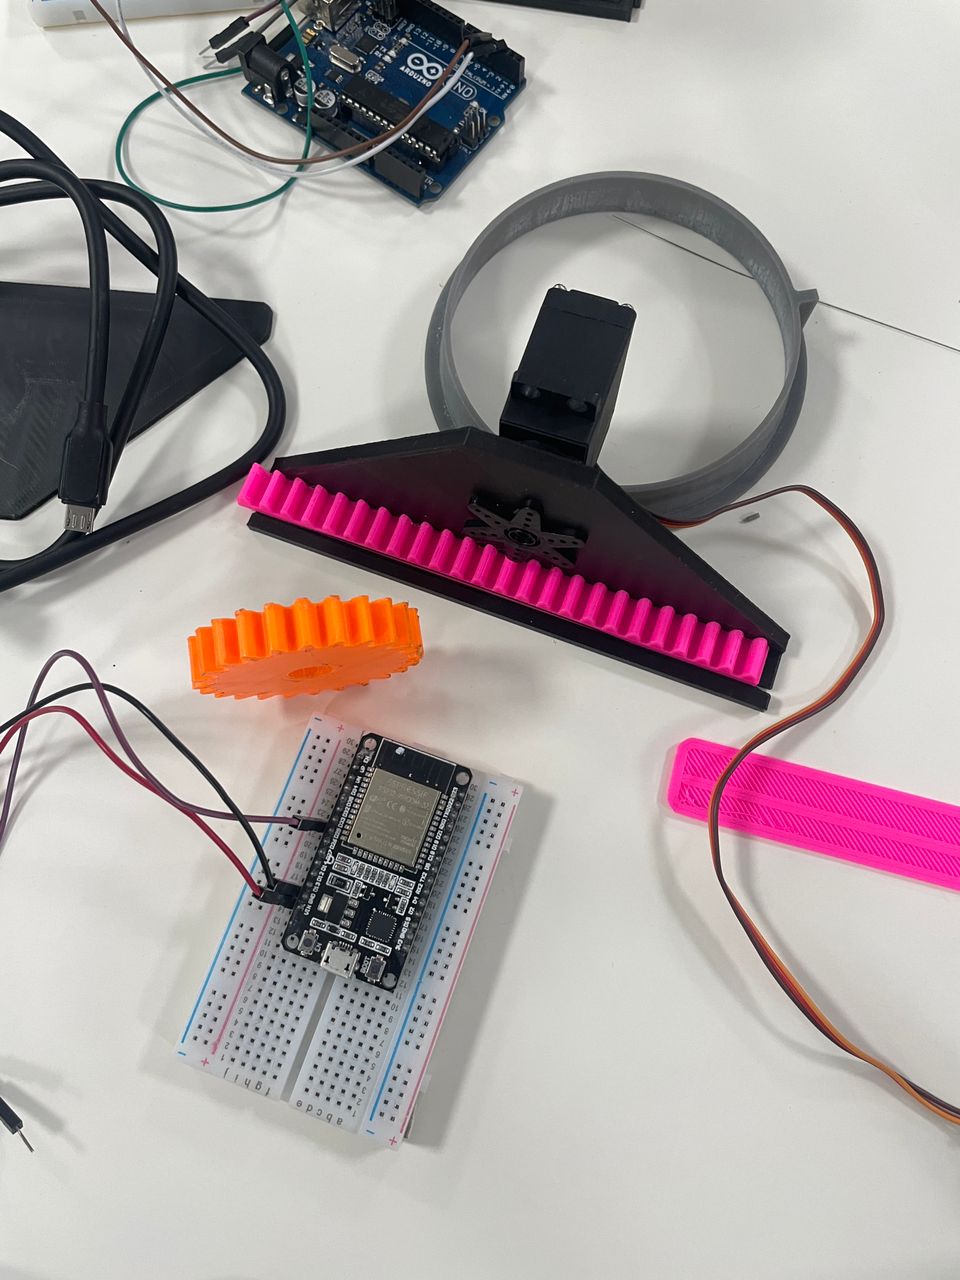
Mechanical part design and print

-
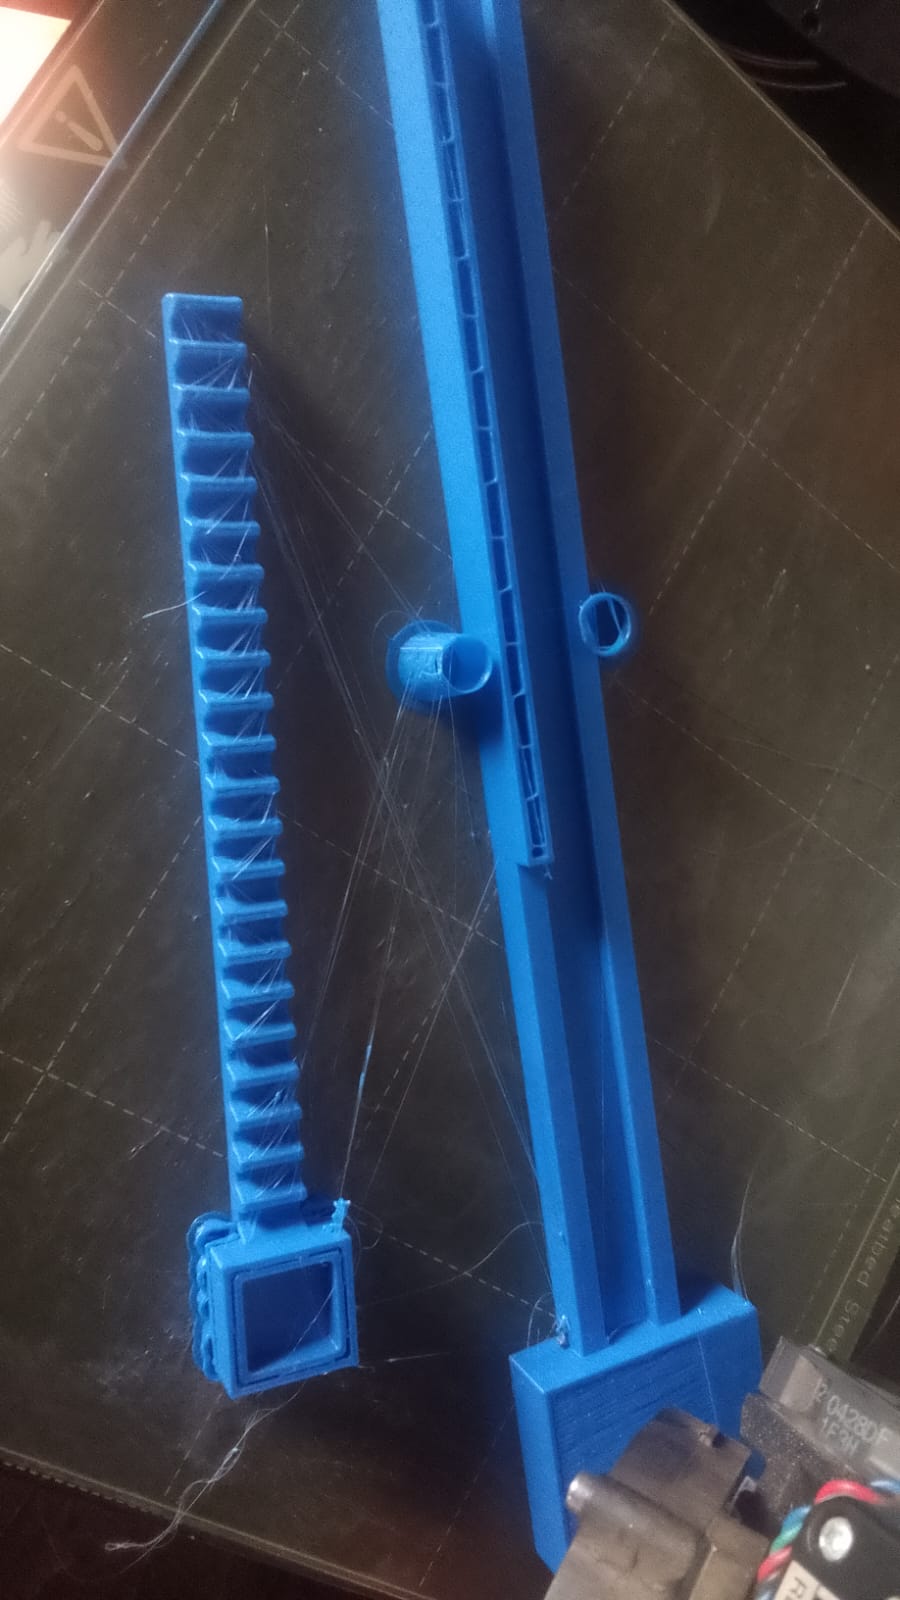
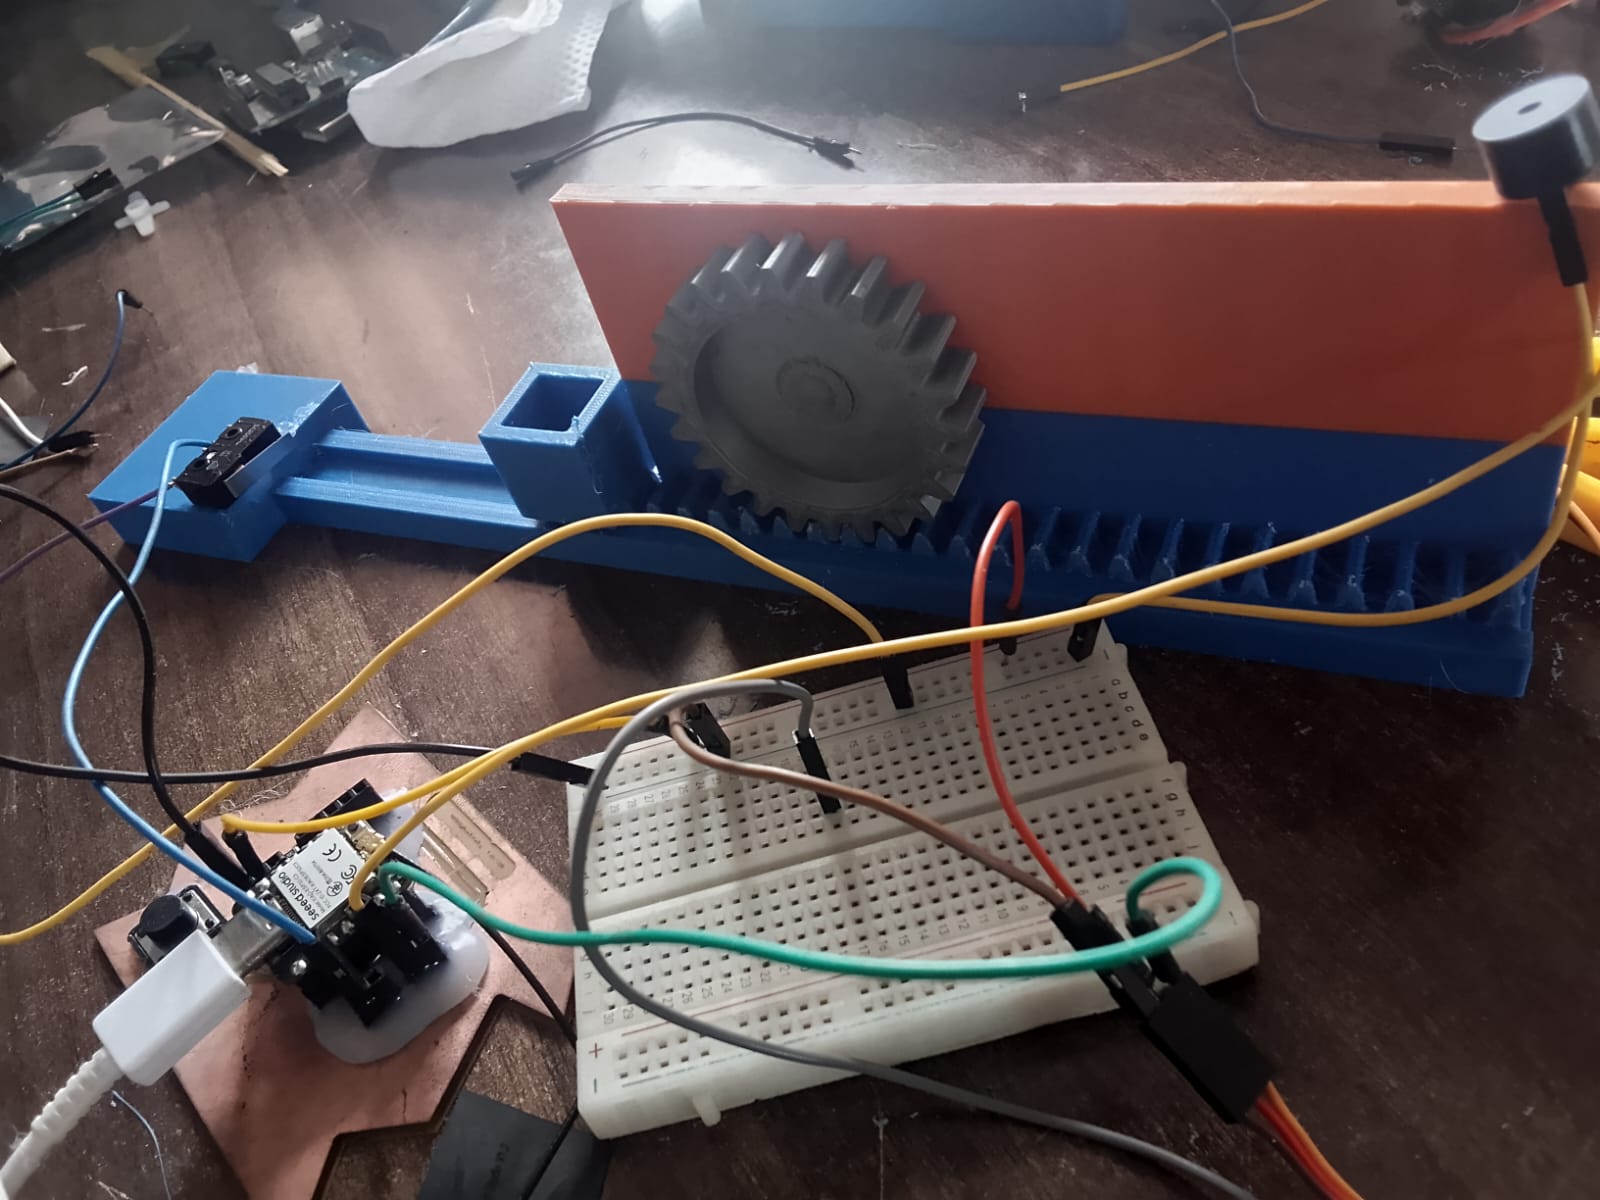
3D printed parts
-
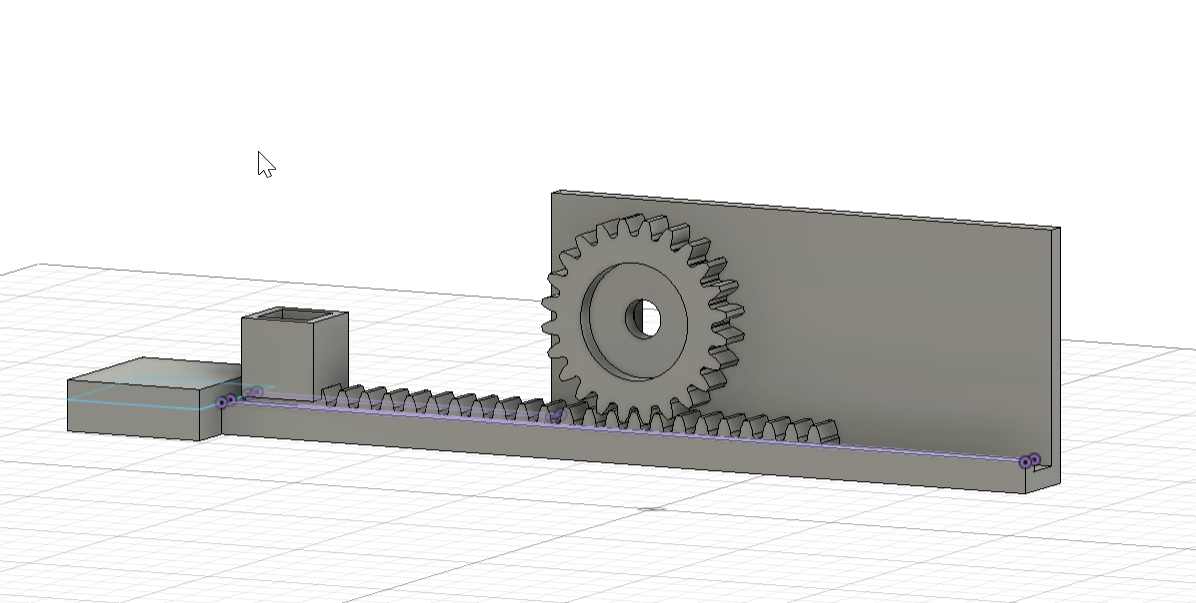
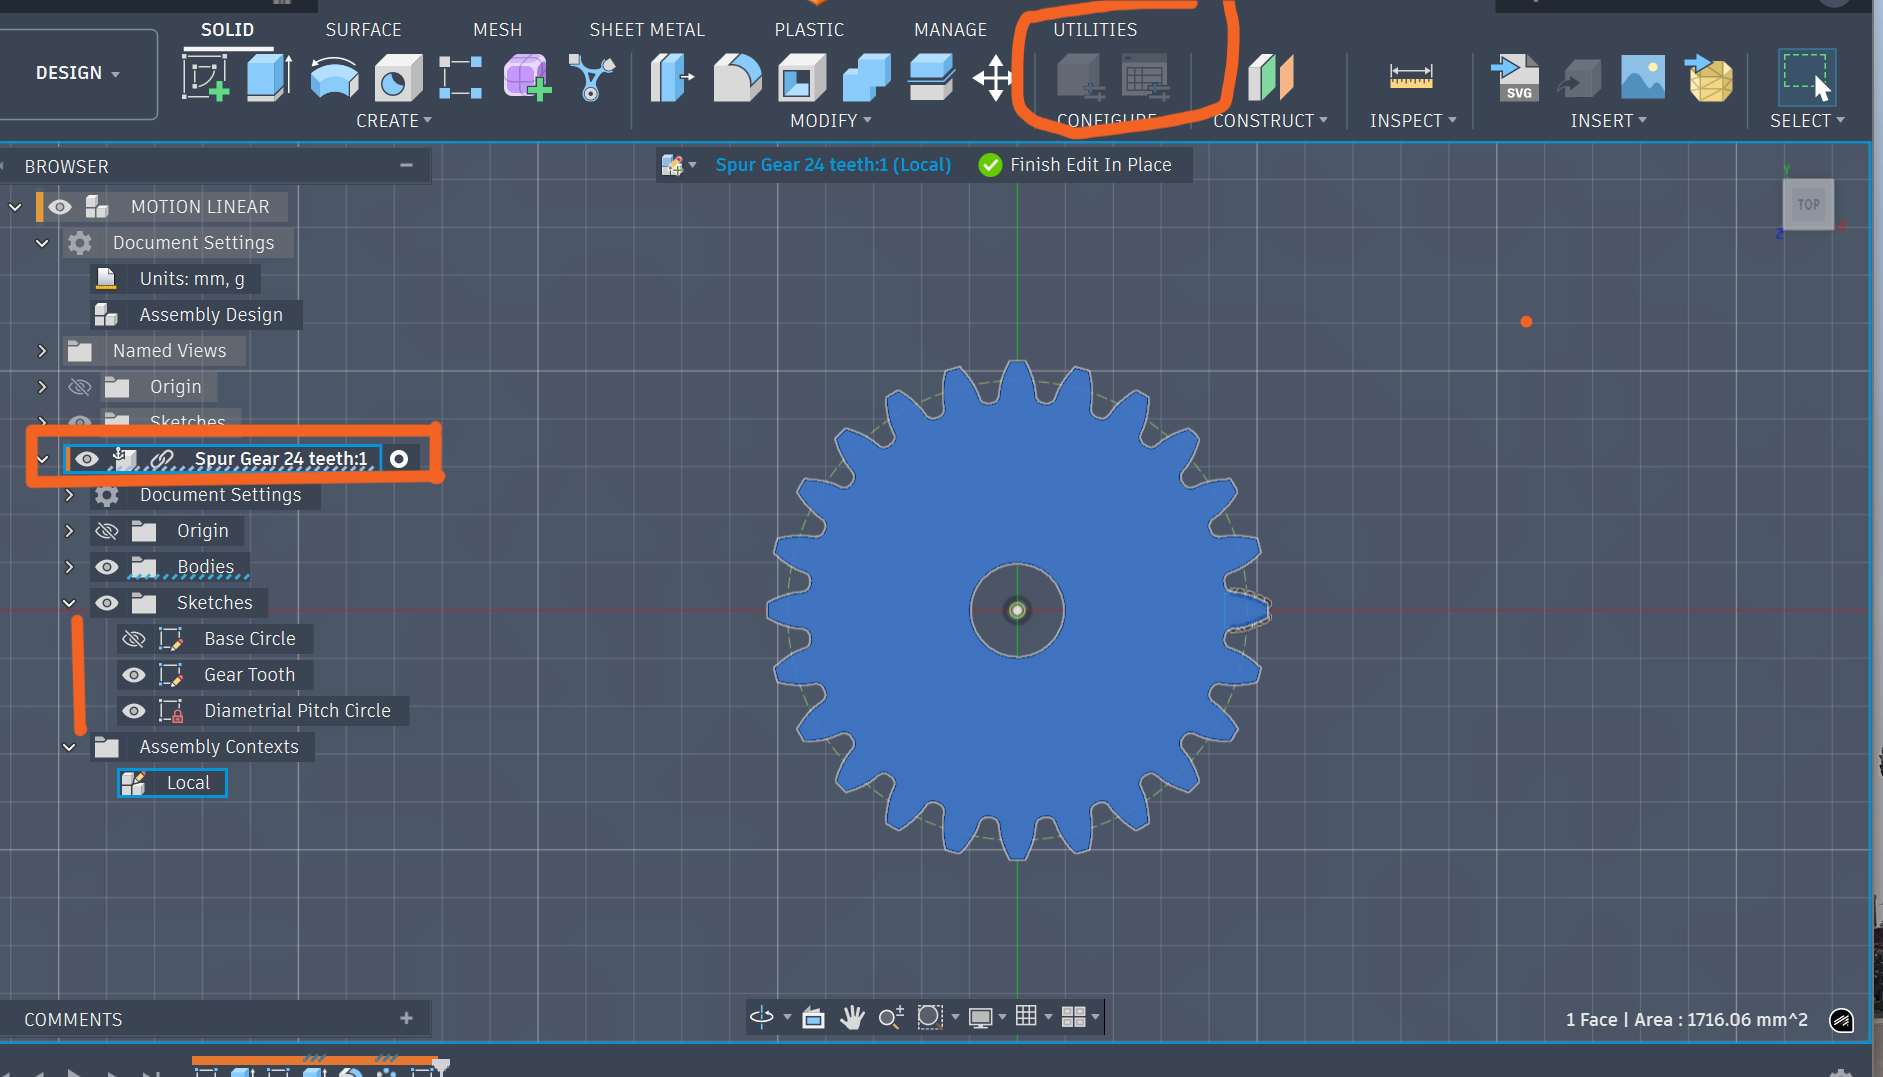
Design again the gear part in Fusion 360 and assembling

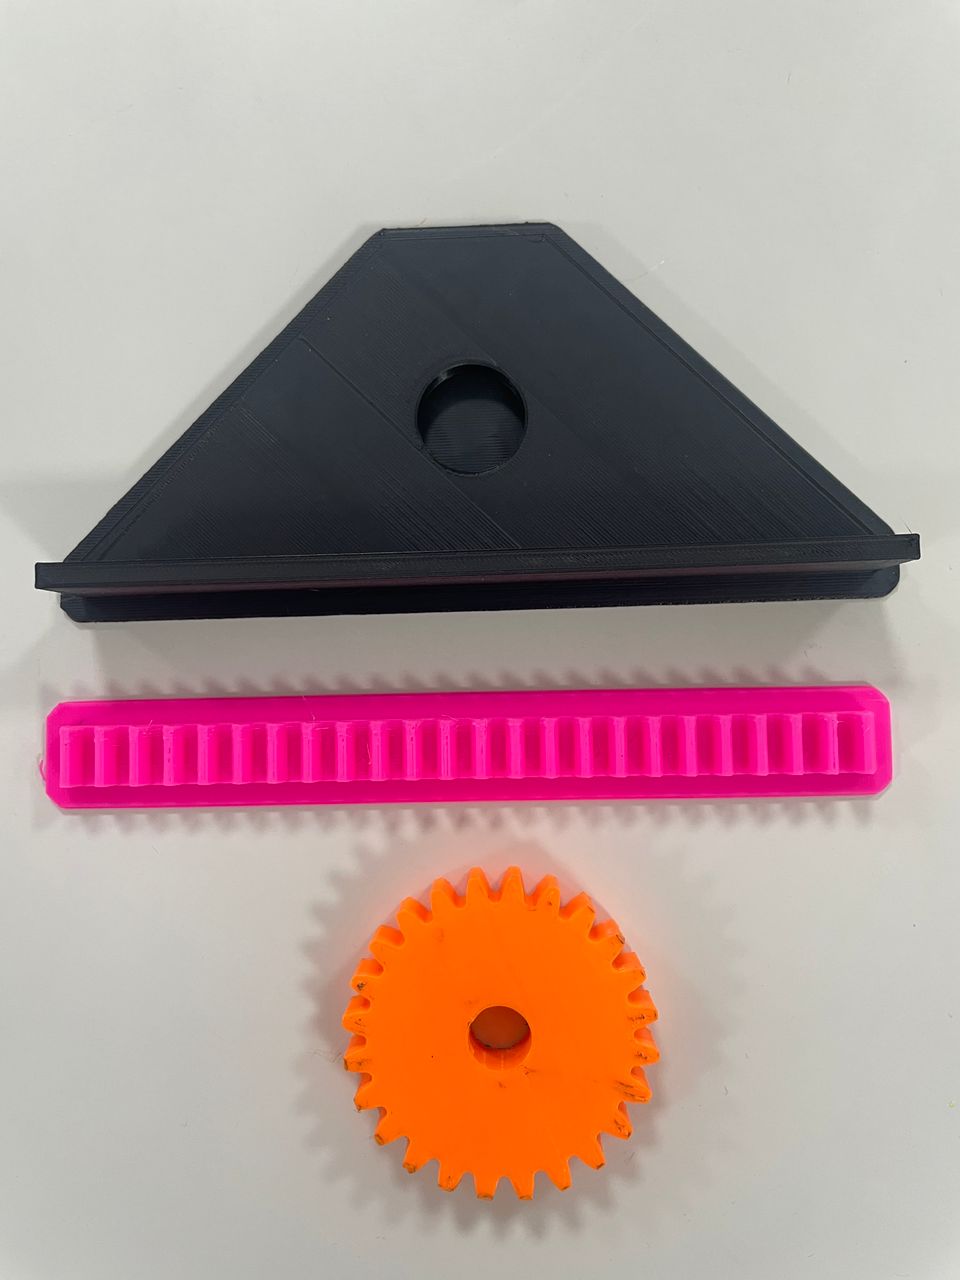
- assembling
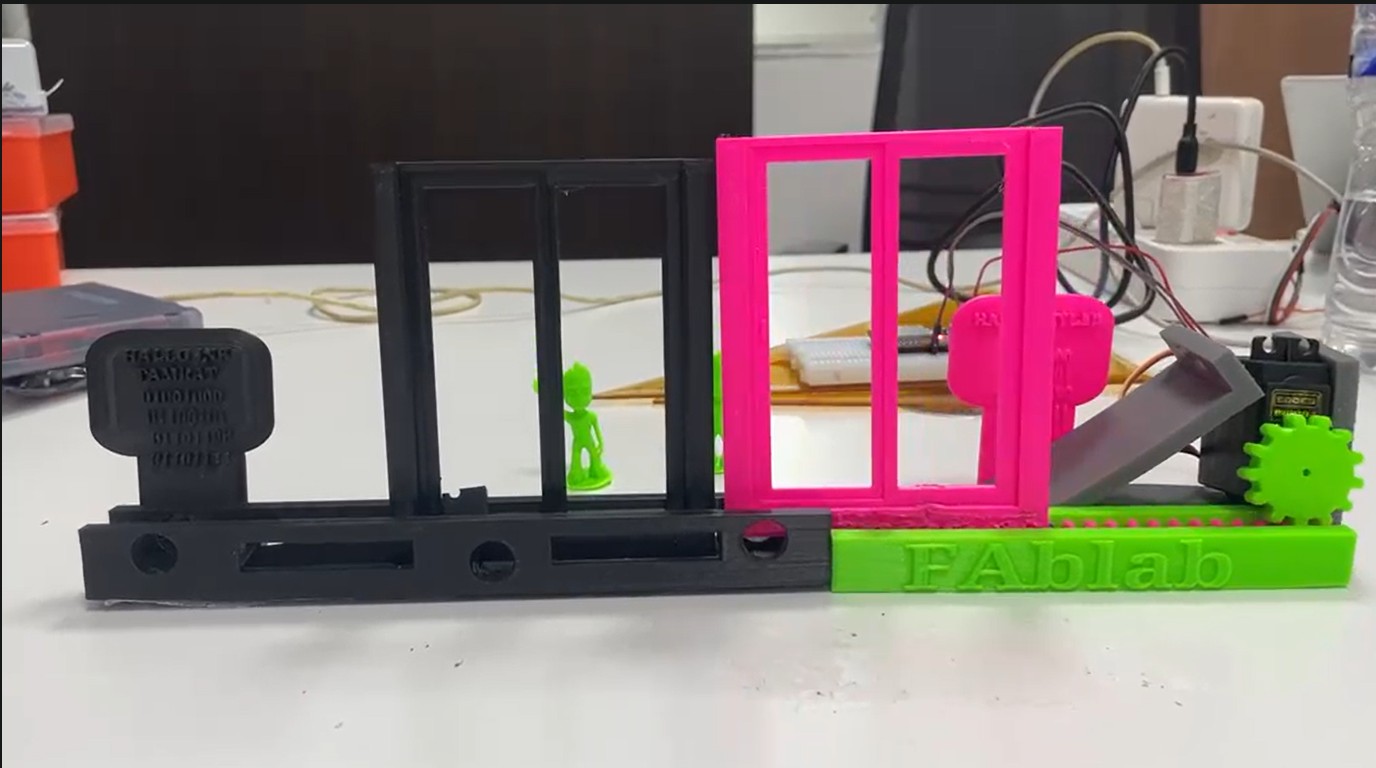
Communicate machines from far and send messages from skylab

the full procedure is listed in the group page
Other sources shared to learn from them, by My instructor Rico’s and I learn from the following
- 2D CNC Plotter – Homework Writing Machine https://www.youtube.com/watch?v=IVgoBncPw4E
In this project, we explored how a machine can transform digital instructions into physical movement. We observed how two stepper motors, arranged along X and Y axes, allow precise control over a pen to draw or write on paper.
Through discussion, we understood that CNC machines rely on coordinate systems and programmed instructions (G-code) to perform tasks accurately. We also learned how motor drivers and firmware act as the bridge between software commands and hardware motion.
This helped us realize that machine design is a combination of mechanical structure, electronics, and software control working together as one system.
- Arduino Waving Hand – Sensor-Based Interaction https://youtube.com/shorts/l6BlQSQFm78?si=WMSCVboSlNLca0DL
Arduino Waving Hand
In this activity, we studied how machines interact with their environment. Using an ultrasonic sensor, the system detects the presence of an object and triggers a servo motor to perform a waving motion.
As a group, we discussed how this demonstrates the concept of input → processing → output, where the sensor collects data, the controller processes it, and the actuator responds.
This project helped us understand that adding sensors allows machines to behave intelligently and respond dynamically to real-world conditions.
- DIY Braiding Machine – Coordinated Motion System https://www.google.com/search?q=https://youtu.be/yV0ecqW1MSs%3Fsi%3DvRph3kcGf6HZ6Vlu
DIY Braiding Machine Description
This project introduced us to more advanced machine coordination. We observed how multiple motors must operate in a synchronized pattern to achieve a consistent braiding process.
Through group discussion, we learned that timing and precision are critical in complex systems. Stepper motors were used to ensure repeatable and accurate motion, which is essential for maintaining quality output.
We also explored how custom-designed mechanical parts are necessary to guide and control the movement of materials.
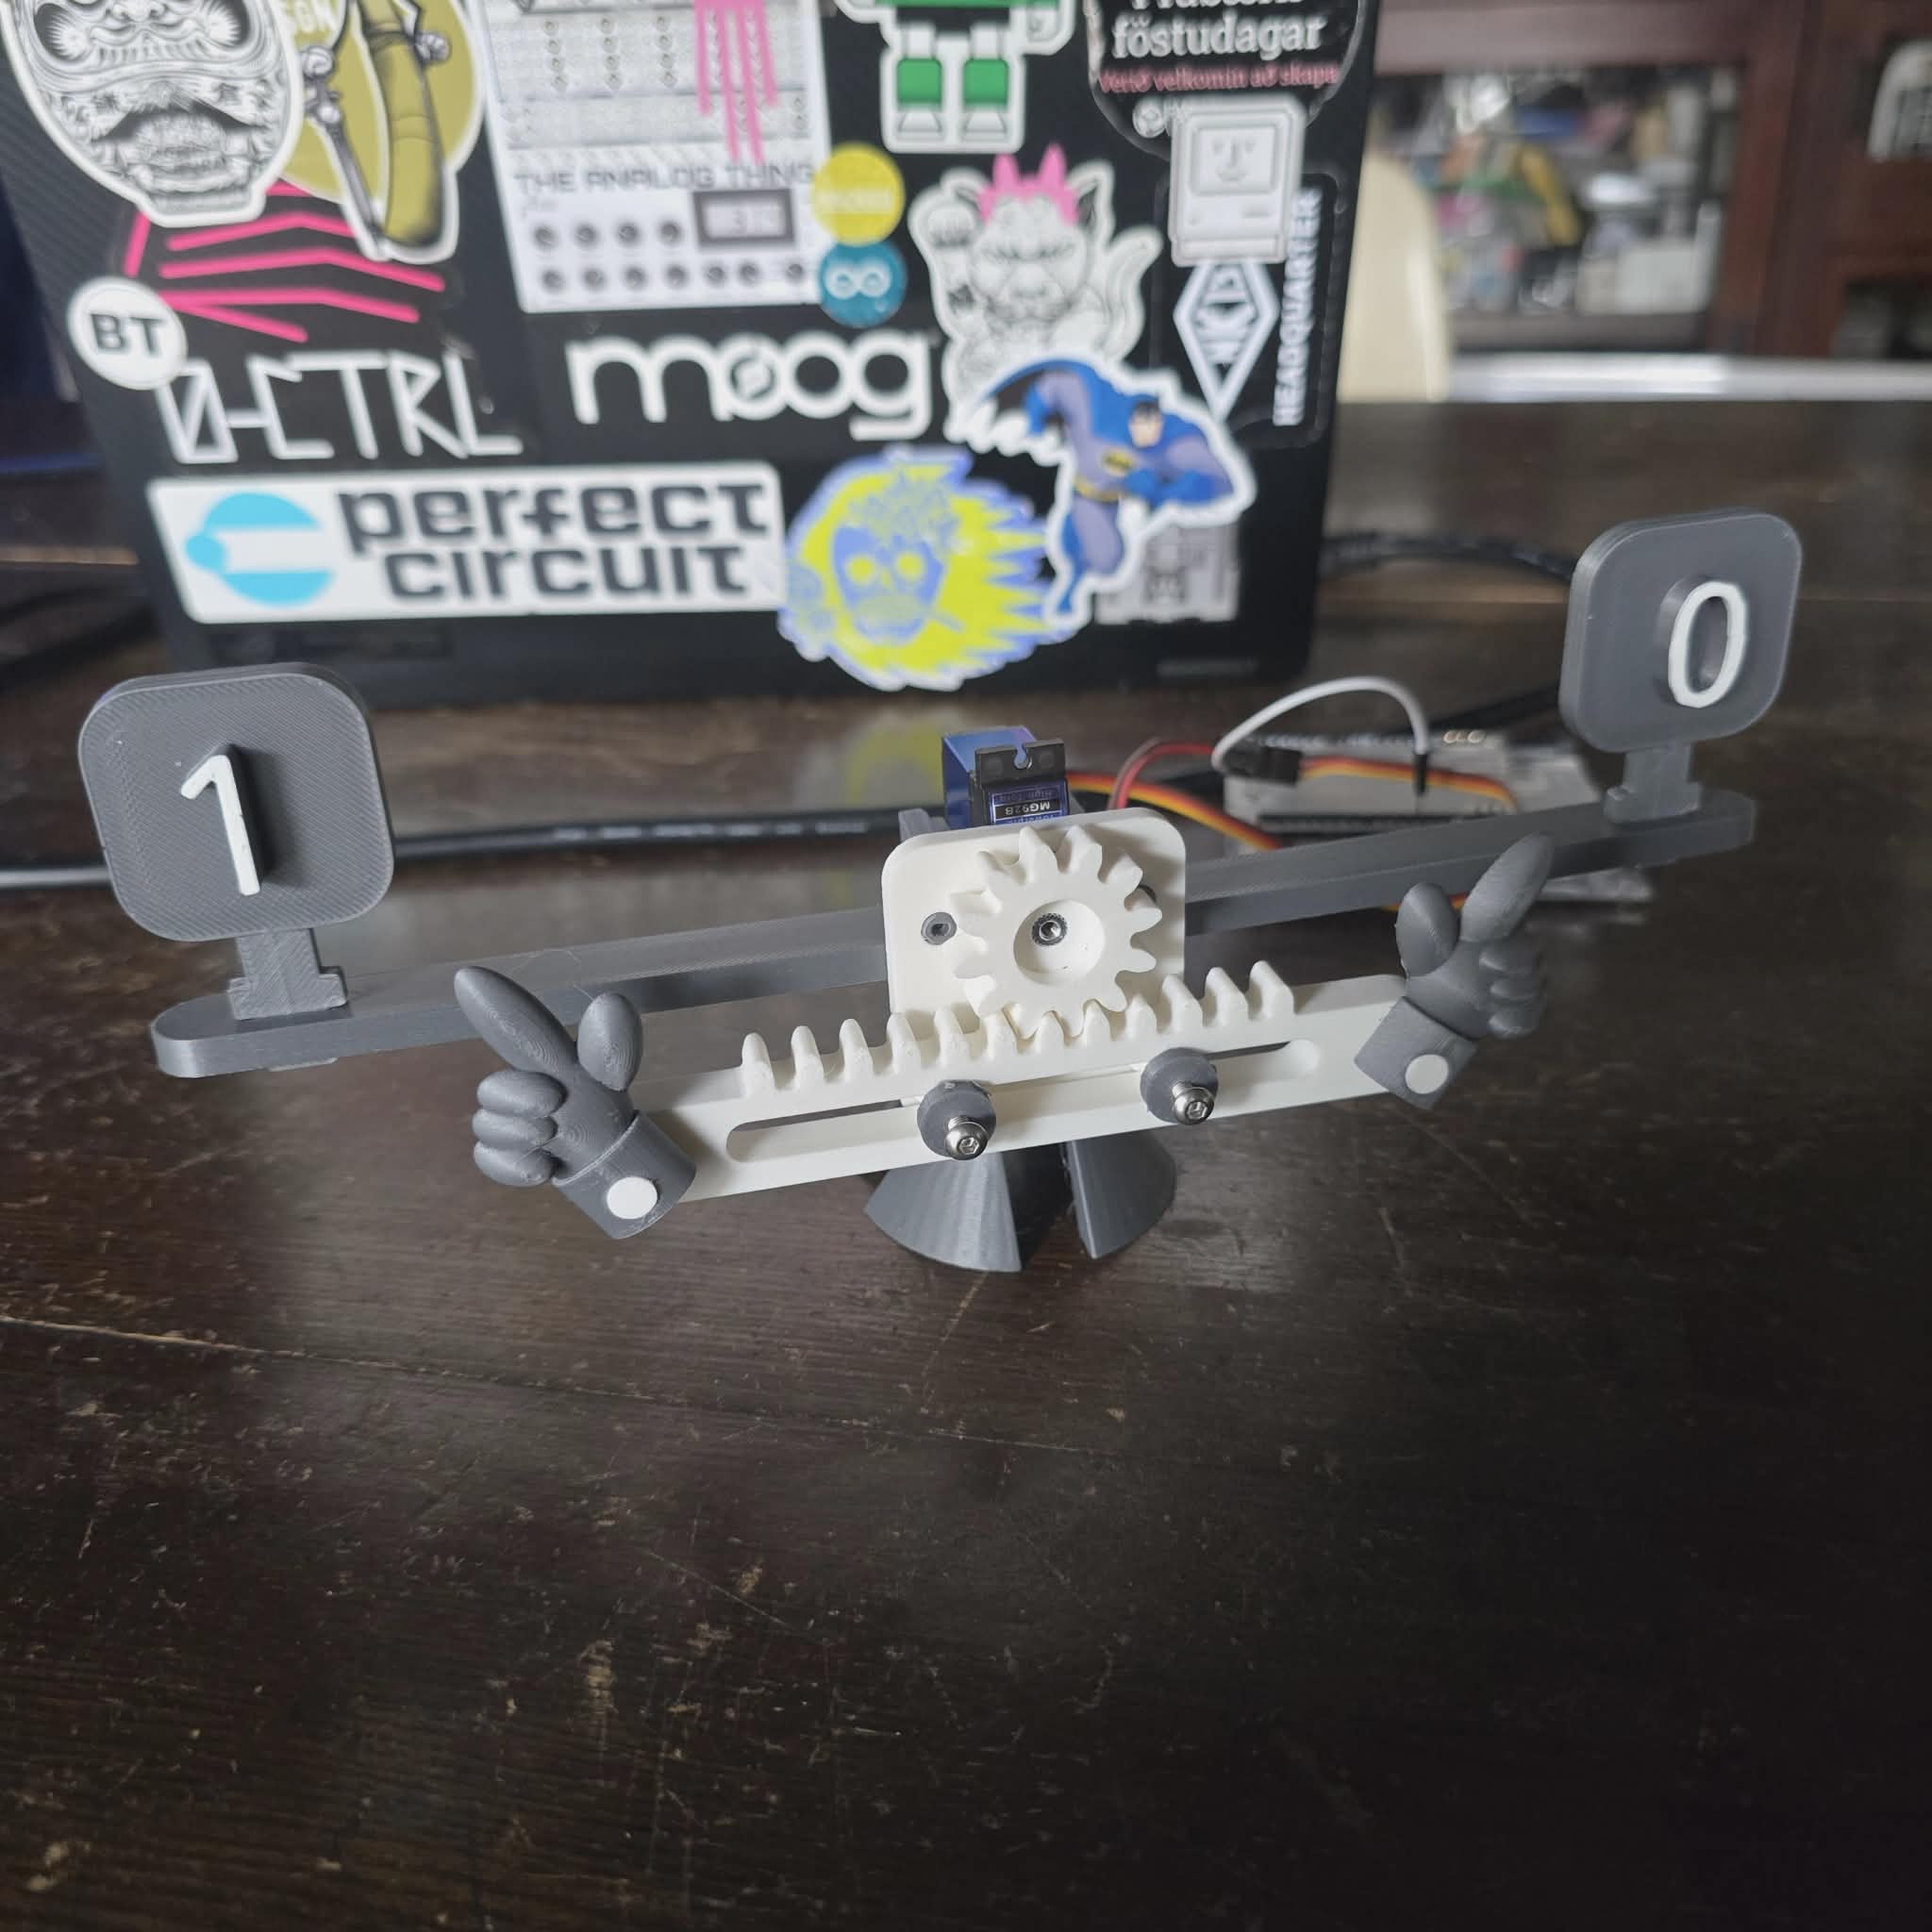
- Servo Motors – Working Principle, I mainly work on this step with different mechanism https://www.youtube.com/watch?v=1WnGv-DPexc
Servo Motors, how do they work? Description
We studied the internal working mechanism of servo motors and understood how they achieve precise position control. The concept of a closed-loop system was particularly important, where the motor continuously adjusts its position based on feedback.
We also learned about PWM signals and how they determine the position or speed of the motor. This knowledge is essential for designing controlled mechanical systems.
Group Learning Reflection
-
Working together allowed us to break down complex systems into understandable parts. By discussing and explaining concepts among ourselves, we improved both our technical understanding and our teamwork skills.
-
We realized that successful machine design depends not only on technical knowledge but also on effective collaboration, communication, and shared problem-solving.
Individual Assignment
Personal Contribution to Group Work
-
As part of the group assignment, my individual contribution focused on conducting deeper research, understanding the concepts in detail, and applying them practically. I took responsibility for analyzing the working principles of servo motors and different machine systems, and then shared these insights with the group to support our collective understanding.
-
Beyond theoretical learning, I also worked on applying these concepts in a practical context within our incubation center new way of machine is learn as not only the mechanism but functional prototyping of things. This included exploring how to design and fabricate simple machines using available resources such as 3D printing and basic mechanical components.
Through this process, I gained hands-on experience in:
- Translating concepts into physical designs, understanding the limitations of materials and components and improving designs through testing and iteration. Working both individually and within the team helped me understand the importance of contributing knowledge while also learning from others.
Learning Through Teamwork
- By participating actively in the group, I learned how engineering projects are developed collaboratively. Each member contributes different ideas and skills, and the final result is achieved through continuous discussion and improvement.
This experience helped me develop:
Better problem-solving skills - The ability to communicate technical ideas clearly - Confidence in applying theoretical knowledge to real projects - Application in Machine Design and Fabrication
- As part of my contribution, I focused on how these concepts can be implemented in real machine design. I explored designing small mechanical systems and preparing them for fabrication using digital tools.
In my incubation center, i worked on transforming design ideas into physical prototypes by:
- Creating CAD models
- Preparing files for 3D printing
- Testing mechanical movement
This step was important because it connected our learning directly to real-world applications.
Fusion 360 Design Process
-
Creating and Organizing Components
-
We began by creating components to maintain a structured design workflow. This helped us manage complex assemblies efficiently.
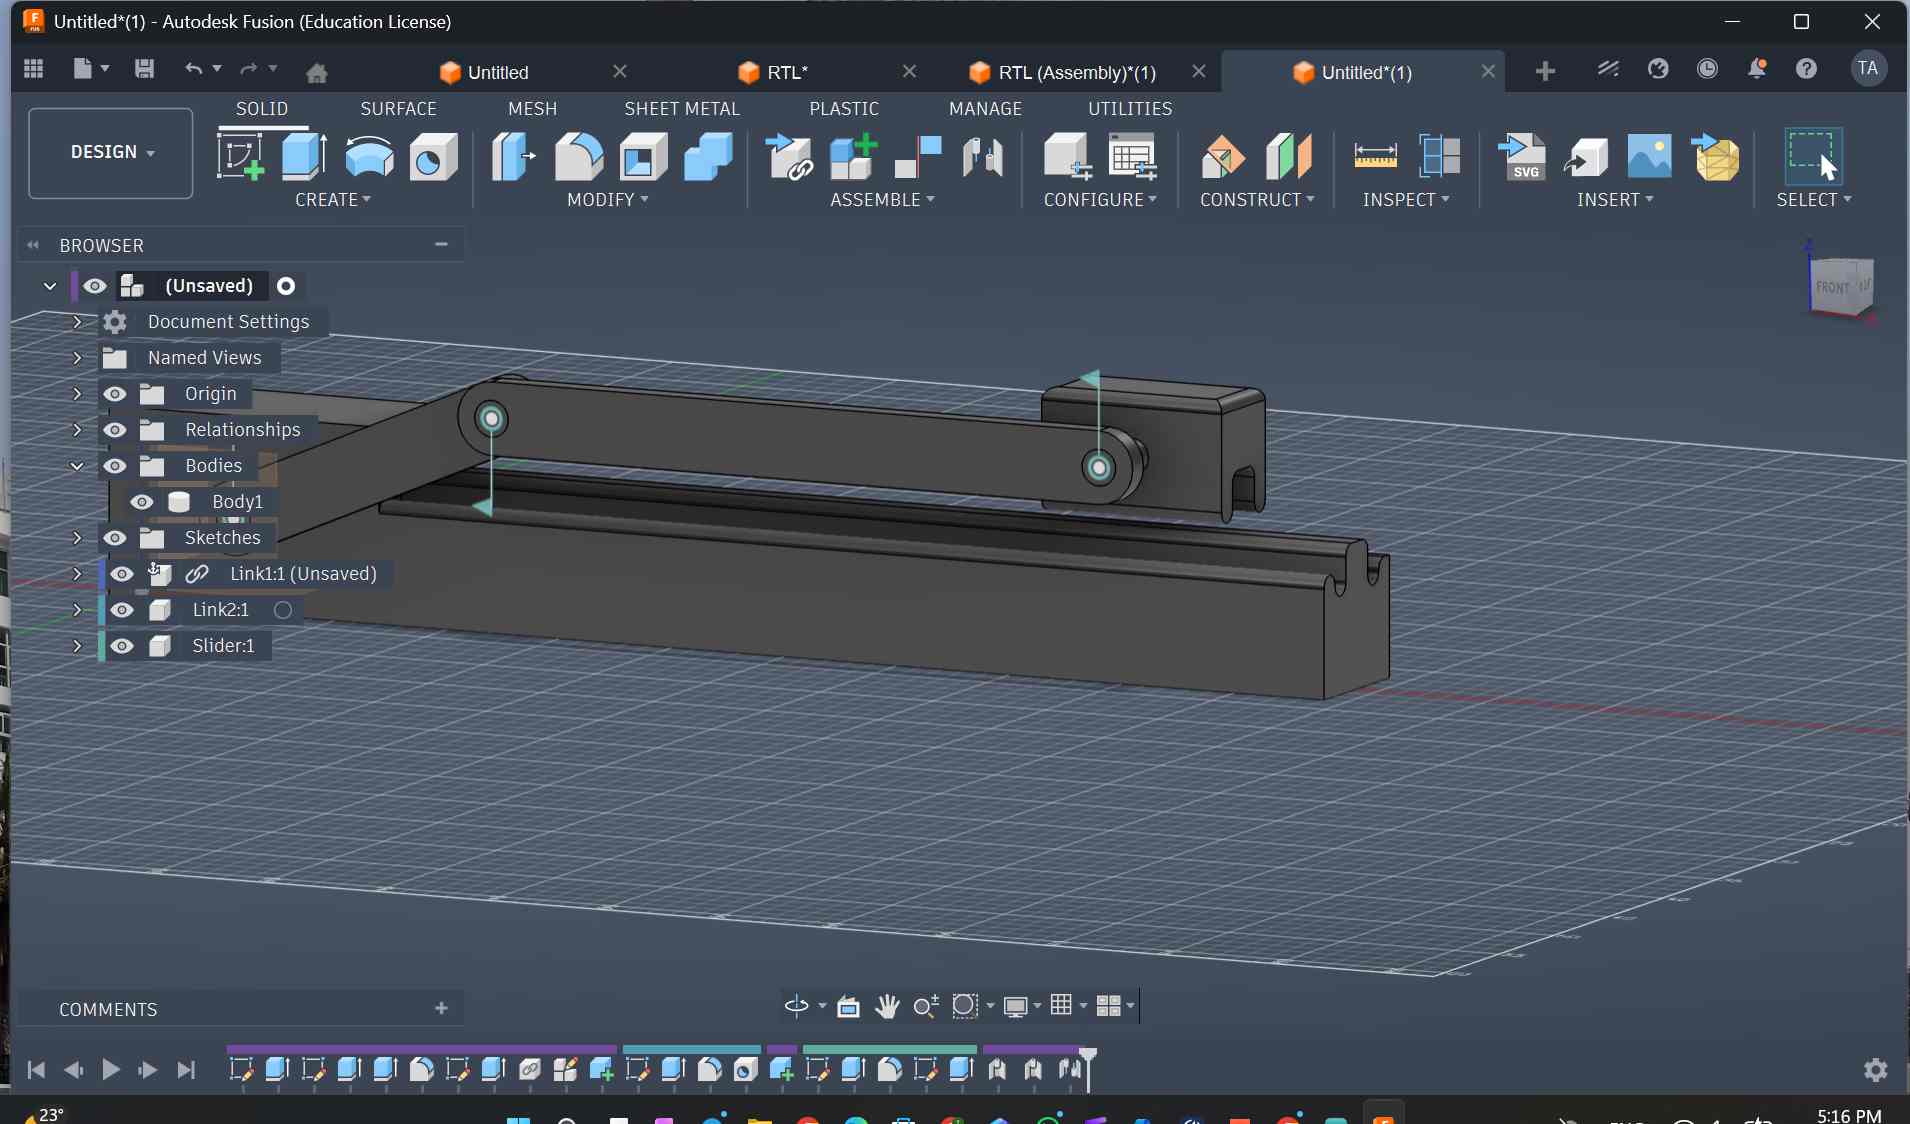
- and other mechanism as door open and close
What I Learned from the Design Process
Through this process, I learned that good machine design requires careful planning, accurate modeling, and continuous testing. Using Fusion 360 helped me visualize ideas and improve them before physical production.
This week’s assignment helped me understand the full workflow of machine design—from concept and research to modeling and fabrication. By combining group collaboration with individual contribution, we were able to build a strong foundation in both technical knowledge and practical skills.
The experience of working together while also contributing individually prepared me for real-world engineering challenges, where teamwork and personal responsibility are equally important.
NEW Itaration steps to design hello_skylab and messsage when open the door and closs it
- Hallo changed to Hello skylab and more clean ways as recommended by Instructor Rico as we work on it together.
Links to some videos
- problem faced uploading videos as link because it comes like the below (the wrong one)
<video controls src="Images/w12_image/C0165.mp4" title="Title"></video>
- now solved by Instructor and friend’s from Kenya help me
Add the following
…/ infront of the source videos link as below (corrected one)
<video controls src=".../Images/w12_image/C0165.mp4" title="Title"></video>
Codes used in IDE
Code Source: AI (chatGPT) with prompt : “give code to run MQTT with servo motor Using ESP32 DEv Kit”
#include <WiFi.h>
#include <PubSubClient.h>
#include <ESP32Servo.h>

// WiFi
const char* ssid = "SSID";
const char* password = "********";

// MQTT
const char* mqtt_server = "broker.hivemq.com";
const int mqtt_port = 1883;
const char* topic = "esp32/servo/control";

// Objects
WiFiClient espClient;
PubSubClient client(espClient);
Servo myServo;

int servoPin = 25;

//Control flag
bool runServo = false;

// MQTT callback
void callback(char* topic, byte* payload, unsigned int length) {
  String message = "";

  for (int i = 0; i < length; i++) {
    message += (char)payload[i];
  }

  Serial.print("Message: ");
  Serial.println(message);

  if (message == "ON") {
    runServo = true;
    Serial.println("START servo loop");
  }
  else if (message == "OFF") {
    runServo = false;
    Serial.println("STOP servo");
  }
}

// MQTT reconnect
void reconnect() {
  while (!client.connected()) {
    Serial.print("Connecting MQTT...");
    if (client.connect("ESP32Client123")) {
      Serial.println("connected");
      client.subscribe(topic);
    } else {
      Serial.print("failed, rc=");
      Serial.println(client.state());
      delay(2000);
    }
  }
}

void setup() {
  Serial.begin(115200);

  myServo.attach(servoPin);
  myServo.write(0);

  WiFi.mode(WIFI_STA);
  WiFi.begin(ssid, password);

  while (WiFi.status() != WL_CONNECTED) {
    delay(500);
    Serial.print(".");
  }

  Serial.println("\nWiFi Connected");

  client.setServer(mqtt_server, mqtt_port);
  client.setCallback(callback);
}

void loop() {
  if (!client.connected()) {
    reconnect();
  }
  client.loop();

  // LOOP MOVEMENT CONTROL
  if (runServo) {
    myServo.write(120);
    delay(500);
    myServo.write(0);
    delay(500);
  }
}