Week12
Mechanical Design, Machine Design
Group assignment:
- Design a machine that includes mechanism + actuation + automation + application
- Build the mechanical parts and operate it manually
- Actuate and automate your machine
- Document the group project
Individual assignment:
- Document your individual contribution
Group page
Group page: https://fabacademy.org/2026/labs/nagoya/assignments/week12/
BOM
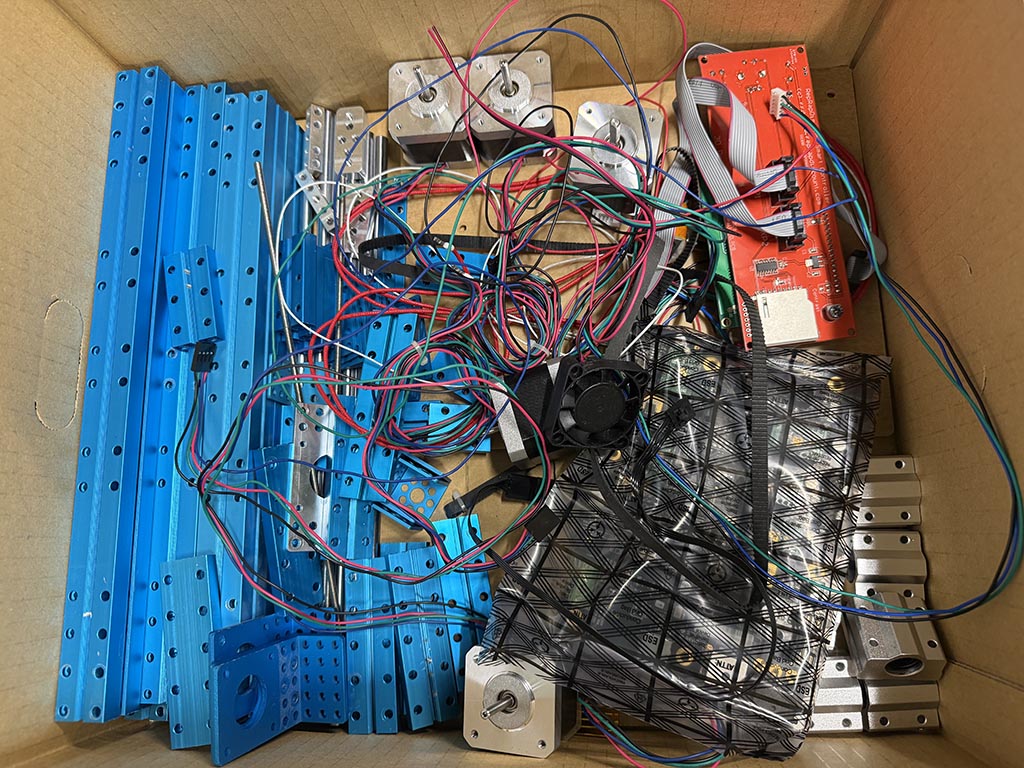
I sourced most of the components by disassembling donor 3D printers.
| Qty | Item | Source |
|---|---|---|
| 2 | NEMA 17 200 step stepper 17HD4063-03M | Makerbot Replicator 2X |
| 5m | GT2 Timing belt | Amazon |
| 2 | GT2 20 tooth pulley | Amazon |
| 1 | SG90 like servo | Inventory |
| 2 | End stop switch | Makeblock Constructor I |
| 1 | Arduino Mega 2560 | Makeblock Constructor I |
| 1 | RAMPS 1.4 | Makeblock Constructor I |
| 2 | A4988 stepper driver | Makeblock Constructor I |
| 1 | 12V 10A power adapter | Makeblock Constructor I |
Software
I tried to find existing opensource software for wall hanging drawing robot. I thought Marlin may works but I didn’t know CAM software for wall hanging drawing robot. After some google, I found a good software Makelangelo. Makelangelo supports multiple OS, and works with Marlin. I decided to use this.
Configuration of Marlin would be made on Configuration.h and Configuration_adv.h.
Since I’m using RAMPS 1.4 and A4988 stepper driver, I changed
// Choose the name from boards.h that matches your setup
#ifndef MOTHERBOARD
  #define MOTHERBOARD BOARD_RAMPS_14_EFB
#endif
I attached all three jumper for A4988, so microstep would be 1/16. And we are using GT2 (2mm pitch) 20 tooth pulley, so 1. 2 mm pitch x 20 tooth = 40 mm/pulley rotate 2. 200 step x 16 (1/16 microstep) = 3,200 step/stepper rotate 3. 3,200 step / 40 mm = 80 step/mm
So, I setup as like this.
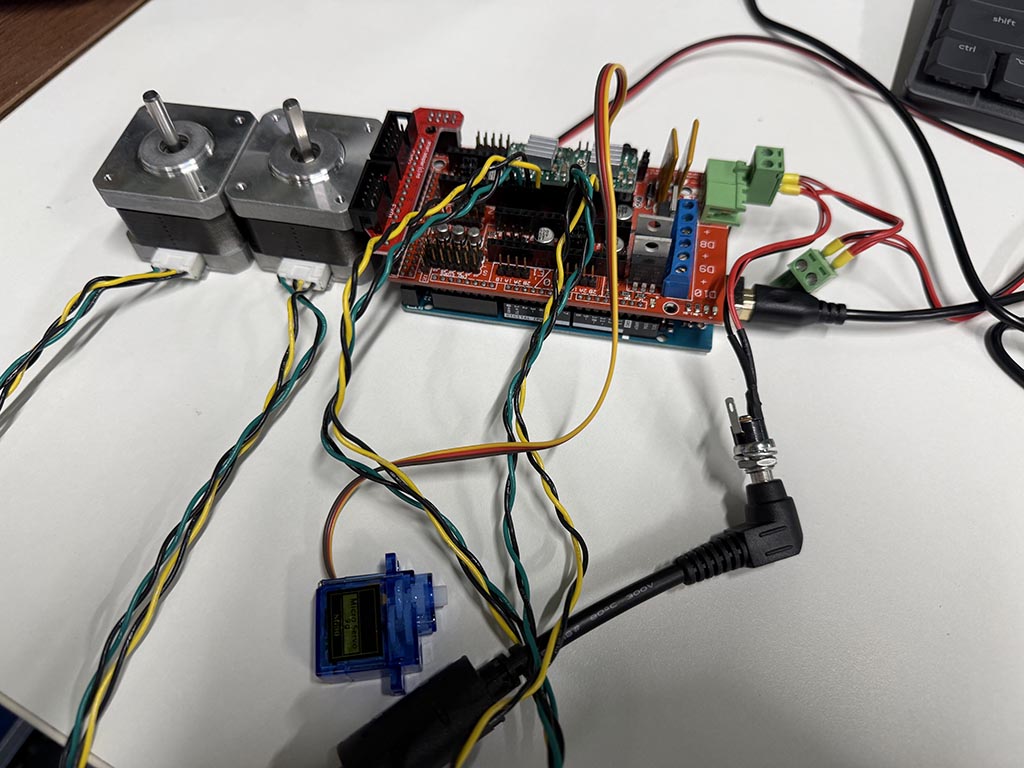
Before adjusting configration values on Marlin, I confirmed if may works on bench test.
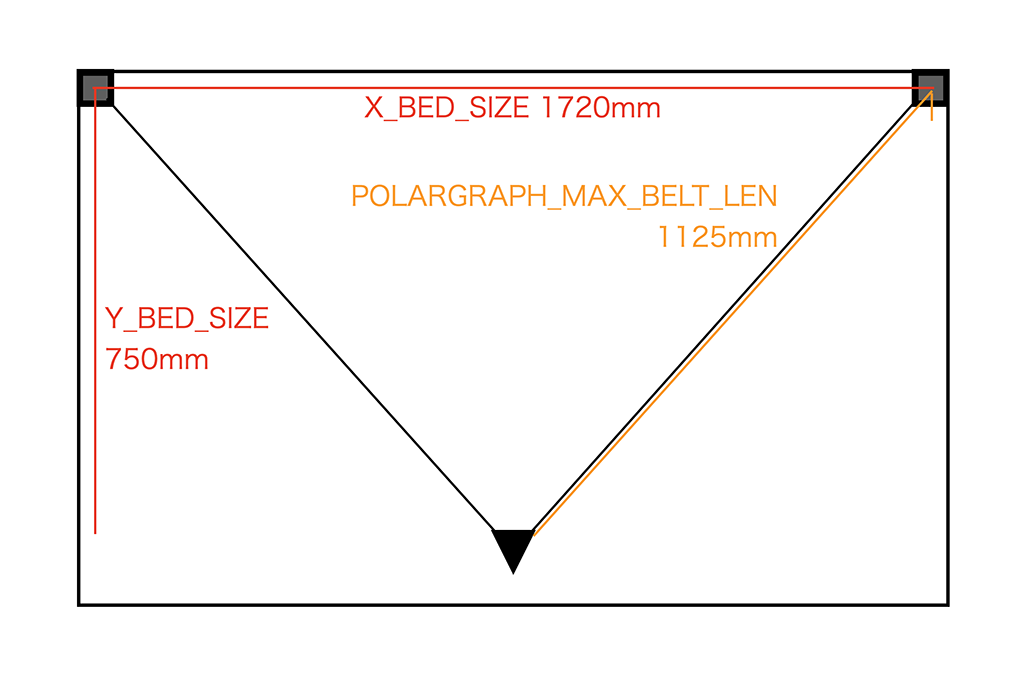
For drawing robot dimension, I assembled drawing robot by using 3D printed parts Bara-san provided. And measured dimensions were as the picture. So I configured as
#define POLARGRAPH_MAX_BELT_LEN 1125

#define X_BED_SIZE 1720
#define Y_BED_SIZE 750
#define Y_BED_OFFSET -25

#define X_MIN_POS ( - (X_BED_SIZE/2) )
#define Y_MIN_POS ( - (Y_BED_SIZE/2) + Y_BED_OFFSET )
#define Z_MIN_POS 0
#define X_MAX_POS ( X_BED_SIZE/2 )
#define Y_MAX_POS ( Y_BED_SIZE/2 + Y_BED_OFFSET )

#define MANUAL_X_HOME_POS 0
#define MANUAL_Y_HOME_POS (-375 + Y_BED_OFFSET) //(Y_MAX_POS-( sqrt(sq(POLARGRAPH_MAX_BELT_LEN)-sq(X_BED_SIZE/2))))
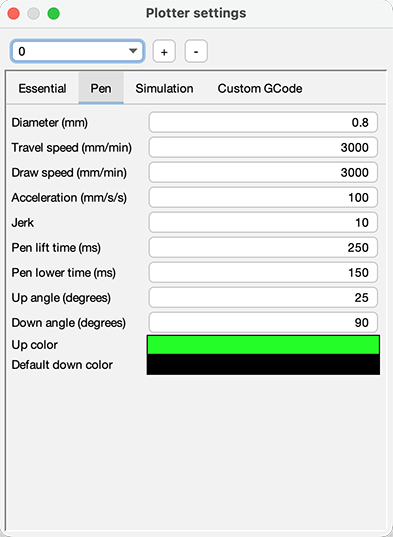
I wondered how I can set a degree of servo for pen up/down, and finally found it in [Settings]-[Plotter settings]. I changed these values to work well with Bara-made parts.
You can find full source code on our group page.
Wiring
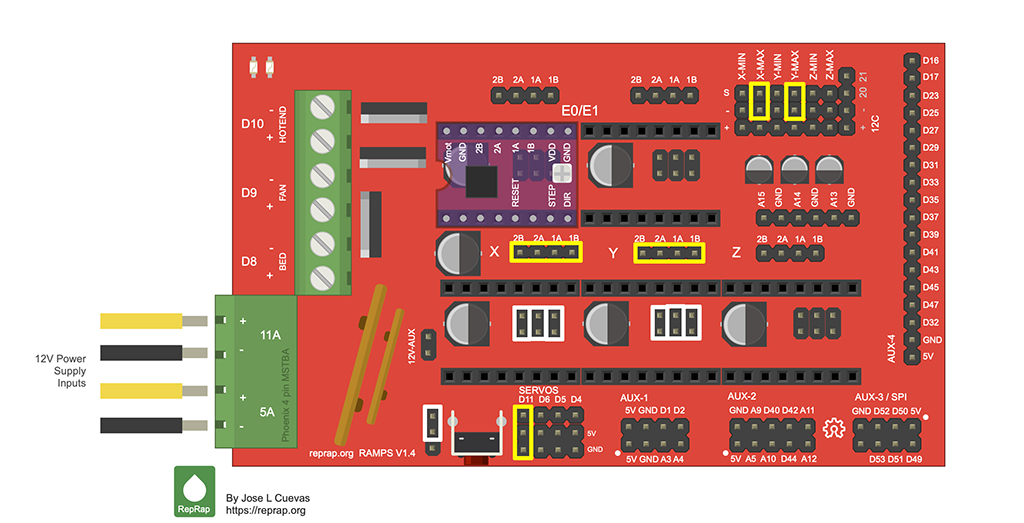
White rectangles are where I jumpered. Yellow rectangles are where I connected something. X-axis stepper goes to top left of wall, Y axis goes to top right of wall.
Makelangelo
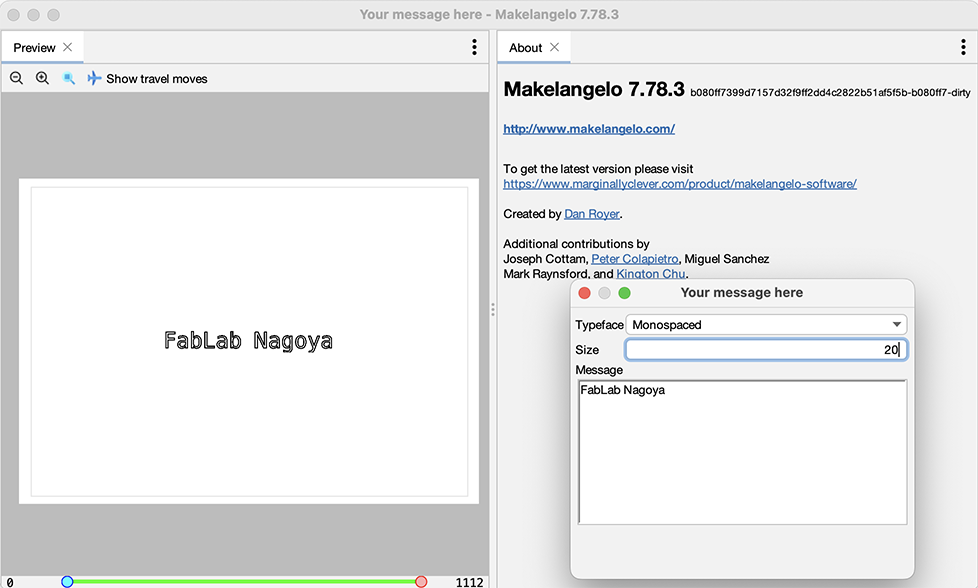
To use this robot, make what want to let draw on Makelangelo. For example input text.
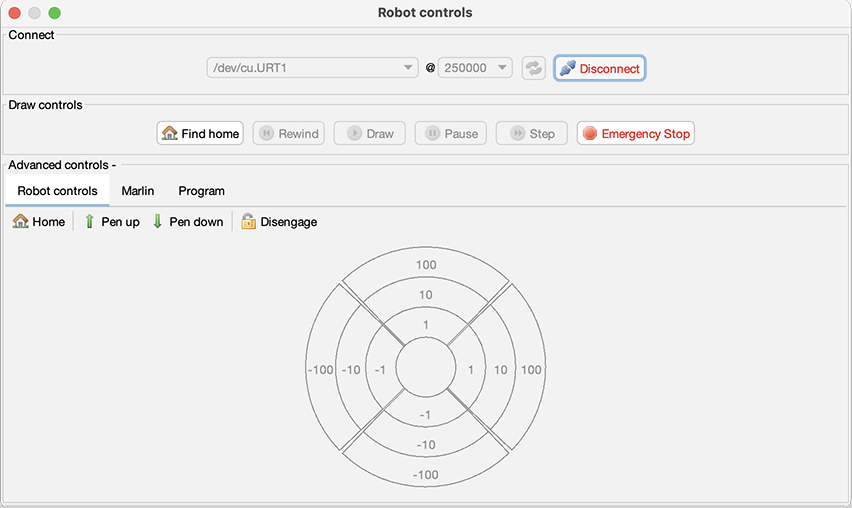
On the robot controls window, we can move pen as same as XYZ machines and send g-code to machine.
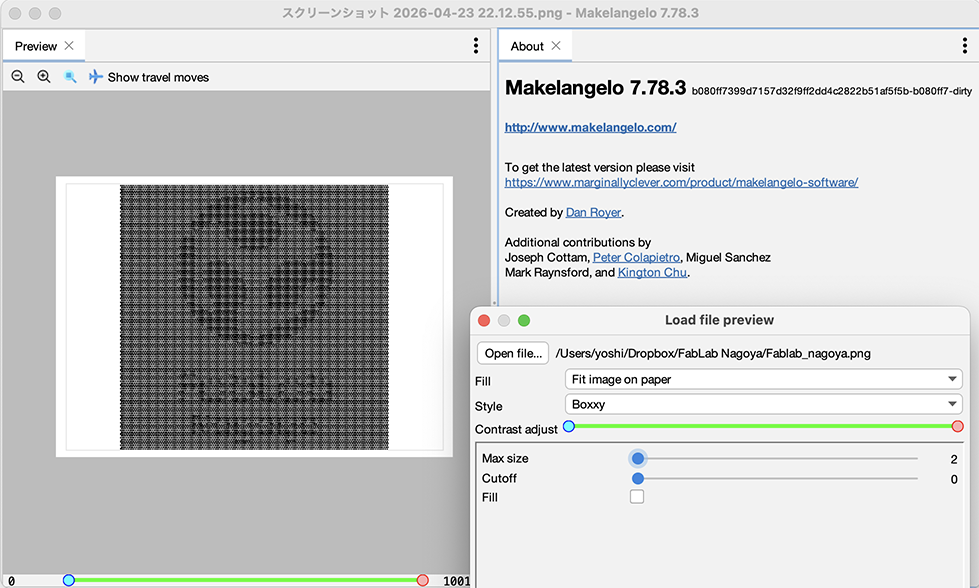
We can open an image file and convert it on Makelangelo.
Checklist
- Documented the machine building process to the group page
- Documented your individual contribution to this project on your own website
- Linked to the group page from your individual page as well as from group page to your individual pages
- Shown how your team planned, allocated tasks and executed the project (Group page)
- Described problems and how the team solved them (Group page)
- Listed possible improvements for this project (Group page)
- Included your design files (Group page)
- You need to present your machine globally and/or include a 1 min video (1920x1080 HTML5 MP4) + slide (1920x1080 PNG) (Group page)