Week14
Interface and Application Programming
Group assignment:
- Compare as many tool options as possible.
- Document your work on the group work page and reflect on your individual page what you learned.
Individual assignment:
- Write an application for the embedded board that you made. that interfaces a user with an input and/or output device(s)
Group assignment
Group page: https://fabacademy.org/2026/labs/nagoya/assignments/week14/
I choose Flutter/Dart because I thought .NET MAUI came from Xamarin, and I don’t like Xamarin. I also don’t like JavaScript, TypeScript and Java. So I found my choice was right. (But as you can see on following document, I really didn’t write any code for phone app.)
What I made
When nRF51822 came to market, I played with it a lot. At that time, I wrote phone app with techBASIC. On the other hand, I start using Claude Code these days to port FabLab Nagoya web site from proprietary CMS to Docusaurus on GitHub Pages.
So I thought about to make a phone app with Flutter and Dart by using Claude Code. Actually it works great.
I’m using iPhone, so I may need to use Bluetooth LE (Low Energy) as a procotol that communicate between phone app and the board. I know BLE UART (Nordic UART Service) is an improper way for BLE. While low power consumption is the defining characteristic of BLE, tuning parameters to achieve “maximum speed” for UART communication—specifically by minimizing the connection interval and maximizing the transmission packet size—significantly compromises energy efficiency. I wouldn’t use BLE UART for a professional development project, but I decided to try it out this time since this was an experiment in rapid prototyping.
Hardware
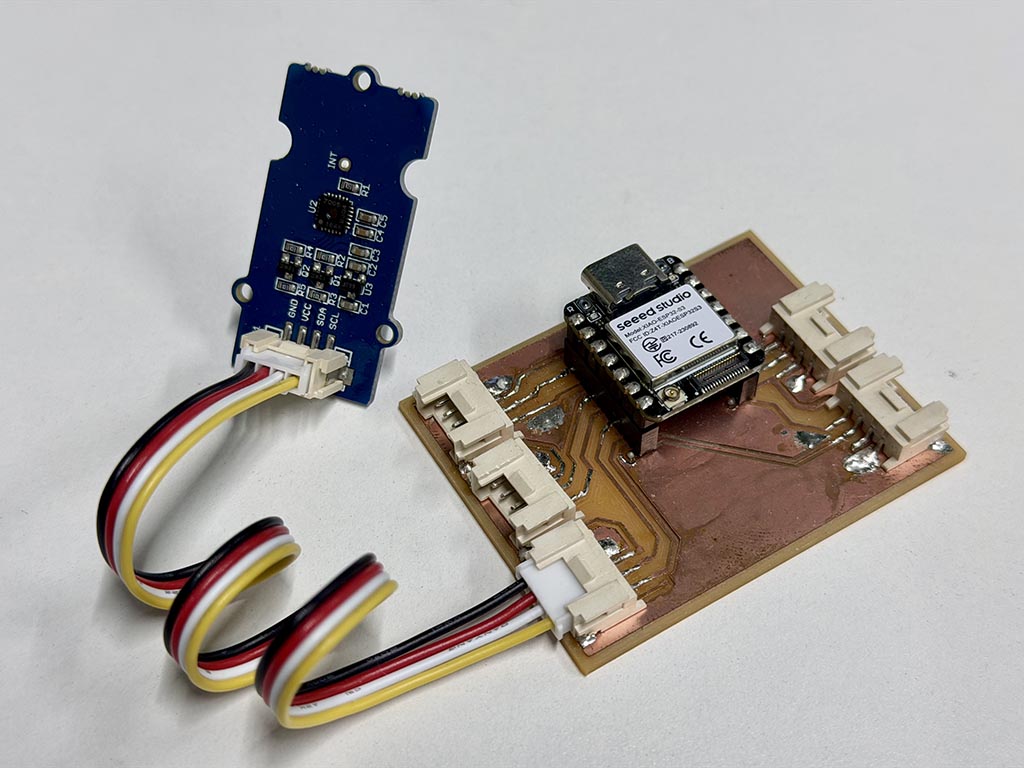
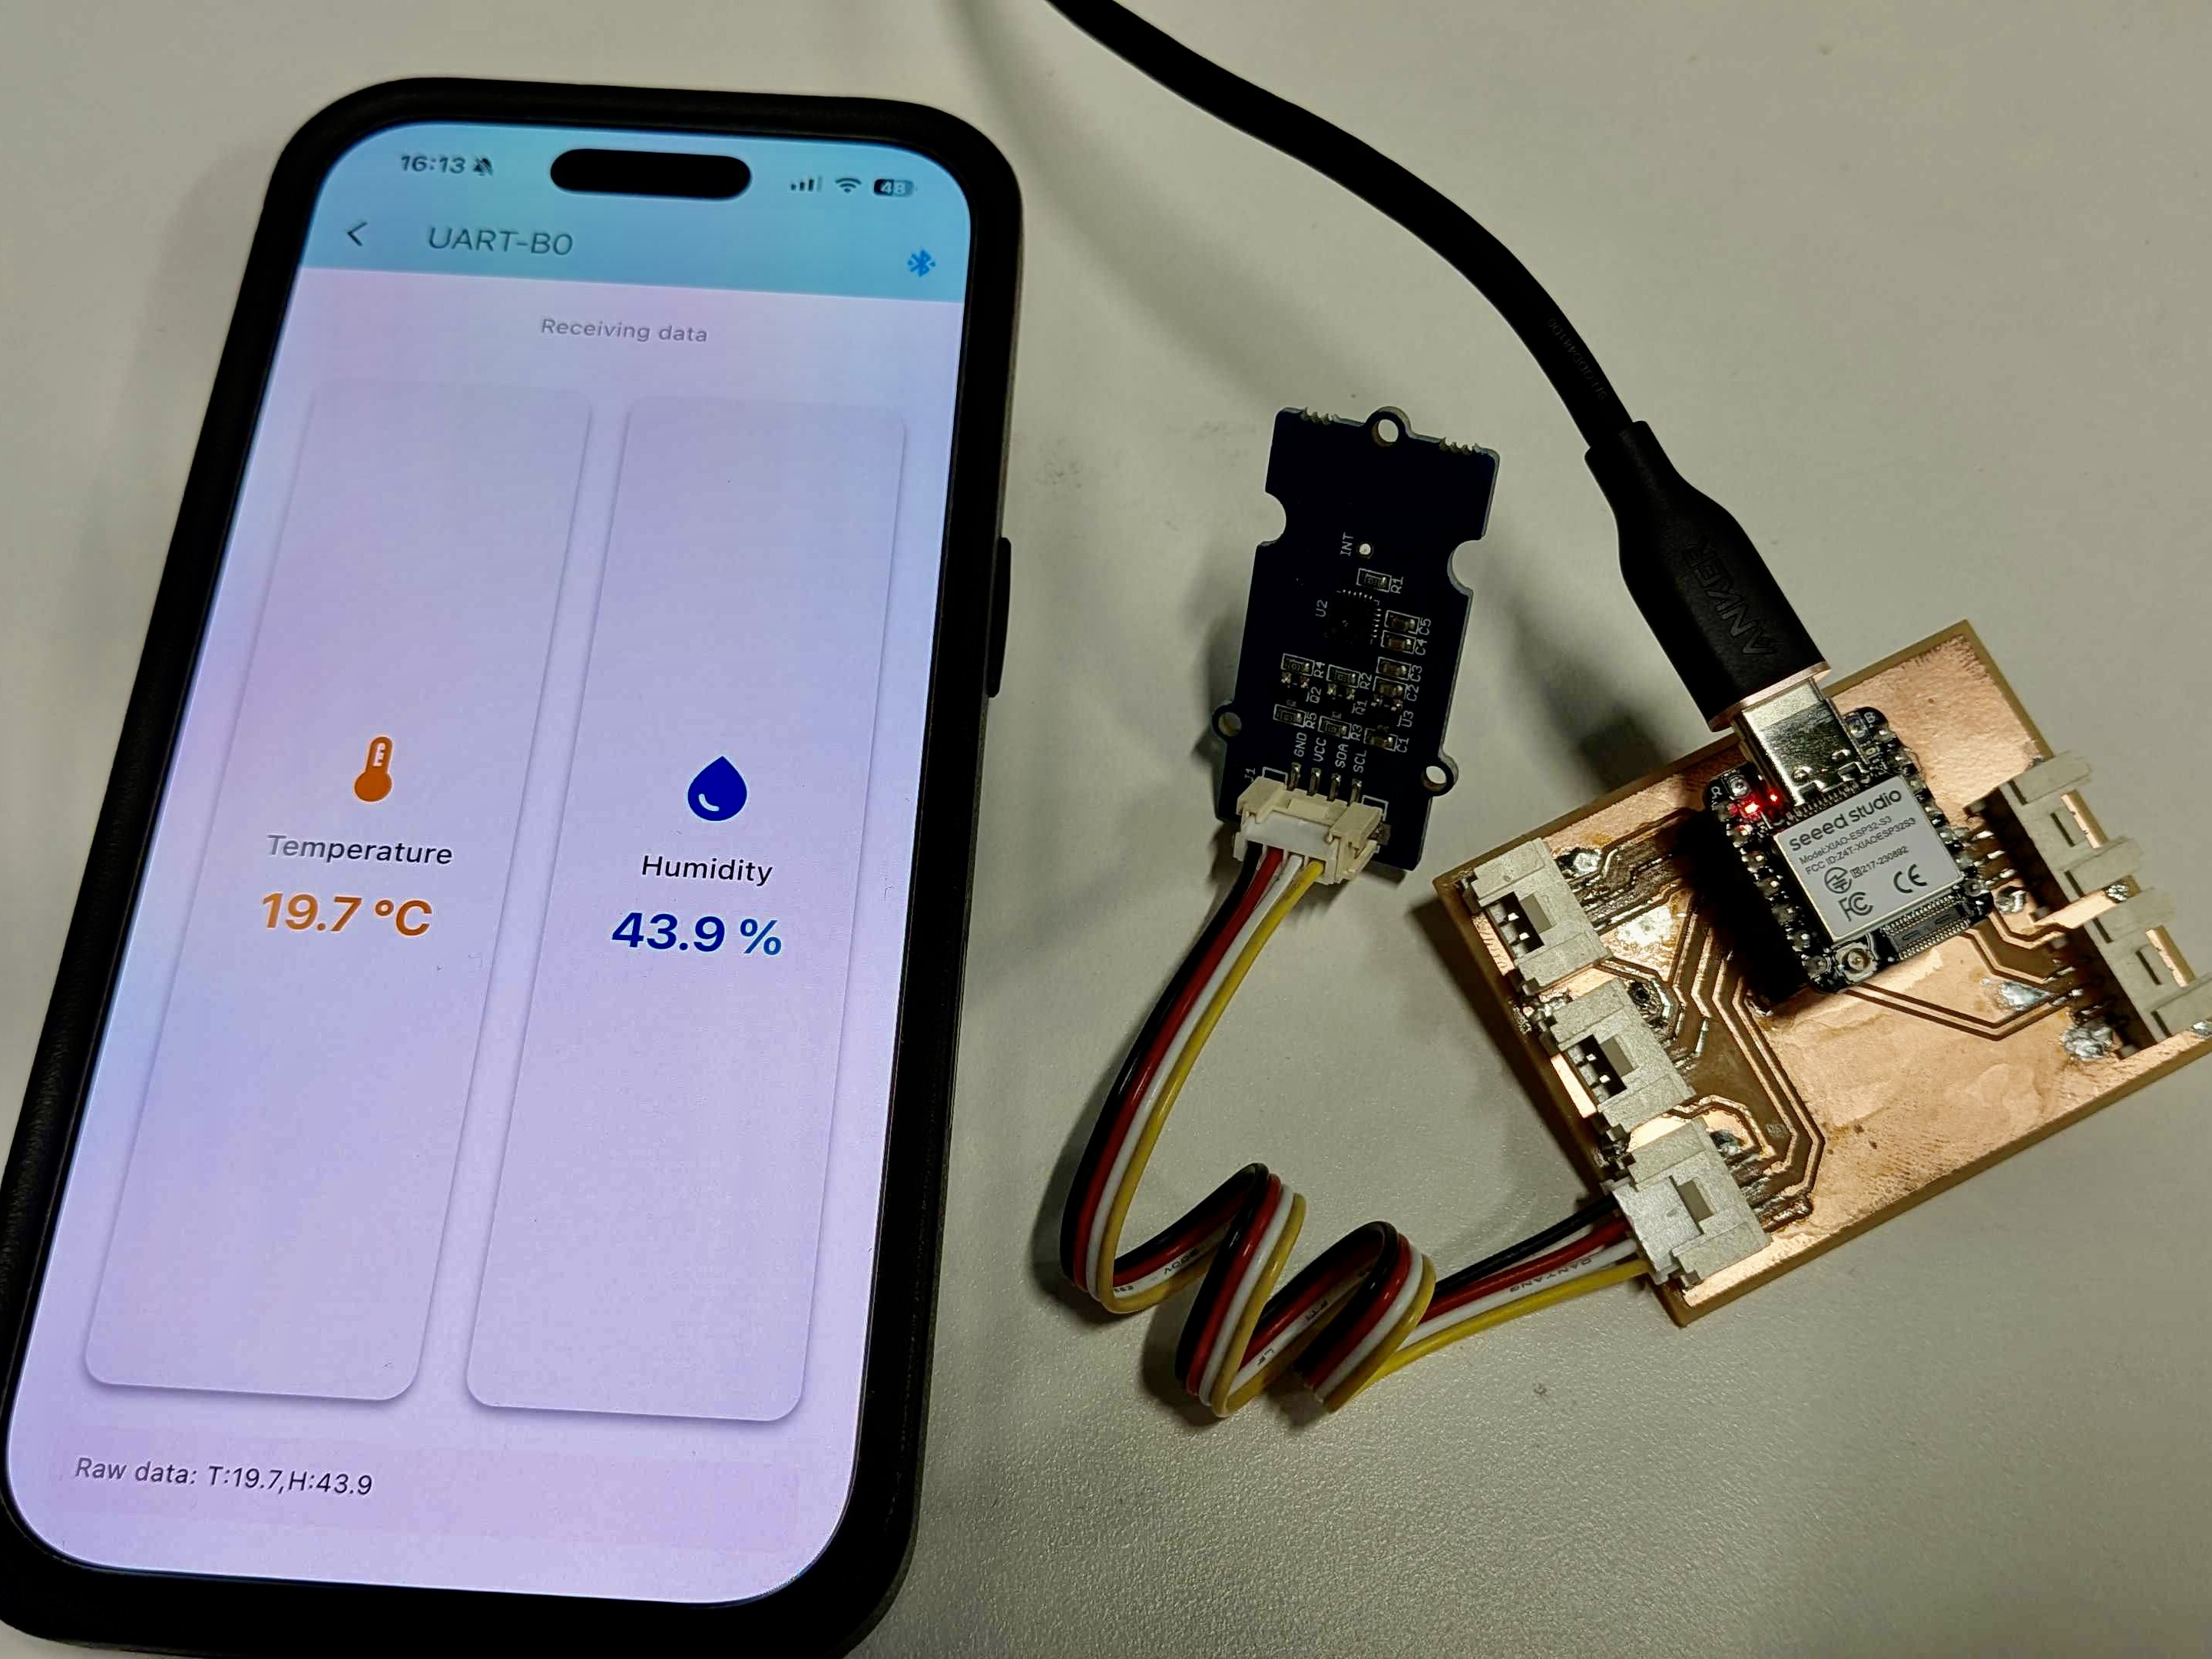
I have Seeed Studio XIAO ESP32-S3 and Grove - Temperature&Humidity Sensor (High-Accuracy&Mini) v1.0, so I built temp and hum sensor node with the board I made at week 8.
Since this Grove Temp & Hum sensor is I²C connection, I used left bottom I²C Grove connector.
The phone app
Preparation
- Install XCode from Mac App Store.
brew install cocoapodsbrew install --cask flutterflutter doctorto confirm toolchain workssudo xcode-select --switch /Applications/Xcode.app/Contents/Developerby the flutter doctors suggestionsudo xcodebuild -runFirstLaunchby the flutter doctors suggestionflutter create ble_uart_appcd ble_uart_appflutter run
How to code (iOS App)
And then, I opened ble_uart_app directory with VSCode, and opened Claude Code on VSCode. My prompt was
So that Claude Code generate a code and built it. I really didn’t need any other instructions. Claude Code generated the code including designing GUI and protocol that uses over BLE UART.
The code Claude Code generated is hosted on https://gitlab.fabcloud.org/ytsuboi/BLE_UART_App. Here are generated code and Claude Code record. It only took about 30 min from step 7 to make it running. I didn’t need any modification on the code. Additionally, most of the part it took was make it running on actual iPhone. I don’t need any debug things. I just needed a single prompt.
The original design file is: W14_BLE_UART_App-main.zip
Encountered problem
To run unsigned iOS application on iPhone, we need to enable developer mode. The toggle switch should be on Settings - Privacy & Security but it wasn’t exist on my iPhone.
The solution was reboot a phone. 😭
The protocol
I use the protocol Claude Code suggested. According to the output from Claude Code, this iOS app supports following formats.
T:25.5,H:60.2orTemp:25.5,Hum:60.225.5,60.2(CSV: temperature,humidity)TEMP=25.5 HUM=60.2
So, I decided to use T:25.5,H:60.2 as the protocol for this project.
How to code (XIAO firmware)
When I googled about BLE UART with XIAO ESP32S3, I found a page that a teached of a technical junior college wrote. It was written in Japanese. So I wrote a sketch by refering his example code and used his helper class.
For the library to use Grove Temp&Hum sendor, I used Grove_Temper_Humidity_TH02 library distributed by Seeed.
// BLE UART sample program
// works with XIAO-ESP32S3 and Grove Temperature&Humidity Sensor
// Reference: https://coskxlabsite.stars.ne.jp/html/for_students/iot/XIAOESP32S3/ESP32S3BLEServer_iOS.html

#include <Handy_BLE_Uart.h> // A utility libarary to use BLE UART on ESP32S3, distributed on reference page.
#include <TH02_dev.h> // A Arduino library to use Grove Temp&Hum sensor this time.
#include "THSensor_base.h" // A common library to use Grove Temp&Hum sensor this time.

#define DEVICENAME "UART-B0"
#define INTERVAL 1000 //milli sec

Handy_BLE_Uart bleuart;
TH02_dev TH02; // Grove Temp&Hum Sensor

void setup() {
  Serial.begin(115200);
  delay(300);

  TH02.begin();
  delay(100);

  bleuart.setCallbackFunc(StringReceptionReport); // registering callback
  bleuart.begin(DEVICENAME, true); //
  delay(1000);
}

void loop() {
  bleuart.RegularWorkInLoop();
  if (bleuart.isConnected()) {
    float tempreture = TH02.ReadTemperature();
    float humidity = TH02.ReadHumidity();
    char string0[256];
    sprintf(string0, "T:%.1f,H:%.1f", tempreture, humidity); // sending data as Claude code expected format
    bleuart.transferString(String(string0));
  }
  delay(1000);
}

// This callback will be called when receive something
void StringReceptionReport(String str) {
  // do nothing
}
The original design file is: W14_BLE_UART_TH2.zip
It works!!
Checklist
- Linked to the group assignment page.
- Documented your process.
- Explained the UI that you made and how you did it.
- Explained how your application communicates with your embedded microcontroller board.
- Explained any problems you encountered and how you fixed them.
- Included original source code (or a screenshot of the app code if that’s not possible).
- Included a ‘hero shot’ of your application running & communicating with your board.