Week 1: Project Management
Actually, project management is not as complicated as it sounds. Its core isto plan, organize, and supervise a project from start to completion, which helps us advance work more efficiently.
In the theoretical part of the course, we learned several practical project management methods. The first is the so - called 80/20 principle, and in reality, it is even more extreme, the 95/5 principle. 80% of tasks only take 20% of the time, while the remaining 20% of critical tasks will take up 80% of the time. We also discussed how to balance ** the time between the demand side and the supply side *, how to divide ** task priorities *, and how to ** execute multiple tasks in parallel ** to avoid wasting time or getting caught in inefficient processes. These ideas may seem simple, but they can help us better manage time and clarify priorities in the upcoming courses.
This week, there are two core learning tasks, which also serve as the foundation for the subsequent content of the entire course: the first is ** distributed version control , mainly using ** Git *; the second is ** web development *.
Simply put, we need to learn to use Git to manage code versions, avoid issues such as accidental file deletion and loss of modification records during the development process, and lay a solid foundation for subsequent project work. Meanwhile, we also need to build ** a personal website ** to introduce ourselves and showcase all the works and assignments completed throughout the course.
In addition to these two main tasks, there are two other important things to accomplish this week: First, ** read and sign the Fab Academy Student Agreement *, and submit the agreement to your own repository; Second, ** start to conceive and write the final project description *, clearly defining the goals and directions you want to achieve by the end of the course.
This week\'s task list:
-
Read and sign** the Student/Tutor/Laboratory Agreement**, and submit it to your repository.
-
Complete** the Git Tutorial **, master basic operations, and be able to independently manage code versions.
-
In the course archive ** build a personal website ** to introduce yourself and your final project.
1. What problems do I need to solve this week?
1.1 Confusion and Uncertainty When First Receiving the Assignment
When I received the first week\'s assignment, I was completely lost. Looking at tasks like \"Git operations\", \"HTML modifications\", and \"project sketches\", I didn\'t know where to start. This week, I followed the assignment requirements step by step, encountered one question after another, and gradually found solutions. Every time I solved a problem, I could feel a sense of accomplishment. The following is a complete record of my learning, thinking, and operations this week, hiding every moment of my transition from unfamiliarity to familiarity.
1.2 Reunderstanding of the job objectives
The goal of this week\'s assignment is not to complete a single technical point independently, but to actually publish a project as an accessible website. To achieve this goal, I must first address the issue of \"how files are to be uniformly managed and continuously updated.\" Therefore, the first step is to learn how to use Git for version control of the project and synchronize and save all files through GitLab as a remote repository. This step addresses the issue that the project may be repeatedly modified from the very beginning but must not become chaotic.
After the repository was able to synchronize normally, the next question became: how to make these files ultimately accessible in the form of web pages. To this end, I needed to understand which content in the repository would be used for web page display, so I started modifying the HTML files under the public directory and verified through commit and push operations whether the modifications would actually be reflected in the online pages. This step helped me establish the correspondence between \"local modification → commit → deployment result\".
After the web page could be updated normally, the next problem I encountered was the use of media files. Directly uploading original images and videos would result in excessively large file sizes, affecting loading and submission. Therefore, I needed to learn how to compress images and videos. By using specialized compression tools, I kept the files within the specified size limit, then re-uploaded them and referenced them on the web page, ultimately resolving the conflict between page display and performance.
As the content gradually increased, handwritten HTML began to become inconvenient to maintain, so I started to introduce website templates to unify the page structure. This step requires understanding the template\'s directory structure, configuration files, and content generation rules, so as to migrate the original content into the template system, ensuring that the website can be generated normally and is convenient for subsequent continuous updates.
Throughout this entire process, the techniques learned at each step do not exist independently but are aimed at solving the new problems exposed in the previous step. Ultimately, what I have completed is not just a webpage but a complete technical path from \"project management\" to \"content publishing\".
2. Git and GitLab Operation Records

2.1 What problems does Git solve?
Before starting to learn Git, I first pondered a question: Why do we need to learn Git, and what problems does it help us solve?
It is imaginable that during project development, we will constantly modify and adjust our own files. At the same time, we also hope to save the old version while updating to the latest version, because we are not sure if we will need it again. It would be even better if we could record the history of each modification and allow us to revert to a previous version at any time.
Git meets these requirements well. It is a distributed version control system that can record the history of each modification in a project and allows us to revert to previous versions at any time.
The so - called distributed system means that each developer\'s computer has a complete copy of the repository, rather than relying solely on a central server. Even in an offline state, version recording and management can still be carried out, and synchronization with the remote repository can be done after reconnecting to the network. In contrast to the distributed system is the centralized system, where all code is stored on a central server, and version recording and management require network connectivity. If the server or network encounters problems, development work will also be affected.
Using Git can bring us several obvious benefits:
-
Every modification is recorded
-
can return to the previous version at any time
-
Project files will not become chaotic due to multiple modifications
-
Local files can be synchronized and backed up with remote repositories
During this Fab Academy learning process, all my assignments and learning records will also be managed through a Git repository and ultimately published on my personal website. So, let\'s start by learning Git.
2.2 Getting Started with Git
2.2.1 Install Git and Configure SSH Key
Git Installation Link: https://git-scm.com/install/
On the basis of having already completed the installation of Git, before officially using Git, I need to first complete the SSH configuration. This step is mainly to enable GitLab to recognize the identity of the current computer, so that password-free connection can be achieved for each subsequent code submission or synchronization.
**Step 1: Generate SSH Key **
Open the command line terminal and enterssh\-keygen \-t ed25519 \-C \&\#34; your\_email@example\.com \&\#34;to generate an SSH key. Note: your\_email@example\.com needs to be replaced with the email address you used when registering for GitLab.
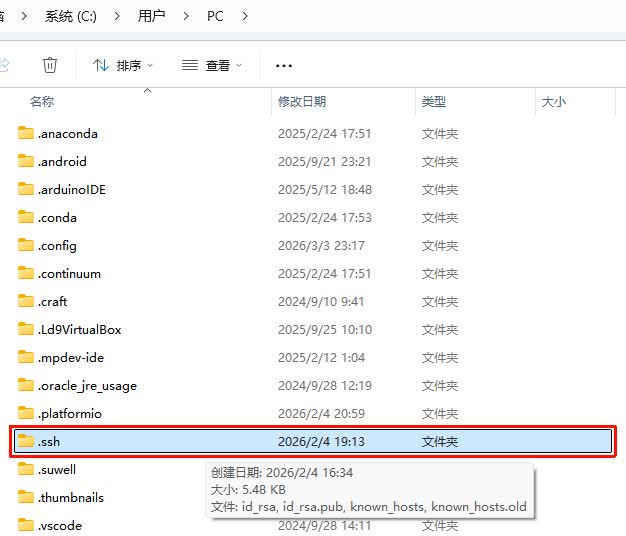
**Step 2: View and copy the public key **
After running the above command, the terminal will output information related to the successful generation of the key. The generated SSH key is generally saved in the C:\\Users\\PC\\\.ssh\\ directory. You need to view and copy the public key.
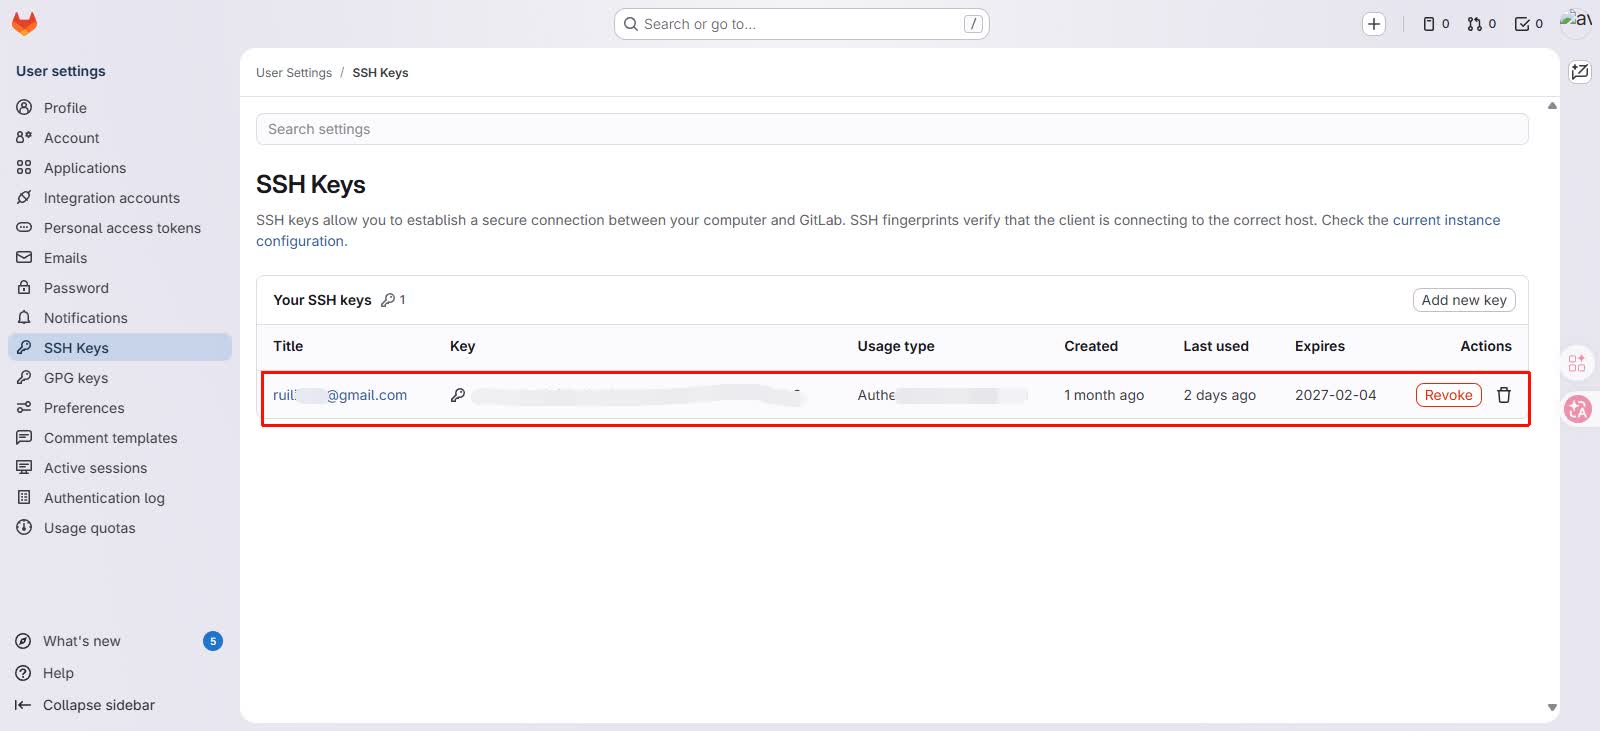
**Step 3: Add the public key on GitLab **
First, log in to GitLab, go to 「Edit profile」→「SSH Keys」, and add the public key.
**Step 4: Verify if the connection is successful **
In the local command line terminal, enter the command ssh \-T `` git@gitlab\.com to verify if the connection is successful.
2.2.2 Add Remote Repository
Suppose only a Git repository is created locally, which means I can perform version control locally. However, once my local computer is damaged or files are accidentally deleted, version records will have problems, and it will also be impossible to synchronize progress across multiple devices.
Therefore, we can associate and push the local repository to the GitLab remote repository, and these issues will be readily resolved.
The specific implementation steps are as follows:
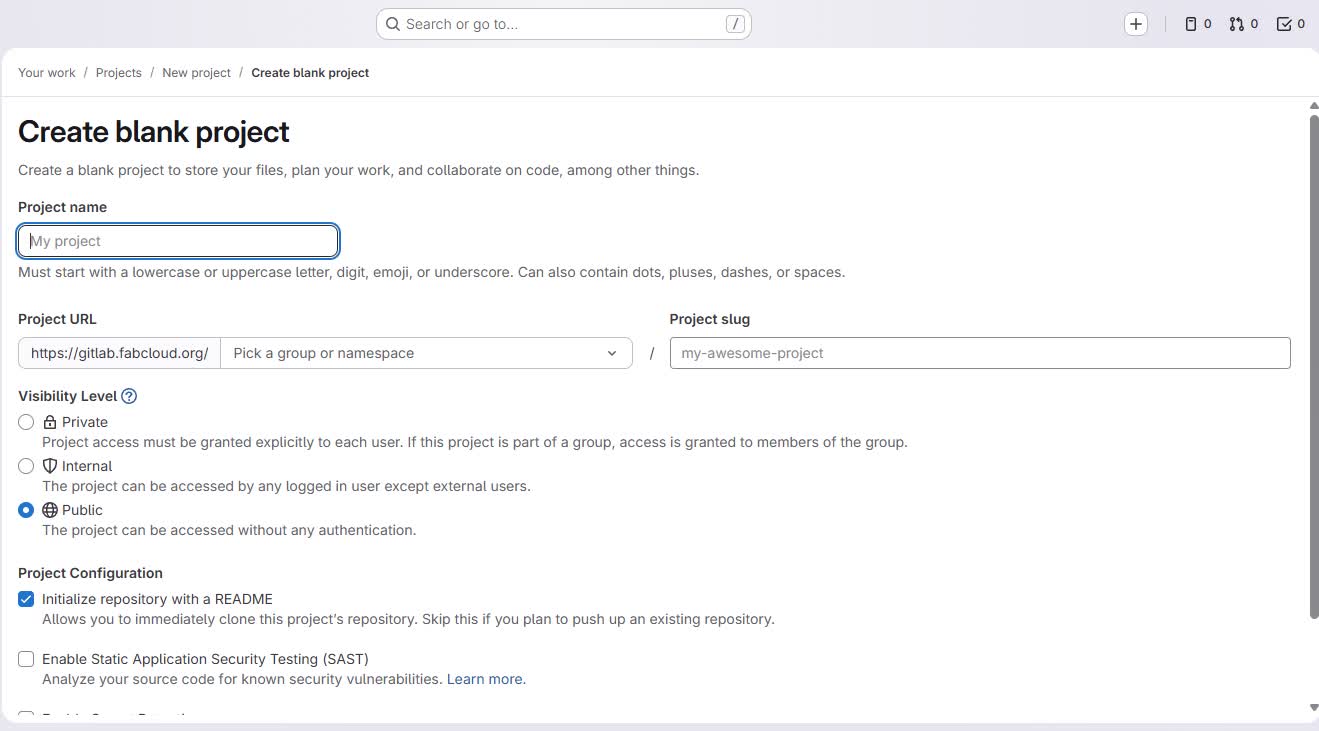
**Step 1: Create a remote repository on GitLab **
First, find the \"New project/repository\" button in the upper right corner of GitHub and create a new repository.

Next, set up information such as the repository name and visibility,
**Step 2: Initialize a Git repository locally **
In this step, I will initialize the local Git repository and perform the first commit using 4 command lines:
-
Open the project root folder, right-click to open Git Bash, and enter the command
git initto initialize the Git repository. This step will create a\.githidden folder in the project root directory, which will be responsible for storing the core data of subsequent version management; -
Enter the command
git status, which allows you to see which files have not yet been tracked by Git; -
Enter the command
git add\.to add files to the staging area; -
Finally, enter the command
git commit \-m \&\#34;Initialize local repository\&\#34;to submit the first version. After completion, the local files will be under Git\'s version control.
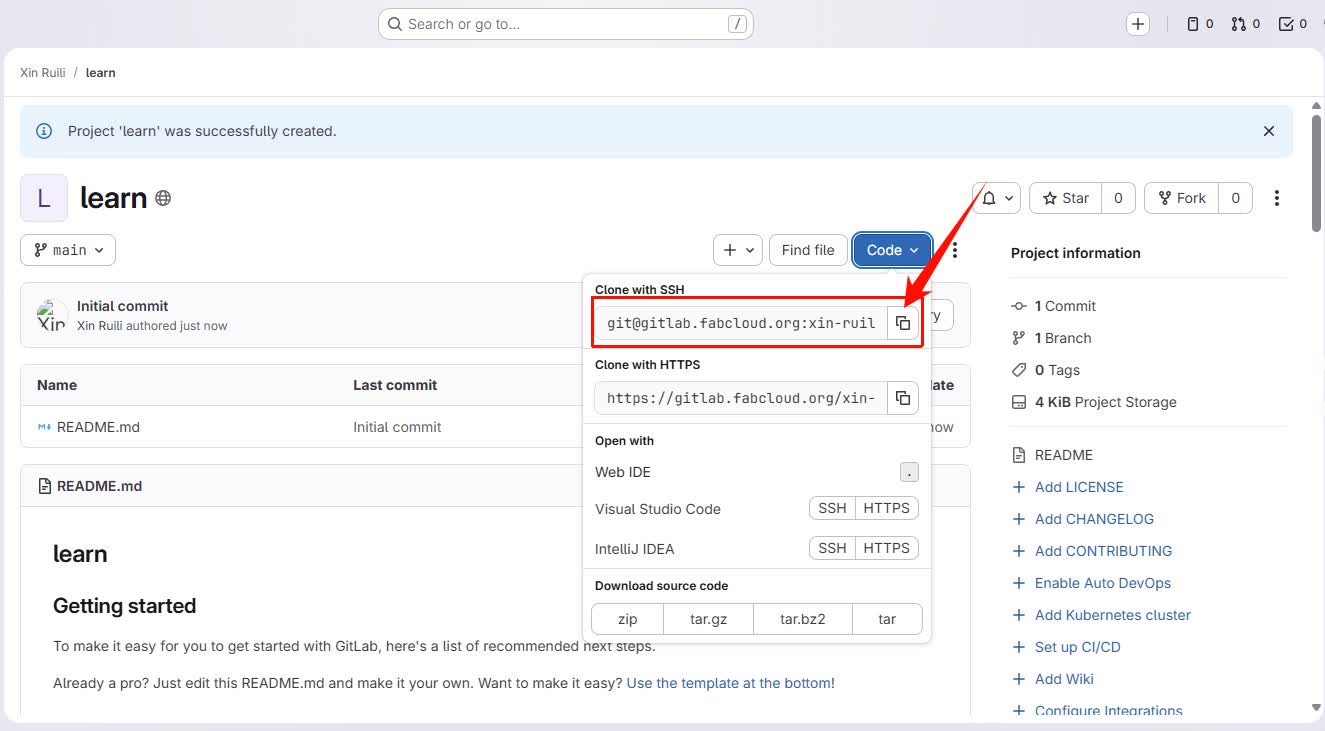
**Step 3: Associate the remote repository **
- Copy the SSH address of the remote repository provided by GitLab.
-
Return to the Git Bash terminal in the root directory of the local project and enter the following command
git remote add origin \<repository address\>. Taking my current operation as an example, the command is:git remote add origin ``git@gitlab\.fabcloud\.org:xin\-ruili/learn\.git -
Continue to enter commands
git remote \-vto check if the association was successful:
**Step 4: Push the contents of the local repository to the remote repository **
Enter the following command to push local commits to GitLab:
git push -u origin main
//如果你的默认分支不是 main,用 master 或对应分支名。
//-u 参数表示把本地分支和远程分支关联,以后推送可以只用 git push。
Then open the GitLab repository page, and after refreshing, you will see that the content of the local files has already appeared in the remote repository.
2.2.3 Clone from Remote Repository to Local
**Step 1: Copy the SSH address of the GitLab repository **
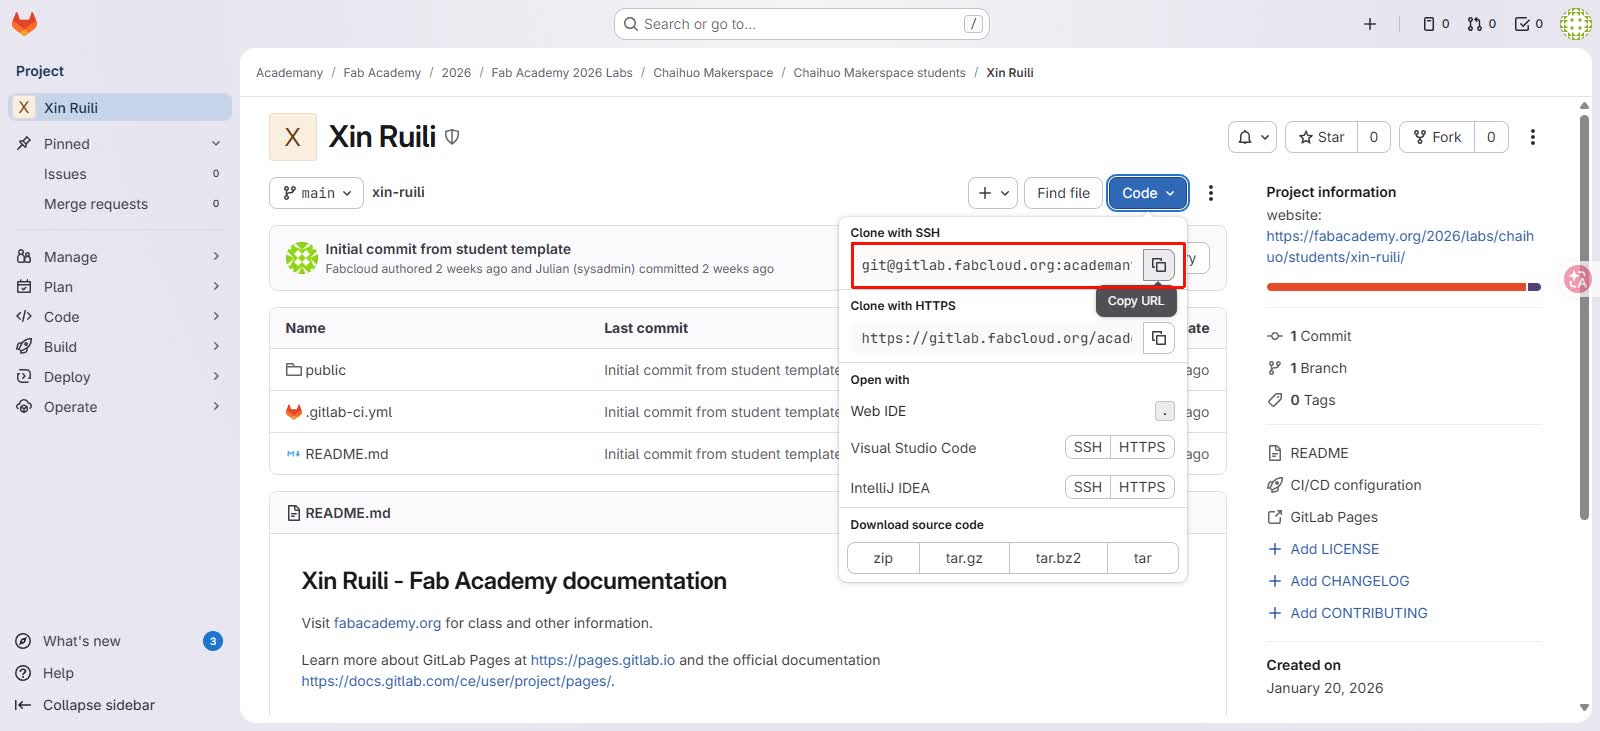
Step 2: Open Git Bash and use the commandgit cloneto clone the repository
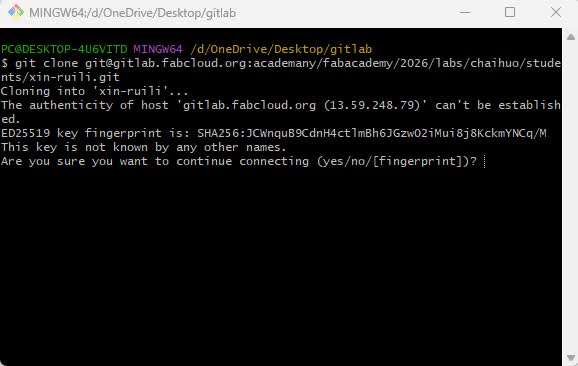
Step 3: Enter *yes*
When pushing or cloning a remote repository via SSH for the first time, the system prompts \"Do you trust the remote server?\" Enter yes in the command line and press Enter to continue. Subsequent operations do not require entering yes.

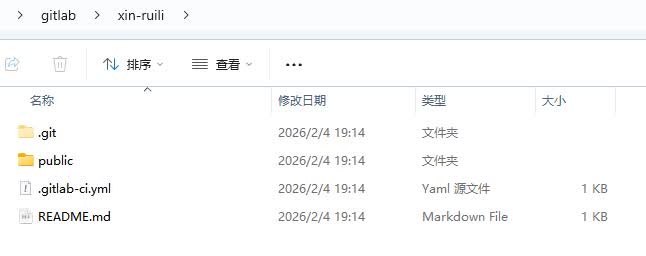
Step 4: Check the local folder for verification
2.2.3 File Modification and Push
After establishing a connection between my local repository and the remote repository, when updating my personal website and submitting assignments in the future, I will perform operations locally, and then synchronize the changes to the GitLab remote repository after the operations are completed.
After completing the modification and saving of local files, I also want to synchronize the local changes to the remote repository. The operation steps are as follows:
**Step 1: Commit changes to the local repository **
Execute the following command in the Git Bash** ** terminal to record the changes to the local repository:
git add\. adds all modified files to the staging area.
git commit \-m \&\#34;description\&\#34; will record these changes as a version snapshot, making it easy to roll back or view history at any time.
**Step 2: Push changes to the remote repository **
Continue to execute the following command to synchronize local commits to the GitLab repository:
After completion, you can refresh my GitLab repository, and then you will see the latest content we pushed.
To summarize, the operation processes for file modification and push are respectivelymodify -\> stage -\> commit -\> push. Modify means editing content locally, staging \(add\) tells Git which changes need to be recorded, committing \(commit\) saves a historical snapshot of the changes, and pushing \(push\) synchronizes the local version to the remote repository.
Useful Git Tutorial: https://liaoxuefeng.com/books/git/introduction/index.html
3. Build a Personal Website
After completing the Git configuration, I then began to build my personal website. I prefer to use a static site generator to build the website framework rather than writing HTML and CSS from scratch, and I chose to accomplish this through a static site generator like MkDocs.
Using MkDocs, I only need to focus on writing content in Markdown \(\.md\) syntax, and the page structure, navigation bar, etc. of the website can all be automatically generated, which saves me a great deal of time and also provides many ready-made features and styles.
3.1 Install MkDocs
3.1.1 Install Python Environment
Python Installation Link: https://www.python.org/downloads/
Before starting to use MkDocs, we need to prepare a Python \(version ≥ 3\.8\) environment. This is because MkDocs itself is written in Python, and subsequent installation and operation both rely on Python.
After downloading and installing Python \(version ≥ 3\.8\), you can enter python \-\-version or python3 \-\-version in the command line for verification.

3.1.2 Install MkDocs
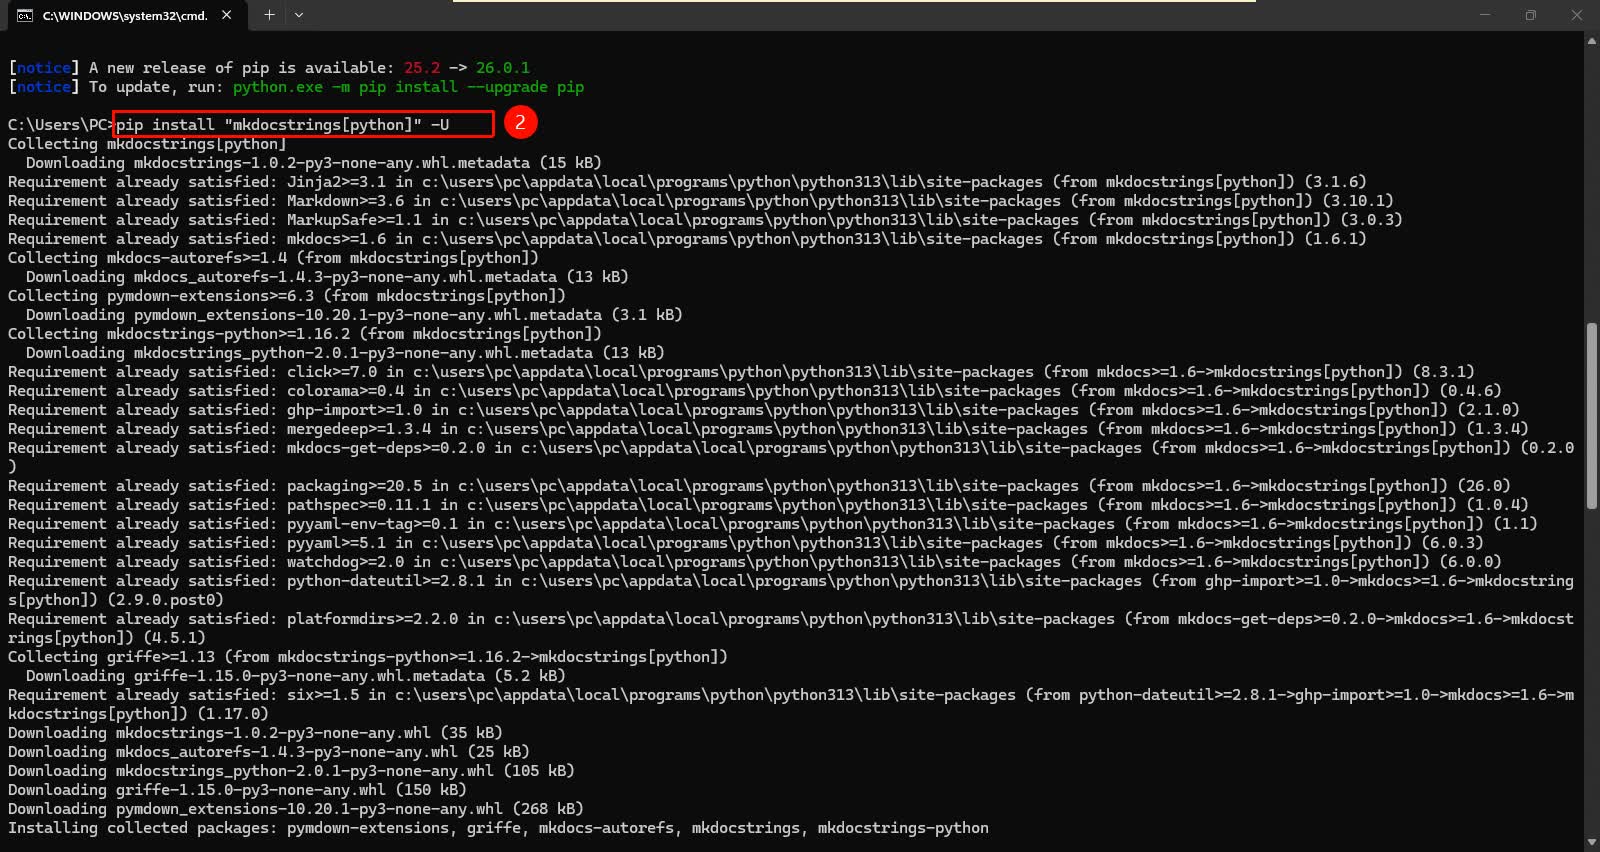
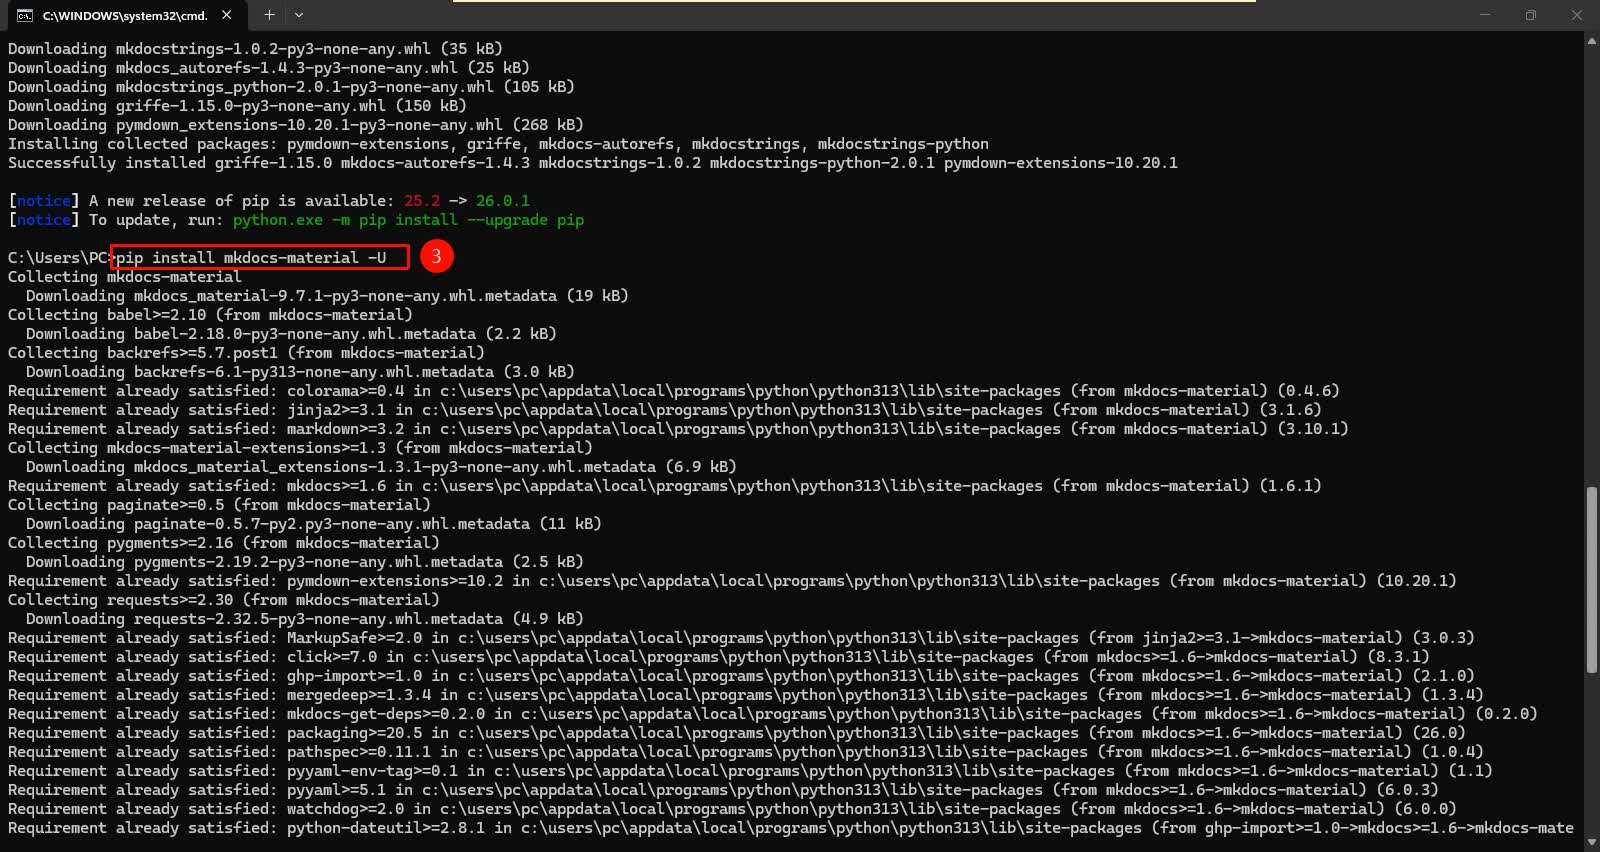
After confirming that Python can be used normally, open the command line \(terminal\) and enter the following command to install the required tools:
Note that it can be directly copied together into the command line, which is very convenient, where:
mkdocs represents the core of the main documentation library
mkdocs\-material represents a nice code theme
The running results are as follows:
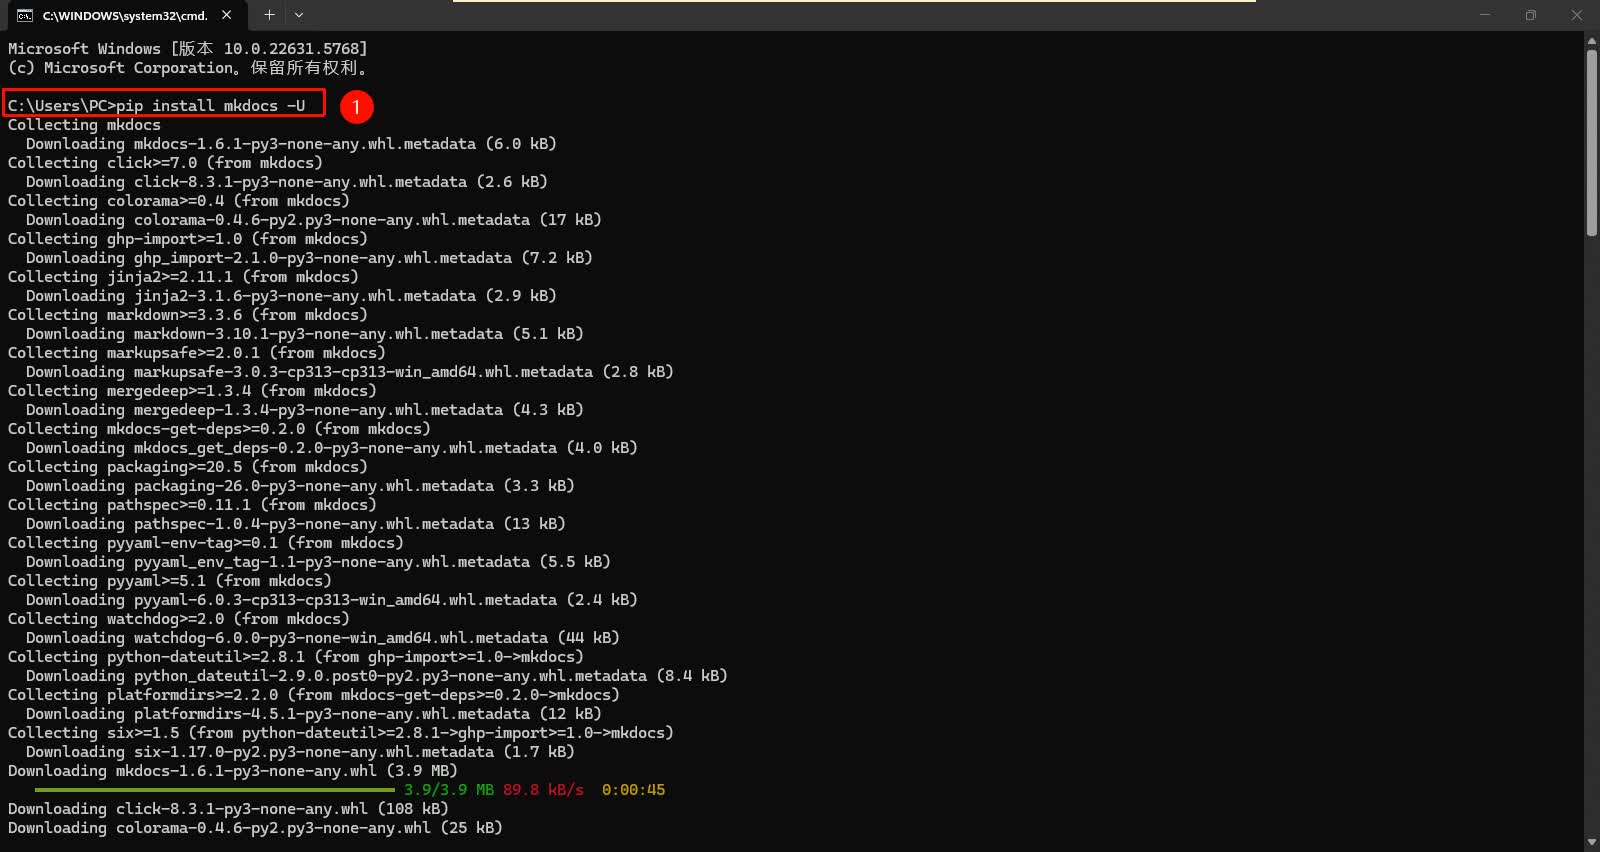
At this point, the installation is complete.
3.2 MkDocs Initialization and Local Debugging
3.2.1 Create a New MkDocs Project
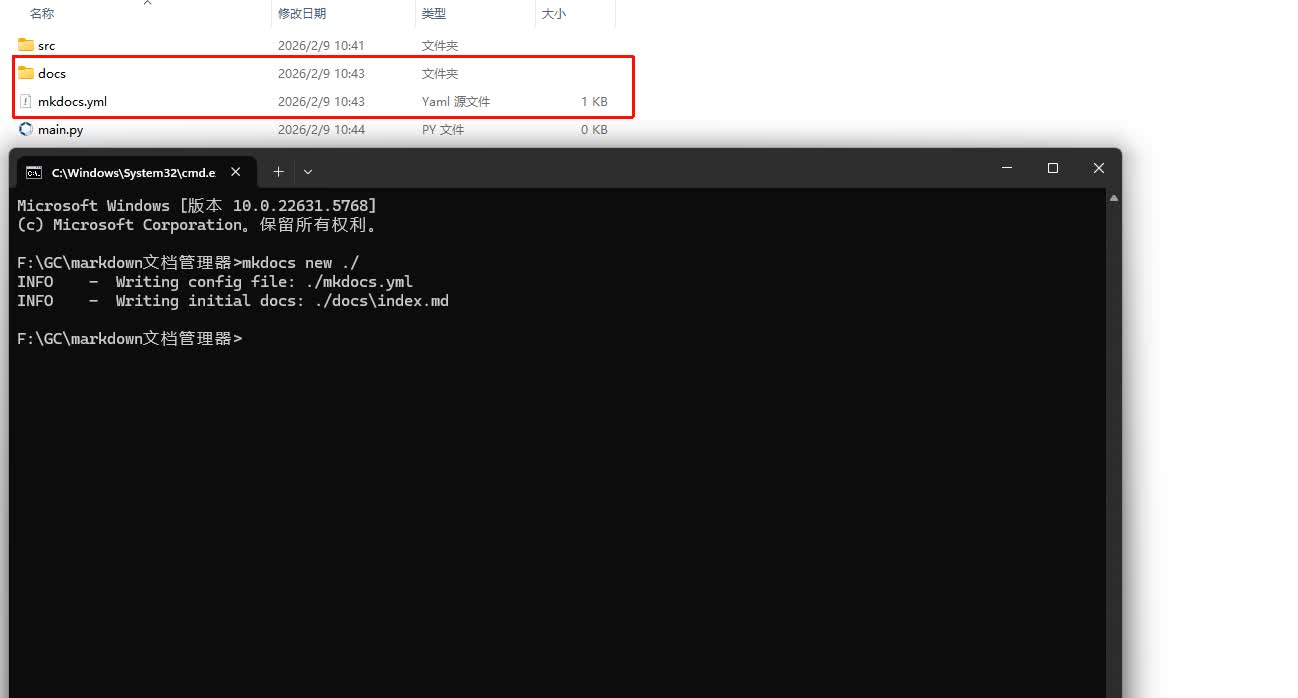
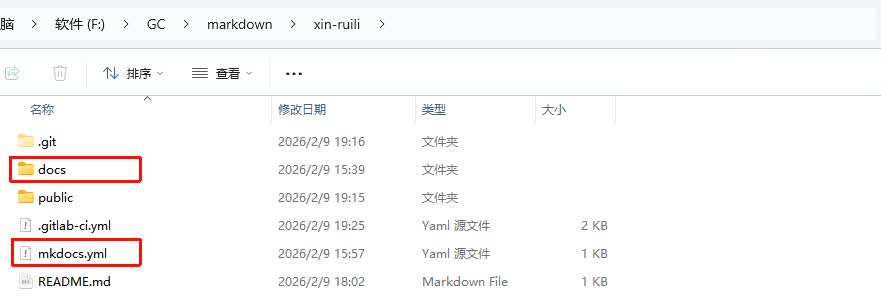
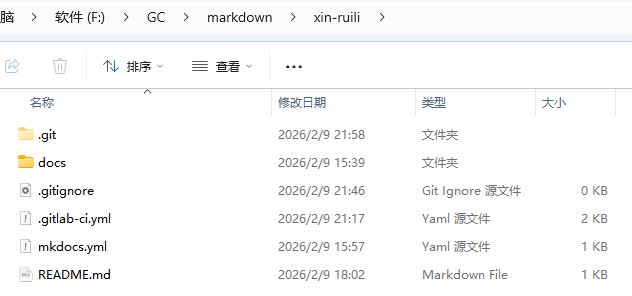
We first create the main folder, and enter the following code in its directory:
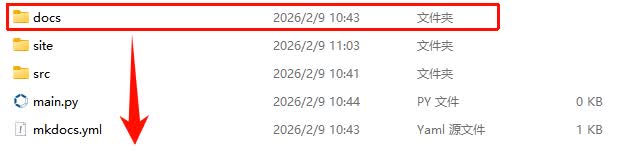
We will see that there is one moremkdocs\.ymlfile anddocsfolder in the directory, indicating successful creation
Project Structure Analysis:
-
docs/: Stores documents (the homepage isindex\.md) -
mkdocs\.yml: Core configuration file

3.2.2 Real-time preview and generate a static website
After completing the basic configuration of the MkDocs project, enter the following command:
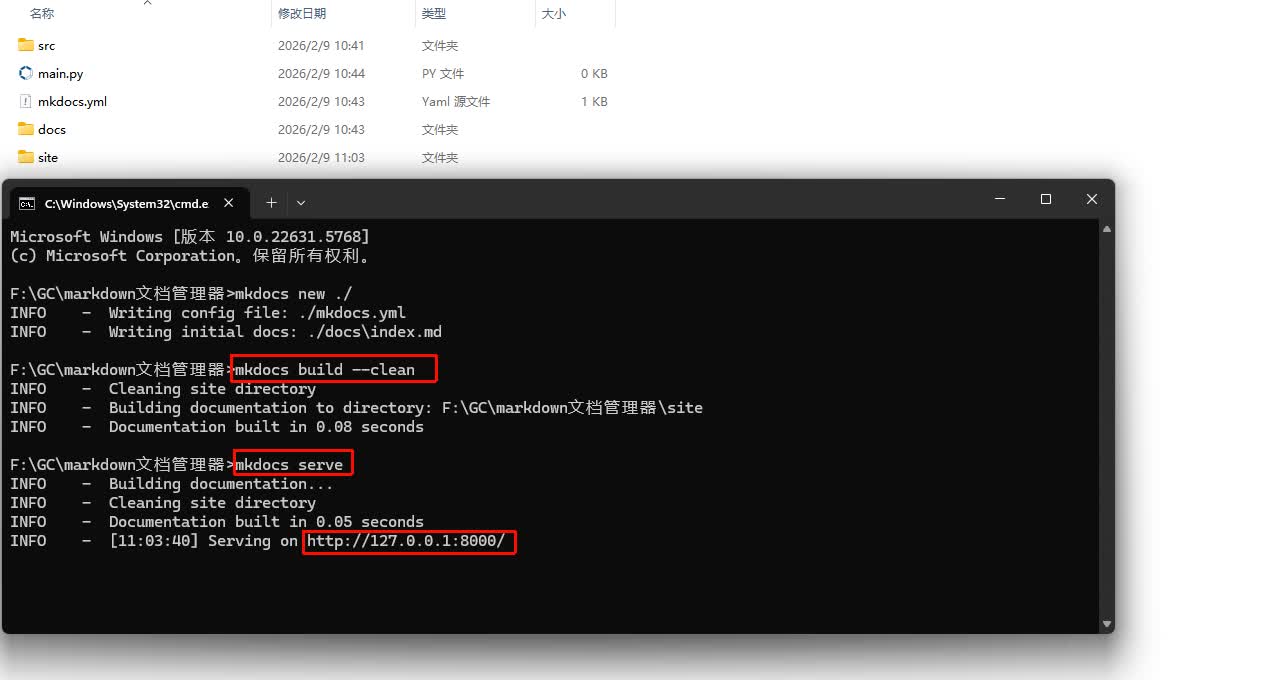
Use mkdocs serve, which will start a temporary server locally. Open http://127\.0\.0\.1 :8000/ in your browser to see the page effects of the current website . The feature of this command is real-time updates, meaning that when I make changes and save them again in the project files, the web page will also automatically update.
Use mkdocs build, which will generate a site folder in the project directory. This folder contains the complete static website files, which are the files for subsequent web deployment. As long as you upload this folder to a platform or server that supports static web hosting, you can access it in a browser. In this Fab Academy learning process, we will submit this folder to the GitLab repository for deployment and complete the website publication through GitLab Pages.
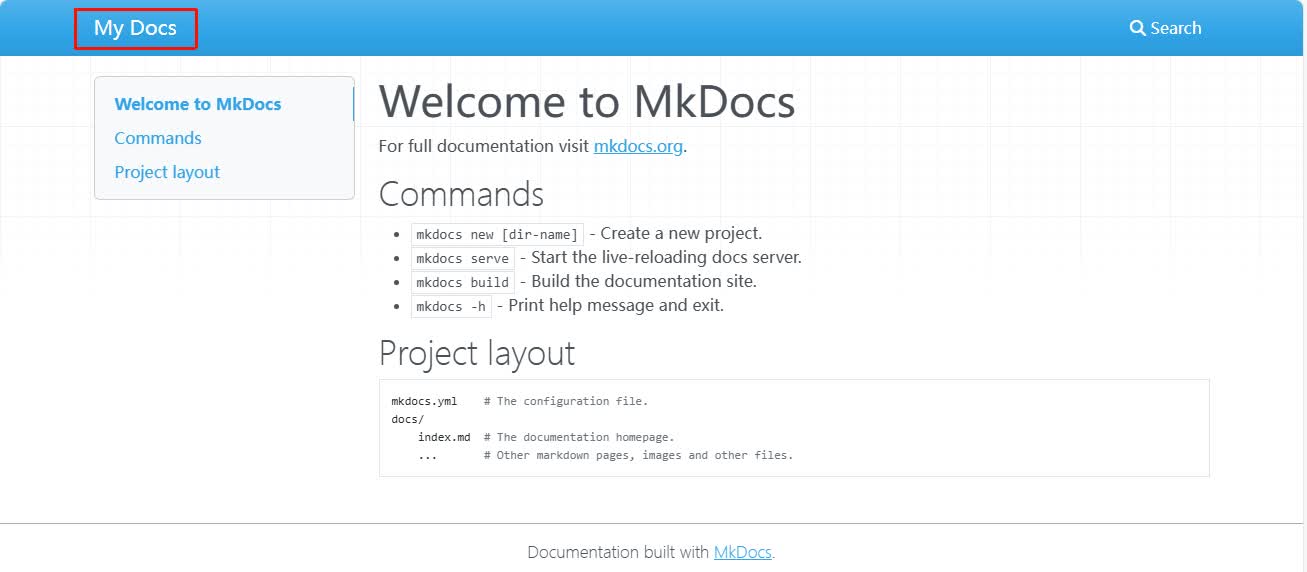
Visit the URL http://127.0.0.1:8000/ , and we will see:
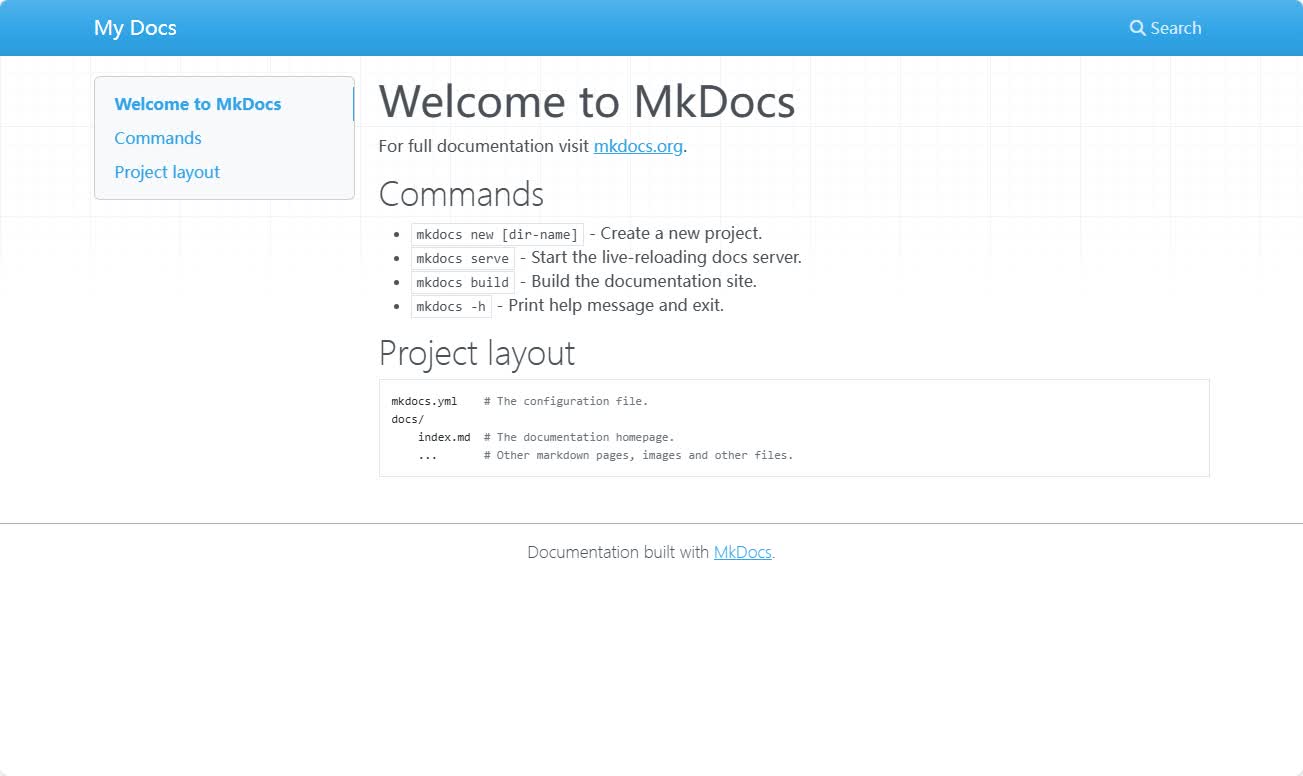
This is our current home page. Next, we can modify it, which is by default modified in docs folder\'s index\.md.

3.3 Configuremkdocs\.ymlfile
In the MkDocs project, there is a very important configuration file called mkdocs\.yml. This file is mainly used to control the basic settings of the entire website, such as the website name, theme style, navigation structure, etc.
Next, open themkdocs\.ymlfile using VScode software:
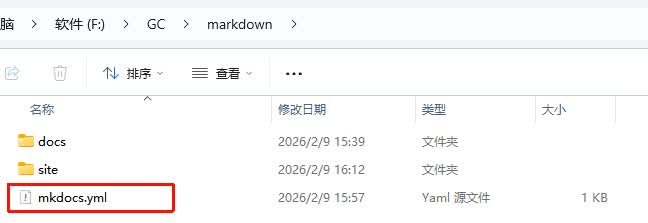
We will find that there is nothing inside, and we can configure it.
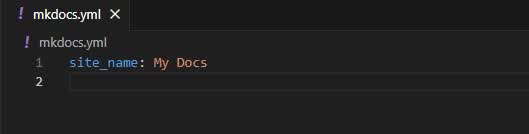
3.3.1 Change Site Name
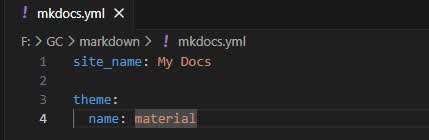
The name of our site can be set via the site\_name parameter, and this name will be displayed in the top left corner of the web page.
3.3.2 Modify mkdocs Theme
Copy the following content into VScode:
The meaning is that we changed the theme to material, which is a very nice theme we installed previously.
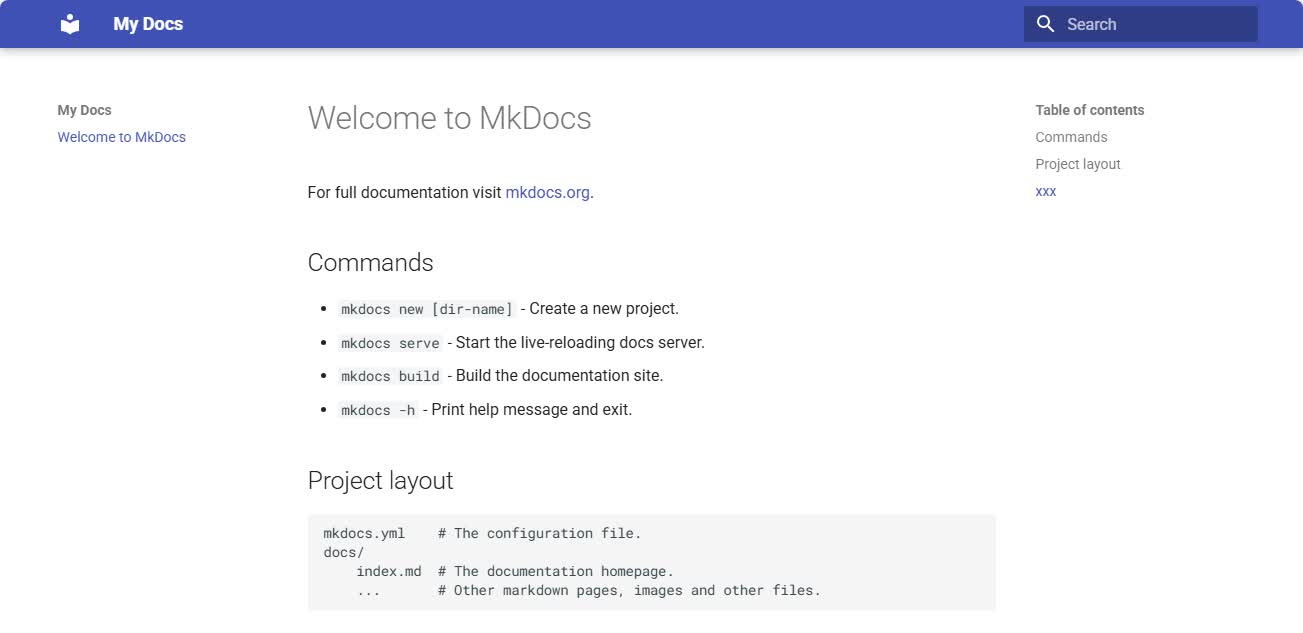
The theme determines the overall interface style, layout method, and navigation style of the website. MkDocs supports many different themes.
You will find that our web page display has changed to this, with a different style compared to before.
3.3.3 Navigation Bar \(Navigation\) Settings
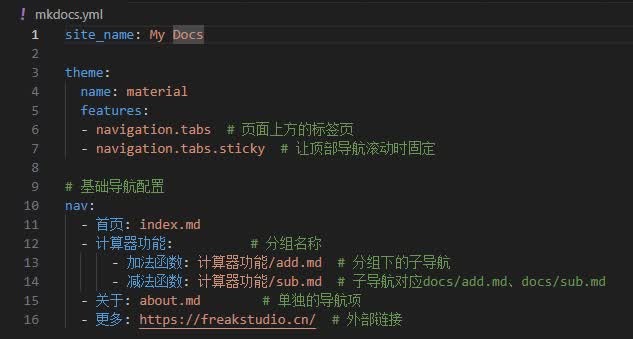
Throughnavsettings, note that the address here is based on the docs folder, and the file name and file address we create in the folder need to be consistent with those set in nav.

Copy the following code to themkdocs\.ymlfile
# 基础导航配置
nav:
- 首页: index.md
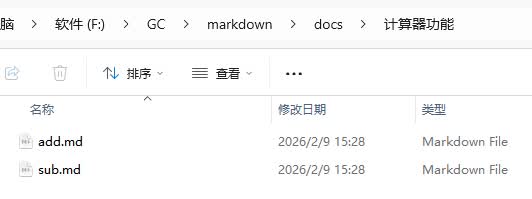
- 计算器功能: # 分组名称
- 加法函数: 计算器功能/add.md # 分组下的子导航
- 减法函数: 计算器功能/sub.md # 子导航对应docs/add.md、docs/sub.md
- 关于: about.md # 单独的导航项
- 更多: https://freakstudio.cn/ # 外部链接
The page can be seen as follows:
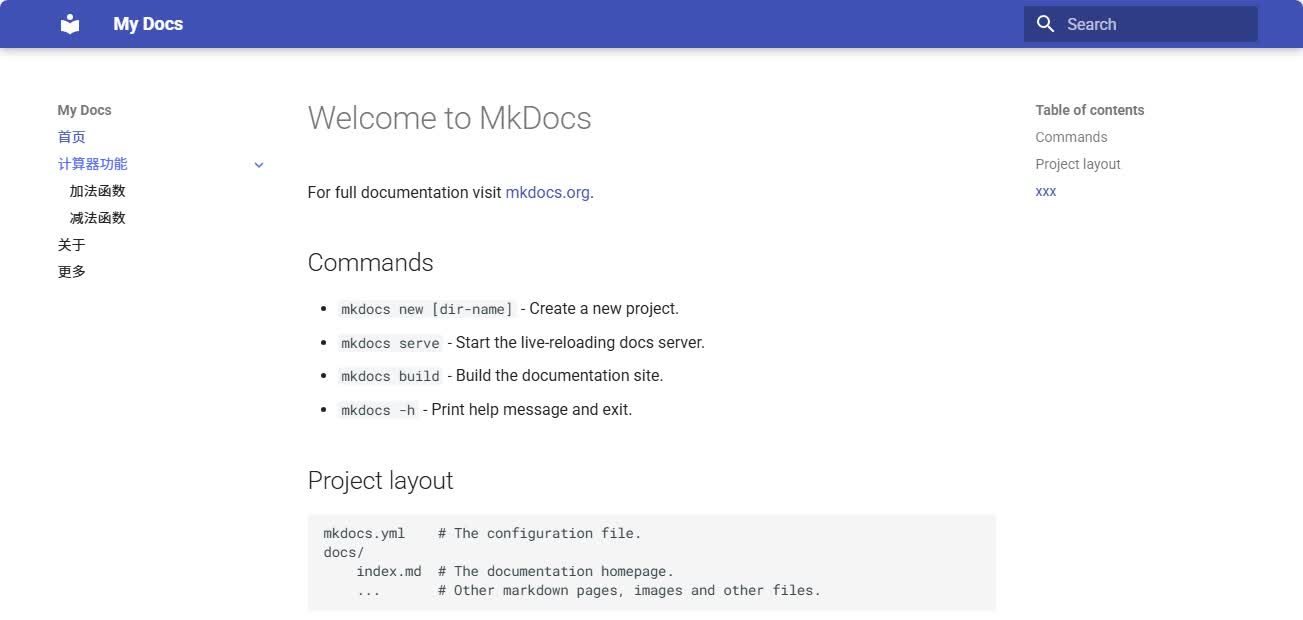
Click \"More\" and you will be redirected to our designated external link: https://freakstudio.cn/
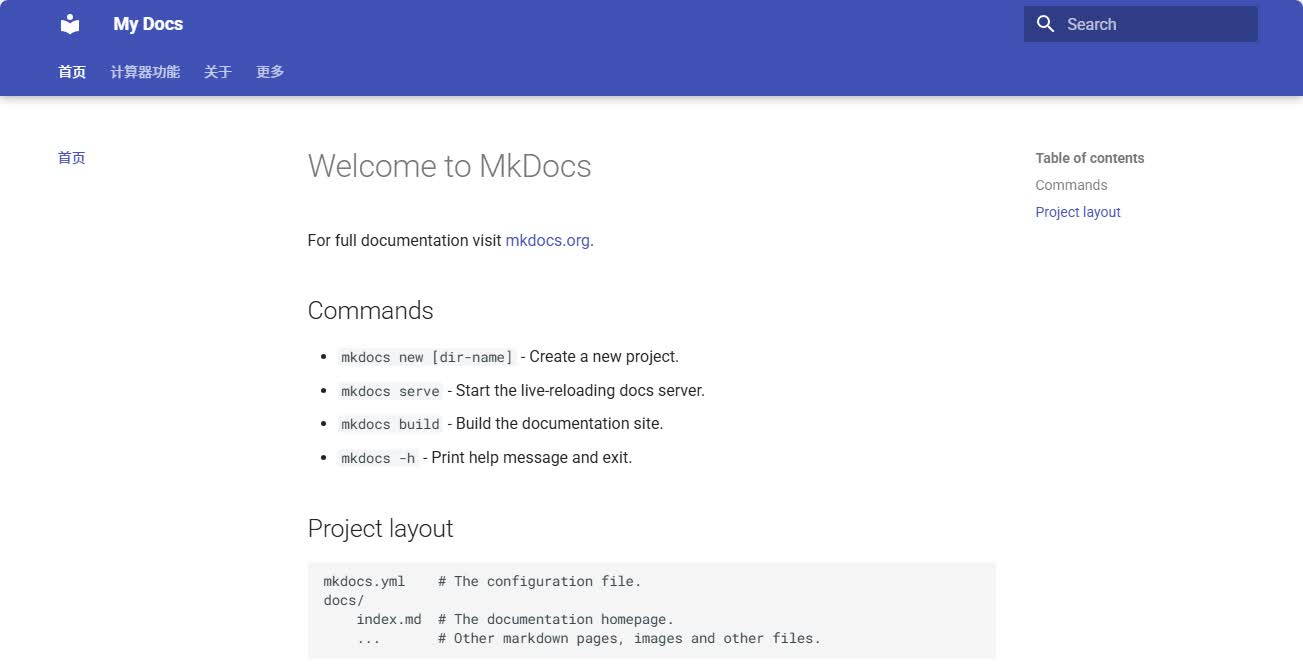
We can also place the navigation bar at the top, which requires us to manually enable it. Copy the following code into the mkdocs\.yml file:
We can now see the navigation bar appearing in the upper position.
3.4 Deploy the MkDocs website to GitLab Pages
We have now completed the editing of the website content and the local build of MkDocs. The next step is to deploy the generated static web pages to GitLab Pages so that others can access them via a browser. Additionally, we will continue to make ongoing modifications to the documentation and content locally, and these changes also need to be synchronized to the online website.
Break down the goal into two key points: First, publish the previously generated site/ folder to GitLab Pages so that the web page can be accessed; Second, after each modification and adjustment to the local files, synchronize the updates to the remote repository via Git to ensure that the website also updates automatically.
During this process, the tools I used and their corresponding functions are as follows:
-
Git: Responsible for version control and synchronization between local and remote repositories; Skill points: Clone repository, add → commit → push
-
MkDocs: Generate static web pages from Markdown documents; Skill point: The build command generates the
site/folder -
GitLab Pages: Host static web pages and provide access URLs; Skill point: Publish the generated website files to GitLab Pages for display.
-
GitLab CI/CD: Enables automated building and deployment, improving modification efficiency. Skill point: Automatically executes the building and publishing processes through
\.gitlab\-ci\.ymlconfiguration.
3.4.1 Manual Deployment Process
**Step 1: Prepare local files **
Generated the site/ folder, and checked whether HTML, image, and video files are within the specified size limits.
**Step 2: Synchronize the remote repository **
Clone the entire GitLab repository, copy the contents of site/ to the public/ folder of the repository, overwriting the existing contents.
**Step 3: Submit and push changes **
**Step 4: Verify whether the web page is effective **
Open the GitLab Pages URL to check if the page is displayed. If the page does not display, you can check if the files within the public directory are complete.
3.4.2 Automated Deployment \(CI/CD\) Process
We have already achieved the deployment of the web page through manual operations, but I found that in this way, every time we modify the document, we have to regenerate the web page and upload the files to the repository, which is a rather cumbersome process. If we need to update the website frequently and in large quantities in the future, it will be very laborious. So, can I just modify the document and have the web page automatically updated?
The automatic deployment \(CI/CD\) provided by GitLab can solve the above problems. It can implement an automated process, allowing each local modification push to the repository to automatically complete website building and publishing, eliminating the need for cumbersome manual operation steps.
Let\'s take a look at the automatic deployment process of GitLab Pages:
-
Locally modify the Markdown document and submit it to the GitLab repository
-
GitLab detected a new
pushoperation -
CI/CD reads the
\.gitlab\-ci\.ymlconfiguration file in the repository -
GitLab Runner executes build commands (such as
mkdocs build) according to the configuration -
Generate static web page files \(HTML, CSS, JS\)
-
Publish the generated web page to GitLab Pages
-
Users access the updated website via a browser
3.4.2.1 Clean up the warehouse
Since I previously performed a manual deployment, there is a public folder in the repository, and the upcoming automated deployment will automatically generate this folder. To avoid conflicts, we will directly delete the old public folder.
Meanwhile, add the\.gitignorefile to the local root directory and add the following content:
This step is also mainly to avoid file conflicts that could lead to pipeline failure. After writing is completed, enter the following command to synchronize to the remote repository:
# 1. 把删除public和新增.gitignore都加入暂存
git add .

# 2. 提交修改
git commit -m "删除旧public文件夹+添加.gitignore,避免构建产物干扰CI/CD"

# 3. 推送到GitLab仓库,触发新流水线
git push origin main
3.4.2.2 Write the simplest \.gitlab\-ci\.ymlconfiguration file
To make CI/CD effective, I need to add a key file in the root directory of the repository:\.gitlab\-ci\.yml. It will tell CI/CD what environment to use, which operations to perform, and which files to generate for release.
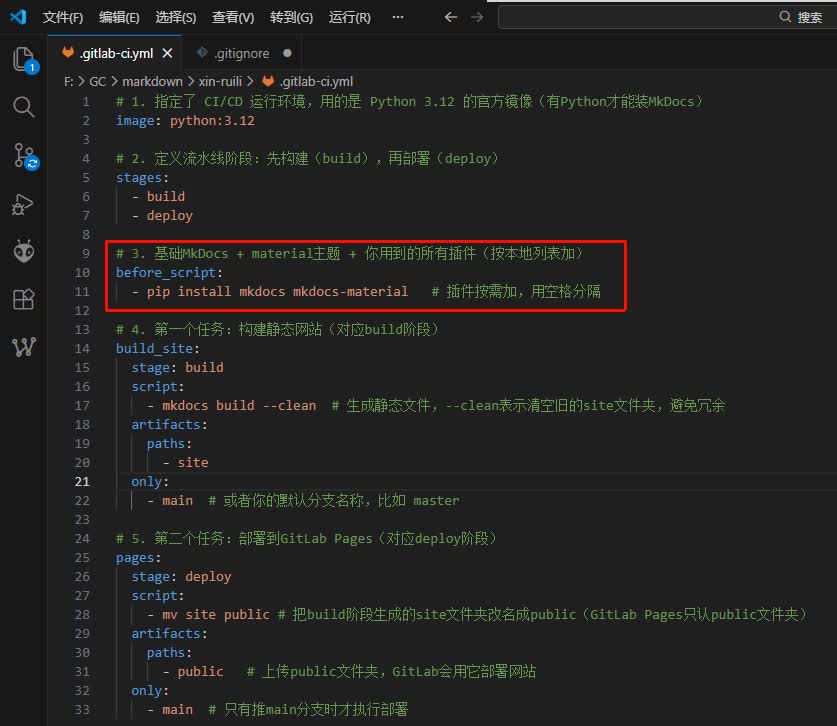
After some thought, I tried to write a minimized version:
# 1. 指定了 CI/CD 运行环境,用的是 Python 3.12 的官方镜像(有Python才能装MkDocs)
image: python:3.12

# 2. 定义流水线阶段:先构建(build),再部署(deploy)
stages:
  - build
  - deploy

# 3. 基础MkDocs + material主题 + 你用到的所有插件(按本地列表加)
before_script:
  - pip install mkdocs mkdocs-material   # 插件按需加,用空格分隔

# 4. 第一个任务:构建静态网站(对应build阶段)
build_site:
  stage: build
  script:
    - mkdocs build --clean  # 生成静态文件,--clean表示清空旧的site文件夹,避免冗余
  artifacts:
    paths:
      - site
  only:
    - main  # 或者你的默认分支名称,比如 master

# 5. 第二个任务:部署到GitLab Pages(对应deploy阶段)
pages:
  stage: deploy
  script:
    - mv site public # 把build阶段生成的site文件夹改名成public(GitLab Pages只认public文件夹)
  artifacts:
    paths:
      - public   # 上传public文件夹,GitLab会用它部署网站
  only:
    - main  # 只有推main分支时才执行部署
That is to say, after I finish modifying the document and push it, GitLab will automatically perform the build and deployment.
3.4.2.3 Submission and Triggering of CI/CD
After completing the writing of the \.gitlab\-ci\.yml configuration file, we upload the changes to GitLab to make the automatic deployment actually run.
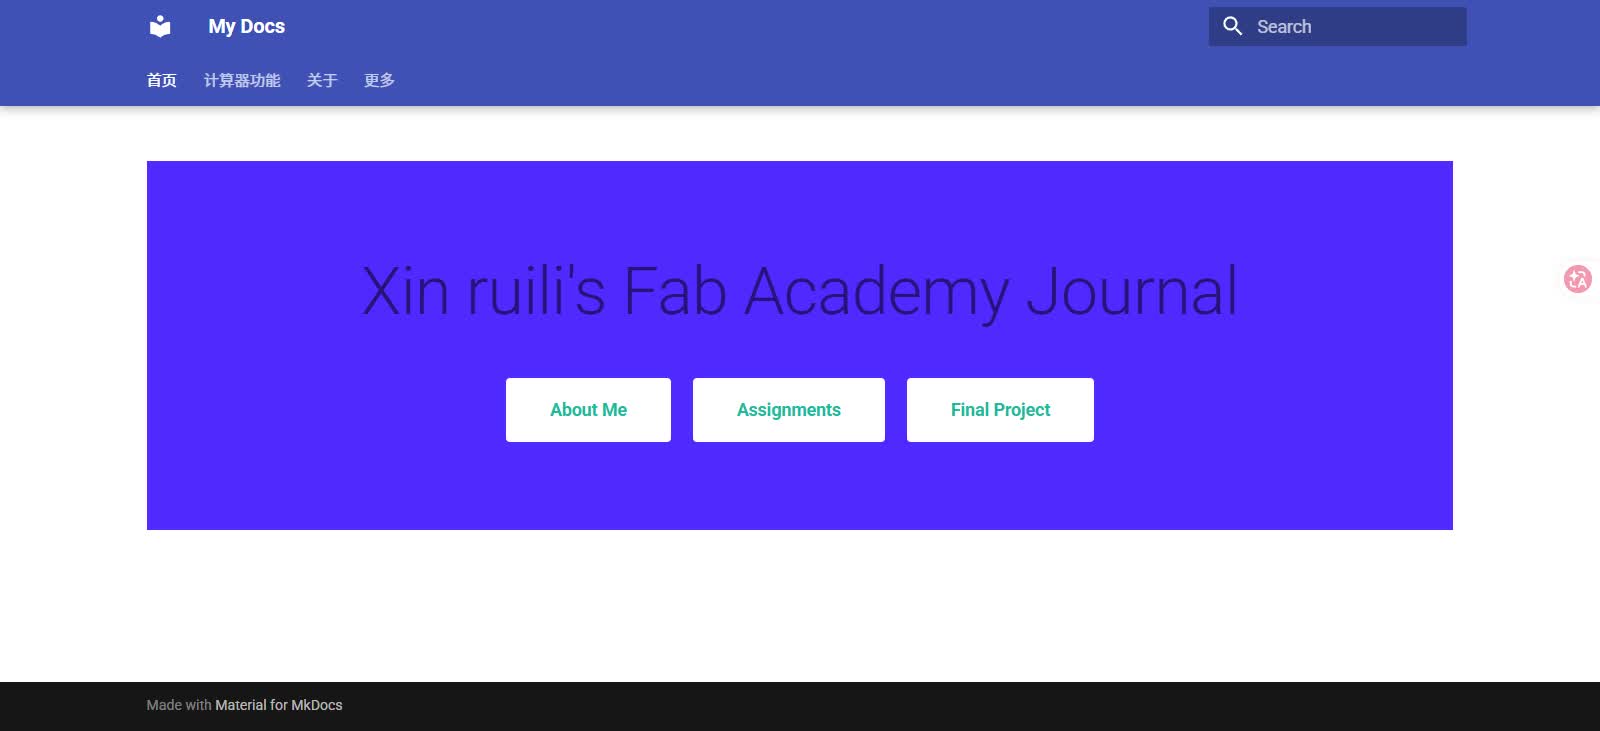
**Step 1: Remember the page before modification **
To clearly see the modification effects after automatic deployment, we first record the current state of the online website as a reference, and we save this screenshot for direct comparison of visual changes after modification in the future:
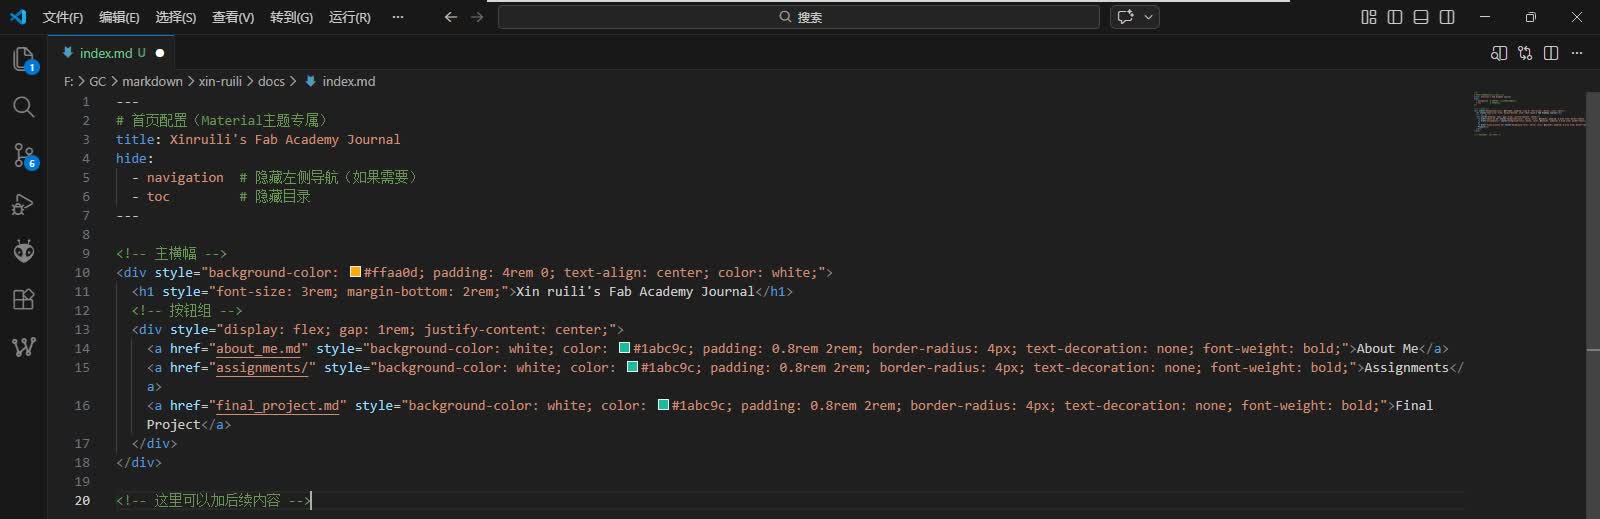
**Step 2: Complete content modification locally **
Now we are making modifications in the local index\.md file, changing the background color to orange-yellow:
You can perform command-line input locally mkdocs serve to preview first and confirm that there are no issues:
**Step 3: Commit local changes to Git **
Right-click on the blank space in the root folder of the local repository, select Git Bash, and enter the following command:
**Step 4: Check the running status of the CI/CD pipeline **
After the push is successful, GitLab will automatically detect this push operation and start executing a ** pipeline \(automated pipeline\) **. This step does not require manual operation on our part.
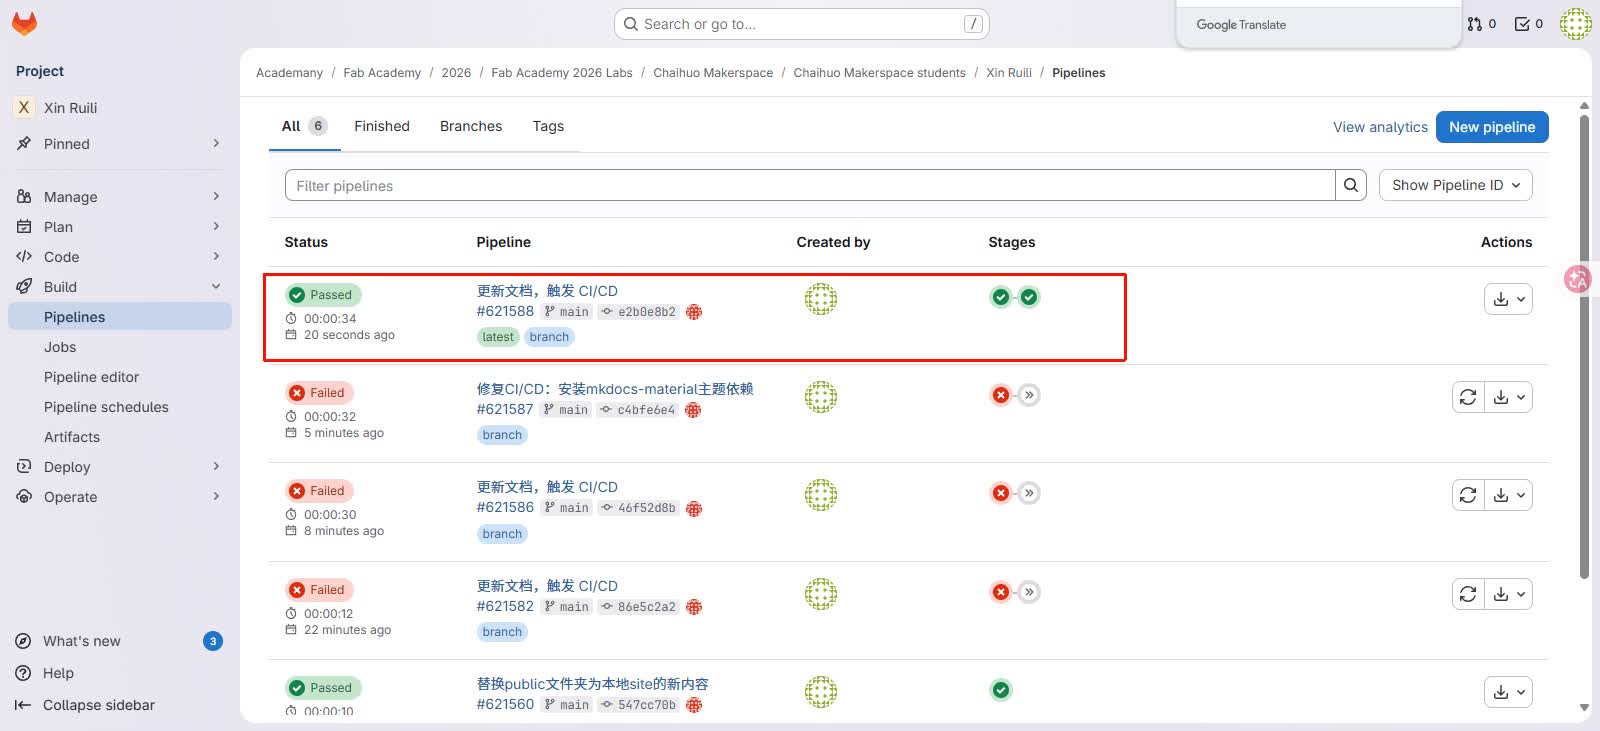
Go to the GitLab repository page, click CI/CD → Pipelines in the left menu, and you can view the running status of the current pipeline.
You will see a new pipeline record, and its initial state is usually running, indicating that GitLab is automatically executing the steps in \.gitlab\-ci\.yml.
When the pipeline is in the running state, please wait patiently and do not repeatedly perform the push operation. When the pipeline state changes to *passed *, it indicates that the entire process has been successfully completed.
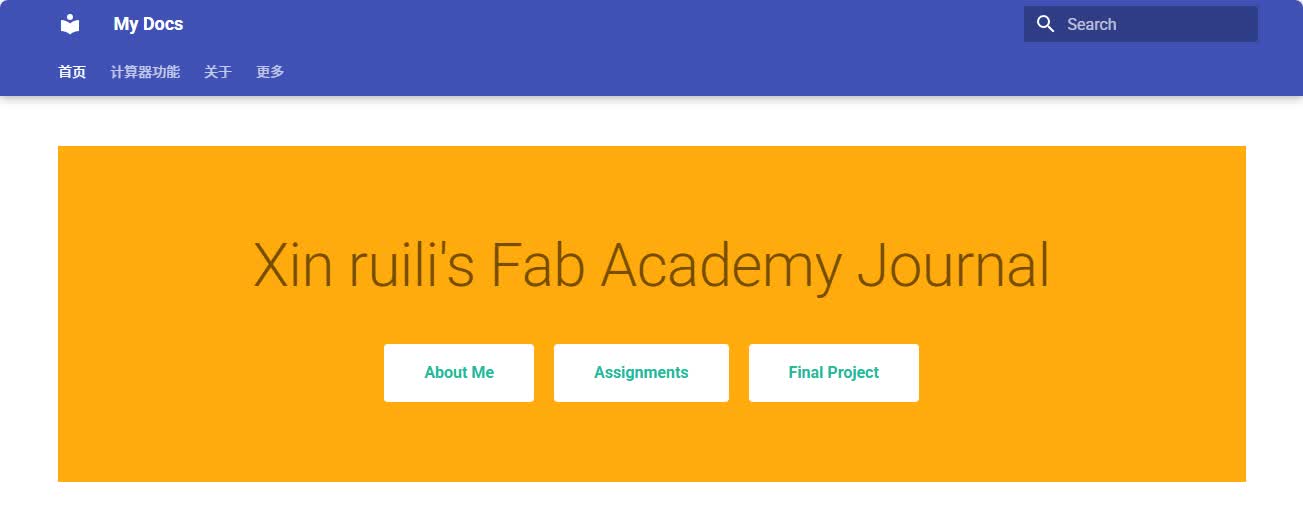
**Step 5: Verify the web page update and visit the URL assigned by GitLab Pages **
In the 「Project information」 area on the right side of the current GitLab repository page, find and click GitLab Pages, and the browser will automatically open and jump to your personal website page.
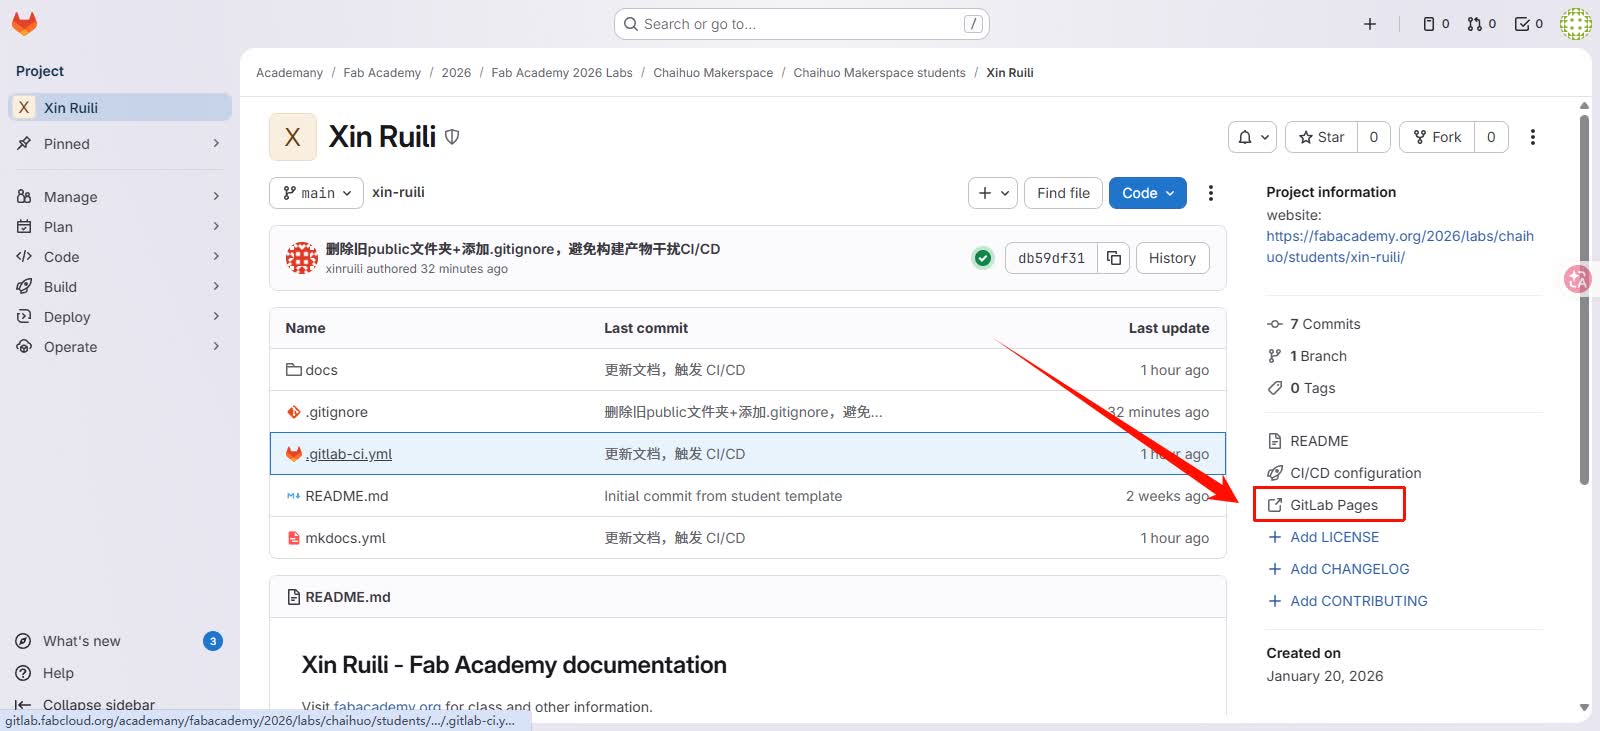
As can be seen, the page has been successfully updated, displaying the latest effect after we modified the background color:

3.4 Record of Pitfalls Encountered
It should be noted that during the process of configuring GitLab Pages and CI/CD, I didn\'t complete it in one go. I encountered some pitfalls along the way, which can be considered a learning-as-you-go experience. I\'d like to share the problems I encountered and their solutions, hoping they will be of reference value to fellow students who are also working on MkDocs + GitLab Pages.
3.4.1 Pipeline failure caused by incorrect build path
When I first configured \.gitlab\-ci\.yml, I directly copied an example from the internet, but the Pipeline failed as soon as it started.
After an issue occurs, on the left side of the repository page, ** Build → Pipelines ** can be used to find the corresponding pipeline record, ** Build → Jobs ** can be clicked to open the log and view the complete error information.
From the logs, it can be seen that GitLab did not find the site folder, so it was unable to generate Pages.
After carefully checking the \.gitlab\-ci\.yml configuration, I found that the problem lies in the path configuration of artifacts.paths. The default static web page directory generated by MkDocs is site. If the path is written incorrectly or the directory is not located in the root directory of the repository, CI/CD will not be able to find the files to be published.
The solution is to make the configuration in \.gitlab\-ci\.yml consistent with the actual generated path. We can choose to change the location of site/ to ensure it is in the root directory without modifying the code.
3.4.2 Missing dependencies in the CI environment
After resolving the path issue, I thought everything was ready, but when I ran the Pipeline next time, a new error occurred:
$ mkdocs build --clean
Aborted with a configuration error!
ERROR - Config value 'theme': Unrecognised theme name: 'material'.
The available installed themes are: mkdocs, readthedocs
Cleaning up project directory and file based variables 00:01
ERROR: Job failed: exit code 1
The error log shows that the theme material cannot be found, but previously we were able to preview it normally locally.
It turns out that the environment in which CI/CD runs is brand new, so all themes, plugins, or dependencies used by local MkDocs must be reinstalled in the \.gitlab\-ci\.yml file\'s before\_script. Therefore, I can simply install all the dependencies I use through the \.gitlab\-ci\.yml file\'s before\_script.
4. Conceptualization of the Final Project
During this Fab Academy, I plan to attempt tobuild an open-source embedded device ecosystem for makers and educational scenarios.The entire project centers around an independently operable terminal device, and gradually builds hardware modules, a driver system, and a software distribution platform around this terminal.
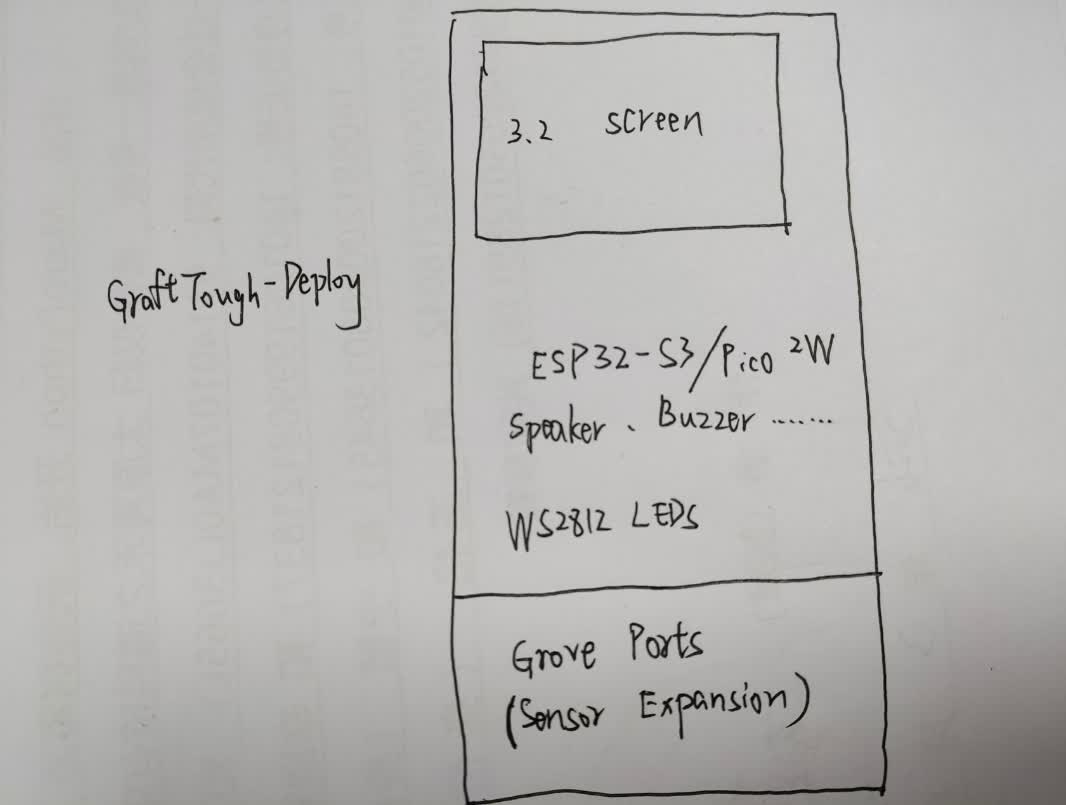
The core terminal device of the project is tentatively named ** GraftTouch-Deploy **. It can be understood as a \"micro intelligent terminal\" for makers, with an appearance and usage similar to a small development device or a maker\'s mobile phone. The device will integrate a main control chip, a display screen, network communication capabilities, and basic peripherals, while reserving standard interfaces for expanding various sensor modules.
4.1 Hardware Aspects
The terminal is planned to adopt ** ESP32 - S3 or Pico2W ** as the main control platform, and integrate ** a 3.2 - inch display screen ** for human - machine interaction display. Meanwhile, the device will also have a built - in ** 4G communication module **, enabling it to have independent networking capabilities, allowing for remote updates, data uploads, and application downloads. To enable the device to have more diverse functions, some basic components will also be integrated inside the terminal, such as gyroscopes, buzzers, speakers, SD card interfaces, and WS2812 light sets, etc.
To expand device capabilities, the terminal board will provide ** Grove standard interfaces **. Through these interfaces, various sensor or actuator modules can be connected, such as environmental sensors, input devices, control modules, etc. In the future, we plan to design and produce a series of self-developed modules, and uniformly conduct hardware design according to Grove\'s interface specifications, so that different modules have good compatibility with each other.
4.2 Software Level
This project will be developed based on uPyOS \(an improved version of the MicroPython system\). The core goal of the system is to use pure *\.mpy* \(MicroPython bytecode\) drivers ** to implement functional modules as much as possible. The advantage of doing this is that it can reduce the dependence on the underlying firmware, enable the driver code to be migrated between different development boards, and thus improve the compatibility of the system.
Under the uPyOS framework, sensors and peripherals will be managed through modular drivers. Internally, the system will utilize existing components, such as sensor manager, audio manager, storage manager, UI manager, and task manager, to uniformly encapsulate the driver logic. Meanwhile, the system will also adhere to uPyOS\'s Activity lifecycle mechanism and leverage asyncio and other methods to implement asynchronous tasks, such as reading gyroscope data in real-time and synchronously displaying it on the screen, or controlling WS2812 lighting effects based on the system state.
In addition to hardware and drivers, this project also hopes to attempt to build a simple software distribution ecosystem. All module drivers can be uploaded to ** the uPyPi software repository **, and remotely installed and version-managed through the mip tool of MicroPython. This way, when users need a certain sensor driver, they can directly download and install it online without manually copying the code.
Furthermore, I hope to implement a *simple app store mechanism *on uPyOS. Drivers or functional modules can be packaged into installable apps, such as gyroscope monitoring, light control, SD card file management, audio playback, etc. Users can directly download and install these apps via terminal devices and manage them through the system interface. With the device\'s 4G network capabilities, OTA updates and remote distribution can also be implemented in the future.
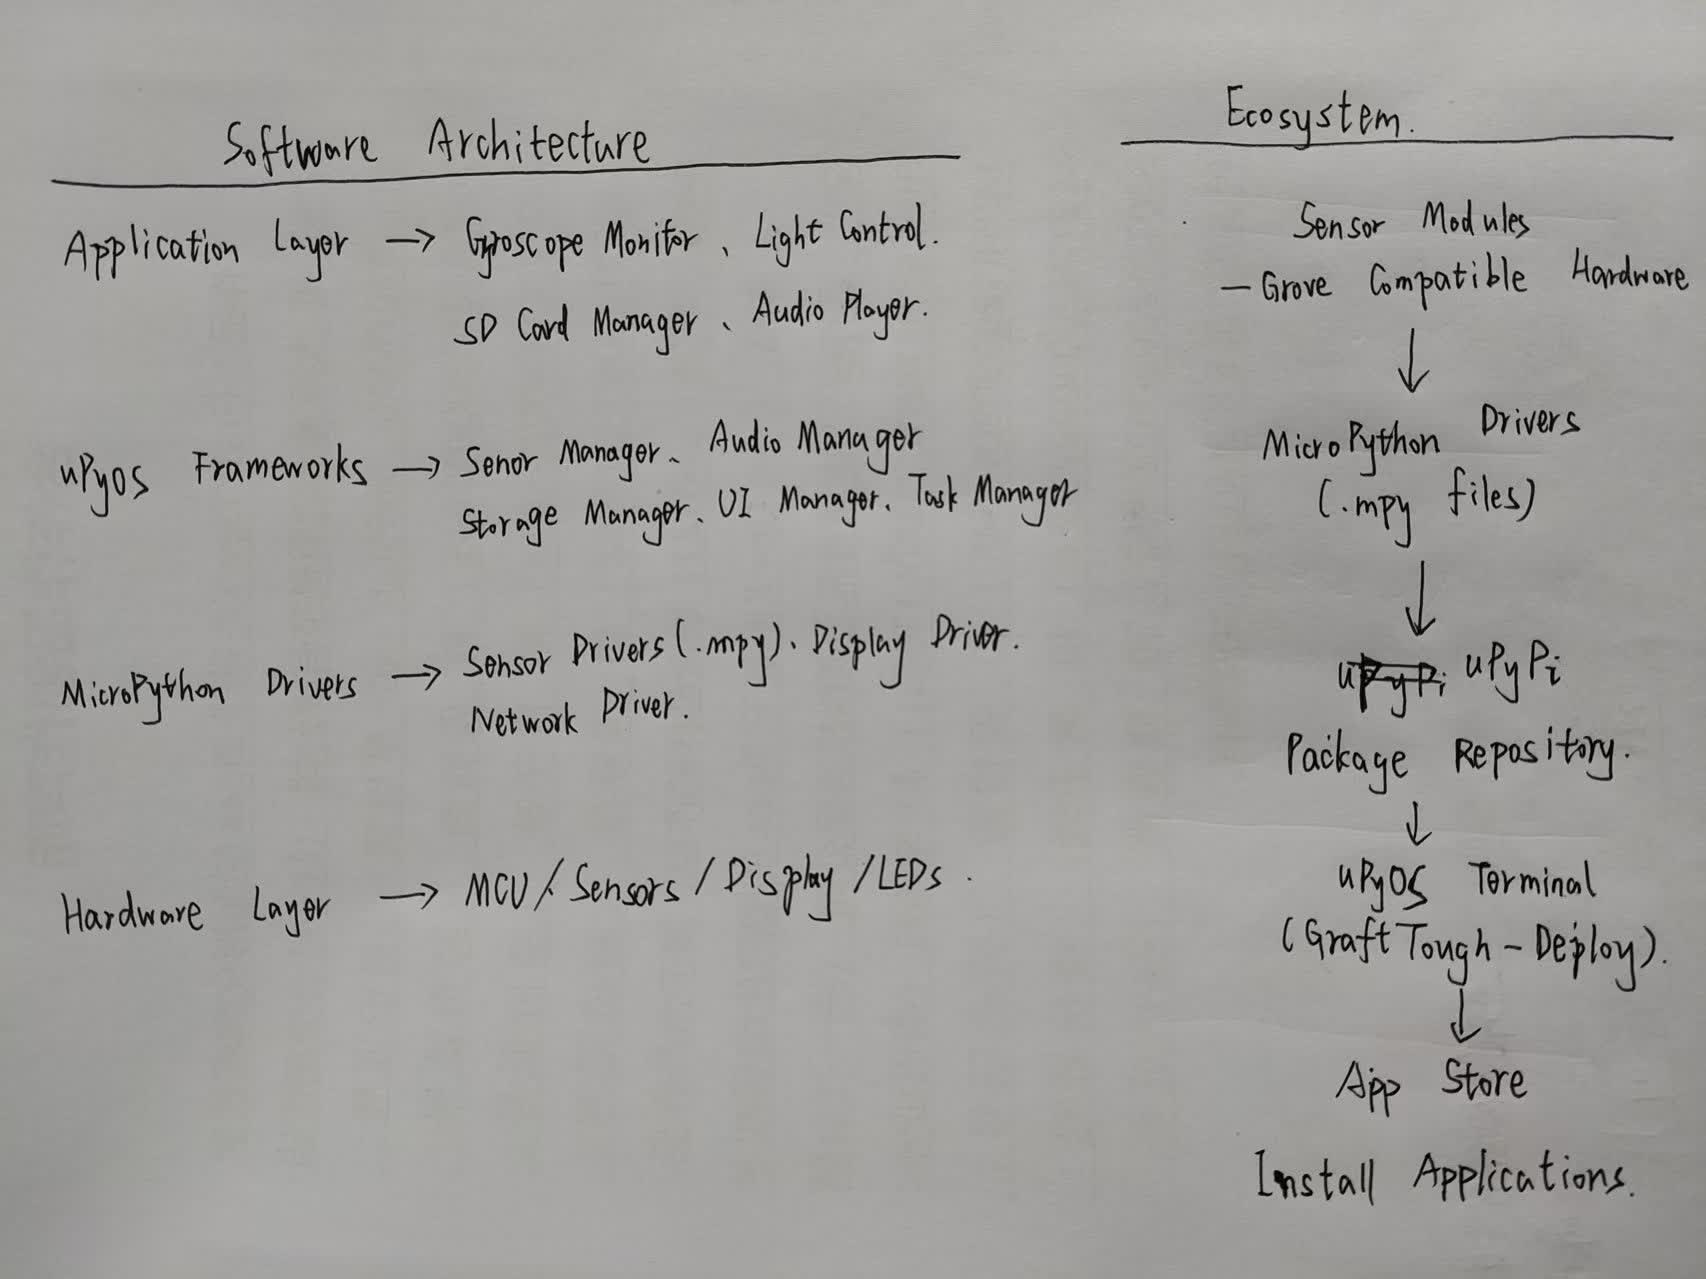
Overall, the goal of this project is to attempt to build a complete open-source embedded development ecosystem:
From hardware terminal → sensor module → MicroPython driver → software package distribution → application system, a relatively complete chain is formed. In this way, it is hoped to lower the threshold of embedded development, enabling more makers and students to quickly develop and combine various hardware applications through Python.
During my learning process at Fab Academy, I will gradually complete the structural design of the terminal device, the production of some hardware modules, the implementation of system functions, and the establishment of the basic software ecosystem.
5. Reference Links
Useful Git Learning Link 1: https://liaoxuefeng.com/books/git/introduction/index.html
Useful Git Learning Link 2: https://www.runoob.com/git/git-tutorial.html
MkDocs Chinese Version Tutorial: https://wcowin.work/Mkdocs-Wcowin/blog/websitebeauty/mkdocs-translate/
mkdocs Documentation Generation, Quick Start Guide to Python Self-Documentation https://www.cnblogs.com/BEMAKE/p/mkdocsTutorials.html
MkDocs Themes: https://github.com/mkdocs/mkdocs/wiki/MkDocs-Themes
HTML5 UP Web Template: https://html5up.net/
Beautiful template webpage resource link 1: https://sc.chinaz.com/tag_moban/JingTai.html
Nice template web resource link 2: https://startbootstrap.com/themes
Beautiful template webpage resource link 3: https://freebiesbug.com/
Free SVG Background Generator: https://bgjar.com/
Free SVG Icon Library: https://heroicons.com/
Scroll Animation Library AOS: https://michalsnik.github.io/aos/
[!NOTE]
AI Assistance:
During the preparation of this documentation, ChatGPT \(GPT\-4\) was used as a language assistance tool.
It helped with sentence polishing and translation from Chinese to English to improve readability and clarity.