2. Computer-Aided Design - Week 2
2.1. Assignments
Computer-Aided Design
Model a possible final project (raster, vector, 2D, 3D, render, animate, simulate, …)
Compress your images and videos
Post a description with your design files on your class page
2.2. CAD-Software
I tried following CAD-Software (I work under Linux so my choice was a bit limited):
Onshape (not in depth)
LibreCAD
FreeCAD
OpenSCAD
2.2.1. Onshape
I didn’t like Onshape because of the first quick-start video, which in the first tips for the software was advertisement for sharing the software and to use the mobile app, which scared me a bit and I didn’t continue.
I may try it later but I now like FreeCAD already.
2.2.2. OpenSCAD
I’ve designed before a little cover module for my keyboard. It’s a really interesting way to design I really like this programming-way :D
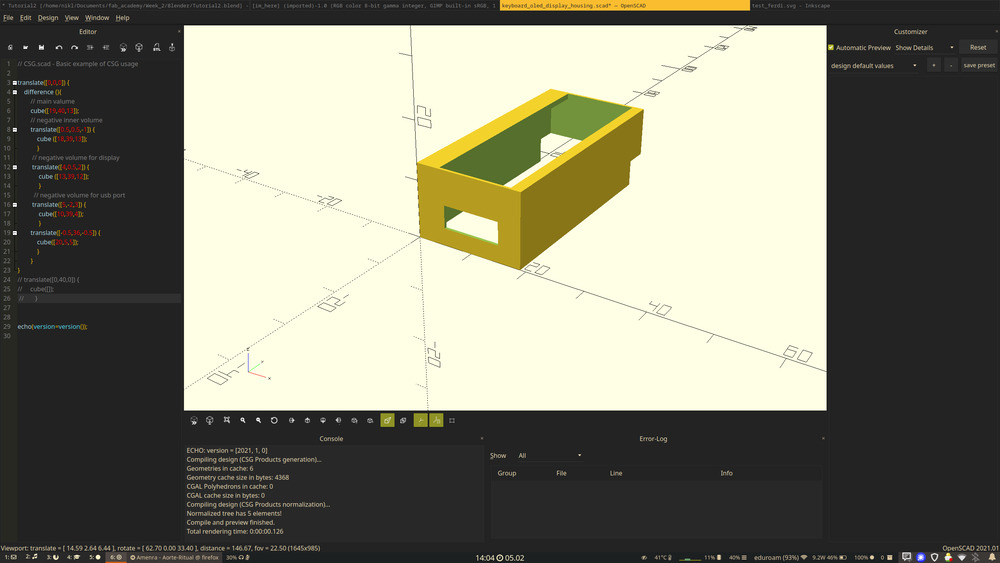
2.2.2.1. How it works
use a programming/functional approach for designing a model:
translate([0,0,0]) {
    difference (){
        // main valume
        cube([19,40,13]);
        // negative inner volume
        translate([0.5,0.5,-1]) {
            cube ([18,39,13]);
            }
         // negative volume for display
         translate([4,0.5,2]) {
             cube ([13,39,12]);
             }
          // negative volume for usb port
         translate([5,-2,3]) {
             cube([10,39,4]);
             }
        translate([-0.5,36,-0.5]) {
            cube([20,5,5]);
            }
        }
}
you have different operations, that use other that change others with given parameters
nesting them and the order determines the execution and thus the outcome
2.2.3. Blender
2.2.3.1. General
a big suit of tools for creating 3d-models based on meshes
includes: sculpting, animating, texturing, …
very powerful for creating complex structures, but a bit more harder to create exact models (mm precise)
also procedural generation with Geometry Nodes very powerful
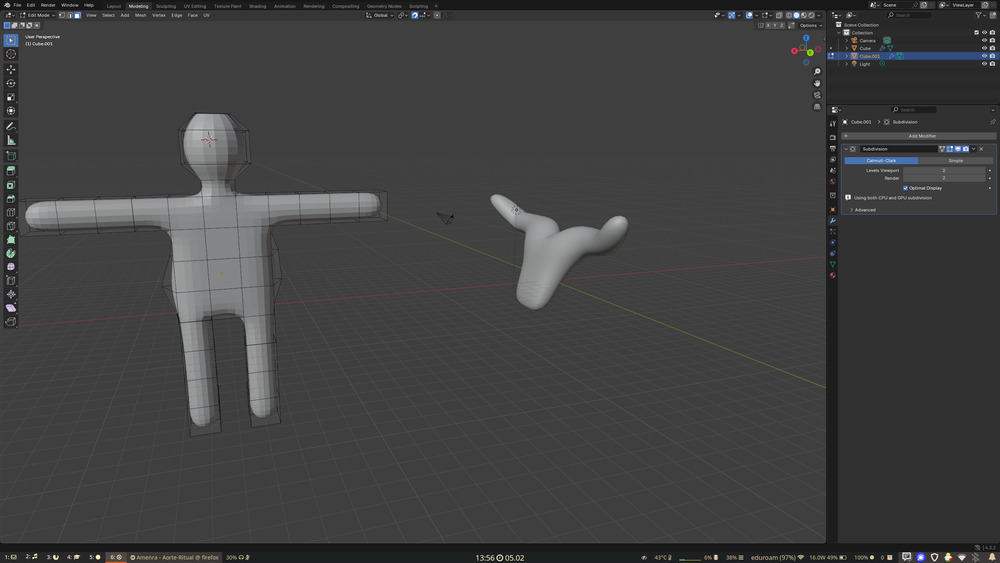
Already modeled with blender, but learned new many new things:
2.2.3.2. Findings
No Numpad
preferences -> input -> emulate numpad (1-0 are new numpad keys)
keymap ‘frame select’ -> change 3D select with ‘Numpad.’ to ‘.’ -> orbital change object
navigation -> zoom to mouse
Keymaps
-> mouse buttons AND shortcut depend on the window
Shift+Drag on window (border) -> new same extra window
t -> toggle toolbar
n -> numerical side-panel
g -> move (grab)
on top: info for the distance
in ‘g’->’y’->’1’->’Enter’ (arbitrary, also negative value)
numpad 1/3/7 -> front/right/top
with Ctrl opposite
s -> scale -> depends on the center of object (close = big adjust, far = small/precise)
r -> rotate
Alt+g/r/s -> resets those settings -> !!ONLY OBJECT MODE!!!
ctrl+n -> new file
x/y/z -> use axes
shift+x/y/z -> move in the plane
Tab -> toggle between object and edit mode
c -> paint select (scroll for circle)
a -> select all, aa -> deselect all
l -> select object under it
e -> extrude
‘origin to geometry’ -> sets the origin point
in the top icons -> change rotation point
Edit mode
1,2,3 -> change between selection modes
when moving in edit mode -> topology of selected stuff changes but not origin point!!!
Modifier
Wrench-Icon -> add modifier
Subdivision surface <5! (else crash)
more surfaces
always from origin point
Notes
in move -> middle mouse uses axes
when inserting an object(so only after add), left bottom a bar is showing for settings
right mouse button on button -> assign shortcut
‘Shade Smooth’
‘Shade Auto Smooth’ -> smooth shades above a degree
middle click toolbar -> drag it
right-click -> cancel
automatically creates .blend1 files (backup) when saving -> higher number == older
base-unit==mm
local view -> only show selected (top left indicator)
last object gets brightest orange
shift click selection modes -> select them
everything where you can type a number -> keyframe (animate)
2.2.4. LibreCAD
I liked working with it, was very intuitiv and easy to learn.
I documented here some findings i had:
2.2.5. FreeCAD
It was the first time for me using CAD-Software.
2.2.5.1. Findings
Constrains
important to fully constrain -> unconstrained parts can lead to reconstruction errors on model regeneration
different workbenches for different design methods
white drawing tools, red constrain tools
new body -> creates a coordinate system, shown with ‘space’
new sketch -> klick on plane to draw on it
draw sketch and then apply constrains to it
drawing on the axes stays on the axes -> ‘constrained’ to it
auto-recognizes straight lines -> red line next to cursor
for constrains (eg. horizontal/vertical line), select stuff and use red icons to apply
dimension tool for setting length) -> constrains length
click on line to define dimension
if something is fully constrained, turns green
Variables
parametric approach -> enable dynamic adjustment
‘{}’-Icon for variables
create variable for body with name VARNAME
select sketch again and select dimension to combine the variable with
double click and select ‘fx’-button -> use VarSet.VARNAME
also possible to use relateive size -> VarSet.VARNAME + 20mm
dimension with variable turns orange
create external Geometry -> project object contures for sketch
Assembly
create ‘assamble’ of an object with many sub objects and just combine with selecting faces/edges
Format
export as .3mf -> better meta data for continous production/verarbeitung
2.2.5.2. Tutorial Outcome
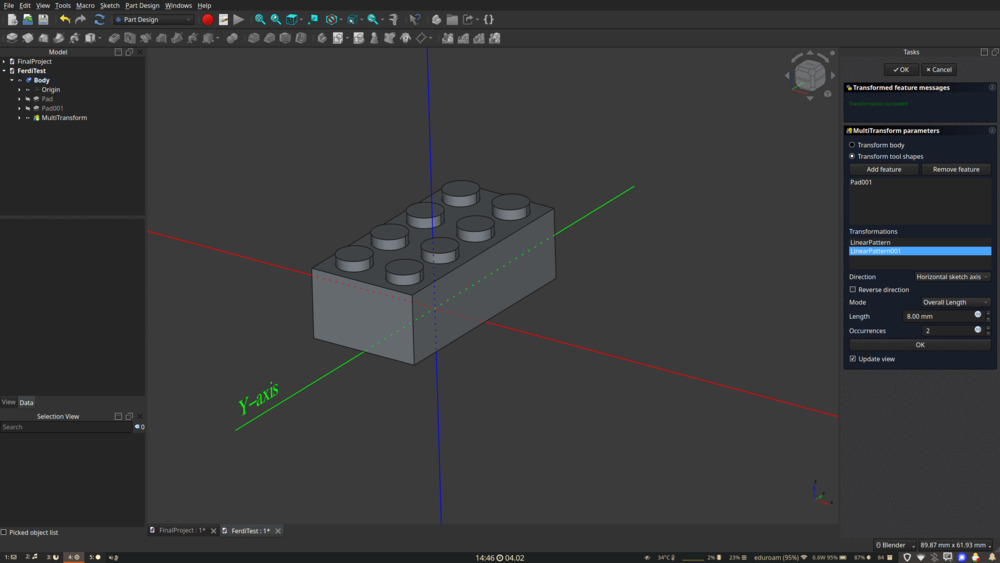
I followed above mentioned tutorial and build this in it:
Also with the tutorial from Ferdi, I learn even more about FreeCAD and designing with CAD-Software:
2.3. Image and Video Manipulations
For image manipulations I tried:
GIMP
Inkscape
Kdenlive (personally tested)
Shotcut
2.3.1. GIMP
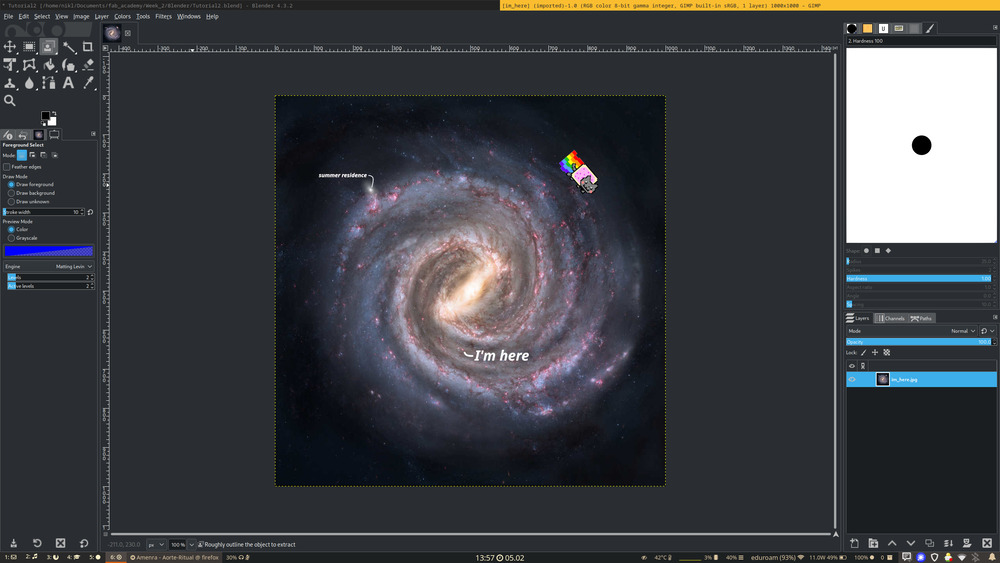 )
)
2.3.1.1. Findings
CTRL-Shift-A -> deselect all
CTRL in path -> change bezier or connect
left bottom button -> show mask -> edit with brush etc.
GIF
name layers NAME (TIMEms) e.g.: layer_1(100ms)
2.3.2. Inkscape
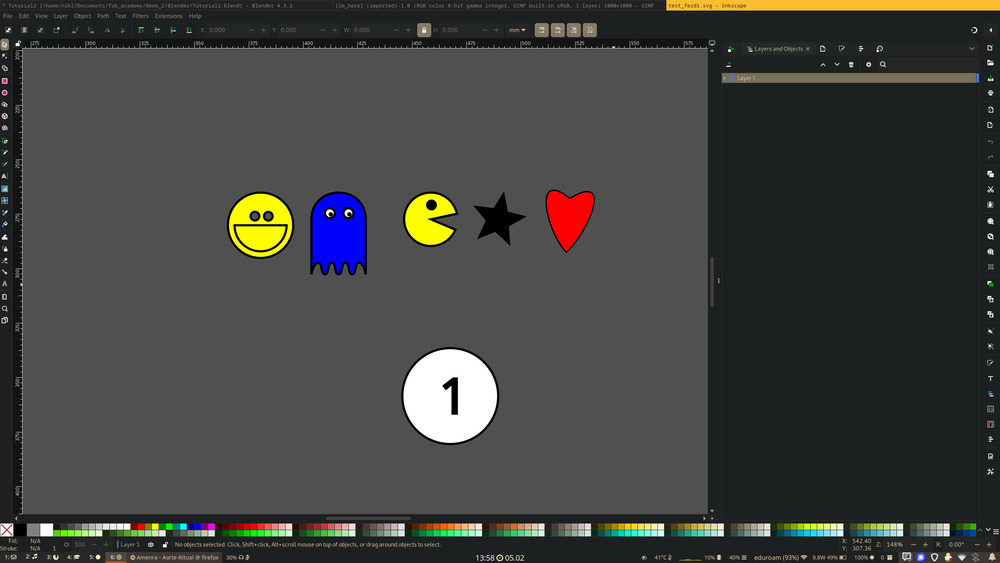
2.3.2.1. Findings
set property/size to machince one
Ctrl in creating a shape -> snap
Crtl+Shift in creating an object -> snap + use startpoint as center
Tab ‘Align and Distibute’ -> align object relative to another
Node Tool -> change nodes to be used
Ctrl+d -> duplicate
Ctrl+- on selected objects -> remove from each other
Ctrl+G -> group objects
Import:
Embed -> copy in it
Link -> update if original updates
2.3.3. Increase smallness of images and videos
For changing videos and images sizes/format, I use ffmpeg and imagemagick.
So i use this magick-command, e.g.:
magick INPUT.jpg -fuzz 30% -quality 0.5 -resize 1000 OUTPUT.jpg
#                                       ^^^^^^^^^^^^ resizes the width to this value and changes height accordingly
#                          ^^^^^^^^^^^^  compression quality
#                ^^^^^^^^^  sets the distance, for wich pixels are considered equal

# also this is handy for changing many images
magick *.png -resize 1000 -quality 0.5 -fuzz 30% -set filename:f '%t' '%[filename:f].jpg'
# selects every image and changes it in place
And this ffmpeg-command, e.g.:
ffmpeg -i INPUT.mkv -vcodec libx264 -b:v 1000k -vf scale=-2:1080 -ss 00:00:13 -to 00:00:38 -an OUTPUT.mp4
#                                                                                          ^^^ removes audio output
#                                                                             ^^^^^^^^^^^^ end time of the video
#                                                                ^^^^^^^^^^^^ start time of the video
#                                              ^^^^^^^^^^^^^^^^^ scales the video to 1080p
#                                   ^^^^^^^^^^ change bitrate of video codec
#                   ^^^^^^^^^^^^^^^ change codec to H264
Hint
For creating time-lapses, this command from ffmpeg is very nice:
ffmpeg -i INPUT.mp4 -vf framestep=3,setpts=N/30/TB -an OUTPUT.mp4
#                                                  ^^^ remove audio or else the clip is longer then wanted (audio does not get speed up)
#                                   ^^^^^^^^^^^^^^ framerate of your video (in this case 30Fps), change accordingly
#                       ^^^^^^^^^^^ Frames to skip, so the wanted speed up, in this case 3 times the speed
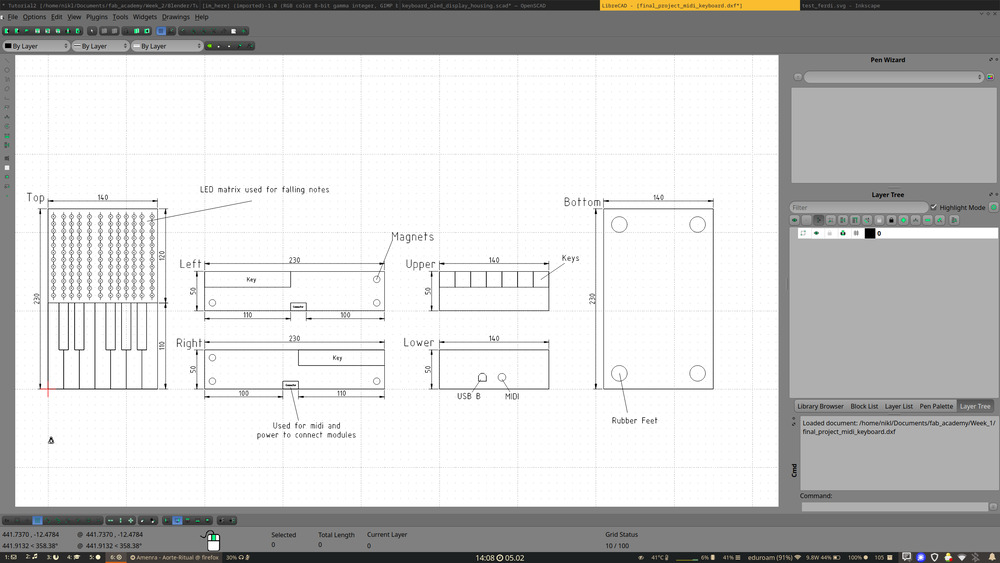
2.4. First design files Final Project
2.4.1. 2D design sketch
In Principles and Practices I showed, how I modeled the 2D Sketch of my final Project.
2.4.2. 3D Model
For creating the 3D-model, I’m going to use FreeCAD and want to try out the new Assembly module.
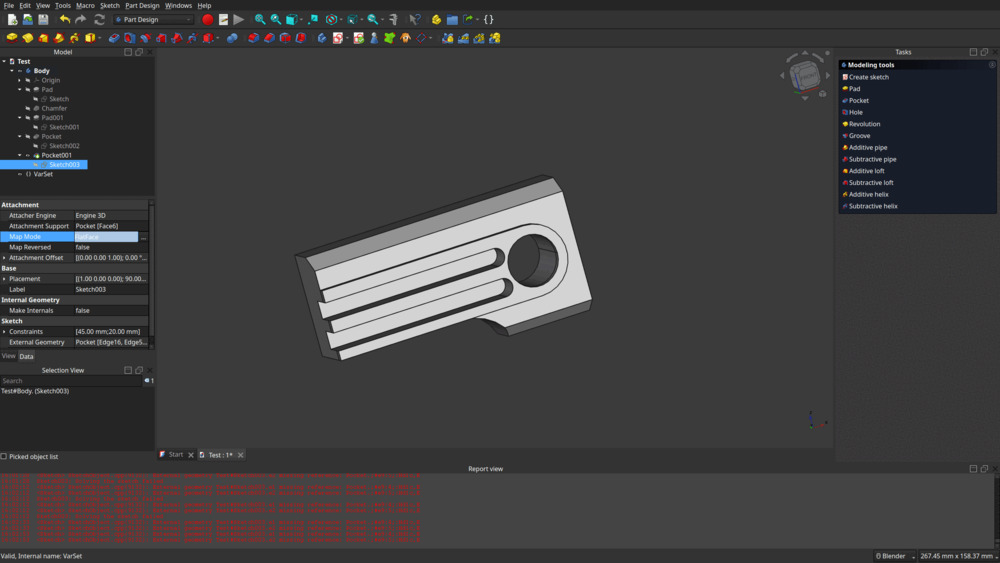
2.4.2.1. Keys
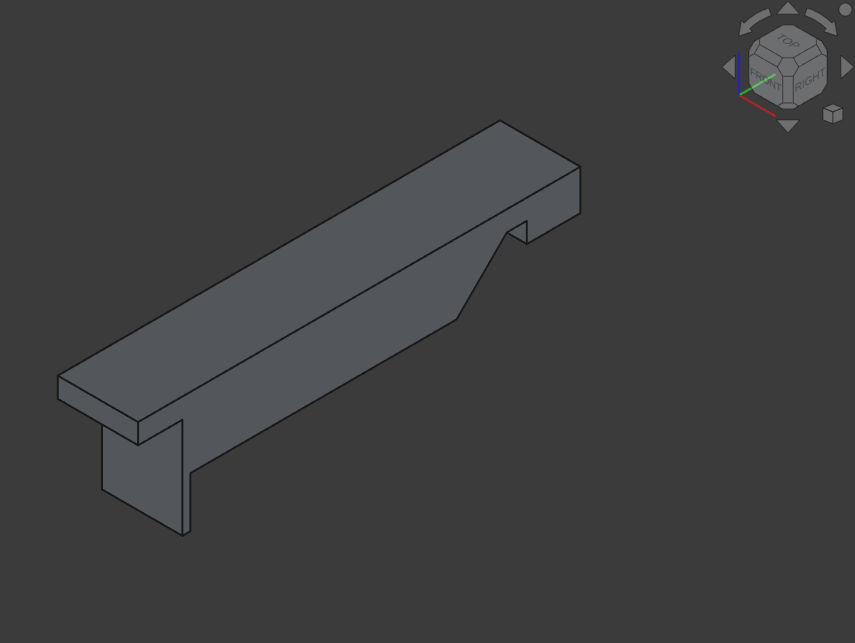
First model of the left key made with FreeCAD:
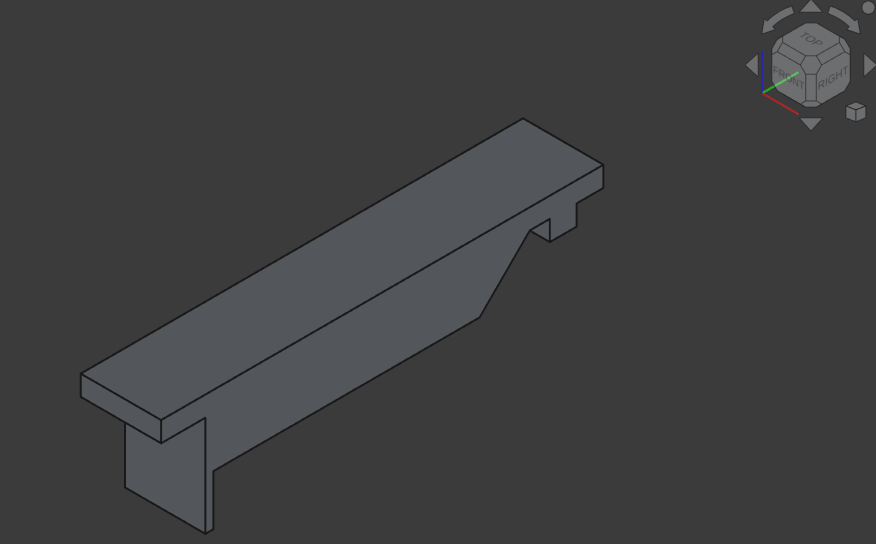
But after that, I wanted to make a better structure and redesigned it.
I first measured out a keyboard and found out, how to calculate the keys parametrically (so I can adjust the width easily).
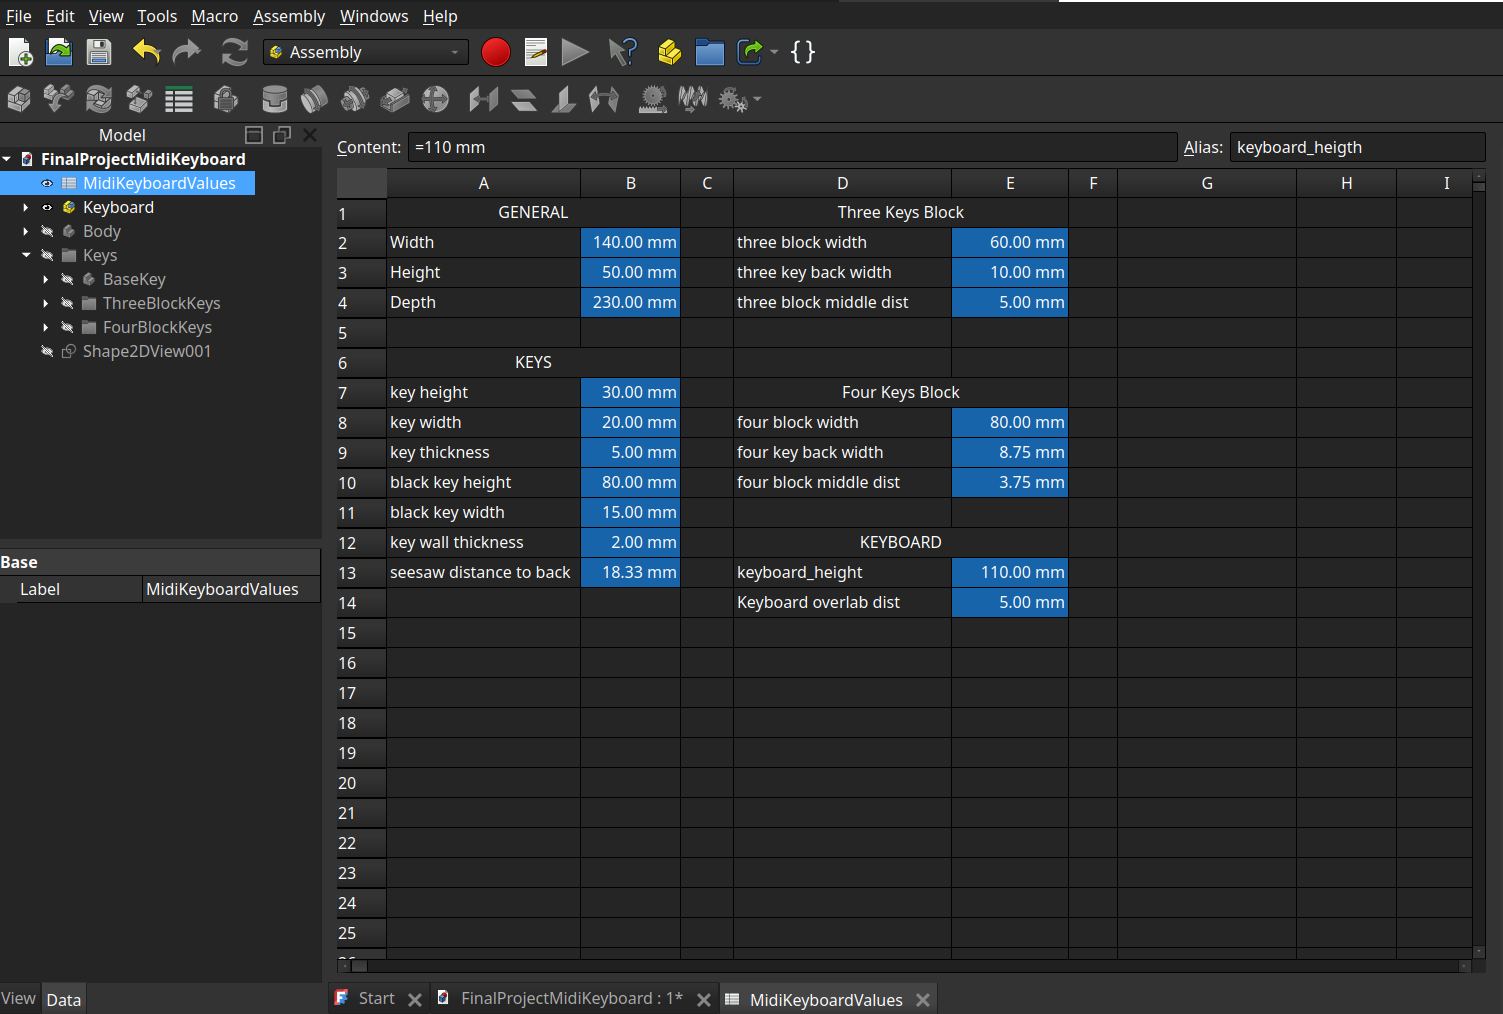
Then to design, I applied above knowledge to create a sketch and then combine it with the values from the spreadsheet.
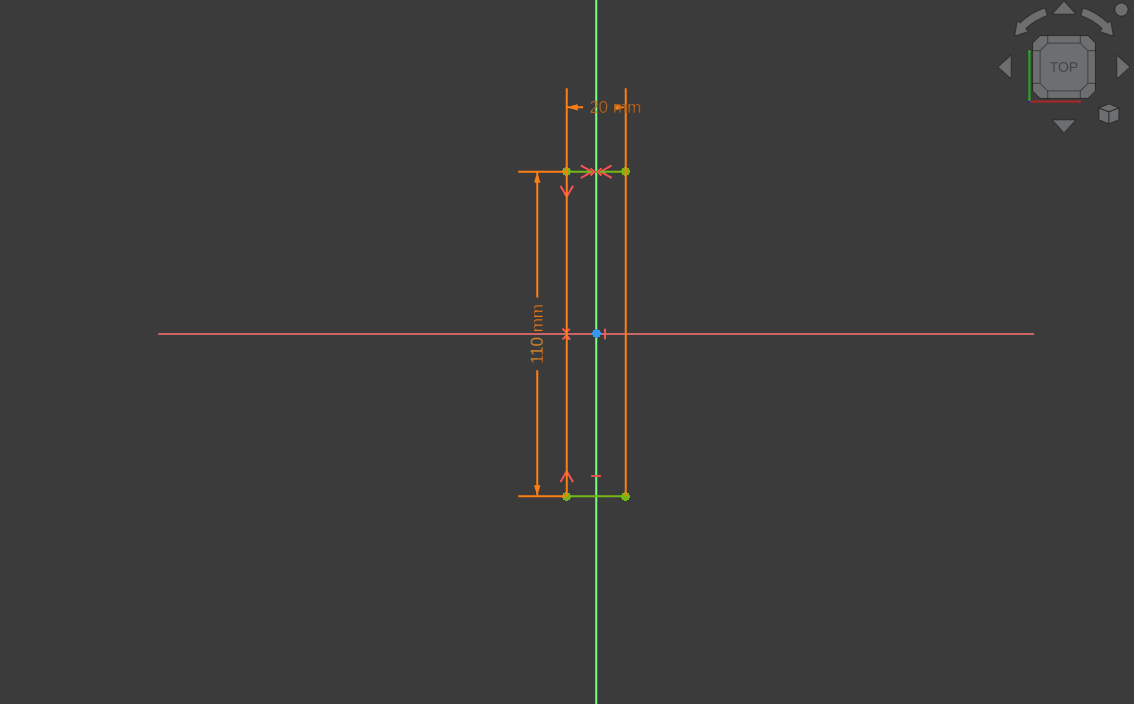
Create the sketch…

… and press on all values the fx button (or ‘=’) to assign it to a value from the spreadsheet.
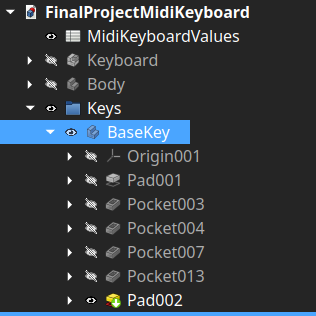
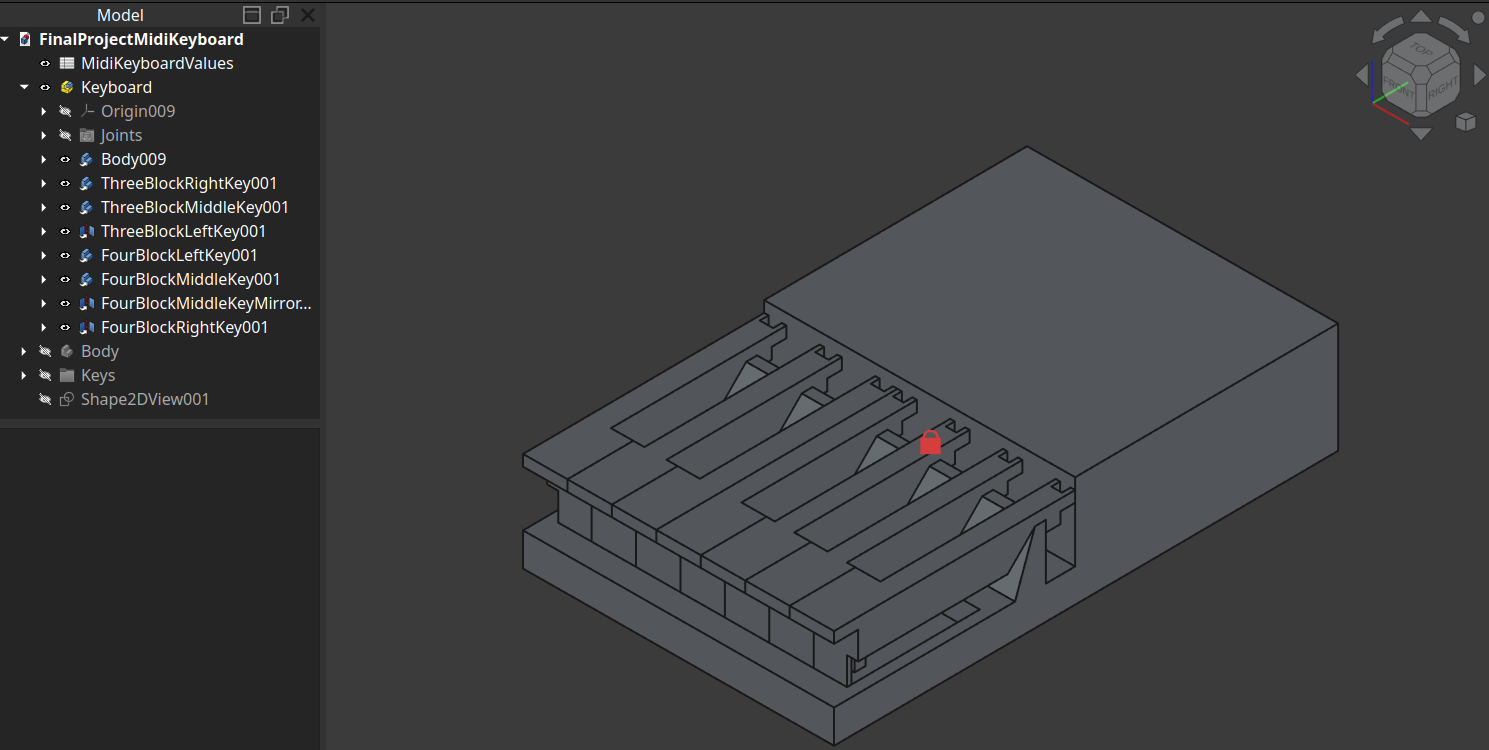
And then I continued with following approach to create a key:
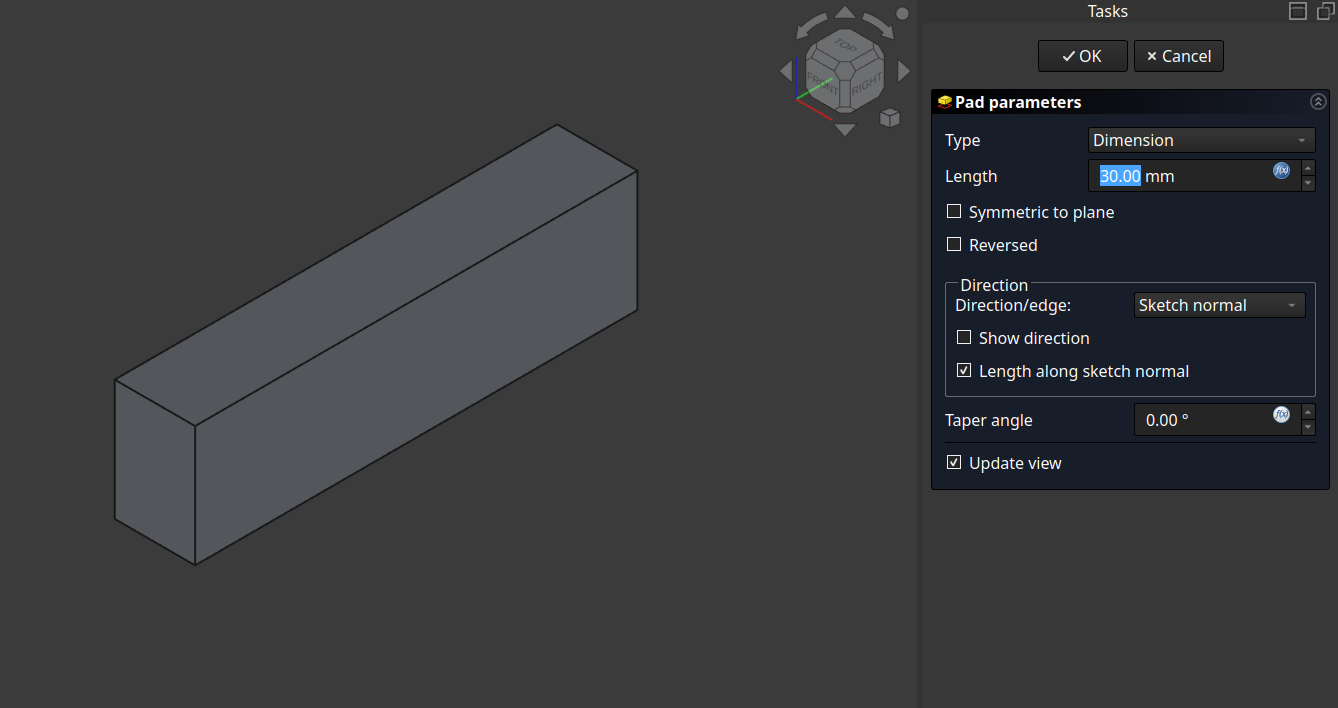
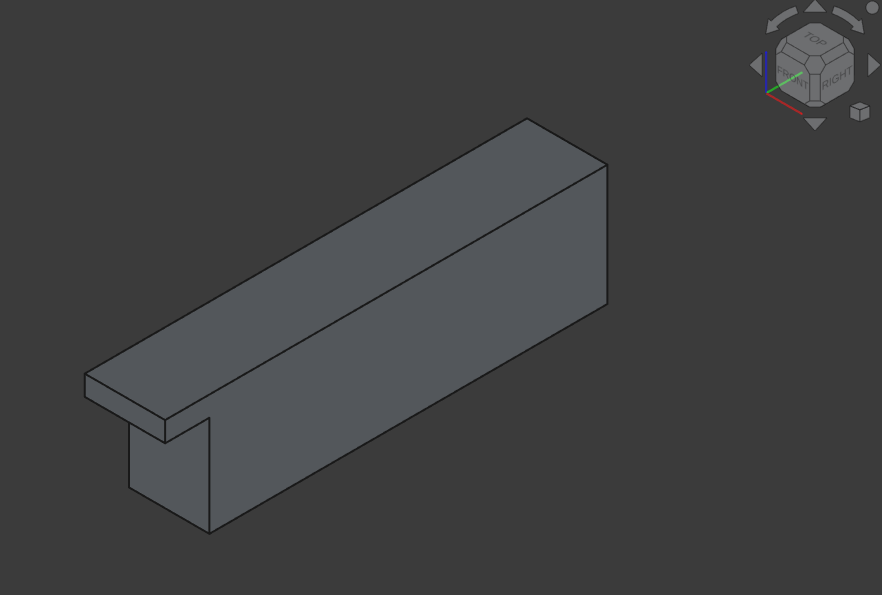
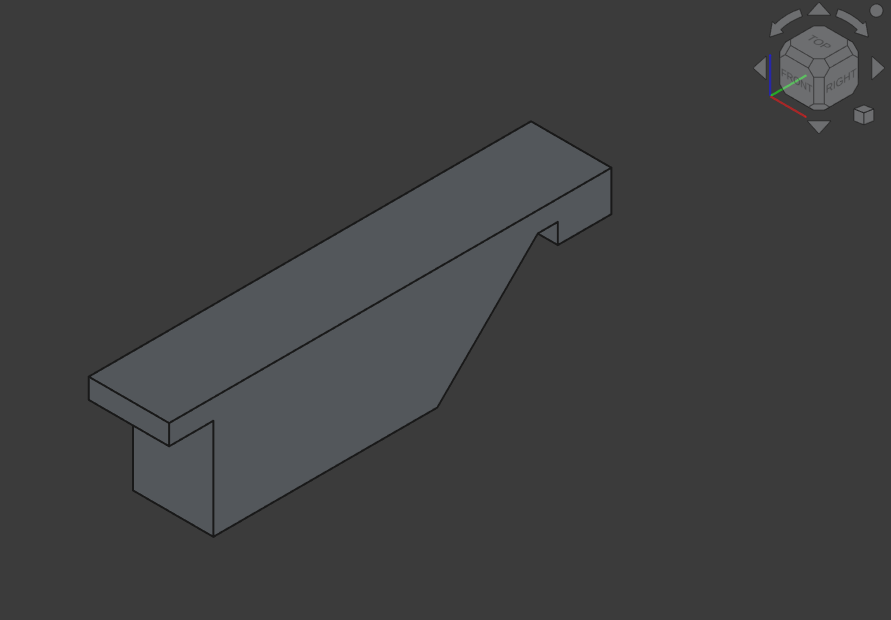
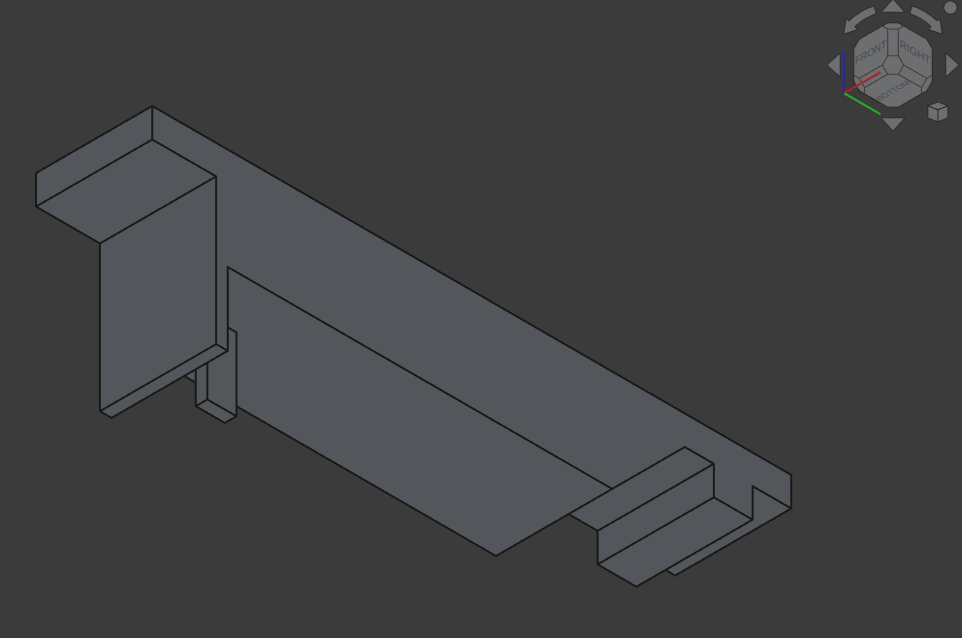
Those steps result in following ‘history’-cad-structure:
Then I designed the body:
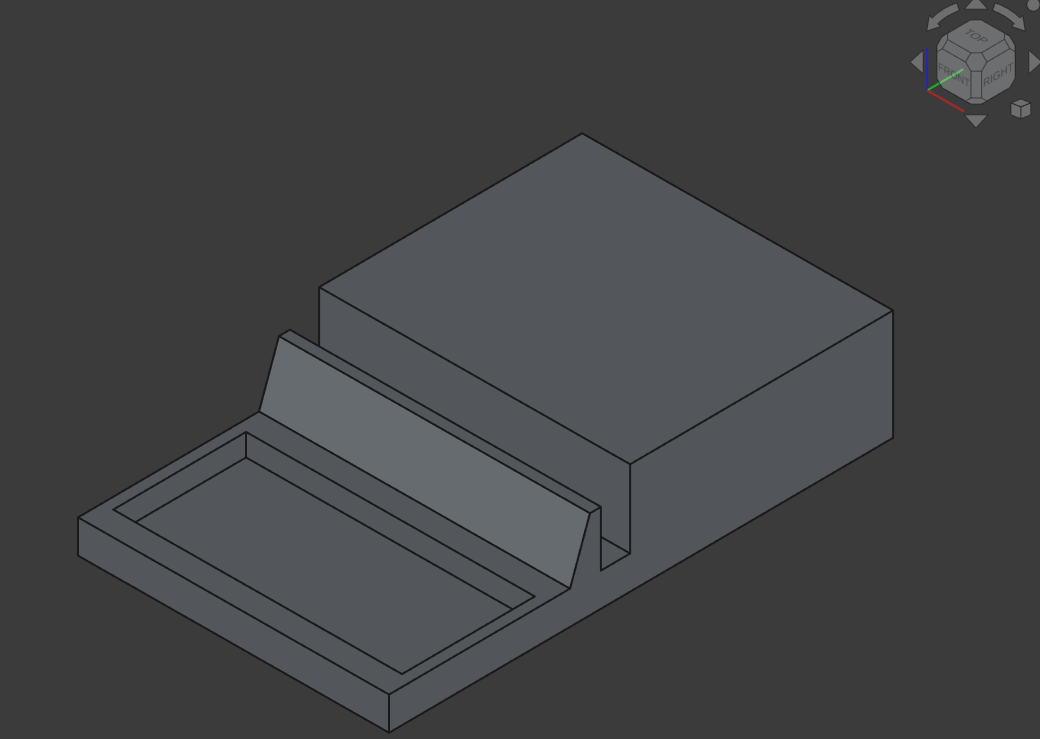
And assembled everything, which works quite cool :D
You use different assembling joints:

and then can assemble:
2.5. Learning Outcomes
I need a better documentation workflow (document as I go, directly in the right format)
CAD design principles (completely new to me)
Inkscape from scratch