2. Computer Aided design
Assignment:
-
model (raster, vector, 2D, 3D, render, animate, simulate, …) a possible final project
-
compress your images and videos, and post a description with your design files on your class page
1. 2D design software
vector software
Hi! friends, this week we’re going to use Inkscape software to make something together. Inkscape is an open source vector graphics program that lets you create and modify vector graphics such as illustrations, icons, logos and diagrams. Designed to be easy to use yet powerful and flexible, Inkscape is based on the standard SVG (Scalable Vector Graphics) format for optimum compatibility with other software and platforms. This approach guarantees the durability and interoperability of files created with Inkscape.
Installing Inkscape
In your browser, type Inkscape and click on the first link. With the page open, download the .msi file. Click on the red circle symbol to download the file.

Now run the installation program
Ok, open the software and select the It’s time to draw tab, then click on new document as shown below.
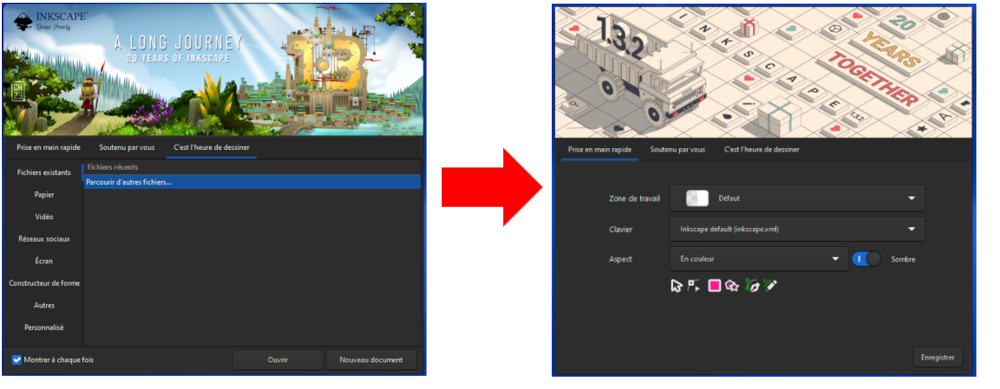
After that, you should see this interface on your PC.

Click on documentation to learn more about Inskape. - Use the shortcuts ctrl + arrow to move with the keyboard or simply the mouse wheel - Use the -, + and = keys to zoom in or out, or simply ctrl + wheel (middle control).
We’re going to create the logo below using Inkscape software.

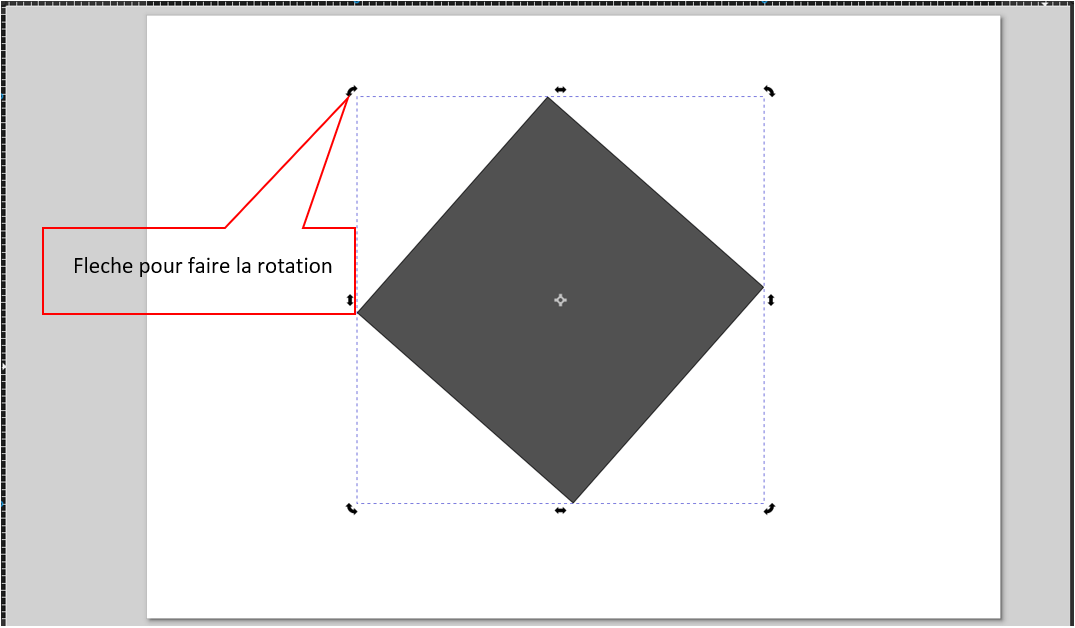
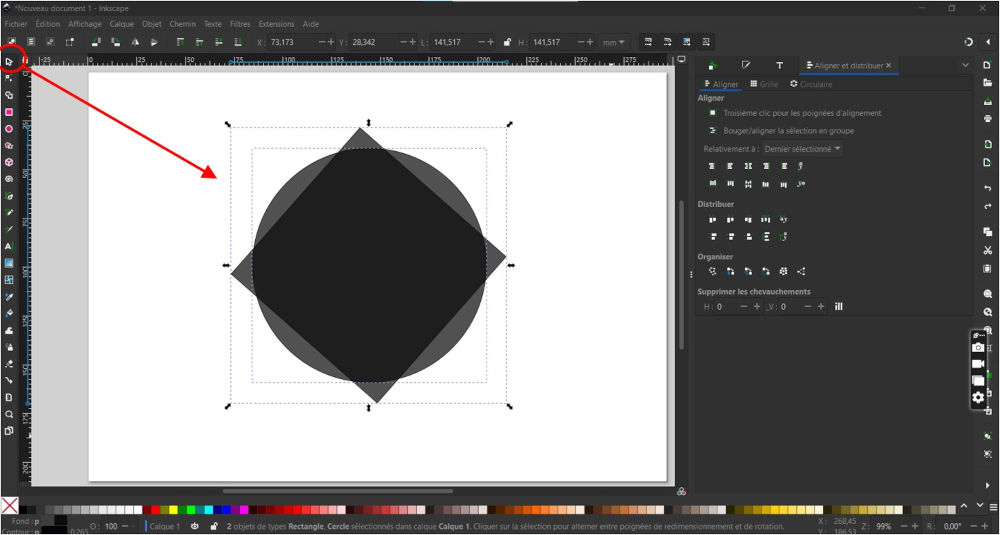
Select the Rectangle tool or keyboard shortcut R and draw a square on the blank page. Enter the following values: L=100 and H=100
Rotate by moving the mouse close to the edge of the square, directional arrows will appear. Rotate.
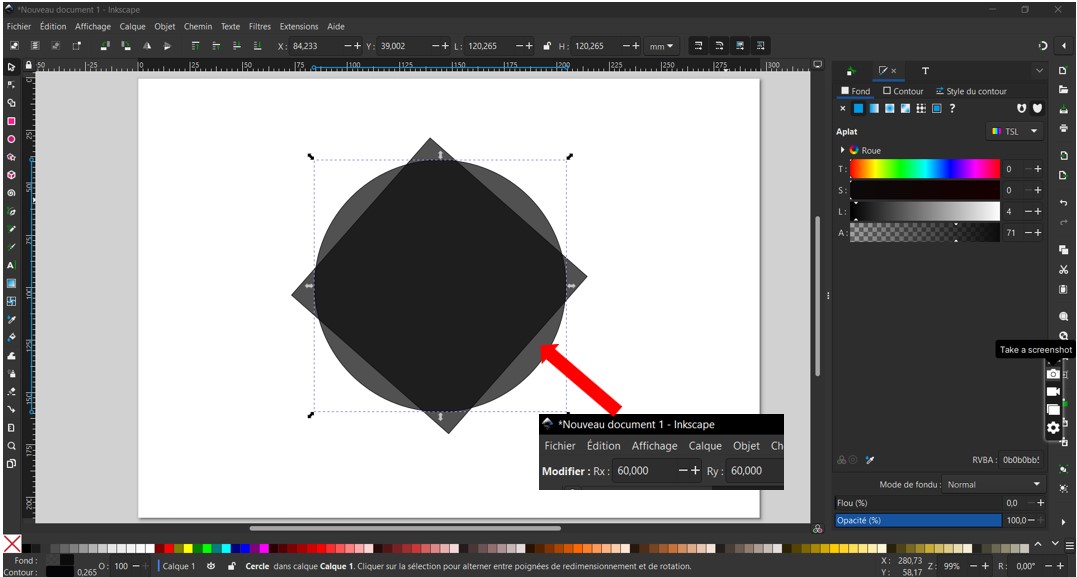
Following the same process, draw a circle on the same blank page. Resize the circle and place it centered on the square.
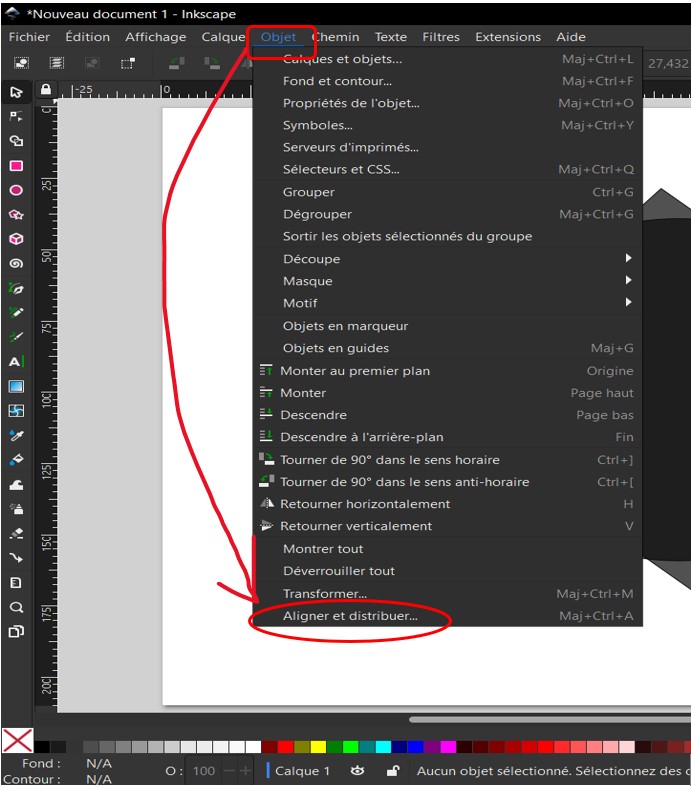
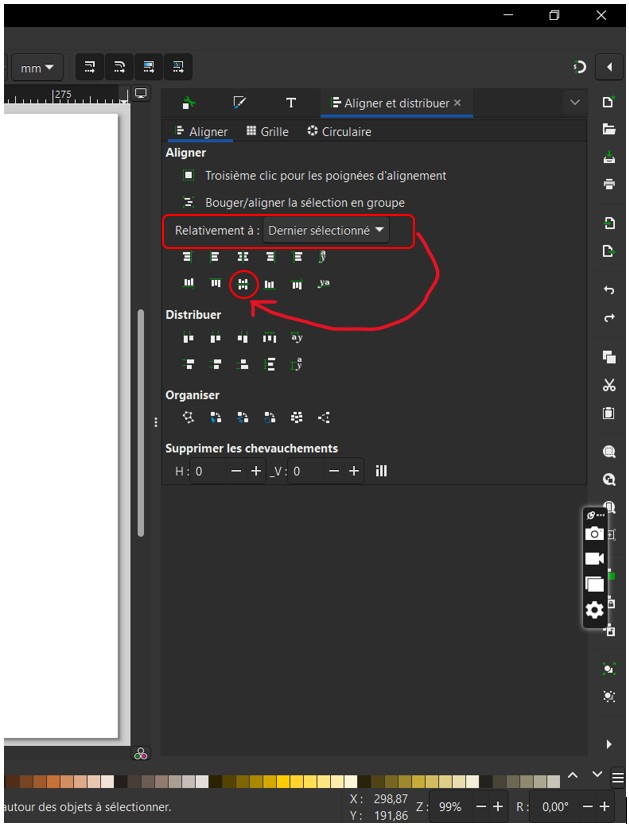
We’re going to remove the area of intersection between the two shapes Click on the Object tab, scroll to the bottom and click on Align and distribute.
A window will open on the right-hand side of your computer. Point your mouse at Relative to, unfold the Last selected list and click on the symbol of centered on a horizontal axis.
Now select your two shapes using the tool Select.
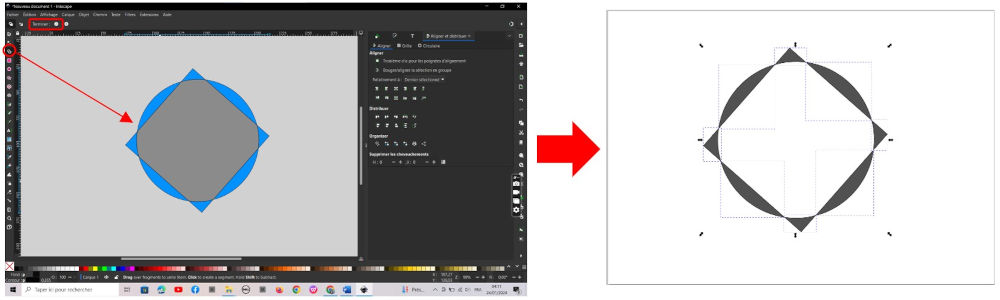
We are now going to remove the shadow zone between our two shapes. Use the Shape Builder Tool or X. Then select the shapes you wish to keep and click on Finish.
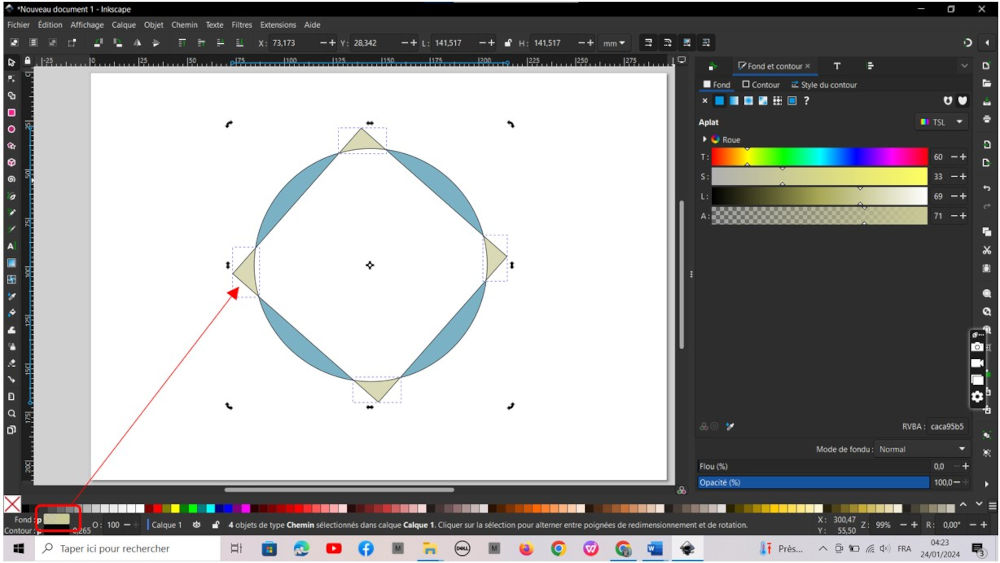
To add a color palette, select the desired figure and click on the color of your choice.
Now add text to the middle of your logo using the Select tool. Then, to change the font, click on the tab Text < Text and font and choose the font of your choice.
![]()
![]()
If you have followed the steps from start to finish, you should obtain the following result:
![]()
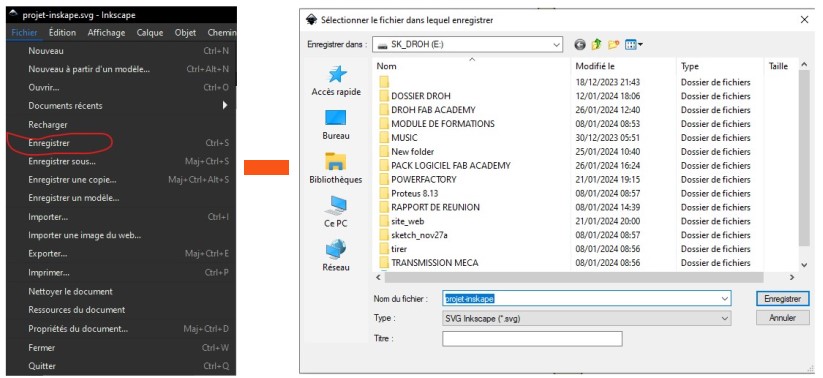
Congratulations dear friends, you’ve successfully completed your Inkscape project 👏🏽👏🏽👏🏽🫶🏿🫶🏿🫶🏿. 😱😱 Sorry, we forgot something very important: Save the project !!!!!! To save our work, don’t worry, this is the easiest part of the tutorial, just go to File > Save as shown below.
Raster software
Gimp
Friends, in this tutorial we’re going to learn together how to reduce the size of an image with Gimp to better insert it in a project for example.
GIMP is a free image editing and retouching program. It offers a wide range of tools for reworking images, including photomontages and hand-drawn images. It can be seen as an alternative to Photoshop, with similar functions.
Installing Gimp
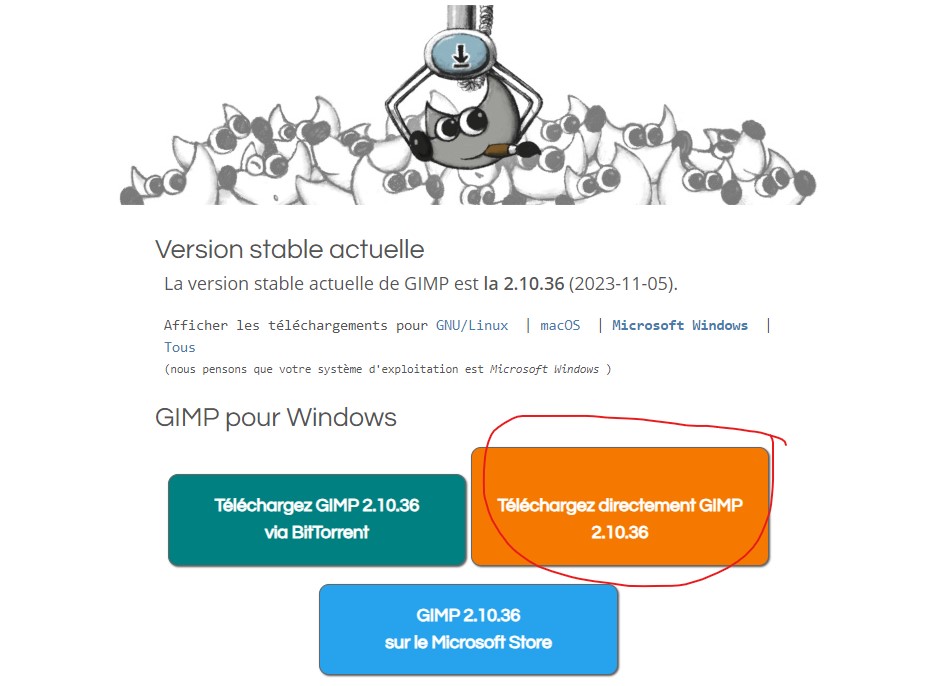
Before you start, please download the Gimp software, otherwise bah!!! you won’t be able to install it 😋. Don’t forget to download the one circled in red.Open it and launch the installation.
- Open it and launch the installation.

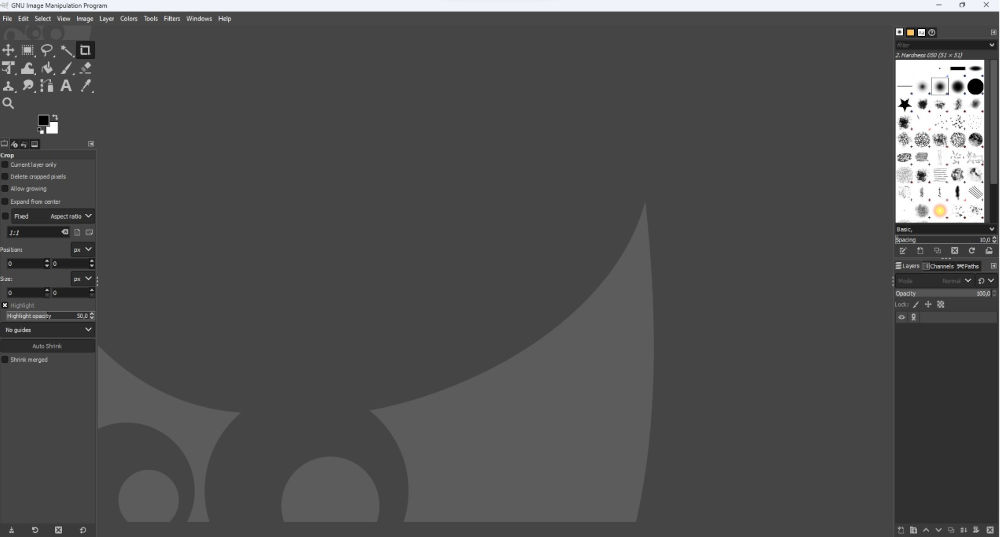
- Now open the software and access the working interface
Well, the interface may look a little odd, but don’t worry, you’ll be familiar with the basic tools for reducing your image. For further documentation, click on ok.
If you’ve just installed it, you can go to the tab Edit < Preferences (interface) to select the language of your choice.

- Importing your image
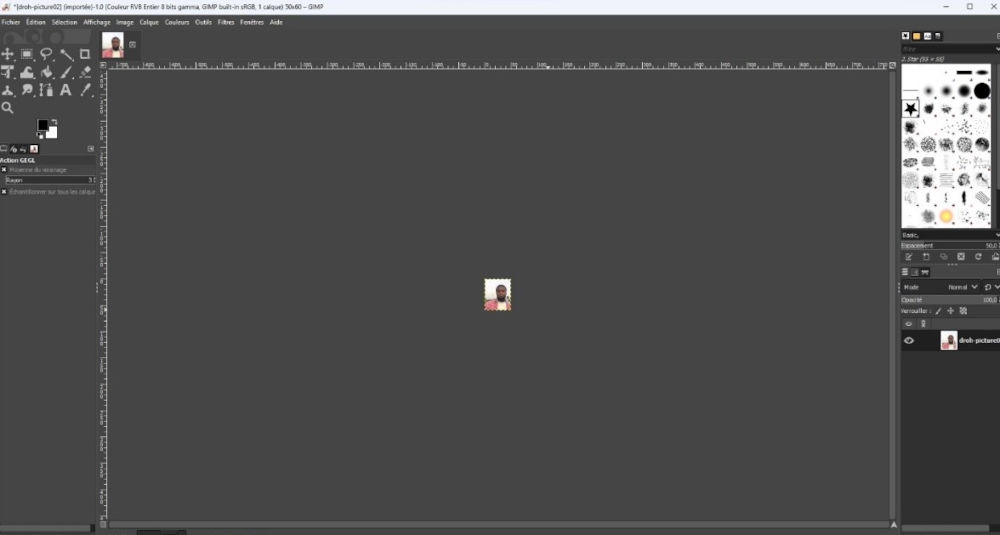
Click on File < Open. Go to the folder where your image is stored and open it, or simply press the famous ctrl+O key.

If you’ve followed the process, you should get something like the image below.
- Reduct image
As you can see, the image is too large for your current needs. To reduce the dimensions, go to Image < Scale < Image size. Set the values according to your needs.
Congratulations, you’ve successfully reduced your very first image.
- Export the image
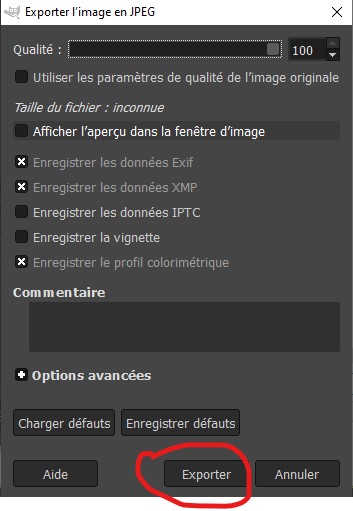
If you’re happy with the result, export your image for further use. Go to File, scroll down to Export as or simply press Shift+ctrl+E. When exporting, don’t forget to increase the quality to 100.

Finally, click on Export and your template will be saved in the folder of your choice.
Congratulations on completing your image reduction with Gimp.
Links that may help you :
3d modeling software
Fusion 360
It’s a comprehensive tool that enables designers, engineers and manufacturers to create, simulate and produce their designs all using a single platform. Fusion 360 is renowned for its cloud-based collaboration features, facilitating teamwork on projects.
we’re going to design a sprocket to help you learn this software.
- we will download the free version of fusion 360 as shown below

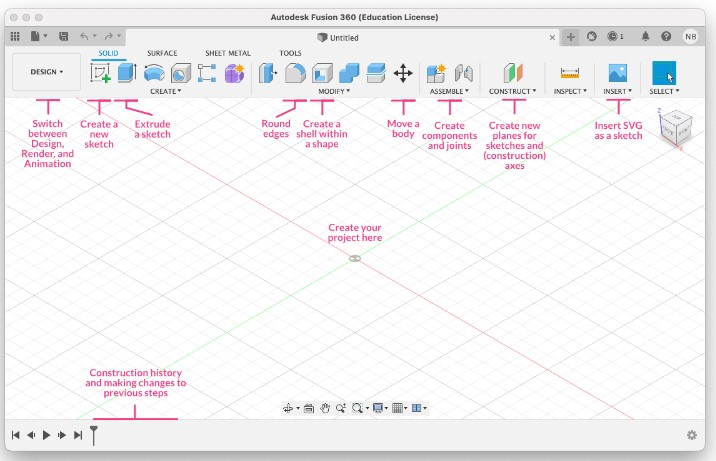
- create your account to access the free version. If everything is correct, you’ll see the interface below.

The following image describes the fusion 360 interface designed by Nadieh Bremer Fabacademy 2021
to design our gable :
- File
- New conception
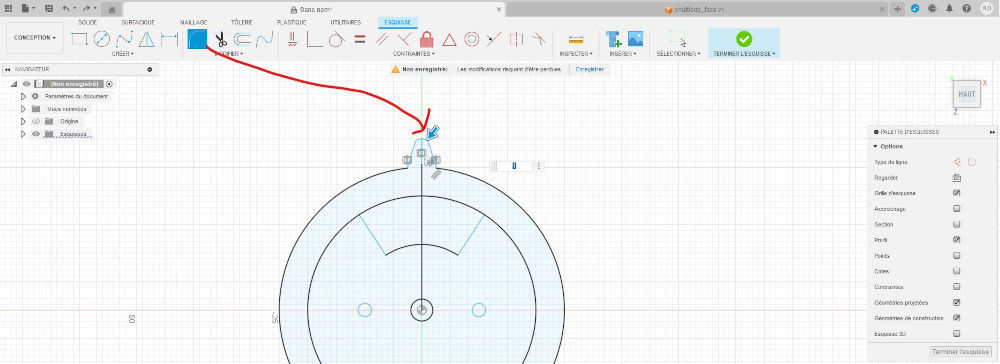
click on Create a sketch and Select your profile

- when you select the face of your choice, a new sheet appears with a palette on the right of your screen.
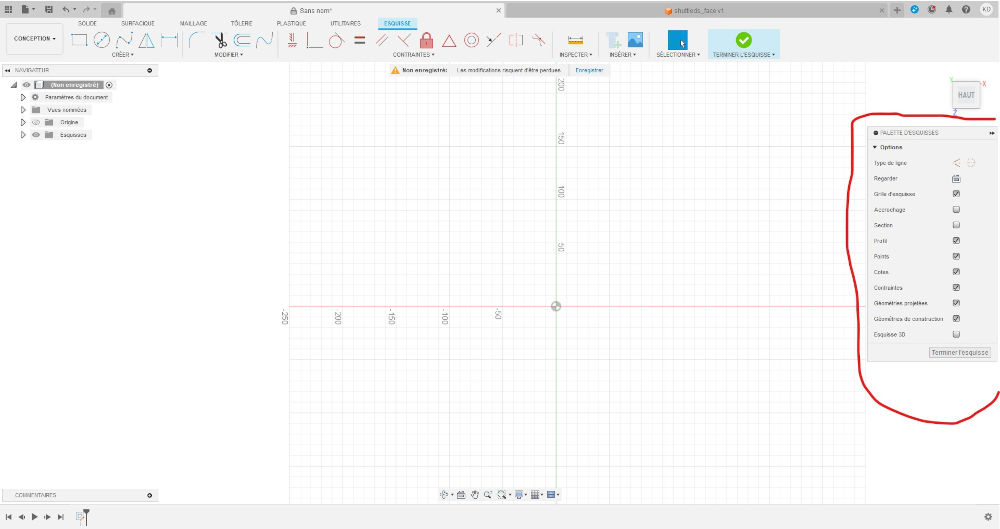
Description of sketching tools by Nadieh Bremer Fabacademy 2021

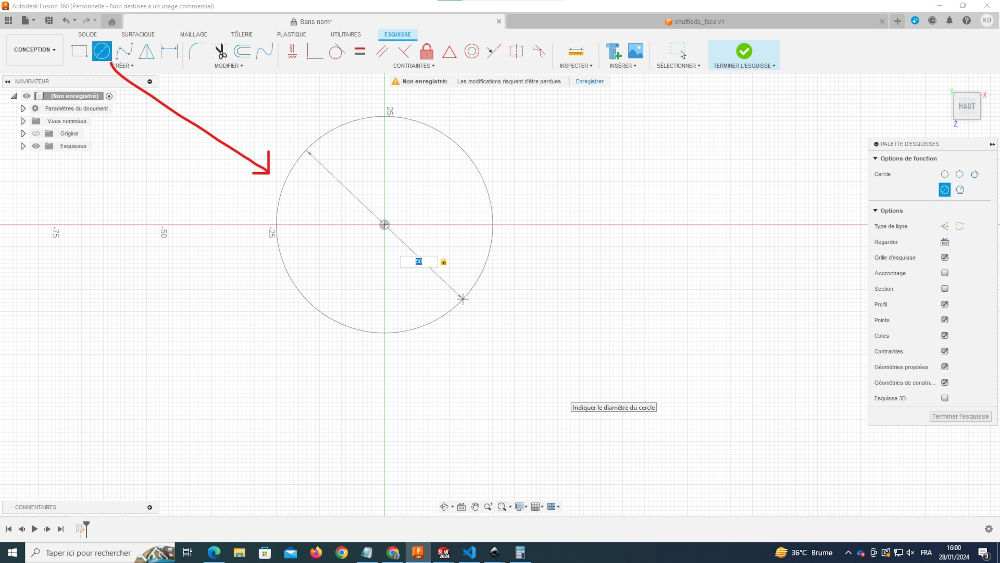
- Start by selecting the tool Circle. Go to the drawing sheet, mark the first point of your circle by left-clicking and moving your mouse. Set the diameter of your circle.
- Still using the Circle tool, you should obtain the following:

you can use the symmetry tool to avoid reproducing the same shape several times.
- Using the Line and Symmetry tools, sketch the tooth of your pinion. For the line tool, click on the L key on your keyboard. don’t forget to use the Fillet tool to round off the edges of your tooth.
- Do, create then circular network to make circular repetition of your teeth. Select your shape, then select the center of your circle in the Center point section.

- If you are satisfied with your gable, click on finish the sketch

- Select your sketch and extrude. click on the Extrude tool to obtain a 3D shape. Dont’ t forget to put a value of extrusion.
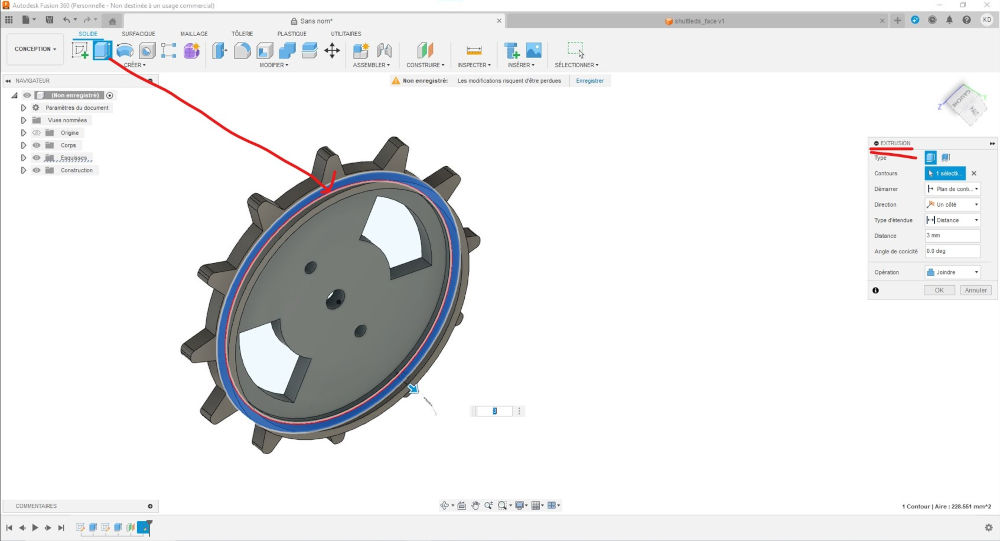
- if you have followed the tutorial correctly you should obtain this pinion

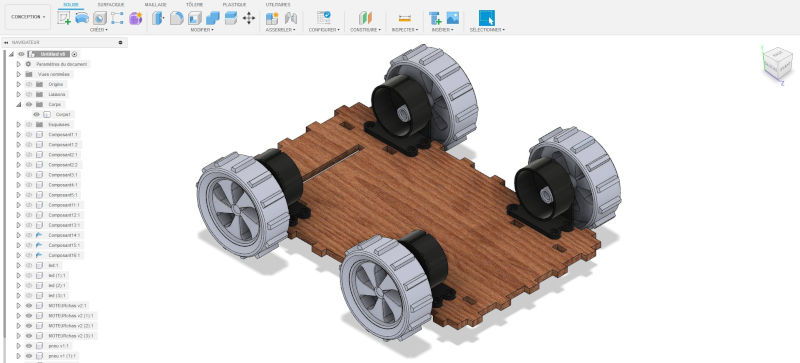
Potential final project
For my final project, I’m planning to make a mobile robot. To do this, I’ve decided to make a quick model of the robot and a short animation to support it.
Project files
-
Inskape project file : Inskape file
-
Fusion 360 project file : Fusion 360 file
-
Gimp projet file : Gimp file
End