1. Principles and practices & Project management
Assignment:
- Principles and Practices
- Plan and sketch a potential final project.
- Project Management
- Build a personal site describing you and your final project.
- Upload it to the class archive.
- Work through a git tutorial.
Possible final project
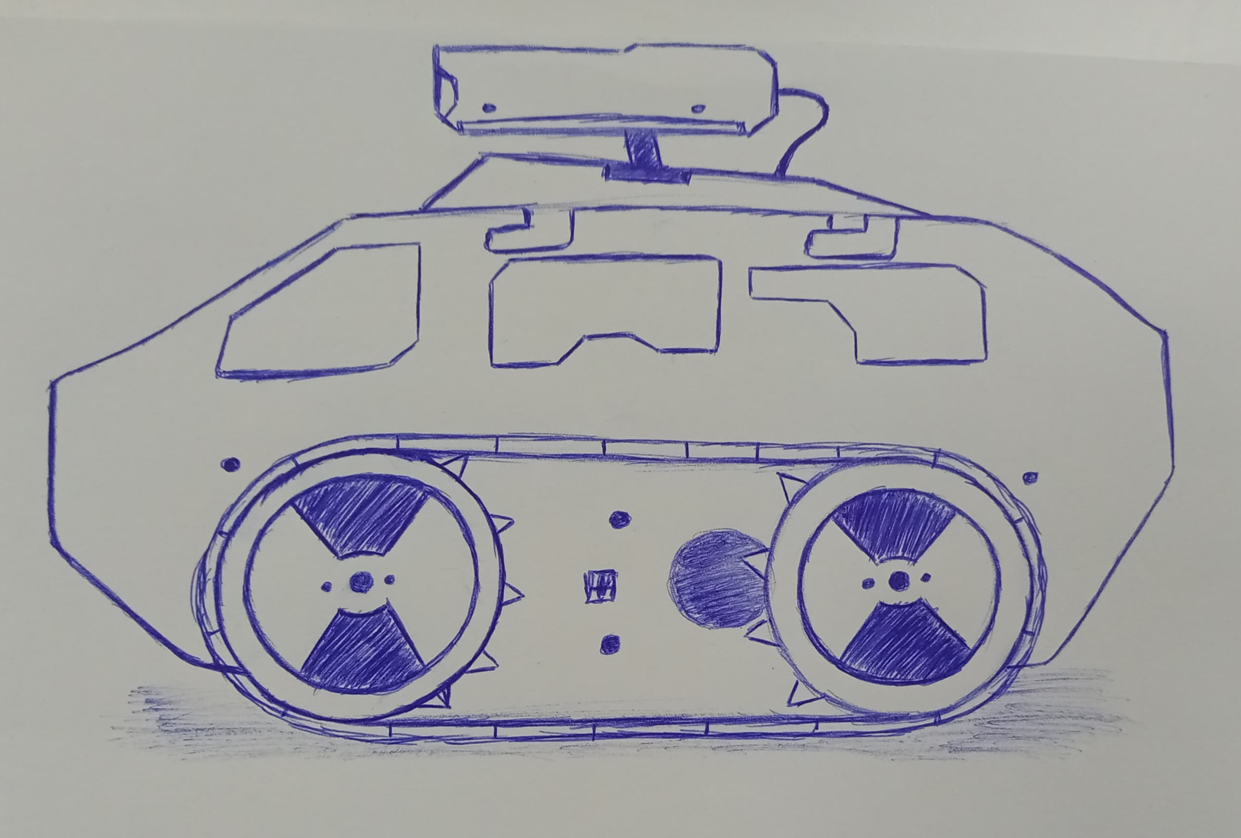
SurveyBot
The project aims to design a robot capable of providing supervision in spaces that are somewhat restricted to humans. The idea is for the robot to be able to easily enter spaces such as air ducts, rather than the person himself going in.
This could limit the risk of potential hazards. However, this robot is not specifically used for this purpose. It could be used to deliver medication from one room to another, saving people the need to move around. The ultrasonic sensor will help the robot avoid obstacles.
Basic design canvas

create your own web site with mkdocs
To create our website, we’re going to use mkdocs. It’s a fast, simple and downright beautiful static site generator, designed for the creation of project documentation.
The site’s source files are described in Markdown and configured with the YAML configuration file.
Phase 01: Install mkdocs on your PC
mkdocs requires a recent version of python. Download python on to your PC. When you’ve downloaded python, open it and launch the installation. Don’t forget to check the box Add python.exe to PATH (see image below).

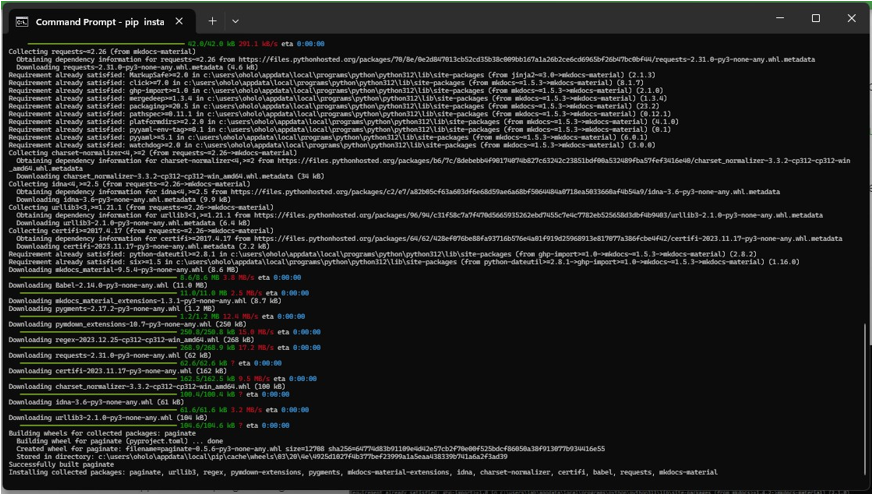
With Python installed, we can move on to installing mkdocs. Type cmd in your PC’s search bar to open your command prompt. In the command prompt enter the following command line: pip install mkdocs. If you’re good you should see the following in your command prompt: ``

Here are a few links that may help you:
Phase 02: mkdocs template
We’re going to use an available template to design our website. Download the template via the following link:
https://gitlab.fabcloud.org/academany/fabacademy/2022/labs/testlab/students/julian-henk
Download the template as a file (.zip) and unzip it in any folder. In order to make changes to the template locally, we’ll need a few prerequisites, please consult :
- To install the theme Material for mkdocs, enter the following command line in the command prompt:
pip install mkdocs-materialand you’ll see in the display:
- We’re going to install the plugin mkdocs-git-revision-date-localized-plugin. Enter the following command line:
pip install mkdocs-git-revision-date-localized-plugin.
If you’ve followed the process correctly, you’ll be happy. Go to the folder where the template is stored and type cd (the path to the template) at the command prompt. In the command line, type: mkdocs serve to launch the mkdocs server locally. If all goes well, you’ll get the url underlined in orange. Copy and paste it into your browser.

You should see the following image in your browser.

Phase 03: Modify template
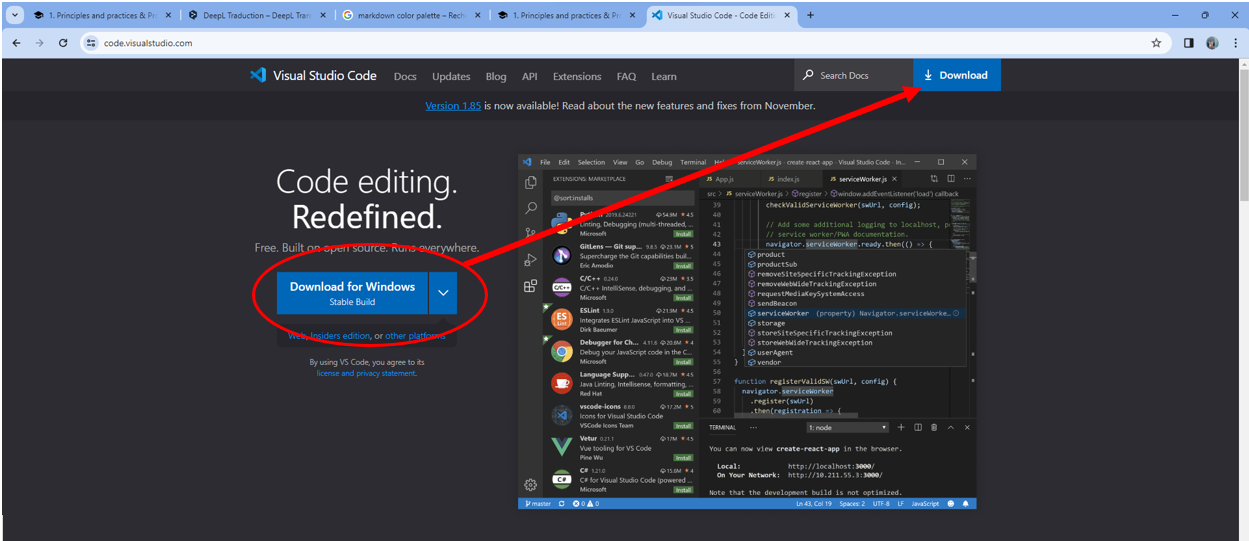
To modify the model as required, we’ll use VS Code. Visual Studio Code is an extensible code editor developed by Microsoft for Windows, Linux and macOS. Features include debugging support, syntax highlighting, intelligent code completion, snippets, code refactoring and Git integration.
Install the VS Code software
Right-click on your mouse and select open, as shown below :
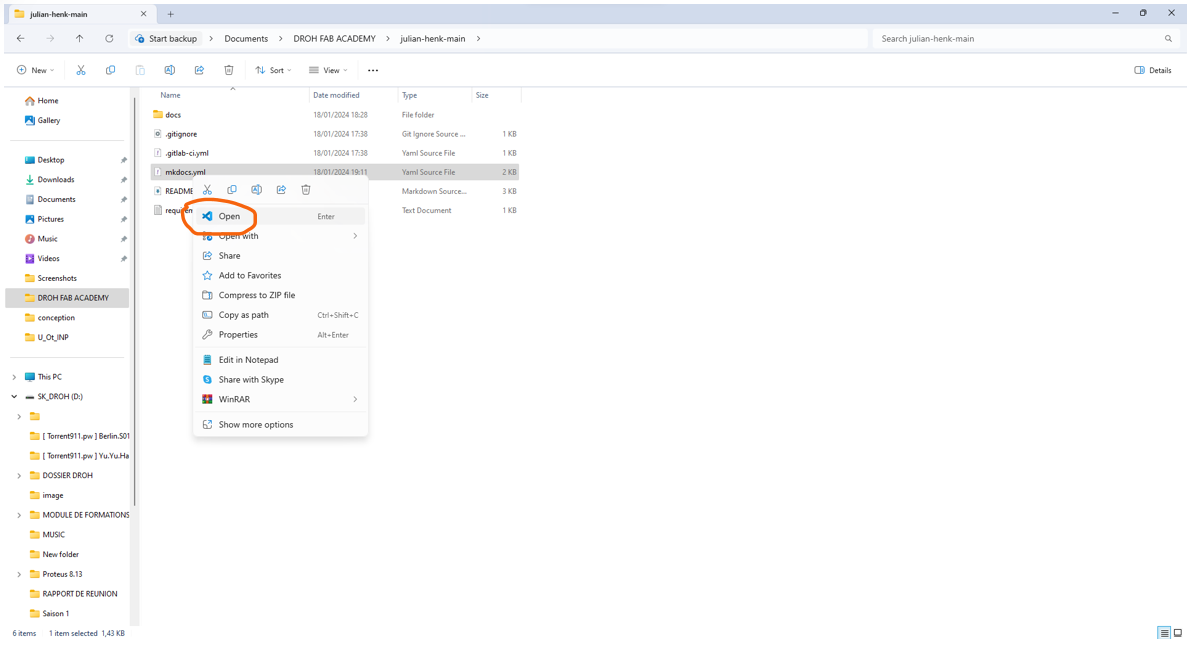
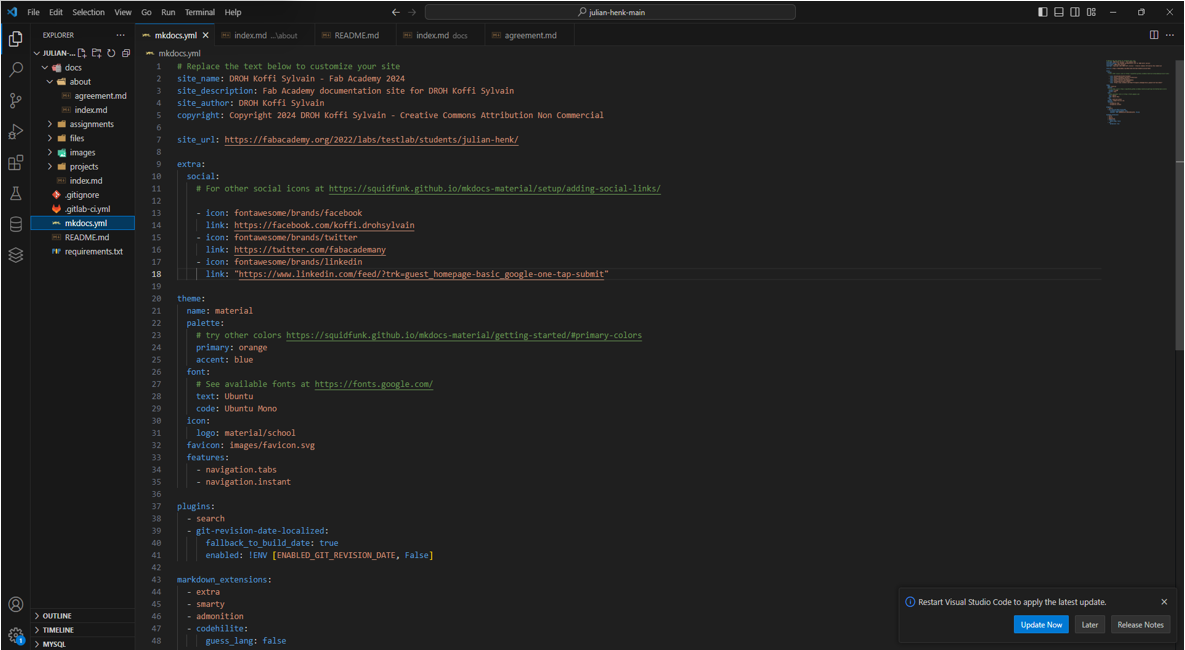
With the software open, drag and drop the unzipped file to obtain all the files directly in the software. Double-click on the mkdocs.yml file. Enter your data and save. For further documentation, see Theme Material for mkdocs.

very good we have just created your website 👏👏👏
GIT install tuto
Hi! guys, we’re going to download git and install it.
Git is a free, open source distributed version control system designed to manage everything from small to very large projects quickly and efficiently.
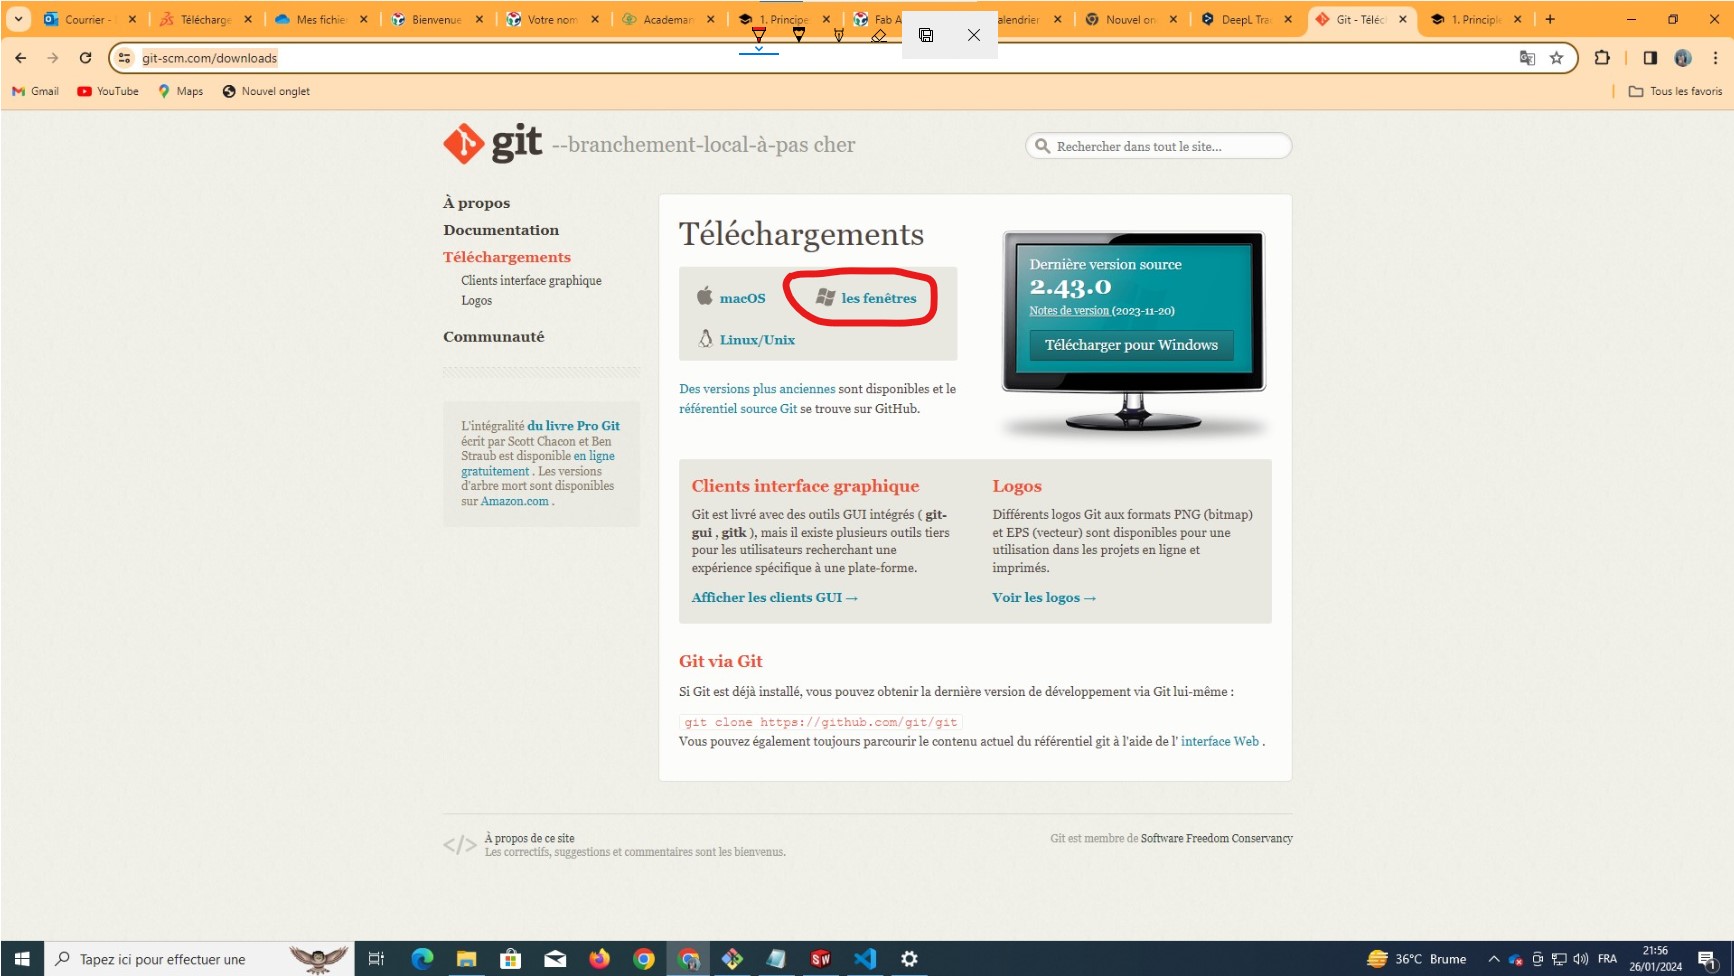
1. Download Git
don’t worry, to download git just click on this link https://git-scm.com/downloads and go to the page. click on Windows and the download will begin.
2. clone your gitlab repository
follow these steps carefully and you’ll be on your way.
-
Create an empty folder and place it where you want it, preferably using simple names and avoiding long paths, as this will benefit you.
-
Open your GitBash on your PC and type in your command prompt :
cd " path of the folder created below -
initialize the Git repository :
git init

- Add your Git user name and enter your email address :
git config --global user.name "Your_username"

- configure your e-mail address for downloading :
git config --global user.email "your_email@exemple.com"
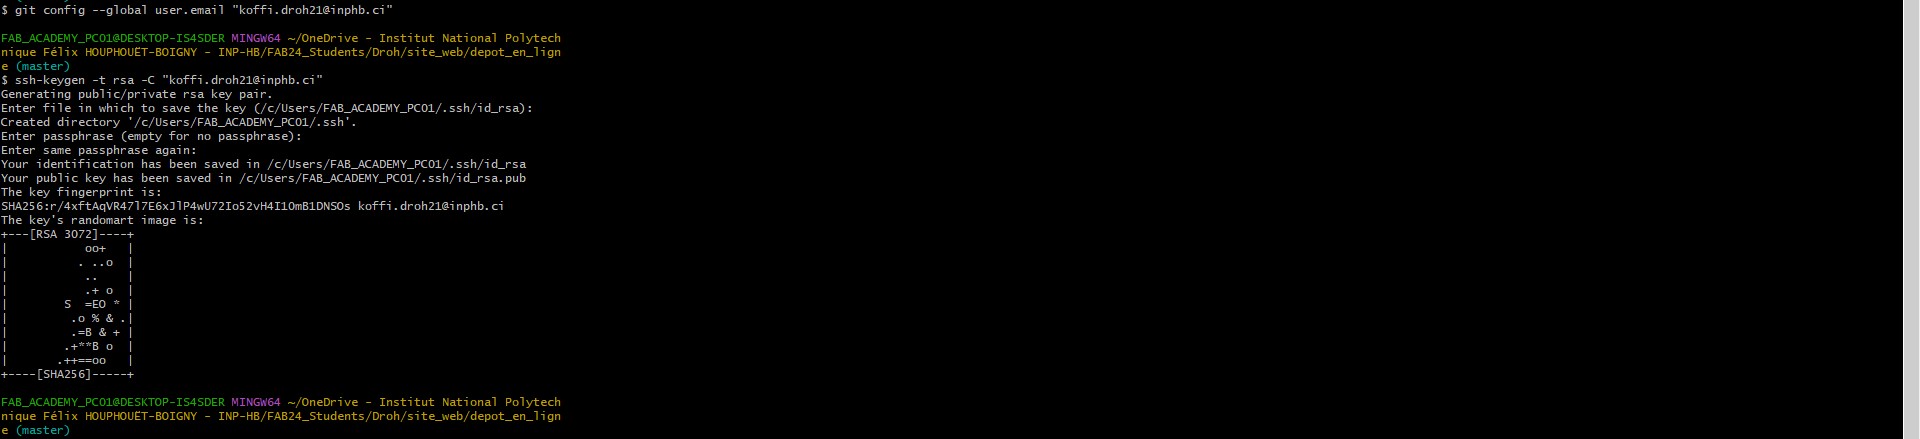
- generate your ssh key :
ssh-keygen -t rsa -C "your_email"
(An SSH key is an access identifier for the SSH (Secure Shell) network protocol. This secure, authenticated and encrypted network protocol is used for remote communication between machines on an open, unsecured network. The SSH protocol is used for remote file transfer, network management and remote access to the operating system.)
-
get your keygen :
cat ~/.ssh/id_rsa.pub -
Copy your ssh key to display it in Gitbash
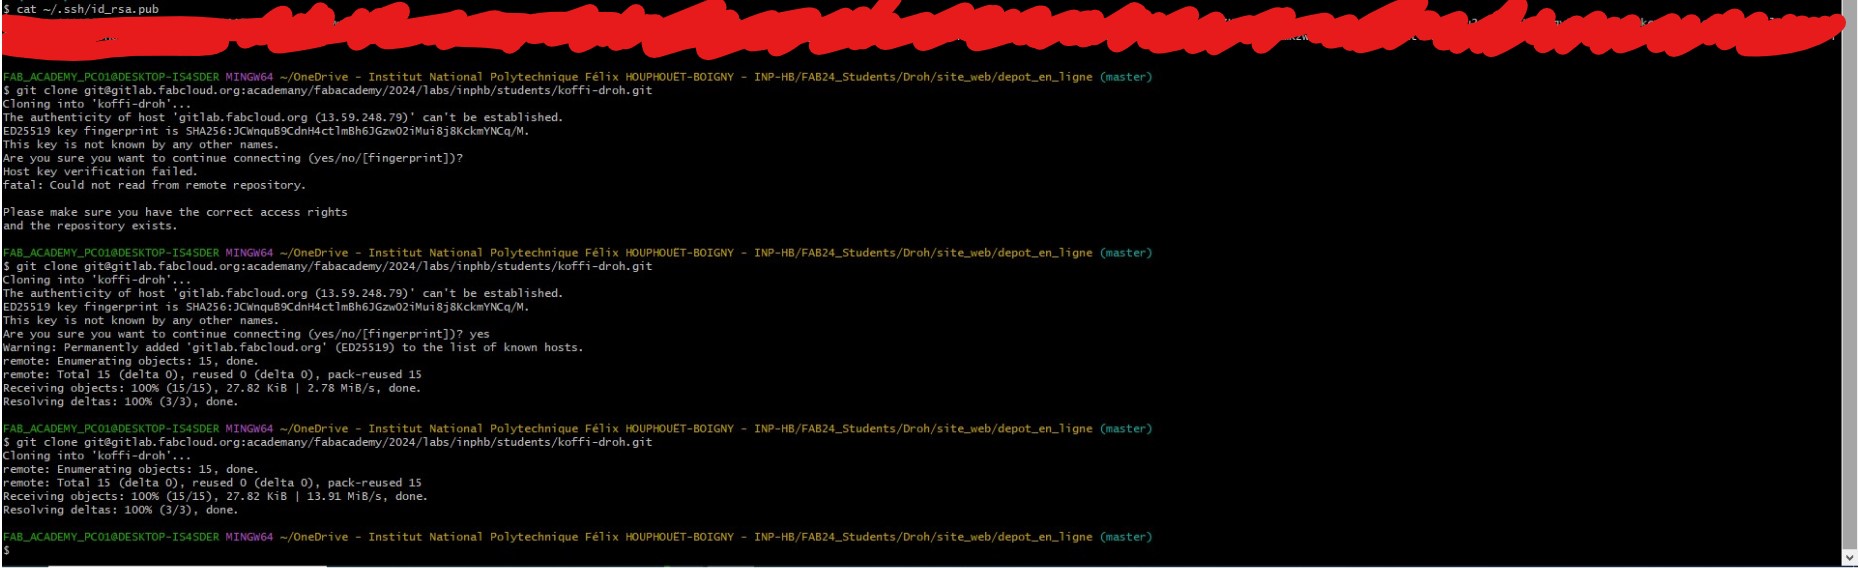
- Open GitLab > Account > Preferences > SSH Keys > paste the contents of the file you’ve created into it

- Open the folder you created earlier on your PC and right-Click < Open GitBash here

- use this command prompt
:
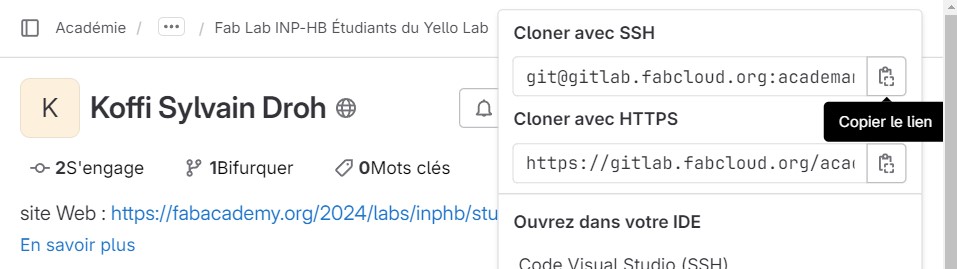
git clone < repository path to clone >.

- to get the path open the Git repository to clone > Clone
congratulations you have just cloned your gitlab repository 👏🏽👏🏽👏🏽🫶🏿🫶🏿🫶🏿
3. upload your repository
- Add the new files you added to git :
git add index.html to upload file by file
git add . to upload all the files at once
-
Give your updates a name so you know exactly what you’ve changed :
git commit -m ‘change you did’ -
Download in your online referencial :
git push
For more information, please refer to the following links :
-
https://www.atlassian.com/fr/git/tutorials/setting-up-a-repository
-
https://pub.fabcloud.io/tutorials/week01_principles_practices_project_management/git_simple.html
End