13. Networking and communications
So, since our assignment this week was networking and communications, and for my Final project I needed a Bluetooth module, I decided to use Bluetooth to better understand the device in the future.

Group Assignment
So this week our task was to send a message between two projects, but since I was using wireless communication and did not have a board for I2c or bus communication, and I really wanted to try wired communication, we decided to use Elena and Shushan boards.
#include <SoftwareWire.h>
const int sda=0, scl=1;  // replaced sda and scl pins on board
SoftwareWire Wire(sda,scl);
#include <hd44780.h>
#include <hd44780ioClass/hd44780_I2Cexp.h>
#define SW 10  // Joistick  pins
#define VRY 9
#define VRX 8

int SwState = 0; // joistick state
int Xposition = 0;
int Yposition = 0;

void setup() {
Wire.begin();
Serial.begin(9600);
pinMode(sda, INPUT_PULLUP); // software level resistors for SDA SCL pins
pinMode(scl, INPUT_PULLUP);
}
void loop() {
    Xposition = analogRead(VRX);
    Yposition = analogRead(VRY);
    SwState = digitalRead(SW);
    Xposition=map(Xposition,0, 1023, -512, 512);
    Yposition=map(Yposition,0, 1023, -512, 512);
    Serial.print("x: ");
    Serial.println(Xposition);
    Serial.print("y: ");
    Serial.println(Yposition);

if (Xposition !=0 || Yposition !=0) {

    Wire.beginTransmission(0x9);
    Wire.write(Xposition);
    Wire.endTransmission();
    delay(200);

}
else {
    Wire.beginTransmission(0x9);
    Wire.write(0);
    Wire.endTransmission();
    delay(200);

}
}
  #include <Wire.h>
  #define I2C_SLAVE_ADDRESS 0x9  // the  adress of secondary board
  bool ledState;
  int led1=1;
  int led2=0;
  byte recivedData=0;
  void setup() {
  pinMode(led1, OUTPUT);
  pinMode(led2, OUTPUT);
  Serial.begin(9600);
  Wire.begin(I2C_SLAVE_ADDRESS);
  Wire.onReceive(receiveEvent);
  }
  void loop() {
  if((int)recivedData > 0) {
      digitalWrite(led1,HIGH);
      digitalWrite(led2,LOW);
  } else {
      digitalWrite(led1, LOW);
      digitalWrite(led2,HIGH);
  }

  }
  void receiveEvent(int numBytes) {
  while(Wire.available()){
      recivedData=Wire.read();
      Serial.println(recivedData);
  }
  }
Here I will explain only those parts that I think may not be clear.
We added these lines to the main code because Ellen’s board didn’t have I2C pins and we had to change the other 2 pins to be SDA and SCL.
const int sda=0, scl=1;  // replaced sda and scl pins on board
SoftwareWire Wire(sda,scl);
#include <hd44780.h>
#include <hd44780ioClass/hd44780_I2Cexp.h>
Reads the state of the joystick. Convert value range from [0, 1023] to [-512, 512]. Output X and Y results to serial monitor for debugging.
void loop() {
Xposition = analogRead(VRX);
Yposition = analogRead(VRY);
SwState = digitalRead(SW);
Xposition=map(Xposition,0, 1023, -512, 512);
Yposition=map(Yposition,0, 1023, -512, 512);
Serial.print("x: ");
Serial.println(Xposition);
Serial.print("y: ");
Serial.println(Yposition);
Transferring data to the device with address 0x09.
if (Xposition !=0 || Yposition !=0) {

Wire.beginTransmission(0x9);
Wire.write(Xposition);
Wire.endTransmission();
delay(200);

}
else {
    Wire.beginTransmission(0x9);
    Wire.write(0);
    Wire.endTransmission();
    delay(200);

}
Secondary board code
Defines the address of this device on the I2C bus.
#define I2C_SLAVE_ADDRESS 0x9 // the adress of secondary board
Wire.begin(I2C_SLAVE_ADDRESS): Initialize I2C in slave mode with the given address. Wire.onReceive(receiveEvent): the function to be called when data is received from the I2C master.
Serial.begin(9600);
Wire.begin(I2C_SLAVE_ADDRESS);
Wire.onReceive(receiveEvent);
receiveEvent(int numBytes): This function is called whenever data is received from the I2C master.
while (Wire.available()): While there are data available to read.
recivedData = Wire.read(): Read data and store it in the variable recivedData.
Serial.println(recivedData): Print the received data to the serial monitor for debugging.
void receiveEvent(int numBytes) {
 while(Wire.available()){
 recivedData=Wire.read();
 Serial.println(recivedData);
 }
}
Individual Assignment
So, I started the week by studying Neil’s lecture in detail, then I found Adrian’s assignment, he also used Bluetooth. And it was very usefull.
Bluetooth setup
So, to use Bluetooth, you first need to determine the code name as well as the bitrate. I tried ATtiny first but couldn’t get any result so I decided to do this part using Arduino.
The first
9 step is to upload the code to the Arduino and if it works, a “Start” message will appear on the serial monitor.
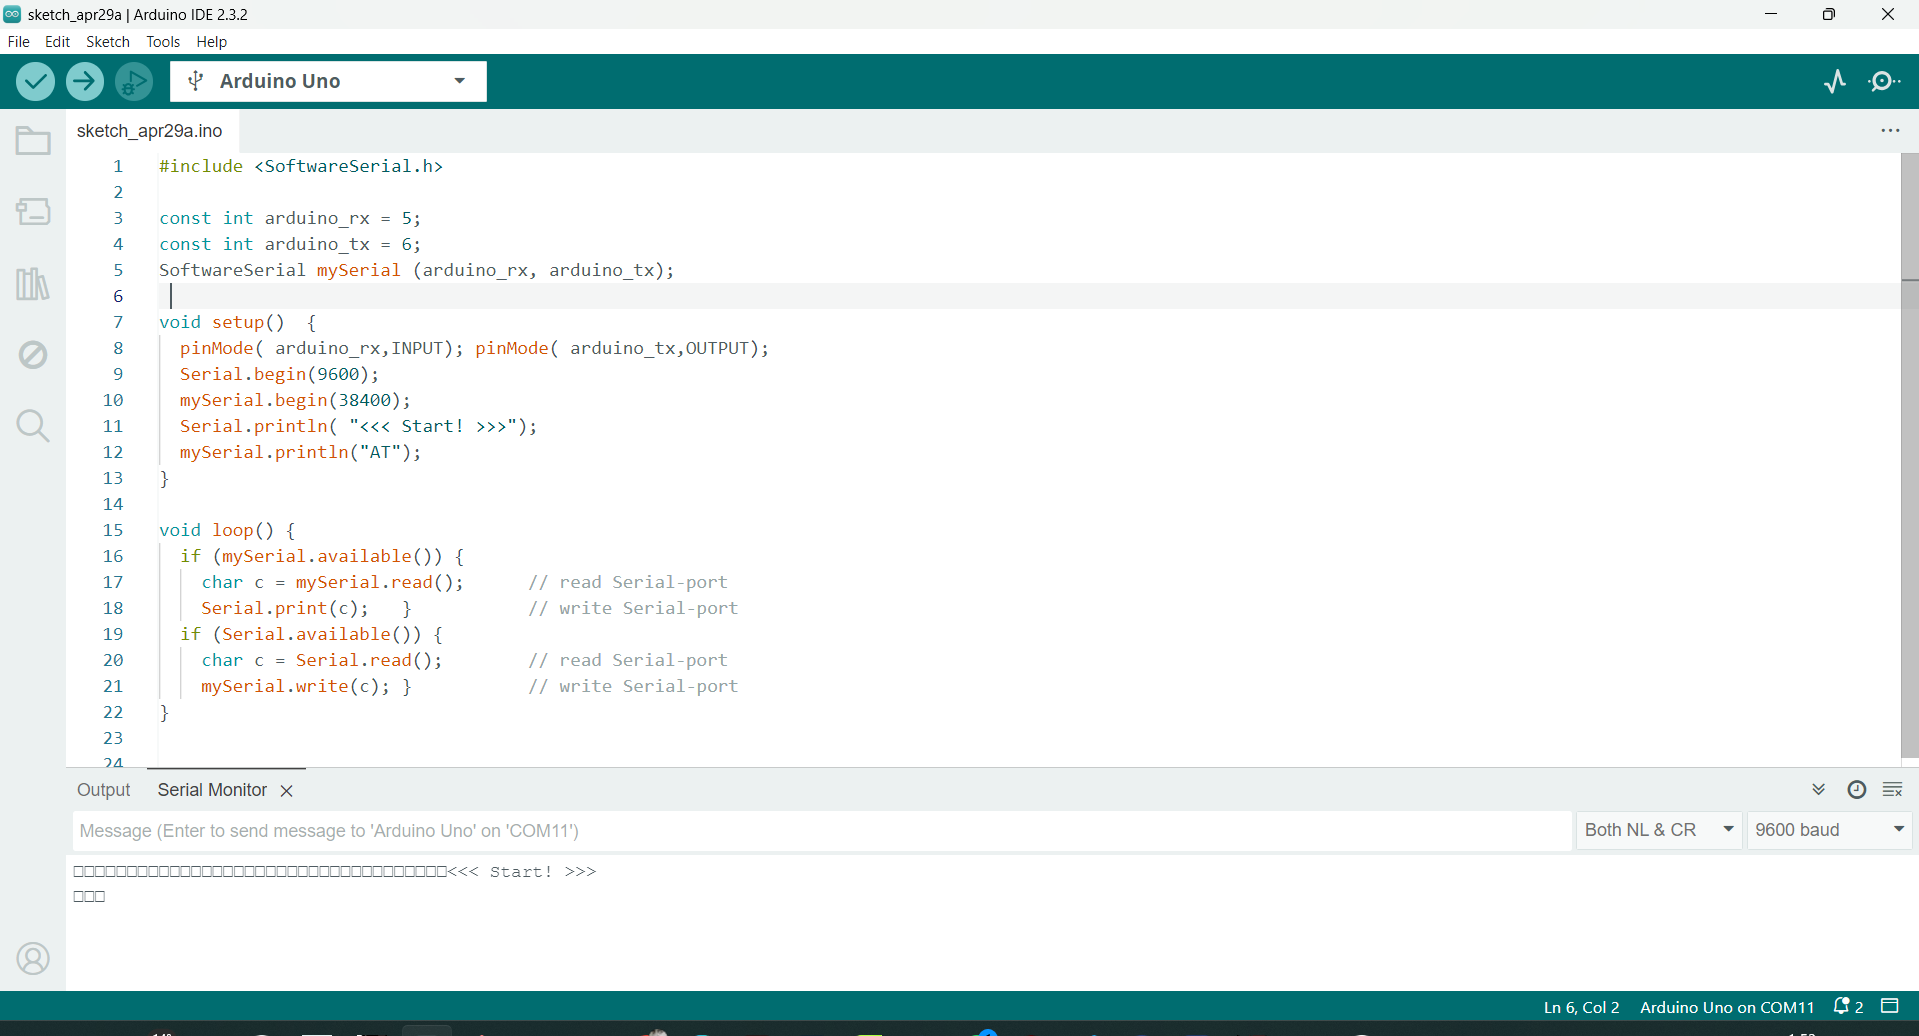 The code did not work correctly because I used a different bitrate, as it turned out the previous user changed the bitrate. I set 38400 to 9600 and it worked correctly
After that you need to connect the Bluetooth module to the Arduino by holding down the button.
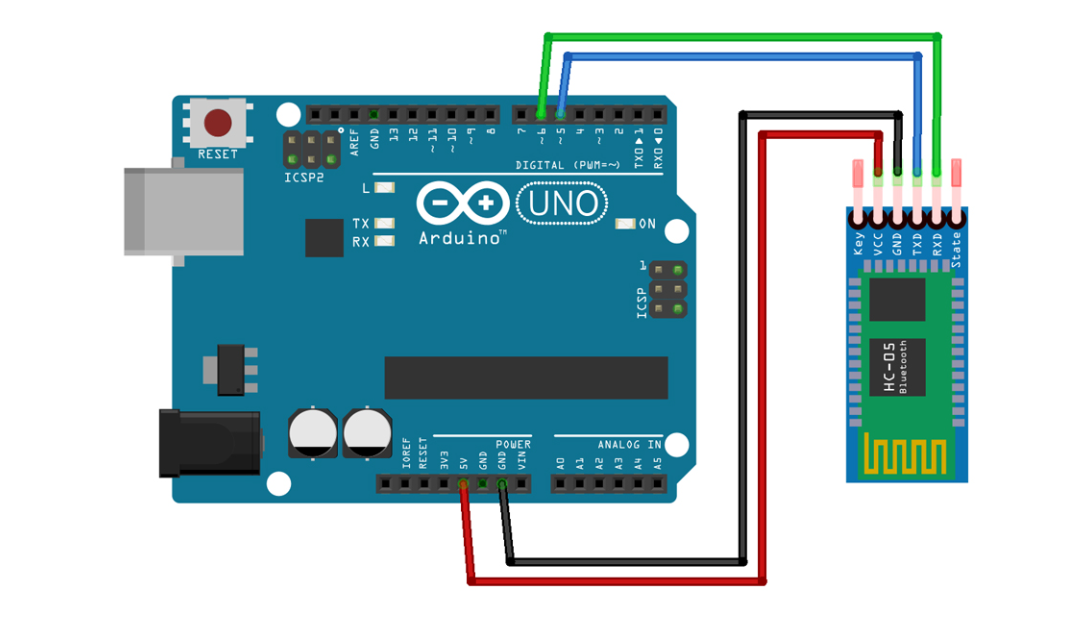 Here is a diagram of connecting Arduino to Bluetooth
If everything is done correctly, an OK message will appear on the serial monitor.

After that with these commands I request information
- AT+NAME? - Name
- AT+PSWD? - Password
- AT+UART? - Communication speed.

And then you can change the name bitrate and password for your bluetooth I didn’t need this, I just changed the name for the test.
- AT+NAME= your name - Name
- AT+PSWD=”your code” - Password
- AT+UART= Communication speed.

Code for setting up bluetooth using arduino.
#include <SoftwareSerial.h>

const int arduino_rx = 5;
const int arduino_tx = 6;
SoftwareSerial mySerial (arduino_rx, arduino_tx);

void setup()  {
  pinMode( arduino_rx,INPUT); pinMode( arduino_tx, OUTPUT);
  Serial.begin(9600);       //in the port monitor select NL&CR, Arduino speed with computer 9600
  mySerial.begin(9600);    //By default, the speed of the Bluetooth module with Arduino in AT command mode is 38400, sometimes 9600
  Serial.println("<<<Start!>>>");
  mySerial.println("AT");
}

void loop() {
  if (mySerial.available()) {
    char c = mySerial.read();      // read Serial-po
    Serial.print(c);   }           // write Serial-port
  if (Serial.available()) {
    char c = Serial.read();        // read Serial-port
    mySerial.write(c); }           // write Serial-port
}
Control via mobile app
After setting the parameters, I tested what Adrian wrote, since this was my first acquaintance with the Bluetooth module. In this code you can see the bitrate that we read using setup code and wrote here so that the program works correctly Code for LED control.
//Fab Academy 2021 - Fab Lab León
//Bluetooth
//Adrianino
//ATtiny1614

const int led = 8; // LED pin

int option;

void setup(){
  Serial.begin(9600);  //speed of the communications
  pinMode(led, OUTPUT);
}

void loop(){
  //if there is pending information
  if (Serial.available()>0){
    //let's read the option
    char option = Serial.read();
    //if the option is between '1' and '9'
    if (option >= '1' && option <= '9')
    {
      //we subtract the value '0' to obtain the number sent
      option -= '0';
      for(int i=0;i<option;i++){
         digitalWrite(led, HIGH);
         delay(100);
         digitalWrite(led, LOW);
         delay(200);
      }
    }
  }
}
Connection is very simple. Gnd to Gnd, VCC to VCC, TX to RX and RX connect to TX .
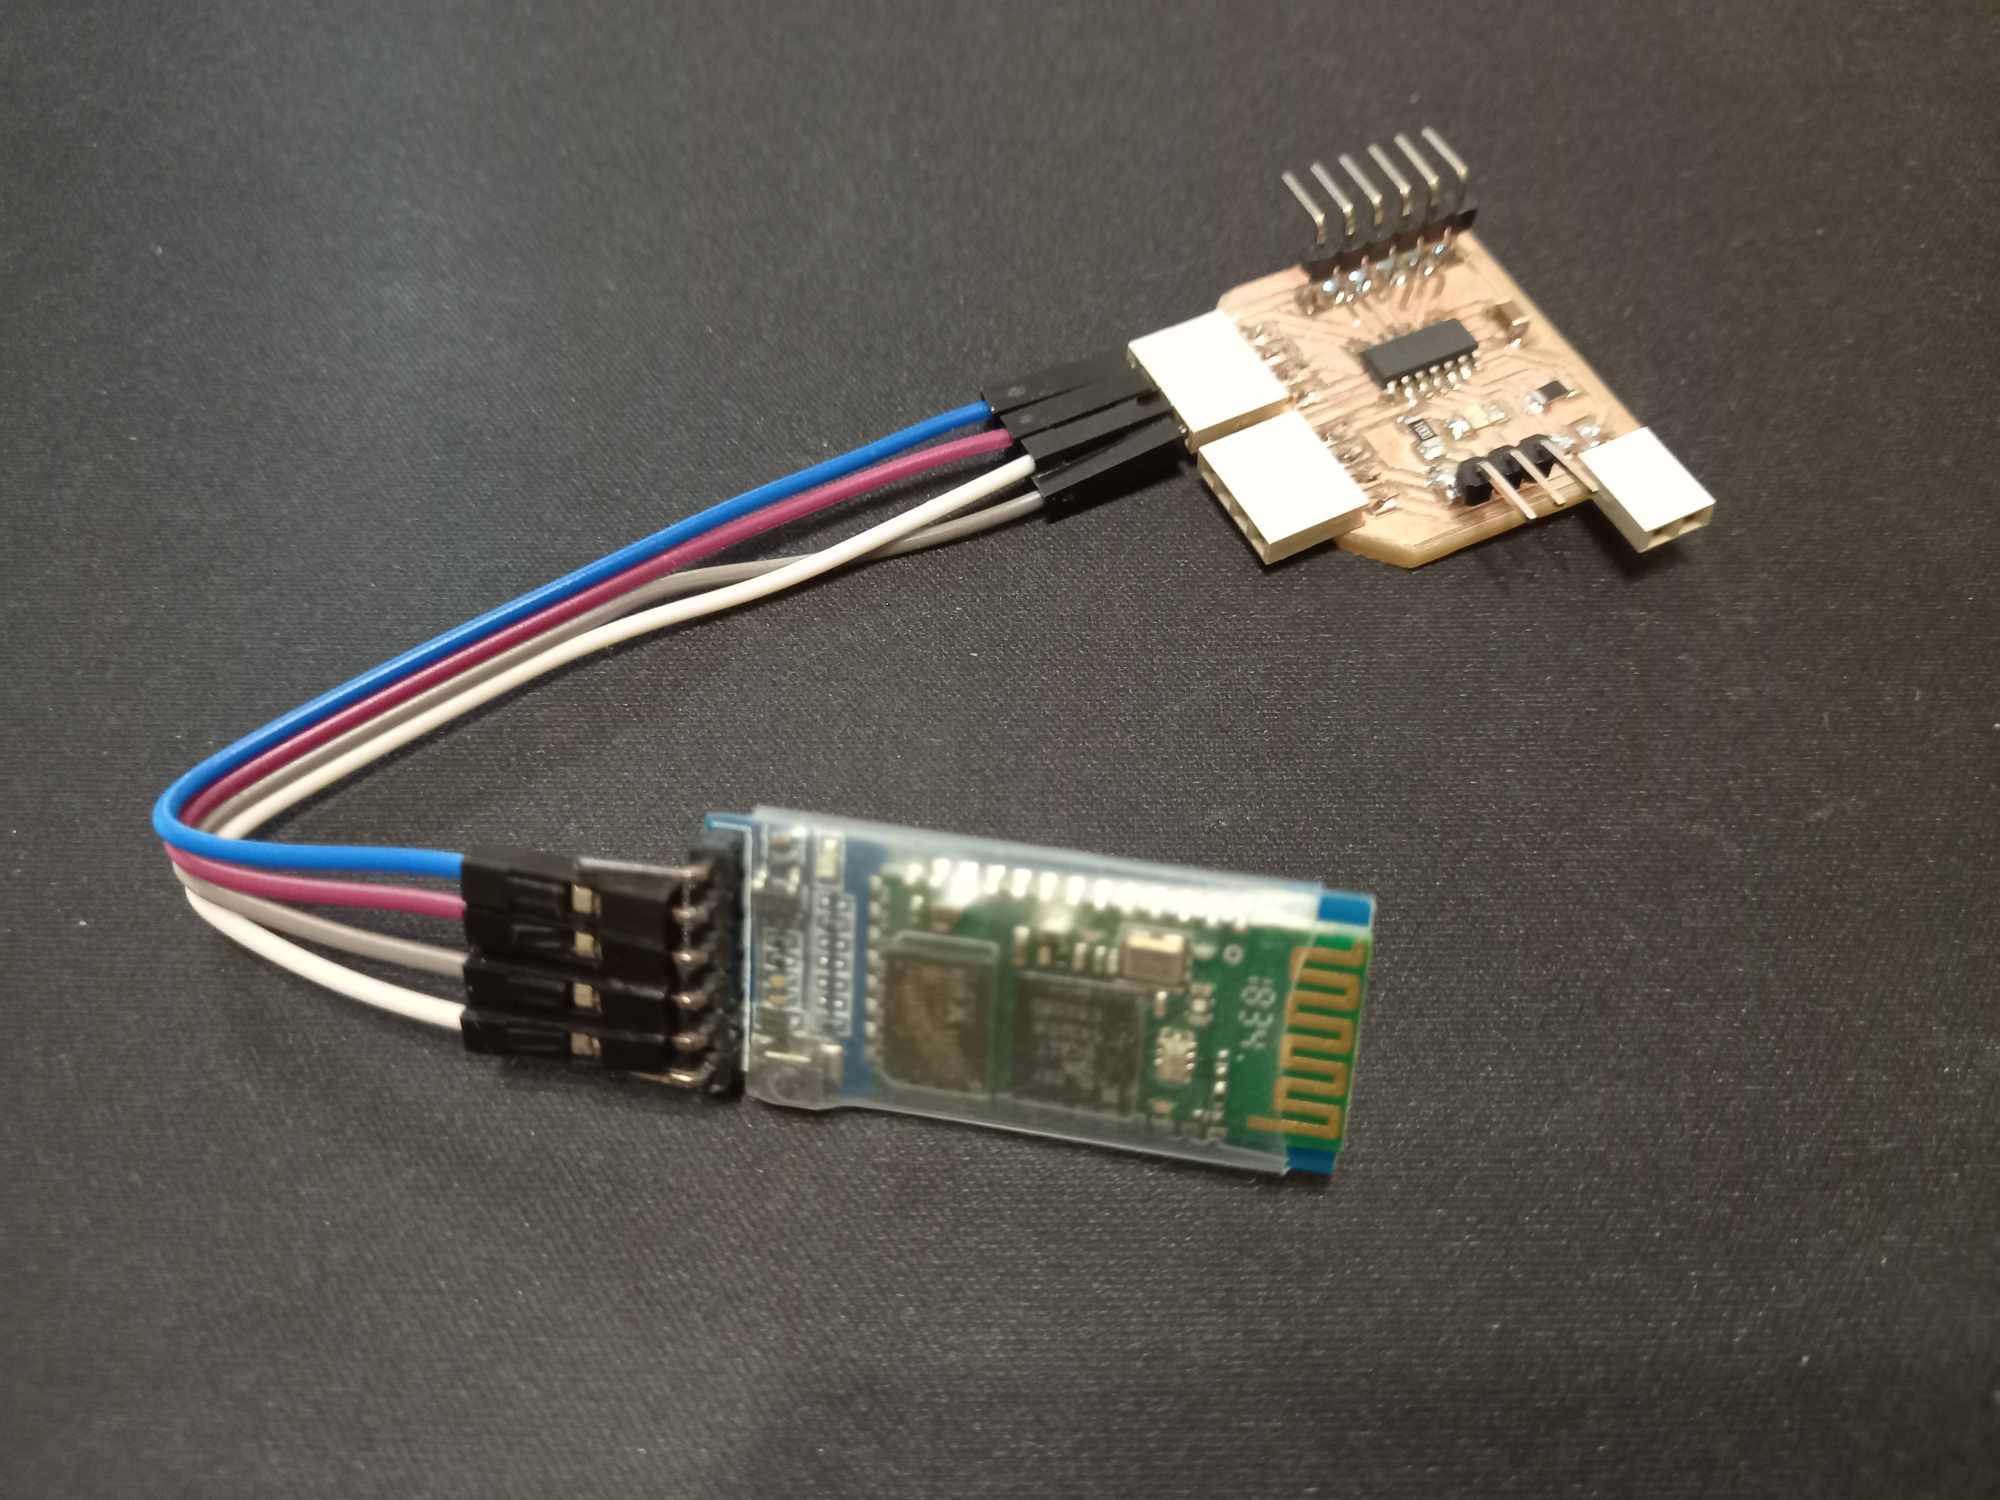
Programmed using rp2040 with UPDI adapter .
I also downloaded a program for Bluetooth on my Android. I used 2 programs and both work here you can find links to APPs.
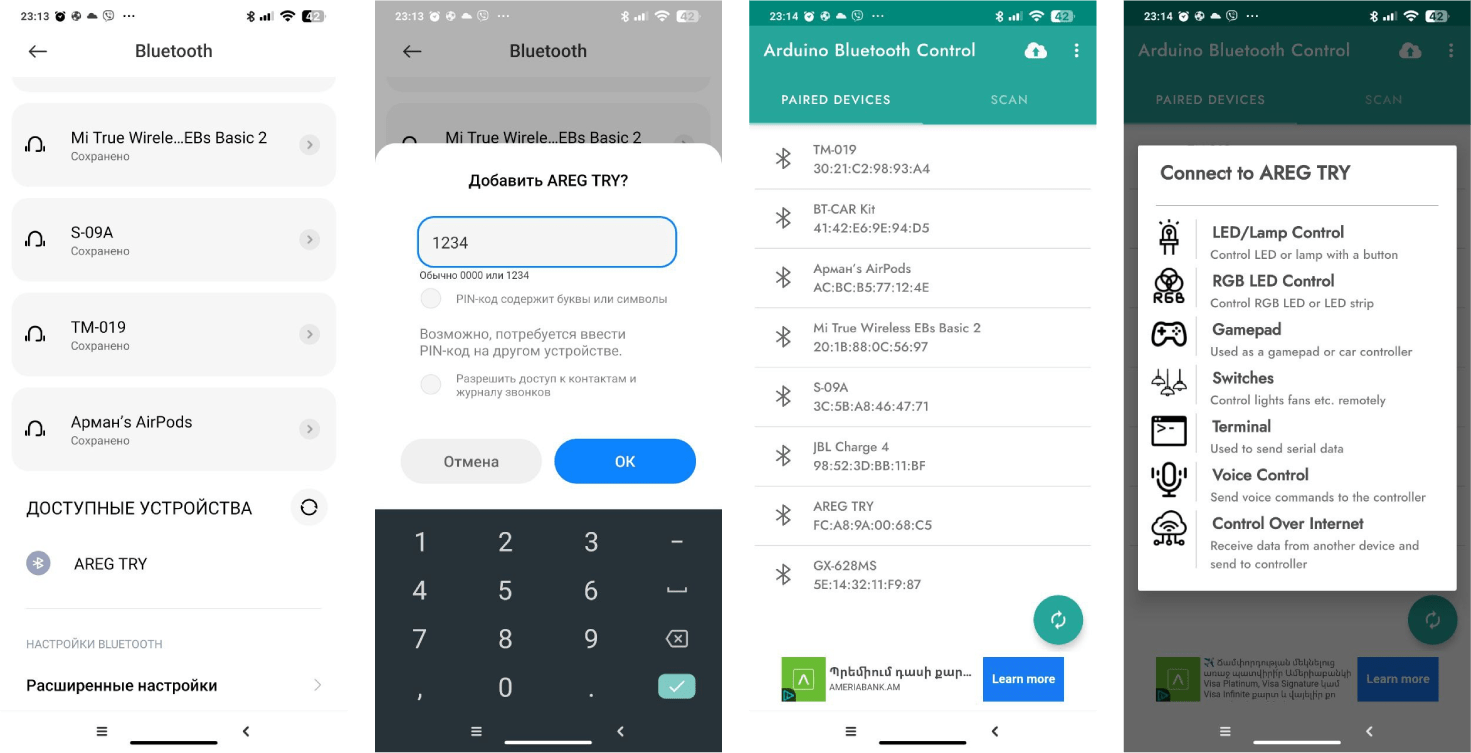
And so After downloading the program, we connect to the bluetooth whose name was set on the Arduino and also enter the password.
And as you can see when I send a message 1 my slender LED flashes 1 time when 3 - 3 times when 6 - 6 times and so on from 1 to 9.
Message on LCD display
So based on Adrian’s code I modified the code for the LCD screen.
The most important difference in this code is that Adrian used a Char intended for a single character; whole words were not needed and therefore I rewrote the code a lot, but subsequently I wrote an array, with which I first created a buffer for characters and, using the command of the resulting line, read the line
Code for sending messages from phone to LCD via Bluetooth.
#include <Wire.h>
#include <LiquidCrystal_I2C.h>
LiquidCrystal_I2C lcd( 0x27, 16 , 2 );
void setup(){
Serial.begin(9600);  //speed of the communications
pinMode(led, OUTPUT);
  lcd.init();
lcd.setBacklight(255); // turn on backlight
}

void loop() {
  // Checking the presence of data on the Bluetooth serial port
  if (Serial.available()) {
       // Create a buffer to store the string
    char receivedString[32];

    int i = 0;
    while (Serial.available() ) {
      receivedString[i] = Serial.read(); // Reading the character
      i++;
    }
    receivedString[i] = '\0'; // Add a terminating null character


    lcd.clear();
    lcd.setCursor(0, 0);
    lcd.print(receivedString);

  }
}
Conclusion
And this time I didn’t document my failures, there were some, but I forgot to take a photo. At first I wanted to use my ATtiny board to set up Bluetooth, but it didn’t work. I also had difficulties sending messages from my mobile phone to the LCD screen.I tried many different codes to read words since this is the first time. But in general, everything worked out