2. Computer Aided design
-
Planning
So in this week i’m going to design my final project first ideas.
-
In Adobe illustrator- vector 2D program.
Create drawings and schemes. -
In Solidworks - Design 3d models.
I’m only going to design the external views based on supposed overall dimensions and visual appearance. -
In Keyshot(visualisation program)- will do some renders.
-
In Adobe Photoshop (raster progam) - slide creation.
I finaly will edit all of my colected materials and have nice slides in outcom. -
Adobe illustrator
-
Creating New Document
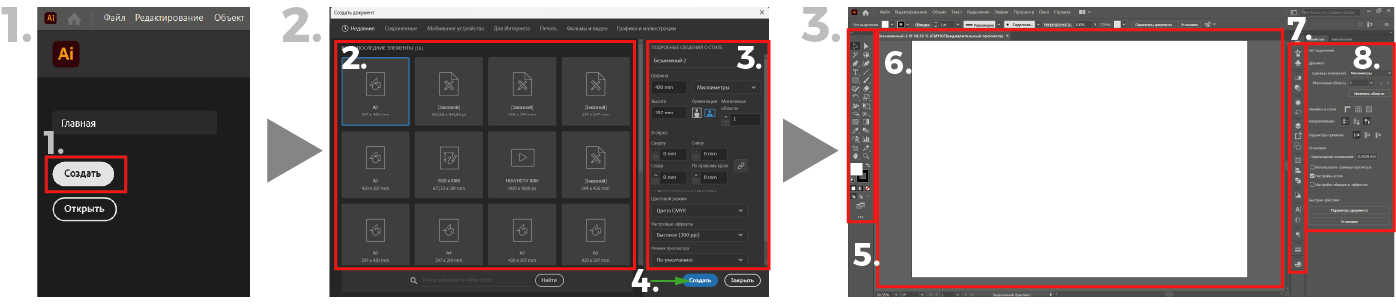
Instruction
Step 1.
When we have already opened the application, the 1. “Create” button appears in the upper left corner. Click on it
Step 2.
After opening the window we will be able to select the preferred format 2.here.
In Window 3. edit some parameters .Then click the button 4.”Create”
Step 3. Congratulations, your document has been created.
Navigation
5.Tools
6.Workspace
7.Control panels
8.Properties and options
-
The working process

Instruction
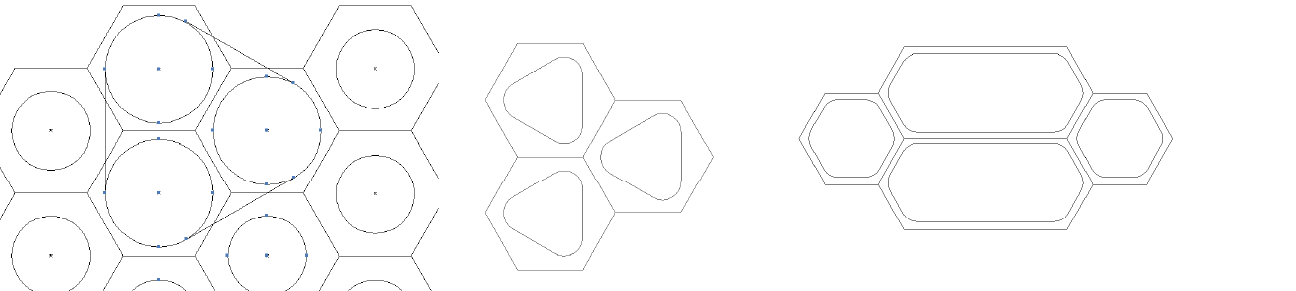
Step 1. First I draw a hexagonal polygon by selecting the polygon and editing the number of angles using the up and down buttons
Step 2. Then I clone the hexagon by moving it with the Control button pressed and this way I clone it to where I need
Step 3. Then I group the two objects for convenience so as not to get confused
Step 4. And repeat the cloning until I have the required number.
Step 5. Using the Control D command I repeat the last action, this way I clone all the hexagons more conveniently
Step 6. Then using Control Shift G I ungrouped the objects
Step 7. Then I delete the objects, leaving only the necessary ones
-
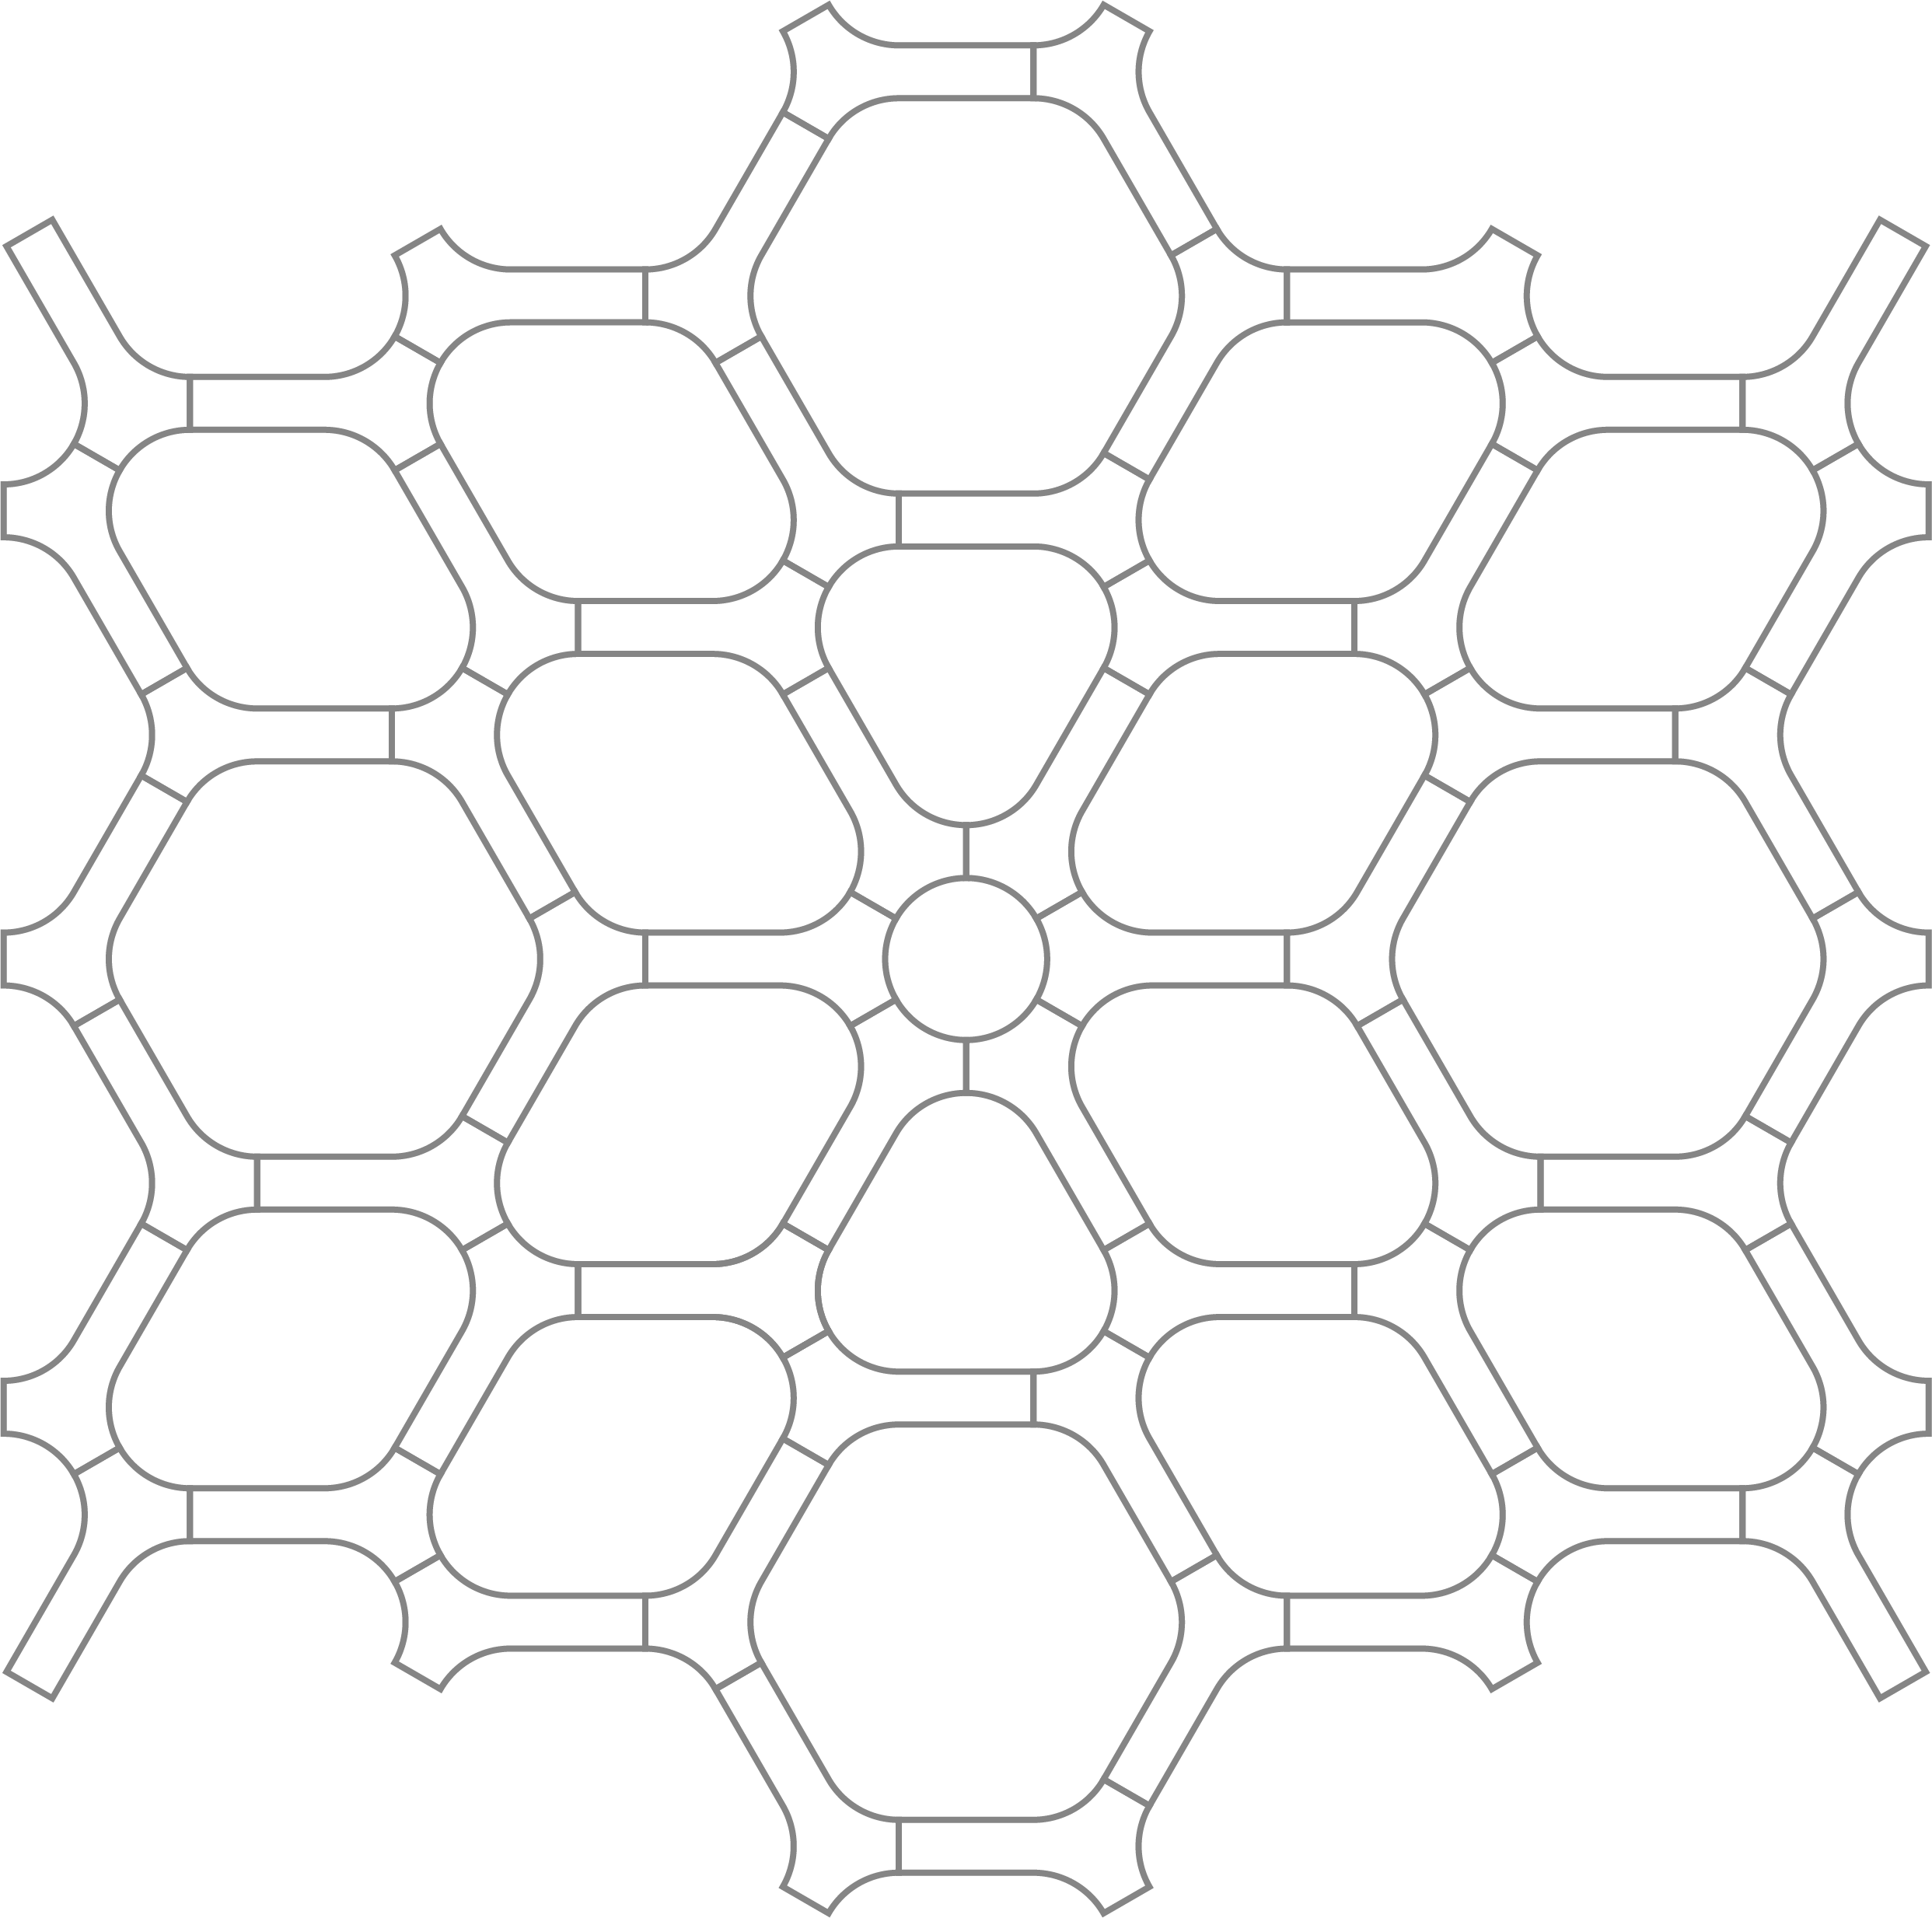
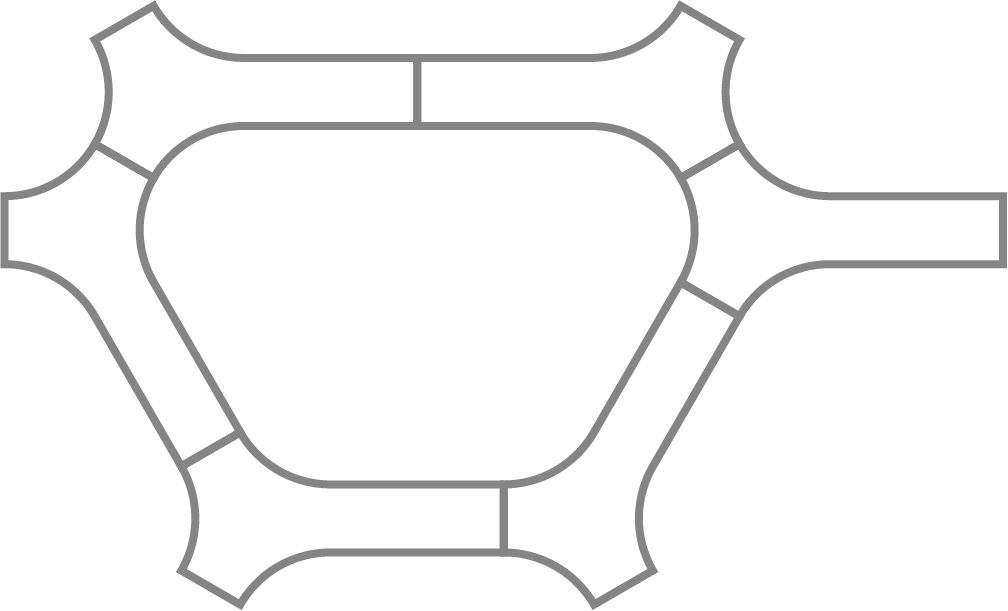
Some experiments
-
1 part creating

Instruction
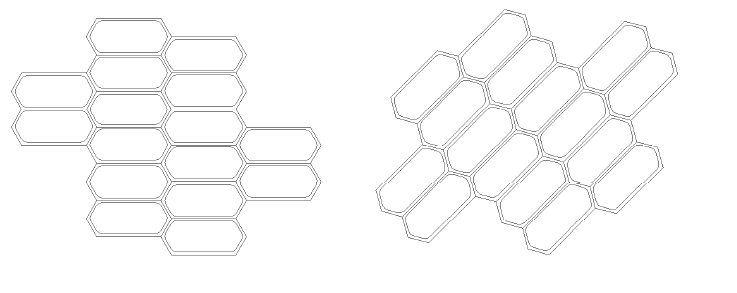
Step 1. First I draw the grids I need.
Step 2. Then I merge and remove the desired objects using this tool
Step 3. Then i select the rotate tool and select the center of rotation using the Alt+click command.An options window opens in which I select the angle of rotation and click clone.
Step 4. And repeat the cloning with command ctrl + D until I have the required number.
-
Final resuts
Finally I managed to create the pattern I needed


-
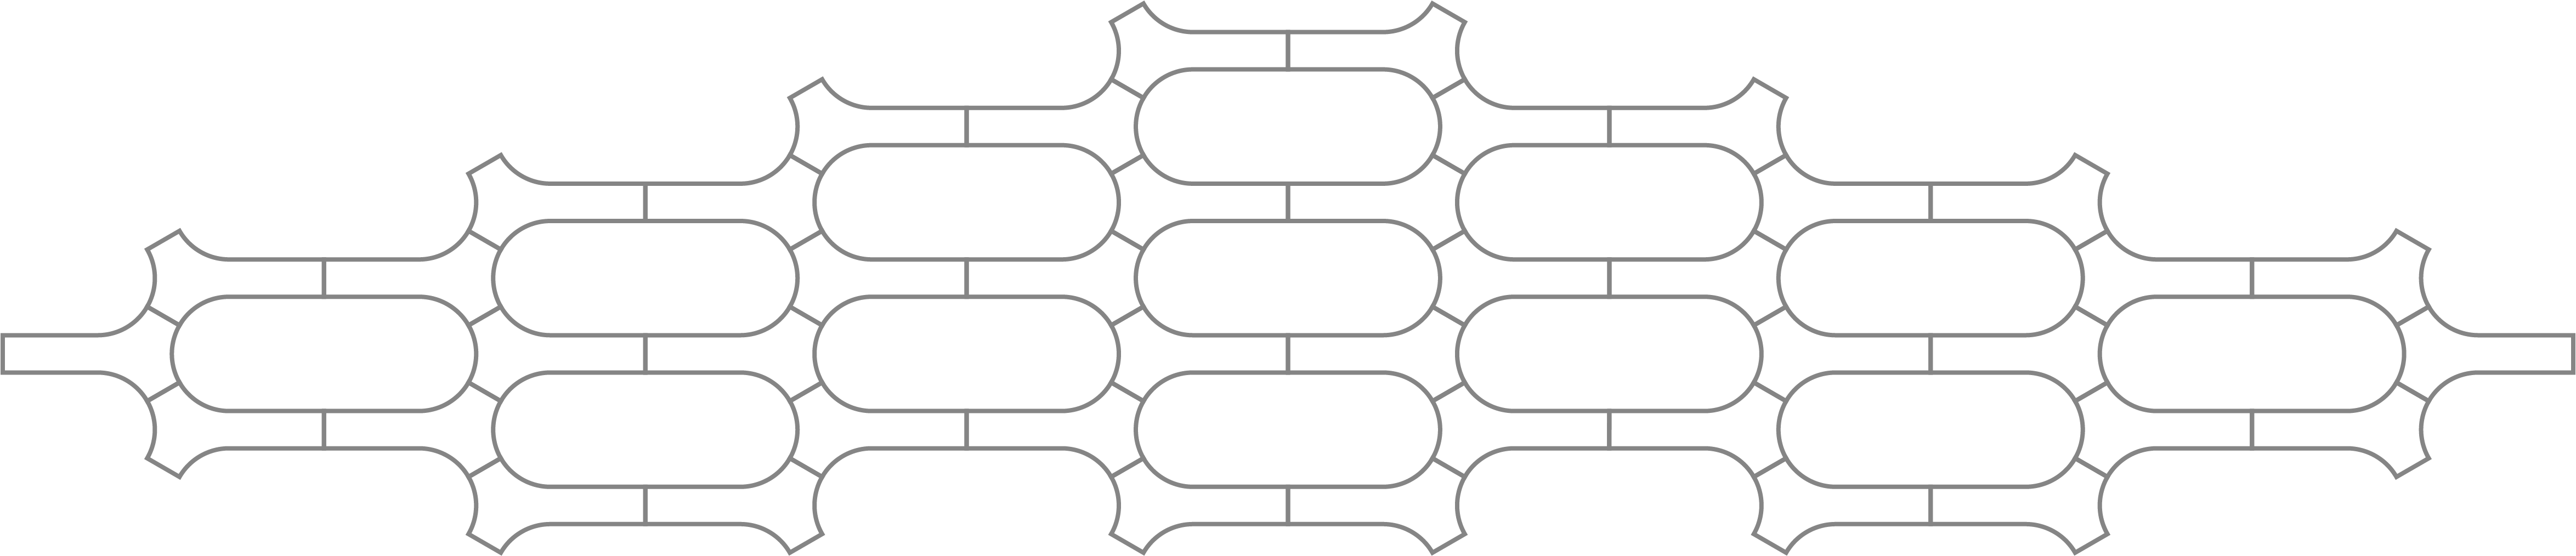
Some other paterns


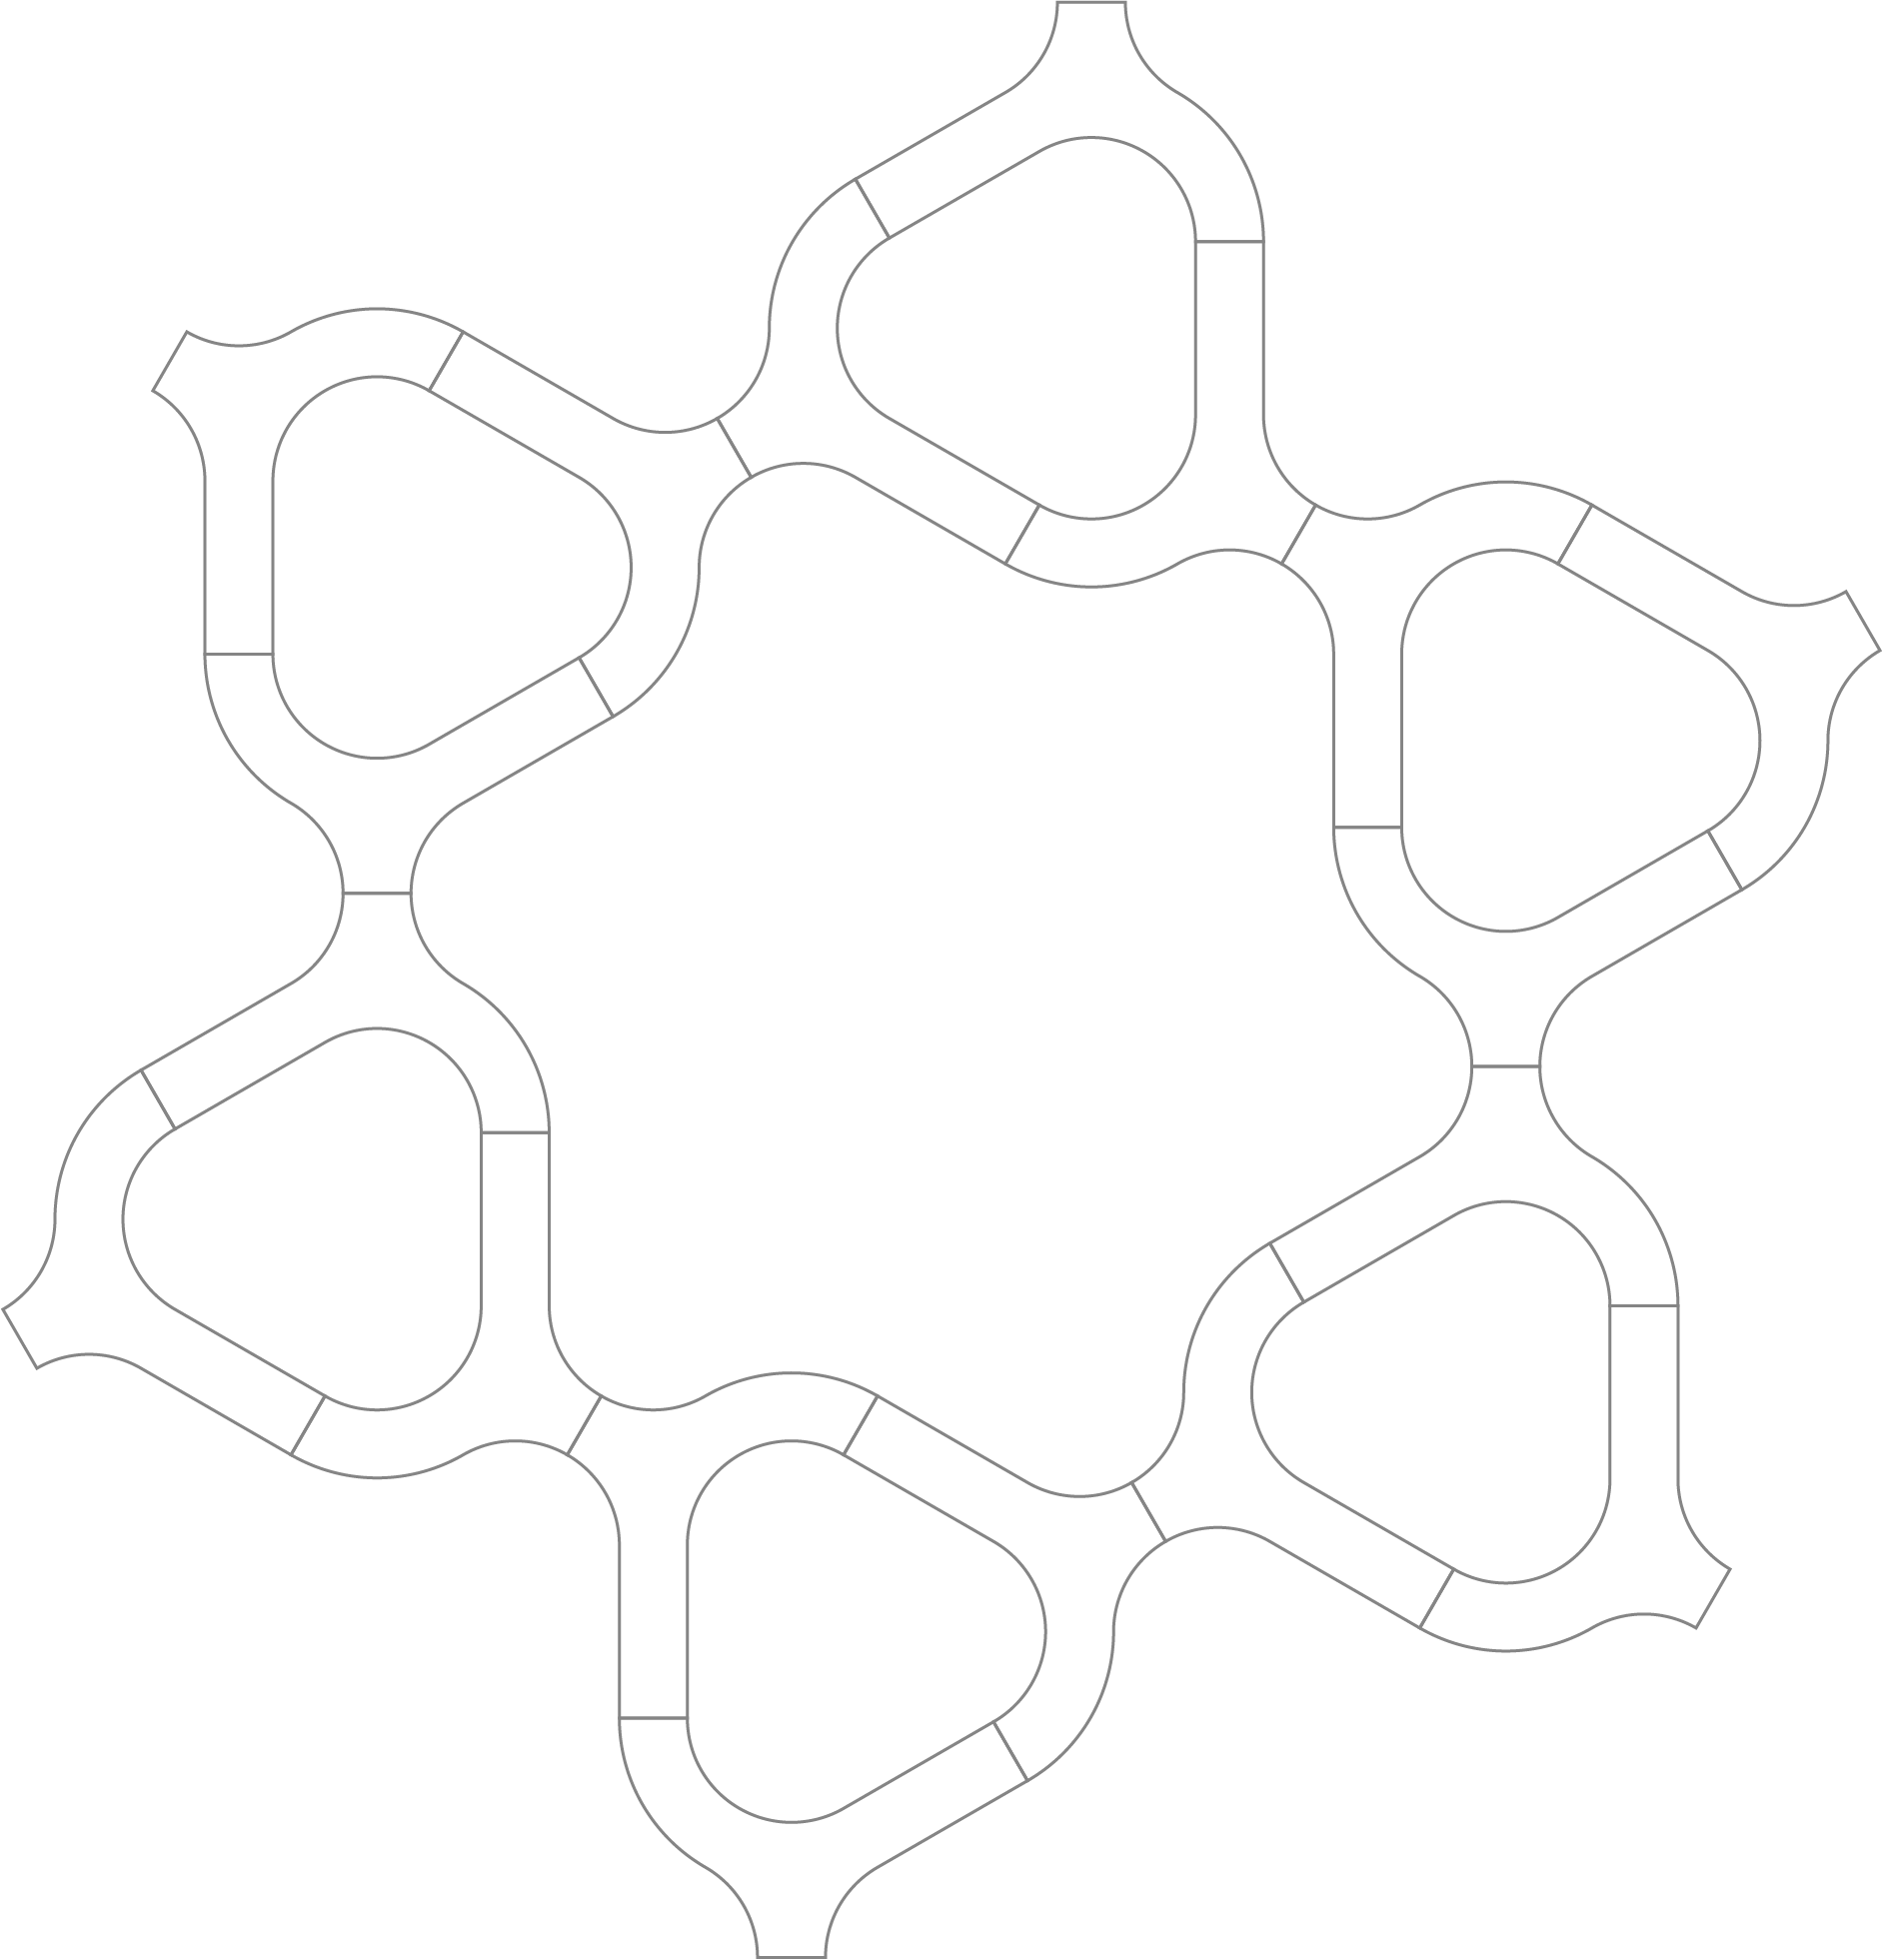
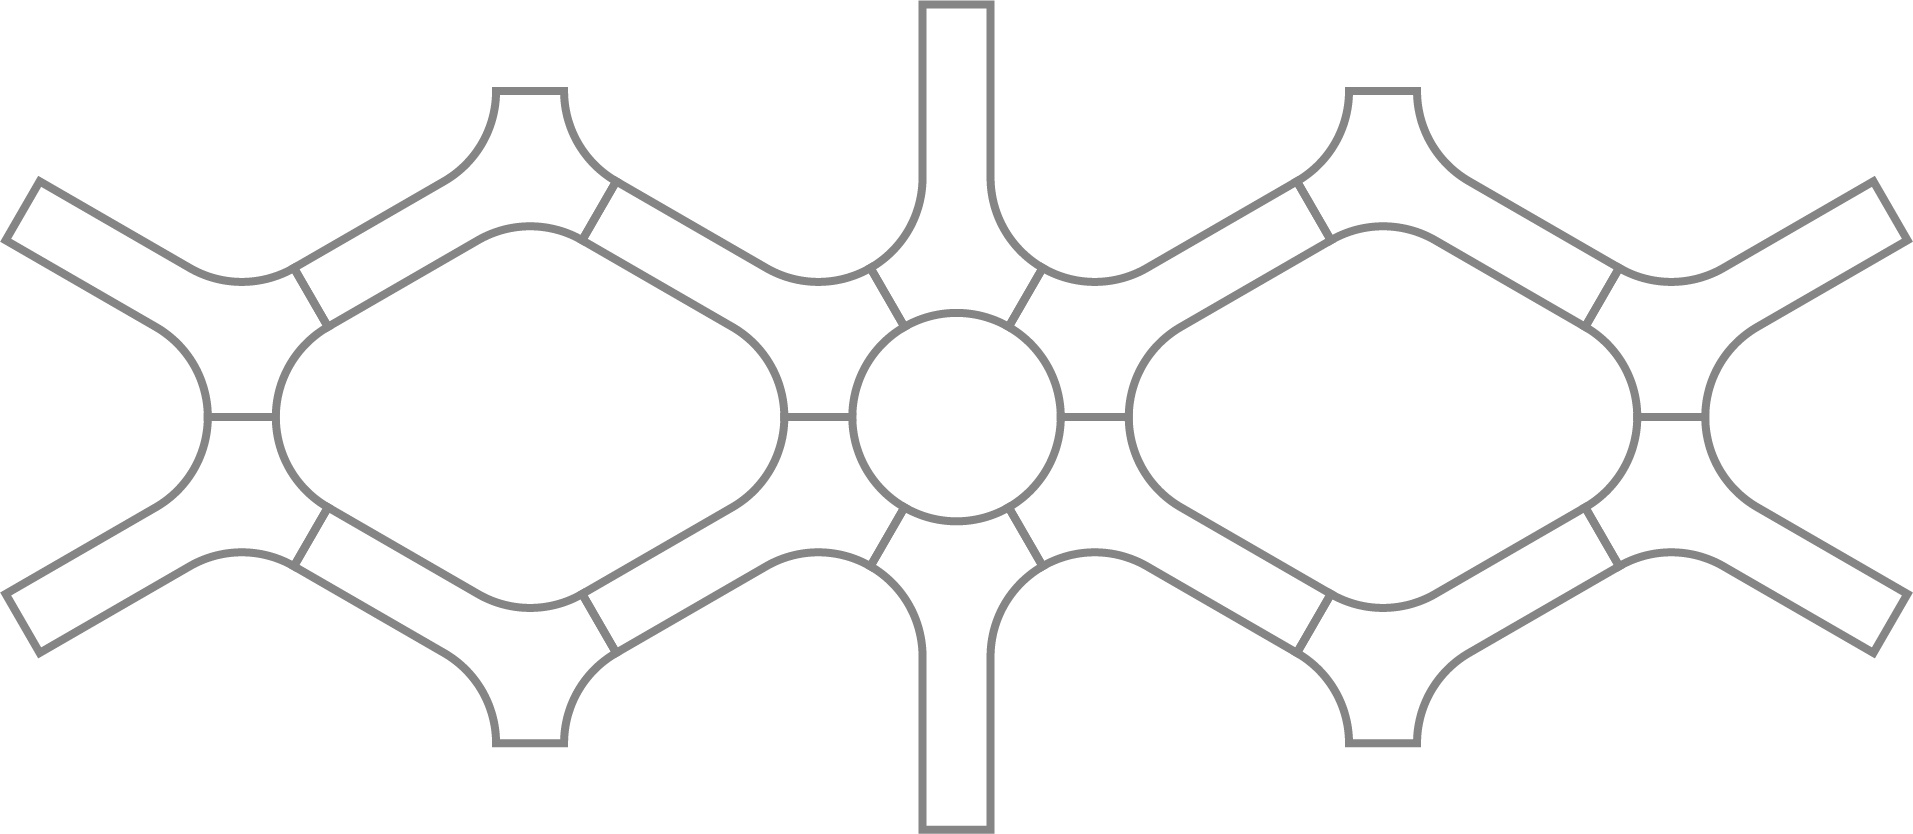
So how I showed in previous assignment I create my own logotype.
I created this logo using Adobe Illustrator.
-
My final project preliminary design
 So I already have the first concept. And it becomes clear that the only parametric element of my design is the base - it will depend on the size of the wall. That’s why I decided to make this part parametric.
-
Solidworks
Since I already had experience with SolidWorks modeling I decided to use parametric design which I had never tried. It was very difficult because SolidWorks was throwing a lot of warnings.
-
How I started modeling
First I created a sketch on the front plane
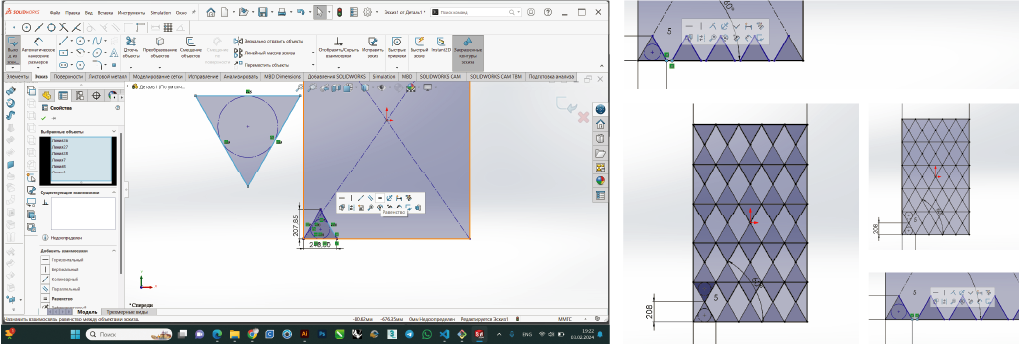 And started drawing with simple primitives like a square and triangle. I also gave them some measurements and bindings
 -
First Equations
 1.Then I created some kind of extruded boss
2.And started to wrote the first equations
3.In the first case, I set the number of triangles to two and tied the width of the plywood to them.
4.Then I changed the number of triangles to five and thus changed the sheet of plywood
-
Offset, Fillet, Cut-extrude
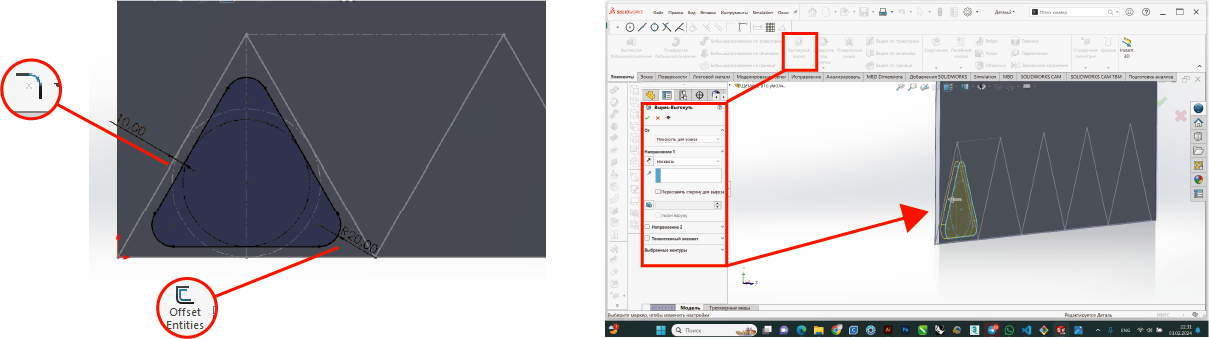 1.Then I created a new sketch using offset entites, snapping to the previous triangle.
2.And made filleted corners.
3.then using a cut-extrude made a hole.
-
Linear pattern
 1.So using a linear pattern I multiplied the holes..
2.And tied the distance between instances to the width of the triangle.
This way, when I change the size of my product in the future, it’s frame will also change to fit it. -
Second row
 1.I repeated the steps and created a second row using a linear pattern.
2.And the quantity was set to n -1 since we have one less.
3.Next step I check How the equation works. -
Reference Plane
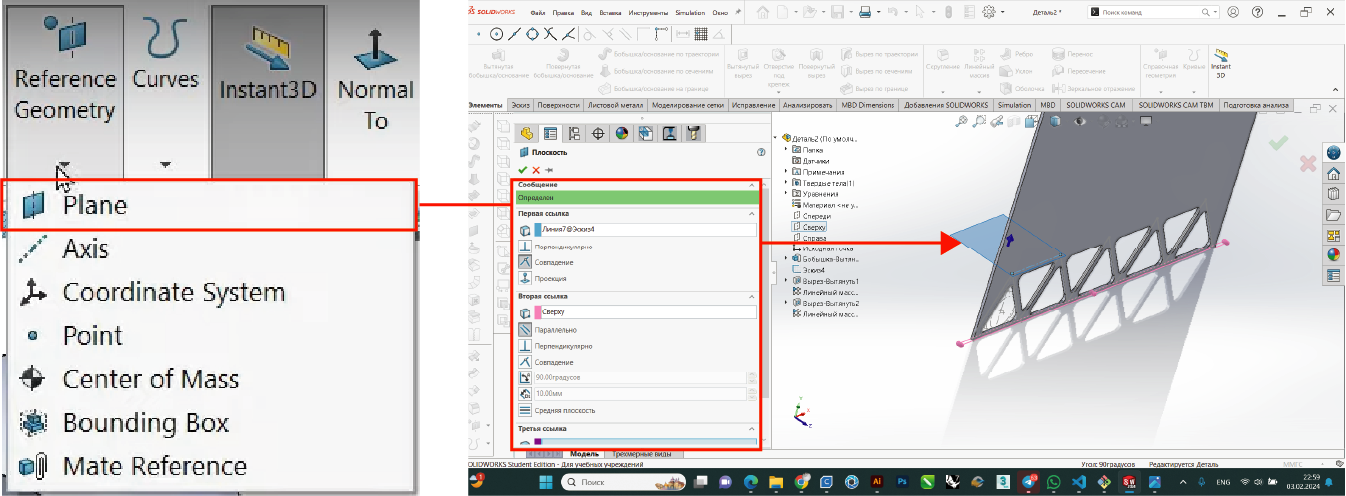 1.I create a plane using the reference geometry, plane commands.
2.Then I define the plane by snapping to the previous sketch. -
Mirror
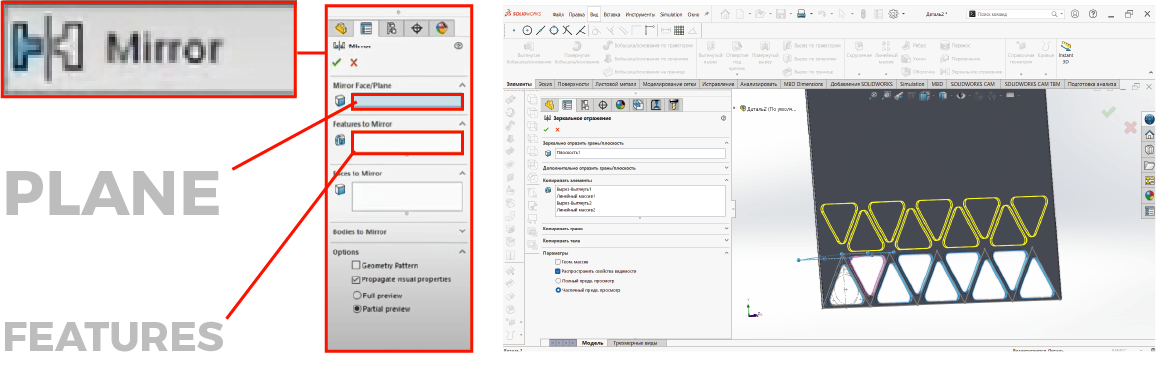 Then I mirror all the existing cutouts.
 -
2 Linear pattern
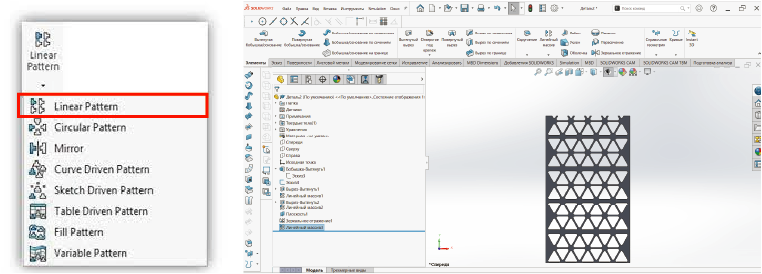 Creating a random linear pattern.
-
Final Equations
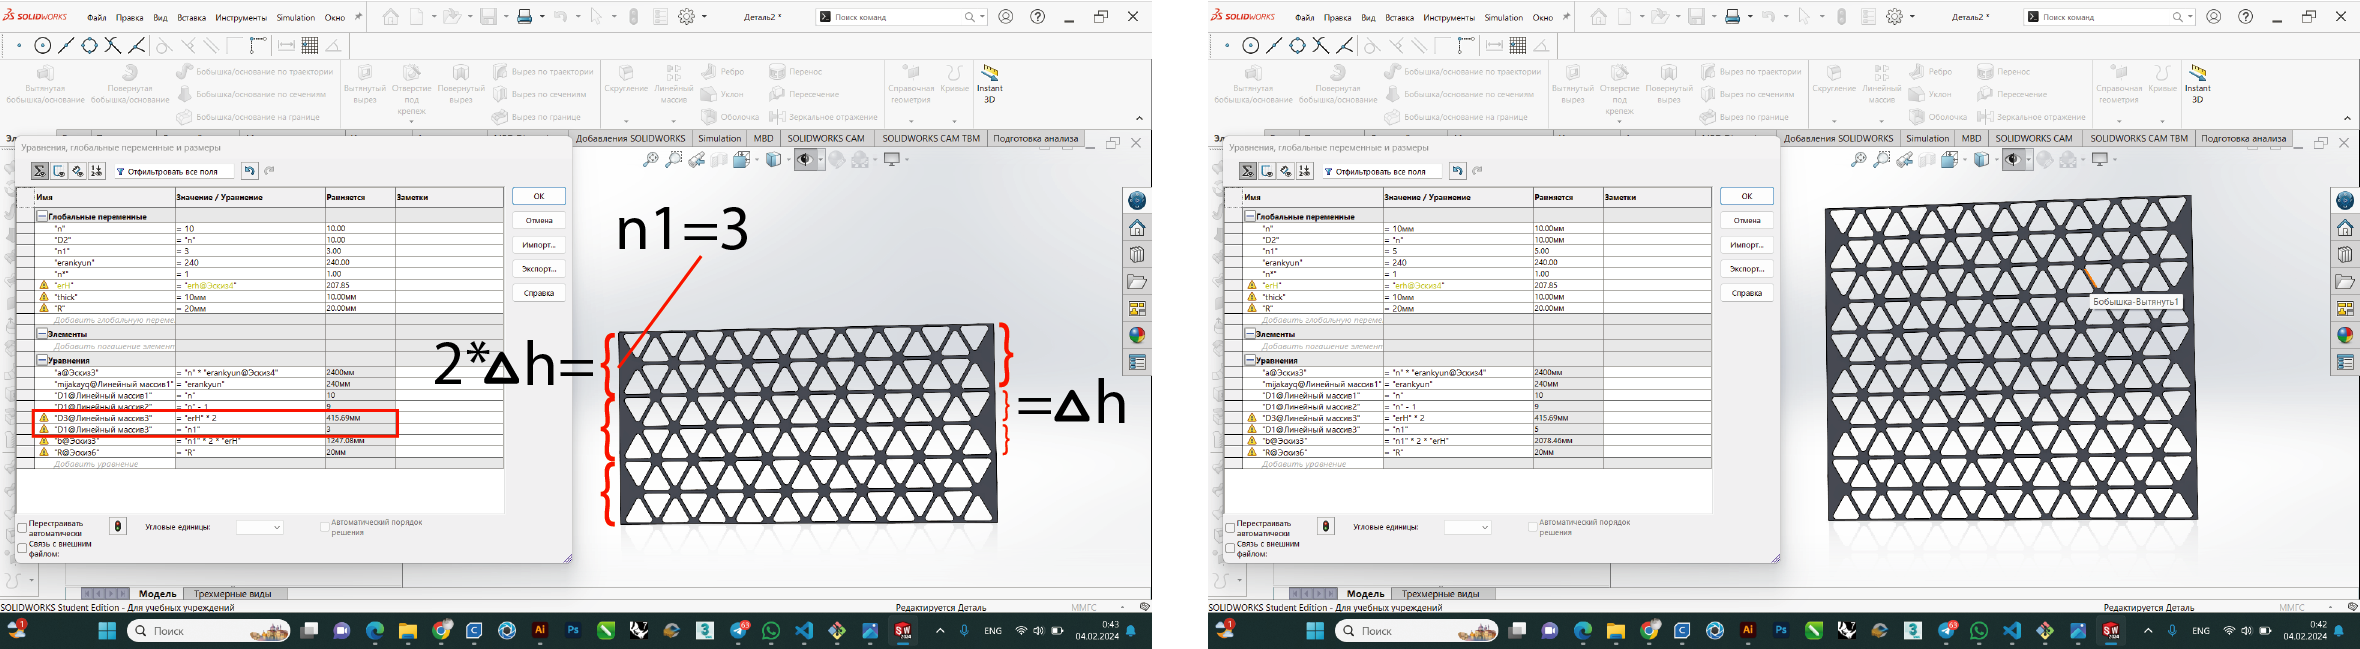 Here I set all the necessary equations and tried to change their value.
Everything worked great.
Here I set all the necessary equations and tried to change their value.
Everything worked great. -
Rendering/KeyShot
So, I have already designed my parametric base patern. And now I need to do some rough renderings .And for this I chose one of the simple and better visualization programs- Keyshot.
-
Import
 First I imported the 3D model into Keyshot -I export the SolidWorks file as a STEP . Then simply by dragging the file onto the workspace.
 -
Material
 Then I select the desired material from library and by dragging onto the model.
-
Additional geometry
 Then i opened cube 3d model from library and made some wall using scale tool and set wall material.
-
Environments and backplates
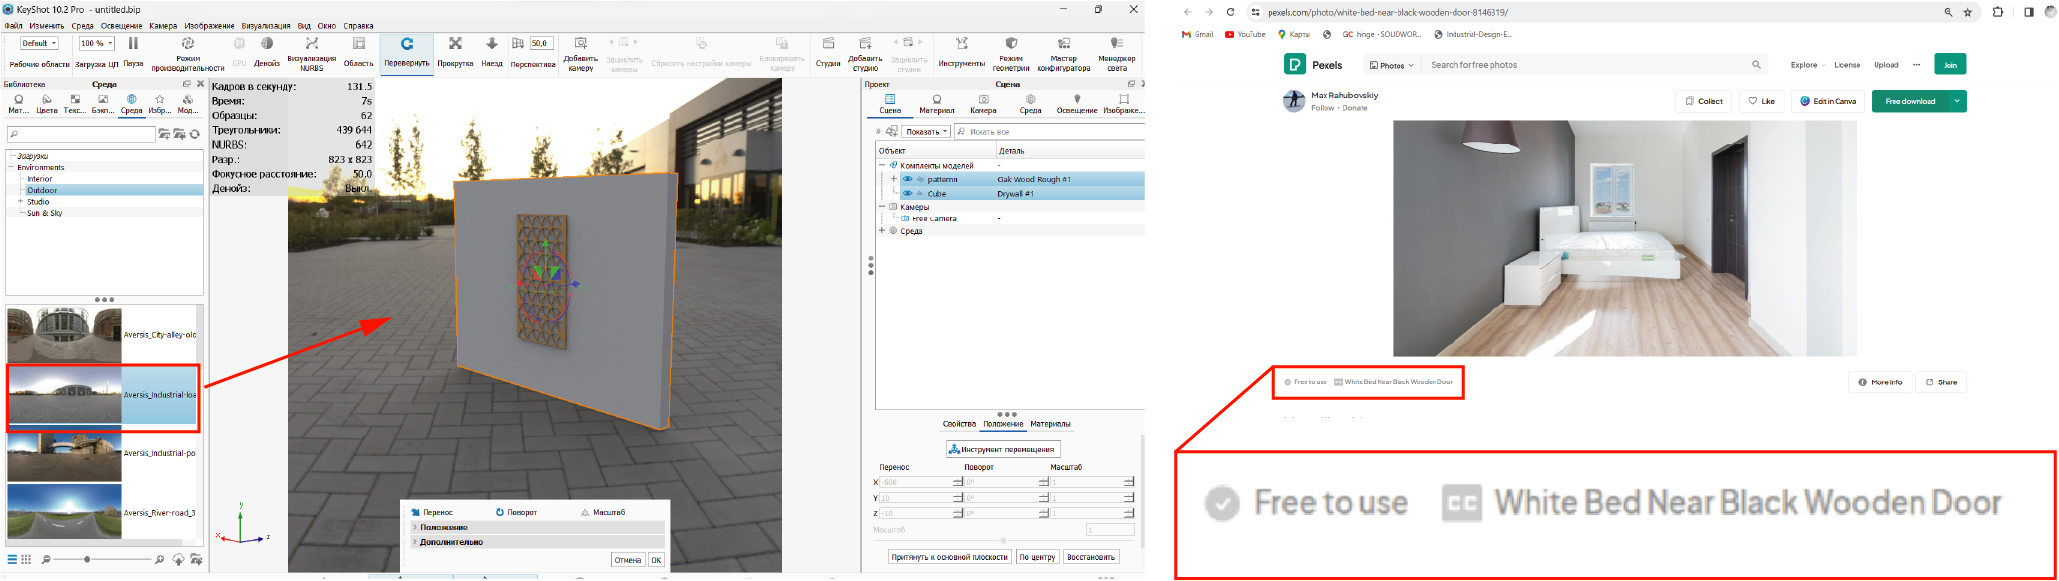 Then I set up an environment - just for natural light. The result is that I end up with a transparent PNG and the background won’t show up.I also added some backplate.
-
Perspective correction
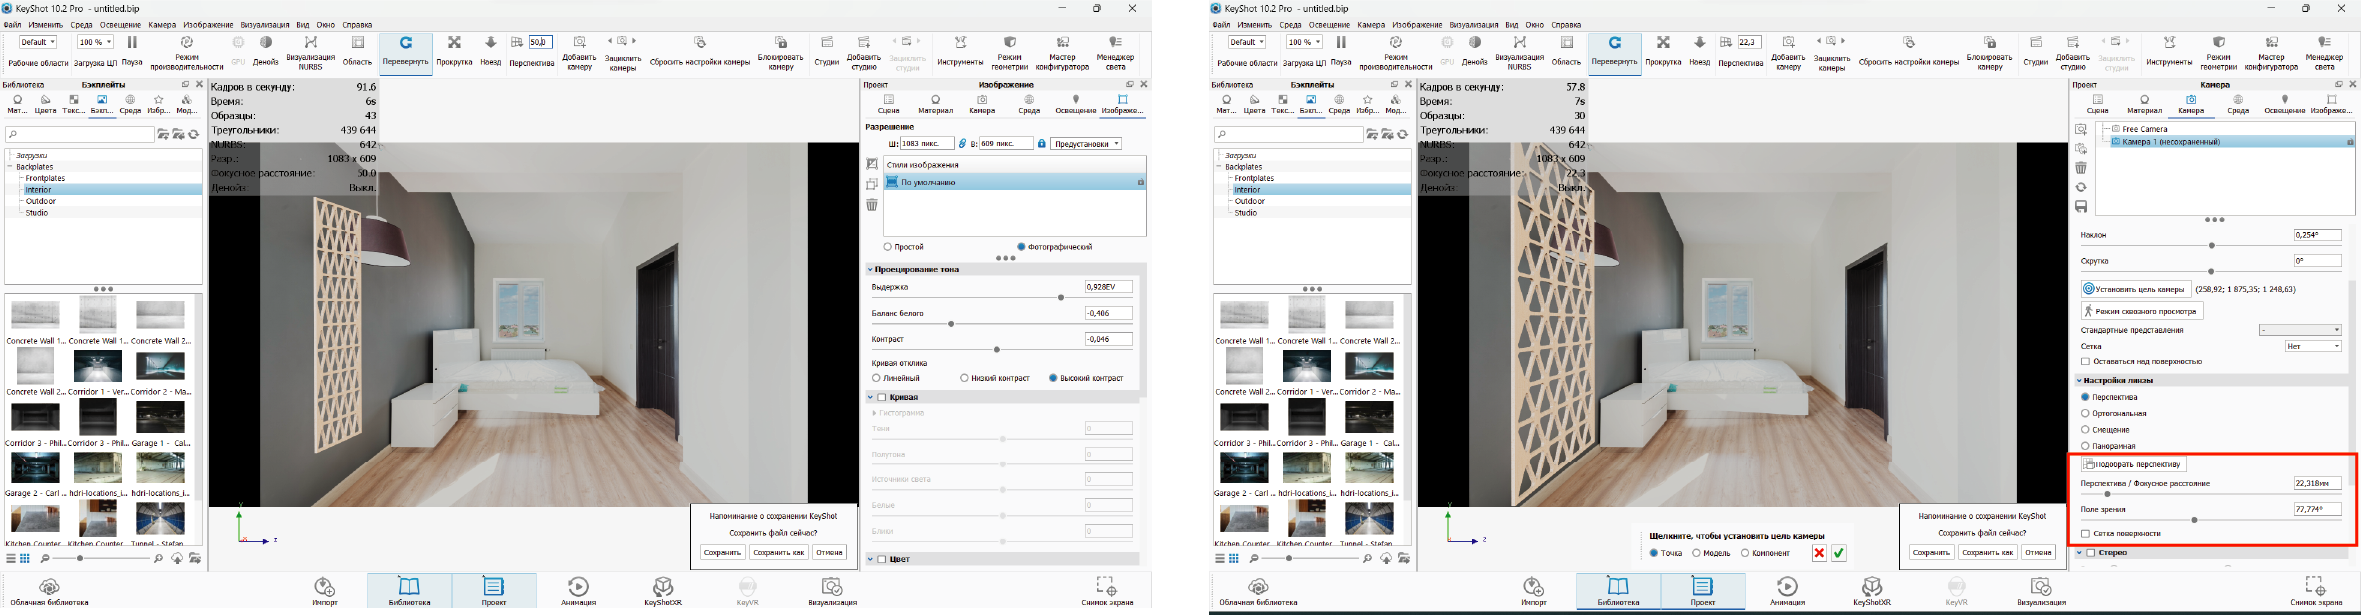 I corrected perspective using camera tools.
-
Color correction
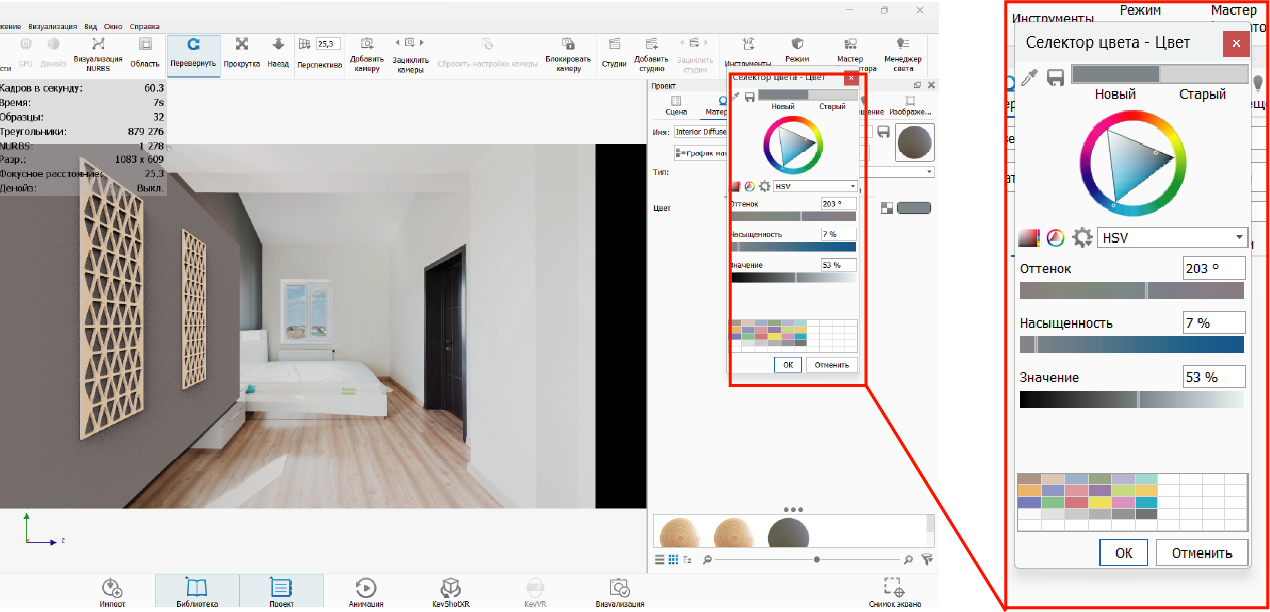 Then changed the wall color.
 -
Rendering
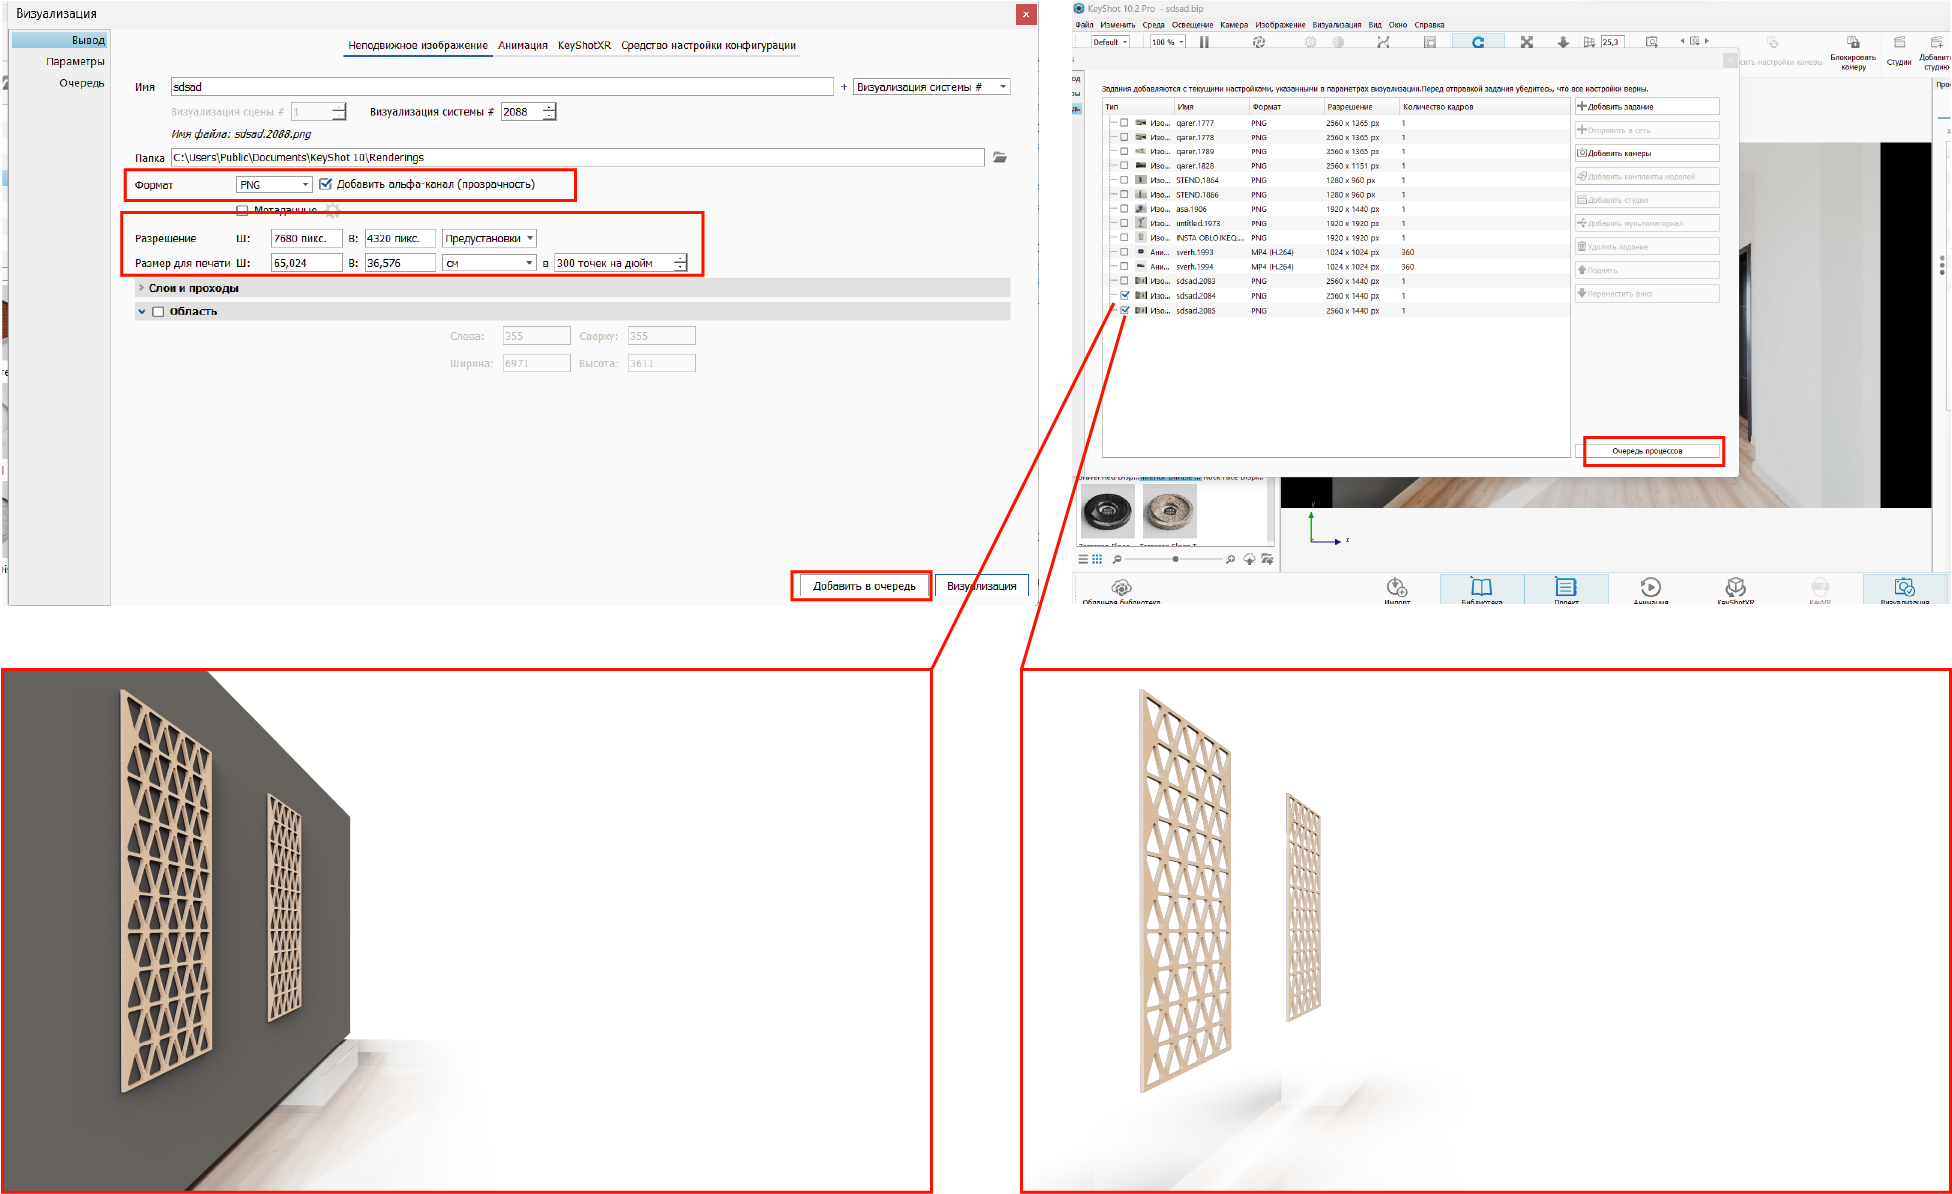 So in the final render I set the png format with an alpha channel and set the parameters to 7680 px x 4320 px.
And as a result I got two renders - 1.with the wall and 2.the other without. -
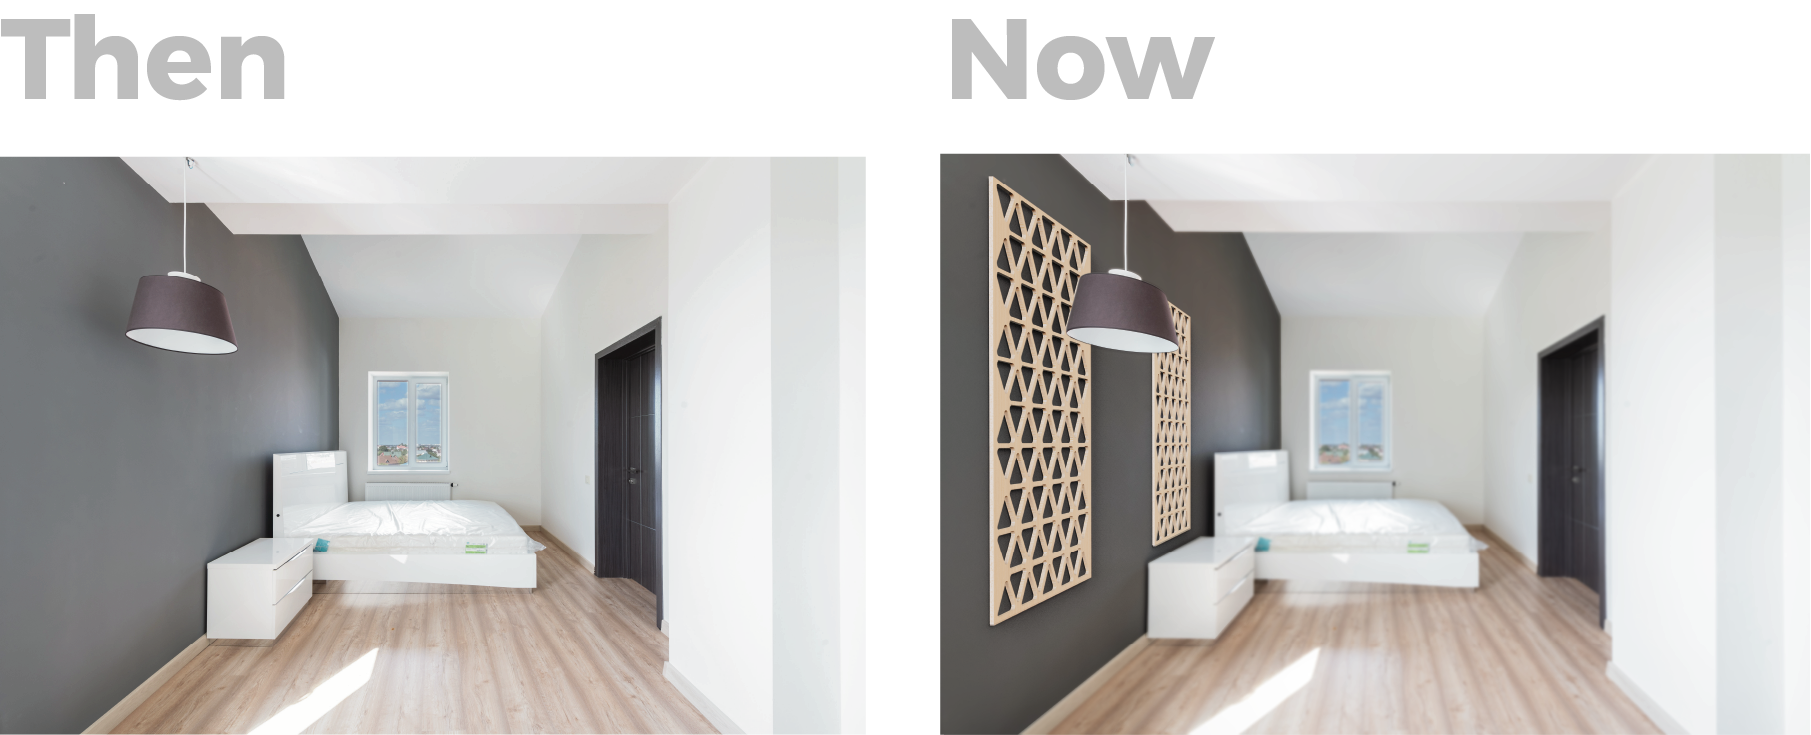
Adobe Photoshop
So I already have some rough images that I need to finalize and combine with the original image.
 With polygonal lasso tool i chose pixels that i need and created layer mask.
Then I changed the overlay .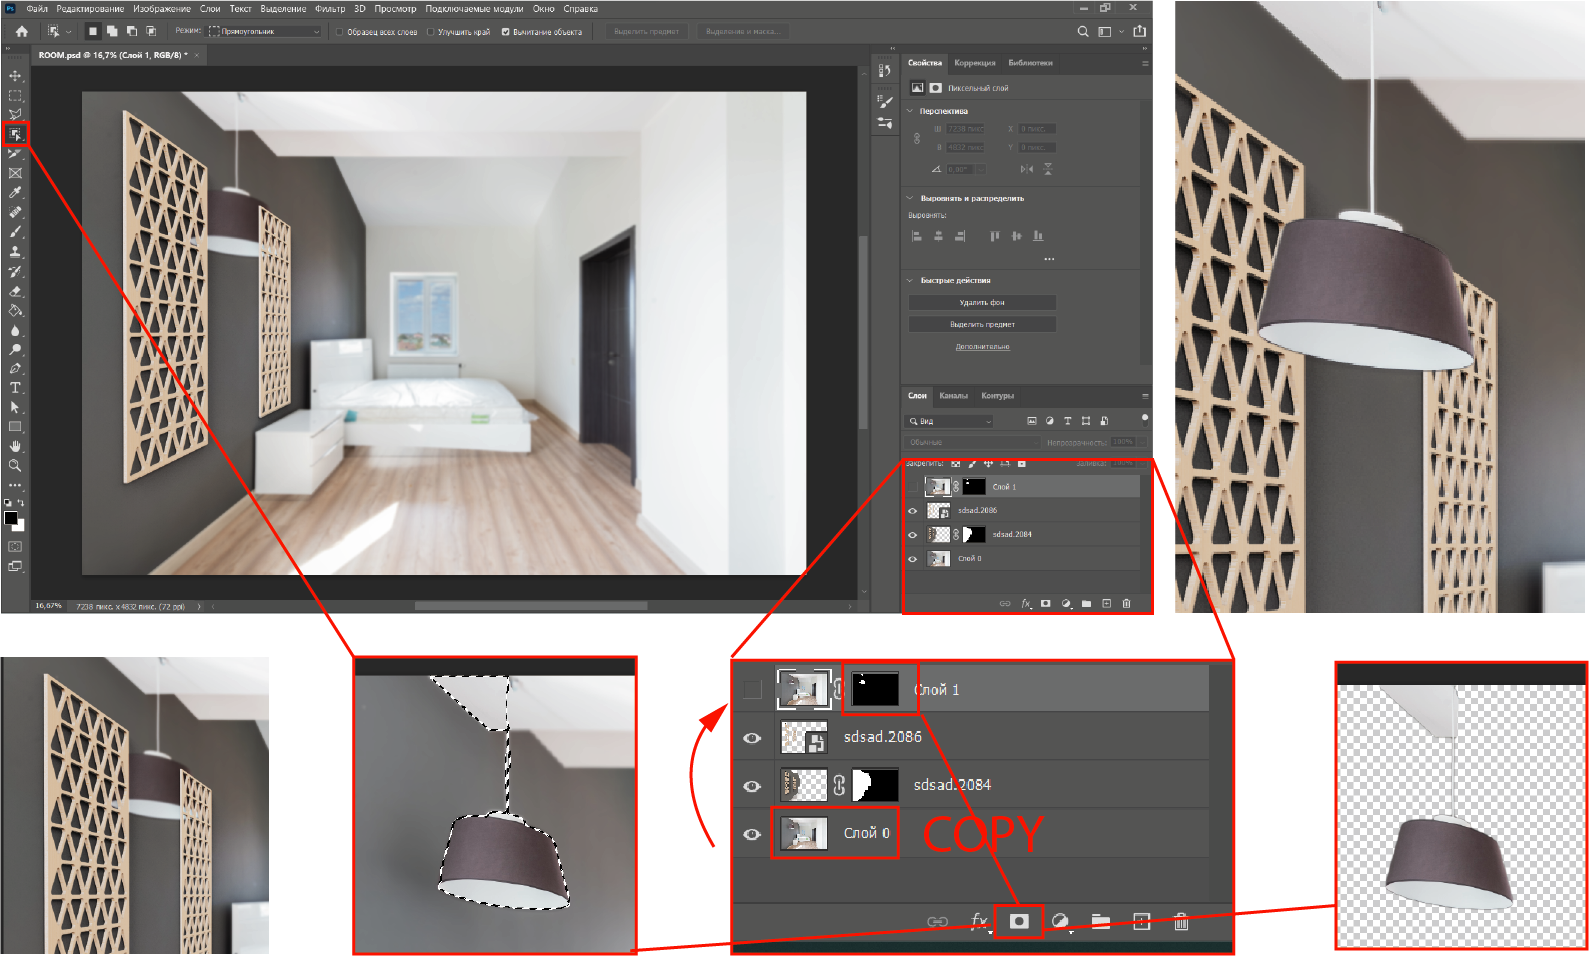 First I copy the background layer
With object selection tool i selected the lamp and created layer mask.
First I copy the background layer
With object selection tool i selected the lamp and created layer mask.
Then I raise this layer to the top.
-
Conclusion
So I have been using SolidWorks for a long time, but I have never used it in parametric modeling and I can say that it is a very good tool. Because you can create one instance of a product and then use parameters to create multiple configurations, making future design much easier.
-
Source files
Click for downloading
2D- Adobe Ilustrator,Photoshop
3D- Solidworks,KeyShot