Week 14: Interface and Application programming
This week the task was to create an application that would interact with the board through Wi-Fi. I used the REST API.
Group assignment
The page describing the group assignment for this week (compare as many tool options as possible) can be found here.
The idea
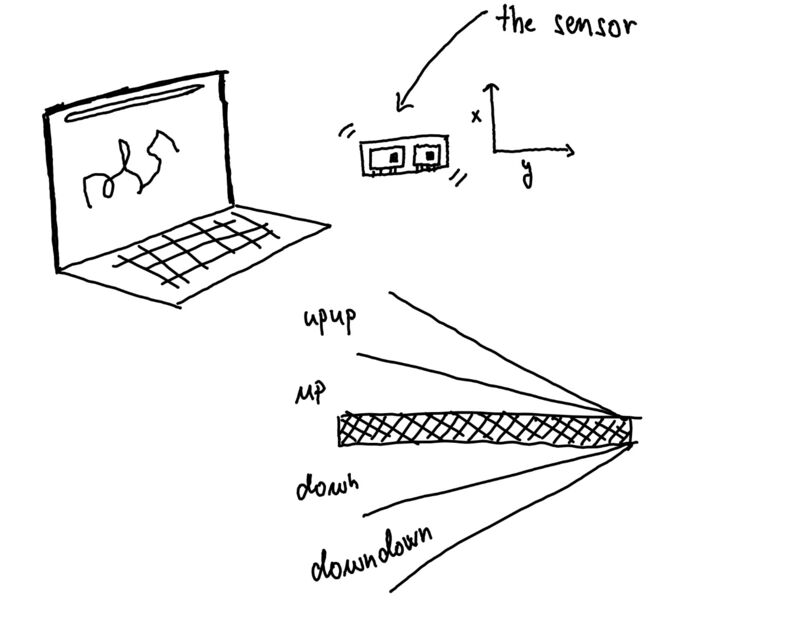
I would like to draw on a PC screen using the accelerometer. So the web interface would be sending request to the XIAO every 200ms, and the response would be JSON style dictionary saying if the sensor is titled (and how much) in an x & y direction.
The execution
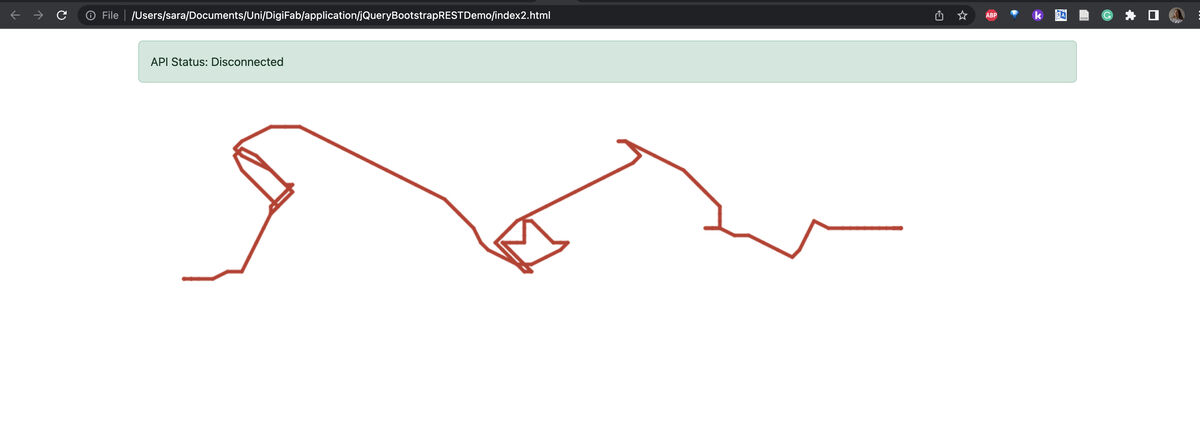
I fist took some code where you were drawing in the screen using mouse, and changed it that it is responding to the params it gets.
index.html code
<!DOCTYPE html>
<html lang="en">
<head>
    <meta charset="UTF-8">
    <meta http-equiv="X-UA-Compatible" content="IE=edge">
    <meta name="viewport" content="width=device-width, initial-scale=1.0">
    <title>Bootstrap REST Demo</title>
    <link rel="stylesheet" href="lib/bootstrap/css/bootstrap.min.css">
</head>
<body>

  <header class="container mt-3">
    <div id="status-alert" class="alert alert-light" role="alert">
        API Status: <span id="status-api">Undefined</span>
    </div>
</header>

    <script src="lib/bootstrap/js/bootstrap.bundle.min.js"></script>
    <script src="lib/jquery/jquery-3.6.4.min.js"></script>
    <script>

var y_axis = "still";
var x_axis = "still";

function checkAPIStatus(){
            $.ajax({
                // change the IP address in the following url to the one you get from Arduino code
                url: "http://192.168.50.82/",
                timeout: 5000
            })
            .done(function(){
                $("#status-api").text("Connected");

                if ( $("#status-alert").hasClass("alert-light") ) {
                    $("#status-alert").removeClass("alert-light");
                }

                $("#status-alert").addClass("alert-success");
            })
            .fail(function(){
                $("#status-api").text("Disconnected");
            });
        }
        function getParams(){
            $.ajax({
                // change the IP address in the following url to the one you get from Arduino code
                url: "http://192.168.50.82/params",
                timeout: 5000
            })
            .done(function(response){
                const responseJSON = JSON.parse(response);
                console.log(responseJSON);
                y_axis = responseJSON["y_axis"];
                x_axis = responseJSON["x_axis"];
                color = responseJSON["color"];
                reset = responseJSON["reset"];
                thickness = responseJSON["thickness"];
                if (reset == "1"){
                    ctx.clearRect(0, 0, canvas.width, canvas.height);
                }
                draw(y_axis, x_axis, color, thickness);
            })
            .fail(function(){
                console.log("Sorry, params call failed");
            });
        }

        $(document).ready(function(){
            console.log("Document has loaded!");

            setInterval(checkAPIStatus, 2000);
            setInterval(getParams, 200);
        });

// create canvas element and append it to document body
var canvas = document.createElement('canvas');
document.body.appendChild(canvas);

// some hotfixes... ( ≖_≖)
document.body.style.margin = 0;
canvas.style.position = 'fixed';

// get canvas 2D context and set him correct size
var ctx = canvas.getContext('2d');
resize();

// last known position
var pos = { x: 255, y: 255 };
var what = {"up": 10, "upup":20, "down":-10, "downdown":-20, "still":0}


window.addEventListener('resize', resize);
// document.addEventListener('mousemove', draw);
// document.addEventListener('mousedown', setPosition);
// document.addEventListener('mouseenter', setPosition);

// new position from mouse event
function setPosition(y_axis, x_axis) {
  pos.x += what[x_axis];
  pos.y += what[y_axis];
}

// resize canvas
function resize() {
  ctx.canvas.width = window.innerWidth;
  ctx.canvas.height = window.innerHeight;
}

function draw(y_axis, x_axis, color, thickness) {

  ctx.beginPath(); // begin

  ctx.lineWidth = parseInt(thickness)*2;
  ctx.lineCap = 'round';
  ctx.strokeStyle = color;

  ctx.moveTo(pos.x, pos.y); // from
  setPosition(y_axis, x_axis);
  ctx.lineTo(pos.x, pos.y); // to
  console.log("here");
  ctx.stroke(); // draw it!
}
    </script>
</body>
</html>
The interesting part is that in the code I am sending a request every 200ms to the XIAO asking for the updated parameters:
setInterval(getParams, 200);
getParams is a function. Here I parse the incoming JSON:
function getParams(){
            $.ajax({
                url: "http://192.168.50.82/params",
                timeout: 5000
            })
            .done(function(response){
                const responseJSON = JSON.parse(response);
                console.log(responseJSON);
                y_axis = responseJSON["y_axis"];
                x_axis = responseJSON["x_axis"];
                color = responseJSON["color"];
                reset = responseJSON["reset"];
                thickness = responseJSON["thickness"];
                if (reset == "1"){
                    ctx.clearRect(0, 0, canvas.width, canvas.height);
                }
                draw(y_axis, x_axis, color, thickness);
            })
            .fail(function(){
                console.log("Sorry, params call failed");
            });
}
The rest is very similar to drawing on canvas with mouse.
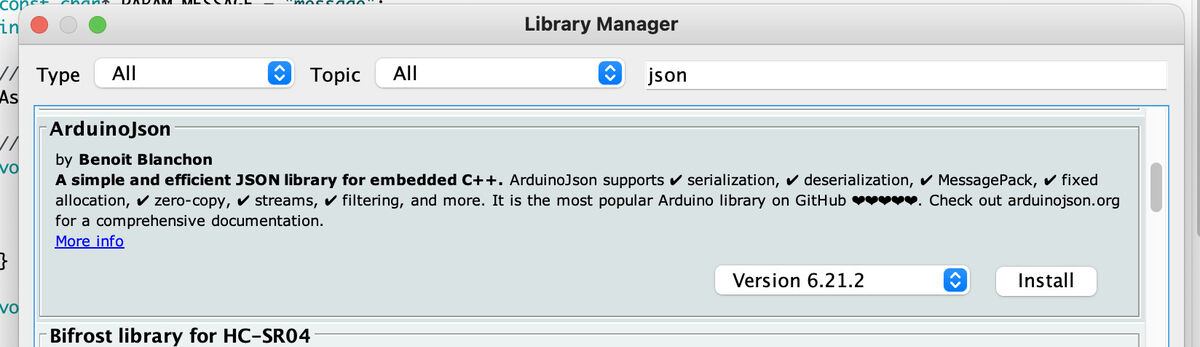
There was a problem with parsing the JSON from the Arduino Json library, so I’m just sending it as a plain text and then parsing in on the web (thanks Hiski).
Another common error was that sometimes I got disconnected from the Fab Wi-Fi, and then everything stopped working without the clear reason, and it always took me some time to figure out that this is the problem.
Arduino code
On the Arduino part, we are reading the data from the accelerometer sensor in a loop, and saving it in the global variable. So then when the request comes from the browser, we can immediately send back a response.
// Srduino code version 1, fina; code shared later in the documentations
#include <Arduino.h>
#include <WiFi.h>
#include <AsyncTCP.h>
#include <ESPAsyncWebSrv.h>
#include <ArduinoJson.h>

#include <Adafruit_LSM6DS3TRC.h>

// For SPI mode, we need a CS pin
#define LSM_CS 10
// For software-SPI mode we need SCK/MOSI/MISO pins
#define LSM_SCK 13
#define LSM_MISO 12
#define LSM_MOSI 11

Adafruit_LSM6DS3TRC lsm6ds3trc;

// Some variables we will need along the way
const char* ssid     = "Fablab";
const char* password = "Fabricationlab1";
const char* PARAM_MESSAGE = "message";
int webServerPort = 80;

String y_axis = "still";
String x_axis = "still";


// Setting up our webserver
AsyncWebServer server(webServerPort);

// This function will be called when human will try to access undefined endpoint
void notFound(AsyncWebServerRequest *request) {
  AsyncWebServerResponse *response = request->beginResponse(404, "text/plain", "Not found");
  response->addHeader("Access-Control-Allow-Origin", "*");
  request->send(response);
}

void setup() {

  Serial.begin(115200);
  delay(10);

  // We start by connecting to a WiFi network
  Serial.print("Connecting to ");
  Serial.println(ssid);
  WiFi.begin(ssid, password);

  if (!lsm6ds3trc.begin_I2C()) {
    // if (!lsm6ds3trc.begin_SPI(LSM_CS)) {
    // if (!lsm6ds3trc.begin_SPI(LSM_CS, LSM_SCK, LSM_MISO, LSM_MOSI)) {
    Serial.println("Failed to find LSM6DS3TR-C chip");
    while (1) {
      delay(10);
    }
  }

  Serial.println("LSM6DS3TR-C Found!");

  while (WiFi.status() != WL_CONNECTED) {
    delay(500);
    Serial.print(".");
  }

  Serial.println("");
  Serial.println("WiFi connected");

  // We want to know the IP address so we can send commands from our computer to the device
  Serial.println("IP address: ");
  Serial.println(WiFi.localIP());

  server.on("/", HTTP_GET, [](AsyncWebServerRequest *request){
    AsyncWebServerResponse *response = request->beginResponse(200, "text/plain", "Hello world!");
    response->addHeader("Access-Control-Allow-Origin", "*");
    request->send(response);
  });

  server.on("/params", HTTP_GET, [](AsyncWebServerRequest *request){
    String json = "{\"y_axis\":\"" + y_axis + "\", \"x_axis\":\"" + x_axis + "\"}";
    AsyncWebServerResponse *response = request->beginResponse(200, "text/plain", json.c_str());
    response->addHeader("Access-Control-Allow-Origin", "*");
    request->send(response);
  });

    // If human tries endpoint no exist, exec this function
  server.onNotFound(notFound);

  lsm6ds3trc.configInt1(false, false, true); // accelerometer DRDY on INT1
  lsm6ds3trc.configInt2(false, true, false); // gyro DRDY on INT2

  Serial.print("Starting web server on port ");
  Serial.println(webServerPort);
  server.begin();

}

void loop() {
  sensors_event_t accel;
  sensors_event_t gyro;
  sensors_event_t temp;
  lsm6ds3trc.getEvent(&accel, &gyro, &temp);

  y_axis = "still";
  x_axis = "still";

  if (accel.acceleration.x > 0.5) {
    y_axis = "up";
  }
  if (accel.acceleration.x > 2.5) {
    y_axis = "upup";
  }

  if (accel.acceleration.x < -0.5) {
    y_axis = "down";
  }
  if (accel.acceleration.x < -2.5) {
    y_axis = "downdown";
  }

  if (accel.acceleration.y > 0.5) {
    x_axis = "up";
  }
  if (accel.acceleration.y > 2.5) {
     x_axis = "upup";
  }
  if (accel.acceleration.y < -0.5) {
    x_axis = "down";
  }
  if (accel.acceleration.y < -2.5) {
     x_axis = "downdown";
  }
  delay(10);
}
The way I am sending the JSON is as a string, which does not look pretty, but does the job well:
String json = "{\"y_axis\":\"" + y_axis + "\", \"x_axis\":\"" + x_axis + "\"}";
After some time and a lot of debugging, I managed to get it to work.
Extra
I wanted to extend the project to be more “cool”. The idea is that there would be custom board with some buttons that would have some useful features such as change of colors, or perhaps erase the canvas. The other feature would be that the board would be powered by battery, so it would be easier to swing with it in front of the screen.
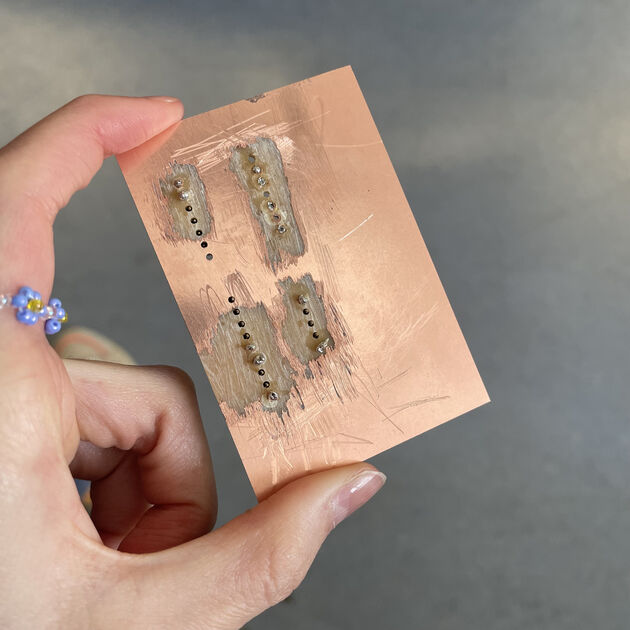
The board design:

|

|
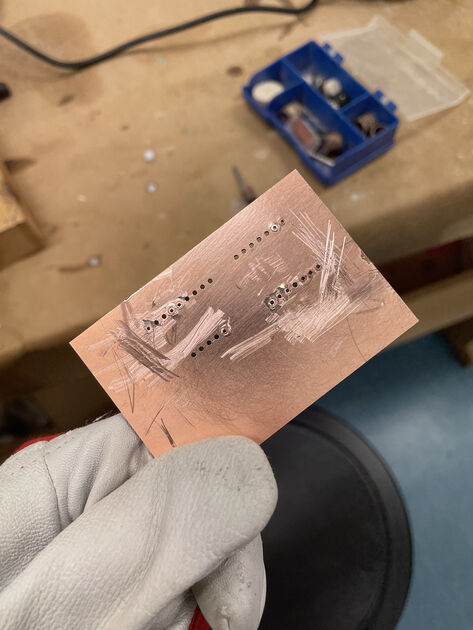
There were unfortunately no one-sided board when I was milling, so I just used some leftover two-sided board. It didn’t occur to me that later when I use rivets, this may be an issue as then all the pins are connected. Thankfully, with Solomon’s help we managed to scrape the other side, so it mostly works, but it was much harder to soler.
Also, the PCB machine is vicious recently, and only works properly in top right corner.
|
|
However, I was rather inexperienced when working with the rivets which was frustrating - the connections did not work properly and randomly disconnected! Later Kris showed me that it is better to put a bit of solder on top pf the rivet, and slide it a little on the track, so the river and the track are connected with solder. This trick is amazing! No more random disconnecting.
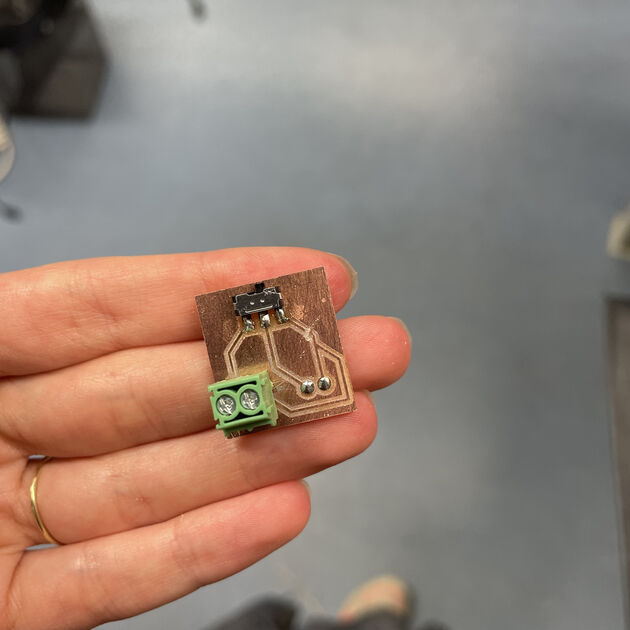
I then made a new board where I added buttons and I had it battery powered. It worked well, but I forgot to add a switch to turn the battery on and off - so I made another (very tiny) board.

|
|
You can notice in design that it seems like at some point the ground of the battery would be connected to the positive side - that’s my mistake, and I scratched that track from the milled PCB.
|

|
In the code I added the new buttons (color, thickness and reset). I had to add a debounce delay for the buttons, so one press would be one color change or one level thicker pen width (otherwise when you press the button, it reads it as pressed and can count it at “newly” pressed for more than one loop cycles).
// This is a code snipped from inside the loop, showing how to set up the debounde delay for a button
// Read the current state of button 1
int reading1 = digitalRead(buttonPin1);
// Check if button 1 state has changed
if (reading1 != lastButtonState1) {
lastDebounceTime1 = millis(); // Record the time of state change for button 1
}
// Check if enough time has passed since the last state change of button 1
if ((millis() - lastDebounceTime1) > debounceDelay) {
if (reading1 != buttonState1) {
buttonState1 = reading1;
if (buttonState1 == LOW) {
button1_pushed += 1;
color = color_array[button1_pushed%5];
}
}
}
// Update the last state of button 1
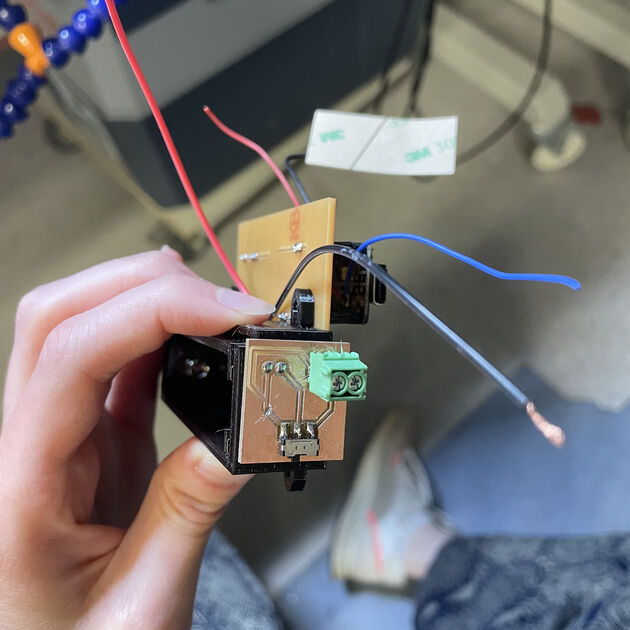
lastButtonState1 = reading1;Final board:
Demos
I also asked some other people to try to use it :)
Files:
Resources:
https://stackoverflow.com/questions/2368784/draw-on-html5-canvas-using-a-mouse https://www.geeksforgeeks.org/how-to-draw-with-mouse-in-html-5-canvas/