Week 1: Principles and Practices
In the first week, we talked about the course structure and the basics of Git and Git CI. We also developed and deployed the first basic version of a website that will document our progress throughout the course.
I wanted to make my website look more presentable with Hugo static site generator. I haven’t worked with Hugo before, so it was an interesting experience. It was nice to choose from variety of themes, the only thing I struggled with were the default icons. The second thing was the Final Project idea, which I haven’t thought much yet. Thinking of making a “smarter” furniture perhaps.
I modified the Zen theme quite a bit. At the landing page, there are the previews of the documentation pages. However, it was not really clear that these are only previews, and the reader of my website could have been misleading. I have therefore overwritten the summary.html page (copied the one that was in the yen theme, paste it in the /layouts/_default/ and made the modifications), and added Read more link at the end of it. More about how to modify a Hugo theme: https://gohugobrasil.netlify.app/themes/customizing/
I changed to copyright to be my name. This was possible by overwriting the baseof.html (similar to the procedure above with the summary.html).
The default icons were changed to reflect this course (Fab Academy), so now we have a cute 3D printer as a main icon! The icons used are made by Hans Gerhard Meier, and are appropriately credited in the footer of the website.
Note: you can use shortcodes to make more sophisticated changed to Markdown, for example to change the way how the tables are shown etc. Some built in shortcodes include Figure (to include images) or Highlight (nice code highlighting).
Including images in the posts
The simplest way to include image in the post is to use

And it will be shown like this:
The image caption will be shown when the image cannot be found or loaded, and it will look like this:

The more clever way to include image in the post is to use the figure shortcode. It can take a number of arguments (such as title or height|as well and therefore can make the image appear nicer to the website. The complete list of arguments can be found here, together with explanation what shortcodes are: https://gohugo.io/content-management/shortcodes/
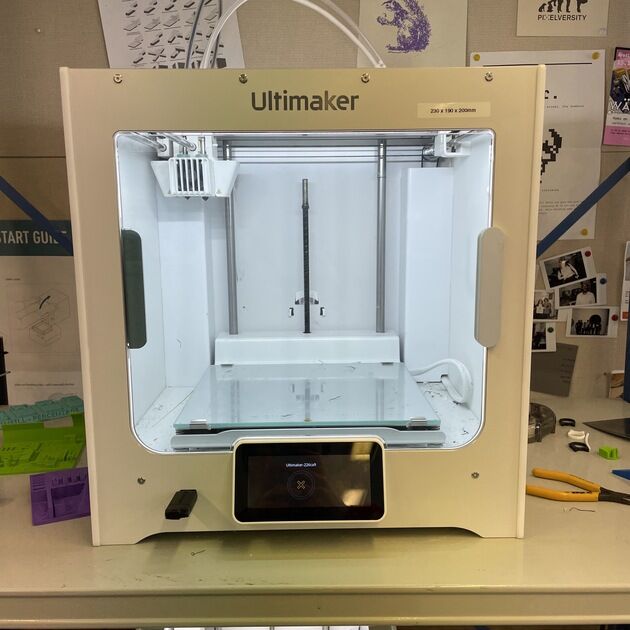
{{< figure src=“week2/3d_printer.jpeg” caption="Figure 1: this is a 3D printer" height=“450”>}}
And it will look like this:
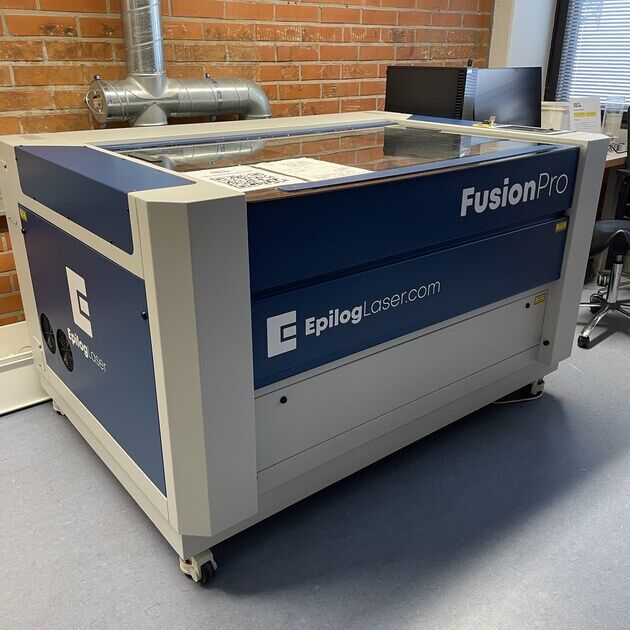
However, what if you want to have 2 images next to each other? Or perhaps have the images in the middle of the page not aligned in the left? The proper way would be to modify the shortcode to allow these options, or to write a new one. However, because this is not a production web, just a class project, we can use a bit of a heck and insert out images into a table. The markdown looks like this:

And on the website it will look like this:
|
|
|
Spell checker
During the course, I will be writing a lot of documentation. I would like to do it directly in the VS Code, and to prevent spelling mistakes, I installed a Code Spell Checker extension.
Sharing files
I created a folder called “files” in my main content folder. Now I can share files with the following command:
Example File - [TXT file](/digital-fabrication/files/example_file.txt)
If you want your file to automatically start downloading, compress it to a .zip file.
Project Management with Git
Tools used
Creating website
I decided to use Hugo as my website will be static (mostly just documentation). First we need to download Hugo software, I am using brew as I have a MacBook.
brew install hugo
Then in the directory I wanted to initialise the project I ran:
hugo new site digital-fabrication
cd digital-fabrication
After that I initialised the repository which will be later pushed to GitLab.
git init
Another reason for me to use the Hugo was because of the variety of themes it has. I am using the Zen theme, which I modified to look more to my liking.
git submodule add https://github.com/theNewDynamic/gohugo-theme-ananke themes/ananke
echo "theme = 'ananke'" >> config.toml
To locally run the page we just made:
hugo server
While the server is running, the default page where my site is running is “http://localhost:1313/digital-fabrication/” so if I open that page in my browser, I will see how it currently looks like.
The next steps for me was to modify the website. I reused the default structure, and changed the content. I also tried to change the icons and some default elements.
Using Git and GitLab
When I was happy with the changes I made, I wanted to transfer these changes to my remote GitLab repository hosted at https://gitlab.fabcloud.org/academany/fabacademy/2024/labs/aalto/students/sara-kutkova.
SSH
Public and private key is a for of authentication (like a username and password). However, in this case, there is a private key that only you know, and a public key that can everyone know. It works something like this (my explanation is simpler version of what’s happening): You create a public and private key pair on your machine, and give your GitLab account the public key. So the GitLab knows that the public key is legit. Now it can encrypt the data using it, and only the private key (on your machine) will be able to decrypt it. It is impossible to know what the private key is only knowing the public one.
So in practice, the next command will create a private & public key pair in the current directory, so we need to make sure we are in the ~/.ssh.
ssh-keygen -t rsa -b 4096 -f lab_rsa
Here the -t stands for type, b for byte (length of the key) and -f for filename. It will create two files: lab_rsa and lab_rsa.pub.
Note that lab_rsa is a secret! Handle with care, don’t copy or cat it. If you ever reveal it, create a new key pair.
However, lab_rsa.pub can be handled as a publicly known information, so you can copy it and paste it to you GitLab repository.
Now we can ssh to our remote repository and push any changes there.
Note: It is also nice to modify the config file in the .ssh directory.
More information about the whole process and how the SSH works: https://docs.gitlab.com/ee/user/ssh.html
Transferring changes to remote repo
At first, I like to look at status of my local repository. We use local command line for the next few steps.
git status
With this command I can check the new files I created, and all the files I modified. So in the next step I can add all the files I want to “transfer” to the remote repository.
git add .
The above command includes all the changes. I usually want to include everything I changed (the files I don’t are usually included in the .gitignore file, which will be mentioned later).
Now if I want to commit the changes, I use the commit command.
git commit -m "Message about what was changed"
It will create a commit with a message (using -m flag for that).
Now it’s time to push the commit to the remote repository.
git push
And it’s done! Because I made a .yml file, the GitLab will run a pipeline and publish the changes to my website - https://sarisko.gitlab.io/digital-fabrication/. The .yml file was a template from Hugo, but we can also write our own .yml if we want to publish our website somewhere else.
The gitlab-ci.yml file:
image: registry.gitlab.com/pages/hugo/hugo_extended:latest

variables:
  GIT_SUBMODULE_STRATEGY: recursive

pages:
  script:
  - hugo
  artifacts:
    paths:
    - public
  rules:
  - if: $CI_COMMIT_BRANCH == $CI_DEFAULT_BRANCH
I’m using only the main branch, because there is no collaboration happening, so some excessive branching is not necessary.
As mentioned above, I also created a .gitignore file. There are some files (usually some computer/VS Code related config) that are not necessary to have at the remote repo. So that we don’t have to avoid adding them to our commit, we can simply write the name of the file/folder to .gitignore file, and as the filename suggests, the git will then ignore this file and any changes in it from now on.
Optimizing images and videos
Make sure you use jpg over png. For conversion, I am using either https://squoosh.app/ or magick library. On MacBook, can be installed with:
brew install imagemagick
Converting:
magick image_name.png image_name.jpg
Converting all the files with specific file type (more info here):
magick mogrify -format jpg *.png
Reducing the size:
magick convert image_name.jpg -resize 1200x630 image_name_1200x630.jpg
Reducing the quality of the image:
magick convert image_name.jpg -quality 65 image_name_1200x630_65.jpg
It can all be combined in one command.
Note: For videos, it is advised to use FFmpeg - https://ffmpeg.org/. It can be installed using:
brew install ffmpeg
Example use (based of Buraks Digital Fabrication page):
ffmpeg -i v1.mp4 -c:v libx264 -preset slow -crf 40 -an -vf scale=720:-2 output.mp4
Reflection
This week I mostly spend documenting my progress. As I used most of the tools before, my workflow was smooth, so I documented all that I found interested rather than things I was stuck on. I found the talk about the image and video optimisation interesting. I agree that it is important to keep your repositories small. Looking forward to the next weeks!