Week 15 - Wildcard Week: Embroidery
Prepping the machine - Brother SE600
In order to touch the machine we first had to watch 2 videos about winding the bobbin and prepping the machine for the embroider. THe setup was very easy to memorize as you could just follow the numbers on the machine to continue threading the machine. Next I had to learn how to create the design to embroider it.
Creating the design in ink/stitch
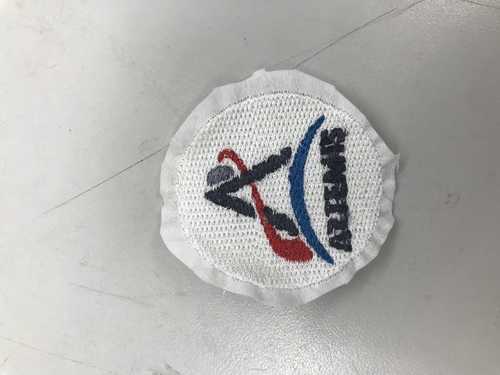
TO create this design, I used inkstitch, an add-in for inkscape. To learn how to use ink/stitch I followed this tutorial. The process was fairly simply, all I needed to do was to create a bitmap of what I wanted to create. I took the image of the new NASA Artemis mission to use for my first design.

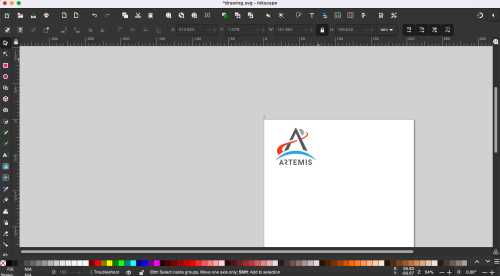
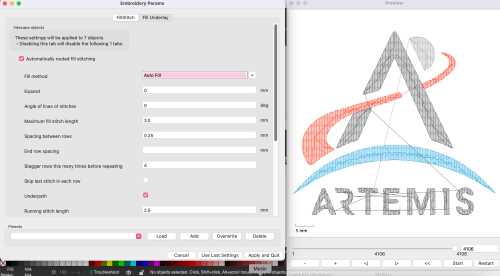
Once I uploaded it I created a bitmap of it, then I sized it down to fit within the 4x4 embroidery area the machine had. Then I selected the extension menu, selected the ink/stitch dropdown and selected params, which I didn't change the default settings, as it all looked good. This all cam eout pretty well with the final project.
Next I had to save my file as a pes file for the brother embroidery machine. I found out which file I needed from Mrs. Dhiman's site. Once I had this file, I uploaded it to a flash drive and plugged it into the machine to begin embroidering!
Embroidering
Here is the full workflow created by myself, Adam Stone, and Jed Smith,
` Bobbin (Video 1)
Place bobbin on the right pin Place spool on the long thing Take the spool and hook it under the metal hook Make sure it is under the thing well enough Put under the white tab Put it around the lever then around the wheel Must be under the groove Bring the thread around the bobbin once then in the slip (look at diagram on machine) Touch screen after turning it on Push the bobbin lever to the right Press orange bobbing button and adjust speed with slider Keep finger always by the stop button After its winded enough, remove the bobbin and cut the thread Take the bobbin, but it on the bobbin clamp
Video 2
Insert bobbin (can follow diagram on machine)
Press the button to remove bobbin cover
Put bobbin in hole
Pull thread behind hook Replace the bobbin cover When threading have the pressure lever up Link the thread down in the seam for the new thread and wrap along until it latches on a hook Then go back down Place the thread in the hook labled 6 Place in the hook to the left now Lower pressure lever. While holding the thread with one hand use the lever on the left of the machine and then let go. Pull something through the loop. CUt some of the thread off, not too short through Lift pressure lever
The Hoop Take off one side then lay your material to where it covers the entire hoop Push your other side of the hoop down with a little bit of tension Get out all the wrinkles. Now tighten the hoop. It should have a little give Make sure pressure lever is up Connect hoop to the arm -Place the two links into the slots and push down until you hear a click
Making the design Place memory card with the design into the machine Touch the screen once, press OK, and press cancel to resume previous memory Press the USB icon Select your design Press set Select edit end and then you can maneuver where your thing goes. Select OK Put the pressure foot down Then when you click the button it will start When it is done with your item it will prompt you to choose the next color thread Lift pressure lever remove the thread Cut the thread after the first loop then pull the thread through from the bottom Load the new thread the same way as you did before Press the button again
InkSketch workflow
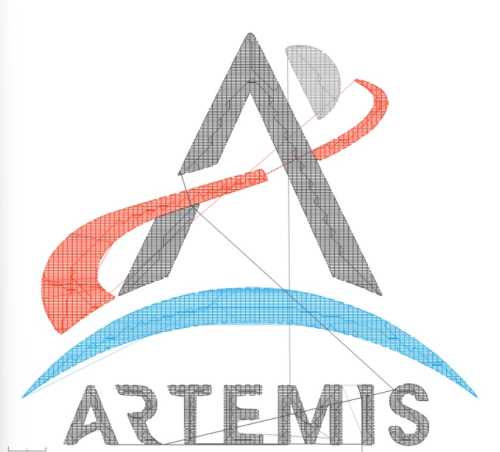
Path>Trace Bitmap and get it to look the way you want (you can always touch it up in InkScape) Drag Click over the whole bitmap and right click and group everything Then at the top of the file, make sure the W and H are below 99mm, if your file is bigger click the lock and then change the file size. Extensions>Ink/Stitch>Params( you should see a preview of your toolpath it will take a minute or two) File>Save As> pes file Download the file to a usb drive then your done with Ink Stitch `
I followed these steps to create my design, but there were some slight issues. When I ran my design, there were some slight outline designs that were for some reason created. I didn't want to do these because they weren't necessary, so I wanted ot skip them. Mrs. Dhiman helped me find how I could do this and we found this website that shows how. Essentially, you can skip threads, or even entire colors by clicking the button on the bottom right and clicking the + spool button or the + numbers buttons. I did this a few times until it got to a point where I needed the actual design. Here is how that turned out
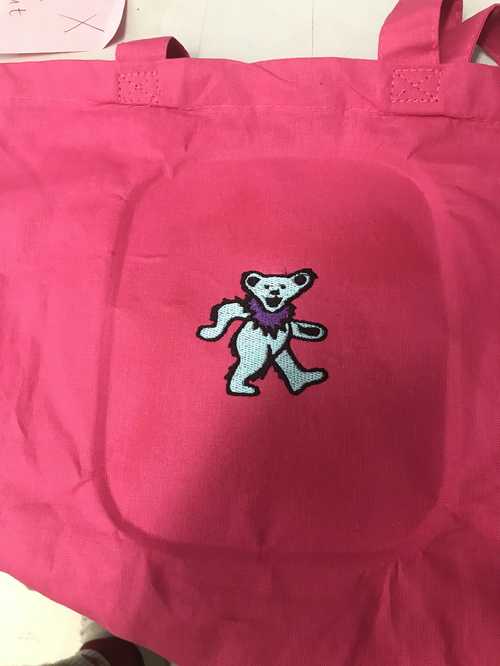
Embroidering on a bag
Since mother's day was this past sunday, I wanted to make my mom a gift. I got a pink bag and wanted to incorporate a Grateful Dead dancing bear onto it. I created this design, but had some trouble with the color bitmap option, so I had to do it in grayscale. This was fine, I just had to pay more attention to the actual shape that was being embroidered. I followed a video found on Aaron Logan's site for a emroidering on a shirt. I followed the same process, but used a bag instead. I used a tear away stabilizer to more easily clean it up after I was finished. Now I I began a test, not actually on the bag, which turned out pretty well, but there was some evidence off the spools I skipped.
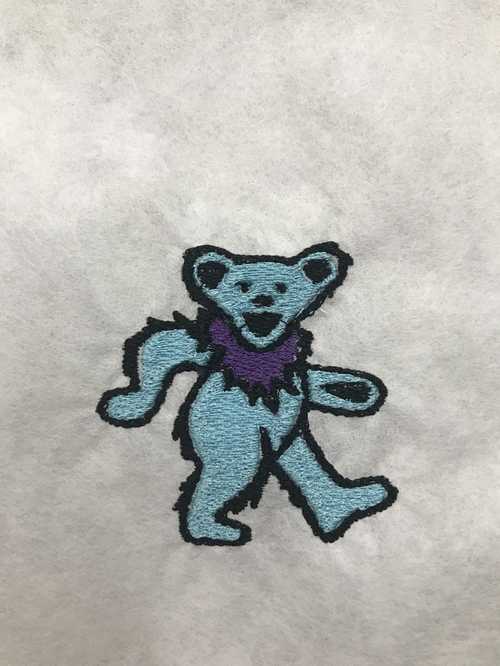
I figured it would be good enough, so I moved onto the actual bag. The process was essentially the same, I just needed to make sure that none of the other parts of the bag were underneath the hoop, or else they would get caught in the embroider. This went off without a hitch for the most part, except my black bobbin ran out of thread midway through, but it didn't affect the design.