Week 1 - Project Management
In this week, the first week of fab, I worked on setting my my website and repo. The initial setup gave me lots of problems, and I went through lots of different tutorials to finish this week. To begin this week, I downloaded python and vscode. Upon opening up vs code, I was extremely overwhelmed, I had never seen such a place in order to develop code, and I was a little worried. Now on the python side howeber, I felt a little more comfortable. I started by opening up windows command prompt, and running the command pip install mkdocs
This Initially didn't work out for me, I tried to run this again and again to no avail, but eventually my classmate, Adam Stone, helped me by telling me, python needed to be in my environment variables to run python commands in terminal. I then spent a while looking for the files, and copying and pasting them to my environment variables in the path section.
Once this didn't work, I tried changing my python download, and low and behold, the answer was there. When downloading python, you need to make sure the setting to add to environmental variables is selected, which was something I hadn't done. This is shown below in the python install menu.
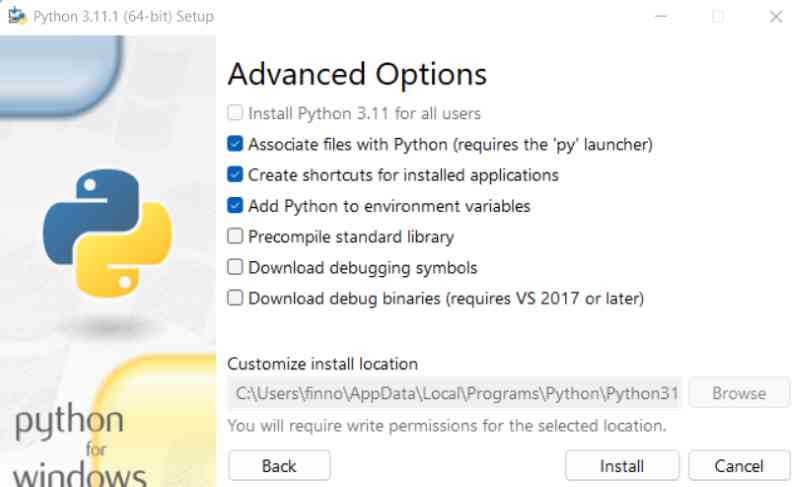 Make sure the environmental variables option is clicked
 This is the error that showed up when it wasn't in my environmental variables and I tried to run the commands
Mkdocs installation
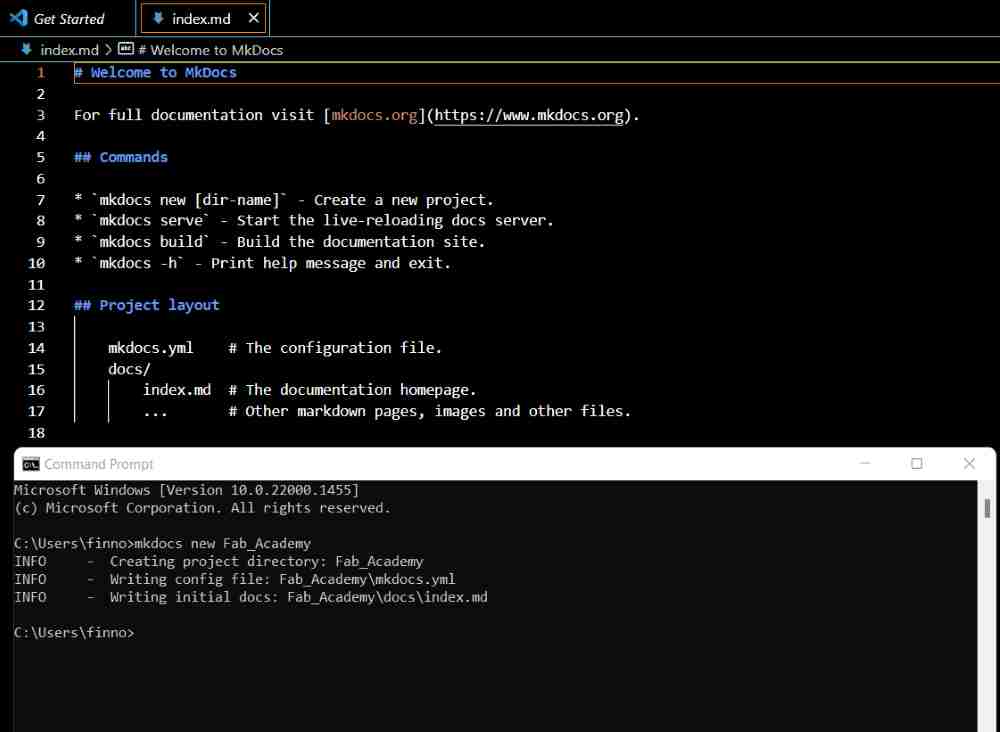
After I fixed this, I could run pip install mkdocs, which was where I ran into my nest issue, a simple foolish one that cost me hours. I skipped an important step. I now was trying to get mkdocs to work, in order to truly start documenting and completing this week's requirements. I ran code based off the Mkdocs web tutorial provided to our class by Dr. Taylor, linked here. Here I encountered an issue, because I left out a simple command, cd <name>, which I struggled for a while to see why my mkdocs serve command wasn't working, which was an irritating process. I kept retrying and getting the same error message, Error: Config file 'mkdocs.yml' does not exist.. Again, I want to restate this, you need to make sure to run cd <Project-Name> or else you will get this error. Eventually after talking to my teacher Mrs. Morrow, I finally realized that I had skipped the command resulting in an error message repeatedly occurring. I had finally relieved the issue, and could move on to generating an SSH key.
These are those codes I ran into powershell to generate my SSH key, also found in the mkdocs tutorial above
mkdocs new <Project-Name>

cd <Project-Name>

mkdocs serve
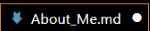
 If the circle is shown next to your project in the tab it is unsaved
SSH key generation
I had downloaded Git to my pc when this week had started, which made things easier. I opened up the gitbash terminal in vscode, and followed a combination of two tutorials, one of which was the GitHub tutorial suggested in Teddy Warner's Website. From this I found the command to generate the SSH key, I followed the tutorial and followed along in the steps in the terminal to generate the actual SSH key. Now, I was having the issue of locating and pasting the SSH key. I tried to locate the public key for a while. I repeatedly tried to locate the file where the key was stored, but it wouldn't go through, and I couldn't open the file. Because I couldn't open the file, I tried searching for an alternative route to generating the key. After searching for a bit I stumbled upon the GitLab tutorial for generating an SSH key. I found a specific command from within, and used to to copy the public key to my clipboard. In this command, you should replace <email> with the email linked to your git account. The sequence I used follows as below ~
$ ssh-keygen -t ed25519 -C "<email>" - generates the actual SSH key

$ cat ~/.ssh/id_ed25519.pub | clip - copies the SSH key
After this was generated I pasted it into my profile's slot for SSH key, which enabled me to then push to GitLab as soon as I needed to. There was not much to do now, I just had to get Mkdocs up and running, but this would prove to be my biggest task yet, despite the simplicity when looking back on it.
Setting up Mkdocs
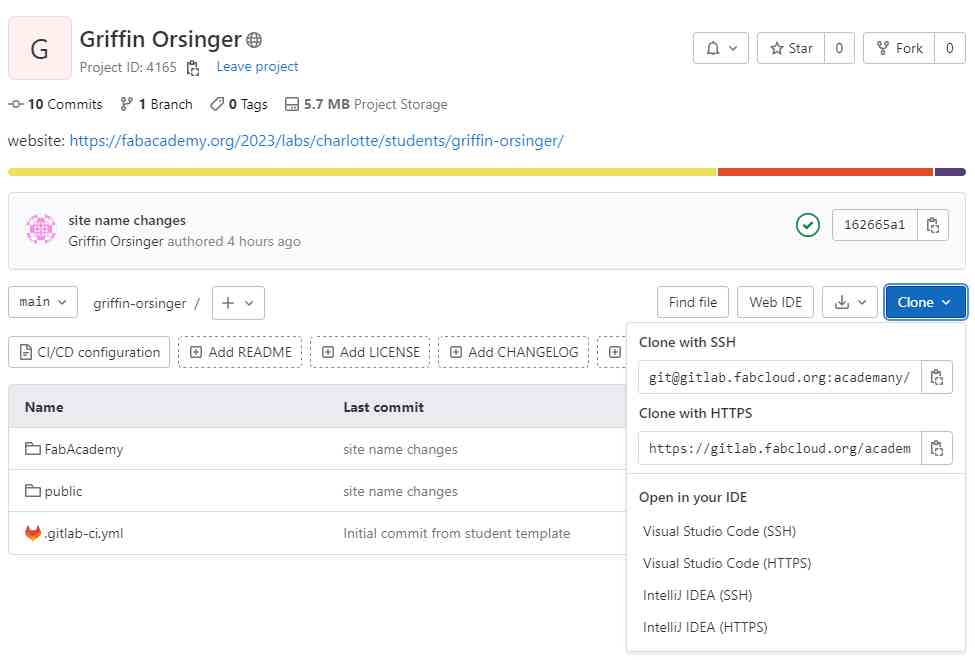
Initially, I struggled quite a bit with the beginning portion of this task, due to my skipping over of a very important step. Now, in order to refrain from repeating these steps if you create a website using git and mkdocs in the future, I suggest paying close attention to my errors. I wanted to initially open the mkdocs folder in vs code, but I couldn't locate it. Due to a continuation of my prior incompetence, I kept repeating previous errors, and was unfortunately struggling with them again. In reality this was a shorter stint, but I started this whole process before I found the remedy to my issues. I generated around 4 different new mkdocs documents, and eventually managed to locate one and open it in vs code. After I had opened it in vs code, upon hearing from other classmates whom were ahead of me, I needed to clone my repo. This was a fairly simple process, and all it took was clicking the clone dropdown, and selecting open in Visual Studio Code (SSH). I now had The repo cloned and open in vs code, but here I face the longest struggle of this week.
Finalizing the Site
I initially had trouble locating the mkdocs folder, as stated above, but then got it, and had it opened in the same place as the Gitlab file in vs code. I tried for a while to locate the file, and when I did find the file, it also compounded with the issue mentioned before of having missed the command to serve mkdocs. I ended up making a total of 4 different new mkdocs documents before there was a notable and easy transition between the 2 files, the gitlab clone and the mkdocs file. Since the project was now working I could start the mkdocs tutorial. I began documenting my process, but again struggled to figure out the serve command, so I deleted the file and began again, and finally this time I remembered to use the cd <Project-Name> command. I could finally start editing the mkdocs site, so I was able to change the name, url, and content of the site. I had to make sure that I had saved as well, or else the locally hosted server would not show up in my site, which was an error that also cost me lots of time.
I followed the mkdocs cheat sheet in order to understand how to do all the special formatting for markdown. Now, I could use the git commands, aka the big 3
git add .

git commit -m "<change messages>"

git push
I finally had my website being uploaded to git, but I had to replace the old template given to us. I was instructed again by adam stone, that when I used mkdocs build I had to copy everything within the site folder and paste it into the public folder in my repo. To do this I had to delete everything out of the folder first, which I was nervous to do, and when it took a while to load my site to fix it, it gave me a huge relief when it worked after a few file location changes. Initially I had misunderstood him, and simply moved my entire mkdocs folder into the public folder, which made it not work. Now I have a site up and running and am able to continually update it and can start my Fab journey.
Image uploading/compressing
The very final portion of this week that i needed to do was to upload images to my repo. I initially started with looking at the mkdocs cheat sheet as mentioned above, but that only showed how to link an image from a web link. I then asked Mr. Stone if he knew how to do it. Mr. Stone then directed me to use  This did not initially work for me, so I asked Alaric Pan to help me, because he had been in helping our class with minor issues. Alaric directed me through a whole list of potential fixes such as removing the ../ before the path to the image. This did not work so we worked through a variation of these techniques in order to fix this, such as just doing ./, removing it all together and just having the /. Finally after looking at this Thread from stack overflow, I tried to use the path without any of the ../ portion, and it finally worked. I then pushed this and finished my site!