16. Interface and application programming
Group Assignment
Compare as many tool options as possible.
Kodular
Kodular (formerly Makeroid) is a modern app builder which lets users to create stunning Android applications without having any special knowledge of programming. It is a complete suite which allows people start programming without spending years learning a coding language. Kodular primarily provides Kodular Creator. It is a drag-and-drop Android app creator. Just by dragging and dropping a few components, and joining some blocks the desired app will be ready! It also provides a free alternative to Play Store to host and distribute your apps, projects, extensions and screens to a large public. Kodular also brings an Extensions IDE for advanced users, which is an online IDE to create new components on Kodular Creator without downloading any software.
MIT App Inventor
The Massachusetts Institute of Technology now manages MIT App Inventor, an integrated development environment for online applications that was first made available by Google.

Processing
For learning how to code in the visual arts, Processing is a flexible software sketchbook and programming language. Since 2001, Processing has worked to advance both visual and software literacy in the arts and technology. Tens of thousands of students, artists, designers, researchers, and hobbyists utilize Processing for learning and prototyping.
Bubble
Design beautiful web and mobile web applications without writing any code. Bubble’s drag and drop builder gives you total freedom, letting you build pixel-perfect designs. Bring your site to life with responsive layouts and animations. Tell Bubble what should happen step-by-step when users interact with your application. Change the text or appearance of your app for different users, send them emails, process transactions, let them save and display data. The rules can be as simple or as complicated as you want. Launch your application instantly on our cloud platform. Bubble hosts and scales your site as your traffic grows. No need to deploy servers or build out an operations team: Bubble provides secure, production-ready, scalable infrastructure out of the box so you can focus on your users.
Individual Assignment
to make the interfacing between my board and my phone , I will program my board which has attiny44 microcontroller using Arduino IDE and for programming the application on phone , I will use the mit appinventor site.
Arduino part
I will use the “output device assignment” board which had a led , usbtiny and bluetooth HC-05 .here is the code
#include <SoftwareSerial.h>

SoftwareSerial mySerial (1,0); // RX, TX

void setup() {

mySerial.begin(9600);
 pinMode(7, OUTPUT); // put your setup code here, to run once:

mySerial.begin(9600);


 }
void loop() {

  // put your main code here, to run repeatedly:
 if(mySerial.available()>0)
   {
      char data= mySerial.read();
      switch(data)
      {
        case '1': digitalWrite(7, HIGH);
        break;
        case '0': digitalWrite(7, LOW);

        break; //
        default : break;
      }
     mySerial.println(data);
   }
   delay(50);
}
MIT appinventor part
I used the website of MIT App inventor to design and program an interface to control the led on my board . I used the board of “output devices assignment” which has a led that is connected to the pin 7 .
once I enter the website , and click on the create apps! button like the below image .

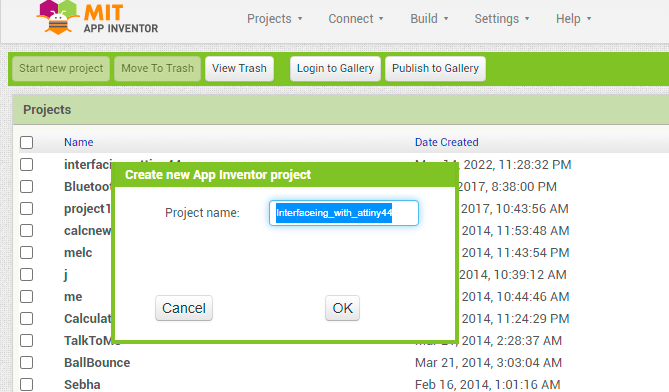
then new window is opened , click on start new project :

I chose a name for my project which is “Interfacing with attiny44” .
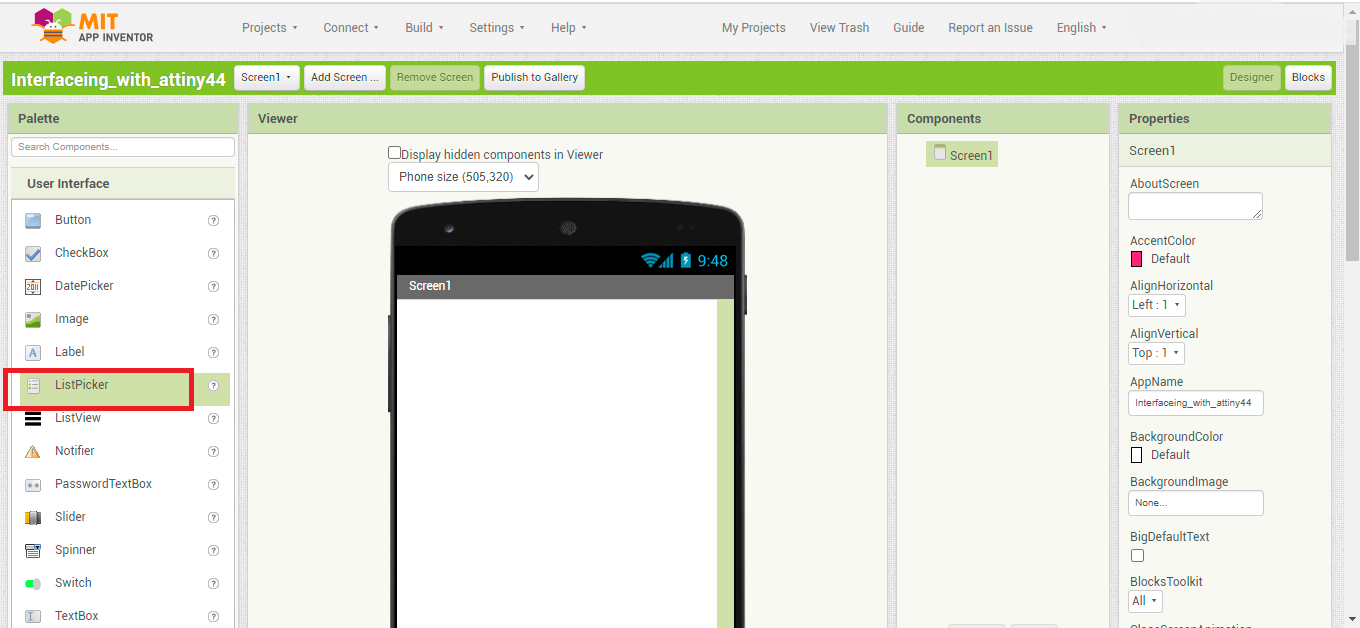
Go to the palette , and click on the “listPicker” and drag it to the white space like this :
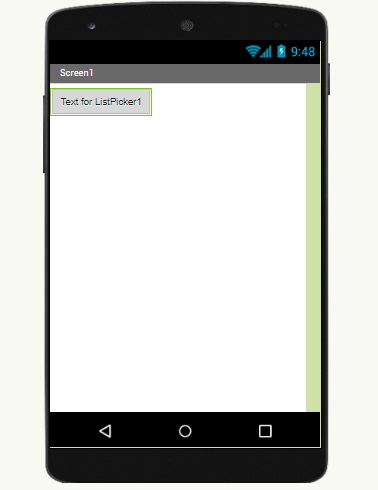
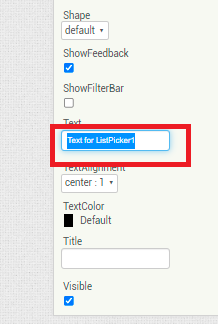
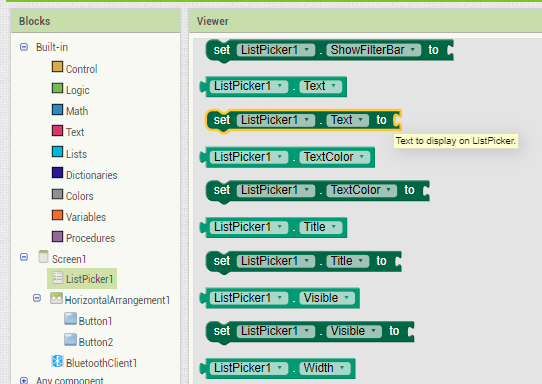
for changing the text , go to the right side of the screen , and under the “Text” option , write the desired words and hit enter . I wrote “Search for devices”
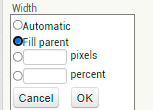
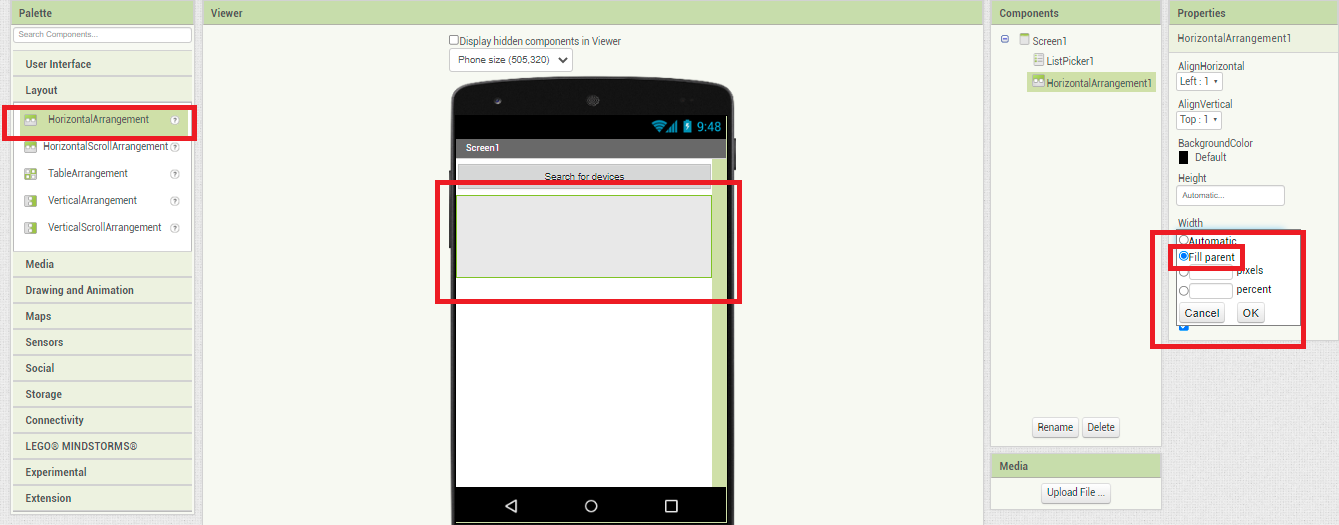
to make the “listPicker” fit to the width of the parent , go to the width and select “Fill parent”
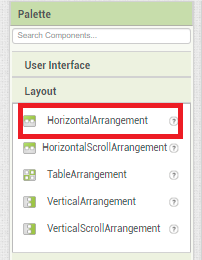
Now , move to the “Layout” and choose “HorizontalArrangement” and make the width of it fill to the parent
Now , add new buttons , I will add two buttons , on for turning the LED ON , and the other is to turning the LED OFF.
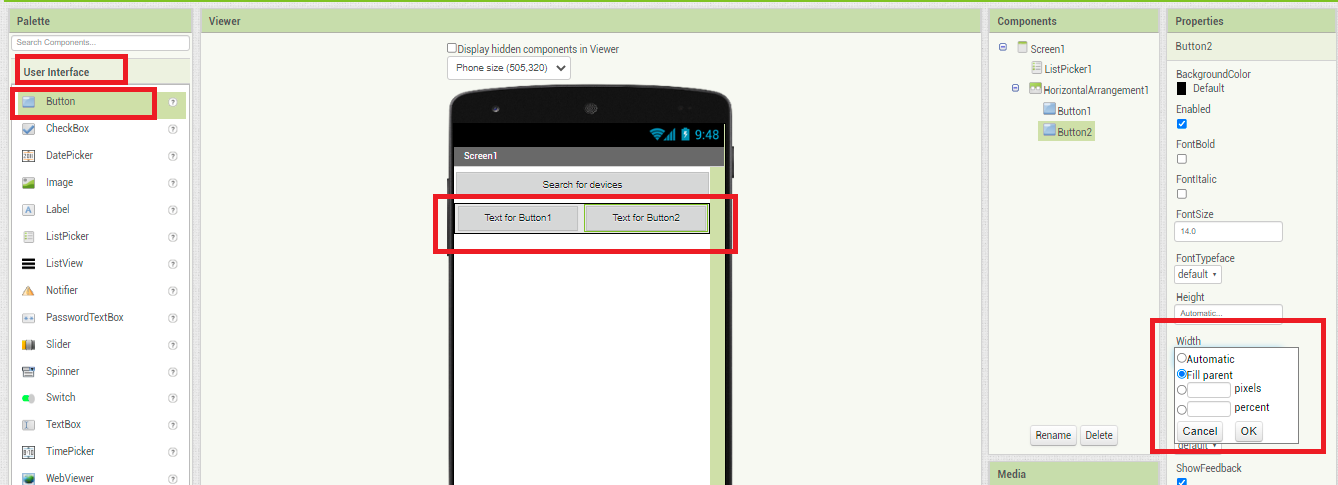
here is the result of the design :

to deal with bluetooth , I have to go to “connectivity” tab and choose “BluetoothClient”. you notice that it is not visible .
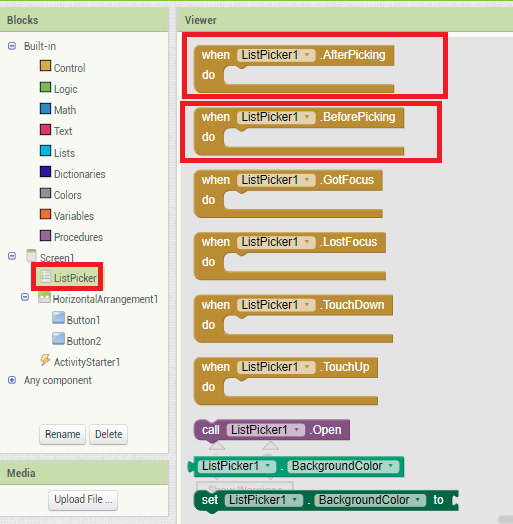
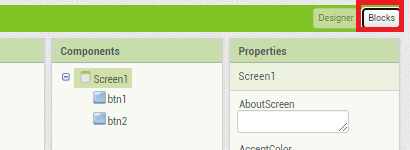
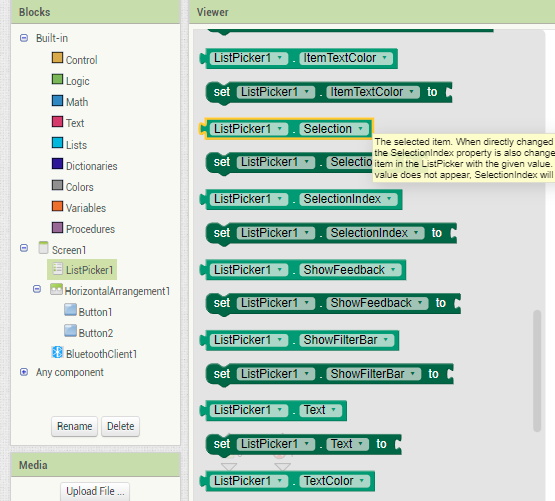
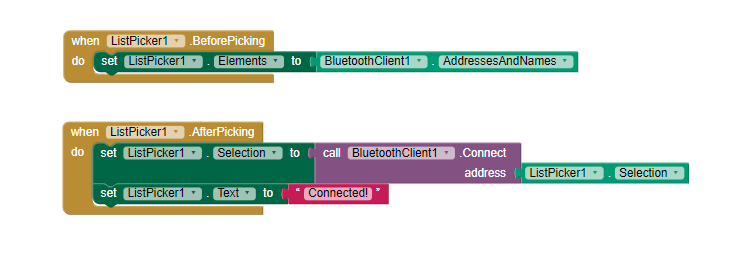
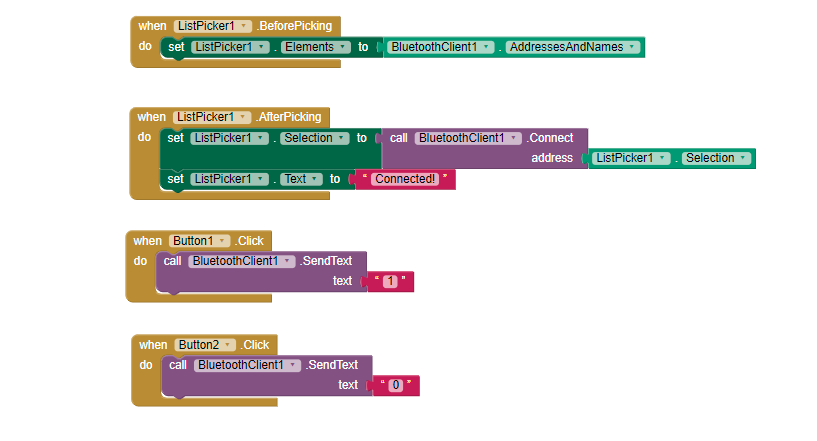
Now , I finished the design part , let’s move to the “Blocks” part . click on blocks tab then click on “listPicker” , from blocks shown , select the event block “when the listPicker1.BeforePicking” and the event block “when the listPicker1.AfterPicking” and drag them to the programming space.


from “listPicker” tab choose “set listPicker.Elements to” block ,then go to “BluetoothClient1” tab and choose the “BluetoothClint1.AddressesAndNames” Block in it.
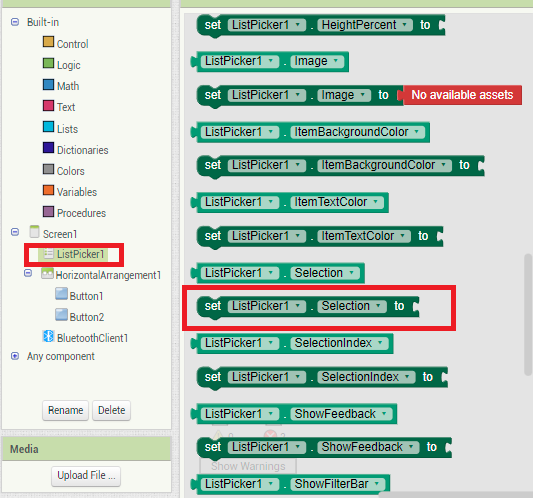
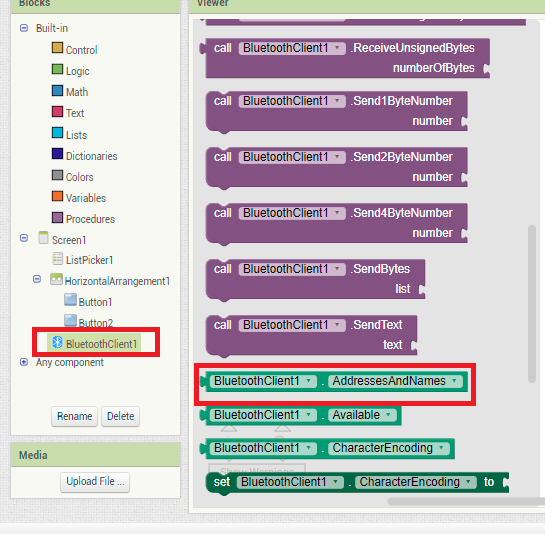
the result is like this :

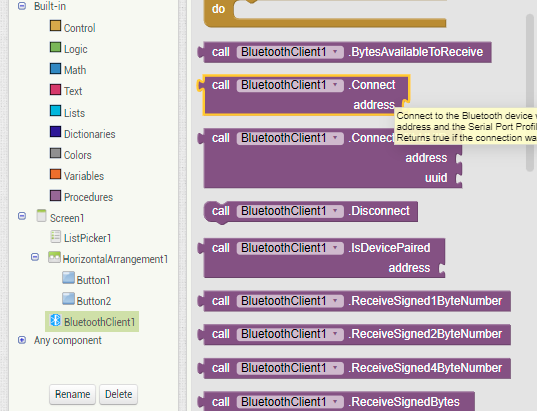
add the connection block as follows :
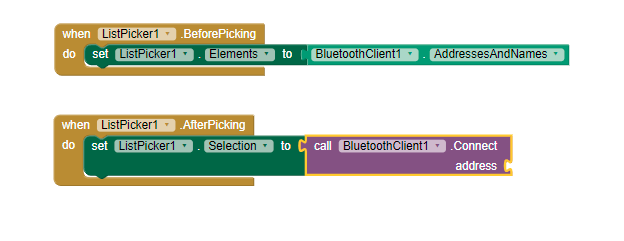
we need to indicate that the connection is established , so we change the text from “search for devices” to “connected”
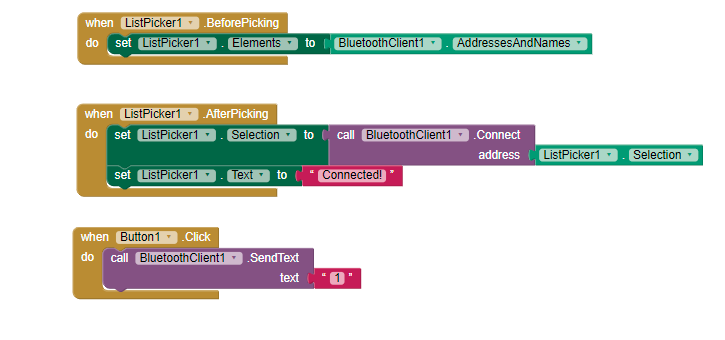
the code will be like the following :
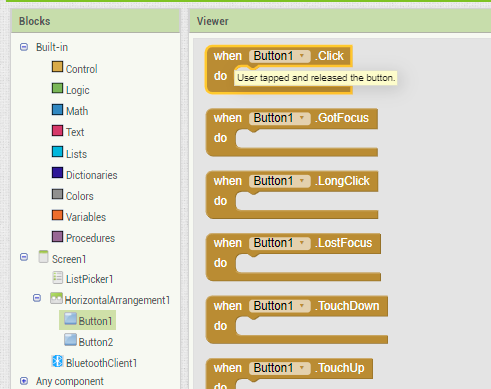
move to button1 and click on it and choose the block “when button1.click”
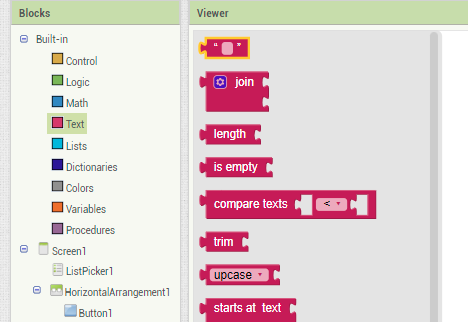
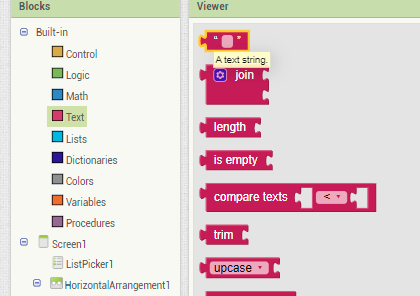
go to the bluetoothClient1 and choose “call bluetoothClient1.sendText” block and add a “text” block from Text tab and change the value of text to 1. duplicate the button1 code and change button1 to button2 and the value 1 to 0 .
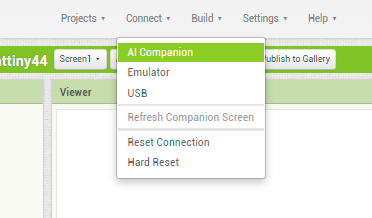
now , go to “connect” tab and choose “AI Companion”
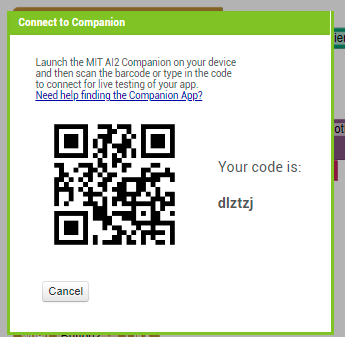
the following image is appeared :
using the code appeared and your phone , scan the QR Code after opening the AI companion application on your phone (note : the application is available on playstore , install it before this step)
the hero shot is below .