6. 3D Scanning and printing
Group Assignment
Files
the most important thing here is to follow the safety instructions :
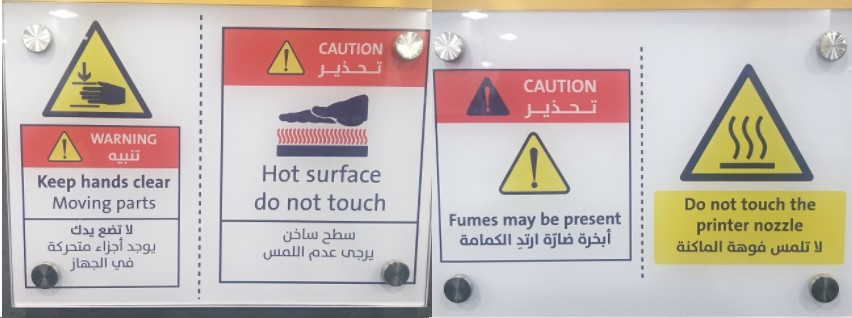
- We have to avoid putting our hands underneath or close to nozzle.
-
the bed surface and nozzle head are heated to high temperature , so it is necessary not to touch the surface or nozzle as well.
-
some types of filament produce a fume when it is heated , so it is important to wear a mask .
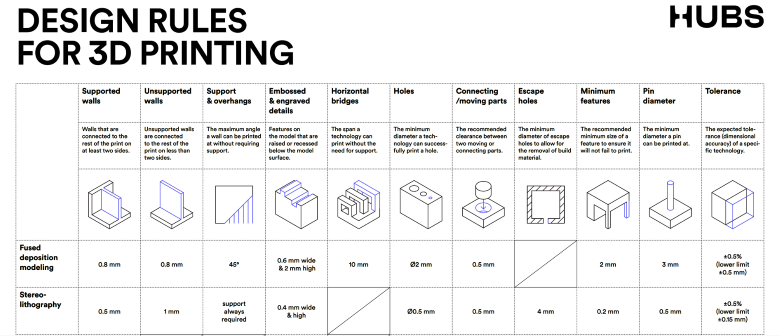
for the design rules for the 3d printer , this is from 3D Hubs site :
through Group assignment we discover the printing tests such as :
- Overhangs “3D print overhangs are geometric shapes in a 3D model that extends outwards and beyond the previous layer. Overhangs have no direct support on it so it is difficult to be printed.
Nonetheless, there are overhangs that are tolerable. These are 3D print overhangs with as much as 45ᵒ angle. But, if it exceeds this number, then issues such as droopy filament strands may be encountered.
General rule for overhangs
There is a general rule when it comes to 3D printing overhangs. The angle of the overhang should not exceed 45ᵒ. This is to make sure that each successive layer has enough support on it. This also means that at 45ᵒ, the 3D model is printed well because every layer is in about 50% contact with the layer below it.”Source
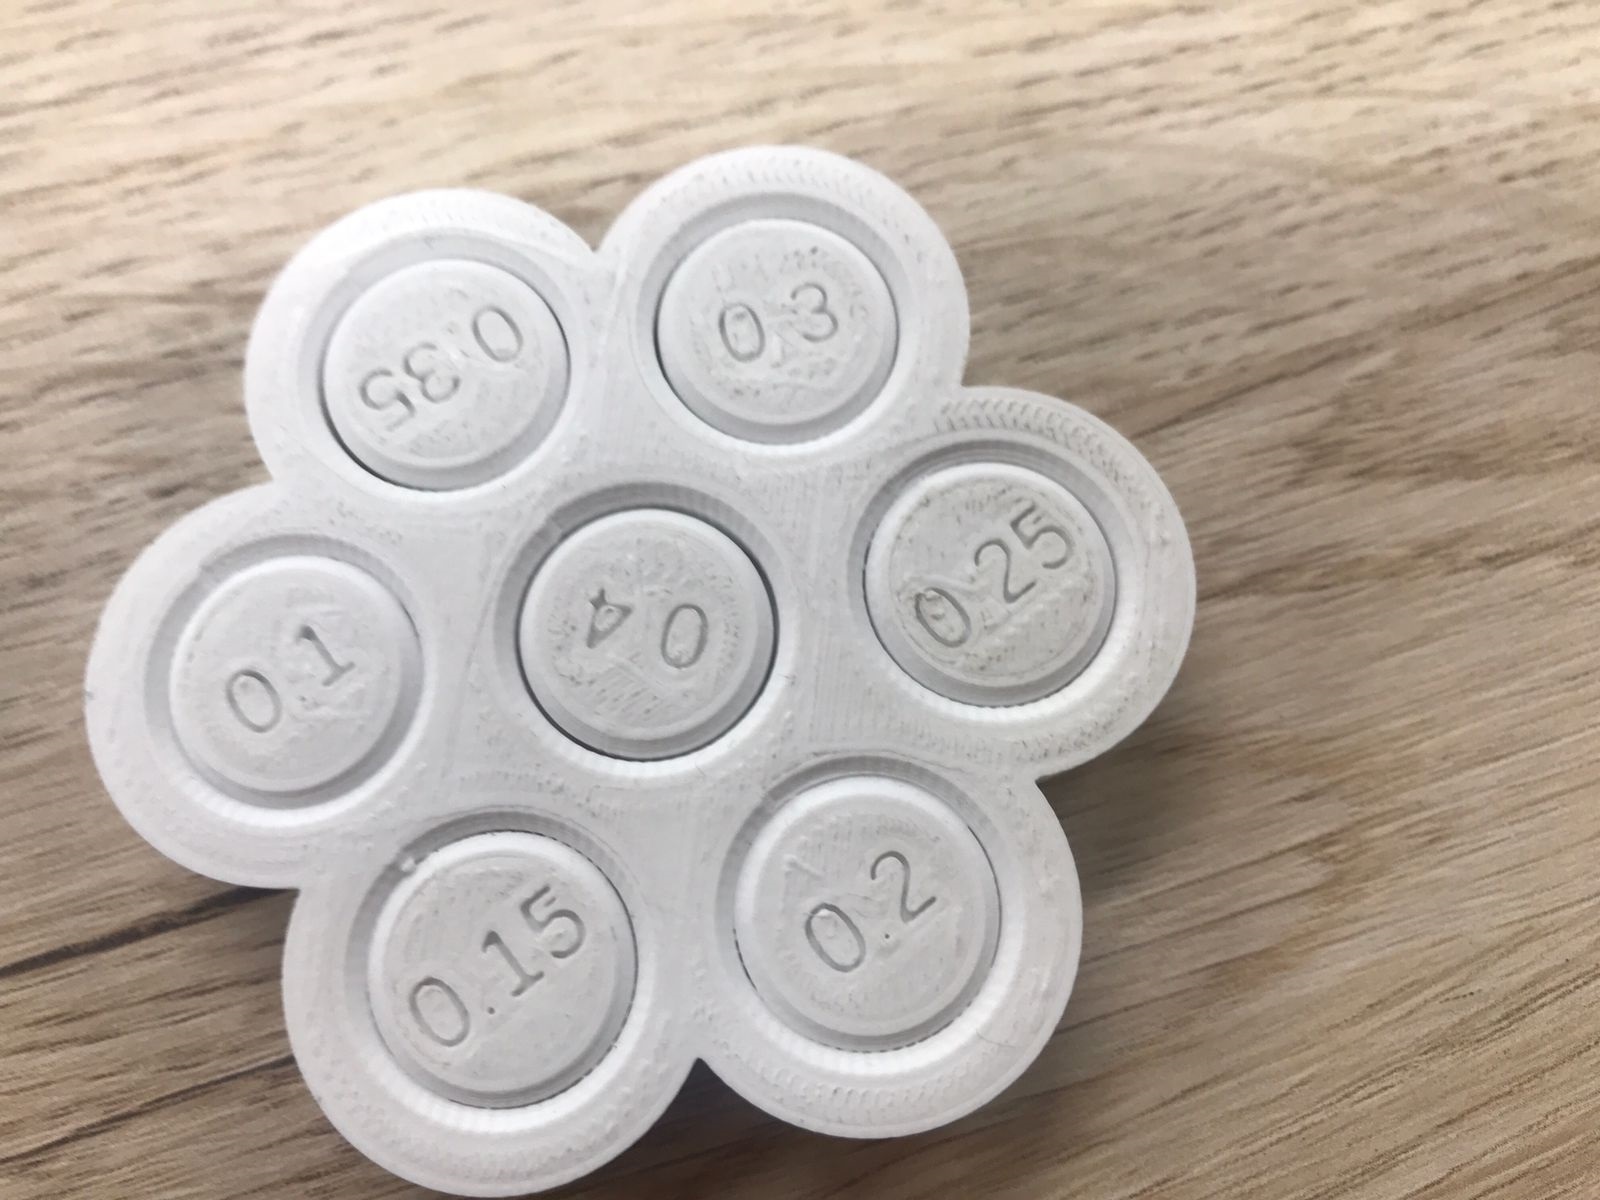
- Clearance and tolerance when we think about fitting 3d prints together , we have to make room or clearance value between the two parts .so they can fit with each other .
for FDM printer the following test is done :
- Clearance test
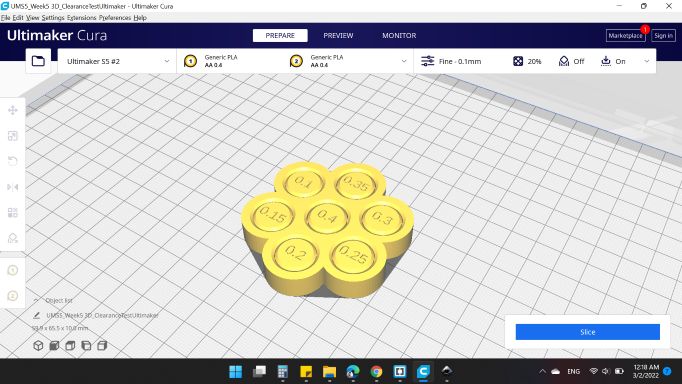
- All in one test
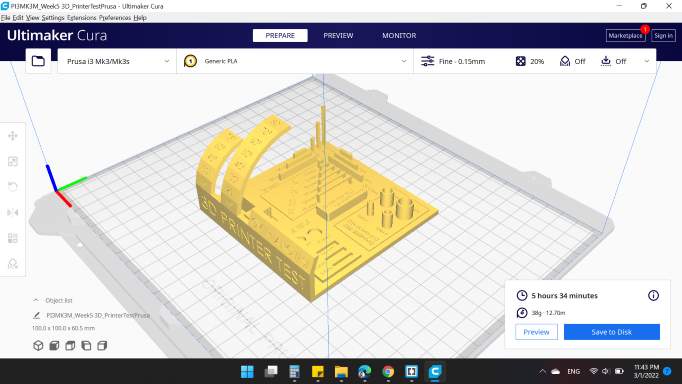
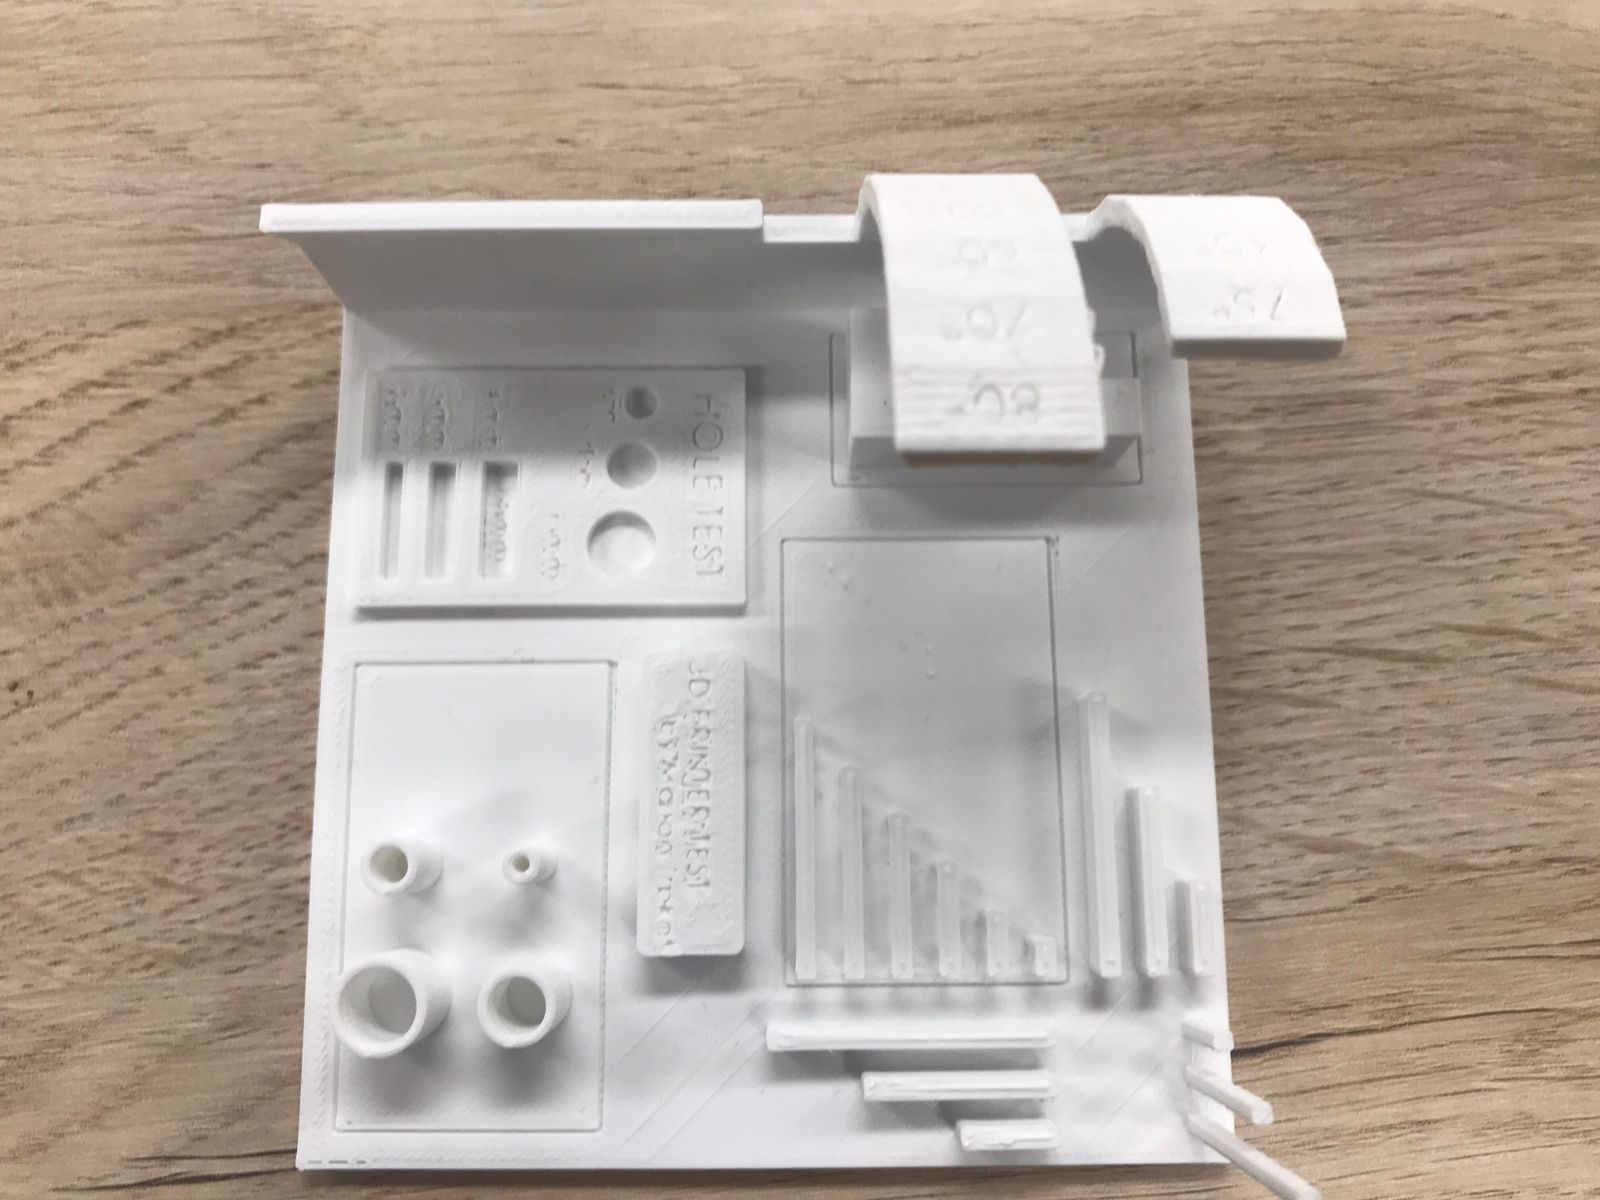
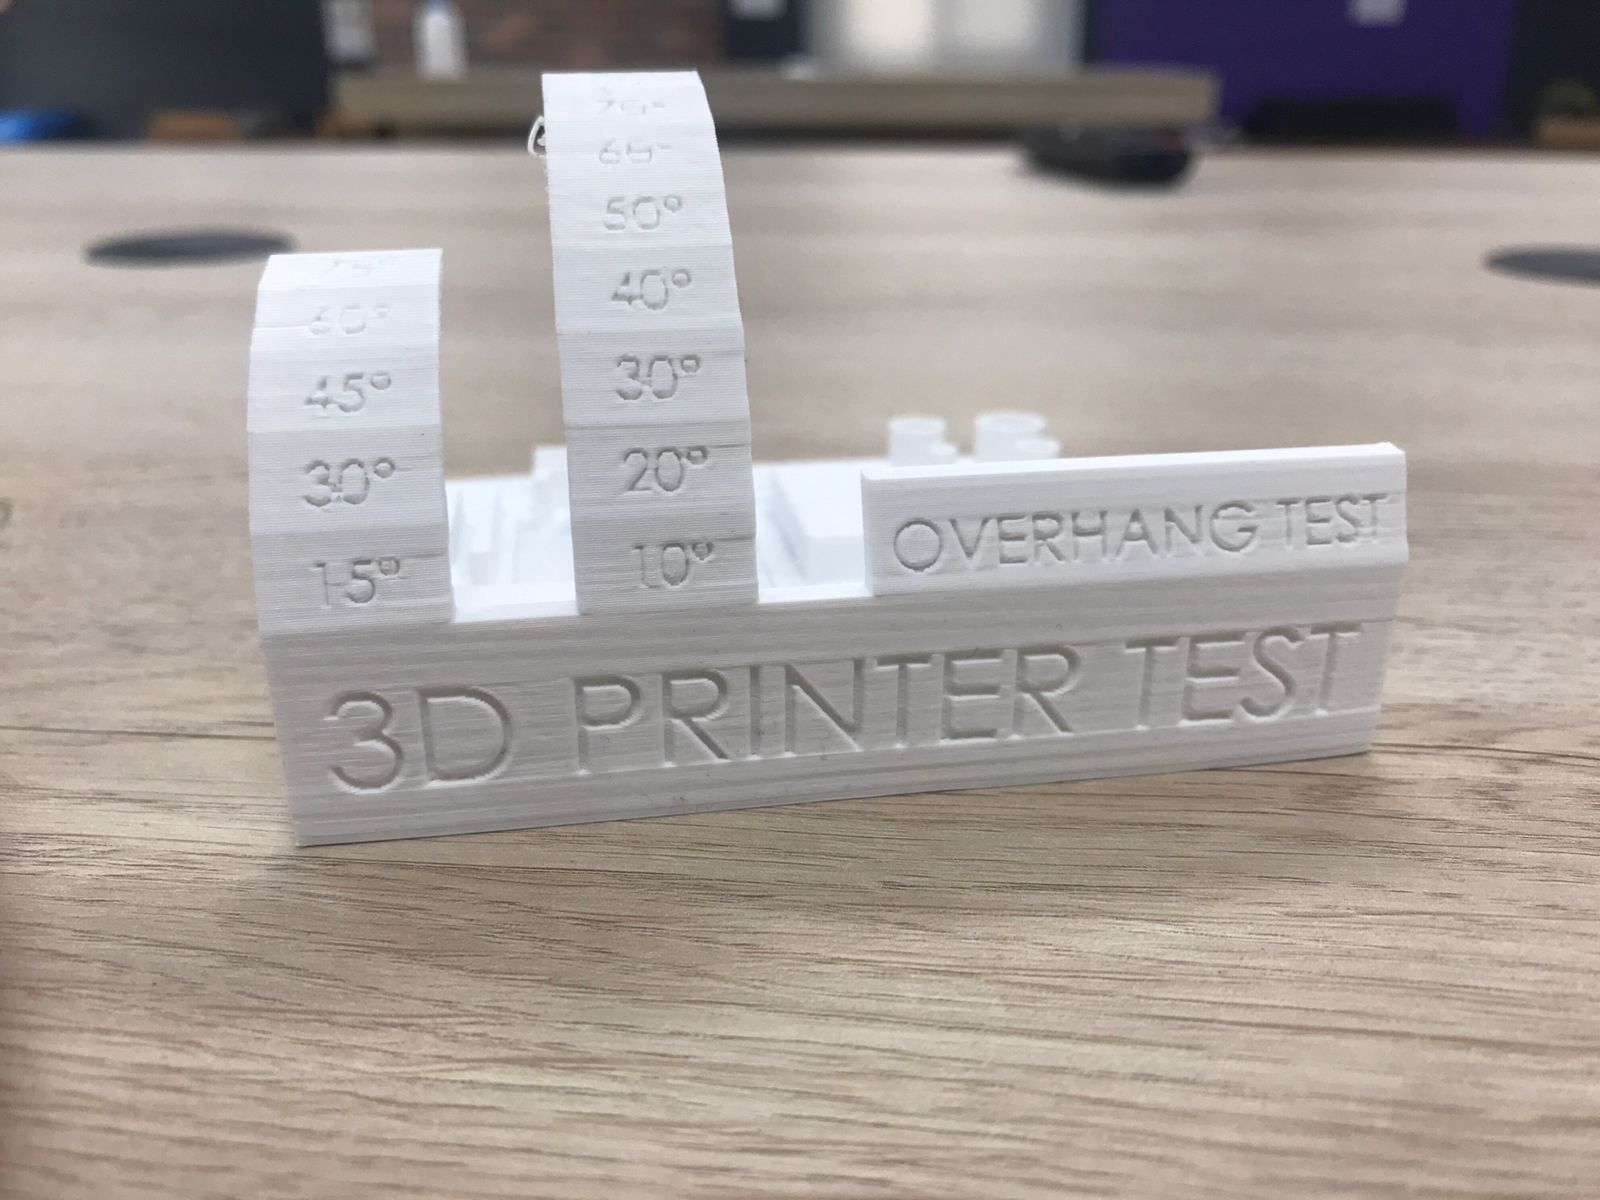
All settings have been made as defaults. All print settings are correct, and observed that after the angle 60, there is some strings. That’s normal, because over angle 60, we need support to carry the part.
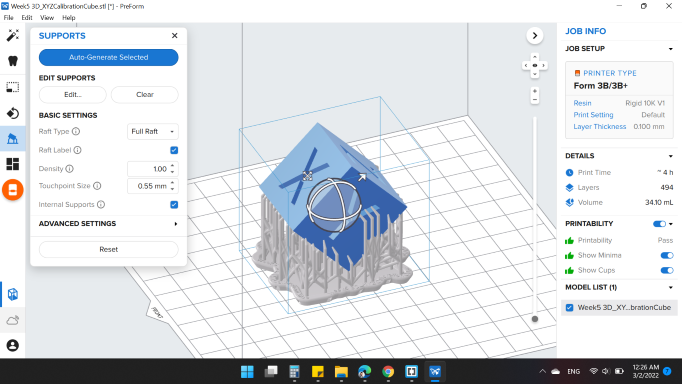
for SLA clearance test : we measure the actual dimension distance printed and the designed one and find the difference between them and that will be the difference . which is here = 0.12 , see the following pictures.


Individual Assignment
Files
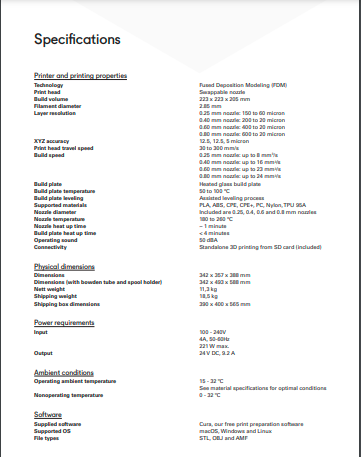
I made a pens holder using Ultimaker +2 printer with Normal default settings but with minimizing the design size by 50% in slicer program “Cura”.
ultimaker +2 specifications :
How I designed my pen holder using Fusion 360 Software :
-
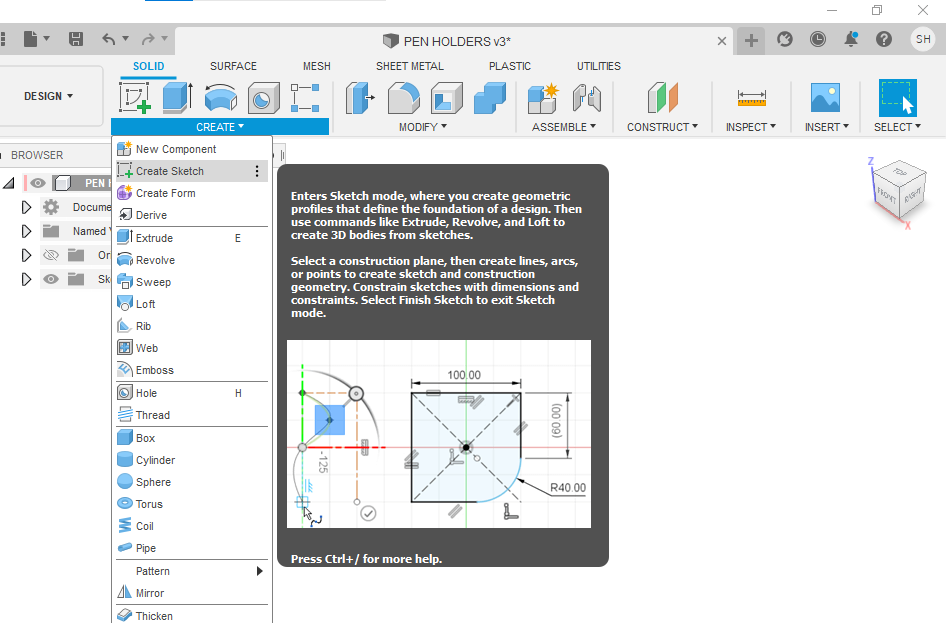
open the fusion 360 software
-
create sketch and choose the plane you want to work on .
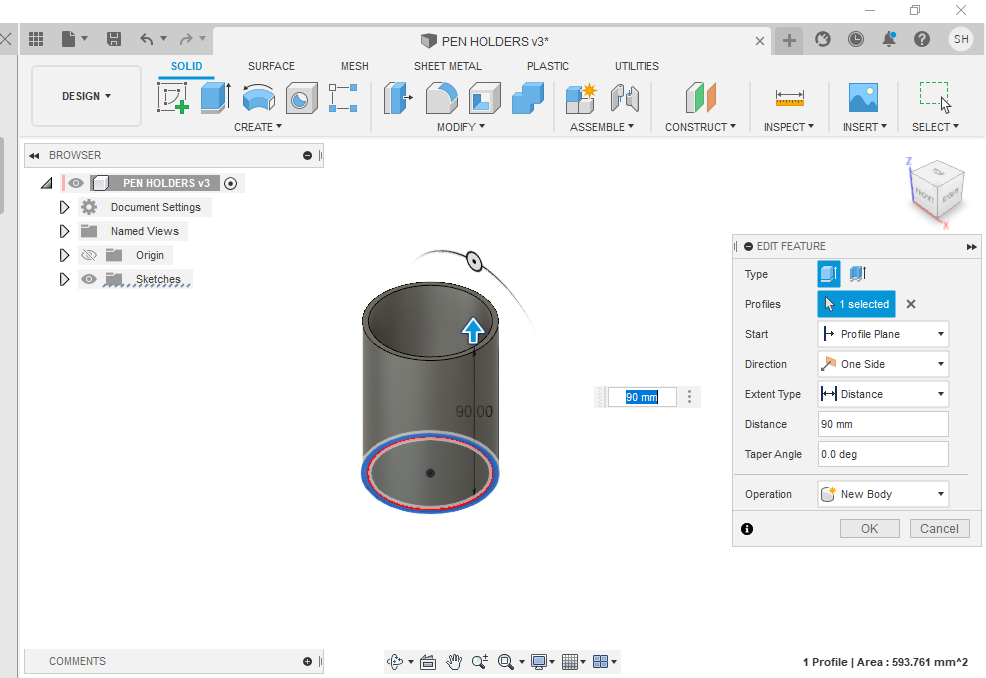
- I created two circles then extruded the common area by 90 mm and the inner circle by 2 mm.
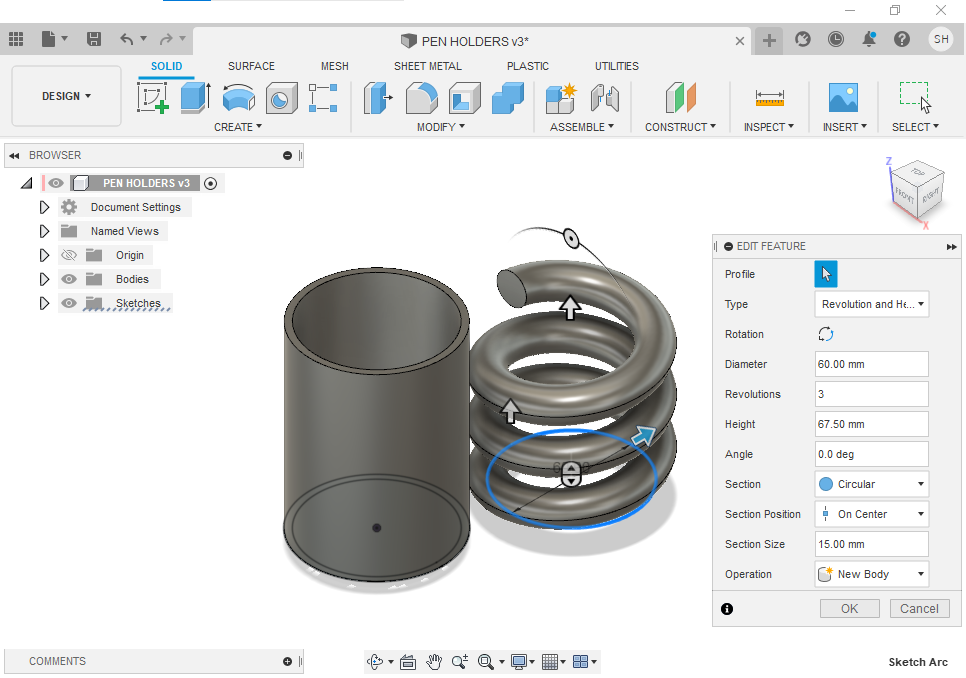
- I created a torus a coil :
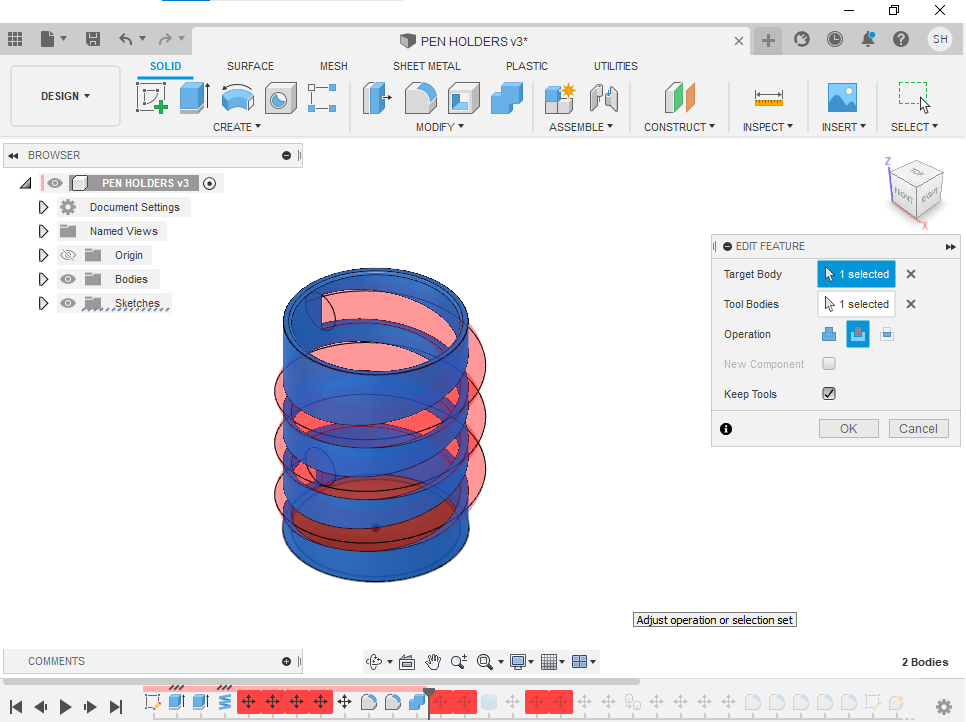
- I made a combine as cut , so I choose the cylinder to be the target body , and the coil to be the tool . and I chose the operation to be cut , un check the keep tool and hit ok.
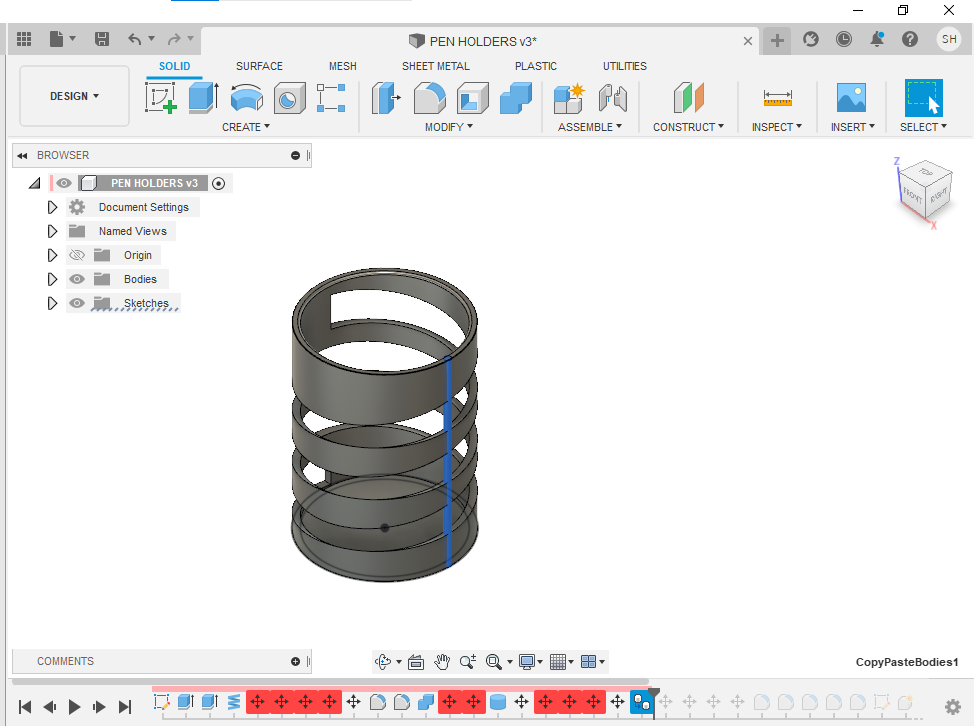
- the result after cut operation :

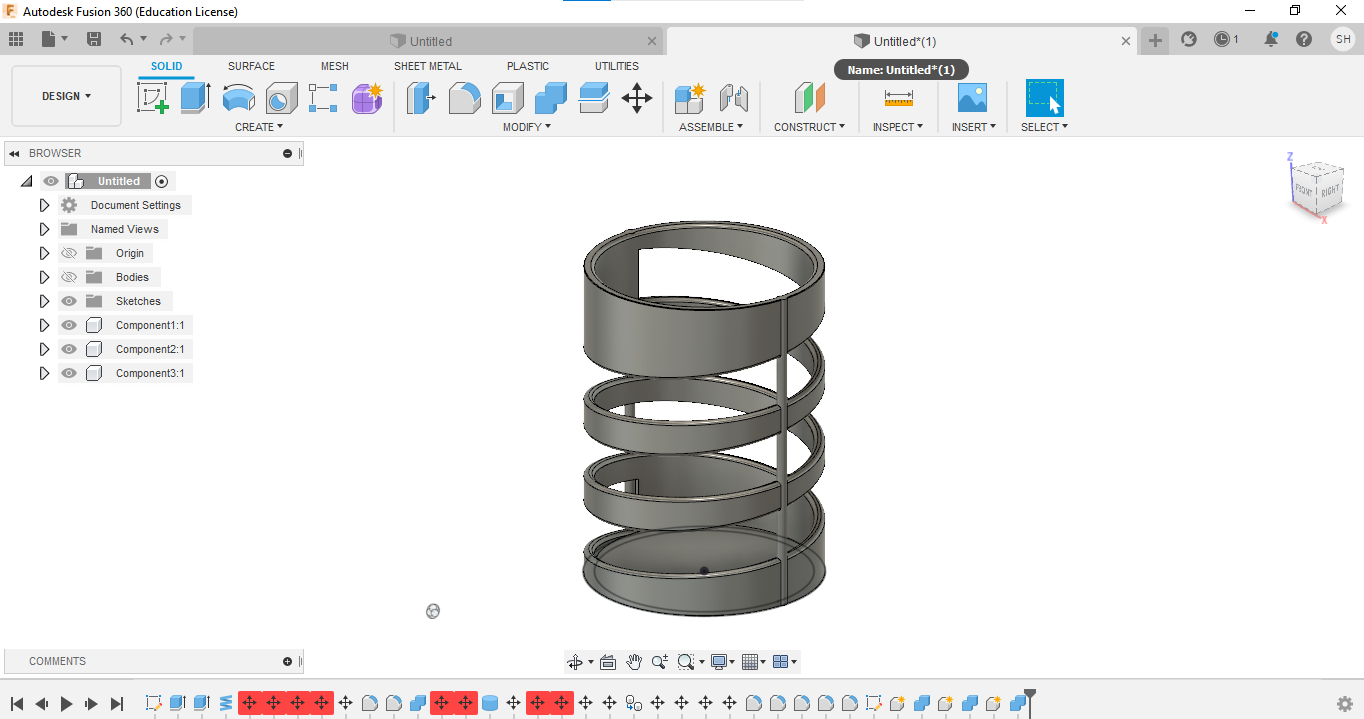
- I added a two cylinder to add more support to my model
and here is the final result fusion 360 design file
the result of 3d printing :
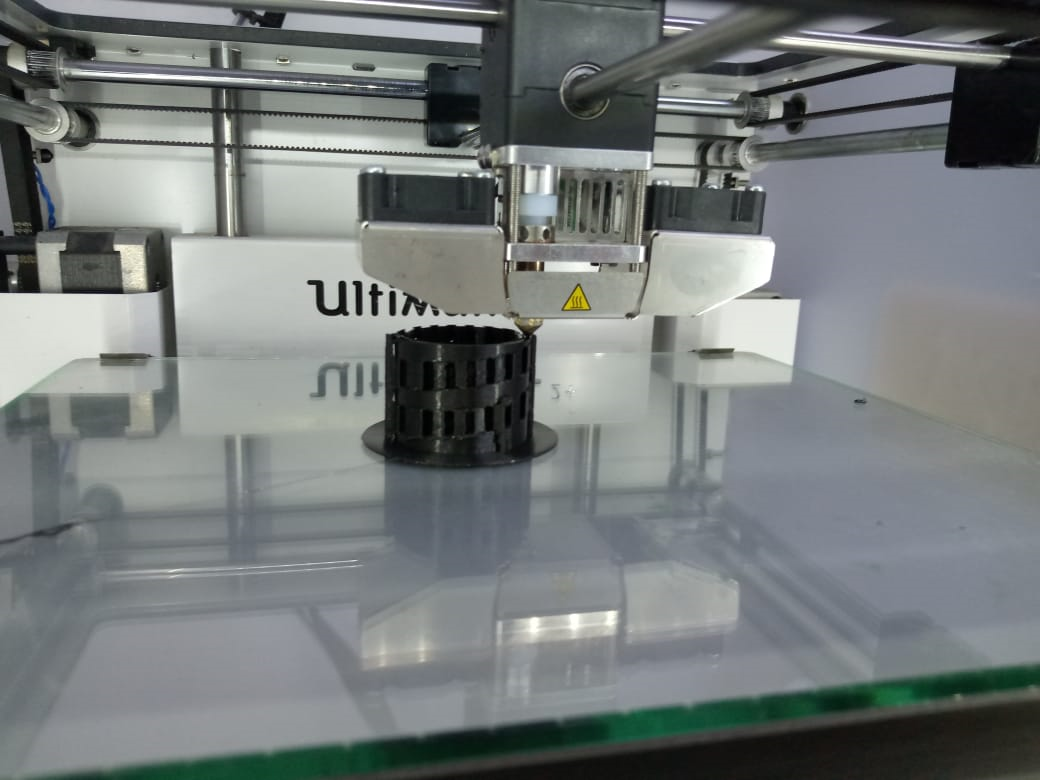
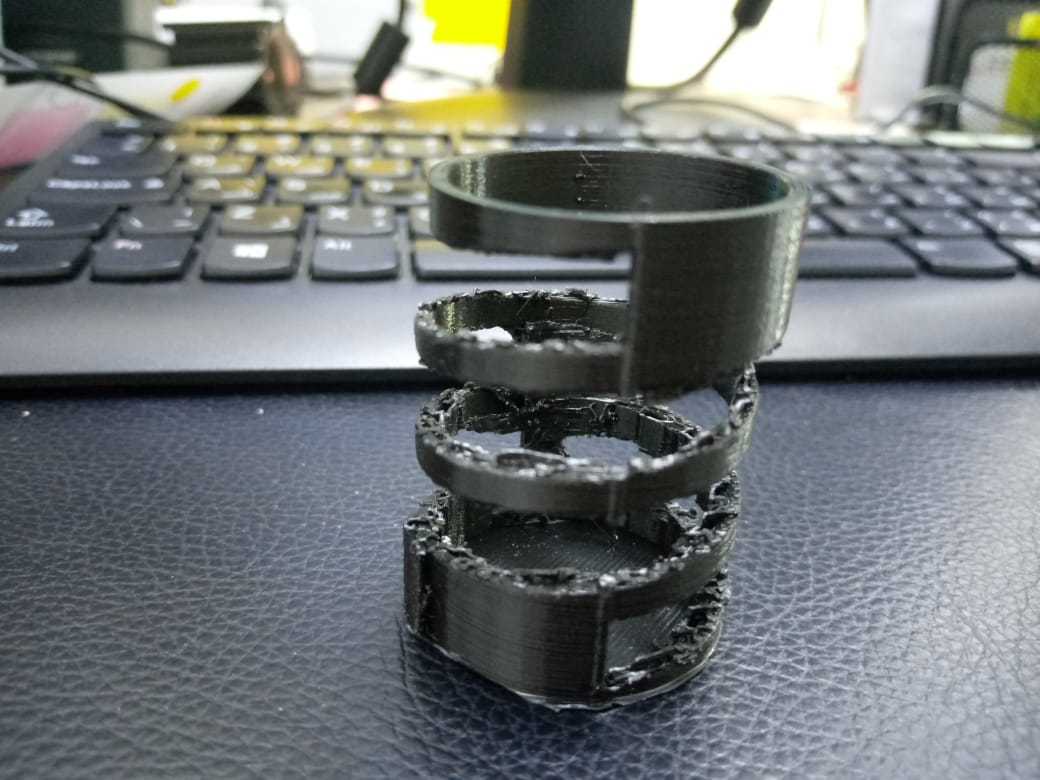
the result is unsatisfied since it is small and the support needs to be smoother. but this design can’t be produced substractively because it follows the spiral shape .
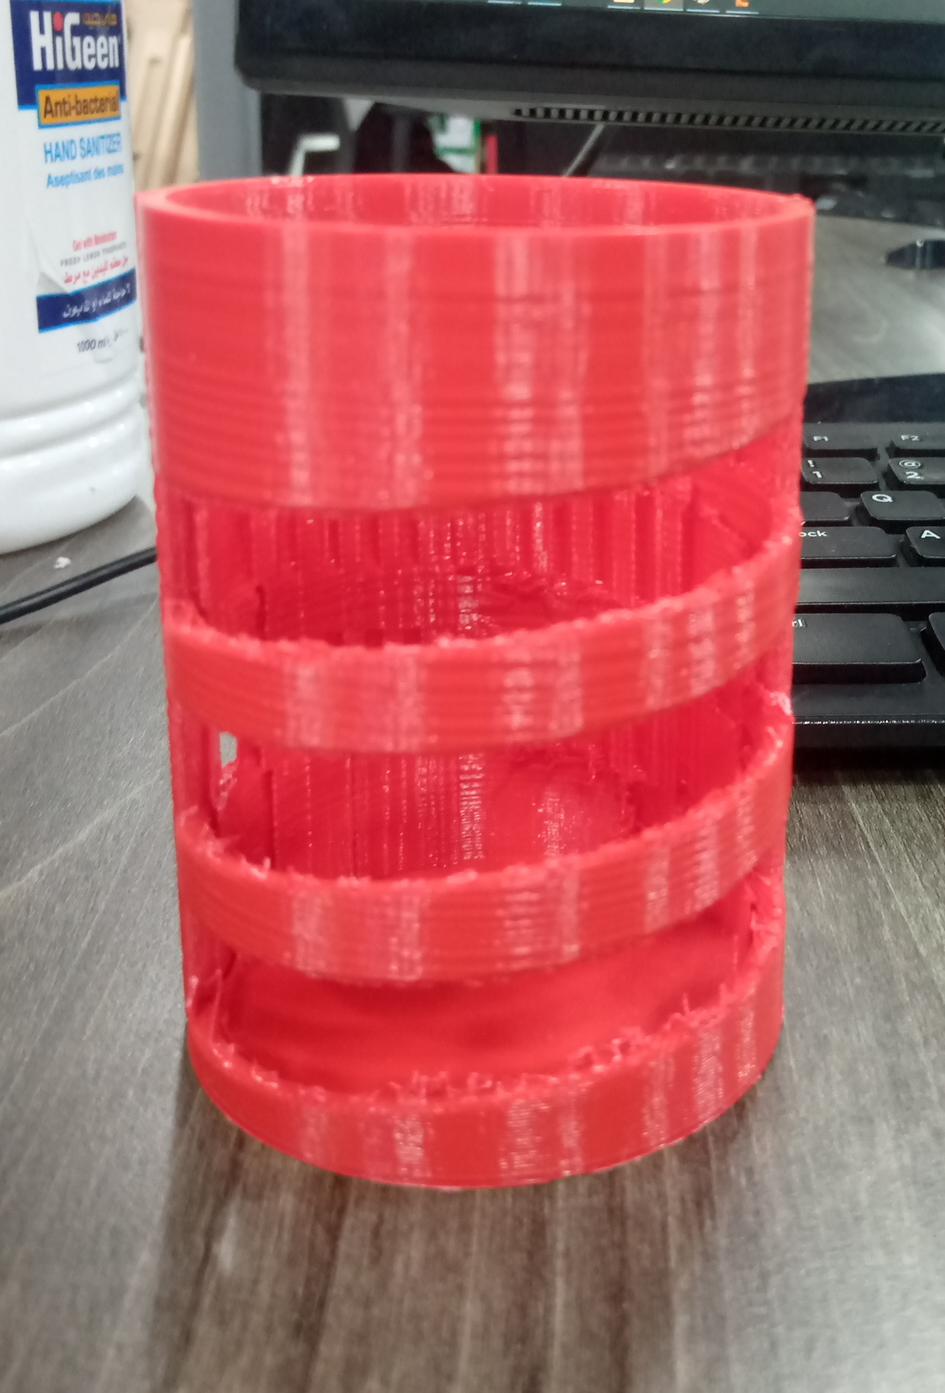
another try with different design :
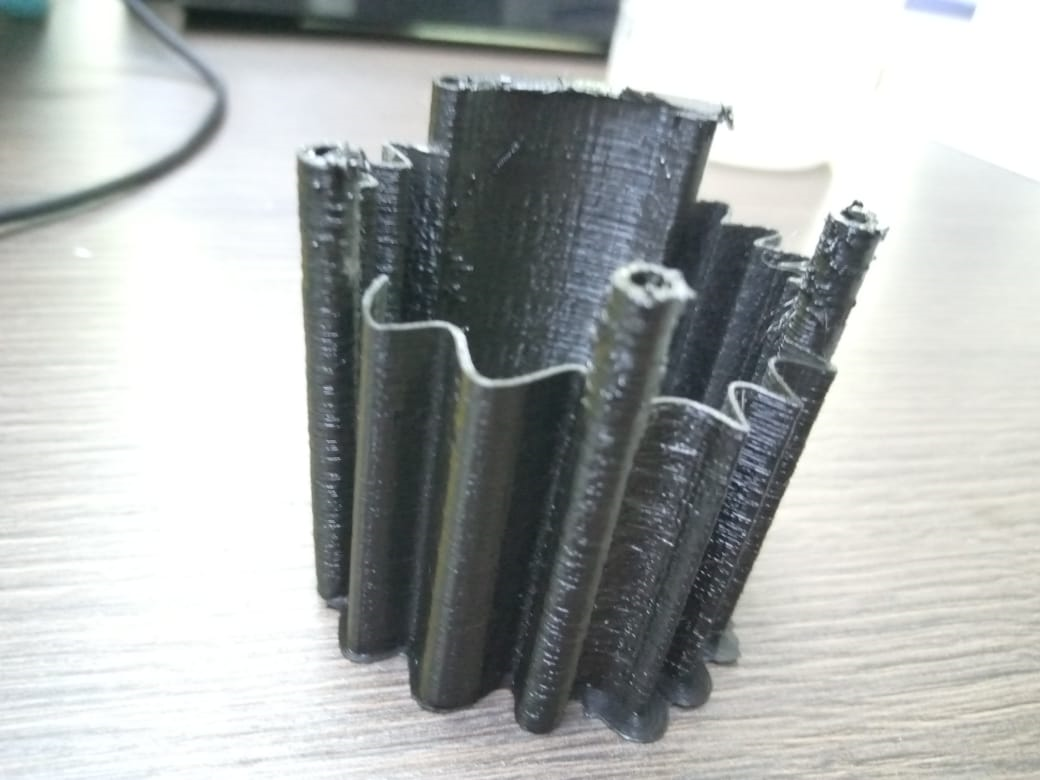
I tried to print the 3d design via Ultimaker5 with the fast settings and here is the result :
3D Scanning
files
I tried the SCANN3D software which you can install it on your phone and start scanning your object via capturing multiple images equal or more than 20 images , theses images is converted to 3d model using this software .
and here is the YouTube video that demonstrates the using of this software : https://youtu.be/TSIwDTDvc68
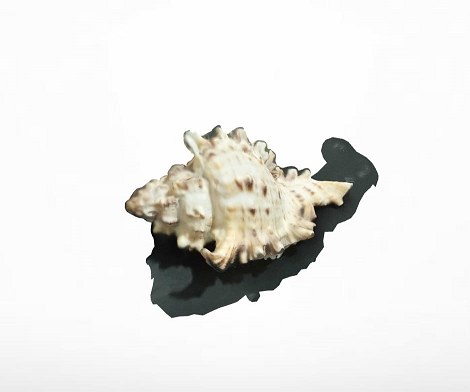
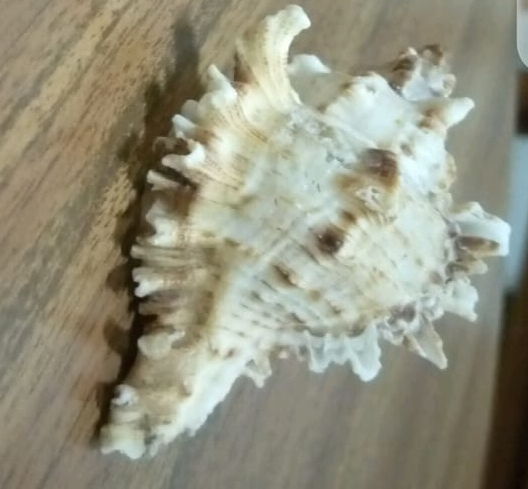
The original :
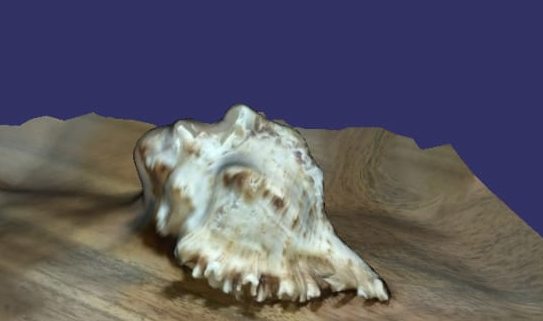
The scan version :
the problem in this app is that it is paid and you cant get the stl or obj file unless you pay .
so I tried to use xyz scanner , but the quality is so bad , but I included the file in Files section.
so I searched again about 3D scanning , and I found this app in PlayStore , Its name is “KIRI Engine” and it provides me with satisfied result .
and here is the result as Hero shot
Hero shot :