Mechanical & Machine Design
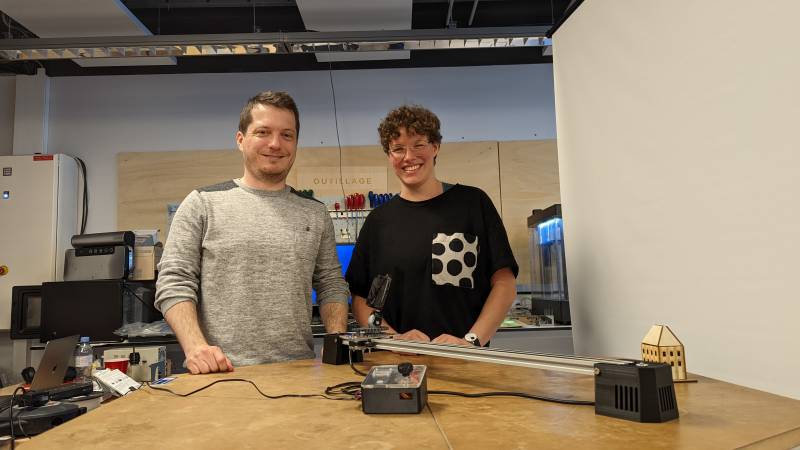
This week we worked as a group with my instructor Stephane and Clara, the other Fab Manager in FabLab SU. We decided to work on a Camera Slider as neither Stephane or Clara will be working full time on this project. It matches the ambition of making a beginner’s machine but is feasable in the same time (at least I hope so).
The global documentation can be found on Sorbonne website. We also made a public GitLab project to give access to everyone interested. All the files can be found on this repository.
Project Management
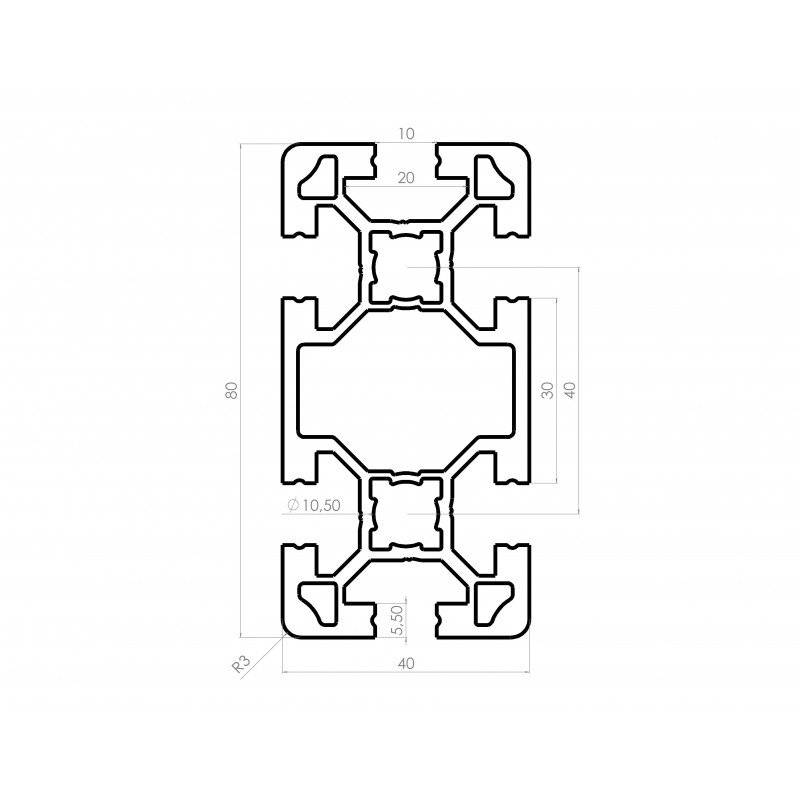
We started the week by having a brainstorm meeting to be on the same page on the design and fabrication techniques. We know we would be using an aluminium rail because we had them at the lab, but it was pretty much all I knew about the project.
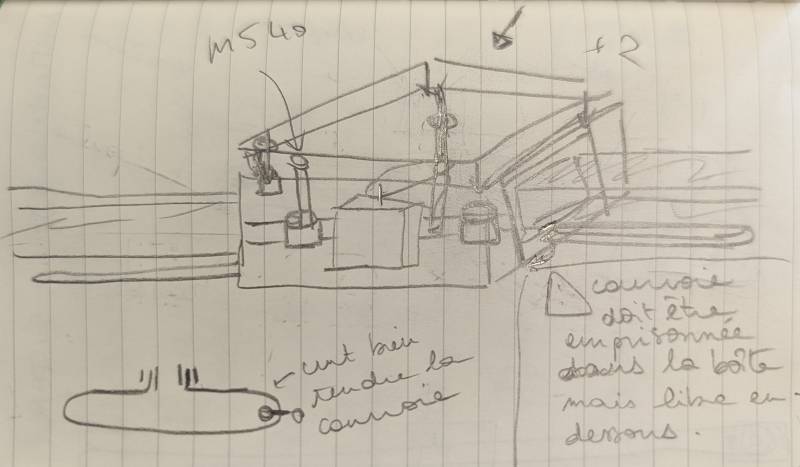
We draw a few design ideas to make it concrete. I found it hard to visualize everything we had in mind. We watched a few videos to have a better idea of the mechanisms we wanted to use (one from CNC Kitchen and the other from Daniel de Bruin). From these ideas and inspirations we decided to hide the belt into the aluminium rail, and to use gears to turn the camera around its axe.
Every one of us should make their own part: Clara is in charge of the Camera Holder, Stephane of Electronics, and I will be doing the Mechanics. It’s a challenge for me as I never did something like that before, but time to learn!
We decided to make our parts on our own but to communicate along the way to be able to correct our designs if needed.
CAD Design
Gathering available 3D models
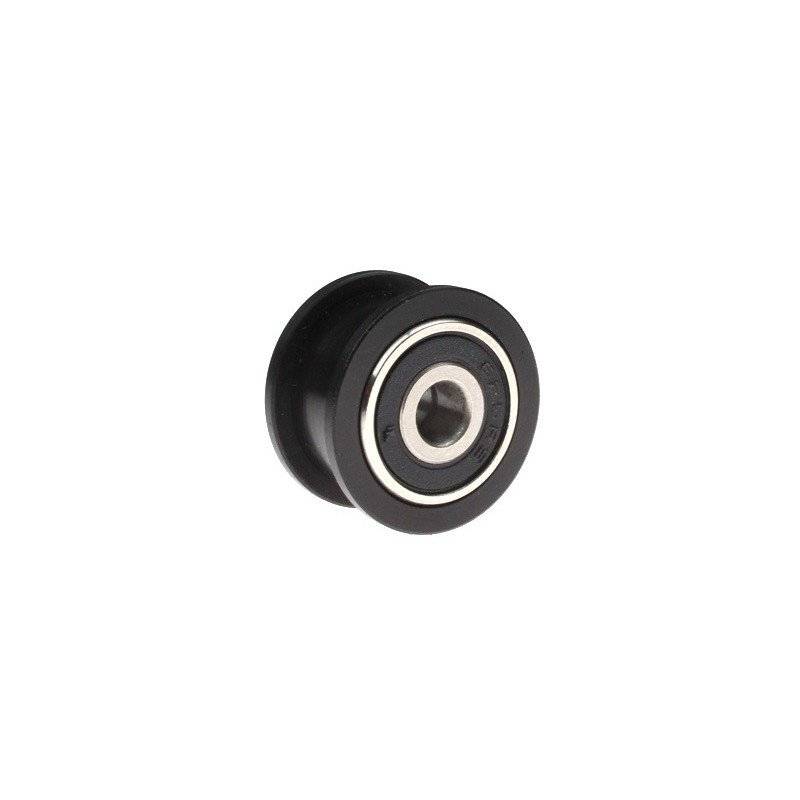
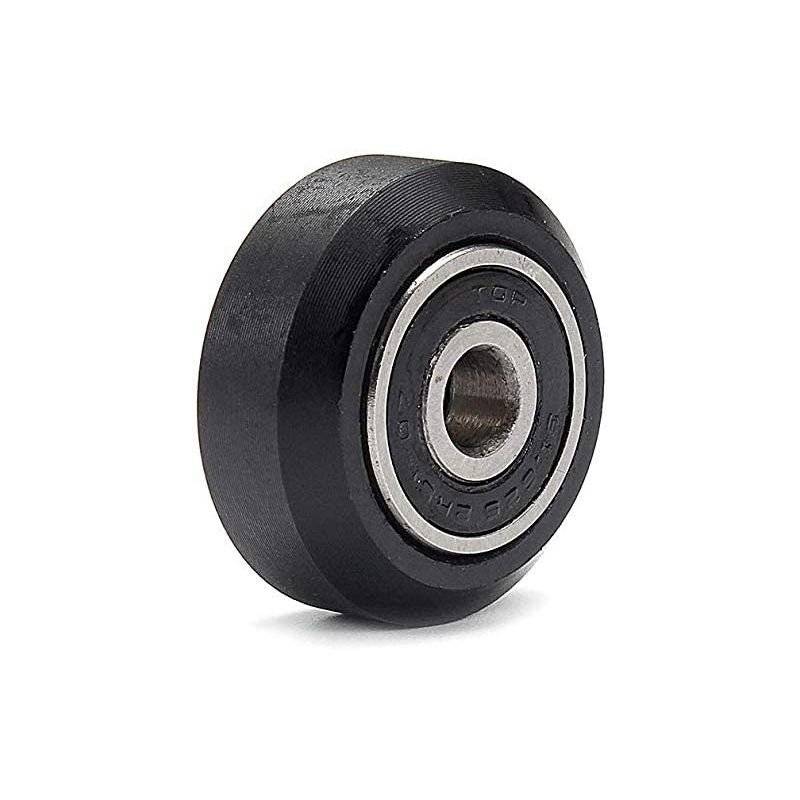
I first checked the available mechanical parts we have at the lab and asked around to know what was the name of some parts… Then I selected four wheels and pulleys I thought were adapted for the slider, and that gave me enough design ideas to start making it on FreeCAD.
I first needed to get all the available parts I would be using into FreeCAD, so I searched them online. Stephane told me that I could find the 3D models of the aluminium rails on Systeal, and I did, as well as the pulley and wheels.
I still needed to find or create 3D models of the motors and some electronic parts, and then I remembered that I found GrabCAD a few months ago when trying FreeCAD for the first time. I found a Nema 17 stepper model model, a Nema 14 one and a belt model that proved very useful later.
Mechanical design
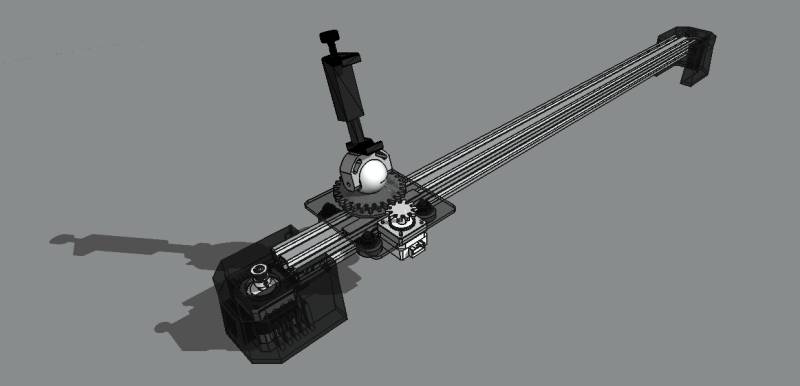
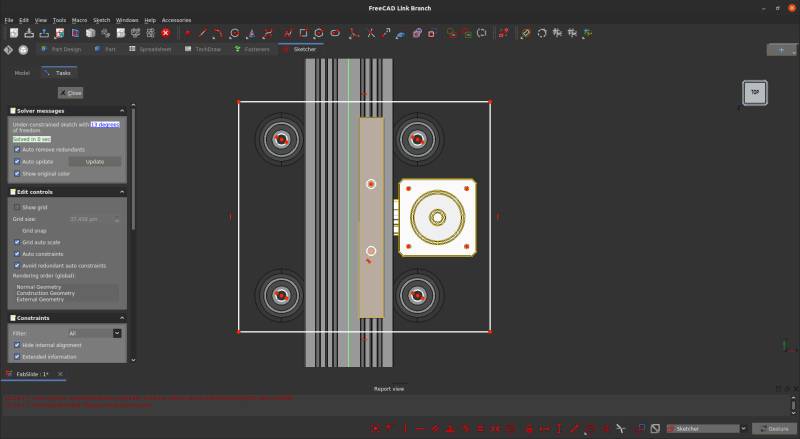
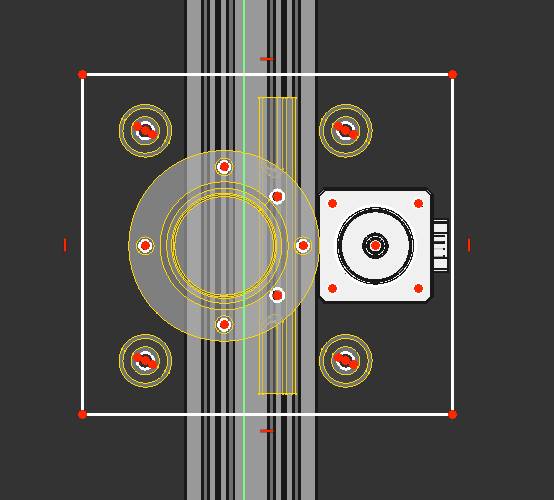
I first started by positioning every elements I had on the screen. I didn’t use any assembly plugin because I don’t know yet how to use them properly and it seemed easier to just position everything on the right spot. I had to clone the original step files to be able to modify them: as an example, the aluminium rail was way too small to be usable, so I lengthened it at the right size.
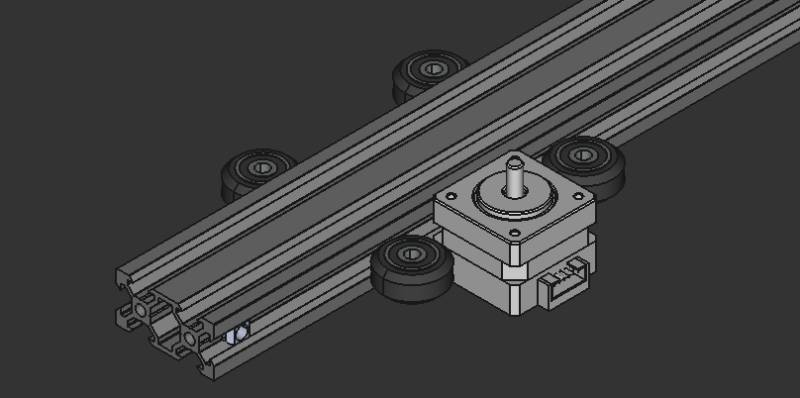
Once it was done, I had a base to work on!
Platform
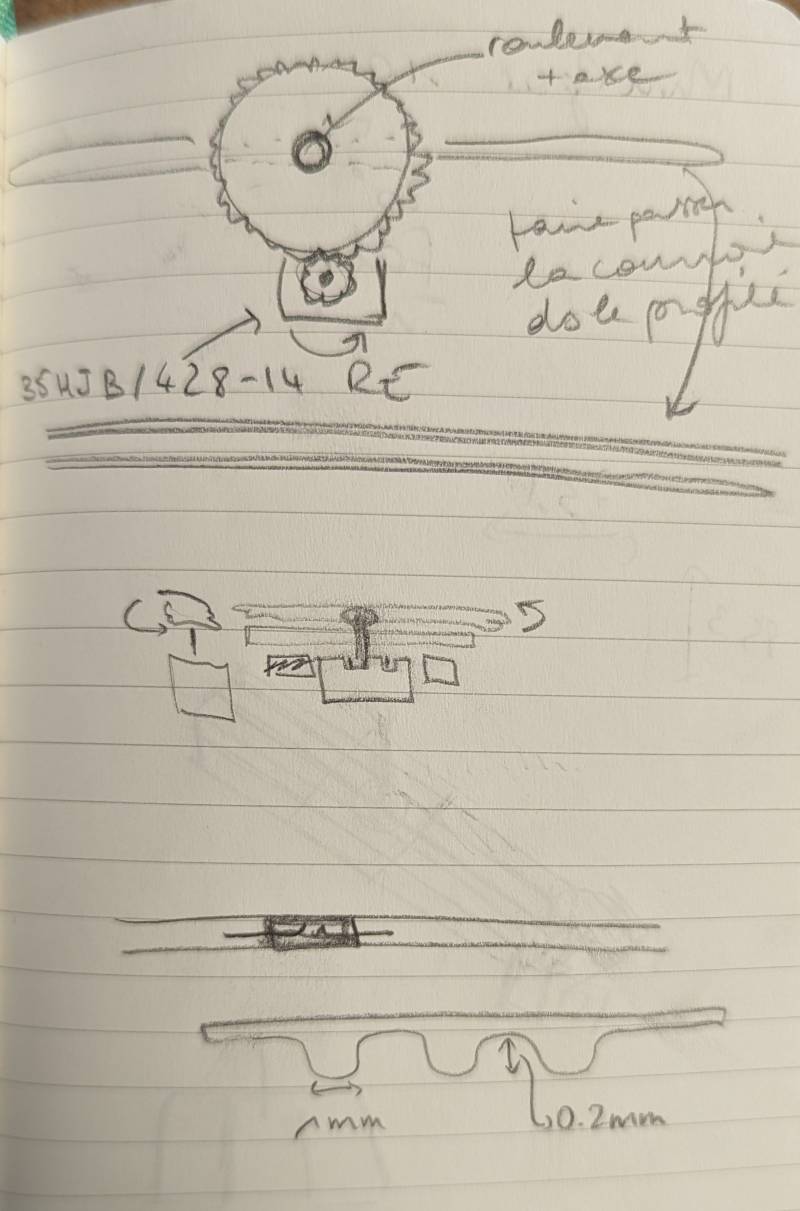
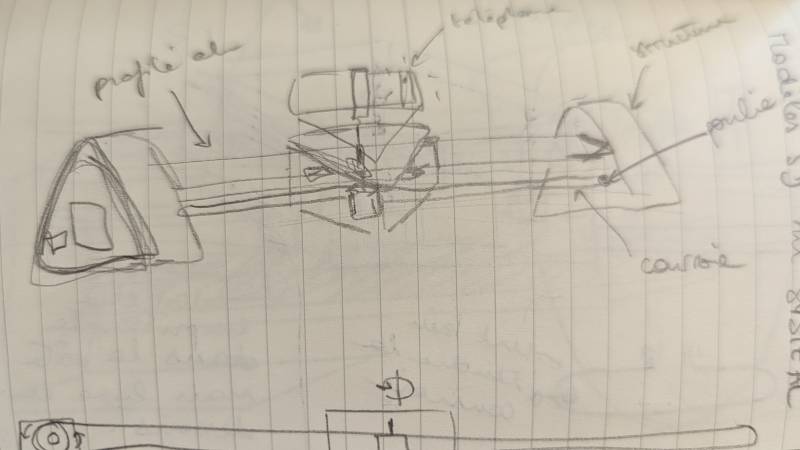
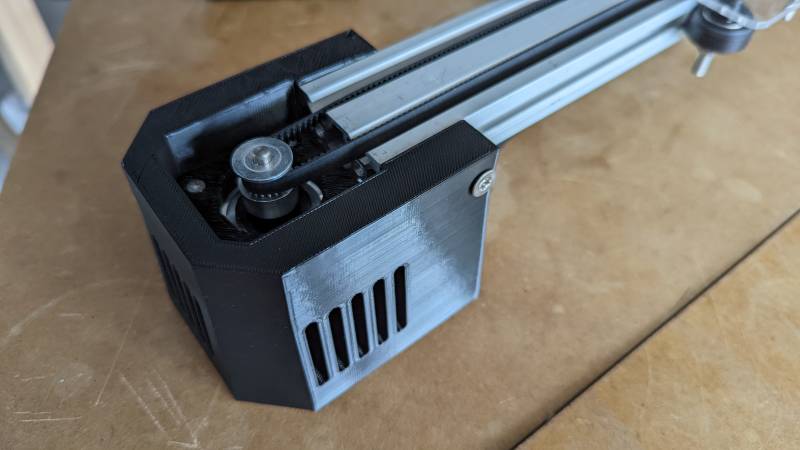
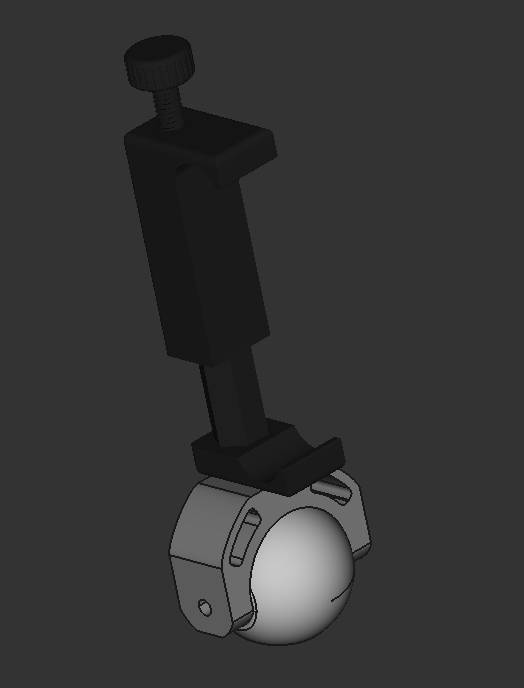
The trickiest part to design was the thingy that was going to hold the platform to the rail, so I began by that part. I sensed it would take a few iterations, and I was right…
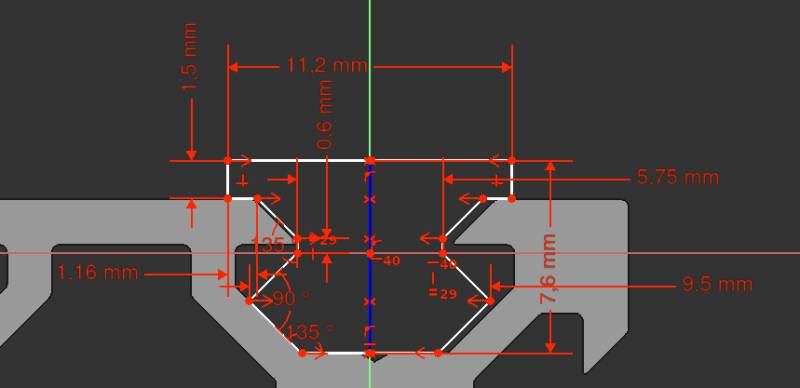
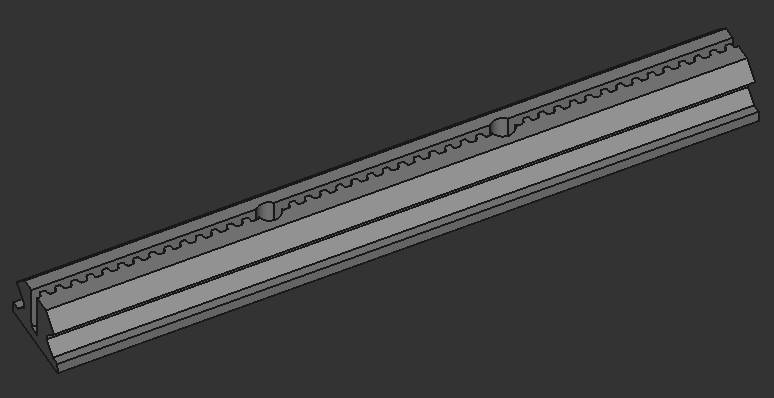
As you can see, I draw directly from the rail form and tried my best to keep the piece as large as possible (it will take the weight of the camera on top and I didn’t want it to be unbalanced).
I tried a bunch of designs for the tightning part (see below the thingy’s cimetary), but finally the best option to keep the belt well tight was to insert it directly: so I made a boolean operation with the design of a GT2 belt I found earlier.
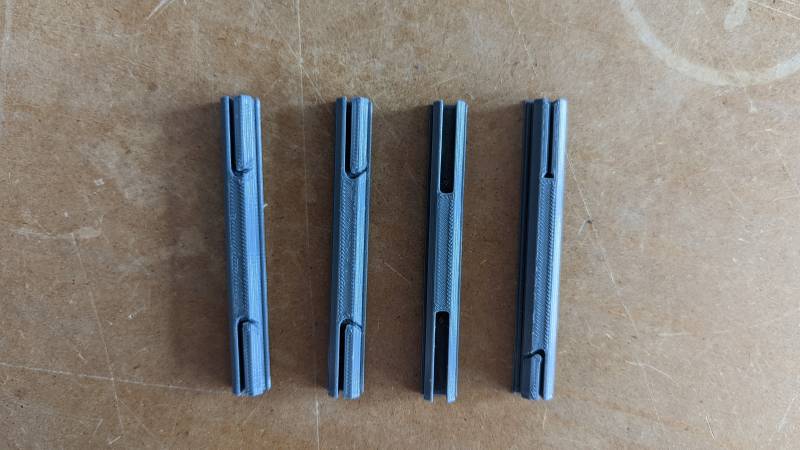
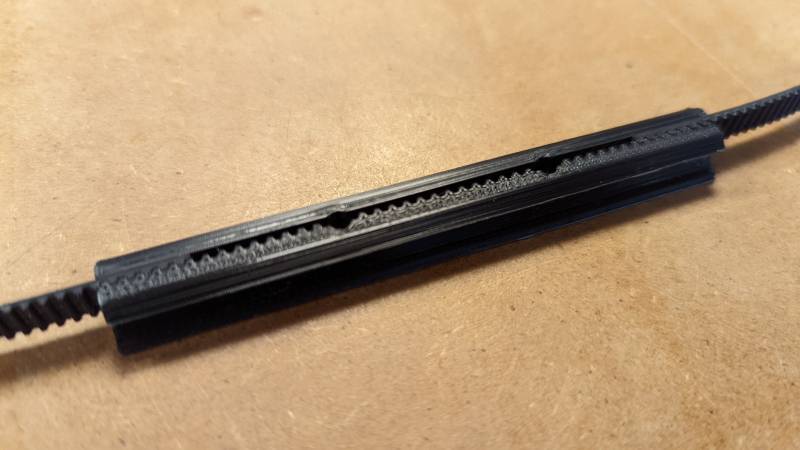
After designing this part for the fifth time, it fitted nicely on the rail and gripped the belt surely enough. So I designed quickly a platform on top of the wheels and the thingy (I really need to call it otherwise but it sounds good, no?) to test the alignment. Of course it didn’t work the first time: I cut the platform in 3mm plexy but the holes for the wheels were a bit too close to each other and it bent the platform.
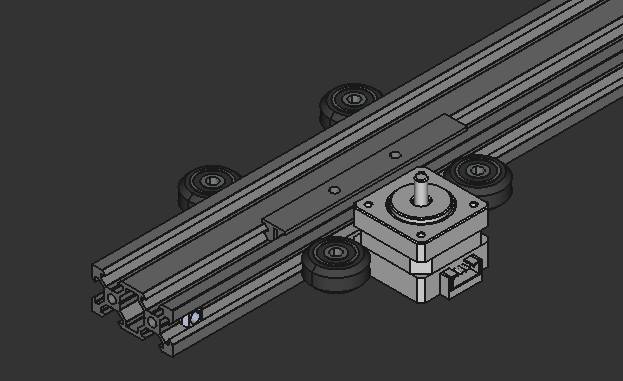
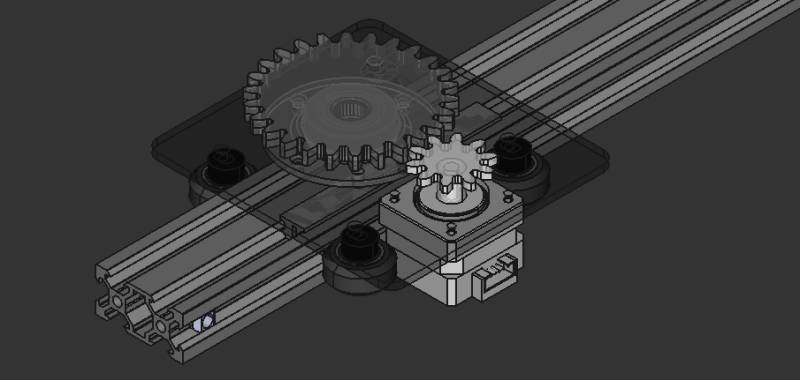
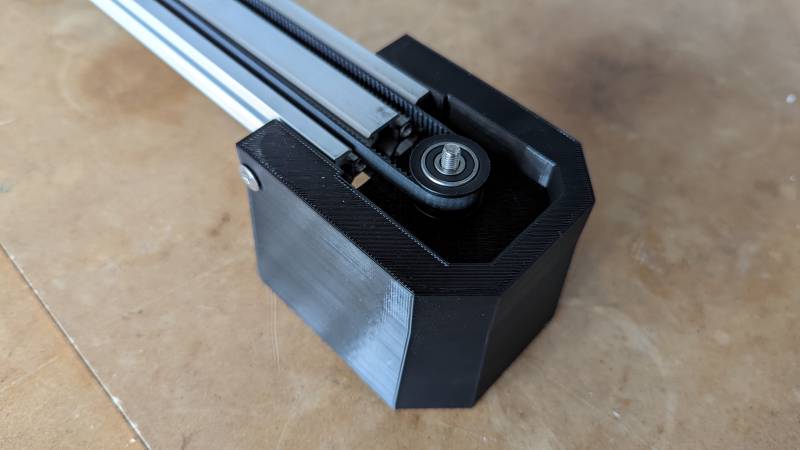
So I decided to work on the gears for the rotating palet before redoing the platform. Stephane helped me designing the puck because I was working on the thingy for the fourth time at this moment. So he did the rotational part that holds the bearing, and I added the gear part and the holes for fixing the thingy. You can see the result on the exploded view on the right picture below (we changed the design from square to round in the process).
Gears in FreeCAD
I discovered a workbench called Gear that does a very decent job, but I finally used the Part Design builtin function Involute gear that you can find under Part Design > Involute gear…
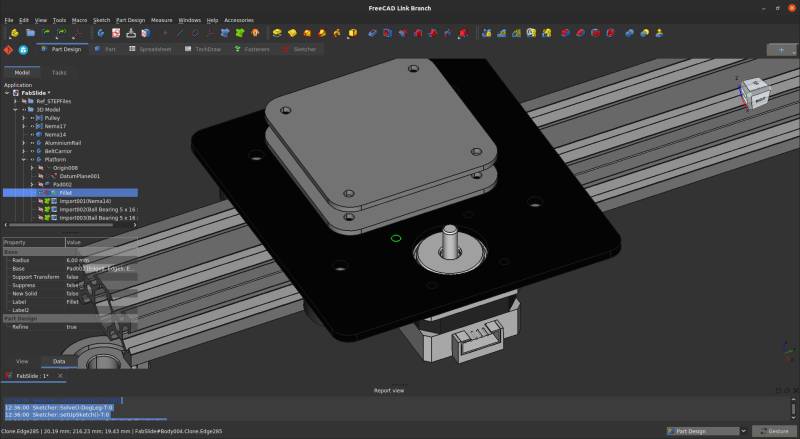
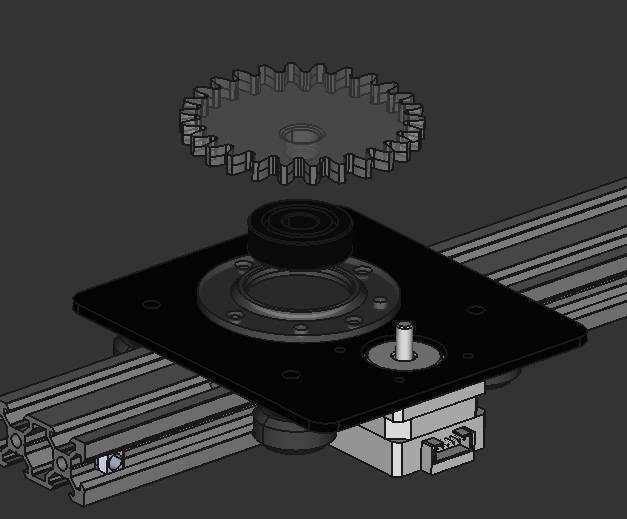
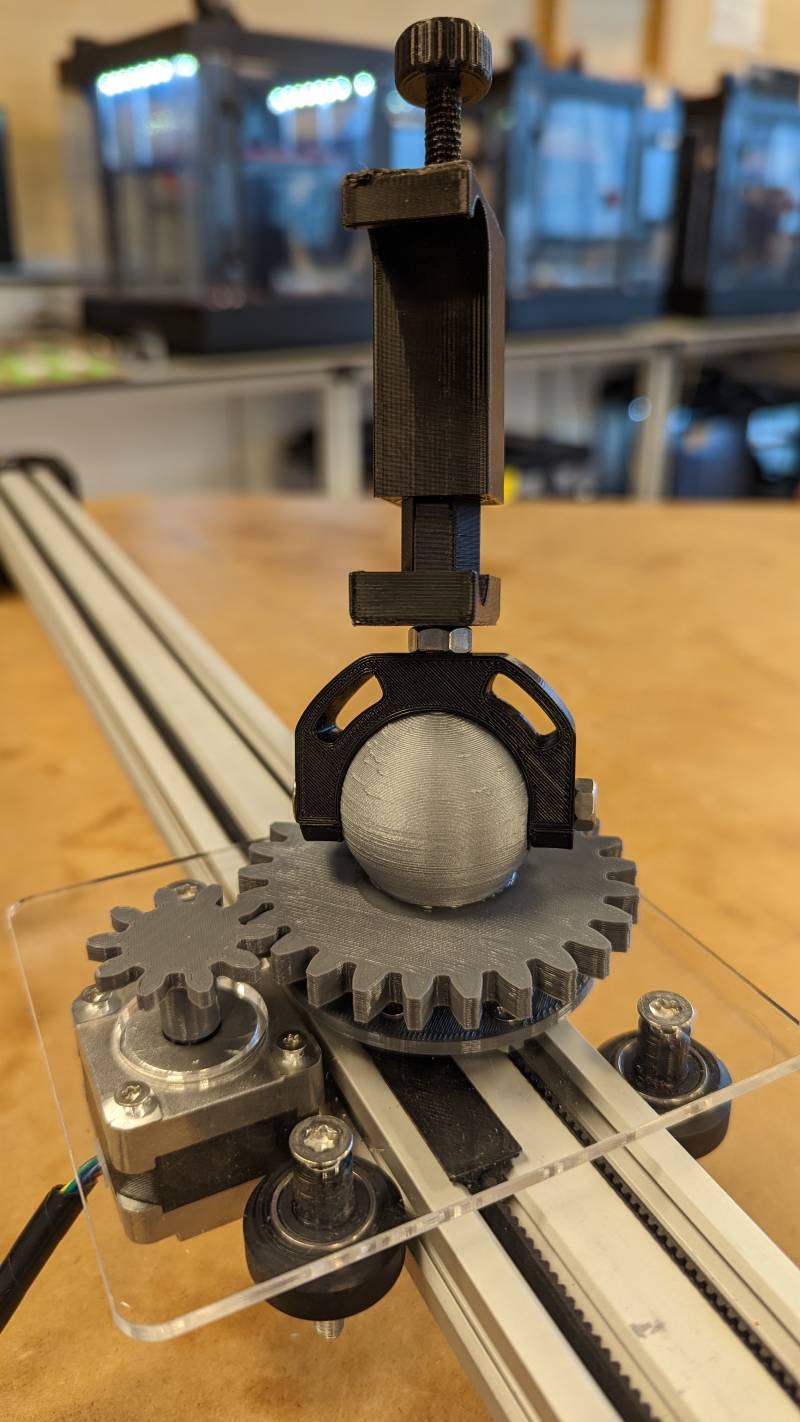
Then I added the mini gear and all the holes in the platform and we had a valid prototype. I also added some supports between the wheels and the platform because it wasn’t stable enough.
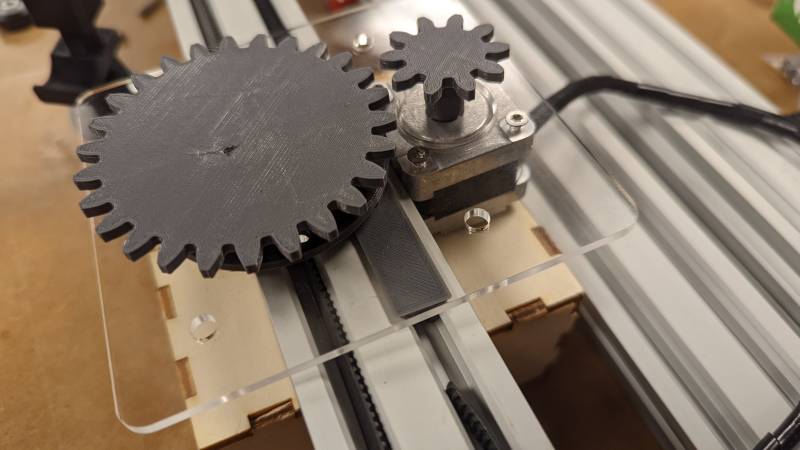
The first time I printed them it didn’t work as I expected because the large gear were too far away from the small one. Moreover, the gear wasn’t flat because when I removed it from the 3D printer it bent: as it was 3mm thick, it wasn’t hard enough. So I redid the alignment and made the gear 5mm thick to make it work.
Supports
I designed the supports with no aesthetic in mind because I was stuck for a while trying to make something nice to see. I ended up making a bad looking design but it worked, so the good looks will be for a V2 (maybe?).
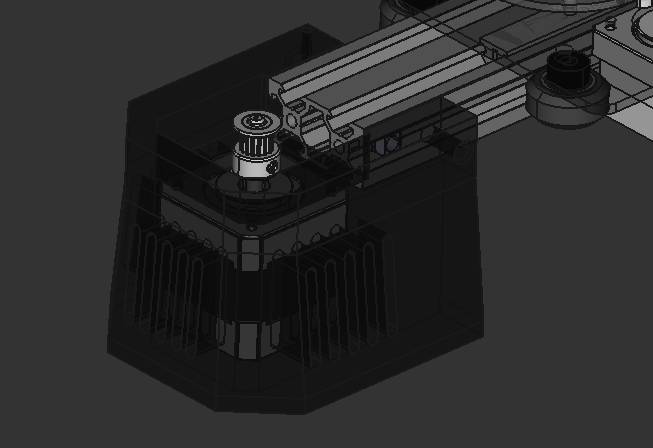
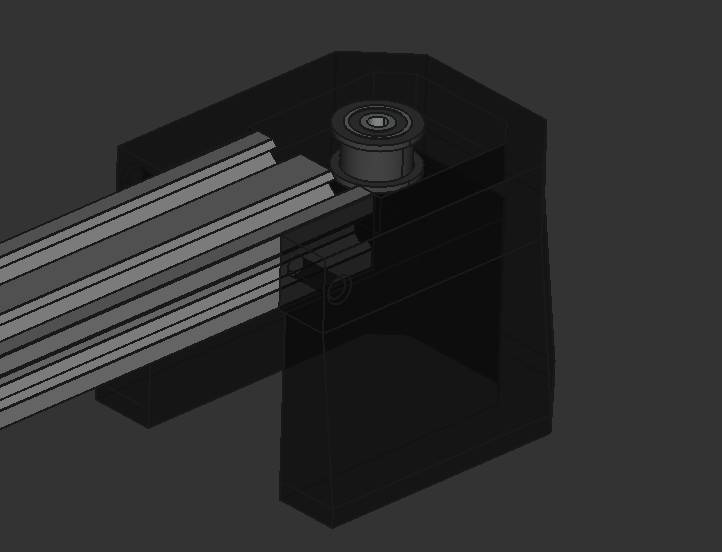
And here are the real ones: the pulley support is also the piece that strains the belt.
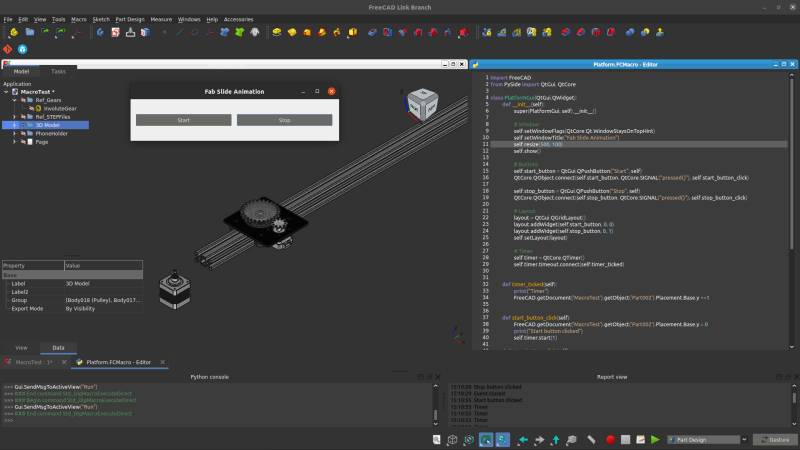
Using python to animate a model in FreeCAD
A few ressources about macros in FreeCAD
I wanted to try python macros in FreeCAD for so long, it was finally time to do it! I like watching the replays of a Twitch channel by Adrien Bracq, a Fab Academy alumni who explains his progress learning FreeCAD. I really like how he experiments with the software, and he showed how to use macros to animate a robot in one of his videos.
I also found a few tutorials that helped me starting it.
Of course the animation is basic and everything does not work, but what a treat to use python directly in FreeCAD! I even added a little button in the toolbar to call the macro without passing through all the menus. I love these open source software, they are so customisable. You may have notice that my interface does not look like the classic one, it’s because you can change everything you want in it, as you like.

Python code
If you’re interested, here is the python code that is used in the video above. It’s very easy, I didn’t do anything spectacular because I didn’t want to lose too much time (we only have one week, it’s crazy!).
import FreeCAD
from PySide import QtGui, QtCore

class PlatformGui(QtGui.QWidget):
    def __init__(self):
        super(PlatformGui, self).__init__()

        # Window
        self.setWindowFlags(QtCore.Qt.WindowStaysOnTopHint)
        self.setWindowTitle("Fab Slide Animation")
        self.resize(500, 100)
        self.show()

        # Buttons
        self.start_button = QtGui.QPushButton("Start", self)
        QtCore.QObject.connect(self.start_button, QtCore.SIGNAL("pressed()"), self.start_button_click)

        self.stop_button = QtGui.QPushButton("Stop", self)
        QtCore.QObject.connect(self.stop_button, QtCore.SIGNAL("pressed()"), self.stop_button_click)

        # Layout
        layout = QtGui.QGridLayout()
        layout.addWidget(self.start_button, 0, 0)
        layout.addWidget(self.stop_button, 0, 1)
        self.setLayout(layout)

        # Timer
        self.timer = QtCore.QTimer()
        self.timer.timeout.connect(self.timer_ticked)


    def timer_ticked(self):
        # Move platform on the rail
        FreeCAD.getDocument('MacroTest').getObject('Part002').Placement.Base.y +=1
        # Move gears on platform
        FreeCAD.getDocument('MacroTest').getObject('Body011').Placement.Rotation.Angle += 0.5

    def start_button_click(self):
        FreeCAD.getDocument('MacroTest').getObject('Part002').Placement.Base.y = 0
        print("Start button clicked")
        self.timer.start(1)

    def stop_button_click(self):
        print("Stop button clicked")
        self.timer.stop()

    def closeEvent(self, event):
        self.timer.stop()
        print("Event closed")


gui = PlatformGui()
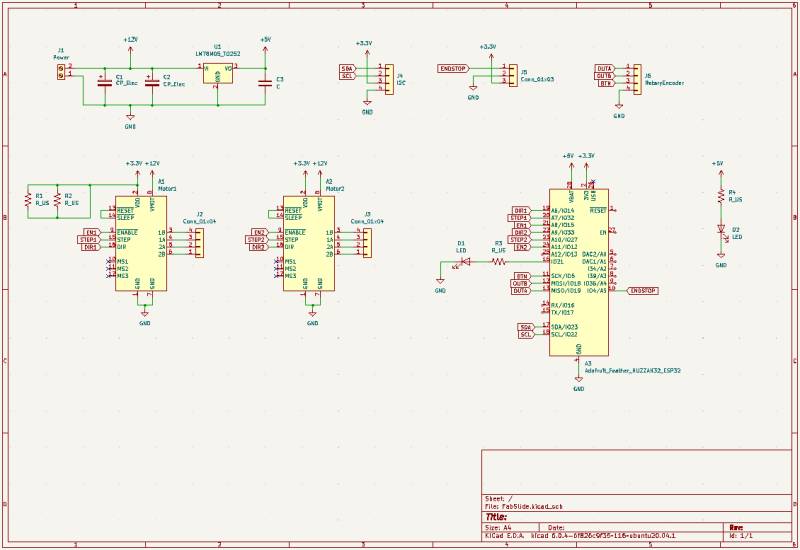
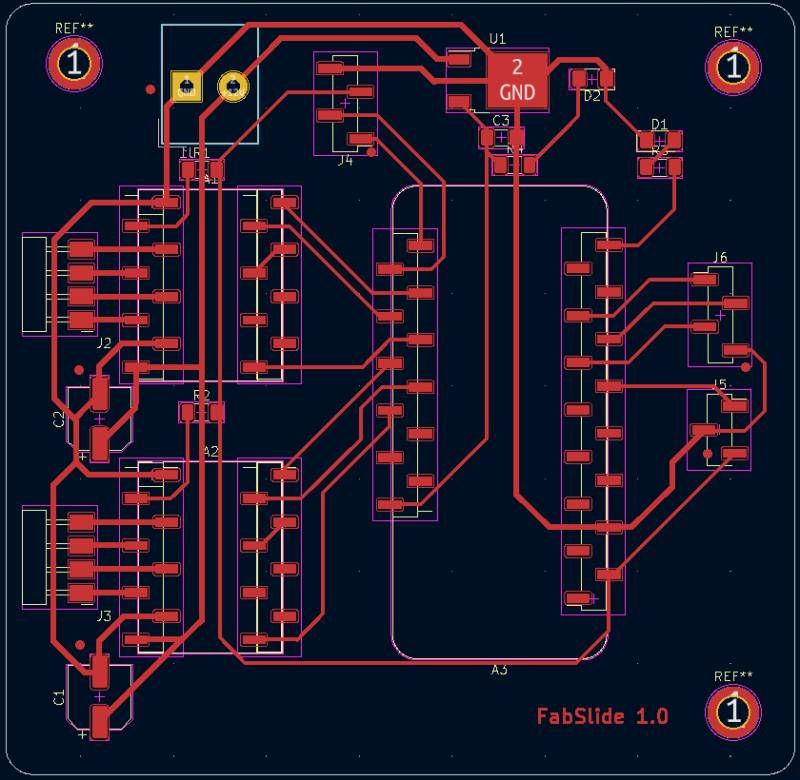
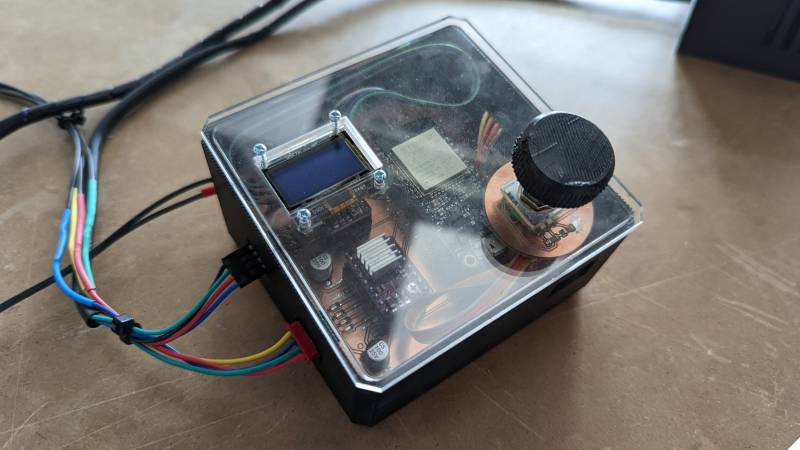
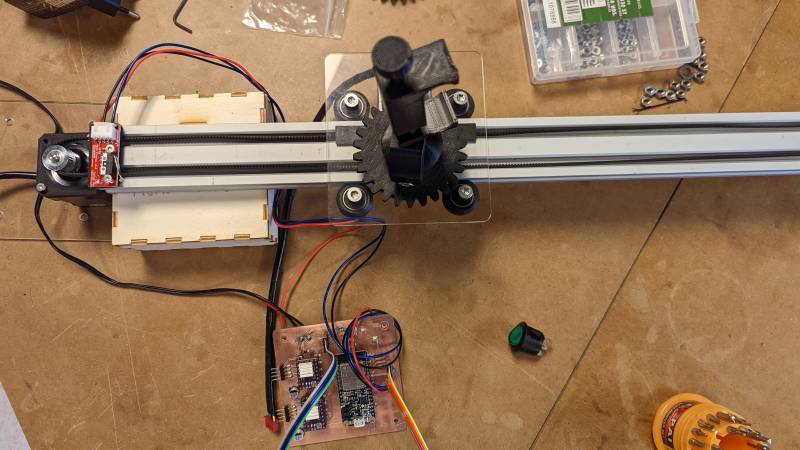
Electronics in a box
Stephane made the main board for this project and designed a nice box to contain everything. You can find his documentation on the Sorbonne website.
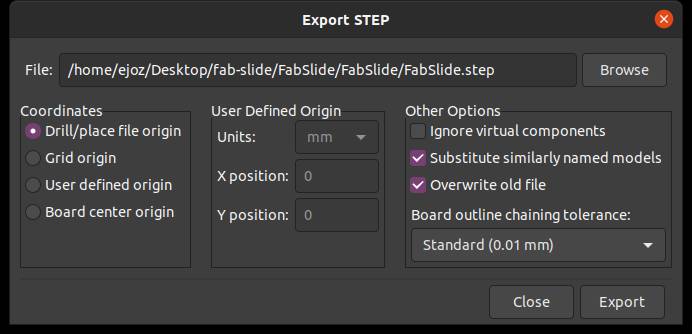
How to import a 3D board model from KiCAD to FreeCAD
I found here the trick to export correctly a board design from KiCAD to obtain a complete 3D version.
Go to File > Export > STEP and check the box Substitute similarly named models.
KiCAD Design
Production
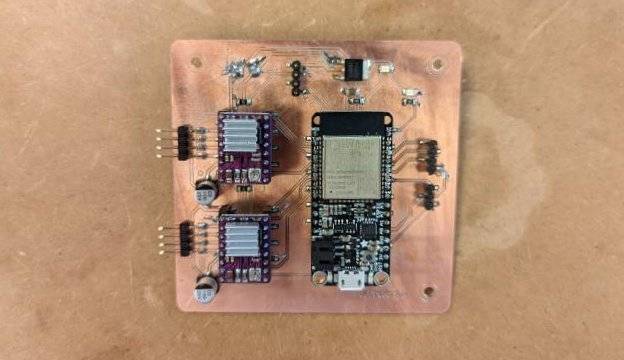
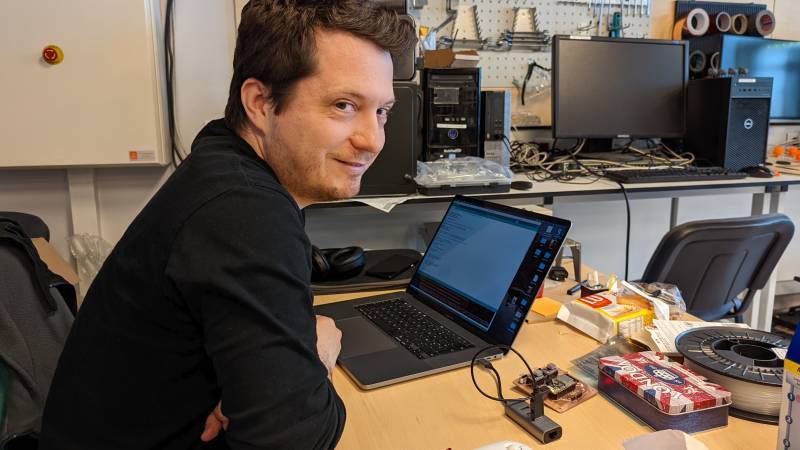
You can see the result of the production above, as well as Stephane waiting for the code to compile.
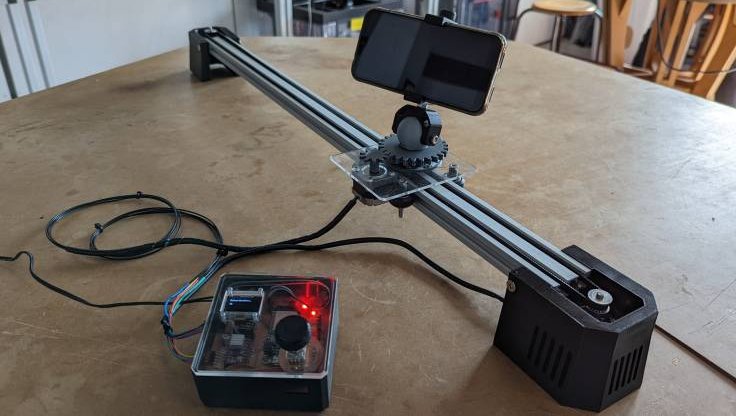
Result
The result is really neat, I love it: the plexy cover make a very beautiful effect.
Phone Holder
Clara mixed up a few files she found online to make an universal phone or camera holder. To integrate it in the project I added a screw to fix it to the big gear, but it doesn’t work. We had to fix it with epoxy glue to make it strong enough: the platform would turn only the gear and not the phone or camera.
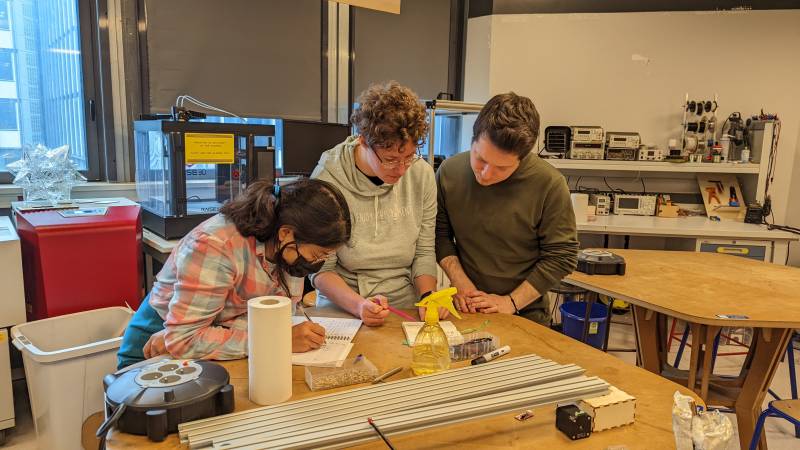
Testing and finetuning
Once everything was in place, there was still some finetuning to do. We had to find the right speeds for both motors and also adjust the current drawn by the motors. The code seemed to be working fine but for some reason the camera never ended its course in the right position. As it turns out, the driver wasn’t outputting enough current and the stepper did not have enough torque which had the effect of missing some steps.
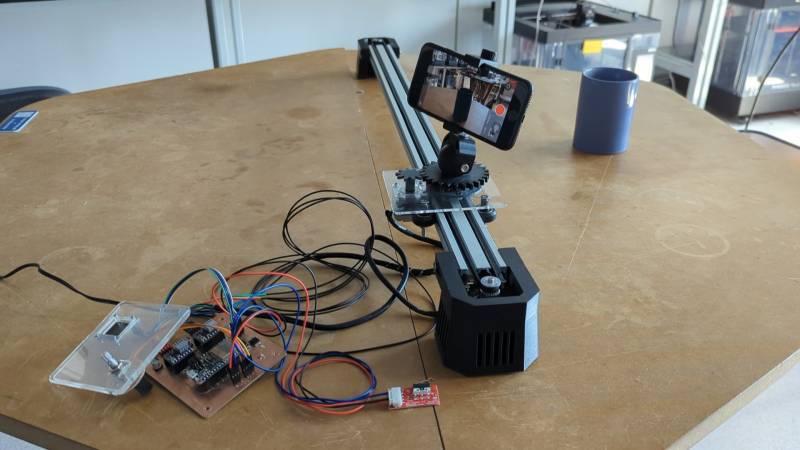
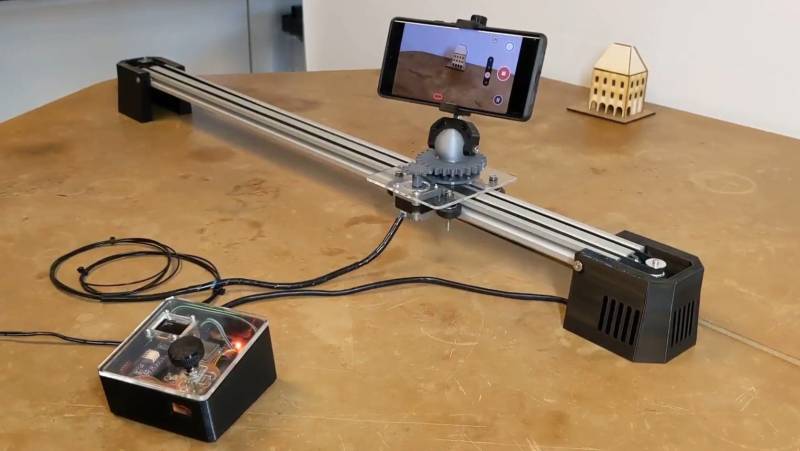
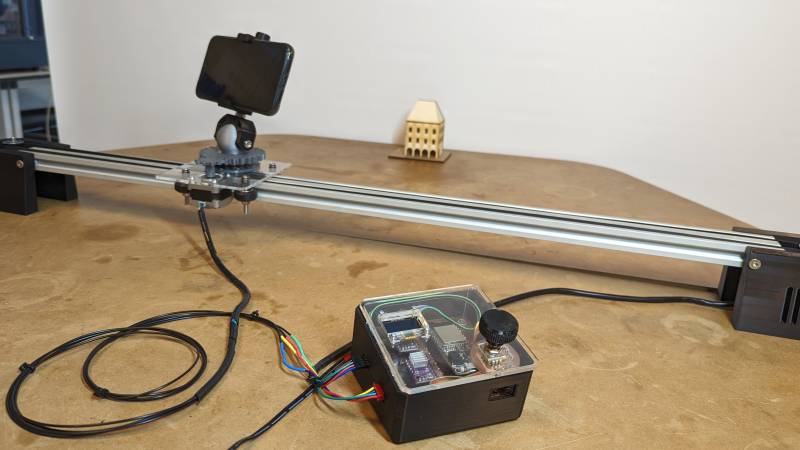
Final result
For the final result we set up a little scene to make a video. It’s a good thing we made a camera slider, we will be able to shoot a better video next time!
Files
All files can be found on the public GitLab repository.
About this week
This was the most challenging week of the Fab Academy so far. But that’s really rewarding when it’s done. It made me want to do more machines, and it gave me a little more confidence of my hability to design and iterate around a project. I hope I will experience a smoother workflow for my final project though, because sometimes this week I was a little overwhelmed by all the things to do.