Molding and Casting
This week we have two missions.
Group assignment: In this we will consult the safety data files of each of the new molding and foundry materials. Make and compare test casts with each of them.
Individual mission: Here we will design a 3D module around the stock and tooling that we will use the milling (coarse cut + (at least) three-axis finishing cut) and use it to cast parts.
Group assignment
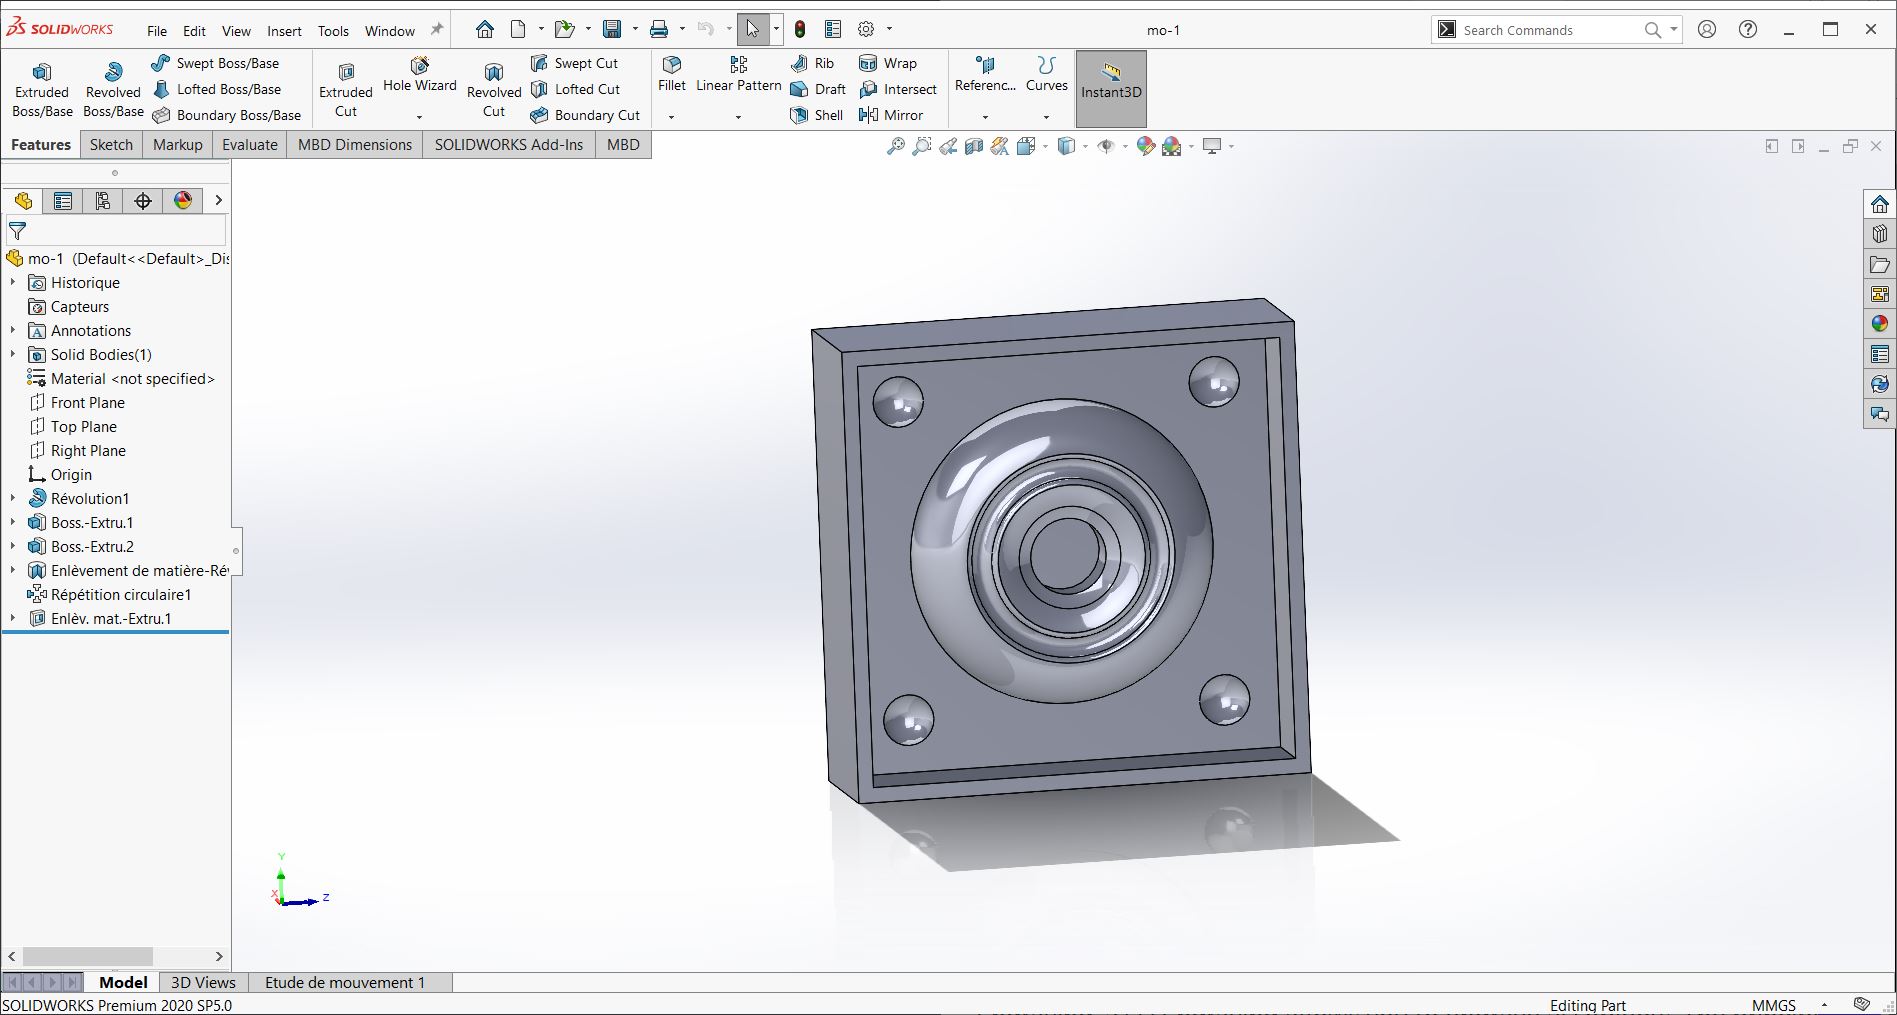
Let's say it was my first time making a mold. That being the case, I was in great need of my instructor. He made a mold to show me how it works. To do this, we used SolidWorks to design the desired model.
We decided to cut our Object with Modela MDX-50. To do this we used Vcarve Pro and SRP Player to configure the toolpath. But we decided to use a single cutter for quick cutting and final cutting. So, we didn't see the importance of using SRP Player since we only have one cutter.
The image below shows the modeling on SolidWorks.
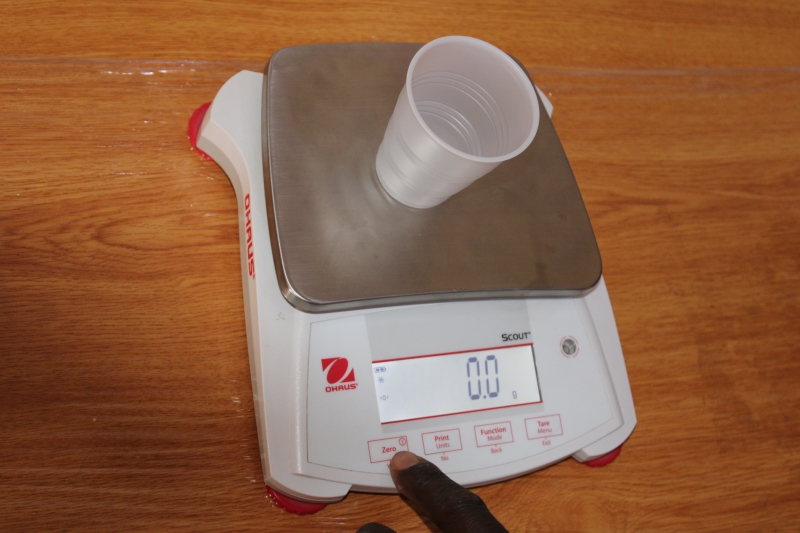
This photo represents our measuring device
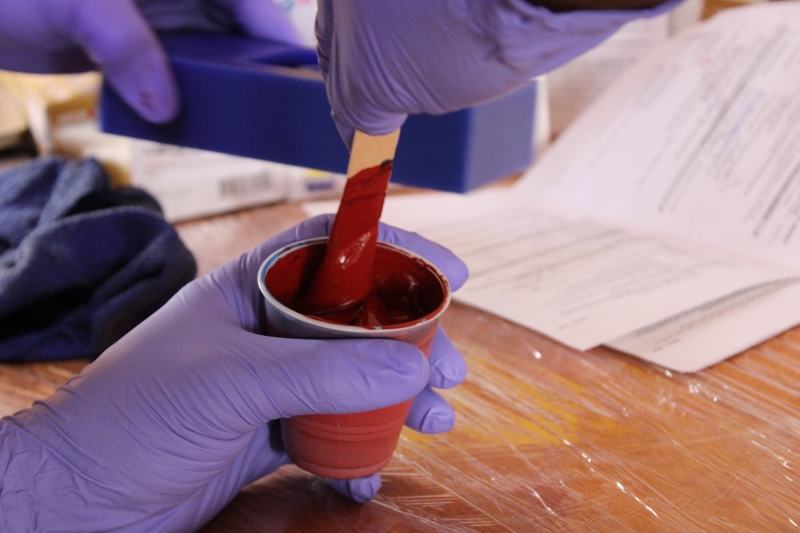
This photo represents the mixture
Vcarve Pro 2.5D Engraving
During the week of electronic production and machine-controlled machining we used Vcarve Pro but this week we will use the 2.5D Engraving. 2.5D Engraving allows you to engrave 3D objects. The principle is to first make a Quick Cut and finish with a Finish Cut. So we will use the 2.5D engraving to model our mold. Here we used a round-headed Ball Nose cutter. To better understand the types of cutters you can visit our week 8 mission.
Photo of configuration of the tool paths of Vcarve Pro.
Materials
After milling we used different materials to make our mold and the part. In this part we will study the different materials in our FAB.
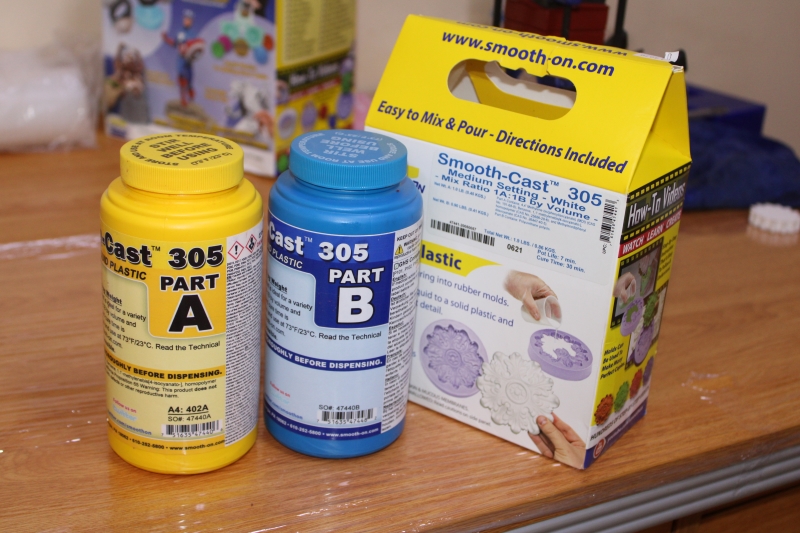
Smooth-Cast 305
The liquid plastics of the Smooth-Cast 300 series are casting resins with very low viscosity that result in castings that are bright white and virtually bubble-free. Vacuum degassing is not necessary. They offer the convenience of a mixing ratio of 1A:1B by volume or 100A:90B by weight. The differences between them are the pot life and the release time. The molded parts are resistant, durable, machinable and can be painted. They are resistant to moisture and mild solvents
The image below represents our material.
Smmooth-Cast305
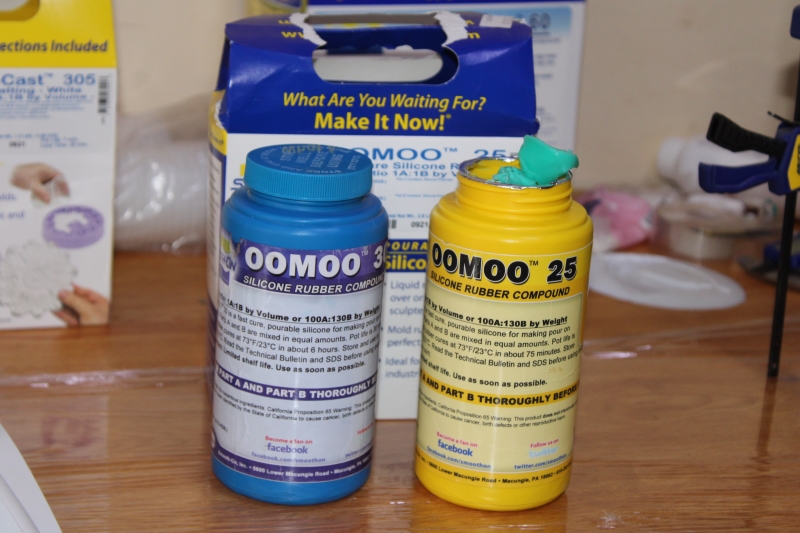
OOMOOMC25
It is an easy-to-use, tin-hardened silicone rubber component that has a convenient one-to-one mixing ratio by volume (no scale needed). It has a low viscosity for easy mixing and pouring. Vacuum degassing is not necessary. This product hardens at room temperature with negligible shrinkage. It has a pot life of 15 minutes and a curing time of 75 minutes.
The photo above shows the OOMOOMC25. Hardened product.
OOMOO 25
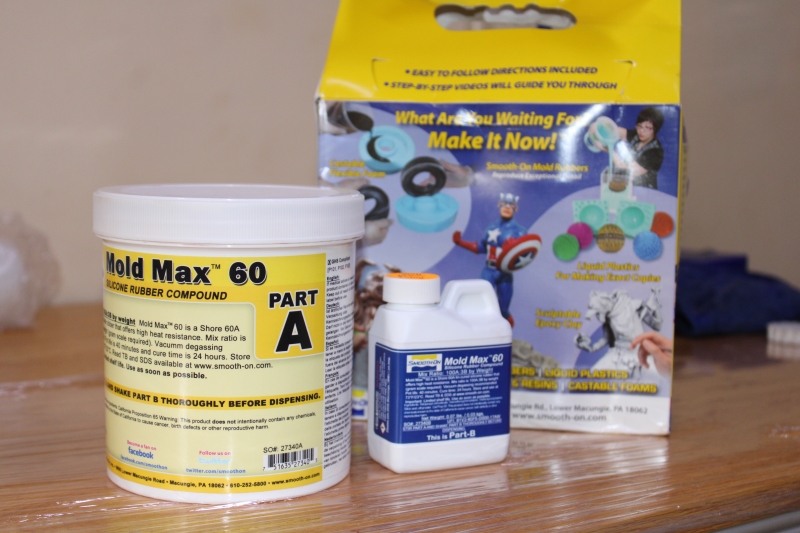
Mold Max 60
Mold Max 60 is a Shore 60A tin-catalyzed silicone mold rubber formulated for applications requiring high heat resistance (up to 560°C/294°C). It has a low mixed viscosity and hardened rubber has a very low linear shrinkage. Parts A and B are mixed 100A and 3B by weight. The shelf life in pot is 40 minutes and the curing time is 24 hours. Applications include the manufacture of foundry models, reproductions of flat models, and casting of low melting point metal alloys such as tin.
The photo above shows the Mold Max 60.
Mold Max 60
Molding
For the mold we used Smooth-Cast 305 and Mold Max 60. We used Smooth-Cast 305 to mold the mold (because of its flexibility) and Mold Max 60 (because of its hardness) to mold our part. Unfortunately we were not able to take advantage of OOMOOMC25 because of its poor conservation. As we have described above it should not be stored under room temperature while in Africa it is very hot. We found that the entire OOMOOMC25 product is hardened especially types B.
Mold Max 60
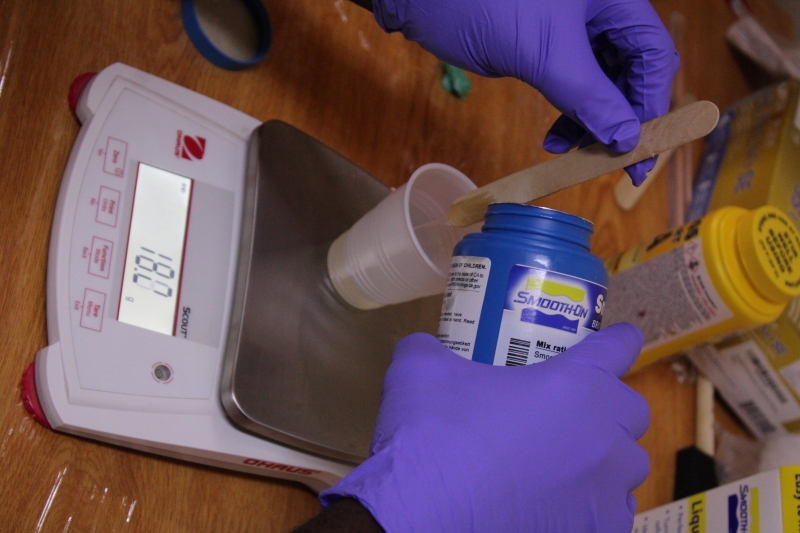
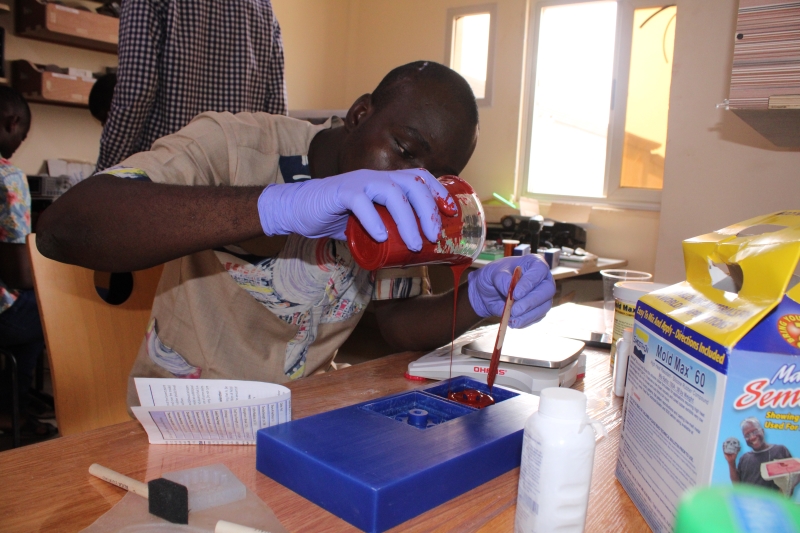
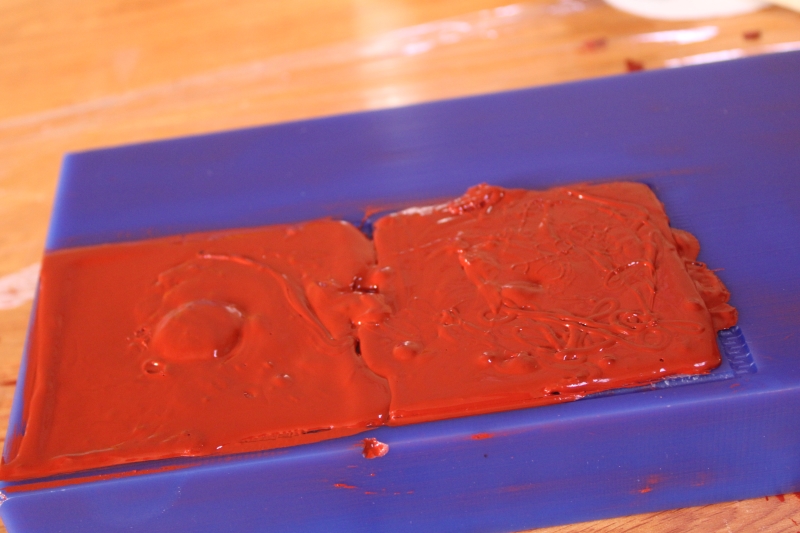
To begin with we followed the instructions in the product leaflet. Depending on the instructions for use, volume or weight can be used. As we have a weight measuring device, we have therefore chosen the weight option. After estimation we decided to make a mixture of 62g. So we put 60.14g of A and 1.86g of B. According to the leaflet the mixture should not exceed 3 minutes. But with the very high temperature here, after 2 minutes the liquid began to harden. Reason why we did not get a very mold because there are small holes in the mold since we could not get rid of all the air bubbles.
This photo represents our measuring device
This photo represents the mixture
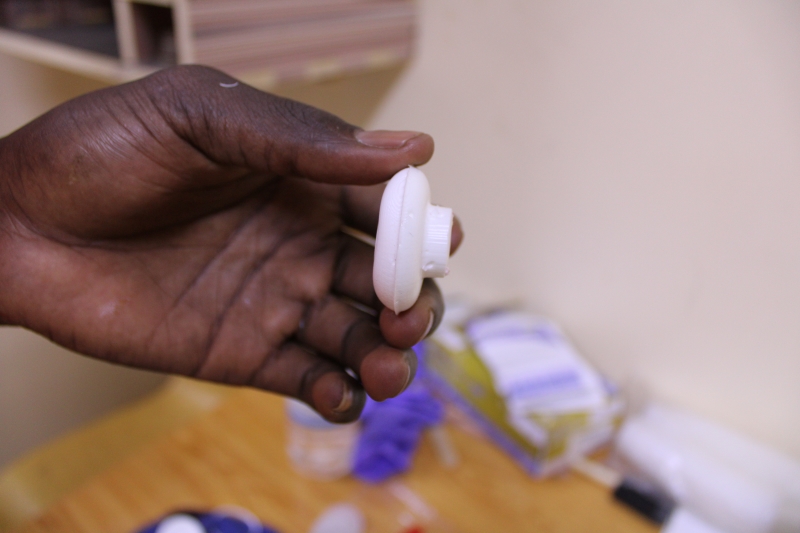
This photo represents our mold.
Smooth-Cast 305
For our piece we used Smooth because it is hard. According to the instructions for use for the mixture one must have 100g of A and 90g of B. We decided to use a total of 50g so we mixed 25g of A and 22.5g of B. This time the mixture took a little longer than the first one before solidifying.
To be able to put the mixture in our mold we used fasteners to be able to put the two molds together. We created two cavities, one to introduce the liquid into the mold and the other as a gas escape.
This represents our piece.
This photo represents the assembly.
This photo represents the mixture
The pictures represents the final object
Here we wanted to show you all the pieces designed
Individual Assignment
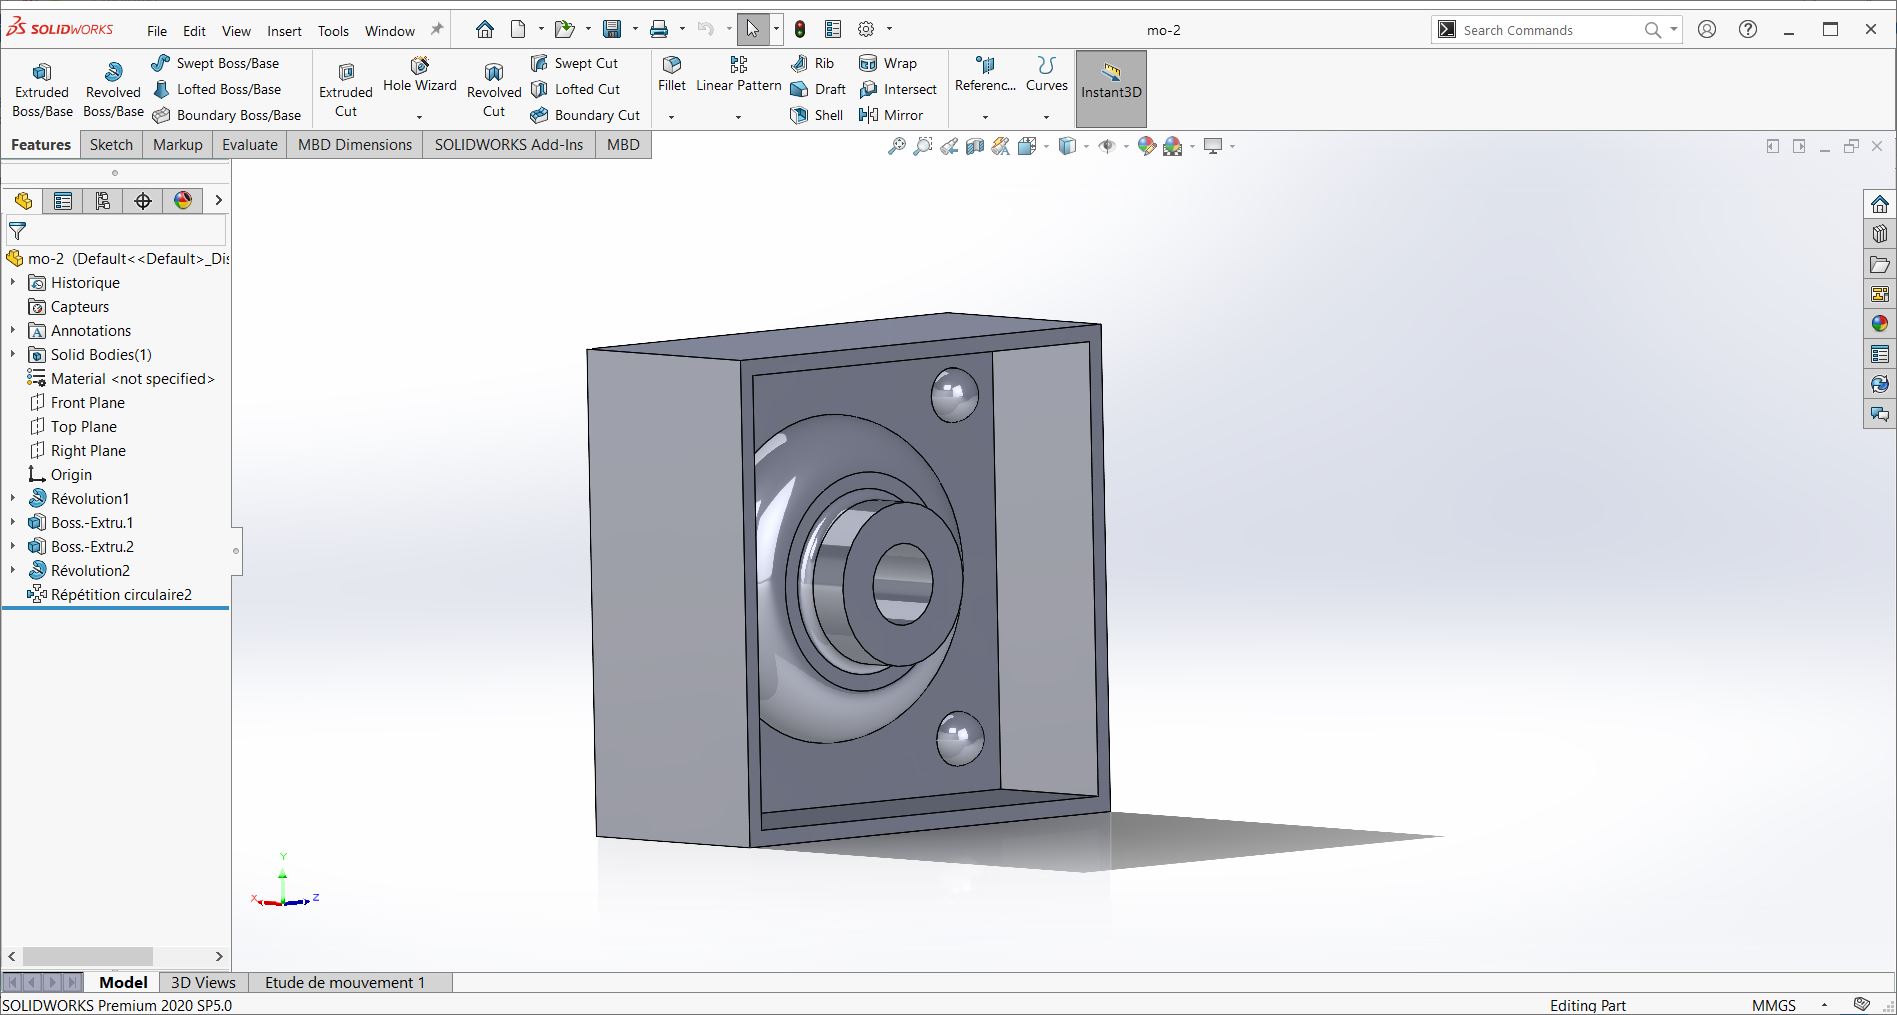
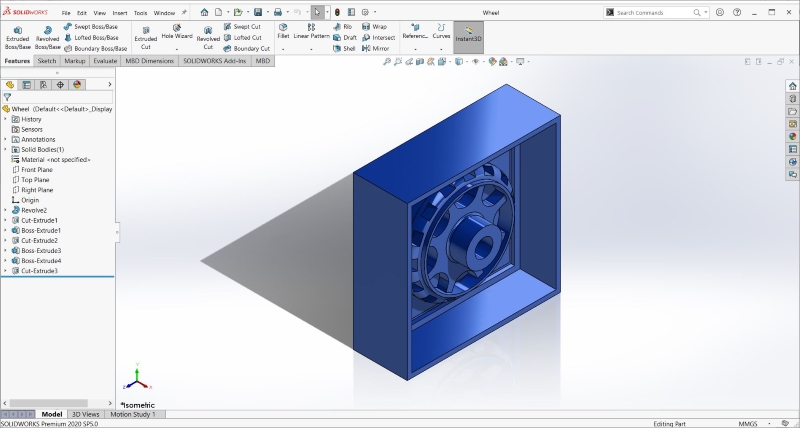
For my individual mission I decided to do something for my final project. After reflection I decided to mold the wheels of the automatic trash can. To begin with, I designed the desired model on SolidWorks.
This photo shows the model on SolidWorks.
SRP Player Pro
For this task I used SRP Player Pro. It is a software of Roland DGA Corporation and comes with the machine. It allows you to configure Modela MDX for milling. With SRP Player the machine works automatically is that the change of the different cutters is done automatically.
I used a 3mm cutter for quick cutting and a 2.35mm cutter for finishing hence the importance of SRP Player.
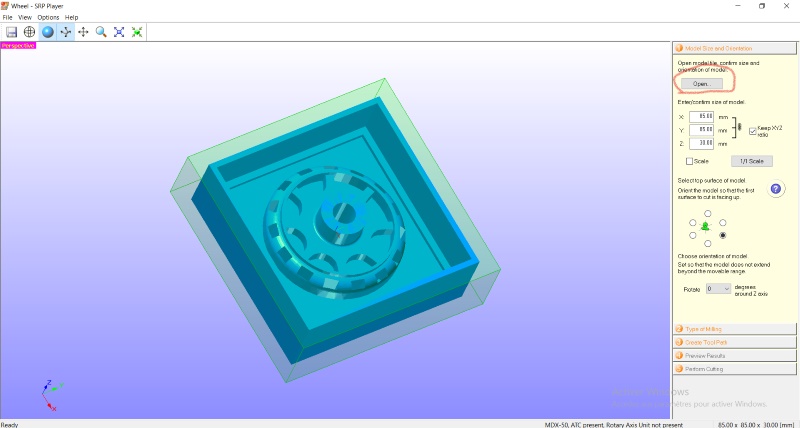
The photo below shows the different configurations on SRP Player.
We clicked on the circled part to export our STL file
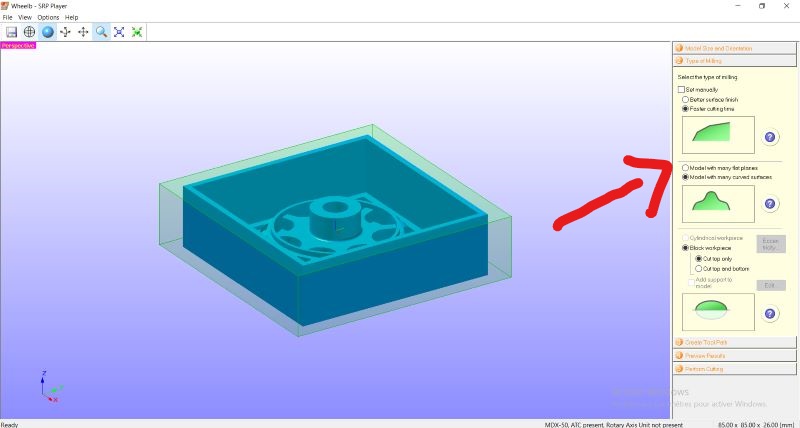
Here we have chosen the type of milling
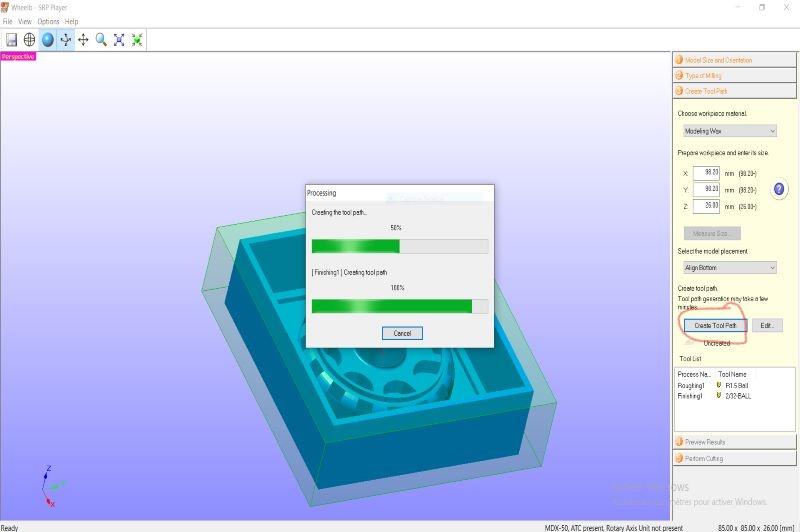
This photo represents the creation of the toolpath
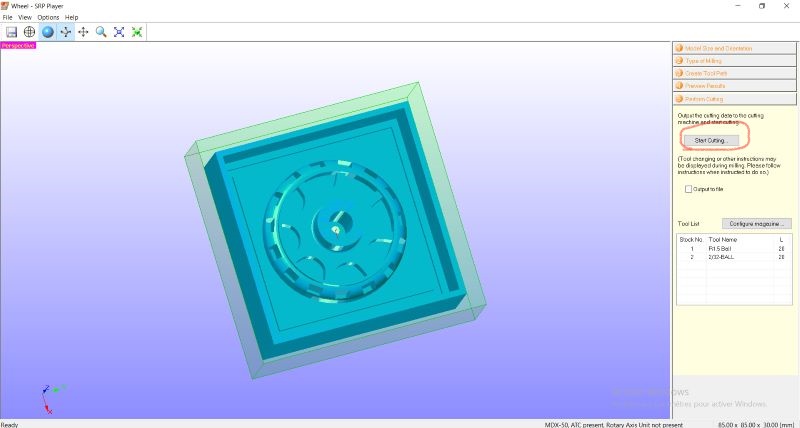
Now we made a preview to see how our room will look like.
This part represents the starting of the machine
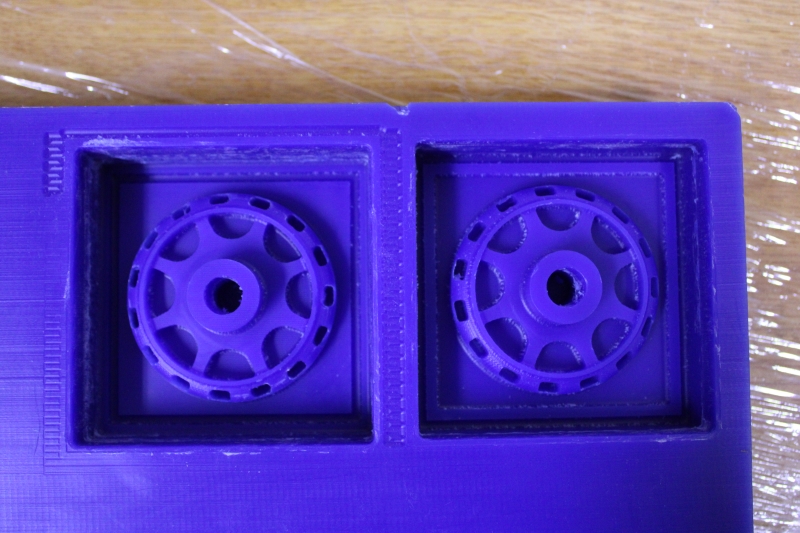
After milling I found that the part was not very smooth. In addition to this we do not have a cutter with long cutting head so the body of the cutter touched the contour of the piece.
The photo above shows the part after milling.
This part represents the starting of the machine
Molding
This part is dedicated to the molding of the mold and the part. As stated above I molded the mold with Smooth-Cast 305 and the piece with Mold Max 60.
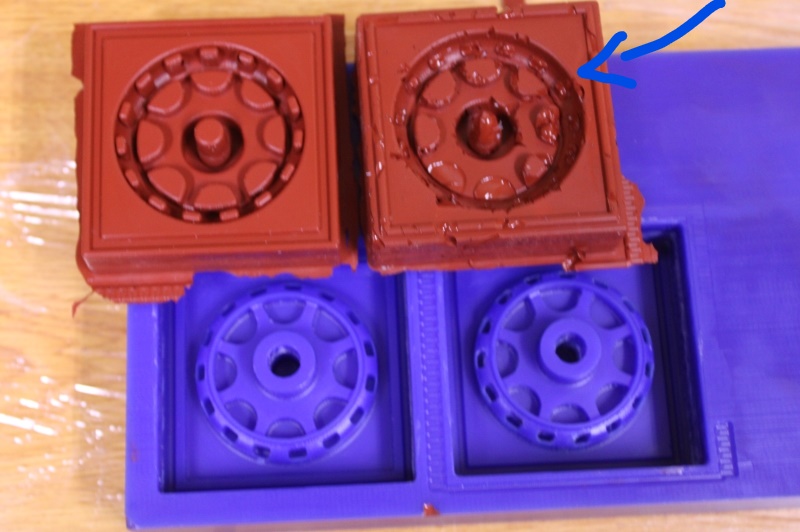
Mold Max 60: For the mixing I used 250g of A and 7.5g of B. As we described above, because of our temperature we really have trouble doing the mixture well. The mixture hardens quickly.
After 8 hoursI took off and noticed that among the two molds there is one that did not succeed. You will see it yourself in the image above. The arrow indicates the unsuccessful mold.
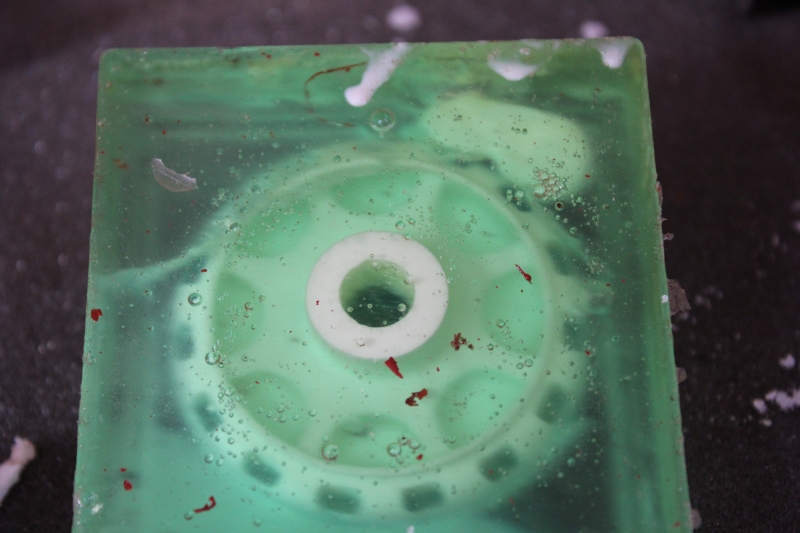
After the failure above I wanted to take another mixture to be able to have a good mold but I noticed that the product had started to solidify. With the advice of my instructor I wanted to continue the adventure with resin. So, I poured the resin into the mold. .
For drying I exposed the resin to the sun for 48 hours. After the 48 hours the experiment with the resin was successful.
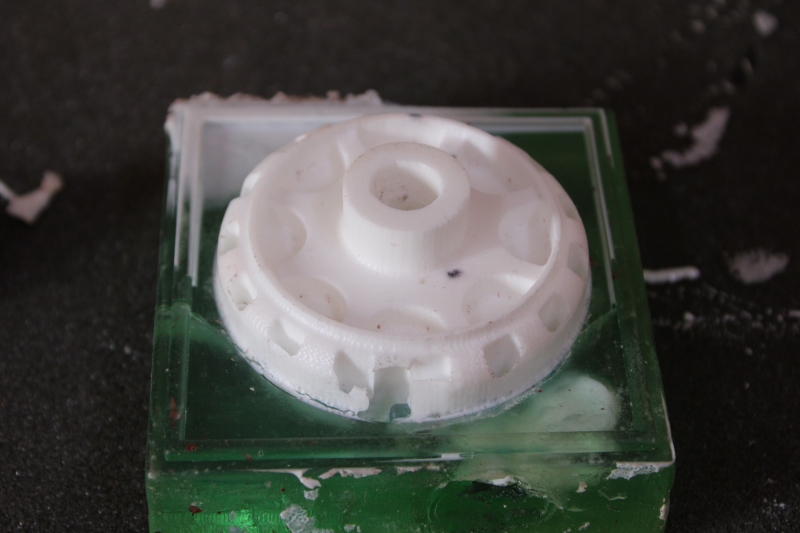
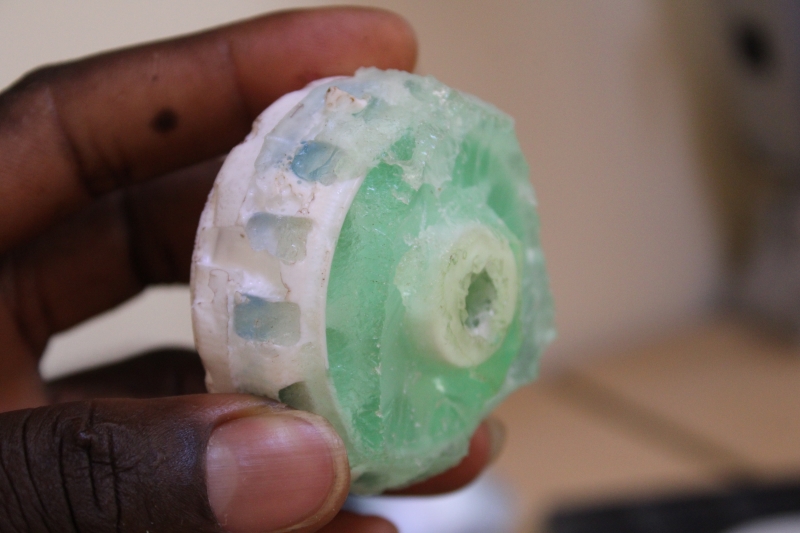
Smooth-Cast 305: To be able to get the part I combined the mold of Mold Max 60 and that of la resin. I used 60g of A and 40g of B to get the part. The experience did not go as I would have liked. The mold wheel of Mold Max 60 went well but the resin wheel is glued to the mold. The two pieces became one piece and I had a hard time removing the piece.
You will see it in the photos above.
Part glued to the resin mold
The image above represents the final part.